Pokemon Red Version (Game Boy) - RetroAchievements/guides GitHub Wiki

Guide by Paradise1
| Set Difficulty | 2/10 to beat, 4/10 to master, click for detailsBeating the game is not very difficult, as many 90s kids will attest. Mastering the game is not that much harder. The tough achievements like Have Fun tend to be grindy rather than mechanically difficult. |
| Approximate time to master | 25-40 hours with fast-forward (median time: 32.5 hours) |
| Minimum numbers of playthroughs needed | 1 |
| Number of missable achievements | 21 |
| Does difficulty affect achievements? | Not Applicable |
| Hardest achievement of the set | Gotta Catch 'em All |
Pokémon Red Version is one of the two Western releases of the first entries in the long-running Pokémon series. Originally released as Pokémon Red and Green in Japan in 1996, an updated version named Pokémon Blue was localized and released in the West in 1998 as the Red and Blue Versions we all know. Despite releasing very late into the Game Boy's lifespan, the games were a smash success, selling over 31 million copies worldwide. To this day, they are still the best-selling Pokémon games! They were followed with an anime, a trading card game, and an unbelievable amount of merchandise, launching a multimedia empire that would grow to be the highest-grossing of all time.
Generation 1, as it's known, is beloved by fans for its relatively simple mechanics and classic Pokémon designs. The games hold up decently well today, although various QoL and balance changes made over the years mean that FireRed and LeafGreen may be a better experience if you've never played a Pokémon game before. Still, the games are by no means unplayable, and some even find that the unique mechanics of Generation 1 actually enhance the experience. In fact, this generation has a thriving competitive scene filled with players who love exploring the idiosyncrasies of the Generation 1 battle system.
This set, developed by Blazekickn and dude1286, is quite comprehensive, covering story progression, picking up items, defeating trainers, and, of course, catching 'em all! There are a few frustrating and grindy achievements, but with fast-forward (which I highly recommend) it's honestly not too bad. This was the first set I ever mastered, and I feel like it strikes a good balance difficulty-wise.
This guide doesn't have a beat-by-beat walkthrough, but I've linked a few excellent ones in the Useful Resources section if you'd like. I have also created a Pokémon Red Checklist that lists all items and trainers, which will hopefully be very helpful for your run! I would also recommend checking out the Achievement Set Tips section for some pointers on the set as a whole. If you've never played Pokémon before, I've included a Pokémon Basics section. Feel free to read through it, or head straight to the Walkthrough to begin the game.
As always, feel free to message me with any suggestions or corrections!
- I use the North American scheme for floor names. That is to say, the floor above the ground floor is the second floor, the floor above that is third, and so on.
- At the end of every section, I provide a link to Return to the Table of Contents, for easier navigation of the guide.
If you've never played Pokémon before, this short video is an excellent introduction to the basic mechanics. Just note that some parts of it don't apply to Generation 1 - namely, Pokémon don't have Abilities, Pokémon can't hold items, and the Special Attack and Special Defense stats are a single stat called Special.
This section will pick up where that video left off and explain some intermediate mechanics of the Pokémon series (and this game specifically) that may prove helpful.
- Keep the Type Chart handy to figure out what moves are super effective against what types. Note that the type chart has changed over the years, so make sure you're using the one specific to Generation 1.
- When a Pokémon uses a move that matches its type (or one of its types, if it has two), it gains a Same-Type Attack Bonus (STAB), which multiplies the move's power by 1.5. This is a very significant boost.
- Each Pokémon species has a set of Base Stats that range from 1-255 that determine what its stats will be. For instance, Chansey's base HP is 250, meaning it will have a lot of HP, but its base Attack is 5, meaning it will have a very low Attack stat. This makes certain Pokémon species suitable for certain roles.
- A Pokémon's Base Stat Total (the sum of all five stats) is a good approximation of how powerful they are. For instance, Weedle/Caterpie, the weakest Pokémon in the game, have BSTs of 175, while Mewtwo, the strongest Pokémon in the game, has a BST of 590.
- Typically, when a Pokémon evolves, its Base Stats will go up, making it more powerful.
- There are two categories of moves: Physical and Special. Physical moves use the Attack stat of the attacking Pokémon and the Defense stat of the defending Pokémon. Special moves use the Special stat of both the attacking and defending Pokémon. In this generation, whether a move is Physical or Special depends entirely on its type.
- Normal, Fighting, Flying, Poison, Ground, Rock, Bug, and Ghost moves are all Physical.
- Fire, Water, Grass, Electric, Psychic, Ice, and Dragon moves are all Special.
- This means a few Pokémon have a disadvantageous combination of stats and typing. Take the Fire-type Arcanine, for instance - it has an impressive 110 Attack, but if it wants to use Fire-type moves for STAB, it has to use its relatively unimpressive 80 Special.
- Whichever Pokémon has the higher Speed stat typically moves first. The only exception are moves that have a different "priority." In Generation 1, the only moves that have different priority are Quick Attack (which moves before all other moves), and Counter (which moves after all other moves). If two opposing Pokémon both use Quick Attack, the one with the higher Speed will move first, as normal.
- In this generation, Speed also affects how often you get a critical hit, doubling your damage. If a speedy Pokémon uses a high crit chance move like Slash, you can basically guarantee a critical hit!
- Stat buffs and debuffs have twelve levels, six in each direction. Moves in this game will raise or lower a stat by either 1 or 2 stages. If it says a stat "greatly rose/fell", it's 2 stages, if it just says "rose/fell," it's 1 stage. Once a stat gets to +6 or -6, it can't be boosted higher or lower, respectively. The modifications to stats given by each stage are listed in the table below:
| Stage | Multiplier |
|---|---|
| -6 | Stat x .25 |
| -5 | Stat x .28 |
| -4 | Stat x .33 |
| -3 | Stat x .40 |
| -2 | Stat x .5 |
| -1 | Stat x .66 |
| 0 | Stat x 1 |
| 1 | Stat x 1.5 |
| 2 | Stat x 2 |
| 3 | Stat x 2.5 |
| 4 | Stat x 3 |
| 5 | Stat x 3.5 |
| 6 | Stat x 4 |
- There are five status effects in the game: Sleep, Paralysis, Burn, Poison, and Freeze.
- Sleep will prevent your Pokémon from moving until it wakes up. It takes a full turn to wake up in this generation, so if you're unlucky, you won't be able to get an attack in at all. Thankfully, sleep-inducing moves are somewhat inaccurate (except for Parasect's Spore).
- Paralysis will cut your Pokémon's Speed to a quarter of its normal value, and the Pokémon will have a 25% chance to not be able to move during a turn. Decreasing Speed also makes it harder to run away from battles. Paralysis doesn't go away naturally - you have to cure it using an item or go to a Pokémon Center. This condition is most often caused by Electric-type moves, but a few other moves can cause it too.
- Burn will cut your Pokémon's Attack in half, and your Pokémon will lose 1/16th of its max HP after every turn. Burn can be cured with items or by healing at a Pokémon Center. This status is caused by Fire-type moves.
- Poison simply decreases the affected Pokémon's HP by 1/16th at the end of each turn. Outside of battle, poisoned Pokémon will take 1 HP of damage for every four steps the player takes. Poison can be cured with items, or by healing at a Pokémon Center. Unsurprisingly, Poison is typically inflicted by Poison-type moves.
- Freeze prevents Pokémon from moving at all. In this generation, Pokémon will never unfreeze by themselves - they either have to be hit with a Fire-type move, or healed using items or a Pokémon Center. Thankfully, Freeze is relatively rare - it's only caused by Ice Beam and Blizzard, each with only a 10% chance of freezing the opponent.
- If your Pokémon's stats are debuffed, you can restore them by switching out to a different Pokémon and switching back. If your Pokémon's stats are boosted, this will also reset them back to normal. This will also cure confusion, but will have no effect on status conditions like paralysis, sleep, freeze, or poison (with one exception)
- The exception is "bad" poison, caused by the move Toxic. Bad poison will increase the damage it does every turn (from 1/16th to 2/16ths to 3/16ths, and so on), but it can be converted to regular poison by switching out.
- Status effects are very helpful in catching Pokémon, especially in this generation. Getting a Pokémon that learns Thunder Wave early (like Pikachu), will be a great help.
- PP restoring items like Ethers and Elixers cannot be bought. Be careful about using them, as you may want to keep a few to make some achievements a little easier.
- A more exhaustive list can be found on this page. I'll note some of the more applicable differences here.
- Perhaps the most major difference is the Special stat. In this game, Pokémon have a single Special stat which acts both as their attack stat when using Special moves, and as their defense stat against Special moves. This makes Pokémon with high Special absolutely busted.
- Speaking of Special moves, moves in this game are Physical or Special based only on their type. Normal, Fighting, Flying, Poison, Ground, Rock, Bug, and Ghost moves are all Physical. Fire, Water, Grass, Electric, Psychic, Ice, and Dragon moves are all Special.
- TMs in this game are single-use. Be careful about who you give them to.
- Although there is a Pokémon Day Care south of Cerulean City, you can only put one Pokémon in there and can't breed Pokémon.
- Pokémon cannot hold items.
- Pokémon do not have abilities.
- Item space is severely limited in this generation. In my opinion, this is the most annoying part about playing these games. Your Bag has space for 20 stacks of items (up to 99 items in each stack without glitches), and your PC has room for 50 more. This isn't enough room for every possible item, so you'll have to choose what to prioritize. For TMs, I would definitely recommend keeping TM03 (Swords Dance), TM13 (Ice Beam), TM24 (Thunderbolt), TM26 (Earthquake) and TM29 (Psychic) until the end of the game, as these are strong attacks that will be very useful for the Elite Four achievements. Otherwise, feel free to use or sell/toss TMs as you prefer.
- If your Pokémon Box is full, you won't be able to catch additional Pokémon unless you head back to the PC and switch it yourself.
- Some type interactions are different. Consult The Generation 1 Type Chart for details. Most notable are probably Poison being super effective to Bug (and vice versa, for whatever reason), and Ghost being completely ineffective against Psychic.
- The balance between types is infamously lopsided in these games. In general, Psychic and Normal are very good due to their type matchups, strong attacks, and Pokémon with excellent stats. Many types which seem good on paper, such as Bug, Fighting, Ghost, and Dragon, have few good damaging moves, making them not very useful offensively. Ultimately, the game is easy enough to which you can make pretty much anything work, though, so don't be too discouraged.
- Critical hits are based on Speed, not a fixed ratio. They deal approximately twice as much damage as a normal hit. They also ignore all stat changes of both the defender and the attacker, positive and negative, meaning that if a Pokémon's Attack is boosted enough, a non-critical hit can do more damage than a critical hit.
- It takes one full turn to wake up from Sleep in this generation - the Pokémon won't attack on the same turn.
- Freeze will never go away naturally in this generation. It can only be removed with items, being hit by a Fire-type move, or Haze.
- There is no move reminder in this game, so if you overwrite a move, it's gone forever.
- There's also no move deleter, which means that any HM moves you teach to a Pokémon cannot be overwritten by any means.
- If you level up a Pokémon more than one level in one go, any moves learned on levels you skipped will not be learned.
- If you attack a dual-type Pokémon with a move that one of its types is weak to and the other type resists, (e.g. hitting a Normal/Flying type with a Fighting move), the game will falsely state that the move is either super effective or not very effective instead of neutral. The actual damage calculation is unchanged, though. See this article for more specifics.
- Finally, and perhaps most infamously, due to a programming error, every move has a 1/256 chance to miss, even if it's 100% accurate. This is known as a "Gen 1 Miss." The only exceptions are Swift and using an X Accuracy, which both allow you to bypass the bugged accuracy check entirely.
- Pokémon Red is absolutely riddled with glitches. Several of these can be used to the player's advantage, such as the item duplication glitch which can let you obtain basically infinite money. Feel free to use these glitches if you'd like (it's not against the RetroAchievements rules), but I'll be writing this guide assuming that you won't be using any glitches. Not intentionally, at least. I also can't guarantee that achievements will work properly if you use glitches, so use them at your own risk.
- You're going to want to spread out your XP a little bit to stay under the level cap for the gym leader achievements. You'll need to keep up with obtaining and evolving Pokémon anyway for the Oak's Aide achievements, so try and level up different Pokémon as you go!
- You're definitely going to want to pick up every item and fight every trainer as you go. Nothing is more devastating than getting to the end and realizing you missed a single item or trainer somewhere. The Bulbapedia and zerokid guides linked in the next section have lists of items obtainable per area. The StrategyWiki guide and zerokid guide also have labeled maps (although not all of the StrategyWiki maps are labeled). My checklist linked in the next section can also be very helpful for keeping track if you want to be methodical about it.
- Once you jump down from Route 4 into Cerulean City, you won't be able to go back to Pewter or Viridian City until a little later in the game. Make sure you have everything you need for Misty's achievement beforehand.
- In the comments of the Gym Leader challenge achievements, people seem to report having trouble unlocking them fairly often. To figure out why, I looked into the achievement code myself, and found (to the best of my knowledge) the three conditions that will prevent you from earning the achievements:
- If Shift Mode is on, it will prevent you from earning the achievement. You can turn Shift Mode into Set Mode in the in-game Options menu.
- While the gym music is playing (i.e. before the battle), if any Pokémon in your party is above the level cap, if will prevent you from earning the achievement. Even if you don't use them in the battle, it will still prevent you from earning it. However, if a Pokémon levels up beyond the cap during the battle it won't prevent you from earning the achievement, despite what the first forum post says.
- During the fight, if you use an item, it will prevent you from earning the achievement. It used to be that pressing A at all (even to hit cancel) in the item menu would prevent the achievement, but that is not the case anymore.
- The achievement Smogon still uses this older logic to detect item use (as of time of writing), so be careful.
- Make sure you save before challenging the Gym Leader. The Gym Leader achievements now have challenge indicators in the corner which should appear when they send their first Pokémon out. If you don't see it, reset to your save and make sure that you have Set Mode on and no Pokémon in your party are above the level cap.
- After you complete the Pokémon Tower, the game actually opens up quite a bit, and you can actually do Gyms out of order. In this guide, I've routed Silph Co. and Sabrina before Koga, as that's the route the Bulbapedia and StrategyWiki guides (linked below) follow. Feel free to do Koga first if you'd like! Just remember that the level cap is 43 for both of them, and that there's a missable achievement in the Safari Zone.
There are two available subsets for this game. With the advent of Multiset, you can earn subset and main set achievements at the same time!
- The Professor Oak Challenge subset requires you to catch and fully evolve every possible Pokémon before each Gym Leader. Prepare for a lot of grinding, especially in the early game before Brock. The relative open-ness of this game after the first few Gyms makes it a pretty interesting challenge in the midgame. If you're trying to do the main set achievements, the level cap for Gym Leaders may not synergize well with having to evolve certain Pokémon early. That being said, it's definitely not impossible, but you may have to bench some of your higher-level Pokémon for a little while. Here is a link to several resources and guides if you're interested!
- The Glitch Showcase subset has achievements for taking advantage of glitches. Several achievements don't synergize well with the base game achievements, but there are a few that are doable.
- I have created a Pokémon Red Checklist for use with this set. The checklist has every item and trainer in the game, as well as a Pokedex section. If you like going through games methodically so you don't miss anything, this is the checklist for you.
- The Pokedex section links to each Pokémon on the Serebii Generation 1 Pokedex, allowing you to see Red-specific location information and levelup movesets. It also lists the most efficient way to catch each Pokémon if you're at the end of the game. Finally, it tells you if you will end up catching a Pokémon in a specific way like in-game trades or for Have Fun in the Safari Zone.
- Bulbapedia is the most thorough and accessible source of Pokémon information out there. You can use it for Pokémon locations, learnsets, item locations, and more. Note that by default pages display information and movesets for the latest generation, which definitely won't be accurate for Generation 1. Usually there will be a button to view different generations, if applicable.
- The Serebii Generation 1 Pokedex has thorough information on all Pokémon specific to Generation 1, and without extra information on things like the anime. If you want a more streamlined and Gen 1-specific experience than Bulbapedia, this is likely your best bet.
- The Generation 1 Type Chart is worth keeping handy. There are several notable differences from later generations.
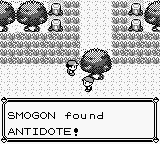
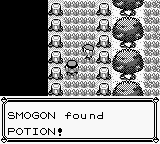
- Smogon has a guide for all hidden items with pictures included. Very handy! I'll use these images as appropriate.
- Bulbapedia and StrategyWiki both have an excellent beat-by-beat walkthrough if you'd like to follow them. They also provide a list of items and trainers in each area to keep on top of those achievements. Bulbapedia lists the items in a single easy-to-parse box, while StrategyWiki tends to include them throughout the text, and has labeled maps for many areas. Choose which style you prefer. Bulbapedia also has the advantage of being specific to Red and Blue, whereas StrategyWiki includes Yellow, which may be slightly more confusing.
- This GameFAQs guide by zerokid is also excellent, and additionally provides in-depth explanations of Gen 1 mechanics and glitches, and viability rankings for each Pokémon. It also has labeled maps for every area, which is excellent for keeping track of items and trainers.
- The Cave of Dragonflies is a treasure trove of really in-depth information on Gen 1 mechanics, as well as every other generation. Of particular interest for this set are the Gen 1 Catch Rate Calculator and the Gen 1 Safari Zone Calculator.
- NostaMap has a fantastic interactive map that shows all trainers, items, and even achievements! What's more, it even has native RetroAchievements integration, allowing you to instantly sync achievements you already have (although it doesn't work for anything else like items and trainers).
- Map Genie is an alternative option to NostaMap, although free users are limited to only checking off 100 entries.
This section will simply detail the missable achievements in the game, as well as when they become unavailable.
This section is designed as a relatively spoiler-free experience for those who prefer less guidance and only want a heads-up for missable achievements. Click each section to expand. If you would like more detailed strategies on how to earn these achievements, check out the full guide.
Missable achievements are split into a few major categories:
Gym Leader Challenge Achievements
As stated before, Gym Leader challenge achievements have three main requirements:
- Set Mode must be on. If Shift Mode is on, it will prevent you from earning the achievement. You can turn Shift Mode into Set Mode in the in-game Options menu.
- While the gym music is playing (i.e. before the battle), if any Pokémon in your party is above the level cap, if will prevent you from earning the achievement. Even if you don't use them in the battle, it will still prevent you from earning it. However, if a Pokémon levels up beyond the cap during the battle it won't prevent you from earning the achievement, despite what the first forum post says.
- During the fight, if you use an item, it will prevent you from earning the achievement. It used to be that pressing A at all (even to hit cancel) in the item menu would prevent the achievement, but that is not the case anymore.
If you fail to meet all three requirements, you will miss the Gym Leader challenge achievements. A challenge icon should be present in the corner if all conditions are met.
- Rock Smash - Defeat Brock on Set Mode without using items in battle and without using Pokémon above level 14 at the beginning of the battle.
- Pool's Closed - Defeat Misty on Set Mode without using items in battle and without using Pokémon above level 21 at the beginning of the battle.
- One Man Army - Defeat Lt. Surge on Set Mode without using items in battle and without using Pokémon above level 24 at the beginning of the battle.
- Kicking Some Grass - Defeat Erika on Set Mode without using items in battle and without using Pokémon above level 29 at the beginning of the battle.
- Ninja Gaiden - Defeat Koga on Set Mode without using items in battle and without using Pokémon above level 43 at the beginning of the battle.
- Brawn Over Brains - Defeat Sabrina on Set Mode without using items in battle and without using Pokémon above level 43 at the beginning of the battle.
- Fire Fighter - Defeat Blaine on Set Mode without using items in battle and without using Pokémon above level 47 at the beginning of the battle.
- Blasting Off Again - Defeat Giovanni in the Viridian Gym on Set Mode without using items in battle and without using Pokémon above level 50 at the beginning of the battle.
Missable Pokémon
Static encounter Pokémon are missable if you KO them or run from them, as they will not respawn in this generation. This includes the following three achievements:
-
The Sleeper Awakens - Use the Poké Flute to awaken and catch a Snorlax.
-
Uno, Dos, Tres! - Catch the three legendary birds.
-
The Strongest Pokémon Ever! - Catch the fabled Mewtwo.
-
A Fair Fight - Catch Mewtwo without using the Master Ball.
- This achievement is missable if you KO Mewtwo or catch it with the Master Ball.
-
Gotta Catch 'em All - Catch all 124 Pokémon that are available in Red Version.
- This achievement is missable if you:
- Fail to catch any of: Mewtwo, Articuno, Zapdos, Moltres, or both Snorlaxes.
- Use or lose all of your Moon Stones without obtaining Nidoking, Nidoqueen, and Clefable (Wigglytuff appears in Cerulean Cave).
- Do something silly like releasing your starter, Eevee, or Omanyte/Kabuto before you evolve them.
- This achievement is missable if you:
Miscellaneous Missables
-
Parting Gift - Obtain 5 Poké Balls from Prof. Oak.
- This achievement is at the beginning of the game, and is missable if you have more than one Pokémon registered in your Pokedex (including evolving your starter).
-
Sleeping Giant - e told about a legendary Pokémon that sleeps a lot.
- This achievement is found aboard the S.S. Anne, which will leave after you obtain HM01 Cut.
-
My Heart Will Go On - Collect every optional item and defeat every optional trainer on the S.S. Anne.
- This achievement is found aboard the S.S. Anne, which will leave after you obtain HM01 Cut.
-
Dearly Beloved - Gift the Ghost at the top of Lavender Tower a Poké Doll to calm it without using the Silph Scope.
- This achievement is missable if you defeat the Ghost as intended using the Silph Scope.
-
No Item Left Behind - Without resetting, collect all optional items in the Safari Zone within a single Safari Hunt.
- This achievement is missable if you collect some, but not all items during a single Safari Zone hunt.
-
Ekans Dilos -Reach the Rival in Silph Co. without defeating more than 1 trainer.
- This achievement is missable if you encounter more than one trainer before reaching your rival in Silph Co.
-
Hostage Situation - Find every item, defeat every trainer, and open every door in Silph Co.
- This achievement is missable if you don't defeat every trainer in Silph Co. before defeating Giovanni. Items and doors will still be available, though!
-
2000 IQ Super Quiz - Without resetting and without leaving the building, complete all of the quizzes in the Cinnabar Island Gym without fighting any trainers.
- This achievement is missable if you fail any of the quizzes, fight any of the trainers, or if you leave the Gym after answering any questions, including via saving and reloading (as you must do them all in one go).
In this section, we'll be going over the story of the game and grabbing missable achievements along the way. This part is separated into subsections by badge. Around the midpoint of the game, you can actually do things in a few different orders. I've decided to route Silph Co. and Sabrina's Marsh Badge before the Soul Badge, as that's what a few guides recommend, and it's also how my checklist is structured. This might make it tough to find a specific achievement if it's not where you expect, so I would recommend using Ctrl-F to search for the achievement name.
In terms of missable achievements, the most common ones are for defeating Gym Leaders on Set Mode without items within a certain level cap. See the Achievement Set Tips for more specific details.
MISSABLE ACHIEVEMENTS:
- Parting Gift
- Rock Smash
- Pool's Closed
- Sleeping Giant
- My Heart Will Go On
- One Man Army
- Kicking Some Grass
- Dearly Beloved
- No Item Left Behind
- Ninja Gaiden
- Ekans Dilos
- Hostage Situation
- Brawn Over Brains
- Fire Fighter
- 2000 IQ Super Quiz
- Blasting Off Again
- The Sleeper Awakens
There are a few achievements for defeating the Elite 4 in special ways, so I'll group them in this section. If you kept at least a few great TMs, you should have no problem crafting teams to get through these conditions fairly easily. If not, there's no shortage of cheesy tactics you can use, so don't worry.
The only truly missable achievements in this section are for capturing Mewtwo without the Master Ball. You may want to keep Smogon in mind too, though, as you can definitely make that achievement harder than it needs to be if you don't prepare accordingly.
MISSABLE ACHIEVEMENTS
Step 3: Catch 'em All/Miscellaneous
This section will have multiple subsections. The first, Adventure Achievements, will detail achievements for collecting items, defeating Trainers, leveling Pokémon, and other miscellaneous things you may do while exploring the Kanto region. Catch 'em All Achievements will naturally have to do with completing your Pokedex. Game Corner Achievements cover winning and buying prizes at the Celadon Game Corner. Safari Zone Achievements cover the two achievements for catching Pokémon in the Safari Zone. Finally, Battle Achievements cover the achievements earned from fulfilling certain conditions in battle.
MISSABLE ACHIEVEMENTS

As you begin the game, pick your starter. Bulbasaur is probably the easiest, as it makes the first two gyms easier, but pick whoever you prefer! After you fight Blue for the first time, go ahead and head north to Viridian City. Whatever you do, DO NOT catch any Pokémon yet, as that will lock you out of our first missable achievement. Don't even bother buying any Poke Balls. If you do, you can throw them away.
Free Points (1)
Get a free sample courtesy of the Viridian City Pokémon Mart.
As you head north to Viridian City, talk to the first person on your left to grab a free Potion.
Journey Has Started (5)
Obtain the Pokédex.
Grab Oak's Parcel from the Poke Mart in Viridian and bring it back, and Oak will give you the Pokedex.
The United Cities of Kanto (2)
Obtain a map of the Kanto region.
After getting the Pokedex, head to Blue's house north of the lab and his sister will give you the Town Map. After that, start training for the next rival fight, but remember - don't catch any Pokémon or buy any Poke Balls!
Parting Gift (5)
Obtain 5 Poké Balls from Prof. Oak.
MISSABLE
This achievement is missable if you capture more than one Pokémon (including evolving your starter) or if you have Poke Balls in your inventory.
In order to get Poke Balls from Oak, you'll have to defeat your rival on Route 22 west of Viridian City without buying Poke Balls and therefore without catching any additional Pokémon. Blue brings a level 9 Pidgey and a level 8 starter. Pidgey can be annoying to deal with, as it will use Sand-Attack and lower your accuracy, and you can't switch to a different Pokémon to restore your stats. If you're using Bulbasaur, Leech Seed can help give you an edge, as it will do passive damage even with lower accuracy. For Squirtle and Charmander, you can try and use STAB (same-type attack bonus) attacks like Bubble or Ember. For the starter, just use Tackle/Scratch (and Leech Seed with Bulbasaur) and hope for the best. I managed to get through at Level 10 with some luck, but you might need to go a bit higher. Just keep in mind that Brock has a Level 14 cap, and you also can't evolve your starter, as that would count as having captured another Pokémon.
Once you defeat Blue, go ahead and return to Professor Oak, who will give you a few Poke Balls and remind you what the point of the game actually is. After that, feel free to start catching Pokémon and filling up your team! Make sure you keep your starter at level 12 or 13 if you plan to use them during the Brock fight. At this point, you may want to catch 2 extra NidoranMs and an extra Spearow for in game trades later on, but you can save that for later too if you'd like.
(Thanks to MagicalChef1007, tinycyan, alcoatjez, lo9i, and others in the comments for their suggestions!)
Setting the Forest Ablaze (5)
Find every item and defeat every trainer in Viridian Forest.
Checklist
- HIDDEN ITEM – Viridian Forest – Antidote
-
FIELD ITEM – Viridian Forest – Poké Ball
-
TRAINER BATTLE – Viridian Forest – Bug Catcher (Rick)
-
TRAINER BATTLE – Viridian Forest – Bug Catcher (Doug)
-
FIELD ITEM – Viridian Forest – Antidote
-
FIELD ITEM – Viridian Forest – Potion
-
HIDDEN ITEM – Viridian Forest – Potion
- TRAINER BATTLE – Viridian Forest – Bug Catcher (Sammy)
Anybody Home? (5)
Without resetting, and without using Repels or Cut, get from one entrance of Viridian Forest to the other without initiating any wild encounters.
You don't have to get this on the first try, so if you run into a Pokémon, exit the forest and try again.
From Bulbapedia:
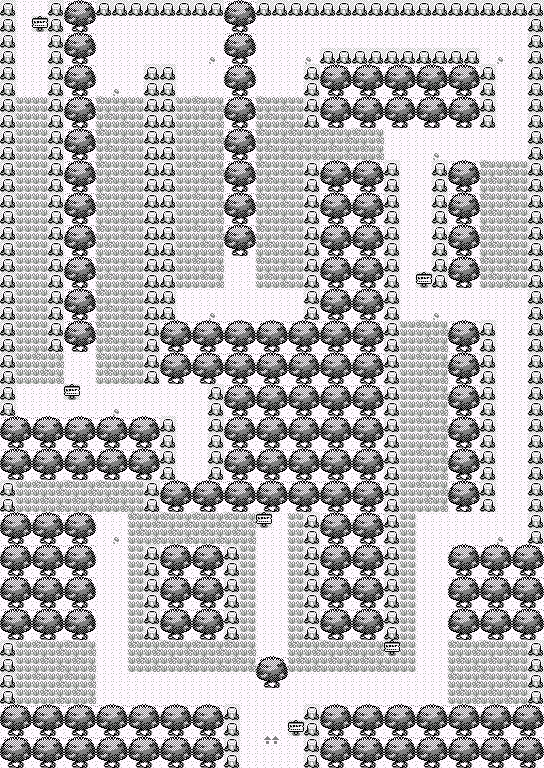
Basically, what you'll want to do, coming from the north side, is to walk through as few grass tiles as possible until you can take the white path the rest of the way. Starting from the north side lets you reset quicker if you run into an encounter.
Rock-Solid Boulder Badge (5)
Defeat Brock and earn the Boulder Badge in Pewter City.
Rock Smash (5)
Defeat Brock on Set Mode without using items in battle and without using Pokémon above level 14 at the beginning of the battle.
MISSABLE
This achievement is missable if you defeat Brock without the restrictions.
Rock Smash is our first Gym Leader challenge achievement. There are three conditions for unlocking it:
- First, you must be in Set Mode, as opposed to Shift Mode. You can change this setting in the in-game Options menu. This will prevent you from switching to a new Pokémon when Trainers send out a new Pokémon, making the game slightly more difficult.
- Second, you must not use any items during battle.
- Finally, you must not have any Pokémon above the level cap (14 in this case) in your party before the battle starts. Even if you don't use them during the battle, having them in your party at all will prevent you from earning the achievement. However, going above the level cap during the battle is OK.
Make sure you save before challenging Brock. Once he sends out Geodude, you should see a challenge indicator for Rock Smash in the corner of the screen (assuming you have challenge indicators turned on in your emulator settings). If you don't see it, reset to your save and make sure you have Set Mode turned on and no Pokémon in your party that are above the level cap.
If you picked Squirtle or Bulbasaur, this battle is very easy. Brock has just two Pokémon: a level 12 Geodude, and a level 14 Onix. Both are 4x weak to Grass and Water. Bulbasaur learns Vine Whip at level 13, and Squirtle learns Bubble at level 8. If you picked Charmander, you might have a harder time. The best option is probably to evolve a Caterpie into a Butterfree and have it learn Confusion at Level 12. Geodude and Onix have pretty low Special, so any type of Special attack will take them out pretty easily.

Make sure to buy the Magikarp in Mt. Moon Pokémon Center - it's considered to be a "gift" Pokémon (and at only 500 Pokedollars, it practically is a gift!).
Shoot for the Moon (5)
Find every item and defeat every trainer in Mt. Moon.
Checklist
-
FIELD ITEM – Mt. Moon 1F – TM12 (Water Gun)
-
FIELD ITEM – Mt. Moon 1F – Potion
-
TRAINER BATTLE – Mt. Moon 1F – Bug Catcher (Kent)
-
TRAINER BATTLE – Mt. Moon 1F – Lass (Iris)
-
TRAINER BATTLE – Mt. Moon 1F – Super Nerd (Jovan)
-
FIELD ITEM – Mt. Moon 1F – Potion
-
TRAINER BATTLE – Mt. Moon 1F – Bug Catcher (Robby)
-
FIELD ITEM – Mt. Moon 1F – Rare Candy
-
FIELD ITEM – Mt. Moon 1F – Escape Rope
-
TRAINER BATTLE – Mt. Moon 1F – Lass (Miriam)
-
TRAINER BATTLE – Mt. Moon 1F – Youngster (Josh)
-
TRAINER BATTLE – Mt. Moon 1F – Hiker (Marcos)
-
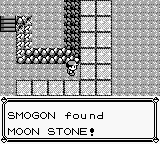
FIELD ITEM – Mt. Moon 1F – Moon Stone
-
FIELD ITEM – Mt. Moon B2F – HP Up
-
TRAINER BATTLE – Mt. Moon B2F – Team Rocket Grunt
-
TRAINER BATTLE – Mt. Moon B2F – Team Rocket Grunt
-
FIELD ITEM – Mt. Moon B2F – TM01 (Mega Punch)
-
HIDDEN ITEM – Mt. Moon B2F – Ether

-
TRAINER BATTLE – Mt. Moon B2F – Team Rocket Grunt
-
TRAINER BATTLE – Mt. Moon B2F – Team Rocket Grunt
-
HIDDEN ITEM – Mt. Moon B2F – Moon Stone
- TRAINER BATTLE – Mt. Moon B2F – Super Nerd (Miguel)
Make sure you keep the Moon Stones you get in here. There are only five in the game, and you'll need to use them on four different Pokémon to complete the Pokedex (Those being Nidorino, Nidorina, Jigglypuff, and Clefairy). You can also directly capture Jigglypuff's evolution Wigglytuff later on, though.
Only Take One (5)
Choose the Helix Fossil or the Dome Fossil at the end of Mt. Moon.
You can take whichever you want. You won't be able to revive them until much later in the story, so it probably doesn't matter too much, but I think Omastar is better, strictly speaking.
Again, once you jump down into Cerulean City, you won't be able to return to Pewter or Viridian City (unless you death-warp to the last Pokémon Center you used), so make sure you're ready to take Misty down!
Raindrop Cascade Badge (5)
Defeat Misty and earn the Cascade Badge in Cerulean City.
Pool's Closed (5)
Defeat Misty on Set Mode without using items in battle and without using Pokémon above level 21 at the beginning of the battle.
MISSABLE
This achievement is missable if you defeat Misty without fulfilling the conditions.
Misty has a level 18 Staryu and a Level 21 Starmie. Starmie is probably the biggest threat we've faced so far, as it has quite high stats, especially Special and Speed. If you have an Ivysaur, Misty probably won't give you too much trouble. If not, here are some suggestions:
- A Pikachu from Viridian Forest (assuming you caught one) would probably be your best bet. As supersharpy64 and Vespidcrown note in the comments, you can try and land a Thunder Wave to paralyze Starmie to prevent it from outspeeding all of your Pokémon, allowing them to finish the KO if Pikachu goes down.
- You could also use one of the Moon Stones you picked up in Mt. Moon to get an early Nidoking evolution. Nidoking has very good stats for this part of the game. However, his Ground typing leaves him weak to Water moves, so you might have to bring something else to finish the job,
- Magikarp evolves at level 20, and Gyarados' massive 125 Attack stat combined with its Water resistance will take down Starmie without too much trouble.
- If all else fails, you can grab a Spearow and/or Rattata from Route 4 and evolve them at level 20. Raticate's Hyper Fang will put in work.
- You could even try and cheese with Ekans' Wrap (assuming Starmie is paralyzed, so you outspeed it), which will slowly but surely get you the win.
- Another cheesy strategy would be to use Pidgeotto's (or Sandshrew's) Sand-attack to lower Starmie's accuracy, as Slackot suggests in the comments.
After defeating Misty, there's not much else to do in Cerulean right now. There's a trainer wanting to trade Poliwhirl for Jynx, but you probably don't have a Poliwhirl yet, so that will have to wait. Head north to Route 24, defeating Blue and the trainers on the Nugget Bridge. On Route 24, you may want to catch an extra Abra if you can for an in-game trade later. Once you rescue Bill, return to Cerulean City and head south on Route 5 to get to Vermilion City. In the north gate of the Underground path, there's a girl offering a NidoranF for a NidoranM. Not the most exciting deal, but it's required for an achievement, so go ahead and do it if you have an extra NidoranM.
Once you get to Vermilion City, there's another trade available - Farfetch'd for Spearow. Go ahead and do it if you have a Spearow you're willing to part with. Farfetch'd is not very strong, but makes a decent HM friend, as it can use Cut and Fly. In any case, both the trade and Farfetch'd are required for achievements. If you want to catch an extra Spearow, the closest place is Route 4, west of Cerulean.
You'll also want to grab the Old Rod and the Bike Voucher while you're here.
I Like to Ride It (5)
Obtain the Bicycle from the Bike Shop in Cerulean City.
Once you get the Bike Voucher by listening to the old man in the Pokémon Fan Club north of the Vermilion Gym, you can head back to Cerulean City and obtain the Bike. There's no pressing need, though, so you can do it later if you'd like.
Once you're ready, head to the S.S. Anne. Note that once you get the HM01 Cut from the Captain and then leave the ship, it will sail off, never to return. This makes a few achievements missable, so make sure you don't pick up Cut until you're ready! Before you pick up Cut, you can enter and exit the ship as many times as you'd like, though.
Also keep in mind that Lt. Surge's level cap is only 24, so make sure you're spreading experience out (or be ready to leave some Pokémon in the PC).
Sleeping Giant (2)
Be told about a legendary Pokémon that sleeps a lot.
MISSABLE
This achievement is missable if you fail to talk to the man before the S.S. Anne departs.
The man who tells you about Snorlax is located on the second floor, in the leftmost cabin.
My Heart Will Go On (10)
Collect every optional item and defeat every optional trainer on the S.S. Anne.
MISSABLE
This achievement is missable if you don't collect all the items and fight all the trainers before the S.S. Anne departs.
Checklist
-
TRAINER BATTLE – S.S. Anne B1F – [Missable] Fisherman (Barny)
-
TRAINER BATTLE – S.S. Anne B1F – [Missable] Sailor (Phillip)
-
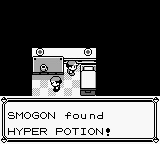
HIDDEN ITEM – S.S. Anne B1F – [Missable] Hyper Potion
-
TRAINER BATTLE – S.S. Anne B1F – [Missable] Sailor (Huey)
-
FIELD ITEM – S.S. Anne B1F – [Missable] TM44 (Rest)
-
TRAINER BATTLE – S.S. Anne B1F – [Missable] Sailor (Dylan)
-
FIELD ITEM – S.S. Anne B1F – [Missable] Ether
-
TRAINER BATTLE – S.S. Anne B1F – [Missable] Sailor (Duncan)
-
TRAINER BATTLE – S.S. Anne B1F – [Missable] Sailor (Leonard)
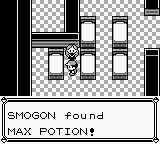
-
FIELD ITEM – S.S. Anne B1F – [Missable] Max Potion
-
TRAINER BATTLE – S.S. Anne 1F – [Missable] Gentleman (Thomas)
-
TRAINER BATTLE – S.S. Anne 1F – [Missable] Gentleman (Arthur)
-
TRAINER BATTLE – S.S. Anne 1F – [Missable] Lass (Ann)
-
TRAINER BATTLE – S.S. Anne 1F – [Missable] Youngster (Tyler)
-
FIELD ITEM – S.S. Anne 1F – [Missable] TM08 (Body Slam)
-
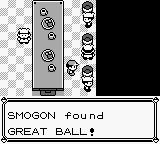
HIDDEN ITEM – S.S. Anne Kitchen – [Missable] Great Ball
-
TRAINER BATTLE – S.S. Anne Deck – [Missable] Sailor (Trevor)
-
TRAINER BATTLE – S.S. Anne Deck – [Missable] Sailor (Edmond)
-
TRAINER BATTLE – S.S. Anne 2F – [Missable] Fisherman (Dale)
-
TRAINER BATTLE – S.S. Anne 2F – [Missable] Gentleman (Brooks)
-
FIELD ITEM – S.S. Anne 2F – [Missable] Max Ether
-
TRAINER BATTLE – S.S. Anne 2F – [Missable] Gentleman (Lamar)
-
TRAINER BATTLE – S.S. Anne 2F – [Missable] Lass (Dawn)
-
FIELD ITEM – S.S. Anne 2F – [Missable] Rare Candy
Make sure you get all of them before you get HM01 Cut!
A Boatload of Fun (5)
Rub the Captain's back on the S.S. Anne and obtain HM01 Cut.
Once you get Cut, make sure that you have picked up all the items and battled all the trainers you need to. The S.S. Anne will depart as soon as you exit.
Be careful about teaching Cut - in this game, HMs cannot be overwritten by any means, so it's probably best to designate 1 Pokémon as an HM friend (like Farfetch'd) so you don't have to put Cut on your stronger Pokémon.
Cut opens up a lot for us, but since we're in Vermilion, let's go ahead and challenge Lt. Surge's gym first.
Sunny Thunder Badge (5)
Defeat Lt. Surge and earn the Thunder Badge in Vermillion City.
One Man Army (5)
Defeat Lt. Surge on Set Mode without using items in battle and without using Pokémon above level 24 at the beginning of the battle.
MISSABLE
This achievement is missable if you defeat Lt. Surge without fulfilling the conditions.
Lt. Surge has a level 21 Voltorb, level 18 Pikachu, and level 24 Raichu. Raichu in particular is a threat with its Thunderbolt and high Special. Here are a few strategies to get by:
- As blood and Dragonskhan mention in the comments, Ground types will completely wall Raichu. If you need one, you can head east of Vermilion to Diglett's Cave to grab a Diglett. You can also find level ~30 Dugtrio, but they are above the level cap. Watch out for Screech from Voltorb and Quick Attack from Pikachu, though. If you have 2 Ground Pokémon, you should be in the clear.
- Ivysaur (and other Grass types) resists Electric moves (Bulbasaur fans stay winning), allowing you to whittle down the first two Pokémon.

After defeating Surge, head east to Route 11.
Lawn Mower (2)
Cut the grass.
When you're next to tall grass, you can use Cut to clear a patch of it, allowing you to (very tediously) walk risk-free through a route. Probably not all that useful, but it's a neat feature!
Metal Detector (5)
Obtain the Itemfinder from Prof. Oak's aide on Route 11.
The Aide is found on the second floor of the gate on the east side of route 11. If you have caught 30 types of Pokémon, he'll give you the Itemfinder. Next to him is a guy who will trade Nidorina for Nidorino. Again, unimpressive, but it's required.
You can't head east any more because Snorlax is blocking the way, so head through Diglett's Cave back to Route 2. South of the exit onto Route 2 is a house where a kid will offer his Mr. Mime for an Abra. This is the only way to get Mr. Mime, so trade an Abra if you have an extra one.
Flashing Lights Warning (5)
Obtain HM05 Flash from Prof. Oak's aide on Route 2.
Further south, there's another gate where an Aide will give you HM05 Flash if you've caught at least 10 types of Pokémon. Again, HMs can't be overwritten in this game, so be careful about who you teach it to.
After getting Flash, there aren't any achievements until you reach Celadon City. You can use Cut to get the Old Amber from the Pewter Museum on the way.
Once you reach Celadon, you can pick up Eevee through the back door of the Pokémon Mansion, visit the Department Store (make sure to get an extra drink for the guard and at least 2 Poke Dolls), and challenge Erika at the Celadon Gym.
Floral Rainbow Badge (5)
Defeat Erika and earn the Rainbow Badge in Celadon City.
Kicking Some Grass (10)
Defeat Erika on Set Mode without using items in battle and without using Pokémon above level 29 at the beginning of the battle.
MISSABLE
This achievement is missable if you defeat Erika without fulfilling the conditions.
Erika has a level 29 Victreebell, a level 24 Tangela, and a Level 29 Vileplume. Victreebell and Vileplume are probably the biggest threats - they can put you to sleep with Sleep Powder, which really sucks in Gen 1. Here's some suggestions:
- Charmander users finally get their first W (and Bulbasaur boys their first L). Charmeleon should have no problem ripping through Erika's Pokémon.
- Actually, Venusaur may not be bad in this fight. Erika's AI may repeatedly use Poison Powder (as it thinks it's super-effective against Venusaur's Grass typing), which is useless against Venusaur. This lets you slowly and surely chip down Erika's Pokémon.
- You can also grab a Growlithe/Vulpix on Route 8 east of Saffron City or Route 7 east of Celadon.
- Kadabra will make short work of Victreebell and Vileplume due to their Poison typing. Kadabra learns Psybeam at level 27, and should outspeed to avoid Sleep Powder if your level is high enough.
- You can use your Flash Pokémon to lower the accuracy of Sleep Powder even further if you'd like.
After defeating Erika, we'll have to go tackle the Rocket Hideout and the Pokémon Tower.

The Rocket Hideout is located within the Celadon Game Corner. You could try a few of the Game Corner achievements, or you could wait until later when you have more funds.
Raiding the Vault (5)
Find every item and defeat every trainer in the Rocket Hideout.
Checklist
-
TRAINER BATTLE – Rocket Hideout B1F – Team Rocket Grunt
-
FIELD ITEM – Rocket Hideout B1F – Escape Rope
-
TRAINER BATTLE – Rocket Hideout B1F – Team Rocket Grunt
-
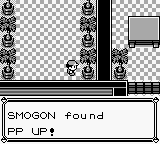
HIDDEN ITEM – Rocket Hideout B1F – PP Up
-
TRAINER BATTLE – Rocket Hideout B1F – Team Rocket Grunt
-
TRAINER BATTLE – Rocket Hideout B1F – Team Rocket Grunt
-
FIELD ITEM – Rocket Hideout B1F – Hyper Potion
-
TRAINER BATTLE – Rocket Hideout B1F – Team Rocket Grunt
-
TRAINER BATTLE – Rocket Hideout B2F – Team Rocket Grunt
-
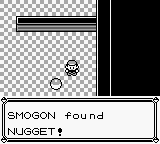
FIELD ITEM – Rocket Hideout B2F – Nugget
-
FIELD ITEM – Rocket Hideout B2F – Moon Stone
-
FIELD ITEM – Rocket Hideout B2F – TM07 (Horn Drill)
-
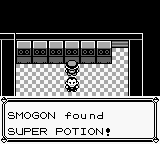
FIELD ITEM – Rocket Hideout B2F – Super Potion
-
TRAINER BATTLE – Rocket Hideout B3F – Team Rocket Grunt
-
FIELD ITEM – Rocket Hideout B3F – TM10 (Double-Edge)
-
HIDDEN ITEM – Rocket Hideout B3F – Nugget
-
FIELD ITEM – Rocket Hideout B3F – Rare Candy
-
TRAINER BATTLE – Rocket Hideout B3F – Team Rocket Grunt
-
FIELD ITEM – Rocket Hideout B4F – HP Up
-
FIELD ITEM – Rocket Hideout B4F – TM02 (Razor Wind)
-
TRAINER BATTLE – Rocket Hideout B4F – Team Rocket Grunt
-
FIELD ITEM – Rocket Hideout B4F – Lift Key
-
TRAINER BATTLE – Rocket Hideout B4F – Team Rocket Grunt
-
TRAINER BATTLE – Rocket Hideout B4F – Team Rocket Grunt
-
FIELD ITEM – Rocket Hideout B4F – Iron
-
TRAINER BATTLE – Rocket Hideout B4F – Boss Giovanni
-
FIELD ITEM – Rocket Hideout B4F – Silph Scope
-
HIDDEN ITEM – Rocket Hideout B4F – Super Potion
Ghost Buster (5)
Obtain the Silph Scope from the Rocket Hideout.
Now that you've gone to all that effort to get the Silph Scope, go ahead and put it (and the Lift Key) into your PC, as an achievement in the Pokémon Tower requires you to pass the ghost without using the Silph Scope. Before you head back to Lavender Town, take a short detour to the west, onto Route 16. This will allow you to grab Fly, which will be very useful.
Prepare For Liftoff (5)
Obtain HM02 Fly from the secret house on Route 16.
Snorlax will be blocking the entrance to Route 16 proper, but you can Cut a tree to go through the northern path instead. Doing so, you'll find a house with a woman who will give you the Fly HM! If you brought an HM friend like Farfetch'd, you can teach it to them now, and Fly straight to Lavender Town. Otherwise, you can walk back to Celadon and go east, potentially unlocking the gates to Saffron City by giving the guards a drink item.
Before you head into the Pokémon Tower, make sure you bring a Poke Doll, and leave the Silph Scope in the PC. If you don't have a Poke Doll, you can buy one on the 4th floor of the Celadon Department Store.
Grave Robbing (5)
Find every item and defeat every trainer in the Pokémon Tower.
Checklist
-
TRAINER BATTLE – Pokémon Tower 2F – Rival
-
TRAINER BATTLE – Pokémon Tower 3F – Channeler (Hope)
-
FIELD ITEM – Pokémon Tower 3F – Escape Rope
-
TRAINER BATTLE – Pokémon Tower 3F – Channeler (Patricia)
-
TRAINER BATTLE – Pokémon Tower 3F – Channeler (Carly)
-
TRAINER BATTLE – Pokémon Tower 4F – Channeler (Laurel)
-
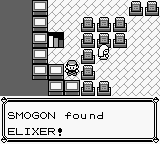
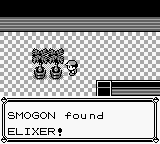
FIELD ITEM – Pokémon Tower 4F – Elixer
-
FIELD ITEM – Pokémon Tower 4F – Awakening
-
TRAINER BATTLE – Pokémon Tower 4F – Channeler (Jody)
-
FIELD ITEM – Pokémon Tower 4F – HP Up
-
TRAINER BATTLE – Pokémon Tower 4F – Channeler (Paula)
-
HIDDEN ITEM – Pokémon Tower 5F – Elixer
-
TRAINER BATTLE – Pokémon Tower 5F – Channeler (Ruth)
-
TRAINER BATTLE – Pokémon Tower 5F – Channeler (Tammy)
-
TRAINER BATTLE – Pokémon Tower 5F – Channeler (Karina)
-
FIELD ITEM – Pokémon Tower 5F – Nugget
-
TRAINER BATTLE – Pokémon Tower 5F – Channeler (Janae)
-
TRAINER BATTLE – Pokémon Tower 6F – Channeler (Angelica)
-
FIELD ITEM – Pokémon Tower 6F – X Accuracy
-
TRAINER BATTLE – Pokémon Tower 6F – Channeler (Jennifer)
-
TRAINER BATTLE – Pokémon Tower 6F – Channeler (Emilia)
-
FIELD ITEM – Pokémon Tower 6F – Rare Candy
-
TRAINER BATTLE – Pokémon Tower 7F – Team Rocket Grunt
-
TRAINER BATTLE – Pokémon Tower 7F – Team Rocket Grunt
-
TRAINER BATTLE – Pokémon Tower 7F – Team Rocket Grunt
Dearly Beloved (5)
Gift the Ghost at the top of Lavender Tower a Poké Doll to calm it without using the Silph Scope.
MISSABLE
This achievement is missable if you defeat the Ghost normally with the Silph Scope.
If you encounter the Ghost at the top without a Silph Scope in your inventory, you can use the Poke Doll item to immediately end the fight. Due to a programming oversight, this counts as defeating the Ghost, allowing you to progress!
GHOST!? (5)
Save Mr. Fuji and obtain the Poké Flute.
After getting to the top floor and rescuing Mr. Fuji, make sure you talk to him so he'll give you the Poke Flute. If you'd like, you can go back into the Pokémon Tower with the Silph Scope to catch Gastly and Cubone.
At this point, you actually have a few options. For your next badge, you could challenge Silph Co. and Sabrina in Saffron City or Koga in Fuchsia City. The level cap for both gyms is 43, so there's a lot of room to train Pokémon up. I'll be following the order in the Bulbapedia and Strategy Wiki guides, which both do Sabrina first.
When you get to Saffron, there's not much you can do, as Team Rocket has taken control of the city. Our ultimate goal is Silph Co., but if you want, you can challenge the Fighting Dojo beforehand.
Enter the Dragon (5)
Claim your prize from the Saffron City Dojo.
The Dojo is the building that says GYM right next to the regular gym. You'll face five Black Belts, who all have Fighting type Pokémon. A Psychic type like Kadabra will make short work of them. Once you defeat them, you can choose Hitmonchan or Hitmonlee. Hitmonlee is probably slightly better, as the elemental punches that Hitmonchan learns are Special attacks, and Hitmonchan's Special is an abysmal 35.
Next, we'll fight through Silph Co. Make sure you save before you enter, as there's a missable achievement that requires you to "sneak" your way through.
Ekans Dilos (5)
Reach the Rival in Silph Co. without defeating more than 1 trainer.
MISSABLE
This achievement is missable if you encounter more than the required one trainer.
Here are step-by-step instructions, adapted from MarvellousDazza's guide in the comments:
- Enter the front door, and head straight to the elevator at the back. Head up to the 5th floor.
- Walk left until you see two plant pots. Head south of them to avoid a Trainer to the west, and then follow the hallway south to the bottom.
- There should be a Rocket Grunt standing next to a teleport pad. This is our one mandatory encounter - defeat him, then use the teleporter pad. Teleport back the way you came, and you should be able to folllow the hallway south and east to grab the Card Key.
- Once you grab the Card Key, open the door to the northwest of the Rocket Grunt you just defeated. Inside that door, to the south of the boxes, is another teleporter. Take that one.
- Follow the hallway east and turn north as soon as you're able to. There will be a door on the west side of the hallway - go through that door, and step on the teleporter, and the fight with Blue should start, giving you the achievement!
Once you earn this achievement, do note that you'll have to go back and battle all the trainers you missed before you fight Giovanni in order to get the next achievement.
Hostage Situation (25)
Find every item, defeat every trainer, and open every door in Silph Co.
MISSABLE
This achievement is missable if you don't defeat all of the trainers before you defeat Giovanni. The items and doors will still be accessible, though!
Note that the Trainers will disappear once you defeat Giovanni. As Grahamtams says in the comments, Giovanni will challenge you immediately when you walk through his door, so make sure that you've gotten everything before you do! The Blue fight, picking up Lapras, the Giovanni fight, and the Master Ball don't count towards this achievement, so it should pop as soon as you open the last door to Giovanni.
Checklist
- TRAINER BATTLE – Silph Co. 2F – [Missable] Team Rocket Grunt
- TRAINER BATTLE – Silph Co. 2F – [Missable] Scientist (Jerry)
- TRAINER BATTLE – Silph Co. 2F – [Missable] Team Rocket Grunt
- TRAINER BATTLE – Silph Co. 2F – [Missable] Scientist (Connor)
- ITEM GIFT – Silph Co. 2F – TM36 (Self-Destruct) from woman
- DOOR - Silph Co. 2F
- DOOR - Silph Co. 2F
- TRAINER BATTLE – Silph Co. 3F – Team Rocket Grunt
- TRAINER BATTLE – Silph Co. 3F – [Missable] Scientist (Jose)
- FIELD ITEM – Silph Co. 3F – Hyper Potion
- DOOR - Silph Co. 3F
- DOOR - Silph Co. 3F
- TRAINER BATTLE – Silph Co. 4F – [Missable] Team Rocket Grunt
- TRAINER BATTLE – Silph Co. 4F – [Missable] Team Rocket Grunt
- TRAINER BATTLE – Silph Co. 4F – [Missable] Scientist (Rodney)
- FIELD ITEM – Silph Co. 4F – Full Heal
- FIELD ITEM – Silph Co. 4F – Max Revive
- FIELD ITEM – Silph Co. 4F – Escape Rope
- DOOR - Silph Co. 4F
- DOOR - Silph Co. 4F
- TRAINER BATTLE – Silph Co. 5F – [Missable] Team Rocket Grunt
- TRAINER BATTLE – Silph Co. 5F – [Missable] Juggler (Dalton)
- HIDDEN ITEM – Silph Co. 5F – Elixer
- TRAINER BATTLE – Silph Co. 5F – [Missable] Scientist (Beau)
- FIELD ITEM – Silph Co. 5F – Protein
- FIELD ITEM – Silph Co. 5F – TM09 (Take Down)
- TRAINER BATTLE – Silph Co. 5F – [Missable] Team Rocket Grunt
- FIELD ITEM – Silph Co. 5F – Card Key
- DOOR - Silph Co. 5F
- DOOR - Silph Co. 5F
- DOOR - Silph Co. 5F
- TRAINER BATTLE – Silph Co. 6F – [Missable] Team Rocket Grunt
- TRAINER BATTLE – Silph Co. 6F – [Missable] Scientist (Taylor)
- FIELD ITEM – Silph Co. 6F – HP Up
- FIELD ITEM – Silph Co. 6F – X Accuracy
- TRAINER BATTLE – Silph Co. 6F – [Missable] Team Rocket Grunt
- DOOR - Silph Co. 6F
- TRAINER BATTLE – Silph Co. 7F – [Missable] Team Rocket Grunt
- FIELD ITEM – Silph Co. 7F – TM03 (Swords Dance)
- TRAINER BATTLE – Silph Co. 7F – [Missable] Team Rocket Grunt
- TRAINER BATTLE – Silph Co. 7F – [Missable] Team Rocket Grunt
- TRAINER BATTLE – Silph Co. 7F – [Missable] Scientist (Joshua)
- FIELD ITEM – Silph Co. 7F – Calcium
- DOOR - Silph Co. 7F
- DOOR - Silph Co. 7F
- DOOR - Silph Co. 7F
- TRAINER BATTLE – Silph Co. 8F – [Missable] Team Rocket Grunt
- TRAINER BATTLE – Silph Co. 8F – [Missable] Team Rocket Grunt
- TRAINER BATTLE – Silph Co. 8F – [Missable] Scientist (Parker)
- DOOR - Silph Co. 8F
- TRAINER BATTLE – Silph Co. 9F – [Missable] Scientist (Ed)
- TRAINER BATTLE – Silph Co. 9F – [Missable] Team Rocket Grunt
- HIDDEN ITEM – Silph Co. 9F – Max Potion
- TRAINER BATTLE – Silph Co. 9F – [Missable] Team Rocket Grunt
- DOOR - Silph Co. 9F
- DOOR - Silph Co. 9F
- DOOR - Silph Co. 9F
- DOOR - Silph Co. 9F
- TRAINER BATTLE – Silph Co. 10F – [Missable] Scientist (Travis)
- TRAINER BATTLE – Silph Co. 10F – [Missable] Team Rocket Grunt
- FIELD ITEM – Silph Co. 10F – Carbos
- FIELD ITEM – Silph Co. 10F – Rare Candy
- FIELD ITEM – Silph Co. 10F – TM26 (Earthquake)
- DOOR - Silph Co. 10F
- TRAINER BATTLE – Silph Co. 11F – [Missable] Team Rocket Grunt
- TRAINER BATTLE – Silph Co. 11F – Team Rocket Grunt
- DOOR - Silph Co. 11F
Biggest Balls In Kanto (5)
Obtain the Master Ball from the President of Silph Co.
You'll receive the Master Ball after defeating Giovanni. Once you're done, a few things open up - you can use a Poke Doll to get TM31 Mimic, and you can challenge Sabrina's gym.
Golden Marsh Badge (10)
Defeat Sabrina and earn the Marsh Badge in Saffron City.
Brawn Over Brains (10)
Defeat Sabrina on Set Mode without using items in battle and without using Pokémon above level 43 at the beginning of the battle.
MISSABLE
This achievement is missable if you defeat Sabrina without fulfilling the conditions.
Sabrina can be tough, as Psychic has no good counter in this game. What's more, Kadabra and Alakazam often like to use Recover, wiping out any progress you may have made. Enemies don't have PP in this game, so they can use Recover indefinitely. Here's a few suggestions:
- As NimbusSpark suggests, Snorlax is a good option. You can catch one using the Poke Flute (detailed in the next section). Snorlax comes knowing Amnesia, which boosts Special by two stages. After KOing Kadabra, Snorlax can buff up its defenses with Amnesia, and then take down the rest of the Pokémon using Body Slam (learned at level 35), exploiting their relatively weak physical defense.
- Raichu, Jolteon, or Electrode could use Thunder Wave to paralyze Alakazam, lessening the chance that it will successfully use Recover.
- As rickyplays suggests, you can grab a Dugtrio from Diglett's Cave and use Dig.
- Dragon Rage (from Gyarados or Charizard) is still a decent option for guaranteed damage.
- If all else fails, you can use Double Team to cheese the fight. TM32 Double Team is buyable at the Department Store, and can be taught to almost every Pokémon in the game (Metapod fans in shambles). Mr. Mime is a decent Pokémon to set up on.
Monkey's Tounge (5)
Starting from the gym entrance, navigate through the Saffron City Gym using only 4 warps.
You don't need to do this on the first try - you can come back after you defeat Sabrina.
As several users state, the solution is (after taking the first warp) to take the northwest portal, the southwest portal, and the southwest portal again.
After you defeat Sabrina, get ready to head down to Fuchsia City.
There are a couple ways to get to Fuchsia City. West of Celadon City is Cycling Road, spanning Routes 16, 17, and 18. This Route is quick to traverse, has a bunch of hidden items, and a trade (Slowbro for Lickitung) on Route 18. You probably don't have a Slowbro yet, but you'll need to come back when you do.
Meanwhile, south of Lavender Town are Routes 12, 13, 14, and 15. These routes have a long gauntlet of Trainers, which takes longer, but you can get a bunch of XP. Route 12 also contains a house with the Super Rod. Choose whichever way you prefer. Or choose both!
The Sleeper Awakens (5)
Use the Poké Flute to awaken and catch a Snorlax.
MISSABLE
This achievement is missable if you KO both of the Snorlaxes.
Whichever way you go, a sleeping Snorlax will be blocking the way. Use the Poke Flute to awaken them, and then battle and catch them.
Note that if you KO Snorlax, it won't respawn, which is what makes this achievement missable. Thankfully, there are two Snorlaxes, so if you miss one, you can try and catch the other. I would still recommend saving beforehand though, just to be safe.
Snorlax is a very good Pokémon in Gen 1. With its high Attack, it can use Normal-type STAB moves like Body Slam, Double-Edge, and Hyper Beam very effectively. Its Special of 65 is just OK, but with access to Amnesia, which boosts Special by 2 stages, Snorlax can become very tanky, and even dish out some major Special damage of its own with moves like Surf.
In the gate from Route 15 east of Fuchsia City, you can grab two achievements:
Sharing Is Caring (5)
Obtain an Exp. All from Prof. Oak's aide in Fuchsia City.
Oak's Aide can be found on the second floor of the gate. If you've caught 50 species of Pokémon, you can get the EXP. All, an item that splits EXP evenly between different Pokémon in your party while it's in your bag. This can be useful for making sure your Pokémon stay under a level cap, or for leveling up multiple species of Pokémon to evolve them.
Unidentified Flying Object (2)
Glance at a mysterious bird in the distance using the binoculars.
Also on the second floor of the gate are two pairs of binoculars. One of them will show a bird flying in the distance, and will bring up a picture of Articuno.
You can still get this even after you've caught Articuno - the bird will still appear in the binoculars. Must be its cousin.
Once you enter Fuchsia City proper, you can either head straight for the Gym or do some exploring first.
Froggy! (5)
Obtain all 3 Fishing Rods.
If you got the Old Rod in Vermilion City and the Super Rod from the house on Route 12, then you can get this achievement by getting the Good Rod from the house directly to the east of the Warden's.
Heart and Soul Badge (10)
Defeat Koga and earn the Soul Badge in Fuchsia City.
Ninja Gaiden (10)
Defeat Koga on Set Mode without using items in battle and without using Pokémon above level 43 at the beginning of the battle.
MISSABLE
This achievement is missable if you defeat Koga without fulfilling the conditions.
After Sabrina, Koga's not so bad. All four of his Pokémon are pure Poison type, so a Psychic type Pokémon can rip him to shreds. The only potentially annoying things are his Muk using Minimize, or his Weezing using Selfdestruct (although at that point you've already won). Here are some tips:
- Kadabra is perfect for this challenge, especially since it learns the incredibly powerful Psychic at level 38. It will likely be able to outspeed and one-shot all of Koga's Pokémon, avoiding the Minimize issue from Muk.
- A Ground Pokémon can be good, using either Dig or Earthquake. Graveler learns Earthquake at level 36, and Diglett learns it at level 40 (if you delay the evolution). You can also use the Earthquake TM you got in Silph Co., but you may want to hang onto it until the Elite 4 instead (or be careful about who you give it to).
- Snorlax learns the powerful move Body Slam at level 35, and is a decent option. If you get unlucky, Muk might stack more than one Minimize, though.
Ace of the Maze (5)
Starting from the gym entrance, navigate through the Fuchsia City Gym without hitting any walls.
This one isn't missable - you can retry by exiting the Gym and entering again. If you look closely, you can see the pattern of the invisible walls on the floor, so it shouldn't be too hard to avoid. As Earthsouls and Sebta mention, hitting walls, trainers, and the edge of the map will void the achievement. Basically, if you hear the "bonk" sound, it voids the achievement. As Vespidcrown suggests, go slowly and tap the button to go one space at a time if you need to.

Before entering the Safari Zone, empty out your bag so that you have at least 12 open slots. There are ten optional items you'll need to collect in one run, and two quest items. You need Surf to get one of the items, so you may want to get Surf on the first trip and get the rest on a subsequent trip. If you have a good route, you can get all of them in one trip assuming you've beaten Koga and bring a Pokémon who can learn Surf. You can see an example in this video by OmegaVideoGameGod.
Too Much Water (5)
Obtain HM03 Surf from the Safari Zone.
Surf is found in a house in the western area. You'll have to loop around through the east and northern areas to get there, though. While you're there, you can also pick up the Gold Teeth if you'd like but don't pick up any other items, as you'll need to get the rest in one visit. If you want, with the rest of your time you can try fishing for Magikarp with the Old Rod for Getting Your Money's Worth (see the Safari Zone Achievements).
No Item Left Behind (10)
Without resetting, collect all optional items in the Safari Zone within a single Safari Hunt.
MISSABLE
This achievement is missable if you obtain any optional items and exit the Safari zone without collecting all of them.
Make sure you save before entering the Safari Zone, and that you have space in your bag for all the items.
There are ten optional items in the Safari Zone. Try to take them area by area. zerokid's guide has excellent maps of each area.
-
FIELD ITEM – Safari Zone Center – Nugget
-
FIELD ITEM – Safari Zone East – Carbos
-
FIELD ITEM – Safari Zone East – Max Potion
-
FIELD ITEM – Safari Zone East – TM37 (Egg Bomb)
-
FIELD ITEM – Safari Zone East – Full Restore
-
FIELD ITEM – Safari Zone North – TM40 (Skull Bash)
-
FIELD ITEM – Safari Zone North – Protein
-
FIELD ITEM – Safari Zone West – TM32 (Double Team)
-
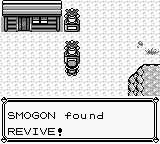
HIDDEN ITEM – Safari Zone West – Revive
-
FIELD ITEM – Safari Zone West – Max Potion
-
FIELD ITEM – Safari Zone West – Max Revive
Performance Enhancement Disk (5)
Obtain HM04 Strength from the Safari Zone Warden in Fuchsia City.
After your adventure in the Safari Zone, give the Gold Teeth to the Warden in his house east of the Pokémon Center. He'll give you the HM04 Strength in return. Make sure you grab the item that's nearby!
Slowpoke is a decent choice for a second HM Friend - it can learn Strength, Surf, and Flash. You can grab one in the Safari Zone (if you're not sick of it yet), or a higher-leveled one in the Seafoam Islands coming up.
Now that you have Surf, you can either head on to the Seafoam Islands, or you can backtrack to the Power Plant on Route 10, east of Cerulean City. In both locations you can capture a legendary bird Pokémon - Articuno and Zapdos, respectively. The easiest way to catch legendary Pokémon in this game is to inflict them with a status and chuck Ultra Balls. Sleep is ideal, but even Paralysis gives a ~10% catch chance at full HP. Don't worry too much about trying to get them to low HP - the increase to catch chance is pretty marginal compared to inflicting them with a status. Alternatively, you could use the Master Ball on one of them, as we won't be using it for Mewtwo. Whatever you do, make sure you save before you battle them - if you KO them, they won't come back!
If you do end up going to the Power Plant, make sure you battle and defeat (or catch) the Voltorbs and Electrodes disguised as items - clearing them all is required for an achievement.
Finally, you may want to keep Articuno and Zapdos in the box for now. Not only are they above the level cap, but them coming at level 50 makes them ideal as a Plan B (or Plan A) for the Smogon achievement (which also has a level cap of 50).
Cinnabar Island has a bunch of things to do. First of all, you can head to the Pokémon Lab, which contains a scientist who can revive your fossil Pokémon! If you've received every other gift Pokémon so far, the It's Present achievement should pop. The lab also contains our final three in-game trades for No ~Multi~ Set Required. The three trades are Venonat for Tangela, Raichu for Electrode, and Ponyta for Seel. Venonat can be caught in a lot of places, and Ponyta can be caught in the Pokémon Mansion here on Cinnabar Island. If you don't want to evolve your own Raichu, you can find wild Raichu in Cerulean Cave in the postgame. Full details for these two achievements are located in Adventure Achievements.
Once you're ready, head into the Pokémon Mansion.
GB Bungaku Zenshuu (5)
Without resetting and without leaving the building, read every journal in the Cinnabar Mansion.
There are two journals on the second floor, one on the third floor, and one in the basement.
Once you finish the Pokémon Mansion, make sure you save before you enter the gym - unlike Sabrina and Koga, there is a MISSABLE gym achievement!
2000 IQ Super Quiz (5)
Without resetting and without leaving the building, complete all of the quizzes in the Cinnabar Island Gym without fighting any trainers.
MISSABLE
This achievement is missable if you answer any questions incorrectly, fight any of the trainers, or leave the gym after answering any questions.
You'll need to get all of the quiz answers correct in one go. Don't save in between them - if you accidentally get one wrong, reload your save from before the Gym!
MarvellousDazza shares the answers:
- Yes (as IanJ1988 notes, this is debatably incorrect, as Caterpie evolves into Metapod, not Butterfree)
- No
- No
- No
- Yes
- No
Once you answer the sixth question, the achievement will pop. At this point, you can go back and talk to the trainers to challenge them if you'd like. They're not required for any achievements, though, so you can just go ahead and fight Blaine if you'd like.
Fiery Volcano Badge (10)
Defeat Blaine and earn the Volcano Badge at Cinnabar Island.
Fire Fighter (10)
Defeat Blaine on Set Mode without using items in battle and without using Pokémon above level 47 at the beginning of the battle.
MISSABLE
This achievement is missable if you defeat Blaine without fulfilling the conditions.
Blaine has four Pokémon: a level 42 Growlithe, a level 40 Ponyta, a level 42 Rapidash, and a level 47 Arcanine. All are pure Fire-types, so their weakness should be easy to exploit:
- To be honest, basically any Water type with Surf can take Blaine down. I managed to do it with a level 38 Slowbro without setting up at all. You can easily catch a suitable Pokémon in Seafoam islands.
- Surf is pretty widely teachable, so even Pokémon like Snorlax or Nidoking can get in on the action. Just remember that you can't overwrite it.
- Ground and Rock type Pokémon are also an option. Earthquake will easily take down Blaine's team.
There's not much else to do at this point besides heading back to Viridian City to challenge the final Gym Leader. Either Surf north from Cinnabar to return to Pallet Town, or Fly straight to Viridian, and get ready for our final Gym Challenge.
Feathered Earth Badge (10)
Defeat Giovanni and earn the Earth Badge in Viridian City.
Blasting off Again (10)
Defeat Giovanni in the Viridian Gym on Set Mode without using items in battle and without using Pokémon above level 50 at the beginning of the battle.
MISSABLE
This achievement is missable if you defeat Giovanni without fulfilling the conditions.
Giovanni brings a level 45 Rhyhorn, a level 42 Dugtrio, a level 44 Nidoqueen, a level 45 Nidoking, and a level 50 Rhydon. Here are some tips:
- Water Pokémon are again likely your best bet. Surf will wreck Giovanni's team, especially Rhyhorn and Rhydon who are 4x weak to it.
- Grass Pokémon like Venusaur aren't too bad either, although they may struggle against Nidoking and Nidoqueen due to their Poison typing.
- As always, Kadabra is a great choice, especially for Nidoqueen and Nidoking who are weak to Psychic type attacks.
From StrategyWiki:

One of a Kind (2)
Grab the only item in the game that is inside of a Gym.
There is a Revive tucked in a hallway to the right of the central area, as shown in the picture above.
Spin to Lose (5)
Starting from the gym entrance, navigate through the Viridian City Gym without using any spin tiles.
To do this, you'll have to go through the central area, past Trainer 4 and Trainer 5. Note that Trainer 5 will block your path, so you'll need to exit the Gym and enter again to reset him. This achievement isn't missable - you can get it after defeating the gym.
We're in the home stretch! Head west of Viridian City to battle your Rival one more time and then head up to Victory Road.
If you can, try and keep a few Pokémon below Level 50 for the Smogon achievement. Conveniently, the legendary birds come at Level 50, so if you keep them in the Box for now, that serves as a decent backup plan if one of your Pokémon goes over.
Victory Lap (10)
Find every item and defeat every trainer in Victory Road.
Checklist
- FIELD ITEM – Victory Road 1F – TM43 (Sky Attack)
- FIELD ITEM – Victory Road 1F – Rare Candy
- TRAINER BATTLE – Victory Road 1F – Cooltrainer♀ (Naomi)
- TRAINER BATTLE – Victory Road 1F – Cooltrainer♂ (Rolando)
- TRAINER BATTLE – Victory Road 2F – Black Belt (Daisuke)
- FIELD ITEM – Victory Road 2F – TM05 (Mega Kick)
- TRAINER BATTLE – Victory Road 2F – Juggler (Nelson)
- TRAINER BATTLE – Victory Road 2F – Tamer (Vincent)
- FIELD ITEM – Victory Road 2F – Full Heal
- TRAINER BATTLE – Victory Road 2F – Juggler (Gregory)
- FIELD ITEM – Victory Road 2F – TM17 (Submission)
- TRAINER BATTLE – Victory Road 2F – PokéManiac (Dawson)
- HIDDEN ITEM – Victory Road 2F – Ultra Ball
- FIELD ITEM – Victory Road 2F – Guard Spec.
- HIDDEN ITEM – Victory Road 2F – Full Restore
- TRAINER BATTLE – Victory Road 3F – Cooltrainer♂ (George)
- FIELD ITEM – Victory Road 3F – TM47 (Explosion)
- TRAINER BATTLE – Victory Road 3F – Cooltrainer♀ (Caroline)
- FIELD ITEM – Victory Road 3F – Max Revive
- TRAINER BATTLE – Victory Road 3F – Cooltrainer♂ (Colby)
- TRAINER BATTLE – Victory Road 3F – Cooltrainer♀ (Alexa)
You can also find Moltres on 2F to complete the Uno, Dos, Tres! achievement.
Once you reach the Indigo Plateau, take a minute to take stock of your Pokémon and remaining TMs to build a team for the Elite 4 achievements.
Pokémon Master! (25)
Beat the Elite Four and the Champion of the Pokémon League.
There are five Elite Four achievements - one for just beating them, and four for beating them under specific conditions. The latter four you can overlap without too much trouble, or you can tackle them individually to make it easier. I'll go through each one individually.
If you've been saving your TMs, now's the time to use them. Having a wide variety of moves on one Pokémon (like having Ice Beam/Thunderbolt/Psychic/Surf on a single Pokémon) will be incredibly helpful for coverage and versatility, especially for Elite Stomp.
I'll also be theorizing a worst-case scenario for each achievement, which will attempt to build a team from scratch without using any non-infinite TMs, missable Pokémon, or non-buyable items like Ethers. Expect plenty of cheese. This is mostly for fun, but feel free to take some inspiration if you've run out of TMs or leveled your good Pokémon past the level cap.
I would recommend you tackle Smogon first due to the lower level cap.
Smogon (10)
Without resetting, beat the Pokémon League on Set Mode without using items in battle and without using Pokémon above level 50 at the beginning of the League.
You should save before you enter the door in case you fail and need to try again.
As the achievement description suggests, the level 50 requirement only applies when you enter the door. Once you're past, you're free to level up your Pokémon past 50 either through battling or, as Slumbo mentions, spamming Rare Candies (although you might want to save them for Elite Stomp)
Also, make sure you don't save in the middle - you need to do it all in one go, so you'll need to start from the beginning if you fail.
You can (and should) use items in between the fights - bring Full Heals, healing items (I like Fresh Water), and Revives. You might want to save at least some Ethers and Elixers for later, if you can.
There are many great recommendations in the achievement comments. You can either head in with a well-rounded team as AlveenKamfort suggests, or go in with one overwhelming Pokémon as Kiwiron or Merricid suggest. I myself managed to get through with a team of Slowbro, Jolteon, Snorlax, Kadabra, Nidoking, and Articuno, all at level 38-44 (except for Articuno). If you're looking for a Pokémon to add, sticking Double Team (buyable in the Department Store) on Articuno and/or Zapdos is a good choice - Articuno comes with Ice Beam and has a fantastic 125 Special. If you level Articuno to 51 (during the Elite 4), it will learn Blizzard, too, which is busted in Gen 1 (90% accuracy?!). It might be tempting to use the Thunderbolt TM on Zapdos, but I think it's better suited for giving coverage to a Pokémon for the next achievement, Elite Stomp.
WORST CASE SCENARIO
- This is probably the hardest one to do under the worst case scenario. The game is very stingy with good moves (Not a single Pokémon learns Thunderbolt by level up? Seriously?), you can't cheese with items or overleveling, and many Pokémon that may be good are either missable (Snorlax, Articuno, Nidoking) or dependent on TMs (Chansey, Tauros)
- Double Team (TM32) is your best friend. It is buyable at the Celadon Department Store, and is compatible with almost every Pokémon in the game. If you manage to get 6 up, the opponent will only have a 25% chance to hit (using a 100% accurate move). In addition, the Badge Boost glitch will multiply all of your Pokémon's stats by 1.125x every time you use Double Team, leading to a total ~2.5x boost to all stats if you use it 6 times.
- Water-type Pokémon are a good choice due to their compatibility with Surf, a free and very powerful Water-type move.
- Cloyster is probably your answer for Lance - Shellder learns the excellent move Ice Beam at exactly Level 50, and can be evolved right away using a Water Stone.
- Dugtrio learns Earthquake at level 47 and is very fast, providing an answer to Agatha's Poison type Pokémon.
- Kadabra is a must-have - the powerful move Psychic can hit most Pokémon for neutral damage and Poison and Fighting type Pokémon for super-effective damage. With Double Team and Recover, it can also survive pretty well. You might even want two of them, to be honest.
- Dodrio is a good option - it has 110 Attack, Drill Peck is the strongest Flying move in the game (maybe good for Blue's Exeggutor), and STAB Take Down and Hyper Beam (via TM) are decent options. STAB Tri Attack is also good, although do note it doesn't inflict status conditions in this generation.
- If Hyper Beam KOs a Pokémon in this game, it doesn't take a turn to recharge.
- Fearow is another decent option, but is outclassed by Dodrio in pretty much every way.
- Tauros is also a decent option for STAB Hyper Beam and Take Down (and Strength, I guess), and is a bit bulkier than Dodrio due to its higher base HP, Defense, and Special. Tauros is less versatile, though, and has a slightly lower Attack (100 vs Dodrio's 110).
- Lorelei might be tough to deal with. No Electric Pokémon learn Thunderbolt by level-up, leaving most with either the weak Thunder Shock or the inaccurate Thunder. Electabuzz, who learns Thunder Punch, could be a decent option.
- Alternatively, there's a pretty infamous exploit you can use. If you send out a Pokémon weak to Psychic, Lorelei's first Dewgong will attempt to use Rest against it endlessly (as it thinks it's a super effective attack). You can use this time to setup your Pokémon. For instance, Machoke can set up with Double Team and then use Low Kick or Karate Chop to take down Lorelei's Pokémon.
- Electrode learns no Electric moves via levelup, but does learn Explosion at level 47. Could be useful as a tactical nuke for a problematic Pokémon like Alakazam or Exeggutor.
If you create a balanced level 50 team, abuse Double Team, and get a little lucky, it should be possible to get through.
Elite Stomp (10)
_Without resetting, beat the Pokémon League with only one Pokémon in your party; it cannot be Mew or Mewtwo. _
This one is decently easy to combine with Prof. Perfect - if you do it with a Pokémon who's less than level 60, you'll unlock both at the same time.
The ability to use items makes this significantly easier. You can buff your Pokémon up with X items, heal any damage they may have taken, and then unleash high-damage attacks to easily win. To make it easy, load up a single Pokémon with great TMs like Thunderbolt, Ice Beam, Psychic, Earthquake, Surf, or Flamethrower so you have a super-effective option against nearly every Pokémon. The Ice Beam/Thunderbolt combo alone hits everything for at least neutral damage, and hits many Pokémon for super-effective damage.
I myself got through with only a level 42 Starmie with Surf/Thunderbolt/Ice Beam/Psychic (similar to MisterJay in the comments). I tested it a few times, and while you need to use a lot of X Specials at lower levels, as you approach level 60, you don't need to use any at all.
There is no level cap to this achievement, though. You'll likely be grinding the Elite 4 to level up Pokémon to evolve them for the Pokedex (and to max out Stat EXP), so you can come back after a bit of grinding to make it easier on yourself.
WORST-CASE SCENARIO
Being able to use items makes this one relatively easy. I think if you took a Level 60 Slowbro, taught it Surf, Strength, Psychic (Level 55) and Double Team, and loaded it up with X Attacks and X Specials, you could get through just fine.
Prof. Perfect (10)
Without resetting, beat the Pokémon League without having any Pokémon faint and without using Pokémon above level 60 at the beginning of the League.
As stated above, it's not too difficult to combine this with Elite Stomp. But if you want to do it separately, it's even easier. You can use Switch mode to swap out injured Pokémon and exploit the weakness of the incoming Pokémon (especially for Blue), and you can use healing items and X items to increase the survivability and destructive potential of any Pokémon.
WORST-CASE SCENARIO
Again, being able to use items makes this pretty easy. If you buff up a Pokémon with X items, you should be able to survive anything and hit back hard.
Brand Loyalty (10)
Without resetting, beat the Pokémon League with a full party of Pokémon exclusive to Red.
As the achievement says, you'll need to do this with a full party. You don't need to have 6 different Pokémon, though, so you can bring multiple Pokémon of a single species if you'd like. Items are fair game, and there's no level cap. Here's some notes on all the options:
- Electabuzz might be your best option. If you have it learn Thunder Shock, Thunder Punch, and Thunder, you should be good to go if you use X items copiously. As cykette suggests, you can use an X accuracy to make Thunder always hit.
- Arcanine isn't quite as good as Ninetales in this generation, as Fire-type moves are all Special. Still, it can put some work in. As WKGames notes, though, you'll have to level Growlithe up to level 50 before evolving if you want it to learn Flamethrower (which you probably do).
- Vileplume has a good 100 Special, but is probably not incredibly useful in the Lorelei or Blue fights due to the Ice and Psychic-type Pokémon. Vileplume's Grass-type attacks will also be ineffective against most of Agatha and Lance's Pokémon. What's more, there aren't too many good Grass-type moves to begin with. You're probably going to want to level Gloom up to level 38 for Petal Dance (or 52 for SolarBeam).
- Scyther is fast and hits hard, but learns absolutely zero STAB moves in R/B. Still, it makes a good backup. If you're going to use Slash, don't bother with X Attacks, as attack boosts don't factor into critical hits in this generation.
- Primeape is a decent physical attacker, and may be useful as a backup. Submission is probably its best option for Fighting-type STAB, so don't make it your primary attacker.
- Arbok is not great. although it can learn Fissure by TM to try and cheese fights using X Speeds and an X Accuracy.
WORST-CASE SCENARIO
With no level cap and items available for use, this isn't too bad. You could grind one Pokémon up to a high level to try and sweep (just make sure you remember to fill the rest of your party), or you can grind a few up to have more coverage. And remember, Double Team and X Item spam is always an option.
After defeating the Elite 4, get ready to head to Cerulean Cave. You're going to want to stock up on Ultra Balls (probably at least 50-60), and bring a Parasect or two (for Spore), and/or a Pokémon with Thunder Wave. You'll also probably want to bring plenty of Revives, healing items, and Max Repels. Finally, MAKE SURE you switch to an empty PC Box before you go into the cave.
Area Unknown (10)
Without resetting and without leaving the cave, catch one of every Pokémon available in Cerulean Cave besides Mewtwo and fishing Pokémon without using the Master Ball.
For this achievement, you'll have to catch all 15 of the cave encounters (i.e. not surfing or fishing) in Cerulean Cave without leaving the cave. This also doesn't include Mewtwo. User tomojin has created an excellent checklist, reproduced here:
1F (Entrance area)
- Golbat (25%)
- Magneton (15%)
- Hypno (15%)
- Arbok (10%)
- Venomoth (10%)
- Dodrio (10%)
- Parasect (5%)
- Kadabra (5%)
- Raichu (4%)
- Ditto (1%)
2F (Maze area)
- Dodrio (25%)
- Venomoth (15%)
- Kadabra (15%)
- Electrode (10%)
- Marowak (10%)
- Rhydon (10%)
- Wigglytuff (5%)
- Chansey (5%)
- Ditto (5%)
B1F (Mewtwo's area)
- Rhydon (25%)
- Electrode (15%)
- Marowak (15%)
- Raichu (10%)
- Parasect (10%)
- Chansey (10%)
- Ditto (10%)
- Arbok (5%)
The bolded entries represent the floor with the highest odds to encounter each individual Pokémon. In order to catch each Pokémon, the easiest way is, as cykette suggests, to inflict them with a status (preferably sleep, but paralysis or poison will do) and then chuck Ultra Balls. You can lower their HP too if you'd like, but putting a Pokémon to sleep will give you at least a 20-40% chance (depending on the species) to catch them with an Ultra Ball even at full HP. Paralysis and Poison are slightly weaker, but still give a respectable 10-30% chance with an Ultra Ball.
Parasect is probably a good choice to put Pokémon to sleep, as its Spore move is 100% accurate. Parasect is slow, though, so it will likely have to take a hit before getting Spore off. If you need a high-leveled Parasect, you can catch one right here in Cerulean Cave, and optionally return to the Pokémon Center to refresh it. Spore also only has 15 PP, meaning you may need to bring Ethers, another Parasect, or a Pokémon that can use Thunder Wave.
As several users note, Electrode might be your biggest problem. Electrode is very fast, can't be paralyzed by Thunder Wave, and has the moves Selfdestruct and Explosion, which gives it a 50% chance every turn to blow up and severely damage your Pokémon. You might want to try catching it sooner rather than later, so it doesn't ruin your run. You can either take the 50% chance and try to get a Spore off, or, as thecoimbra states, you can just try and throw balls. In this case, it's actually better to throw Great Balls (this is what Chickenzes27 is alluding to), as they have a higher catch rate for Pokémon at full HP without a status condition (If they do have a condition, Ultra Balls are better). A Great Ball has about a 15% chance to catch an Electrode at full health, though, so Spore might honestly be the better move.
As JungleCrew states, you can use Repels to easily encounter Ditto on 2F (the maze area) by putting a level 60 Pokémon at the front of your party. Alternatively, you can use Repels and a level 53/54 Pokémon on 2F to only encounter Chansey, Ditto, and Wigglytuff, who may be somewhat difficult to find otherwise.
The Strongest Pokémon Ever! (10)
Catch the fabled Mewtwo.
MISSABLE
This achievement is missable if you KO Mewtwo.
A Fair Fight (10)
Catch Mewtwo without using the Master Ball.
MISSABLE
This achievement is missable if you KO Mewtwo or catch it with the Master Ball.
Mewtwo, the strongest Pokémon in the game, is found on B1F of Cerulean Cave. Make sure you save before you challenge it! To catch it without the Master Ball, you should follow the same strategy we've been using for legendaries so far: inflict a status condition, and then throw Ultra Balls. Use Spore to put Mewtwo to sleep if Parasect can survive a turn, otherwise use Thunder Wave to paralyze Mewtwo. Alternatively, you can put a Pokémon with Ice Beam in the front of your party and fish for a freeze. If Metwo KOs that Pokémon, soft reset and try again. Once frozen, Mewtwo will be unable to do literally anything and will never thaw out, allowing you to chuck Ultra Balls all day long (so much for "a fair fight"). If Mewtwo is asleep or frozen, there's a 21.6% chance to catch it per Ultra Ball thrown, and if it's paralyzed, there's an 11.5% chance to catch it. Don't bother trying to take Mewtwo's HP down, as this will only provide a few extra percent to the catch rate (and it knows Recover, anyways).
Once you've completed Cerulean Cave, you have access to all the Trainers and Items for Genocide Routeand Living Itemfinder, respectively. Remember, there's a Lass west from Cerulean Cave that's easy to miss!
Now that you've finished all the story content in the game, it's time to finish up any miscellaneous achievements you may have left. After that, prepare for the final grind of leveling up Pokémon to evolve them for Gotta Catch 'em All!
No Balls Necessary (5)
Receive 6 Pokémon as gifts.
As Jayzor notes, the 6 Gift Pokémon are:
- The Magikarp from the Salesman in the Mt. Moon Pokémon Center (stretching the definition of the word "gift").
- Eevee from the Celadon Mansion (enter through the back).
- Lapras from a Silph Co employee in the same room as the Rival Battle.
- Hitmonchan or Hitmonlee, from the Saffron City Dojo.
- Omanyte/Kabuto from the fossil you got at the end of Mt. Moon, revived in the lab on Cinnabar Island.
- Aerodactyl, from the Old Amber you can get from the Pewter City Museum. Revived in the lab on Cinnabar Island.
No ~Multi~ Set Required (5)
Complete all 9 in-game trades.
The 9 trades are:
- Abra for MARCEL the Mr. Mime on the east side of Route 2 north of Viridian City.
- NidoranM for SPOT the NidoranF in the Route 5 Underground Pass terminal south of Cerulean City.
- Nidorino for TERRY the Nidorina in the east gate on Route 11 east of Vermilion City.
- Slowbro for MARC the Lickitung in the gate on the west side of Route 18 west of Fuchsia City.
- Poliwhirl for LOLA the Jynx in the house west of the Pokémon Center in Cerulean City.
- Spearow for DUX the Farfetch'd in a house southeast of the Pokémon Center in Vermilion City.
- Raichu for DORIS the Electrode in the Pokémon Lab on Cinnabar Island.
- Venonat for CRINKLES the Tangela in the Pokémon Lab on Cinnabar Island.
- Ponyta for SAILOR the Seel in the Pokémon Lab on Cinnabar Island.
Lickitung, Mr. Mime, Jynx, and Farfetch'd can only be acquired via trade in this game. Also, traded Pokémon will earn experience at a boosted rate (1.5x)! This may not be too useful for our purposes, though, as we're typically trying to stay below level caps.
Now It Is 100 Percent Safe (10)
Defeat or catch every stationary Pokémon.
As rhas777 notes, you don't necessarily have to capture all of the Pokémon, just defeat them. The 15 Pokémon are:
- The ghost Marowak in Pokémon Tower.
- The two Snorlaxes on Route 12 south of Lavender Town and Route 16 west of Celadon City.
- The 8 Voltorbs/Electrodes disguised as items in the Power Plant.
- Zapdos in the Power Plant.
- Articuno in the Seafoam Islands.
- Moltres in Victory Road.
- Mewtwo in Cerulean Cave.
Disk Collector (25)
Find all 50 unmissable TMs and HMs on the overworld.
List of all TMs and HMs in Red and Blue
This achievement includes all TMs and HMs on the above list except for the two on the S.S. Anne (TM08 Body Slam and TM44 Rest), and the three bought from the Rocket Game Corner (TM15 Hyper Beam, TM23 Dragon Rage, and TM50 Substitute). Every TM sold at the Department Store also has a spawn in the overworld. You must collect them, because simply buying them won't count for this achievement!
Note that this achievement works by detecting if you've received them, not whether they're in your inventory. So feel free to use/sell/toss them once you've acquired them. It's impossible to keep them all, anyway.
Many of the comments have suggestions of easy-to-miss TMs, so check them out if you can't figure out which one you're missing!
Living Itemfinder (25)
Find all unmissable items, including hidden items, on the overworld.
If you've been keeping up on getting items by following a guide, this shouldn't be too much trouble. But it can be tough if you're missing one or two items and have no idea where they might be. If you're in that situation, the first thing I might recommend is to take a look and make sure you have the achievements for collecting all items in Viridian Forest, Mt. Moon, the Game Corner, the Rocket Hideout, the Pokémon Tower, Silph Co., the Viridian City Gym , and Victory Road. If you have all those achievements, that means you can at least rule out checking those areas (assuming you didn't get those achievements and then reset without saving for whatever reason). And if you don't have those achievements, then that's a good place to start looking. Note that it might be a Trainer that you're missing, and if you don't have the Silph Co. achievement, you can't battle any of the Trainers.
Note that you don't need to worry about items on the S.S. Anne, as those are considered missable.
The second thing I would recommend is to go through the list of hidden items. Hidden items are easy to miss, so you might want to go through each one methodically to make sure you have them all. You might want to try using the Itemfinder while doing this, as for some items it's easy to check a slightly wrong spot and check it off your list without actually getting it. This is especially true for the hidden items on Cycling Road.
The final thing I recommend is to read through the achievement comments for frequently-missed items. They include the Rare Candy in the Warden's house in Fuchsia City, the hidden Nugget in the Copycat's house in Saffron City, and the hidden items on Cycling Road. As Farzeer suggests, using the Itemfinder on Cycling Road is very helpful, as it can be a little difficult to figure out precisely where the hidden items are. Also, a lot of people seem to miss items in Viridian Forest, apparently due to resetting after getting the achievement. It might be worth checking out just to be sure.
You can use my checklist to methodically go through every item if you'd like.
(Thanks to many in the comments for their suggestions, including but not limited to Marvincenzi, Mophmeister, Baitos, DryIce53, ddot, Farzeer, mooMoony, and itschriz)
Genocide Route (50)
Defeat all unmissable trainers in the Kanto region.
Again, if you've been keeping up by following a guide, this shouldn't be too much trouble. This achievement doesn't include missable trainers, including:
- Gym trainers (including the Fighting Dojo).
- Trainers on the S.S. Anne.
- Trainers in Silph Co.
- The Team Rocket grunt that gives you the Nugget on Nugget Bridge (missable if you lose to him).
The achievement also doesn't seem to include story battles such as Gym leaders, Rival fights, or Giovanni fights. Also, despite what some users say in the comments, stationary encounters like the legendary birds do not count towards this achievement.
Like the item achievement above, if you're missing a trainer, the first thing I would suggest is to make sure you have all the achievements for defeating all trainers in Viridian Forest, Mt. Moon, the Rocket Hideout, the Pokémon Tower , and Victory Road. Assuming you didn't get these achievements and then reset, you can safely rule these areas out. If you don't have one of these achievements, that's a good place to start looking (although it may be an item you're missing instead).
After that, take a look at the achievement comments for some commonly-missed trainers. The water routes especially have some that are easy to miss. Other potential spots are the Lass west of Cerulean Cave, Cycling Road, and the maze on Route 13 east of Fuchsia City. Note that some comments are outdated - for instance, the achievement was updated to not require the Fighting Dojo trainers. It may have required the legendary birds at some point too, but does not anymore.
You can use my checklist to methodically go through every trainer if you'd like.
(Thanks to several users in the comments for their suggestions, including but not limited to Crims0nScorpion, Mophmeister, DryIce53, MissingNoL, WKGames, Jungon, Gutter, AppleAndo, tomojin, and PhazePrime)
Preparing to Be the Very Best (5)
Assemble a full team of Pokémon.
All you need to do is have six Pokémon in your party. You'll likely get this one without even trying.
Anti-Darwinism (2)
Prevent your Pokémon from evolving.
If you press the B button when a Pokémon is evolving, it will stop the evolution. Note that this may prevent it from learning a move, so it's probably best to do it on a Pokémon you don't care too much about.
Halfway (Solo) (5)
Get the Pokémon in Slot 1 from Level 49 to Level 50.
You'll likely do this naturally when facing the Elite Four, or while grinding Pokémon for the Pokedex. Just make sure the Pokémon is at the front of your party.
Halfway (Party) (10)
In a party of five Pokémon of level 50 or greater, get your final Pokémon to level 50.
If you didn't get this naturally, you can catch a bunch of level 50+ Pokémon in Cerulean Cave and then level up a single Pokémon from 49 to 50.
Uno, Dos, Tres! (25)
Catch the three legendary birds.
MISSABLE
This achievement is missable if you KO or run from any of the legendary birds without catching them, as they won't respawn. Make sure you save before fighting them, just in case!
Articuno is located on the lowest level of the Seafoam Islands, Zapdos is located in the Power Plant off of Route 10 east of Cerulean City, and Moltres is located in Victory Road. As stated earlier in the guide, the easiest way to catch legendary Pokémon in this game is to inflict them with a status and chuck Ultra Balls. Sleep is ideal, but even Paralysis gives a ~10% catch chance at full HP. Alternatively, you can use the Master Ball on one of them, as we won't be using it to capture Mewtwo.
Make sure you save before you battle them - if you KO them, they won't come back!
cOmPlEtElY dIfFeReNt GaMeS (5)
Catch all of the Pokémon exclusive to Red version.
Here are the version exclusives:
- Ekans
- Arbok
- Oddish
- Gloom
- Vileplume
- Mankey
- Primeape
- Growlithe
- Arcanine
- Scyther
- Electabuzz
Gotta Catch 'em All (50)
Catch all 124 Pokémon that are available in Red Version.
MISSABLE
This achievement is missable if you KO or run from any of the legendary Pokémon or both Snorlaxes, if you use or lose all of your Moon Stones without getting all the evolutions (except Wigglytuff, who appears in Cerulean Cave), or if you do something silly like releasing Eevee, your starter, or Omanyte/Kabuto before evolving them.
You'll need to catch all the Pokémon possible on a single cartridge (without glitches). To be very specific, you'll need to catch all the Pokémon EXCEPT:
- The two starters you didn't pick, and their evolutions
- e.g. if you picked Bulbasaur, you wouldn't need to get Squirtle, Wartortle, Blastoise, Charmander, Charmeleon, or Charizard.
- The Mt. Moon Fossil Pokémon you didn't pick, and its evolution
- e.g. if you picked the Helix fossil, you wouldn't need to get Kabuto or Kabutops.
- Two evolutions of Eevee (as you can get only one)
- e.g. if you evolve Eevee into Jolteon, you wouldn't need to get Flareon or Vaporeon.
- The Pokémon from the Fighting Dojo that you didn't pick
- e.g. if you picked Hitmonlee, you wouldn't need to get Hitmonchan
- Pokémon evolutions obtained through trading
- i.e. Gengar, Alakazam, Machamp, and Golem
- Pokémon exclusive to Pokémon Blue
- i.e. Sandshrew, Sandslash, Vulpix, Ninetales, Meowth, Persian, Bellsprout, Weepinbell, Victreebell, Magmar, and Pinsir
- Mew
If you're counting, that's 27 Pokémon you don't have to get, giving us our final total of 124. The achievement has been revised so that catching extra Pokémon through glitches will not prevent you from earning this achievement, but they still won't count towards the achievement. For example, even if you use glitches to catch Mew, that doesn't mean you get to skip catching another Pokémon. The achievement still expects you to catch every Pokémon available in Red version. It doesn't just look at the number in the Pokedex.
You'll likely need to grind up levels on several Pokémon to fully evolve them. The best way to do that is probably to run through the Elite 4 with one Pokémon that can sweep and the Exp. All. Try to only bring Pokémon you need XP for, as that will maximize the amount of XP per Pokémon. Alternatively, you could train on wild Pokémon in Cerulean Cave. You'll get less XP per Pokémon, but you won't have to deal with all of the text boxes and flying back to Indigo Plateau that comes with the Elite 4.
Here is a list of all the Pokémon that you strictly must evolve by leveling instead of catching their evolved form, the level you have to get them to, and the best location(s) for catching the pre-evolution to minimize grinding.
| Pokémon | Level required | Best Location |
|---|---|---|
| Starter | 32/36 | Pallet Town (level 5) |
| Butterfree | 10 | Route 25 (Level 8/9) |
| Beedrill | 10 | Route 25 (Level 8/9) |
| Pidgeot | 36 | Route 21 (Level 30/32) |
| Primeape | 28 | Route 8 (Level 20) |
| Tentacruel | 30 | Route 19/20/21 (Level 30-40) |
| Rapidash | 40 | Pokémon Mansion (Level 36) |
| Gyarados | 20 | Route 12/13/17/18, Fuchsia City (Level 15) (use Super Rod) |
| Omastar/Kabutops | 40 | Cinnabar Lab (Level 30) |
| Dragonite | 55 | Celadon Prize Corner (Level 18), Safari Zone (Level 15) |
All other Pokémon either evolve through stones, don't evolve, or are able to be caught in their fully-evolved form, often in late-game areas like Seafoam Islands, Power Plant, Pokémon Mansion, Victory Road, or Cerulean Cave. I'll leave it up to you to decide if you want to catch them fully evolved or grind up the pre-evolutions.
My checklist has a Pokedex with every Pokémon listed, as well as the best way to catch them, assuming you're at the end of the game!
To get all of the Game Corner achievements, you'll need 36,679 coins. If you bought all those coins outright, it would cost you 734,000 Pokedollars. Thankfully, by playing the slots (and with some savvy saving), we can cut that cost down considerably.
First of all, you're going to want to pick up all the free coins on the floor and from the patrons:
Pleading Face (5)
Find all the free coins in the Celadon City Game Corner.
From Bulbapedia:
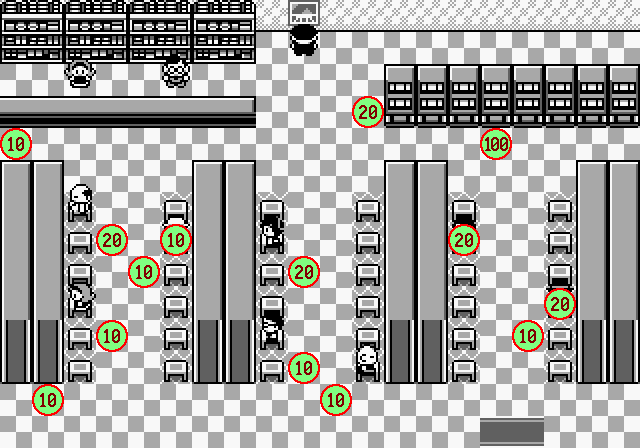
-
HIDDEN ITEM – Celadon City Game Corner – 10 coins
-
ITEM GIFT – Celadon City Game Corner – 20 coins from gentleman
-
ITEM GIFT – Celadon City Game Corner – 20 coins from scientist
-
HIDDEN ITEM – Celadon City Game Corner – 100 coins
-
HIDDEN ITEM – Celadon City Game Corner – 20 coins
-
HIDDEN ITEM – Celadon City Game Corner – 10 coins
-
HIDDEN ITEM – Celadon City Game Corner – 20 coins
-
HIDDEN ITEM – Celadon City Game Corner – 10 coins
-
HIDDEN ITEM – Celadon City Game Corner – 10 coins
-
HIDDEN ITEM – Celadon City Game Corner – 10 coins
-
ITEM GIFT – Celadon City Game Corner – 10 coins from fisherman
-
HIDDEN ITEM – Celadon City Game Corner – 20 coins
-
HIDDEN ITEM – Celadon City Game Corner – 10 coins
-
HIDDEN ITEM – Celadon City Game Corner – 10 coins
After you pick up the free coins, save and start playing the slots. This video explains the full mechanics, but the gist of it is that the best strategy is to head to the bottom right machine and use speedup and turbo-A to play the machine as quickly as possible. If you're unlucky, you'll run out of coins, but otherwise you should see your stash slowly start to creep up.
Second Place Isn't Bad (5)
Win a bar at the Celadon City Game Corner.
7 Grand (5)
Win a jackpot at the Celadon City Game Corner.
Gambling Addict (10)
Without resetting and without leaving the building, win 3,000 coins from slots at the Celadon City Game Corner.
So Rich... (5)
Have 9,999 coins at once.
You'll likely get a Bar and a Jackpot on your way to earning 3000 coins. If not, just keep playing. Once you get 3000, you can either continue to play, or if you have the funds, you can switch to buying coins outright. Once you hit 9999, save and get ready to start buying TMs.
Disk Buyer (10)
In a single session, buy 1 of every TM possible from the Department Store and Game Corner.
You'll need 16,500 coins to buy all the Game Corner TMs, and 20,000 additional Pokedollars to buy all the Department Store TMs. If you're buying the coins outright, you'll need 330,000 Pokedollars.
If you're following from above, you should have enough coins to buy TM15 Hyper Beam and TM23 Dragon Rage, leaving you with 1100 coins. Gamble or buy your way back up to 7700, and buy TM50 Substitute. Then, buy all the TMs at the Celadon Department Store. Once the achievement pops, go ahead and reset your game to the earlier save, when you had 9999 coins, and get ready to buy the Pokémon. Alternatively, if you'd like to keep the TMs, you can simply gamble or buy your way back up to 9999 coins.
This Is Illegal, You Know (10)
In a single session, buy all of the Game Corner Pokémon.
- You should have enough to initially buy Dratini and Scyther from the middle window, leaving you with 1700 coins.
- Gamble or buy up to around 3000 coins, then buy Abra, Clefairy, and Nidorina from the left window, leaving you with about 1000 coins
- Finally, gamble or buy all the way back up to 9999 coins, at which point you can buy Porygon. Congratulations! You're done with the Game Corner!
Note that you do need Porygon for the Pokedex, so don't reset afterwards to get your money back.
Getting Your Money's Worth (5)
Without resetting, catch 10 Pokémon in a single Safari Hunt.
Before you head in, it's probably a good idea to switch to a new Pokémon Box so you don't run out of space halfway through.
As several users note, the best way to do this is to catch Magikarp. Each ball thrown has about a 29-30% chance to catch Magikarp, so it's unfortunately just a matter of RNG. Thankfully, getting 10 Magikarp isn't too unlikely - there's about a 35-40% chance you'll be able to do it within 30 balls. Don't bother throwing rocks - as 14ausher notes, rocks don't boost Magikarp's catch rate because it's already maxed out.
As users Flopsy and JonesTheMoblin suggest, you can also try catching other species in the grass. Strictly speaking, these species have a lower catch rate than Magikarp, although Nidoran M and F, Paras, Venonat, and Doduo are pretty close (27-28%). You can also throw rocks at other species to make them easier to catch, although the catch rate still maxes out at around 29-30%. Feel free to do it if you want a change of pace, but it's not a more efficient strategy, really.
Have Fun (25)
In a single session, catch Chansey, Tauros, Kanghaskan, and Scyther in the Safari Zone.
This is perhaps the most infamous achievement of the set, and may take anywhere from 30 minutes to 4 hours (or even more if you don't use speedup). Make sure you have a decent block of time to attempt this, or are able leave the emulator running.
First of all, let's clarify what it means by one emulator session. You can do a soft reset by pressing A+B+START+SELECT, but don't press the reset button on the emulator. You can use as many Safari Hunts as you want, or you can soft-reset after each one if you'd like.
Four Pokémon doesn't seem that bad, but these are four of the rarest and hardest to catch Pokémon in the Safari Zone. Thankfully, there are a few things we can do to even the odds a little bit.
- The first thing is the Repel Trick. When you use a Repel, you will only encounter wild Pokémon who are of a higher or equal level to the Pokémon in the first slot of your party. So, if you strategically place a Pokémon with a specific level in the front of your party, you can eliminate lower level encounters and give yourself a greater chance of finding the Pokémon you want. If you need a Pokémon with a specific level, you can probably find one in the Safari Zone itself. This trick does require a bit more effort, so you might find it easier to just run away from the extra encounters, especially if you're using speedup.
- The second thing is to strategically choose which area you're looking in. Each Pokémon has one area with a 4% encounter rate and one area with a 1% encounter rate. Obviously, you're going to want to go to the area with the 4% encounter rate for the Pokémon you're trying to catch.
- The third thing is to use the soft reset by pressing A+B+START+SELECT. If you save right when you get to the patch of grass you're hunting in, you can soft reset when your steps run out and get right back into the action instead of walking from the entrance again. This will save a ton of time, effort, and Pokedollars in the long run!
- The final thing is not to bother with rocks or bait. To make a long story short, the best strategy in the Safari Zone is just to keep throwing balls. If you run low on Safari Balls it might actually be better to throw a rock or two for certain Pokémon, but because you'll likely be using a lot of steps to generate each encounter, it's unlikely that you'll get low enough for it to matter. You can use the calculator at the bottom of that page to see the odds for yourself, if you'd like.
With these four tips in mind, here's tips for each individual Pokémon:
TAUROS
- Found in Area 3 (west) at level 26
- 6.62% chance of catching per ball, 12.09% chance of catching before it runs away
CHANSEY
- Found in Area 2 (north) at level 26
- 4.07% chance of catching per ball, 13.78% chance to catch before it runs away
SCYTHER
- Found in Central Area (entrance) at level 23
- 6.45% chance of catching per ball, 13.62% chance of catching before it runs away
KANGASKHAN
- Found in Area 1 (east, aka Central Area East) at level 25
- 6.62% chance of catching per ball, 14.62% chance of catching before it runs away
If you use speedup liberally and the soft reset trick mentioned above, it should make this grind a lot more manageable. If you need to pause, you can minimize the emulator, but don't close it or close the game or else you'll have to start all over again.
Have fun!
(Thanks to many users in the comments for sharing strategies, including but not limited to lordpsycho, mquay2, Lestatfrost, TindalosKeeper, Cavi3D, MarvellousDazza, Greatscoot, Eliaaa, and Loran)
Gone Critical! (5)
In a single battle, land five critical hits in a row.
As stated in the Intro, critical hits in this game depend on a Pokémon's Speed. Here's the nitty-gritty, but the short of it is that a Pokémon using a move with a heightened critical chance (i.e. Slash, Razor Leaf, Karate Chop, or Crabhammer) that has 64 Speed or higher will always crit. Well, almost always (thanks, Gen 1). 64 Speed really isn't all that much, so you have a pretty decent chance of accidentally getting this if you use Slash a bunch of times back-to-back.
Hilariously, using the move Focus Energy or the Dire Hit item will actually lower your chance to crit, due to a bug.
Target Acquired (5)
In a single battle, land five one-hit KO moves in a row.
To get this, you'll have to land one of the OHKO moves (Fissure, Guillotine, or Horn Drill)
As Trufa (and others) mention in the comments, the secret is to use the X Accuracy item, which will bypass accuracy checks for every move, making them always hit. Add in an X Speed or two, and you should be able to take down a member of the Elite 4 easily. If you don't have a Pokémon with an OHKO move, you can catch Rhydon in Cerulean Cave, as Mekevin255 suggests, or buy TM07 (Horn Drill) from the Department store and teach it to a compatible Pokémon.
Stalemate (2)
Enter a battle with full HP and survive 20 turns without switching out or having either Pokémon take damage.
The easiest way to do this is (as the icon suggests) to go to Viridian Forest and catch a Metapod/Kakuna that knows Harden, put it in the front of your party (make sure it's at full HP), and fight another Metapod/Kakuna that only knows Harden. You could do it with a Splash Magikarp as well.
Surprise Mechanics (3)
Use Metronome and go out with a bang!
Clefairy (but not Clefable!) learns Metronome at level 31. Otherwise you'll have to use TM31 to teach it to a compatible Pokémon.
To get this achievement, you'll have to use Metronome (a move that selects a random move) until it hits Selfdestruct or Explosion. Unfortunately, this is just up to random chance. You'll probably want to find a patch of grass relatively close to a Pokémon Center, and just keep trying until you get it. Alternatively, you can save next to the patch of grass, and soft reset by pressing A+B+START+SELECT when you run out of PP.
I Found You, Faker! (2)
As Ditto, use Transform on another Ditto.
You'll have to catch a Ditto, and then use Transform on an enemy Ditto (likely a wild one). Wild Ditto can be found on Routes 13, 14, and 15 east of Fuchsia City, Route 23 leading to the Pokémon League, and in Cerulean Cave.
I Was Frozen Today (5)
Be cured of being Frozen in battle without using an item in that battle.
In Generation 1, the Freeze status lasts until cured by an item, or until the Frozen Pokémon is hit with a Fire-type move. For this achievement, you'll have to get a frozen Pokémon. There are a few ways to do this:
- As Earthsouls and WKGames suggest, you can get frozen by an enemy's attack. Wild Articuno has Ice Beam, and Lorelei's Jynx and Lapras have Ice Punch and Blizzard, respectively. Each of these attacks have a 10% chance to freeze. Note that Aurora Beam, used by some of Lorelei's other Pokémon, cannot freeze the target. To get Lorelei to use Ice Beam, send in a sturdy Pokémon weak to Ice, as poisongirlss suggests.
- As Vermilion suggests, you can freeze a wild Pokémon yourself and then catch it. Unlike later games, the freeze status will not be healed if you send it to the box!
Once you have your frozen Pokémon, you'll have to find a wild Fire-type Pokémon. As the commenters note, the easiest place is in the Cinnabar Island Mansion, where you can find wild Ponyta who know Ember. Wait for them to hit you with Ember (wild Pokémon choose moves randomly), and the achievement should be yours!
- Thanks to the talented staff at Game Freak for creating a classic game, and debatably an entire genre.
- Thanks to Blazekickn and dude1286 for creating an excellent set that holds a dear place in my heart.
- Thanks to Bulbapedia, StrategyWiki, Smogon, zerokid, and Fabio Attard for their excellent resources. I have used images from Bulbapedia and StrategyWiki in several achievements, as well as portions of Fabio Attard's checklist and Smogon's hidden items photos for the relevant achievements.
- Thanks to the many RetroAchievements commenters who have shared tips and strategies in the comments. I've tried to cite users as appropriate, but with such a popular game it's inevitable that I've missed some.
This guide was written with the assistance of the Achievement Block Generator, created by Wes Copeland.
No generative AI was used in the creation of this guide.