Pokemon Pinball: Ruby & Sapphire (Game Boy Advance) - RetroAchievements/guides GitHub Wiki
- Overview
- Game Modes
-
Achievement Guide
- Catch 'Em Mode - 2 achievements, 6 points
- Hatch mode - 0 achievements, 0 points
- Evolution Mode - 2 achievements, 8 points
- Travel Mode - 0 achievements, 0 points
- Pokémon Mart, Upgrades and Start slots - 11 achievements, 40 points
- BONUS Stages - 9 achievements, 85 points
- Score, Single game catch and Leaderboards - 8 achievements, 104 points, 4 leaderboards
- Specific Pokémon - 16 achievements, 100 points
- Pokédex Completion - 6 achievements, 95 points
- Credits
Pokémon Pinball: Ruby & Sapphire is (unsurprisingly) a Pokémon-themed pinball game, specifically focusing on Pokémon and locations featured in Pokémon Ruby and Sapphire, originally released in 2003. It features great integration of Pokémon mechanics into pinball gameplay. The set was created by Brian in 2014 and features 54 achievements worth a total of 438 points.
The default control scheme is counter-intuitive for many, so before you begin playing, check the OPTIONS menu.
| Type | Left flipper | Right flipper | Tilt left | Tilt right | Tilt up |
|---|---|---|---|---|---|
| A | < | A | L | R | L+R |
| B | < | A | L | R | B |
| C | L | R | < | A | <+A |
| D | L | R | < | > | ^ |
(<, ^ & > are the corresponding D-pad buttons) Pick whichever feels most natural to you - pinball is a game of timing and reactions so you don't want to be fumbling for the right button!
There are also two ball speeds available, slow and normal. These have no impact on the set itself so experiment with both to find your own preference.
There are two main playing boards, one representing each game, with separate leaderboards (in-game and on-site), minor layout changes, unique mechanics, different Pokémon spawns and separate bonus stages.
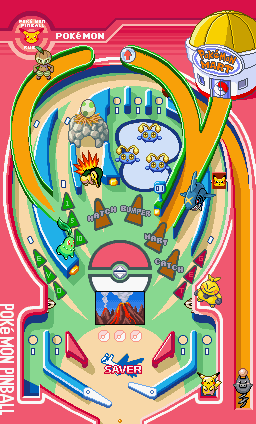

Most of these should be fairly self-explanatory, but I'm including a full list here for easy reference:
- Bonus Multiplier - right of bumper pit. Hit this button to increase the number. End of Ball Bonuses will be multiplied by this.
- Bumper Pit - top. Hit Chinchou/Lotad/Shroomish for points and to reveal your target in Catch 'Em mode.
- CATCH - right. When GET has 2/3 arrows, enter Sharpedo/Wailmer's mouth to start Catch 'Em mode.
- CATCH! Counter - centre, between SAVER and icon panel. Catching or hatching lights up one ball, evolution lights up two. When all three are lit, the next bonus stage activates.
- Centre Hole - centre. Becomes a warp to complete EVO and Travel or to access Start slots and BONUS stages.
- Coin lane - left, above EVO. Send the ball up this path to earn 1, 5 or 10 coins.
- Field Multiplier Upgrade - above the bumper pit. Activate all 3 lights to upgrade your Poké Ball for increased score multipliers. Cycle through them with the flipper buttons. RUBY also has a pick-up on the upper loop that has the same effect.
- Flippers - bottom centre, you! The main means of controlling the game.
- GET/EVO - right/left loops. Charge these by sending the ball up the respective path to activate Catch 'Em and Evolution modes
- HATCH - left of bumper pit on RUBY, right of CATCH on SAPPHIRE. Charge and activate Hatch mode here.
- HOLE lights - 4 lanes leading to pit at bottom. When lit, the lights spell out HOLE. Light all 4 to play the Start Slots.
- Icon panel - centre. Displays current location, slots or current event or mode information.
- Pikachu/Pichu - bottom left and right. Charge with spinner on GET loop. When charged, these Pokémon will prevent a ball that hits them from falling into the pit. Use the flippers to change Pikachu's side.
- Pokémon Mart/Center - right on RUBY, left on SAPPHIRE. Hit the door/the Plusle and Minun switches to open the Mart and buy upgrades. When EVO is charged, door opens and becomes the Pokémon Center.
- SAVER - Bottom centre. When active, Latios/Latias will catch your ball to keep it from falling into the pit and return it to Spoink.
- Spoink - right. Ball launcher.
- Travel button - left. Hit this button/Linoone to charge Travel mode.
- Chikorita - HATCH. Hit the button to have it wake the Linoones.
- Cyndaquil - left of bumper pit. Push it up the path to heat and hatch the egg.
- Left Linoone - Travel button.
- Right Linoone - alerts/calms Makuhita.
- Makuhita - right. Press the right flipper when active to make it punch forwards. Time this carefully to send the ball up the coin lane or around the upper loop.
- Nuzleaf - upper loop. Hitting it twice will create a bridge so you can collect the Field Multiplier pick-up.
- Pelipper - right of bumper pit. When facing up, will catch the ball and drop it above the bumper pit. If the P button beneath it is lit, will take you to the Spheal BONUS stage.
- Zigzagoon - right. Alerted/calmed by the button under it. When active, press A to instantly stop the HOLE slots.
The main gameplay cycle, and best way to earn points, is to keep catching and evolving Pokémon to progress through the different BONUS stages, with later ones being worth more points. Every three balls lit up in the centre sends you to a BONUS stage in this order: 1, 2, 1, 2, 3 (then repeat). Mode List:
- Catch 'Em
- Hatch
- Evolution
- Travel
- Kecleon Bonus (RUBY 1)
- Duskull and Dusclops BONUS (SAPPHIRE 1)
- Groudon Bonus (RUBY 2)
- Kyogre Bonus (SAPPHIRE 2)
- Rayquaza Bonus (3)
- Spheal and Sealeo Bonus
1 point | Catch a Pokémon
To activate Catch 'Em mode, send the ball up the GET loop twice then go into Sharpedo/Wailmer's mouth. This will start the mode with a 2 minute time limit and a 30 second Ball Saver. Going up the loop again before starting will light the third arrow and change the selection of Pokémon available to catch.
During Catch 'Em mode, the icon panel will show a silhouette of the Pokémon you're trying to catch. Hit three Chinchou/Lotad/Shroomish bumpers to reveal it. The Pokémon will then appear below the panel. Hit it three times to capture.
5 points | Catch a Pokémon in Catch 'Em mode with at least 1m30s remaining
This achievement is essentially asking you to catch a Pokémon in 30 seconds, but if you have gotten Timer Up from the Shop or Slots, this is extended to 1 minute. The power-up makes this much easier, but isn't necessary.
Hitting three bumpers without leaving the area will reveal the entire silhouette at once, letting you move to the second phase much faster. Entering the bumper area from above by tilting the board is usually the easiest way to achieve this.
On RUBY, the formation of bumpers can be changed by hitting the button between them and Cyndaquil. The formations are:
- Three Chinchou rotating clockwise
- Three Chinchou rotating anti-clockwise
- Three Chinchou moving up and down
- One single Chinchou rotating clockwise
- Three Lotad not moving
Sending the ball into a three rotating Chinchou formation from below can also easily get three consecutive bumper hits.
On SAPPHIRE, dropping into the pit and relaunching from Spoink will get you two quick hits on a revealed Pokémon.
While this mode doesn't have any dedicated achievements, it will be needed less directly for other achievements later on. Activating this mode works a little differently on each board.
- RUBY: Hit Cyndaquil to push it towards the rock pile to warm and hatch the egg. Takes 4 hits. Enter the empty rock pile after the mode is over to prepare a new egg for hatching.
- SAPPHIRE: Send your ball up the HATCH lane to activate the incubator. The 4th loop will hatch the egg. Return after the mode is over to prepare a new egg for hatching.
When the mode is active, a baby Pokémon will hatch from the egg and wander around the board for around 45 seconds. This time is not extended by the Timer Up power-up, as there is no displayed clock. Hit the Pokémon twice to capture it before it escapes back into the rock pile (RUBY) or into the Poké Mart (SAPPHIRE).
3 points | Evolve a Pokémon
To activate Evolution mode, send the ball up the EVO loop three times, then into the Pokémon Mart, which has now become the Pokémon Center. You must have already caught or hatched an evolvable Pokémon in the current game. Pokémon you have already fully evolved do not count. Select the Pokémon you want to evolve and the mode will start with a 2 minute time limit and a 30 second Ball Saver.
A pick-up will appear in one of several spots around the board. When collected another will appear, then a third. After collecting all three, the Centre Hole will open. Enter it to evolve your chosen Pokémon.
The pick-up's appearance may vary depending on the Pokémon's evolution requirements in the main series. Most use a golden EX for experience and level-based evolution, but elemental stones, link cables and hearts indicating friendship are also used. These differences are solely cosmetic and do not affect gameplay.
5 points | Collect all 3 evolution items in EVO mode with at least 1m30s remaining
The description here is fairly self-explanatory - collect all three pick-ups in 30 seconds. This is largely a test of player skill as it comes down to your ability to grab each pick-up efficiently without too many wasted shots. The more you play the game and Evolution mode, the better a grasp you will have on how to send the ball to each pick-up location. Getting lucky with a set of spots that suit you is also a contributing factor. Keep in mind that sometimes it may be faster to drop your ball in the pit and fire it from Spoink for certain spots if you have trouble with them.
As with the similar Quick Catch achievement, the Timer Up from the Shop or Slots extends the time limit to 1 minute. The power-up makes this much easier, but isn't necessary.
While this mode doesn't have any dedicated achievements, it will be needed less directly for other achievements later on. Activating this mode works a little differently on each board.
- RUBY: Hit Chikorita to bring out the Linoones. Hit the left one to summon a Gulpin above it. Stack 3 Gulpin to start TRAVEL Mode
- SAPPHIRE: Hit the button beneath the basket on the left to summon a Seedot. Gather 3 Seedot to start TRAVEL Mode
On both boards, one of the summoned Pokémon will leave after a minute. When Travel mode starts, you have 1 minute to send the ball up the GET or EVO loops once then into the Centre Hole. Going left will send you up the following list of locations, and right will go down. Travelling 6 times will take you to the Ruins 
| RUBY | RUBY | SAPPHIRE | SAPPHIRE | |
|---|---|---|---|---|
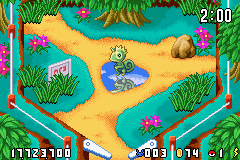
| Forest |  |
Forest |  |
|
| Volcano |  |
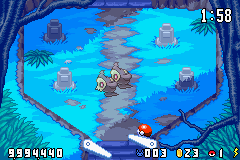
Lake |  |
|
| Plains |  |
Plains |  |
|
| Ocean |  |
Wilderness |  |
|
| Safari Zone |  |
Ocean |  |
|
| Cave |  |
Cave |  |
Before you can get any benefits from the Mart, you'll need coins to spend. Remember the Mart is unavailable when EVO is fully charged.
5 points | Accumulate 99 coins
Send the ball up the Coin Lane to earn 1, 5 or 10 coins. Consecutive trips light up arrows allowing you to earn more at once. You can also earn coins from the Start Slots. You may want to avoid visiting the Poké Mart to save up enough coins for this achievement and the next. This is significantly easier on RUBY as you can use Makuhita to quickly send the ball up the Coin Lane repeatedly.
5 points | Buy an extra ball from the MART
You need 99 coins to purchase this, so save up before opening the Mart. The Mart is opened differently on each board:
- RUBY: Hit the Mart door to open it. You need enough force to make it all the way up that long, straight path, so it may take a few tries before you get the hang of the needed shot.
- SAPPHIRE: Hit the switches beneath Plusle and Minun to deactivate the electrical barriers. The top (blue) barrier is controlled by Minun and the bottom (red) one by Plusle.
Once open, simply enter the MART and scroll right through the options. They are ordered by price so the one for this achievement is right at the end. The full shop stock is listed below for convenience:
| Item | Icon | Price | Details |
|---|---|---|---|
| 30 second Ball Saver |  |
10 | |
| 60 second Ball Saver |  |
20 | |
| 90 second Ball Saver |  |
30 | |
| Ball Upgrade |
 / /  / / 
|
40 | Upgrades your ball one level |
| Timer Up |  |
40 | Adds 30s to the next timed event |
| Pika |  |
50 | Pichu joins Pikachu. They remain fully charged for the rest of the current ball |
| Bonus Challenge |
 / / 
|
60 | Primes Whiscash/Pelipper to take you to the Spheal BONUS stage |
| Extra Ball |  |
99 |
3 points | Gain assistance from Pichu
This upgrade is arguably the most useful item in the Mart, as Pichu's assistance makes it much harder to lose a life and thus extends the duration of each game significantly. Get this by purchasing for 50 coins, or as a Start slots reward.
2 points | Light up all 3 of the Field Multiplier slots at the top of the table
Light up all three slots above the bumper pit to earn this achievement and upgrade your ball one level. This acts as a multiplier for any points you earn, which is especially noticeable when clearing a bonus stage. The upgrade will last for one minute. If you have gone up multiple ball levels, you will downgrade one level at a time with a minute between each.
| Ball | Multiplier |
|---|---|
| Poké | 1x |
| Great | 2x |
| Ultra | 3x |
| Master | 4x |
1 point | Upgrade to a Great Ball
See Master Ball.
2 points | Upgrade to a Ultra Ball
See Master Ball.
3 points | Upgrade to a Master Ball
Upgrade your ball three times by purchasing an upgrade in the shop, using the Field Multiplier slots, or from the Start Slots before it downgrades. On RUBY you can also grab the upgrade pick-up after hitting Nuzleaf twice to create a bridge.
1 point | Light up all 4 of the HOLE slots
The HOLE lights are at the top of the 4 paths leading towards the pit. Light them up with your ball, using the flippers to scroll them from side to side and activate them all. While not necessary for the achievement, doing this opens up the Start Slots in the Centre Hole. Enter it to get one of the following rewards:
- Small - 100 to 900 points
- BIG - 1,000,000 to 9,000,000 points
- Pika - Pichu joins Pikachu. They remain fully charged for the rest of the current ball
- Catch 'em Start - Catch 'em Mode starts
- EVO Mode Start - EVO Mode starts
- Bonus Stage - Start the corresponding Bonus stage
- Coin - get 10, 30, or 50 coins
- Ball Saver - Turns on the Ball Saver for 30, 60, or 90 seconds.
- Arrival - Jirachi's catch mode
- Ball Upgrade - Upgrades your ball one level
- Max up - Upgrades your ball straight to the Master Ball
- Bonus Multiplier - +1 to +5 to End of Ball bonus multiplier
- Extra Ball - Get an extra ball
The ability to force stop the slots with Zigzagoon makes it easier to get specific rewards on the SAPPHIRE board.
3 points | Skip at least one ball tier and go straight to the Master Ball
Get Max Upgrade 
10 points | Catch Jirachi
Jirachi has a unique capture method, only activated through the Start Slots while in the Ruins
5 points | Accumulate 4 or more balls
There are several ways to earn extra balls in this game, in addition to the 2 you start with:
- Buy an extra ball from the market. This can only be done once per game.
- Get an extra ball from the Start Slots. Force-stopping the Slots with Zigzagoon makes this much easier on SAPPHIRE.
- Catch 15, 30, 45, etc Pokémon. Evolved Pokémon count towards this and your current total can be seen next to your balls in the bottom right.
- Sometimes the Field Multiplier pick-up on RUBY will have a 1 instead of an arrow. Grab it for an extra ball.
Access the Kecleon bonus stage by reaching 3 lights on the CATCH! counter then entering the Centre Hole on RUBY.
Kecleon appears in the middle of the stage and promptly turns invisible. Hitting Kecleon will make it fall over. Hitting a fallen Kecleon will do damage and break its invisibility. Hitting the tree in the middle of the stage will make it drop a Devon Scope pickup, allowing you to see the invisible Kecleon for 5 seconds. You have 2 minutes to damage it 10 times.
10 points | Complete the Kecleon Bonus Challenge with at least 1m remaining
There are a few tricks that can help speed up completion of this stage. Firstly, having the Timer Up power-up will give you an extra 30 seconds to work with. As with the other Quick achievements, this is helpful, but not essential. The Devon Scope can be helpful while learning its movement patterns, but I find I tend to waste too much time trying to grab it rather than tracking Kecleon's movements directly. Watch the pool and plants carefully for ripples and movement as these will tell you where your invisible opponent is and which direction its going. You'll be able to tell you've knocked it over from the little dust cloud and accompanying sound effect.
Access the Duskull bonus stage by reaching 3 lights on the CATCH! counter then entering the Centre Hole on SAPPHIRE.
This stage is a graveyard with 2 Duskull wandering around who will be replaced by more Duskull when hit. Hit 20 of them (those that disappear on their own don't count) to summon Dusclops. You have 2 minutes to summon and defeat Dusclops.
5 points | Complete the Duskull Bonus Challenge
Hit Dusclops 5 times to beat it. Hitting it from the front when standing still will make it grab your ball for two seconds before firing it back. Instead, bounce your shots to hit its back and sides, or time them to hit while it's walking.
Access the Groudon Bonus stage by reaching 3 lights on the CATCH! counter after defeating Kecleon, then entering the Centre Hole on RUBY. If you fail to defeat Groudon, you will be able to challenge it next time you reach 3 lights without going back through Kecleon first.
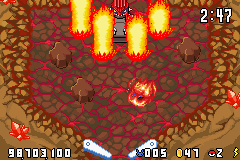
You have 3 minutes to hit Groudon 15 times to clear this bonus stage. Groudon stands at the top of the screen, using its attacks in sequence:
- Eruption - creates a shockwave that pushes your ball away, destroys all obstacles on the field and creates four pillars of magma shielding Groudon. The pillars take 5 hits to destroy
- Fire Blast - shoots a blast of flame at your ball. If it hits, this traps your ball for 5 seconds. Mash/waggle your flippers to break free faster.
- Earthquake - shakes the stage, damaging any remaining magma pillars and dropping three rocks from the ceiling. These take 4 hits to destroy.
- Fire Blast - see above
- Repeat sequence.
Try to prioritise just one of the pillars and don't bother breaking the rocks if avoidable so you can spend your time trying to hit Groudon itself rather than battering down the defences that will be continually rebuilt.
10 points | Catch Groudon
Clear the stage twice in one game to catch Groudon. You will need to beat Kecleon again to return to Groudon's stage.
10 points | Complete the Groudon Bonus Challenge without falling into the pit
The moves most likely to knock you into the pit are Fire Blast and Eruption. As you get used to the timing of the attacks you should be able to anticipate and avoid these. There are a couple of animations that telegraph them, but if you wait until you see them, you'll have very little time to react. Before Fire Blast, Groudon will spit out a tiny puff of flame and before Eruption it will shake its head.
Access the Kyogre Bonus stage by reaching 3 lights on the CATCH! counter after defeating Dusclops then entering the Centre Hole on SAPPHIRE. If you fail to defeat Kyogre, you will be able to challenge it next time you reach 3 lights without going back through Duskull first.
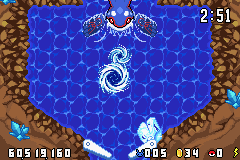
You have 3 minutes to hit Kyogre 15 times to clear this bonus stage. Kyogre starts at the top of the screen, using its attacks in sequence:
- Sheer Cold - creates a shockwave that freezes your ball in place. Mash/waggle the flippers to break free.
- Whirlpool x2 - creates a whirlpool that traps your ball for 5 seconds. Mash/waggle the flippers to escape faster.
- Dive x2 - Kyogre disappears beneath the water's surface. Bubbles indicate when and where it is about to surface
- Repeat sequence.
Sheer Cold is one of the biggest annoyances in this fight as it can't be evaded. However, if you hit Kyogre as it's using it (during the small shake before the shockwave's pulse animation) it will flash white and the move will fail, giving you an opening to attack before it uses Whirlpool.
10 points | Catch Kyogre
Clear the stage twice in one game to catch Kyogre. You will need to beat Dusclops again to return to Kyogre's stage.
10 points | Complete the Kyogre Bonus Challenge without falling into the pit
The biggest issues with this fight are the ball traps as they can release you at unpredictable angles and make it difficult to catch your ball. Be patient and wait for your openings when going for this achievement rather than trying to get an extra hit in at the cost of getting caught. Holding the ball in a flipper where you can immediately catch it on release may be safer than trying to cancel Sheer Cold.
Access the Rayquaza Bonus stage by reaching 3 lights on the CATCH! counter after catching Groudon or Kyogre then entering the Centre Hole. If you fail to defeat Rayquaza, you will be able to challenge it next time you reach 3 lights without going back through the previous bonus stages.

You have 3 minutes to hit Rayquaza 15 times to clear this bonus stage. Rayquaza moves back and forth across the top of the screen, floating up and down and using its attacks in sequence:
- Thunder - summons a bolt of lightning from the sky that stuns your ball for 5 seconds. Mash/waggle the flippers to recover faster.
- Extremespeed - Rayquaza flies offscreen then dashes across the stage horizontally, dragging your ball behind it.
- Twister - two tornados are left behind after Extremespeed. These will launch your ball up right offscreen before dropping it back onto the board.
- Repeat sequence.
You can only hit Rayquaza while it's touching the ground, so shots need to be timed carefully so they don't just roll underneath it.
10 points | Catch Rayquaza
Clear the stage twice in one game to catch Rayquaza. You will need to catch Groudon or Kyogre again to return to Rayquaza's stage.
10 points | Complete the Rayquaza Bonus Challenge without falling into the pit
All of Rayquaza's attacks are a problem here. I suggest playing cautiously and holding the ball in a flipper to avoid Extremespeed. Be especially wary of Twisters in the centre of the board as they can drop you right in the pit with no opportunity to save the ball.
Access the Spheal bonus stage by feeding your ball to Whiscash (RUBY) or Pelipper while its switch is flashing (SAPPHIRE). These can be activated with Start Slots rewards or Mart purchases.

This stage is a pure bonus round. There's no win or fail condition, just rack up as many points as you can in 2 minutes by sending your ball and baby Spheal up the ramps where Sealeo will juggle them into the basket. Ball baskets are worth 1 million points, and Spheal baskets 5 million. If you hit Sealeo while it's juggling a Spheal, it can drop it back in the pool without earning any points. Be careful!
10 points | In the Spheal bonus, make 6 Spheal go through the basket.
Hit Spheal as they start climbing ramps to send them up towards the Sealeo. If they pop out of the water away from the ramps, hit them to make them dive and resurface in a new spot. DO NOT hit the Sealeo while they are juggling.
A large part of any score achievement is simply staying alive long enough for the needed points to build up, but there are a number of ways to help build that score faster.
Ball upgrades multiply all points earned while active, so keep going for the field multiplier lights or on RUBY, the upgrade pickup. Having one active on completion of a bonus stage will also multiply the stage rewards, but be careful - dropping the ball in the pit during these will instantly drop your ball upgrade by one level.
| Ball | Multiplier |
|---|---|
| Poké | 1x |
| Great | 2x |
| Ultra | 3x |
| Master | 4x |
Almost any given action on the boards will award some points, but most of these are too small to be worth focusing on. The main focus when going for a high score should be on continually catching and evolving Pokémon to keep playing the bonus boards. The most efficient way to do this is to catch or hatch one Pokémon, then evolve it as EVO mode gives 2 lights on the CATCH! Counter compared to just one for the other two modes. This does not 'roll over' so completing an EVO with a single light left is effectively wasting a light.
| Bonus | Score |
|---|---|
| Kecleon | 30,000,000 |
| Duskull | 30,000,000 |
| Groudon | 50,000,000 |
| Kyogre | 50,000,000 |
| Rayquaza | 99,999,999 |
| Ball basket in Spheal & Sealeo | 1,000,000 |
| Spheal basket in Spheal & Sealeo | 5,000,000 |
At the end of each ball, you'll be awarded an End of Ball bonus calculated from how many times you've done certain events during that ball then multiplied by your Bonus Multiplier. These can add up quite quickly.


| Task | Score |
|---|---|
| Pokémon Caught | 500,000 |
| Pokémon Evolved | 750,000 |
| Traveled Area | 500,000 |
| Slot Played | 100,000 |
| Pika Saver | 100,000 |
2 points | Get over 100,000,000 points on the Ruby table
This will put you at the top of the pre-set in-game leaderboard on game over. If enabled, your score will also be submitted to the High Score (thousands) - Ruby leaderboard.
2 points | Get over 100,000,000 points on the Sapphire table
This will put you at the top of the pre-set in-game leaderboard on game over. If enabled, your score will also be submitted to the High Score (thousands) - Sapphire leaderboard.
5 points | Get over 500,000,000 points on any table
10 points | Get over 1,000,000,000 points on any table
25 points | Get over 2,000,000,000 points on any table
50 points | Get over 4,000,000,000 points on any table
While going for the high scores, you should be catching and evolving a lot of Pokémon along the way. In doing so, you should be able to pick up these with little to no additional effort.
5 points | Catch 20 or more Pokemon in a single game
5 points | Catch 40 or more Pokemon in a single game
When going for these achievements, consider trying both boards to submit your personal best to the Pokemon Collector - Ruby and Pokemon Collector - Sapphire leaderboards.
Most of this section is for Pokémon that must be caught or hatched in their lowest form and then evolved twice.
5 points | Fully evolve Treecko
Treecko can be caught in Forest
5 points | Fully evolve Torchic
Torchic can be caught in Volcano
5 points | Fully evolve Mudkip
Mudkip can be caught in Lake
5 points | Fully evolve Wurmple to both Beautifly and Dustox
Wurmple can be hatched on any board. It evolves randomly into either Silcoon or Cascoon, both of which can be caught in Forest
5 points | Fully evolve Ralts
Ralts can be hatched on either board.
5 points | Fully evolve Slakoth
Slakoth can be caught in Forest
5 points | Fully evolve Abra
Abra can be caught in Cave
5 points | Fully evolve Geodude
Geodude can be caught in Wilderness
5 points | Fully evolve Zubat
Zubat can be hatched on either board.
5 points | Fully evolve Aron
Aron can be hatched on either board.
5 points | Fully evolve Machop
Machop can be caught in Cave
5 points | Fully evolve Oddish
Oddish can be hatched on either board.
5 points | Fully evolve Horsea
Horsea can be hatched on either board.
5 points | Fully evolve Beldum
Beldum can be caught in Ruins
5 points | Catch Registeel, Regice and Regirock
These Pokémon can be caught in Ruins
25 points | Catch Latios and Latias
These Pokémon have a very small (<1%) chance to be caught in any location. Latios (blue) only appears on RUBY, and Latias (red) on SAPPHIRE.
By the time you've completed the rest of the set, you should have made significant progress on this final set of achievements. Below is a full Pokédex listing by number to help you track down those last few elusive Pokémon needed to complete your Pokédex.
2 points | Own at least 5 unique Pokemon
3 points | Own at least 20 unique Pokemon
5 points | Own at least 50 unique Pokemon
10 points | Own at least 100 unique Pokemon
25 points | Own at least 175 unique Pokemon
50 points | Own all 201 available Pokemon
| No. | Name | Portrait | Mode | Board | Location | Icon | Arrows |
|---|---|---|---|---|---|---|---|
| 001 | Treecko |  |
Catch 'Em | RUBY | Forest | |
3 |
| 002 | Grovyle |  |
Evolution | ||||
| 003 | Sceptile |  |
Evolution | ||||
| 004 | Torchic |  |
Catch 'Em | RUBY | Volcano | |
3 |
| 005 | Combusken |  |
Evolution | ||||
| 006 | Blaziken |  |
Evolution | ||||
| 007 | Mudkip |  |
Catch 'Em | SAPPHIRE | Lake | |
3 |
| 008 | Marshtomp |  |
Evolution | ||||
| 009 | Swampert |  |
Evolution | ||||
| 010 | Poochyena |  |
Catch 'Em | ANY | Plains |
|
3 |
| 011 | Mightyena |  |
Evolution | ||||
| 012 | Zigzagoon |  |
Catch 'Em | ANY | Forest |
|
2 |
| 013 | Linoone |  |
Evolution | ||||
| 014 | Wurmple |  |
Hatch | ||||
| 015 | Silcoon |  |
Catch 'Em or Evolution | ANY | Forest |
|
2 |
| 016 | Beautifly |  |
Evolution | ||||
| 017 | Cascoon |  |
Catch 'Em or Evolution | ANY | Forest |
|
2 |
| 018 | Dustox |  |
Evolution | ||||
| 019 | Lotad |  |
Hatch | ||||
| 020 | Lombre |  |
Catch 'Em or Evolution | SAPPHIRE | Lake | |
2 |
| 021 | Ludicolo |  |
Evolution | ||||
| 022 | Seedot |  |
Hatch | ||||
| 023 | Nuzleaf |  |
Catch 'Em or Evolution | RUBY | Plains | |
2 |
| 024 | Shiftry |  |
Evolution | ||||
| 025 | Tailow |  |
Catch 'Em | ANY | Plains |
|
2 |
| 026 | Swellow |  |
Evolution | ||||
| 027 | Wingull |  |
Catch 'Em | ANY | Ocean |
|
2 |
| 028 | Pelipper |  |
Evolution | ||||
| 029 | Ralts |  |
Hatch | ||||
| 030 | Kirlia |  |
Evolution | ||||
| 031 | Gardevoir |  |
Evolution | ||||
| 032 | Surskit |  |
Hatch | ||||
| 033 | Masquerain |  |
Evolution | ||||
| 034 | Shroomish |  |
Hatch | ||||
| 035 | Breloom |  |
Evolution | ||||
| 036 | Slakoth |  |
Catch 'Em | ANY | Forest |
|
2 |
| 037 | Vigoroth |  |
Evolution | ||||
| 038 | Slaking |  |
Evolution | ||||
| 039 | Abra |  |
Catch 'Em | ANY | Cave |
|
3 |
| 040 | Kadabra |  |
Evolution | ||||
| 041 | Alakazam |  |
Evolution | ||||
| 042 | Nincada |  |
Catch 'Em | ANY | Forest |
|
3 |
| 043 | Ninjask |  |
Evolution | ||||
| 044 | Shedinja |  |
Evolution | ||||
| 045 | Whismur |  |
Hatch | ||||
| 046 | Loudred |  |
Catch 'Em or Evolution | ANY | Cave |
|
2 |
| 047 | Exploud |  |
Evolution | ||||
| 048 | Makuhita |  |
Catch 'Em | ANY | Cave |
|
2 |
| 049 | Hariyama |  |
Evolution | ||||
| 050 | Goldeen |  |
Catch 'Em | SAPPHIRE | Lake | |
2 |
| 051 | Seaking |  |
Evolution | ||||
| 052 | Magikarp |  |
Catch 'Em | ANY | Ocean |
|
2 |
| 053 | Gyarados |  |
Evolution | ||||
| 054 | Azurill |  |
Hatch | ||||
| 055 | Marill |  |
Catch 'Em or Evolution | SAPPHIRE | Lake | |
3 |
| 056 | Azumarill |  |
Evolution | ||||
| 057 | Geodude |  |
Catch 'Em | SAPPHIRE | Wilderness | |
3 |
| 058 | Graveller |  |
Evolution | ||||
| 059 | Golem |  |
Evolution | ||||
| 060 | Nosepass |  |
Catch 'Em | ANY | Cave |
|
2 |
| 061 | Skitty |  |
Hatch | ||||
| 062 | Delcatty |  |
Evolution | ||||
| 063 | Zubat |  |
Hatch | ||||
| 064 | Golbat |  |
Evolution | ||||
| 065 | Crobat |  |
Evolution | ||||
| 066 | Tentacool |  |
Catch 'Em | ANY | Ocean |
|
2 |
| 067 | Tentacruel |  |
Evolution | ||||
| 068 | Sableye |  |
Catch 'Em | SAPPHIRE | Cave | |
3 |
| 069 | Mawile |  |
Catch 'Em | RUBY | Cave | |
3 |
| 070 | Aron |  |
Hatch | ||||
| 071 | Lairon |  |
Evolution | ||||
| 072 | Aggron |  |
Evolution | ||||
| 073 | Machop |  |
Catch 'Em | ANY | Cave |
|
2 |
| 074 | Machoke |  |
Evolution | ||||
| 075 | Machamp |  |
Evolution | ||||
| 076 | Meditite |  |
Catch 'Em | ANY | Safari Zone or Wilderness |
|
2 |
| 077 | Medicham |  |
Evolution | ||||
| 078 | Electrike |  |
Catch 'Em | ANY | Plains |
|
2 |
| 079 | Manectric |  |
Evolution | ||||
| 080 | Plusle |  |
Hatch | ||||
| 081 | Minun |  |
Hatch | ||||
| 082 | Magnemite |  |
Catch 'Em | ANY | Plains |
|
2 |
| 083 | Magneton |  |
Evolution | ||||
| 084 | Voltorb |  |
Catch 'Em | ANY | Plains |
|
3 |
| 085 | Electrode |  |
Evolution | ||||
| 086 | Volbeat |  |
Catch 'Em | RUBY | Plains | |
2 |
| 087 | Illumise |  |
Catch 'Em | SAPPHIRE | Plains | |
2 |
| 088 | Oddish |  |
Hatch | ||||
| 089 | Gloom |  |
Evolution | ||||
| 090 | Vileplume |  |
Evolution | RUBY | |||
| 091 | Bellossom |  |
Evolution | SAPPHIRE | |||
| 092 | Doduo |  |
Catch 'Em | RUBY | Safari Zone | |
2 |
| 093 | Dodrio |  |
Evolution | ||||
| 094 | Roselia |  |
Catch 'Em | ANY | Plains |
|
2 |
| 095 | Gulpin |  |
Hatch | ||||
| 096 | Swalot |  |
Evolution | ||||
| 097 | Carvanha |  |
Catch 'Em | ANY | Ocean |
|
2 |
| 098 | Sharpedo |  |
Evolution | ||||
| 099 | Wailmer |  |
Catch 'Em | RUBY | Ocean | |
3 |
| 100 | Wailord |  |
Evolution | ||||
| 101 | Numel |  |
Catch 'Em | RUBY | Volcano | |
2 |
| 102 | Camerupt |  |
Evolution | ||||
| 103 | Slugma |  |
Catch 'Em | RUBY | Volcano | |
3 |
| 104 | Magcargo |  |
Evolution | ||||
| 105 | Torkoal |  |
Catch 'Em | RUBY | Volcano | |
2 |
| 106 | Grimer |  |
Catch 'Em | ANY | Cave |
|
2 |
| 107 | Muk |  |
Evolution | ||||
| 108 | Koffing |  |
Catch 'Em | RUBY | Volcano | |
2 |
| 109 | Weezing |  |
Evolution | ||||
| 110 | Spoink |  |
Hatch | ||||
| 111 | Grumpig |  |
Evolution | ||||
| 112 | Sandshrew |  |
Hatch | ||||
| 113 | Sandslash |  |
Evolution | ||||
| 114 | Spinda |  |
Hatch | ||||
| 115 | Skarmory |  |
Catch 'Em | RUBY | Volcano | |
3 |
| 116 | Trapinch |  |
Hatch | ||||
| 117 | Vibrava |  |
Catch 'Em or Evolution | SAPPHIRE | Wilderness | |
2 |
| 118 | Flygon |  |
Evolution | ||||
| 119 | Cacnea |  |
Catch 'Em | SAPPHIRE | Wilderness | |
2 |
| 120 | Cacturne |  |
Evolution | ||||
| 121 | Swablu |  |
Catch 'Em | SAPPHIRE | Wilderness | |
3 |
| 122 | Altaria |  |
Evolution | ||||
| 123 | Zangoose |  |
Catch 'Em | RUBY | Plains | |
3 |
| 124 | Seviper |  |
Catch 'Em | SAPPHIRE | Plains | |
3 |
| 125 | Lunatone |  |
Catch 'Em | SAPPHIRE | Cave | |
2 |
| 126 | Solrock |  |
Catch 'Em | RUBY | Cave | |
2 |
| 127 | Barboach |  |
Catch 'Em | SAPPHIRE | Lake | |
2 |
| 128 | Whiscash |  |
Evolution | ||||
| 129 | Corphish |  |
Catch 'Em | SAPPHIRE | Lake | |
2 |
| 130 | Crawdaunt |  |
Evolution | ||||
| 131 | Baltoy |  |
Catch 'Em | SAPPHIRE | Wilderness | |
2 |
| 132 | Claydol |  |
Evolution | ||||
| 133 | Lileep |  |
Catch 'Em | RUBY | Ocean | |
3 |
| 134 | Cradily |  |
Evolution | ||||
| 135 | Anorith |  |
Catch 'Em | SAPPHIRE | Ocean | |
3 |
| 136 | Armaldo |  |
Evolution | ||||
| 137 | Igglybuff |  |
Hatch | ||||
| 138 | Jigglypuff |  |
Catch 'Em or EVO | ANY | Plains |
|
2 |
| 139 | Wigglytuff |  |
Evolution | ||||
| 140 | Feebas |  |
Catch 'Em | SAPPHIRE | Lake | |
2 |
| 141 | Milotic |  |
Evolution | ||||
| 142 | Castform |  |
Catch 'Em | ANY | Plains |
|
3 |
| 143 | Staryu |  |
Catch 'Em | RUBY | Ocean | |
3 |
| 144 | Starmie |  |
Evolution | ||||
| 145 | Kecleon |  |
Catch 'Em | ANY | Plains |
|
3 |
| 146 | Shuppet |  |
Hatch | ||||
| 147 | Banette |  |
Evolution | ||||
| 148 | Duskull |  |
Catch 'Em | ANY | Forest |
|
2 |
| 149 | Dusclops |  |
Evolution | ||||
| 150 | Tropius |  |
Catch 'Em | SAPPHIRE | Forest | |
3 |
| 151 | Chimecho |  |
Hatch | ||||
| 152 | Absol |  |
Catch 'Em | SAPPHIRE | Wilderness | |
2 |
| 153 | Vulpix |  |
Catch 'Em | RUBY | Volcano | |
2 |
| 154 | Ninetales |  |
Evolution | ||||
| 155 | Pichu |  |
Hatch | ||||
| 156 | Pikachu |  |
Catch 'Em or Evolution | RUBY | Safari Zone | |
3 |
| 157 | Raichu |  |
Evolution | ||||
| 158 | Psyduck |  |
Catch 'Em | RUBY | Safari Zone | |
2 |
| 159 | Golduck |  |
Evolution | ||||
| 160 | Wynaut |  |
Hatch | ||||
| 161 | Wobbuffet |  |
Catch 'Em or Evolution | RUBY | Safari Zone | |
3 |
| 162 | Natu |  |
Hatch | ||||
| 163 | Xatu |  |
Evolution | ||||
| 164 | Girafarig |  |
Catch 'Em | RUBY | Safari Zone | |
3 |
| 165 | Phanpy |  |
Hatch | ||||
| 166 | Donphan |  |
Evolution | ||||
| 167 | Pinsir |  |
Catch 'Em | RUBY | Safari Zone | |
2 |
| 168 | Heracross |  |
Catch 'Em | RUBY | Safari Zone | |
2 |
| 169 | Rhyhorn |  |
Catch 'Em | RUBY | Safari Zone | |
2 |
| 170 | Rhydon |  |
Evolution | ||||
| 171 | Snorunt |  |
Hatch | ||||
| 172 | Glalie |  |
Evolution | ||||
| 173 | Spheal |  |
Hatch | ||||
| 174 | Sealeo |  |
Evolution | ||||
| 175 | Walrein |  |
Evolution | ||||
| 176 | Clamperl |  |
Catch 'Em | SAPPHIRE | Ocean | |
3 |
| 177 | Huntail |  |
Evolution | ||||
| 178 | Gorebyss |  |
Evolution | ||||
| 179 | Relicanth |  |
Catch 'Em | ANY | Ocean |
|
3 |
| 180 | Corsola |  |
Hatch | ||||
| 181 | Chinchou |  |
Hatch | ||||
| 182 | Lanturn |  |
Evolution | ||||
| 183 | Luvdisc |  |
Catch 'Em | ANY | Ocean |
|
2 |
| 184 | Horsea |  |
Hatch | ||||
| 185 | Seadra |  |
Evolution | ||||
| 186 | Kingdra |  |
Evolution | ||||
| 187 | Bagon |  |
Hatch | ||||
| 188 | Shelgon |  |
Catch 'Em or Evolution | ANY | Cave |
|
2 |
| 189 | Salamence |  |
Evolution | ||||
| 190 | Beldum |  |
Catch 'Em | ANY | Ruins | |
2 |
| 191 | Metang |  |
Evolution | ||||
| 192 | Metagross |  |
Evolution | ||||
| 193 | Regirock |  |
Catch 'Em | ANY | Ruins | |
2 |
| 194 | Regice |  |
Catch 'Em | ANY | Ruins | |
3 |
| 195 | Registeel |  |
Catch 'Em | ANY | Ruins | |
2 |
| 196 | Latias |  |
Catch 'Em | SAPPHIRE | Any | 3 | |
| 197 | Latios |  |
Catch 'Em | RUBY | Any | 3 | |
| 198 | Kyogre |  |
Bonus | SAPPHIRE | |||
| 199 | Groudon |  |
Bonus | RUBY | |||
| 200 | Rayquaza |  |
Bonus | ANY | |||
| 201 | Jirachi |  |
Start Slots | ANY | Ruins | |
Thank you for reading my guide. I hope it was helpful! If you have any feedback, additional tips or corrections, you can contact me through RA here. Shout out to BahamutVoid's Challenge League 2022 for giving me a reason to write all this. Images linked from RetroAchievements, Bulbapedia and Serebii. Also thanks to JumpingUnicorn and @Superbird for ToC markdown help.
I've sunk many, many hours into this game over the years, long before I discovered RetroAchievements. I hope you enjoy it as much as I have.