Dragon Quest VIII ‐ Journey of the Cursed King - RetroAchievements/guides GitHub Wiki
Guide written by bdjeffyp
- v1.0 (4/6/2024): Initial release
⛔ ** NOTE: CONTAINS MAJOR SPOILERS FOR SOLVING ACHIEVEMENT PUZZLES ** ⛔
This is not an official manual, walkthrough, or critical review. This document is a guide for the current achievement set (208 achievements as of March 11, 2024) available on RetroAchievements. This guide will give the player tips on earning the achievements, hash compatibility, and any other necessary or useful information. It may point to other resources for specific game walkthroughs that are not focused on the achievements themselves.
As with some of the other guides I've made, spoiler solutions for the boss strategies and a potential order to earning the achievements will be hidden in a collapsible entry that you must click to expand so that only the solutions you need assistance with will be viewable. Some of the more minor achievements will have strategies written outright without a collapsible dropdown so use the guide at your own risk.
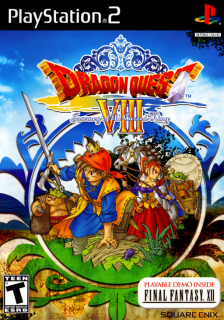
Dragon Quest VIII: Journey of the Cursed King is a role-playing video game developed by Level-5 and published by Square Enix for the PlayStation 2. Released in Japan in November 2004 and then throughout the world between 2005 and 2006, it is the eighth installment in the Dragon Quest series. It is also the first game in the series to have a release in European regions as well as the first to finally have the "Dragon Quest" name, rather than "Dragon Warrior", in the United States. Additionally, it is the first game in the series to use fully 3D environment and characters, rather than 2D pixel art. It leverages cel-shading techniques to make Akira Toriyama's character and monster designs really shine in the 3D style.
Dragon Quest VIII continues the traditional story and gameplay styles of the previous games, using small vignettes across an overarching plot, iconic monster designs, a nameless and silent hero character with hidden abilities, and randomly encountered turn-based combat with experience points. A new alchemy system is introduced to create a new item out of two or three existing stock after a certain number of steps are walked. A skill point system enables character customization, forcing the player to make permanent choices with each level around weapons and attributes that can unlock new abilities and spells.
As with other role-playing games, Dragon Quest VIII will push you into situations that can lock you out of areas, characters, and abilities as you progress. As a result, many achievements for this game can become missable if you are not diligent. However, all achievements can be earned in one playthrough. This guide will attempt to help you in identifying the missable achievements if you'd rather not play this fantastic, but lengthy, game multiple times.
-
Dragon Quest was called "Dragon Warrior" in the United States due to a trademark conflict with a tabletop role-playing game called DragonQuest. The US trademark expired in the early 2000s and Square Enix was able to use the series name in USA for the first time once they took over the trademark.
-
The series, created by Yuji Horii, was inspired by western computer role-playing games Wizardry and Ultima, while incorporating a streamlined user interface more appropriate for a console video game experience. The first Dragon Quest's user interface is based off a Famicom port of Horii's game The Portopia Serial Murder Case, which used a command menu to get user input. Horii was frustrated with text-based entry of PC text adventure games and opted to have a command menu to simplify things.
-
Many monsters were designed by famed mangaka Akira Toriyama, creator of Dragon Ball and many other manga and anime series. Perhaps arguably the most iconic and widely known monster is the Slime. Horii provided Toriyama a sketch of a slime based on Horii's playthroughs of Wizardry and Toriyama drew the teardrop shape with a smile that we are all familiar with.
-
This achievement set, created by TheMysticalOne, makes good use of alliteration and puns similar to the style of Dragon Quest games. Early localizations of Dragon Quest to North America lacked the punny humor of the series, but Dragon Quest VIII's localization really set the standard for future games and remakes of the older games going forward. Spells started to use onomatopoeia names (like Kaboom instead of Explodet and Woosh instead of Infernos) similar to the Japanese style for spells while monster and town names started to lean in a punny direction.
-
Dragon Quest VIII was ported to mobile phones and the 3DS. The 3DS version, in particular, adds two new playable characters and a bunch of quality of life improvements such as being able to speed up battle animations and instant alchemy pot brewing as soon as the feature is unlocked.
-
The western release of Dragon Quest VIII added the affect of giving Hero a "Super Saiyan" appearance when hitting max tension. The Dragon Quest wiki states that this was added specifically to the western releases as a shout out to fans of Toriyama's work, but I could not find any other sources that confirm if that is indeed the reason.
The game uses PS2 memory cards to save games with 30 save slots per card. Since this is being played with the PCSX2 emulator for RetroAchievements support, it is HIGHLY recommended that you make use of all slots in order to minimize the possibility of being locked out of a missable achievement. You can even make more than one memory card file to make saves across multiple memory cards. In my playthrough experience, I only needed one memory card, but I used 27 slots so I got close to needing more than one memory card.
Currently (as of March 11, 2024) this game has 2 unique hashes registered for it. View the linked hashes at the Supported Game Files page. This includes a 60fps patch, if that is the sort of thing you enjoy.
Please view the Dragon Quest VIII Official Forum Topic for more details.
There are no leaderboards currently associated with the game.
There are a currently (as of March 11, 2024) a total of 208 achievements, which can be broken down into the following categories:
- Story/Progression: 32 achievements earned naturally through the course of gameplay (only up to the game's normal ending)
- Side Quest: 30 achievements (9 are missable) which are unlocked from completing requests or talking to specific NPCs are certain times throughout the main adventure, including in the post game
- Cutscene: 15 achievements (8 are missable) that are earned from viewing a specific cutscene or dialogue with an NPC/party member
- Cor Blimey: 13 achievements (6 are missable), a subset of the Cutscene category, revolving around the various "COR BLIMEY" moments throughout the game.
- Challenge: 24 achievements (23 are missable) that require special action during boss fights or meet a condition throughout the entire game
- Lists: 34 achievements (1 is missable) involve progression toward and completing the various lists that are in game, such as alchemy recipes and the monster bestiary
- Grind: 29 achievements (3 are missable) that use actions taken by characters in battle a specific number of times or may require multiple battles to meet the requirements, as well as skill point category maxing and alchemy grinding
- Item Exchange: 6 achievements, a subset of the Lists category, for Dodgy Dave and Princess Minnie, exchanging the specific alchemy items and mini-medals for certain rewards
- Monster Arena: 8 achievements, a subset of the Side Quest category, for advancing in the monster arena and other arena related quests
- Treasure: 17 achievements (3 are missable) which require finding all treasure chests in a given region or dungeon
Out of all of the achievements, a total of 53 are missable
The following is a breakdown of the order of achievements based on my personal playthrough. Note that this is only a potential order for you to follow and not a strict timing on when achievements should be unlocked, especially when grind achievements are considered.
Each section is grouped under story achievements and hidden under a dropdown to avoid spoilers. If you want to see the achievements, click on the arrow next to each section to reveal the table. The dropdown names have the number of achievements in the section so that you can see at a glance about how many achievements you should have by the end of a section, if you were to follow my guide to the letter. If you want to see the entire thing without having to click the arrows, checkout the fully expanded roadmap!
⛔ MINOR SPOILER SECTION ⛔
The tables only reveal when achievements can be earned and possibly missed. No strategies on earning the achievements are provided here, just the approximate order I earned them in.
Guv Gashes Gooey Goons ➡ Vision Plan (8/208)
| Category | Badge | Title | Missable? |
|---|---|---|---|
| Story/Progression | Guv Gashes Gooey Goons | No | |
| Cutscene | Loyal Subject from the Start | Yes | |
| Cutscene | Zooming Zoomer | Yes | |
| Cutscene | Zippy Zoomer Zooms Away Again! | Yes | |
| Grind | Stop! Hammer Time | Yes | |
| Side Quest | Goo'd Faith | Yes | |
| Challenge | Fishticuffs | Yes | |
| Story/Progression | Vision Plan | No |
Vision Plan ➡ Va-Va-Voom (19/208)
| Category | Badge | Title | Missable? |
|---|---|---|---|
| Lists | Got These Tchotchkes | No | |
| Lists | High Up for Low Deeds | No | |
| Side Quest | Oh Queso You Need Tools, Eh? | No | |
| Story/Progression | The Great Mouse Detective | No | |
| Lists | Great Goo-grater | No | |
| Treasure | Towering Treasure Trove | No | |
| Cor Blimey | COR BLIMEY! | No | |
| Story/Progression | Such a Pity | No | |
| Challenge | Inkcinerated | Yes | |
| Side Quest | Salty Yarns, Fresh Salvation | Yes | |
| Story/Progression | Va-Va-Voom | No |
Va-Va-Voom ➡ Sibling Rivalry (33/208)
| Category | Badge | Title | Missable? |
|---|---|---|---|
| Treasure | Ferry Good Foraging, Guv! | No | |
| Story/Progression | Pot o' Golden Creations | No | |
| Lists | Formulated Felony | No | |
| Side Quest | Key Items | No | |
| Treasure | Fantastic Farebury Forager | No | |
| Lists | Knick-Knack Ruck Sack | No | |
| Lists | Beginning Brewer | No | |
| Cutscene | Brawlroom Baller | No | |
| Cutscene | Worm Welcome | No | |
| Lists | Basic Brazen Brewer | Yes | |
| Lists | Cretan Kibosher | No | |
| Challenge | If Your Torture's Incomplete, You Must Whip It | Yes | |
| Cor Blimey | COR BLIMEY!! | No | |
| Story/Progression | Sibling Rivalry | No |
Sibling Rivalry ➡ What Once was Lost is Mare Today (46/208)
| Category | Badge | Title | Missable? |
|---|---|---|---|
| Cutscene | I love my map. I’d be lost without it. | No | |
| Cutscene | Two Traumas | Yes | |
| Side Quest | Silence Rings Wisdom | No | |
| Story/Progression | Mourningfall | No | |
| Lists | Middling Mishmash Maker | No | |
| Monster Arena | Memonstrous! | No | |
| Cutscene | Fortuitousless | Yes | |
| Grind | Puff-Puff Proof | No | |
| Challenge | Lovelorn Looter | Yes | |
| Lists | Capture the Swag | No | |
| Grind | Quadratic Cutthroat | No | |
| Cor Blimey | COR BLIMEY!!! | No | |
| Story/Progression | What Once was Lost is Mare Today | No |
What Once was Lost is Mare Today ➡ Ship-Top Shape (58/208)
| Category | Badge | Title | Missable? |
|---|---|---|---|
| Grind | Idly Breaking the Fourth Wall | Yes | |
| Item Exchange | Side Hustle | No | |
| Side Quest | Welly done a Goo'd Deed | No | |
| Story/Progression | Poticularly Potent | No | |
| Lists | Visibly Notorious | No | |
| Monster Arena | Ragazzo! | No | |
| Lists | Make a Key-line for All Those Locked Chests | No | |
| Treasure | Awesome Alexandrian Half-Inching Hero | No | |
| Monster Arena | Play With Yourself | No | |
| Lists | Slaughtering like a Sabrecat | No | |
| Challenge | Minion Minder | Yes | |
| Story/Progression | Ship-Top Shape | No |
Ship-Top Shape ➡ Sad Sire's Shameful Sham (81/208)
| Category | Badge | Title | Missable? |
|---|---|---|---|
| Item Exchange | Medaling with Minnie's Mission | No | |
| Monster Arena | Comrade Conjurer | No | |
| Side Quest | Just Cheese, Cheese, Cheese | Yes | |
| Lists | Distiller of Desireables | No | |
| Lists | Lovely Litter | No | |
| Cutscene | Brotherhood Bullying | Yes | |
| Grind | Octagonist | No | |
| Cor Blimey | COR BLIMEY!!!! | Yes | |
| Monster Arena | Fresh Fiendly Friends | No | |
| Cor Blimey | COR BLIMEY!!!!! | Yes | |
| Side Quest | Felix Felicis | No | |
| Story/Progression | Dark Detective Work | No | |
| Cutscene | Condescending Crusader | Yes | |
| Cor Blimey | COR BLIMEY!!!!!! | No | |
| Side Quest | Provisory Princess | No | |
| Lists | Hacks-R-Us | No | |
| Grind | Meatshield Mastery | No | |
| Grind | Guv's Globetrotting | No | |
| Cor Blimey | COR BLIMEY! Party Chat Edition | Yes | |
| Story/Progression | Leaping Lizards Loom Large | No | |
| Challenge | Heroic Heart | Yes | |
| Lists | Merching Ever Onward | No | |
| Story/Progression | Sad Sire's Shameful Sham | No |
Sad Sire's Shameful Sham ➡ Vanquished Villain to Vanish Voodoo (87/208)
| Category | Badge | Title | Missable? |
|---|---|---|---|
| Side Quest | Royal Reverie | No | |
| Story/Progression | Radiant Reflection | No | |
| Cor Blimey | COR BLIMEY!!!!!!! | No | |
| Grind | Fiend-Fighting Firebrand | No | |
| Challenge | Dhoulmagus Defeated Despite Having Haphazard Healing | Yes | |
| Story/Progression | Vanquished Villain to Vanish Voodoo | No |
Vanquished Villain to Vanish Voodoo ➡ Dogged Disaster (95/208)
| Category | Badge | Title | Missable? |
|---|---|---|---|
| Story/Progression | Honey, You Got Real Ugly | No | |
| Side Quest | Secretly Skillful | No | |
| Item Exchange | Transfer Tiny Trinkets, Get Golden Goods | No | |
| Cutscene | Engoouragement | No | |
| Story/Progression | Elevated Disappointment | No | |
| Challenge | Magic Must Meet Magic | Yes | |
| Cor Blimey | COR BLIMEY!!!!!!!! | Yes | |
| Story/Progression | Dogged Disaster | No |
Dogged Disaster ➡ Empyreacal Evidence (114/208)
| Category | Badge | Title | Missable? |
|---|---|---|---|
| Cor Blimey | Cor Blimey. | Yes | |
| Lists | Fillet of a Fenny Snake, In the Caldron Boil and Bake | No | |
| Monster Arena | Two Team Taskmaster | No | |
| Monster Arena | Champion Challenger | No | |
| Monster Arena | Morrie's Magnifico Monster Master | No | |
| Lists | Fountain Find | No | |
| Grind | Super Saiyan Squad | No | |
| Lists | Monsterously Magnifico Monster Mauling! | No | |
| Treasure | Grabbin' Gains from Gamblingland | No | |
| Side Quest | Compassionate Champion | Yes | |
| Challenge | Fiendish Friends to the End | Yes | |
| Side Quest | First Rate Reconcilor | Yes | |
| Lists | Platinum Protection Plan | No | |
| Lists | Fast as a Falcon | No | |
| Lists | Gorgeous Gringham Gal | No | |
| Lists | Stewing Stalwart | Yes | |
| Story/Progression | Through the Hellhounds and Frost | No | |
| Challenge | Hellhound Harrier | Yes | |
| Story/Progression | Empyreacal Evidence | No |
Empyreacal Evidence ➡ Heavenly Flight (126/208)
| Category | Badge | Title | Missable? |
|---|---|---|---|
| Treasure | Left the Oven On, So We Came Back to Loot the Place | No | |
| Side Quest | Soft and Squishy | No | |
| Treasure | Superbly Stone Cold Treasure Tracker | Yes | |
| Challenge | Supreme Swashbuckling | Yes | |
| Treasure | Pirate Plunder Pilferage | No | |
| Grind | Combat Colossus | No | |
| Story/Progression | Sailing the Shiny Seas | No | |
| Lists | Murky Monster Masher | No | |
| Cor Blimey | COR BLIMEY!!!!!!!!! | Yes | |
| Challenge | Bruising Big Bird | Yes | |
| Challenge | Gemonstratable Superiority | Yes | |
| Story/Progression | Heavenly Flight | No |
Heavenly Flight ➡ Holy-Hidden Horror (144/208)
| Category | Badge | Title | Missable? |
|---|---|---|---|
| Cutscene | Showing Shade on the Forefront | Yes | |
| Treasure | Light Loot, Dark Dreams | No | |
| Side Quest | Herbal Handout | No | |
| Grind | Victoriously Vicious | No | |
| Treasure | Rampager of the Riverlands | No | |
| Treasure | The Heights of Hoarding | No | |
| Item Exchange | Magnificent Metals from Miniature Medals | No | |
| Treasure | Dedicated Dairy Dude Determinedly Discharges Duty | No | |
| Cor Blimey | COR BLI- | No | |
| Cutscene | Shaken Drink, Stirring Tale | No | |
| Story/Progression | Darkness Detector | No | |
| Treasure | You Sure Can Pickham | No | |
| Lists | Item Miser | No | |
| Treasure | Holy Hoarding, Hero! | Yes | |
| Challenge | Deliciously Cheesy Win | Yes | |
| Story/Progression | Rolo's Redemption | No | |
| Challenge | Hermano a Hermano | Yes | |
| Story/Progression | Holy-Hidden Horror | No |
Holy-Hidden Horror ➡ Gloomsday (165/208)
Grind alert! This is the point where I started to grind for metal slimes and gaining levels and maxing skills. You may decide to do this at a different time that I did, saving it for the postgame or perhaps as soon as you got the Godbird's soulstone. As stated above, your mileage may vary.
| Category | Badge | Title | Missable? |
|---|---|---|---|
| Side Quest | Enduring Endearment | Yes | |
| Side Quest | Flailin' Felon | No | |
| Side Quest | Gonna Brie an Energizingly Gouda Time | Yes | |
| Side Quest | Final Fortune | No | |
| Side Quest | Savouring the Squidly Silence | Yes | |
| Treasure | Arg! Almost as Annoying as Charmles | No | |
| Challenge | Cook Cooker | Yes | |
| Side Quest | Through the Looking Glass | No | |
| Lists | Rising Recipe Retrieval | No | |
| Grind | Smelterweight | No | |
| Grind | Oxidizer | No | |
| Treasure | Daringly Depriving the Darkness of Dreary Duds | Yes | |
| Grind | Powerful Puff-Puff Professional | No | |
| Grind | Gainful Guv | No | |
| Grind | Heavy Axe-cent | No | |
| Grind | Martial Mage Master | No | |
| Grind | Truly Tremendous Templar | No | |
| Challenge | Smiting Satan | Yes | |
| Challenge | Marble Match Mayhem | Yes | |
| Challenge | Rocky Rumble: Red vs. Blue | Yes | |
| Story/Progression | Gloomsday | No |
Gloomsday ➡ Home for Good (172/208)
| Category | Badge | Title | Missable? |
|---|---|---|---|
| Story/Progression | ORB! | No | |
| Challenge | Savvy Sage Summoner | Yes | |
| Challenge | Efficient Evil Eliminator | No | |
| Cor Blimey | COR BLIMEY! With Love | No | |
| Challenge | Peerless Protector | Yes | |
| Challenge | Hoarder Hero | Yes | |
| Story/Progression | Home for Good | No |
Postgame: Home for Good ➡ Heir Unapparent (208/208)
Grind alert! The final stretch will require a significant amount of time getting the remaining skill maxing as well as getting Hero to level 65 for the Dragon Soul ability. While there are probably plenty of good lower level strategies to beating the Dragovian Trials, it's probably more efficient to just get the levels and skills you need before completing the final Trial. In my playthrough, I made occasional breaks from metal slime grinding to go do a Dragovian Trial, and then head back to the grind. Have fun!
The category sections below contain each achievement in the section with tips or suggestions on how to unlock them. Not every achievement may warrant an in-depth discussion and the tips/suggestions I provide may not be the the most ideal. I'm open to feedback on how better to meet an achievement's requirements, as I have done with my previous guides. Feel free to message me via RetroAchievements DM to discuss better strategies and I'll update them here with credit given.
Good luck in your achievement hunting!
The following is some overall strategies to make your playthrough and achievement hunting with Dragon Quest VIII as painless as possible, while also completing your mastery in one run.
-
Alchemy recipe tracking: I created a checklist for tracking your progress on alchemy recipes on Google Sheets. I didn't like that the 100% walkthrough guide didn't identify what the recipes made. It was also noted by RA user Akai in the I Did 'Em Alchemyself achievement forums that the 100% guide was missing one recipe. So, I used both the 100% guide as well as Dragon's Den recipe guide to put together the checklist. The order of the recipes in the same as the 100% guide, with the one missing recipe at the very end of the list. With this checklist, I made sure to complete all recipes and verified its accuracy and completeness.
-
Saving: Please, please, please, PLEASE make full use of your memory card! The last thing you want to do is make all of your saves on one slot. Dragon Quest VIII provides you with 30 slots per memory card. I am reiterating what was stated in the Save Support section it is just that important. The best time to make a new save is just prior to making an attempt on a Challenge category achievement. Having multiple saves definitely helped me in a couple of instances where I missed an achievement because of a small timing window. Please don't forget to make use of all that space!
-
Dungeons and boss challenges: The nature of how save games work in Dragon Quest games, combined with the Peerless Protector achievement's requirement, make dealing with dungeons and boss fight challenges a different level of tricky as compared to a typical Final Fantasy boss achievement. The way I mitigated these types of challenge achievements is by breaking up dungeons in two visits, when possible. The first visit (or more, if needed) is for clearing out the dungeon of treasures. Once that is done, Evac and Zoom to town to save. The next visit will then be for the attempts at the boss challenge. The nice thing about this approach is that death doesn't undo as much work when reverting to a previous save in order to maintain Peerless Protector while also ensuring that you are keeping your experience AND your money earned. If things get too spicy in a dungeon, don't be afraid to Evac early to recover and save your progress. This approach also helps with increasing distance traveled, brewing alchemy recipes, and maintaining new encounters logged in the bestiary.
-
Other guides: The first time I played through Dragon Quest VIII completely was on the 3DS but I certainly didn't accomplish 100% of the game in that playthrough. In order to make sure I didn't miss anything while mastering this achievement set, the primary guide I utilized is the 100% walkthrough guide on GameFAQs. As with most guides, there are bound to be errors but this one was nearly perfect. I also used the Spells and Skills guide on GameFAQs for identifying my skill point distribution route. Also handy were the Dragon's Den overworld maps that identify treasures, notorious monsters, and cow locations!
No discussion on the story achievements here as you simply need to play through the game to earn them. You can't miss them!
| Badge | Title | Strategy |
|---|---|---|
| Stop! Hammer Time | The hammerhood that blocks the way further into the waterfall cave will let you pass without a fight. Fight the hammerhood anyway and win to unlock the achievement. | |
| Goo'd Faith | You can't miss this if you follow my general strategy for dungeons and bosses. Since this is in the first dungeon of the game, it may take you more than one visit to get to where the slime is. If your health is getting to dangerous levels, it may be ideal to leave early and heal. In my experience, I had two battles from the slime to the chest and back. If you can't survive those battles because health and resources are too low, leave without talking to the slime! Once you are ready, talk to the slime, say "yes", talk to the slime again, retrieve the sword from the chest, then return to the slime and talk again. | |
| Oh Queso You Need Tools, Eh? | Ideally best to complete this after the events of the waterfall cave. There are reports that the achievement did not unlock when performed prior. Additionally, you want to do this before going to Alexandria and having Bangerz following you. So, get the tools and give them to the cheese man on top of the hill after the waterfall and before heading to Alexandria. | |
| Salty Yarns, Fresh Salvation | This was noted for having a tight timing window by the developer. Enter Port Prospect and save. Talk to the man o' war in the well. Do the Khalamari boss fight (kill it with Sizz if getting Inkcinerated at the same time). Return to the well and speak with the man o' war again to unlock it. Make liberal use of separate save files and this should be easy to get even with the tight timing. To be safe, I made sure NOT to speak with the man o' war until just before the Khalamari fight even with making early trips to Port Prospect while following along with the 100% walkthrough guide. | |
| Key Items | Once you have your alchemy pot, one of the first things to make is the Thief's Key. The game gives you plenty of hints to make this shortly after arriving at Perequin Quay, to include this guy who wants his chests open. You'll get free items AND the achievement! | |
| Silence Rings Wisdom | There was some talk about this being potentially missable but I don't believe it is. The unfortunate thing about this is that there isn't much of a hint about who wants to see the Lady's Ring that I was able to find from talking to NPCs. You are supposed to just know/remember from earlier conversation that the short rich guy standing outside the right side of the Farebury church is the person who lost the ring in Ascantha. The person in question also migrates to the inn's second floor at night. Concerning the potential for this being missable, someone stated that the man leaves Farebury after the party gets the ship. So, once you have retrieved the ring from Ascantha's well, go Zoom directly to Farebury and talk to the man to complete the quest. | |
| Welly done a Goo'd Deed | You'll find a friendly king slime in the well next to my favorite inn and church at Hilltop Hut. Help the poor slime out and get your first slime crown as well as the achievement. | |
| Just Cheese, Cheese, Cheese | Congrats on getting a ship to sail the world! Now to revisit old places to open previously inaccessible chests. Also, go visit the cheese guy at the top of the Farebury waterfall to get some more cheese. | |
| Felix Felicis | Chateau Felix is conveniently located next to Baccarat. Complete Felix's quest to help the spirit of Baumren and you'll get the bell that makes overworld travel much quicker. | |
|
|
Provisory Princess, Royal Reverie, and Enduring Endearment |
Provisory Princess is the event that kicks off the route to obtaining the elusive Enduring Endearment achievement. Once you have Baumren's Bell, head toward Argonia but go to the Mystical Spring first. The events there will unlock this achievement. Now keep getting Medea to drink from the spring until you only have a "stolen moment". You will then be on track to continuing the Enduring Endearment achievement. You should see the measured notification when Medea successfully drinks from the spring and talks to you. If Medea is too full to drink, take some time to make alchemy recipes by walking around. You must walk in an area where you can hear Medea and the cart, so walking in towns and dungeons does not make Medea thirsty again. My ideal spot was just outside of Hilltop Hut. You can walk with Medea and have no encounters there. There should be two events at the spring before the "stolen moment" happens. Royal Reverie is the event that tells you that you are ready to have two more Mystical Spring sessions with Medea. After every major story event now, Medea will talk to you in a dream, the first of which unlocks Royal Reverie. Once you have a dream, return to the Mystical Spring and repeat the process of drinking, chatting, and walking with Medea until you only have "stolen moments". There are 24 total dreams and Mystical Spring sessions with Medea to finally unlock Enduring Endearment. Here is a breakdown of the major events that will trigger the next leg of dream and spring visits: Spoilers- Before Argonia: escorting Charmles and getting the magic mirror [scenes 1-3] - Before end of Dark Ruins: you are directed there after getting the mirror so get all of the scenes before charging the mirror up and returning to the ruins [scenes 4-6] - Before end of Arcadia scenario: got the dream (scene 7) sleeping at the inn in Arcadia after traveling there for the first time [scenes 7-9] - Before end of Marta's scenario: got the dream (scene 10) sleeping at the inn in Arcadia after having defeated Evil Jessica and mourning the death of another great sage [scenes 10-12] - Before end of the Godbird scenario: got the dream (scene 13) sleeping at the inn in Argonia while opening ultimate key locked doors [scenes 13-15] - Before end of Sir Leopold's scenario: got the dream (scene 16) sleeping at the Hilltop Hut inn after defeating Gemon and getting the soulstone [scenes 16-18] - Before Neos scenario: since you can start the Neos scenario right after Purgatory island, it is imperative that you rest at an inn for the dream (scene 19) and then get the two spring segments right away as the window for this one is short! [scenes 19-21] - After Neos scenario: after the Black Citadel flies off, another inn rest will start the final dream (scene 22) and final Spring segments [scenes 22-24] |
| Secretly Skillful | Check the abandoned shop in Arcadia at night time to purchase the goods that unlock this achievement. | |
| Engoouragement | As you enter Rydon's Tower proper and get ready to climb it, a slime stands near a statue. Pushing the statue will cause the slime to give you some words of encouragement and hint at what the puzzle of the tower will be. | |
|
|
Compassionate Champion and First Rate Reconcilor | These are both missable because Cash and Carrie can resolve their dispute without your help if you don't step in before the Neos scenario. Besides, getting the Casino open as soon as possible is advantageous to you since there is some excellent equipment to get there. The soonest you can start this is after the Arcadia events. Head to Baccarat and choose a side, then head to the Dragon Graveyard. For Compassionate Champion, there are 3 bodyguards. The priest is the first found, on a path off the main route in the second area. The magic user bodyguard is on the main route in the third area. The last one, the warrior, is on the main route laying down on the floor losing consciousness and must be spoken with twice (the measurement for the achievement says there are 4 events to meet the requirement). First Rate Reconcilor will be earned once you defeat the bosses and unlock the casino. The boss strategy is discussed in the Challenge section. |
| Soft and Squishy | I went to Le Club Puff-Puff during the ultimate key treasure clean up and picked up the achievement then. You need the ultimate key to enter anyway so this is a perfect time to get the achievement while getting the treasures in the changing room. | |
| Herbal Handout | Tell Marek "yes" to receive four bits of nook grass. You can do this as soon as you have the Godbird's soulstone. I picked it up when doing treasure chest cleanup with Godbird before heading to Tryan Gully. | |
| Flailin' Felon | One of several side quests that becomes available after the events at Neos. Just chat with Red to get this. | |
| Savouring the Squidly Silence | Defeat the king squid that has shown up outside of the casino in Baccarat. Refuse the first offer of 200 casino tokens, then accept the offer of 400 casino tokens. Taking that initial offer is why the achievement is missable. | |
| Gonna Brie an Energizingly Gouda Time | The Black Citadel's appearance triggers this next opportunity to get some fantastic cheese. The Godbird soulstone makes getting this convenient. Make sure to get this before defeating the postgame dungeon boss the first time. | |
| Through the Looking Glass | The Black Citadel's appearance also triggers this side quest. For some reason, a mirror in the chancellor's house in Argonia has a small dungeon in it. Complete the dungeon and save the chancellor's family to get the achievement. See the Challenge section for this side quest's boss fight if you need help with that. | |
| Final Fortune | I was able to get this as soon as the Black Citadel went into the air. While doing treasure clean up and the final scenes for Enduring Endearment, I went to Farebury to talk to Kalderasha not expecting this to pop then. I had figured that this achievement was for a scene after completing the Black Citadel. So, you might as well get it knocked out during the final treasure clean up before the end of the game. | |
|
|
Vermillion is a Shade of Dead, Emerald Eradication, Silver Slayer, Aureate Assassin, Steel Smelting Superman, Divine Destroyer, and Ultimate Dragon Warrior | The majority of the post game is spent preparing for these battles, especially the Ultimate Dragon gauntlet. Since these achievements are not missable, I am not going to go into specific strategies for beating these bosses as there is a lot of variance depending on your specific equipment, levels, and skill point distributions. There are other guides out there that go into details on these battles that could do it better than I. This is another area where the 100% walkthrough guide was not complete on, so the final few boss fights were attempted on my own. Ultimate Dragon is definitely the scariest, as that is actually a boss rush prior to fighting the actual boss. Good luck on this final challenge the game has for you! |
Back to Achievement Categories
| Badge | Title | Strategy |
|---|---|---|
| Loyal Subject from the Start | Say "yes" to King Trode when you first arrive in Farebury to unlock the achievement. Show that dedication to the monarchy! If you say "no", you'll just have to start the game over from the beginning, so that's not too bad. | |
| Zooming Zoomer | Talk to the person with the bowl cut hairstyle and green tunic after entering Farebury to make him run away... The cutoff for missing this cutscene would be when the townspeople chase out King Trode. | |
| Zippy Zoomer Zooms Away Again! | After the cutscene where the townspeople chase away King Trode, talk to the bowl cut guy with the green tunic once more. I'm not sure what the cutoff is for this achievement to be missable so just make sure you talk to the guy again shortly after re-entering Farebury. | |
| Worm Welcome | You won't miss this one, so not much to say here. Go to the Maella Abbey and meet Marcello. | |
| Brawlroom Baller | This event occurs when entering Simpleton and speaking with Angelo the first time. Apparently, you can skip past this and head to Ascantha first, which will cause this event to be missed. This is not ideal since skipping Angelo for that long of a period is not advisable, even if you are concerned about Dhoulmagus Defeated Despite Having Haphazard Healing. Additionally, skipping Angelo would cause you to miss out on Two Traumas so overall that's not recommended. |
|
| I love my map. I’d be lost without it. | Simply open up the world map once you leave Maella Abbey. You'll be doing this a LOT anyway while looking for overworld treasure chests so you'll get this eventually. FYI, opening the world map from the menu after you get it from Marcello while still in the Abbey does not cause the achievement to pop, so wait until you leave the Abbey and then press the Square button. | |
| Two Traumas | With Angelo in your party, sleep in the Riverside Chapel en route to Ascantha. This is missable if you progress too far into the story, so make sure you stay there. If you are following along with the 100% Walkthrough guide and collecting treasure in the area prior to heading to Ascantha, you'll definitely make use of the chapel and shouldn't miss this. | |
| Fortuitousless | I initially missed this one because I spoke with Trode in the Pickham bar to have Medea stolen without talking to the fortune teller first. Thankfully, I used multiple saves and was able to reload to get this achievement specifically before reloading the later save to progress further. The reason this happened is because the fortune teller was not in their tent at night which was when I was exploring the town. So, make sure you rest to get to day time if it is night before stopping inside the fortune teller's tent. Lesson learned and reinforced: MAKE MULTIPLE SAVES!! | |
| Brotherhood Bullying | After you get the ship and while touring the world looking for new treasures to get, stop in Neos to get this cutscene. This is missable if you progress too far into the story though that cutoff is not known currently. It won't be a problem though if you go to Neos and walk up to the large doors in the back of the town as soon as you get the ship. | |
| Condescending Crusader | Take a trip to Savella Cathedral and check out the elevator to bump into Marcello and pop the achievement. Again, this is missable by progressing too far into the story. I got this after visiting the Dark Ruins the first time and needing to get the magic mirror, as directed by the 100% Walkthrough guide. | |
| Showing Shade on the Forefront | After having Godbird access, head to the Lord High Priest's residence right away! Land on the island and try to open the gate into the residence and the cutscene will play out. As with the other Marcello events, progressing too far into the story will lock this one out. | |
| Shaken Drink, Stirring Tale | Simply go to the pub as King Trode in Tryan Gully, talk to the bartender, and accept the offer of a drink and a tale. It does not appear to be missable, but I made sure to do this cutscene as soon as I arrive in the village. | |
| Familiar Family or Family Familiar? | Speak to Chen Mui after helping the Dragovians to learn the truth. | |
| Tragic Togetherness | When you leave the Dragovian Path and head toward the entrance to the Dragovian Sanctuary, you'll see a tombstone for a name you may have heard before earlier in your adventure. Later, as you explore the Heavenly Dias leading up into the Lord of the Dragovians, you may have come across a circle of tombstones, one of which was intact. Examining it will tell you about a certain villager who died and was buried there. Once you've learned the truth from Chen Mui, you can head back to the tombstone you passed on the Dragovian Path just outside of the Sanctuary to see this cutscene and get the achievement. You will have needed to see the Heavenly Dais tombstone for this cutscene to play out, though you can have examined them in any order. |
|
| Couple o' Cheeseheads | Who do you know that loves cheese as much as Munchie? Talk to them once more after saving the Dragovians to view this cutscene. SpoilerIt's the old man at the hut on top of the waterfall near Farebury. |
Back to Achievement Categories
| Badge | Title | Strategy |
|---|---|---|
| COR BLIMEY! | Unlocked automatically during the events at the top of Alexandria Tower | |
| COR BLIMEY!! | Unlocked automatically during the events at Maella Abbey | |
| COR BLIMEY!!! | Unlocked automatically after the Pickham scenario wraps up | |
| COR BLIMEY!!!! | The first missable Cor Blimey event. After getting the ship, collecting treasures, and then heading to the western continent to pick up Dhoulmagus' trail, go to Seaview Chapel and speak to the monks there to get this scene. | |
| COR BLIMEY!!!!! | The second missable Cor Blimey event, so soon after the first! The cutoff for this event is the Casino opening so the ideal time to do this is when you first arrive in Baccarat on your way to Chateau Felix and Argonia. Go into the inn and head downstairs to the theatre. Talk to the bartender in there. Next, go upstairs to overhear the conversation between the bartender and Golding's bodyguard. Finally, go back to the basement and talk to the theatre bartender again. | |
| COR BLIMEY!!!!!! | Unlocked automatically at the Mystical Spring | |
| COR BLIMEY! Party Chat Edition | Another missable event and it seems to have a small window to get it. After getting lost in Dark Ruins and told to go to Argonia, you must enter party chat once in town but BEFORE going into the castle! I even missed this initially, but thankfully kept a save just before going into the castle that I was able to use to reload and get the scene. | |
| COR BLIMEY!!!!!!! | Unlocked automatically during events in the Dark Ruins | |
| COR BLIMEY!!!!!!!! | This happens directly after the fight with Evil Jessica! Dominico asks you if you would have the honour of finishing her off. Say yes and Trode will run in and... COR BLIMEY! If you choose the wrong option, you'll have to do the Evil Jessica fight again. | |
| Cor Blimey. | This is missable because of what will occur to Marta's place after progressing through the story. When you leave Marta's cottage after her rescue and re-entering to get the mini-medal from the barn, head around back to the nook grass herb garden to get this cutscene and achievement. | |
| COR BLIMEY!!!!!!!!! | Another missable Cor Blimey event that makes you feel like even more of a jerk than the one involving Jessica. When first arriving in Empycchu, speak to the villager near the two horses and say "yes" to their question. Feel the pain. | |
| COR BLI- | Unlocked automatically when entering Tryan Gully the first time | |
| COR BLIMEY! With Love | Unlocked automatically during the normal end of the game |
Back to Achievement Categories
⛔ HERE, THERE BE SPOILERS! ⛔
Boss challenges provide a unique spin on typical boss fights, forcing you to take actions you would not normally do in a casual playthough. These tend to become interesting puzzles to figure out. If you wish to challenge yourself, I recommend not expanding the strategies I used. As a reminder, the flexibility of the combat system means that my strategies are not the hard and fast rule to meeting the requirements of the achievement. If you have recommended solutions to these challenges, I'd be more than happy to add them here. Just send me a DM on RetroAchievements!
| Badge | Title | Strategy |
|---|---|---|
| Fishticuffs | StrategyI put some points into Fisticuffs on Yangus before attempting this, though that was probably not necessary. Maybe 3 points for the extra attack would be enough, especially since Yangus gets a decent amount of skill points at low levels, especially when compared to Hero. With this and nearly all other boss challenges, I made more than one dive into the waterfall cave: first few to clear treasures and gain some levels, then save and return to take on the boss. Once near the crystal ball, unequip weapons on Hero and Yangus. Now punch until it gives up! If you need to heal, have some medicinal herbs among the two characters for flexibility. You will probably get plenty of herbs dropped from enemies as you dive the dungeon. |
|
| Inkcinerated | StrategyKhalamari has 360 HP. I used a calculator to track boss HP totals as I did damage, and even used a couple of Sizz attacks to see what the average damage range is for the spell at the level Hero was. To be safe, you could even use a Psyche Up or two when you get close, just to make sure. Or, you could make Yangus defend while Hero uses Sizz for a round or two if it is close but doesn't die. This isn't too difficult though and the save without a dungeon to runback makes this fairly trivial. |
|
| If Your Torture's Incomplete, You Must Whip It | StrategyThis was probably my first scary boss challenge because I had a couple of close moments where characters nearly died. When Jessica whips the Tortured Soul, the measurement will count up showing how many you have done. While this is happening, use Yangus and Hero as support. Attack the added monsters as appropriate while also using healing items or Hero's Heal spell. Jessica obviously cannot be allowed to die before the 10 whips (and death of any characters should be avoided anyway). If you are concerned about levels, the dungeon has opportunities to get your first metal slime, which could incentivize you to grind a little bit. As with other boss challenges, it is wise to make this in at least two trips through the dungeon, especially at these lower levels. Clean out the dungeon of treasure while also fighting to increase levels. Leave and heal/save. Return and attempt to fight the boss. If it doesn't go well, reload the save and get some more levels. Good luck! |
|
| Lovelorn Looter | StrategyThe right statue plaque by the boss will restore your HP. I'm a broken record but it's ideal to take a couple of trips into the dungeon: one to get all of the treasure, then leave and save, and then return again to actually do the boss challenge. Some people have mentioned grinding to get Jessica the Oomph spell unlocked, which she earns at Level 19. I did it without Oomph. My levels were 20, 20, 18, 18. Just heal with Angelo and Hero, Yangus attacks, and Jessica defends. Raising tension wasn't worth it because Yangus kept getting put to sleep when near or at max tension. Raising defense with Kabuff worked for a bit but wore off and just defending was good enough while having Angelo or Hero heal when HP got too low or a desperation attack was used. |
|
| Minion Minder | StrategyNot much to say here, actually. Use single target attacks on Don Mole, ignoring the other moles. Feel free to use Kabuff the party and Sap the boss. Let Angelo do the healing, Hero can support or attack, Yangus on full offense, and Jessica using single target spells. If you're lucky, the effects of the harp will help more than hinder as well. |
|
| Heroic Heart | StrategyAnother challenge that wasn't too difficult to accomplish. Healing is allowed, but any other status effect, including tension with Psyche Up, is not. Thankfully, tension is really not needed at all. Just attack and heal! |
|
| Dhoulmagus Defeated Despite Having Haphazard Healing | StrategyThis challenge is notable because it's the only boss challenge with a level requirement in that you must defeat both forms of the boss back-to-back without having Multiheal, Omniheal, or Hustle Dance. Hustle Dance is unlocked at 100 skill points in Jessica's Sex Appeal so it is unlikely that this is an issue unless you are ALL IN on that category (which is not a good idea anyway). Omniheal is a Hero only spell from 82 points in Courage, so that is also unlikely to be unlocked without grinding. Multiheal is the spell of primary concern by ensuring Angelo does not exceed level 30 before or after the first boss fight.When I first saw the requirements for this achievement, I was at level 24 on Angelo after having gone to the Dark Ruins and needing to go to Argonia to get the mirror after escorting Prince Charmles. By the time I got to Dhoulmagus, Angelo was level 29. Since this is two boss fights in one, dying to the second form allows you to refight the second form only, which locks you out of this achievement. Fortunately, if you are going for Peerless Protector anyway, this won't be a problem. Just make sure you save before the boss fight. The achievement is awarded before the experience points from the second battle. So, Angelo can be just at level 29 going into the fight and as long as he doesn't level up in the first phase, this should be no problem. I had some difficulty initially because my levels were a bit lower (29/29/27/27). I did some grinding at the pool just before the door to the boss until Angelo hit level 29. The battle went much better. Having magic waters was very helpful as well, since Hero and Angelo were very focused on healing with Mid- and Fullheal. |
|
| Magic Must Meet Magic | StrategyHaving Hero with Zap and a Ring of Awakening is very helpful. Bounce to prevent Kasnooze landing on Angelo helped too. I had Yangus holding Cheiron's Bow from Rydon Tower to help with maintaining health, since Yangus can't do much else. Hero without Zap will make this very slow though. However, if you are working on maxing Courage for Masterful Mettle (and you should), you'd probably have Zap unlocked by this point anyway. |
|
| Fiendish Friends to the End | StrategyI manually tracked the health of the bosses on paper. Red Horn has 3100 HP and Blue Fang has 2630 HP. I ended up messing up the first time because I missed the damage Hero did to Red Horn when trying to equalize their HP and made an estimate that must have been too low because I inadvertently killed Red and couldn't kill Blue in the same round.Second attempt was a success. I used Psyche Up with Hero, Yangus, and Jessica to 50, and used Hero and Yangus to do physical damage to each of the bosses (they both do equivalent damage of approximately 400 HP) while Jessica did Kacrackle to do ~400HP to both simultaneously. Near the beginning of my second attempt, Red Horn tensioned up to 50, so I put in the monster team that won Rank S and they teamed up on Red Horn to knock them down to 374 HP. Once my party tagged back in, we focused on Blue Fang. Then, while Jessica tensioned, I chipped them both to the mid 200s in HP. Unfortunately, Jessica died so while Angelo revived her, I tensioned Hero and Yangus to 50, didn't get knocked over by Blue, and so they both did 400+ HP to each boss in the same round, unlocking the achievement. The forum for this achievement mentioned using Shining Shot with Angelo, but I hadn't unlocked that skill yet (88 skill points on the Bow category). They were able to do 900+ damage while tensioned. |
|
| Hellhound Harrier | StrategyNot a much of a challenge in the strategy sense. There are four fights that are required. Hellhounds are located inside the house as soon as you enter, each room in the cellar, and then outside the cave after the events inside. There is no measurement notification for this one. So make sure you fought three packs of hellhounds before heading to the cave behind the cottage.It is also your last chance to get the four items that can be found in Marta's cottage (needed for Superbly Stone Cold Treasure Tracker) and barn so make sure you check with Nose for Treasure to confirm! |
|
| Supreme Swashbuckling | StrategyI only attacked with Hero equipped with a sword and used Angelo to reduce Crow's tension with Sarcastic Snigger when needed and support healing. I also put a Cheiron's Bow and Rune Staff on Yangus to do backup healing and raise team defense. Jessica should cast and maintain Sap, Oomph, and Acceleratle. Hero's Psyche Ups were only to 20 most of the time because Crow would wave of ice very often. I was able to get to 50 on occasion when I felt the turn order was appropriate. |
|
| Bruising Big Bird | StrategyNot much to say about this one. Just don't use attack spells. I had Hero focus on big healing, Yangus did Psyche Ups to 20 tension then attack, Jessica Oomphs Yangus before his attacks and supports with Hip Drops or other physical attacks, and Angelo Kabuffing and Multihealing between waves of ice. Empyrea did a LOT of waves of ice, much more than Captain Crow, so I had to keep tensioning at 20 rather than try to get to 50. Consider support healing with Cheiron's Bow and Kabuffs with the Rune Staff also, if concerned about MP. |
|
| Gemonstratable Superiority | StrategyGemon has 3960 HP and at least 2000 HP damage must be done with four attacks greater than 500 HP. The wiggle room of 1960 HP should be enough to experiment to see what damage numbers you can get without going too high or too low so that you can adjust your strategy during the course of the battle. Thankfully, Gemon does not have wave of ice, but does summon dark turkeys which can knock characters over with their intimidating scream, causing a loss of tension.In my setup, Yangus was the primary damage dealer with tension at 50, Oomphed, wielding a Bardiche of Binding at level 35, and Gemon sapped once, doing 540-580 HP at a time. Other party members supported with Kabuffs, Insulatle, Acceleratle, and multihealing with the spell or Cheiron's Bow. Hero and Jessica also helped to eliminate additional monsters, prioritizing dark turkeys. Insulatle didn't seem to be too big a factor in the battle. Sap is a HUGE priority to ensure that Yangus' damage will exceed 500+ HP when at 50 tension. If Gemon's defense returns to normal and their Bounce is not active, reapply Sap immediately. After getting four rounds greater than 500+ HP damage, I let Sap lapse on Gemon to see what Yangus' damage would be. At 50 tension, I got only ~450 HP damage on them. So Sap is very important. Of course, party compositions vary so things can be different for others. Thankfully, this battle isn't too demanding and difficult to maintain health in so you have time to experiment and ensure that you can do the necessary damage. |
|
| Deliciously Cheesy Win | StrategyThe last hit must be with an attack cheese. Remember that only two cheeses can be used per battle. Evil Sir Leopold has 4260 HP. Track damage and make sure you use the cheese as the final attack. In my experience, I overshot it once with a 20 tension Yangus that had Oomph in effect. The second time around, I had chipped damage down once Leopold was at 500 HP or so and got them down to 19 HP remaining. I had a plain cheese and super spicy cheese on me. The plain cheese only did 9 HP of damage... Only 10 HP remained. The super spicy cheese did 77 HP of damage. |
|
| Hermano a Hermano | StrategyMarcello's use of wave of ice seems very random, making it tough to keep Angelo's tension up. I resorted to going only to 20 tension then attacking mostly, though I would get interrupted a lot. It could have been that I was just unlucky as well. I did manage to get up to 50 tension a couple of times too. Your mileage may vary. Jessica should definitely Sap once or twice. Hero is the healer this time since Angelo is busy. Yangus will do nothing unless you have some support items like Cheiron's Bow and Rune Staff. |
|
| Cook Cooker | StrategyThese are just a pair of Boss Trolls with slightly higher HP. All I did was tension up to 50 on Hero and Jessica and cast Kasizzle while Yangus and Angelo both supported with Kabuffs and Multiheal with spells and items. Two casts of Kasizzle from both casters killed the trolls in the same round. |
|
| Smiting Satan | StrategyThe first of three boss challenges in a row at the Black Citadel.Tensioning to 100 is a one-in-three chance, but this is further complicated by Rhapthorne doing waves of ice... The timbrel of tension can be a huge help here as it will be for the rest of the game. I managed to luck out and get the 100 tension and then an attack on the following round within the first three rounds of combat. On round one I psyched up Hero and used the timbrel with Jessica. Round 2 I psyched up again and used timbrel, but Jessica went first. Thankfully Hero did hit 100 tension. Round 3 I hit Rhapthorne with an attack and primed the achievement to unlock once the battle was completed. Overall, luck will play a big factor here. You could wait to hit your first super high tension for this fight too, but that shouldn't be necessary. Good luck to you! |
|
| Marble Match Mayhem | StrategyPart two of the three boss challenges.At the start of the battle, the achievement is primed. Ensure that each character targets only their own statue. Since my Jessica only had a whip in their inventory, I had her use the timbrel of tension every round until the other characters destroyed their own statues. There shouldn't be risk of targeting another statue if the character destroys their own and then defends in the following round. The nice thing about this strategy is that Jessica is getting her tension up to 50 or 100 before attacking her statue. I used Kafrizzle and did over 700 HP damage in one shot. Here are the HP values for each statue: - Hero: 545 HP - Yangus: 505 HP - Jessica: 385 HP - Angelo: 467 HP |
|
| Rocky Rumble: Red vs. Blue | StrategyThe final phase of the three boss challenges.Some preparation is in order before heading to the Black Citadel. You will need the My Three Golems monster team: Brickman (from Maella region), Goldman (from Neos), and Stoneman (from Dark Ruins heights). Definitely complete the monster arena fully so that you have two teams and maximum number of monsters that you can add to your reserves. The Golems fusing together into Mazin is RNG and they have to be the one who defeats Ruin. The Golem team will have four rounds so you don't want Ruin's health to be too low that they defeat him without fusing, nor be too high so that Mazin can't kill Ruin either. If they can't win the battle, you have a LONG runback to try again. Fortunately, any boss challenges completed prior to this one can be ignored in the runback which can potentially alleviate some pain points. If this is the sticking point for completing Black Citadel, it may be a good idea to grind some levels at Slime Hill to make the runback quicker... Ruin has 3800 HP. My first attempt was a failure because I forgot to track the HP and my estimations were way off. I ended up having to do a runback which went decently quickly because my levels were already high from grinding metal slimes on Slime Hill for their achievements prior to Black Citadel. In my second attempt, I took down Ruin to around 950+ HP and then called in my Golem team. I was fortunate that they decided to fuse into Mazin on the first round. They then did a normal attack for 311 HP damage on round 2 and went for, and landed, a desperation attack on round 3 for 900+ HP damage, killing Ruin and unlocking the achievement! |
|
| Savvy Sage Summoner | StrategyThis is labeled as missable because shield is permanently destroyed. If you die after destroying the shield and then save, you will lose this achievement because the fight starts at the second phase. If you are going for Peerless Protector, this shouldn't be an issue though. If you die on second phase, reset and try again. This unlocks as soon as you break the shield if you did it within 14 turns, so if for some reason you exceeded the number of turns, just reset and try again. If you are having problems, gain some levels to be able to resist the spells and physical damage enough to be able to heal fully at least every other round or two. Worst case, if you can't get this within 14 rounds, you definitely will when you do it again for the good ending. |
|
| Efficient Evil Eliminator | StrategyThis is not missable since this boss will be fought again in the post game. If you can't get it within 20 rounds, you absolutely will after completing the post game dungeon, the trials, and the other grind achievements. Timbrel of tension will pay dividends for dealing out damage and keeping health up. Good luck! |
|
| Heavy-Handed Healer Hero | StrategyPost game boss challenge time! Kabuff with Yangus' rune staff and Angelo's spell. Multiheal with Yangus' sage's stone and Angelo's spell. Jessica should timbrel of tension and Sap the boss. Hero will Psyche Up and then attack with Multithrust or other powerful technique. |
| Badge | Title | Strategy |
|---|---|---|
| Peerless Protector | Save often. Use multiple save slots. If you have a full party wipe, you will need to reset and load the last save. The main danger with this achievement is the early game and first couple of dungeons. The mid game can also be dangerous, particularly after getting the ship, because enemies in some areas will start to hit harder while your equipment and levels won't necessarily be great, especially if you are working on Hoarder Hero. As discussed in General advice, if you split your dungeon dives between clearing out treasures and boss attempts, your party will strengthen up more and more from the repeated dives, making this achievement's requirements less risky over time. | |
| Hoarder Hero | It is very easy to not ever sell anything. Unfortunately, this does make money harder to come buy when you need to get new equipment for the team or ingredients for the alchemy pot. Truly this was only an issue in the early and mid game though. By the end game, you will have brewed a lot of great equipment for the team. In the postgame, this achievement matters no more as it is unlocked during the normal ending. Sell away, if you wish, but money probably doesn't matter at this point. |
Back to Achievement Categories
| Badge | Title | Strategy |
|---|---|---|
| Formulated Felony | Make the Thief's key in the alchemy pot so that it gets added to both the alchemy recipes list and the item list. | |
| Make a Key-line for All Those Locked Chests | Obtaining the Magic key will add it to the item list. Additionally, it will make a bunch of new chests accessible with more unique items to further fill out the item list. | |
|
|
Great Goo-grater, Cretan Kibosher, Slaughtering like a Sabrecat, Hacks-R-Us, Murky Monster Masher, Astonishing Antagonist Adversary, and Bestiary Bester | This GameFAQs guide of all enemy locations in the bestiary is pretty good! I highly recommend it for filling out any of the blank spots. If you are thorough in fighting encounters as you progress through the game's story, you will probably have very few gaps by the time you hit the postgame. The only things that were really missing by the time I got to the post game, other than the Dragovian trial enemies, were monsters in the ocean and beaches. Crayzee proved to be problematic initially, as I was searching the beach south of Argonia at night. However, it never seemed to show there, so I feel like that was the wrong place. I did find Crayzee fairly quickly once I Zoomed to the Pirate's Cove and whistled for encounters at the entrance. Foul Anchor also caused some problems because they seemingly can just appear anywhere in the ocean. I found them when sailing from the unexplored island where I searched for the Abyss Diver heading north toward the Dark Ruins island. |
|
|
Visibly Notorious, Monsterously Magnifico Monster Mauling!, Defeated a Deck of Denizens, and Eight the Great | Defeating the notorious monsters can be accomplished over the course of the game, though it may be better to wait until post game to finish the majority of them. As mentioned in General advice, I used this map of every monster location to hunt them all down. This does NOT include the post game monsters and Hev, however. |
| True Hev-y Weight | This is a set of six notorious monsters that are only available after having completed the game. The very last monster, Hev, is a metal king slime that appears only when chosen as one of the items after winning against the Lord of the Dragovians. The new notorious monster appears south of Trodain Castle near a small lake. Hev is definitely a good addition to one of the teams! I even used Hev with the two heal slime monsters, Healer and Curer, as a part of my strategy for the final Dragovian Trial. The other five monsters are not on the map of notorious monster locations so I have included screenshots of where I was on the map when I found them, as other resources have not been specific enough in some cases. The spot that my party is located is the location of the monster. Note that some of these monsters may be in more than one location and I am only showing where I found them. If they are not in the area in the screenshot, enter a town and return to see if they show up again. Bishop, the Wight High PriestFound to the east of Simpleton in a forest north of the road at night only Frillsaur, the Jumbo DilophosaurLocated near Tryan Gully north of the bridge containing the Arch-Archdemon and close to where you land if using the Godbird at daytime only Gryphus, the Gryphon GeneralLocated on the plateau accessible only by Godbird between the Mystical Spring and the Peddler's Tent, near the chest that contains a Flametang Boomerang, at daytime only Mornstar, the Headless FlailsmanLocated in front of the cave the leads to the snow region/Orkutsk at night only Spot, the Greater SabrecatLocated on the road between Chateau Felix and the plateau to the Dragovian Path at daytime only |
|
|
|
Got These Tchotchkes, Knick-Knack Ruck Sack, Capture the Swag, Merching Ever Onward, Item Miser, and Cache Cachet | None of these are missable as any of the potentially missable treasure chests (Neos and Marta's cottage) in the game only contain items that can be obtained via other means. The Black Citadel map, if missed, is not counted in the items list and so you won't miss the item achievements. In any case, if you are following along with the 100% walkthrough guide carefully, you won't miss any chests and thus won't miss any unique items either. |
|
|
Beginning Brewer, Middling Mishmash Maker, Distiller of Desireables, Fillet of a Fenny Snake, In the Caldron Boil and Bake, Belaboured Blender of Brewing Brilliance, and I Did 'Em Alchemyself | One of the primary reasons why I started working on a guide was because I wanted a better way to track alchemy recipes and have a complete listing of all 184 recipes in one place as other guides seemed to always miss one or two. The Alchemy Recipe Checklist I created on Google Sheets is designed to give you a way to check off your progress while telling you how many you have completed in total. Simply make a personal copy of the checklist into your own Google Drive account and you'll be able to track your progress on these achievements as you play. The reason why I Did 'Em Alchemyself is missable is because the Icicle Dirk is limited in availability. There are only two of them in the game and BOTH are needed for recipes. If you have been working toward the Hoarder Hero challenge achievement, this should not pose an issue though, since the main way these weapons could be lost is by selling them. The only other issue would be duplicating one of the recipes. If you make use of the Alchemy Recipe Checklist however, you shouldn't have any worries of that either. Late game recipes will require orichalcum and slime crowns, which have pretty terrible drop rates from some elusive enemies. Fortunately, you will get 6 orichalcum throughout the natural course of the game and you only need 1 more to complete all recipes. Pandora's box have a "common" drop rate for orichalcum at a rate of 1/128. Metal king slimes can also drop orichalcum but the drop rate is 1/256. As for slime crowns, there are two provided normally in game and you only need 1 more. Metal king slimes have a "common" drop rate for slime crowns at a rate of 1/128 so hopefully you'll get lucky during your metal slime grinds. |
| Caseiculture Couture | This should come naturally as you complete your alchemy recipes list achievements. If you are making use of the Alchemy Recipe Checklist, you won't have any issues getting this achievement knocked out as you progress through the game. | |
|
|
High Up for Low Deeds, Fountain Find, Lovely Litter, and Rising Recipe Retrieval | These four recipe items are found during your travels throughout the game. The first one can be found right away but the other three only appear after specific story events have occurred. Thief's Key recipeFound in the Farebury church bell tower at nightImp Knife recipeFound at the fountain in Trodain Castle's courtyard after Dhoulmagus' defeatEros' Bow recipeFound at the Pickham watchtower after obtaining the shipDragon Slayer recipeFound behind the elevator to the Lord High Priest's residence in Savella Cathedral after the Black Citadel appears |
|
|
Platinum Protection Plan, Fast as a Falcon, and Gorgeous Gringham Gal | It is ideal to wait until Baccarat's casino is reopened before working toward getting these. This is because Roulette is probably the most efficient way to gain tokens (aside from outright purchasing them). Roulette strategyIf you can at least get 22000 tokens, you can cover the first third of the board. As illustrated in the screenshot below, this includes 0-9 and all of the spots between them, the positions between 7-9 and 10-12, as well as the arrow that covers the 1-9 region. If the ball lands on 1-9, you will gain 52500-66500 tokens depending on where it lands, which is a considerable gain. While you can earn just enough to get the three items needed for their achievements, you will need more tokens in order to get alchemy recipe ingredients as well. Using the 100% Walkthrough guide, I needed 502,000 tokens for everything it recommends, which won't take long with saves/resets. The guide also provides pointers for getting to the 22000 tokens amount that will make roulette much less painful since money is probably tight anyway without being able to sell for Hoarder Hero. Happy gambling! |
Back to Achievement Categories
My overall strategy when grinding is as follows:
-
Combat: Once you have the Godbird's soulstone, you can fly to Howlwind Hill, also known as Slime Hill, located just north of Rydon's Tower. All slime family enemies are here, including metal slime variants. Just stay in one spot, Whistle for an encounter, and fight! Mercurial/Lightning Thrust and Hatchet Man/Executioner are your friend. Unfortunately, after completing the Black Citadel, dark slimes and sabrecats will also appear here, which can slow down the amount of metal slimes that make an appearance... Prior to the Black Citadel, metal slimes seem to appear frequently at all times. After Black Citadel, they only really seem to appear most at night. In other news, I seemed like I was able to intimidate more enemies during the postgame so I built up my intimidate count here too. I did check out the unexplored island and found the liquid metal slime appearance rate to be too little compared to Slime Hill. Getting the Metal King Boomerang can help with the regular metal slime groups that show up too. I was able to take down a 6 out of 9 metal slimes using that boomerang along with Executioner and Angelo with a metal king sword.
- I am a big fan of seeing this encounter which seemed to show up a decent amount during my time on Slime Hill before the Black Citadel:
- I am a big fan of seeing this encounter which seemed to show up a decent amount during my time on Slime Hill before the Black Citadel:
- Alchemy brewing: Before getting the instant pot, once I got the Hilltop Hut zoom spot unlocked, I use the fenced in area outside the hut to run in circles while fast forwarding the emulator at 300%. This was also a useful spot for speeding up Medea's water consumption when working on getting Mystical Spring scenes for Enduring Endearment.

| Badge | Title | Strategy |
|---|---|---|
| Basic Brazen Brewer | You got an alchemy pot! Thanks, King Trode! Now it is time to do your ABCs: Always Be Cooking! If you always have something in the pot, even repeated brewings of medicinal herbs, you will easily get the 30 brews completed before the improved alchemy pot is created. It is missable because if you get the improved alchemy pot before brewing 30 times, this achievement will be locked out. | |
| Stewing Stalwart | Cooking 100 items in the improved alchemy pot seems like a lot, but if you are doing your ABCs (Always Be Cooking), then this should come with ease. It's missable because getting the final upgrade in the postgame will lock this achievement out. But since the time between getting the improved pot after getting Medea back from Red and the postgame unlock of the instant pot is a VERY long time, this shouldn't be an issue if you are persistent in getting new recipes unlocked and cooking repeats. | |
|
|
Masterful Mettle, Straight an' Narrow, Powerful Puff-Puff Professional, and Je Ne Sais Quoi | Each character has a special skill category unique to them that isn't related to a weapon which unlocks special abilities and passive skills. This guide won't provide specific guidance on skill point distribution. Over the course of the game there was fairly even distribution between these skill categories and the weapons I selected to focus on for each character. Jessica's sex appeal and Hero's courage categories have very useful abilities such as monster charming and the Zap spell. Angelo's snigger/chuckle are also useful for some bosses to reduce their tension, though he tends to be more of the party healer, especially in the end game. I made heavy use of the Spells and Skills guide on GameFAQs when I leveled up to determine the best way to distribute my points. |
| Peerless Punch 'n' Punt Prodigy | Before I started the game, I planned out the particular skills that I would max out to get all of these grind achievements. For this fisticuffs achievement, I decided that I wanted to give it to Jessica for her Magic Burst ability, which was very useful during the Dragovian Trials. Since I put all of my seeds of magic and wisdom into Jessica (that weren't used for alchemy recipes), her magic bursts were particularly powerful and resulted in amazing damage rolls especially at high tension. Of course, this is a very opinionated and subjective topic so feel free to put your skill points for fisticuffs into the character of your choice. Your timing on when to max it out can very as well. Perhaps you'll make this the very last skill point achievement to unlock? It's up to you! | |
|
|
Gainful Guv, Heavy Axe-cent, Martial Mage Master, and Truly Tremendous Templar | Pick weapons that you want to use for your characters based on the abilities that you'll want to use for the end game. Take time before you start playing to plan out what weapons that you want to invest in. Make use of the Spells and Skills guide on GameFAQs when you are planning as well as when you level up. My personal recommendations are axe for Yangus (Helm Splitter is a VERY useful skill), whip for Jessica, and bow for Angelo, primarily for boosting attack power with those weapons when I didn't want to do anything else but attack enemies during grinds. Hero is, unfortunately, locked in to using sword because of the GigaGuv achievement requirement, though that is entirely dependent on how much time and effort you want to put into getting seeds of skill and levels to invest in other weapons for Hero. I personally prefer the spear (Multithrust and Mercurial/Lightning Thrust are so good) so I did invest some there. Again, this guide won't go into specific details on how to invest your skill points and the achievements allow for flexibility, so do what feels the most comfortable for you. My biggest advice is that not planning ahead WILL result in significant time investment later to grind for levels and seeds of skill. |
| GigaGuv | Invest 100 skill points each in Hero's sword and courage skill categories. Easy, right? | |
| Birthrite | You need to get Hero to level 65. That means metal slimes. Lots of them. | |
|
|
Quadratic Cutthroat and Octagonist | These will probably occur naturally over the course of your gameplay. If you are having trouble, Slime Hill could be a good place to encounter 8 regular slimes. Make use of spells that target groups or all enemies. A high level and high tensioned Jessica slinging Kacrackle or Kaboom could make this even easier in the late game, as long as the enemies don't run away. |
| Puff-Puff Proof | A battle achievement that is RNG, requiring an enemy that can do Puff-Puff in combat to attempt it on Jessica. Probably the earliest instance where it could happen is the Witches near Red's place. | |
| Idly Breaking the Fourth Wall | This achievement centers around the things King Trode will say when looking at the Battle Log (accessed with the Select button). Trode has priorities for saying certain messages and can block the desired speech that triggers this achievement. If he complains about having too much money, make sure you spend some to get it back down. If he wants you to tension more, go do some battles and purposely raise tension until he no longer says that message. For the achievement, you want to have at least 20+ hours without having intimidated or flee battles too much. Trode will potentially say the message after completing the Venus' Tear/retrieve Medea quest line. A signal that you are on the right track is if Trode calls the party the "Quartet of Questionable Quickness" while working on getting the Venus' Tear. I personally got it at 28+ hours thanks to a lot of time working on the guide's notes while leaving the wonderful overworld music playing in the background. Once this is done, you can then steadily work toward Terrifying Trodanian but avoid intimidating too much prior to this unlocking. The message that will unlock the achievement"I'm sure this doesn't apply to you, but leaving the console power on while you go wandering off to do other things is most uncouth! It gets quite hot in here, you know!" |
|
| Super Saiyan Squad | Have all characters reach max tension at some point in battles. It doesn't have to all be in one battle because the game tracks which characters have reached 100 tension. Characters can only reach 100 tension once some threshold is reached (some reports of a character reaching 50 about 10 times, or the party doing a cumulative 90 Psyche Up actions). You know that a character can go beyond 50 when the game does not say "xxxxx has reached a state of high tension" at 50 tension. The first time a character can hit 100 tension, it happens without fail. Subsequent times have only a 1/3 chances of success for any other character. | |
| Guv's Globetrotting | If you are grinding out your alchemy recipes, you will reach this milestone of 200 miles without any difficulty over the course of the normal gameplay. | |
| Combat Colossus | Another achievement that you should easily reach over the course of normal gameplay. Just fight, not necessarily winning, 1000 battles. | |
| Fiend-Fighting Firebrand | The trend of naturally occurring milestones continue on here. Simply kill 2500 monsters. This will certainly take some time, but should be accomplished before the end of the normal game if you are fighting all encounters. | |
| Terrifying Trodanian | The main thing to keep in mind with this is that you don't want to start work on this substantial threshold until after finishing Idly Breaking the Fourth Wall. Intimidating 1000 monsters is a lot and is best saved for after saving the Dragovians. I noticed while working on this that attempts to intimidate monsters were failing on Slime Hill before Black Citadel. However, after finishing the first part of the postgame, intimidation never seemed to fail. I was also able to run on the first try every time. Maybe it was just luck, but I think the game is designed to remove this pain point when you are in the postgame. | |
| Victoriously Vicious | Unlike Combat Colossus, you actually need to win 1000 battles. Again, this should occur naturally over the course of normal gameplay. | |
| Tireless Terminator Tycoon | Now THIS was an actual grind. By the time I finished the bestiary, other than the remaining Dragovian Trial bosses, I was just over three quarters of the way done... oof. Going to Neos and Whistling for gold golems is what I ended up doing and it didn't take very long to get the last 30k gold I needed. | |
| Overkiller | Perhaps you'll be able to unlock this near the end of the game, before the postgame. I was not able to get it until during a Dragovian Trial battle though. Since you have to fight a single enemy that will be able to take at least 3000 HP damage in one round, bosses are the primary means to reach this threshold. The trouble with bosses are their disruptive waves of ice. Timbrel of tension and psyche ups can be useful in raising tension quickly. Multiple hit skills or very high damage dealing spells and abilities with tension stacked by multiple characters are the ideal way to ensure you hit at least 3000 HP. In my experience, I was able to unlock it with Jessica psyching up to 50 tension and using Magic Burst with a nearly max MP on one of the Dragovian Trial bosses. This skill could also work on any other enemy since you'll probably easily exceed 3000 HP. I was also able to hit over 3000 HP of damage by Hero doing over 2500 HP with Dragon Soul and the Dragovian King Sword while Yangus did another 500+ HP with a 50 tension attack in the same round against the Ultimate Dragon. |
|
| For the Love of Cheese | I'll spoil this here: this was my final achievement before getting the good ending achievement and mastery of the set. At first this seems like it would be a slog, but it actually isn't all that bad, especially with fast forward and going for this in the post game. You can buy fresh milk and rennet powder in the indoor bazaar in Argonia. Brew up a bunch of cheese in your instant alchemy pot. Whistle for encounters and use two cheeses. It'll take at the most 50 encounters and 100 cheese. The reason I say "at the most" is because of a quirk of the game tracking the cheese use, if you use a cheese but the last enemy is defeated before the cheese is actually consumed, it still counts toward the measurement. A bug in the player's favor! Happy grinding! |
|
| Meatshield Mastery | This achievement taught me to love to use my monster teams, as I hardly interacted with this system in my casual playthough on the 3DS. To even have the feature of summoning your monster team(s), you'll need to complete Rank E of the Monster Arena and unlocking the Comrade Conjurer achievement. Getting to 50 summons of the team will not take very long at all, despite the MP cost to do so. My primary team for most of the game, before going for any other arena ranks after Rank E was composed of Hackzilla, Hazel, and Goldman. When I came across an encounter that was relatively simple on the overworld, I would summon the monster team to handle it. Once I got into the later stages of the Monster Arena, I began to see the utility of teams with deathblows and abilities, and that was how I learned to love my monsters. | |
|
|
Smelterweight and Oxidizer | Slime Hill is the place to be! If you are doing postgame content at all, you will be going here and taking advantage of the metal slimes that frequent this place. As stated above in the general guidance for grinding, this is best accomplished before completing Black Citadel since doing so afterword adds dark slimes and sabrecats into the encounter mix. You'll probably get tired of grinding, like I did, and complete the normal game before Hero reaches level 65. That's fine as you'll still unlock both of these achievements before that happens. Black Citadel at level 65 is certainly overkill too. So, when you are grinding metal slimes in the postgame, take advantage of running or intimidating non-metal battles and only fight at night, when metal slime family monsters appear more frequently. |
Back to Achievement Categories
| Badge | Title | Strategy |
|---|---|---|
| Side Hustle | Dodgy Dave's alchemy item exchange is available immediately after getting Medea and the alchemy pot back. Dave will ask for items, the first being a special medicine. If you have been following along with the 100% walkthrough guide or at least doing your ABCs (Always Be Cooking), you'll probably have a special medicine by this point and can afford to cough one up to get Dave's reward as well as this achievement. The 100% walkthrough guide recommends waiting to continue to trade alchemy products to Dodgy Dave because you won't be able to complete all of the requests at this point in the game. I agree with this based on personal experience because I traded an item or two that I needed for later recipes and forgot and wondered where the missing ingredient was. Either note it in your personal Alchemy Recipe Checklist if you continue to exchange now or wait until you can finish the rest of the requests in the postgame. | |
| Hustlin' Entrepreneur | Trade in the remaining requested items until Dodgy Dave loops back to the beginning to pop the achievement. The 100% walkthrough guide has the details on what they want and the rewards you'll get. | |
| Medaling with Minnie's Mission | This is awarded when turning in your first batch of mini-medals. You need 28 medals to get the first reward and, if you are following along with the 100% walkthrough guide, you will have that by the time you have the ship and can go to Princess Minnie's castle for the first time. | |
| Transfer Tiny Trinkets, Get Golden Goods | The next target requires 52 mini-medals. As before, the 100% walkthrough guide identifies the moment that you should have this amount and when to turn it in to Minnie, usually timed with a new exploration option that allows for more treasure hunting. | |
| Magnificent Metals from Miniature Medals | Now you need 83 mini-medals. The reward is arguably and has the potential to be the best of the bunch. | |
| Fashionably Flailing for Finding Falderals | The end is here after delivering 110 mini-medals. Congrats on earning your reward. Personally I find the achievement the better reward than the flail, but I don't have much experience with using that weapon since I prefer the axes for Yangus. |
Back to Achievement Categories
I appreciate that this achievement set got me to engage with the Monster Arena and recruiting notorious monsters to form effective teams for combat. I didn't leverage this system in my 3DS version casual playthrough so I have a greater appreciation for what the monster teams can do for the game play now. In general, it is ideal to get the arena open as soon as you possibly can in the story and rank up as you progress rather than save it for the end. The 100% walkthrough guide has a call out for when they focused on getting the entire Monster Arena completed, but I got up through Rank D earlier than they did. It is up to you, ultimately, on when you use the arena's amenities. Nothing can be missed here, so engage with it as you desire.
By the end of the game and during the postgame, I had the following two teams:
- My Three Golems: Consists of Brickman, Goldman, and Stoneman. It is required for Rocky Rumble: Red vs. Blue but is also an excellent tank and damage dealing team whether they form up or not. It's also perfect for the opening rounds of the Dragovian Trial battles.
- The King and Us: Consists of Hev, Healer, and Curer. They typically open with using their Maximaster move, which revives all dead party members, fully healing the characters as well, and then Kabuff-ing the party while Kasap-ing the enemy party. They aren't much better beyond that other than that they are very evasive and can keep themselves healed up, but it may be better to just swap the character party back in right away to take advantage of the Kasap'd enemies.
| Badge | Title | Strategy |
|---|---|---|
|
|
Memonstrous! and Ragazzo! | You should see Morrie standing above the entrance to the Monster Arena as you head from Ascantha to Pickham. Talk to him to receive the memos documenting the initial notorious monsters needed to be recruit to be able to enter the Monster Arena. Both the 100% walkthrough guide and the map of notorious monster locations can help you find the monsters needed. You won't be able to complete this until you arrive at Trodain castle, where the notorious slime resides at the entrance. |
| Play With Yourself | After making your initial monster team, it is good to swing by Farebury and pick up Hackzilla, the Axoraptor to the north of the town. Swap out the slime for Hackzilla. You should then be able to easily win Rank G and Rank F matches to get this achievement. Winning Rank F also causes more notorious monsters to appear in the overworld, allowing further progress in the arena and fighting more distinct notorious monsters as you wish. | |
| Comrade Conjurer | I added Scorpius and Hazel to my team with Hackzilla and won Rank E. Both are conveniently located near Red's Villa. Goldman is also an excellent monster over Scorpius, if desired, though that requires the ship so you can get to Neos. This allows you to start working on Meatshield Mastery too, so it is good to get this earlier on, perhaps after getting the ship or during Magic Key treasure cleanup. | |
| Fresh Fiendly Friends | Completing Rank D in the Monster Arena adds even more notorious monsters to the overworld. This will allow even MORE progress in the distinct notorious monster achievements. This was a close match with Scorpius, Hazel, and Hackzilla, but they got it done. | |
| Two Team Taskmaster | This is the point where I let the 100% walkthrough guide give me a hand in forming the best team to wrap up the arena achievements. Outside Orkutsk, you can get Roborg on the way to the town from Marta's cottage. I managed it with other monsters mentioned earlier but if you waited until now, Roborg could probably solo and get through Rank D. You can then get Cybot near Orkutsk and Talos near Neos. This team should be able to complete Ranks C and B. Rank B is the toughest in the game and there will be some luck involved. This will unlock the remaining notorious monsters in the world and well as having a second monster team. Talos becomes a key member of the final monster team that will wrap up the arena. | |
|
|
Champion Challenger and Morrie's Magnifico Monster Master | With Rank B done, grabbing Octurion from the beach south of Argonia and Skeledoid from the Dark Ruins will make a fantastic team with Talos. Octurion will heal the team with Fullheal when needed (hopefully before dying...) and Skeledoid is very strong with two attacks per round with sleep touch. It was pretty much easy street for these final two challenges, though Rank S was scary close. I beat it with ~30 HP remaining on Octurion and the other monsters teammates defeated. I love that S Rank has Torneko, as well as Ragnar with Healie in it! You can even chat with them after the fight if you win! |
Back to Achievement Categories
In this section, I am only going to highlight the missable treasure achievements rather than discuss all of them, since there are plenty of other resources out there that already go into detail on this. The main thing to keep in mind is that a lot of the region treasure achievements will require revisits later, either with the magic key or ultimate key. So don't worry if you finish a scenario in a region and you don't have the associated treasure achievement unlocked yet.
One major note: Don't forget that mimics COUNT toward opening all treasure chests in a region or dungeon.
For convenience sake, here are the guides that are helpful in finding all of the treasures:
- 100% walkthrough guide on GameFAQs
- Overworld treasures on Dragon's Den
- Cow locations on Dragon's Den
| Badge | Title | Strategy |
|---|---|---|
| Superbly Stone Cold Treasure Tracker | This is notable because the location that has four missable treasures, Marta's cottage, is encountered about halfway through the region. However, you can't actually complete the region until you have received the ultimate key from Marta because of the locked area in the item shop in Arcadia. So, make absolutely sure that you have collected all four items in Marta's cottage prior to moving on to Orkutsk (Nose for Treasure is helpful here). Note that you do have to re-enter her cottage after your first visit there in order to check the barn for the mini-medal located within. | |
| Holy Hoarding, Hero! | The biggest issue here is that Neos is destroyed when the Black Citadel is summoned. Any items in the town are no longer accessible after this point. Fortunately, you have PLENTY of opportunity to ensure that you have all of the items before that event occurs. A common issue is the two birds that give you seeds on Savella island. Thankfully, the Overworld treasures map is great because it identifies their locations. Don't forget that this also includes all other islands that are not named or even mapped. In particular, the unexplored island in the southwest corner of the map has a chest AND a mimic, both of which need to be opened. |
|
| Daringly Depriving the Darkness of Dreary Duds | The only real missable treasure is the map of the Black Citadel. Make sure you pick it up before completing the boss rush and escaping the citadel. You can find the map to the left of the entrance. All other treasures will appear on Neos if you didn't find them, but the map will not. |