(WIP) Pokemon Emerald (Game Boy Advance) - RetroAchievements/guides GitHub Wiki

Guide by Paradise1
| Set Difficulty | 3/10 to beat, 7/10 to master, click for detailsLike many entries in the Pokemon series, beating the game is not too difficult, especially if you catch Rayquaza before the Pokemon League. In terms of mastery, this game is probably the hardest of the Gen 1-3 Pokemon games. This difficulty is primarily due to the Battle Frontier. To master the set, you'll have to get the Gold Symbol at all facilities, which is widely regarded as one of the most difficult tasks in the Pokemon series. Still, the difficulty is mostly strategy and grind-based instead of being mechanically difficult (with the possible exception of RNG manipulation). |
| Approximate time to master | 70-100 hours (median time: 83 hours) |
| Minimum numbers of playthroughs needed | 1 |
| Number of missable achievements | 28 |
| Does difficulty affect achievements? | Not Applicable |
| Hardest achievement of the set |
Pokemon Emerald Version is the final Generation 3 entry in the long-running Pokemon series. Released in 2004, the game serves as a sort of "definitive edition" of 2002's Pokemon Ruby and Sapphire. Players will once again find themselves in the Hoenn region, a tropical archipelago filled with bustling cities, treetop villages, an active volcano, and plenty of ocean. For the first time in the series, Pokemon Emerald introduces the Battle Frontier, a massively revamped postgame area where you can take on the toughest trainers in the game under challenging rulesets.
This set, originally developed by Blazekickn and Brian and revised by Gudra, has a whopping 197 achievements, worth a total of 2086 points. Needless to say, the set is very comprehensive and covers pretty much everything you can encounter in the game. Included is the main story, defeating all trainers and collecting all items, catching all of the available Pokemon, completing the game's sdequests, conquering the Battle Frontier, and
If you've never played Pokemon before, this might not be the best set to start out with. I might instead recommend Pokemon Red, Blue, Yellow, or LeafGreen. Of the four, LeafGreen is typically considered to be an entry-level Pokemon set and a great choice for beginners. Pokemon Red and Yellow also have RAGuides, as does Pokemon Crystal.
- I use the North American scheme for floor names. That is to say, the floor above the ground floor is the second floor, the floor above that is third, and so on.
- I'll typically be spelling Pokemon without the accented e, just to make things easier for me (and to prevent weirdness with hyperlinks in some cases).
If you've never played Pokemon before, this short video is an excellent introduction to the basic mechanics.
You'll probably be able to figure out most of the mechanics by playing the game, especially if you talk to all the NPCs you meet. But if you want a primer on some helpful mechanics, feel free to read through this section!
The Safari Zone is located near Lilycove City, and has a unique catching mechanic. See this Bulbapedia page for the specific details, and see this document for even more in-depth strategies.
In a nutshell, in the Safari Zone you will not use your own Pokemon, and instead face wild Pokemon yourself. You can't damage the wild Pokemon, and you can't use any Poke Balls besides the Safari Balls (equivalent to Great Balls) you are given at the beginning.
Once you enter the Safari Zone, you'll have 30 Safari balls to work with, and you'll only be allowed to take 500 steps on the overworld. If you run out of Safari Balls or steps, your safari will end, and you'll automatically return to the entrance.
When you encounter a Pokemon, you'll have four options. You can throw a Safari Ball, flee, throw a Pokeblock, or go near the Pokemon. The first two options are pretty self-explanatory, but the second two require some explanation.
Going near the Pokemon will make it more likely to be captured, but will also make it more likely to flee. Because of the way the math works out, this is almost never worth it.
Throwing a Pokeblock will decrease the Pokemon's flee chance. The amount the flee chance is decreased depends on how much the Pokemon likes the flavor (which depends on the Pokemon's Nature).
You can also place Pokeblocks into the Pokeblock feeders located near the grass in order to attract Pokemon with specific Natures who like the flavor. The programming on this is kinda weird, though, and it can be exploited to make catching Pokemon easier. More on that later.
So what's the most effective strategy for catching Pokemon? There are three main options:
Those who had fun in Pokemon Red may be familiar with this strategy. Basically, once you encounter a Pokemon, just throw balls until you catch it or it runs away. Don't bother going near, as this will make you less likely to catch the Pokemon overall.
This strategy isn't as bad as it may seem. Even with the hardest-to-catch Pokemon, you'll have about a 37% chance to catch them before they run away. For unevolved Pokemon (besides ones that don't evolve), this chance jumps to at least 67%.
For this list of Pokemon (click to expand), the brute force strategy has an 82+% chance to work, making it probably the most efficient strategy.
Pikachu, Psyduck, Doduo, Natu, Marill, Pineco, Snubbull, Shuckle, Remoraid, Mareep, Sunkern, Oddish, Geodude, Goldeen, Magikarp, Hoothoot, Ledyba, Spinarak, WooperThis strategy is a little more complex. If you want to fully understand how it works, this video and especially this document by Professor Rex shows the underlying mechanics. If you just want the best strategy, here it is:
Make some purple Pokeblocks Using any of these combinations. They don't need to be high-quality, so you can just speed up the emulator and skip the inputs to make it easier.
1 NPC: Pomeg Berry 2 NPC: Wepear Berry 3 NPC: Pomeg Berry, Leppa Berry, Razz Berry, Figy Berry, Spelon berry
There are other potential recipes, but these are the berries I'd recommend. Next, make some red Pokeblocks by using Cheri Berries with any number of NPCs.
Once you enter the Safari Zone, go to the section for the Pokemon you're looking for, and put the purple Pokeblock into the feeder. It will only last for 100 steps. If you find the Pokemon you're looking for in those 100 steps, throw a red Pokeblock at them. If all went well, there's a 99.99+% chance that the Pokemon's flee rate is now 0%, and you can chuck as many balls at it as you like.
In all honesty, if your goal is just to capture a Pokemon for the Pokedex, this is probably less efficient than just brute-forcing additional encounters as described above. Still, if you don't like getting frustrated and want a more consistent method, it might be worth giving it a try.
Here's the list of Pokemon with lower catch rates that are likely the best candidates for this method and the follwoing method (click to expand)
Dodrio, Pinsir, Aipom, Wobbuffet, Heracross, Stantler, Miltank, Seaking, Girafarig, Gligar, Golduck, Xatu, OctilleryThis strategy is a decent middle ground. Make 2 different types of Pokeblocks (just use basic berries like Cheri, Rawst, etc.). When you encounter a Pokemon, throw a Pokeblock. If it ignores the Pokeblock, throw one of a different flavor, otherwise begin throwing balls. This strategy will make the flee chance either 0% or 5%.
Ultimately, if your goal is just to catch Pokemon for the Pokedex, I would suggest using the brute-force method for most Pokemon, and make a few Pokeblocks for Option 3 for the Pokemon that are rare and hard to catch (Heracross, Pinsir, Gligar, Stantler, Aipom, Miltank, and Shuckle mostly).
- Keep the Type Chart handy to figure out what moves are super effective against what types. Note that the type chart has changed over the years, so make sure you're using the one specific to Generations 2-5.
- When a Pokemon uses a move that matches its type (or one of its types, if it has two), it gains a Same-Type Attack Bonus (STAB), which multiplies the move's power by 1.5. This is a very significant boost!
- There are two categories of attacking moves: Physical and Special. Physical moves use the Attack stat of the attacking Pokemon and the Defense stat of the defending Pokemon. Special moves use the Special Attack stat of the attacking Pokemon, and the Special Defense stat of the defending Pokemon. In this generation, whether a move is Physical or Special depends entirely on its type.
- Normal, Fighting, Flying, Poison, Ground, Rock, Bug, Ghost, and Steel moves are all Physical.
- Fire, Water, Grass, Electric, Psychic, Ice, Dragon, and Dark moves are all Special.
- Two moves (Weather Ball and Hidden Power) can change types - they will be Physical or Special depending on their current type.
- There are also Status moves, which raise or lower a Pokemon's stats, or inflict a status effect (such as Poison or Burn).
- Many attacking moves also have a secondary effect. For instance, Ember has a 10% chance to Burn the target, and Mud-Slap will always lower the target's accuracy by one stage.
- Stat buffs and debuffs have twelve levels, six in each direction. Most moves in this game will raise or lower a stat by either 1 or 2 stages. If it says a stat "sharply rose / harshly fell", it's 2 stages, if it just says "rose/fell," it's 1 stage. Once a stat gets to +6 or -6, it can't be boosted higher or lower, respectively. The modifications to stats given by each stage are listed in the table below:
| Stage | Multiplier |
|---|---|
| -6 | Stat x .25 |
| -5 | Stat x .28 |
| -4 | Stat x .33 |
| -3 | Stat x .40 |
| -2 | Stat x .5 |
| -1 | Stat x .66 |
| 0 | Stat x 1 |
| 1 | Stat x 1.5 |
| 2 | Stat x 2 |
| 3 | Stat x 2.5 |
| 4 | Stat x 3 |
| 5 | Stat x 3.5 |
| 6 | Stat x 4 |
- Evasion and Accuracy are slightly different. Basically, you need three boosts to double accuracy instead of 2, and 6 boosts to triple accuracy instead of 4. This also applies going the other direction. See this section in Bulbapedia for the full details.
- Pokemon have 6 stats: HP, Attack, Defense, Special Attack, Special Defense, and Speed.
- HP determines a Pokemon's Hit Points, which is how much damage they can take before fainting.
- Attack and Defense determine the damage dealt and taken by Physical moves, while Special Attack and Special Defense determine the damage dealt and taken by Special Moves.
- Whichever Pokemon has the higher Speed stat typically moves first. The only exception are moves that have a different "priority." Moves with a higher priority will happen before moves with a lower priority. For example, a Pokemon using Quick Attack will always move before a Pokemon using Tackle, regardless of which has the higher Speed.
- If two Pokemon use a move in the same priority tier, the Pokemon with the highest Speed will move first, as normal. For example, let's say two opposing Pokemon use Quick Attack and ExtremeSpeed. Because both moves have a priority of +1 (in this generation), the one with the higher Speed will move first.
- Each Pokemon species has a set of Base Stats ranging from 1-255 that determine what its stats will be. For instance, Chansey's base HP is 250, meaning it will have a lot of HP, but its base Attack is 5, meaning it will have a very low Attack stat. This makes certain Pokemon species suitable for certain roles.
- A Pokemon's Base Stat Total (the sum of all six stats) is a good approximation of how powerful they are. For instance, Weedle/Caterpie, very weak early-game Pokemon, have BSTs of 195, while Mewtwo, a strong legendary Pokemon, has a BST of 680.
- Typically, when a Pokemon evolves, its Base Stats will go up, making it more powerful.
- If your Pokemon's stats are debuffed, you can restore them by switching out to a different Pokemon and switching back. If your Pokemon's stats are boosted, this will also reset them back to normal. This will also cure temporary status conditions like confusion, but will have no effect on status conditions like paralysis, sleep, freeze, or poison.
- There are five status conditions in the game: Sleep, Paralysis, Burn, Poison, and Freeze.
- Sleep will prevent your Pokemon from moving until it wakes up. After 1-4 turns, the Pokemon will wake up, using the move it was trying to use on the same turn. Thankfully, sleep-inducing moves are somewhat inaccurate (except for Spore.
- Paralysis will cut your Pokemon's Speed to a quarter of its normal value, and the Pokemon will have a 25% chance to not be able to move at all during a turn. Paralysis doesn't go away naturally - you have to cure it using an item or go to a Pokemon Center. This condition is most often caused by Electric-type moves, but a few other moves can cause it too.
- Burn will half the damage done by Physical moves, and your Pokemon will lose 1/8th of its max HP after every turn. Burn can be cured with items or by healing at a Pokemon Center. This status is typically caused by Fire-type moves, and Fire-type Pokemon are immune to being burned.
- Poison simply decreases the affected Pokemon's HP by 1/8th at the end of each turn. Outside of battle, poisoned Pokemon will take 1 HP of damage for every four steps the player takes. Poison can be cured with items, or by healing at a Pokemon Center. Unsurprisingly, Poison is typically inflicted by Poison-type moves. Poison-type and Steel-type Pokemon are immune to poisoning.
- There is also "bad" poison, caused by the move Toxic. Bad poison will increase the damage it does every turn (from 1/16th to 2/16ths to 3/16ths, and so on). In this generation, bad poison is not converted to regular poison by switching out or ending the battle, but the counter starts again at 1/16.
- Freeze prevents Pokemon from moving until they thaw out. In this generation, Pokemon have a 20% chance to thaw out every turn. Pokemon will also thaw out if hit with a damaging Fire-type move. Freeze is relatively rare - each move that causes it typically only has a 10% chance of freezing the opponent.
- Status effects are very helpful in catching Pokemon. A Pokemon who is burned, poisoned, or paralyzed will be 1.5 times as likely to be caught, and a Pokemon who is asleep or frozen will be twice as likely to be caught. Getting a Pokemon that learns a paralysis move like Thunder Wave or a sleep move like Hypnosis will be a great help.
- Generation 3 introduces Abilities, which are basically something special a Pokemon can do. Each species of Pokemon has one or two possible Abilities. For instance, the Pokemon Zangoose has the Ability Immunity, which prevents it from being poisoned. Meanwhile, the Pokemon Rattata can have either the Run Away ability, which guarantees running away from wild battles, or the Guts ability, which increases its Attack by 50% when it has a status condition. If you catch a Rattata, it will have a 50% chance of having either ability.
- Many Abilities also have effects in the overworld. For instance, Pokemon with Pickup will occasionally pick up items after battles, and Pokemon with the Intimidate ability will reduce weaker wild encounters if placed in the front of the party.
- A few Abilities are actually detrimental to the Pokemon. Slaking has the ability Truant, which only allows it to use moves every other turn. This is done to balance out its fantastic stats.
- You can give each Pokemon an item to hold from your Bag. These items can have powerful effects in battle, such as boosting damage of moves of a specific type, healing a little bit every turn, or doubling the amount of money you earn after battles.
- That being said, not all items are effective. Pokemon can't figure out how to use man-made medicine items on themselves (not even Alakazam, with its 5000 IQ). However, Pokemon do know how to use Berries! A Pokemon will eat a berry when a certain condition is met (e.g. when it's at low HP, or when it has a status condition), gaining the same effect as if you had used it on the Pokemon.
- Wild Pokemon will sometimes hold items. You can get them by capturing the Pokemon, or by using the moves Thief or Covet, which will steal the item.
- Generation 3 also introduces Double Battles, in which a team of two Pokemon are active on each side of the field. This alters the mechanics and strategy, as many moves and abilities behave differently in Double Battles! You can be challenged to a Double Battle either by certain Trainer Classes (e.g. Sis & Bro), or if you are challenged by two trainers at the same time by walking in between them. Usually, you will send out the first two Pokemon in your party, so don't get caught off-guard!
- With most attacks, a Pokemon can choose to attack any Pokemon on the field, including its own teammate. Certain moves such as Blizzard and Eruption will target both enemy Pokemon, and other moves such as Earthquake and Explosion will target all other Pokemon, including the user's teammate. Be careful when selecting these moves!
- In Generation 3, Surf only targets both enemies as opposed to every other Pokemon (as is the case in Generation 4 and beyond).
- In this generation, when a Pokemon is KO'd, the next Pokemon is sent out immediately! In later generations, the next Pokemon is sent out after the turn ends.
- With most attacks, a Pokemon can choose to attack any Pokemon on the field, including its own teammate. Certain moves such as Blizzard and Eruption will target both enemy Pokemon, and other moves such as Earthquake and Explosion will target all other Pokemon, including the user's teammate. Be careful when selecting these moves!
In order to master the set, you'll need to conquer the Battle Frontier. This will require a familiarity with several advanced mechanics.
Each Pokemon has a set of six Individual Values (also known as IVs), one for each stat. Individual Values can fall anywhere between 0 and 31, and each point corresponds to an extra point to that stat at level 100. For instance, a Level 100 Mudkip with a 31 IV in Attack will have 31 more points of Attack than a Level 100 Mudkip with a 0 IV in Attack.
Below Level 100, these bonuses are scaled to the Pokemon's level, and rounded down. A level 50 Mudkip with a 30 IV in Attack will have only 15 more points in Attack than a level 50 Mudkip with a 0 IV in Attack. And a level 50 Mudkip with a 31 IV in Attack will also only have 15 more points, as the boost is rounded down.
A Pokemon's IVs are generated when a wild battle starts, when a roamer first spawns, and for Eggs, when it is received from the Day Care man (note that the Nature is set when the egg is first generated). IVs cannot be changed in any way - a Pokemon is stuck with its IVs! IVs are randomly assigned, so if you're trying to find a Pokemon with great IVs, you'll either have to be very lucky, use some tricks while Breeding, or delve into the wild world of RNG Manipulation.
IVs are typically written in the order they appear on the stats screen. Specifically, HP/Attack/Defense/Sp.Attack/Sp.Defense/Speed. For instance, a (29/21/15/31/23/29) Latios has high Special Attack, Speed, and HP, and lower Attack and Defense.
Effort Values
Once you unlock the Battle Frontier in the postgame, you also get access to a very easy cloning glitch that allows you to clone Pokemon and items.
NOTE: Most (if not all) information in this section is only applicable to the ORIGINAL Emerald ROM. If you're using the RTC + Timer Fix patch, RNG Manipulation will not work. Other patches may or may not work.
RNG manipulation is a powerful tool to get Pokemon with high IVs and good Natures, but is by no means required to master the set. Feel free to try it out if you'd like, or feel free to ignore it entirely if it seems too technical or you prefer to do things the old-fashioned way.
If you need an introduction to the general concept of computer RNG, this video by the roadmap is a good primer. In a nutshell, computers can't actually create truly random numbers. What they can do is take an initial value (the "seed"), perform some calculations on it, and spit out a different number, which becomes the "seed" for the next RNG call. In Pokemon Emerald, this process is performed on every frame, meaning that the RNG value changes 60 times every second.
What makes RNG functions close enough to true randomness is the value of the initial seed, which is typically based on something outside of the game itself. For Pokemon games, this is often based on the real-time clock. For Ruby/Sapphire, this is the internal clock in the cartridge, and for the Gen 4 Pokemon games, this is the system time of the DS itself. But what makes RNG manipulation so powerful in Emerald specifically is that for whatever reason, the initial seed upon loading the game is always set to 0. Because the initial seed is always the same and the RNG calculations are always the same, this means that you can reliably predict the RNG value on every single frame after booting up the game. It's like if a casino shuffled their cards into exactly the same order every single time - you would be able to know exactly what card is coming up at any point.
What this means for us is that you can basically choose a Pokemon's IVs, Nature, Ability, Shiny status, and anything else that relies on RNG if you are able to call the RNG function on a specific frame (say, by starting a wild Pokemon battle or receiving a gift Pokemon). This is obviously very powerful, and can let you get Pokemon with great stats. However, it can be tricky to pull off, as you need to hit a frame perfect input twice (once while resetting the game, once while starting the battle).
Basically, the method is to use a program like PokeFinder to find the frame you need to hit to get the Pokemon that you want, and use a timer like Mystic Timer to try and hit that frame exactly.
Note that there are a few caveats. Although it's relatively easy to get a Pokemon with great stats, it can be very hard to get a Pokemon with a very specific set of stats. For instance, the chances of getting 31 IVs in every stat are about one in a billion. In order to get a Latios with perfect IVs, you'd have to wait about 176 million frames, or about 5.5 years. There are other methods that shorten the time required, but I won't go that deep in this guide. If you'd like to know more, check out this site for the full details.
This guide will focus on how to get Pokemon with good IVs and Natures, primarily for use in the Battle Frontier. If you're interested in getting shinies, that is a slightly more involved process that involves your Trainer ID and your Secret ID, a special number that the game never shows you (hence the name).
This RNG manipulation has the potential to be the most tedious, as it can take quite a while to find and catch Latios. Still, I found it much easier than I was expecting, as I was able to get it on my 4th try while having no previous experience with Emerald RNG manipulation.
Immediately after defeating the Pokemon League, the next time you load your save you will have an unavoidable cutscene in your house where a TV report will state that an unknown Pokemon is flying around Hoenn. To get Latios, make sure you answer "BLUE" when your mom asks you what color the Pokemon was. Latios' stats and Nature are set in stone the frame that you choose "BLUE," and cannot be changed afterwards.
I'll use Latios to demonstrate how to use RNG manipulation in general. First of all, you're going to want to download the PokeFinder program, which will tell you which frame to hit if you want to get a specific Latios. You'll also want to open up Mystic Timer in a web browser.
Open up PokeFinder, and you should be greeted by this screen:

Even though it's encountered in the wild, Latios counts as a Static encounter, as its stats are determined during the TV report. Click "Static," and you should see this screen:

For now, we don't need to worry about most of the settings on this screen. Just switch "Category" to Roamers, and Pokemon to "Latios," don't change anything else, and then click Generate. You'll see this screen:

This will show you what Latios you will get on every frame! For instance, if you pressed "BLUE" on frame 19 (it's not actually possible, but just as an example), you would get a Latios with a Docile nature, and IVs of (24/29/19/26/13/29).
If you'd like, you can use the filters to explore the list. However, the Latios I'd recommend (used on Werster and Exarion's teams) is located at frame 4571:

This Latios has an ideal Nature (+SpA-Atk), great SpA, Spe, and HP IVs, and comes up pretty quickly (about 1 minute and 15 seconds after resetting). To catch it, we'll have to press "BLUE" exactly 4571 frames after resetting the game. To do that, open Mystic Timer, and put 4571 in the "Target Frame" slot. Leave all other settings alone, then press "Set Timer:

Now, when you press "Start," a 5 second timer will count down, and will beep 6 times as it approaches 0. This first timer represents when you should reset the game. The best way to reset the game is by pressing A+B+START+SELECT. While the timer is counting down, hold down three of the buttons, and then press the fourth exactly when it hits 0.
Once it hits 0, it will begin the countdown until the target frame. As it approaches the target frame, it will beep 6 times again. This is exactly when you should press A on "BLUE" in the cutscene. If you did it correctly, the Latios with the Frame 4571 stats should spawn and roam around Hoenn!
Before you start the manipulation, run the timer once or twice to get used to the timing of the beeps. Then, when you're ready, load up your save. Start the timer, press A+B+START+SELECT when it hits 0, and then load your save. Make sure you don't use speedup at all after resetting, as this will make the manipulation fail!
Once you load your save, head downstairs and progress the scene until you get to the choice between "RED" or "BLUE:"

You should have 15-30 seconds to spare. Press A on "BLUE" when the counter hits 0, and Latios will be spawned. At this point, you're safe to use speedup if you'd like. Make sure you DO NOT SAVE until you catch the Latios you want, though!
After all the cutscenes, fly to Slateport City. You may want to drop a Pokemon off in the PC to check Latios easier. Otherwise, grab a bunch of Max Repels, the Master Ball, and a Pokemon between level 13 and 40.
Head north of Slateport to Route 110, near the entrance to Cycling Road:

Put your Pokemon between level 13 and 40 at the front of your party, and then spray a Max Repel. This will prevent encounters with any Pokemon besides Latios. Run through the grass to the left a couple times, and if you don't find Latios, head into and then right back out of Cycling Road. Repeat the process, reapplying Repels as needed. It may take a while, but eventually you'll find it. Catch it with the Master Ball, and then go ahead and check its stats. DO NOT SAVE unless you get the Latios you want! Here's my first Latios:


Unfortunately, it's not the right one. So, let's look in PokeFinder to see what frame I hit. It shouldn't be too far from 4571. If you're having trouble finding your frame, you can click the "Show Stats" checkbox in the filters to convert the IVs into stats, and you can filter by Nature.

I ended up hitting frame 4594. That's quite a bit off, but that's not unusual for the first time. We'll use that value to calibrate Mystic Timer. Put the frame you hit (for me, 4594) into the "Frame Hit" field, and then press "Set Timer." That will add a "Calibration" value to the timer that will help you hit the correct timing:

Once you're ready, repeat the steps above to manipulate and catch Latios. Here's the second Latios I caught:


Looking it up again, this Latios is frame 4573:

A lot closer! Enter the frame you hit as into Mystic Timer to adjust the calibration, and try again. My third attempt was frame 4569, and I got frame 4571 on my fourth attempt:


It's possible I got lucky, but as long as you calibrate after every attempt, you should have a decent chance of hitting the right frame. Once you've found the Latios you want, you can go ahead and save!
If you'd like to see the whole process, this video by im a blisy is good, although it details how to get a shiny specifically instead of how to get good stats, uses older programs, and also does it in Ruby version, which has a few differences. This section of Exarion's speedrun shows how it works in Emerald (although you don't see the timer).
If you're really having trouble hitting a 1-frame window, I found a couple of 2-5 frame windows that produce decent (but not ideal) Latioses. When searching, I looked for Latios with good (20+) SpA and Spe, and a decent Nature (+SpA or +Spe). Here's what I found:
| Frame | Nature | HP | Atk | Def | SpA | SpD | Spe |
|---|---|---|---|---|---|---|---|
| 4903 | Modest (+SpA -Atk) | 15 | 11 | 9 | 26 | 6 | 22 |
| 4904 | Quiet (+SpA -Spe) | 22 | 26 | 6 | 21 | 3 | 20 |
| 5082 | Quiet (+SpA -Spe) | 23 | 15 | 6 | 24 | 9 | 31 |
| 5083 | Modest (+SpA -Atk) | 31 | 24 | 9 | 25 | 7 | 26 |
| 5852 | Mild (+SpA -Def) | 29 | 31 | 20 | 21 | 14 | 23 |
| 5854 | Quiet (+SpA -Spe) | 21 | 5 | 15 | 27 | 26 | 22 |
| 9724 | Mild (+SpA -Def) | 15 | 15 | 28 | 20 | 14 | 25 |
| 9725 | Modest (+SpA -Atk) | 25 | 20 | 14 | 20 | 18 | 23 |
| 12058 | Quiet (+SpA -Spe) | 18 | 25 | 15 | 22 | 21 | 23 |
| 12059 | Hasty (+Spe -Def) | 23 | 22 | 21 | 17 | 18 | 16 |
| 12060 | Rash (+SpA -SpD) | 16 | 17 | 18 | 28 | 11 | 25 |
| 12061 | Mild (+SpA -Def) | 25 | 28 | 11 | 21 | 29 | 24 |
| 12062 | Calm (+SpD -Atk) | 24 | 21 | 29 | 21 | 24 | 23 |
| 14867 | Quiet (+SpA -Spe) | 14 | 1 | 17 | 27 | 14 | 29 |
| 14868 | Mild (+SpA -Def) | 29 | 27 | 14 | 21 | 15 | 29 |
| 14869 | Naive (+Spe -SpD) | 29 | 21 | 15 | 22 | 29 | 16 |
| 14870 | Mild (+SpA -Def) | 16 | 22 | 29 | 24 | 11 | 21 |
| 17512 | Quiet (+SpA -Spe) | 25 | 12 | 17 | 30 | 20 | 20 |
| 17513 | Modest (+SpA -Atk) | 20 | 30 | 20 | 27 | 29 | 26 |
There might be some other decent ones out there if you loosen the criteria, or go past 18000 frames (5 minutes). These Latioses aren't as ideal for the Battle Frontier, but they may be able to get the job done (especially if you savescum).
Thankfully, Beldum is a lot easier than Latios.
Beldum: frame 2297 (11119/11120/11121?)
Ditto (mudkip) 3430/3431?
- The Gotta Catch 'Em All achievement is set up in such a way that if you obtain a Pokemon you're not supposed to have (e.g. a Pokemon that's unobtainable in Emerald, or two different starters), it will lock you out of the achievement. Trading Pokemon in from another save file is also a gray area rules-wise, so it might not be advisable anyways.
- Preparing for the Battle Frontier is something you're going to want to keep in mind throughout the run. Getting the Gold Symbols at the Frontier is one of the most challenging tasks in the series, and knowledge of advanced mechanics is essential for success.
- The first challenge is creating your team. Despite what some may say, there are definitely Pokemon that are stronger choices than others.
- In this guide, I'll recommend the team used by Werster and Exarion for the All Gold Symbols speedrun: Swampert, Latios, and Metagross. This team has several advantages: it's achievable in one copy of Emerald,
- Swampert is a great option to have, so you probably want to pick Mudkip as your starter. Latios is also very powerful, so you probably want to choose it over Latias. If you'd like, you can try and get a beneficial Nature and IVs on Mudkip, or you can wait until after the story and just breed a new one.
- Try to avoid using TMS and Move Tutors until you're preparing for the Battle Frontier. This will give you as many options as possible.
- When catching Latios, you're going to want to make sure it has a beneficial Nature, and possibly IVs that are at least decent. You can achieve this either by resetting the old-fashioned way, or by using RNG Manipulation. Note that Latios' stats are generated when you select "BLUE" on the TV and cannot be changed after that point! For this reason, you're probably going to want to keep the Master Ball for Latios, as that will make attempts and resets much easier.
- The Latios event happens right when you load the game after defeating the Pokemon League for the first time, so make sure that you are ready to hunt it!
-
Bulbapedia is the most thorough and accessible source of Pokemon information out there. You can use it for Pokemon locations, learnsets, item locations, and more. Note that by default pages display information and movesets for the latest generation, which might not be accurate for Generation 3. Usually there will be a button to view information for different generations, if applicable.
- Bulbapedia also has an Emerald Walkthrough that is one of the best out there. I'll be linking to it frequently, so check it out if you need more information.
- The Serebii Generation 3 Pokedex has thorough information on all Pokemon specific to Generation 3, and without extra information on things like the anime. If you want a more streamlined and Gen 3-specific experience than Bulbapedia, this is likely your best bet.
- The Generation 2-5 Type Chart is worth keeping handy. There are several notable differences from later generations.
- Bulbapedia and StrategyWiki both have an beat-by-beat walkthrough if you'd like to follow them. Choose whichever you prefer. Bulbapedia has the advantage of being specific to Emerald, whereas StrategyWiki includes Ruby and Sapphire, which may be slightly more confusing.
- The Cave of Dragonflies is a treasure trove of really in-depth information on Gen 3 mechanics, as well as every other generation. Of particular interest for this set is the Gen 3 Catch Rate Calculator.
This section goes through the story and the vast majority of the achievements that can be earned along the way.
MISSABLE ACHIEVEMENTS
Things to remember:
- Keep the Dig TM when you get it on Route 114
- Keep the Sea Incense when you find it in Mt. Pyre
Step 6: Catch 'em All/Miscellaneous

| Littleroot Town | Little Trainer Big World |
|---|---|
| Items | 0/3 |
| Trainers | 0/12 |
| New Pokemon | Treecko/Torchic/Mudkip |
Welcome to the world of Pokemon! As the game begins, you can grab a Potion from your PC if you'd like, but it's not required for any achievements.
After introducing yourself to Brendan/May next door, head north to help Prof. Birch and choose your starter to get our first achievement.
Zigzagone (1)
Help out Professor Birch with the help of your new little friend
Because Swampert is very useful for the Battle Frontier, I would definitely recommend choosing Mudkip as your starter. I wouldn't worry too much about trying to get one with a good Nature/IVs at this point, as it may be easier to just breed one later on. If you plan on using your first Mudkip in the Frontier, you'll have to be very careful with leveling and EV training throughout the whole game, which may be more trouble than it's worth.
After choosing your starter, defeat the ferocious Zigzagoon, and the achievement will be yours.
After choosing your starter, head north to Route 101.
There's not much to do for now besides training Mudkip, so head north to Oldale Town.
Loyalty Program (1)
Receive a free Potion sample in Oldale Town
Standing near the entrance to Oldale Town is a worker wearing an apron. Talk to her, and she'll lead you to the Poke Mart, giving you a free Potion (and a free achievement!)
Once you're ready (make sure to heal at the Pokemon Center), head to Route 103 north of Oldale Town for the first Rival battle.
Let's Have a Quick Battle! (3)
Defeat your Rival on Route 103
This fight should be pretty easy, especially if you've leveled Mudkip once or twice - open with a Mud-Slap or Growl if you'd like, then whale away with Tackle and you should win easily.
Head back to the Lab in Littleroot Town to get the Pokedex, Running Shoes, and some Poke Balls. Now we're in business! Head north to Route 101, and you can start catching a few Pokemon. If you run out of Poke Balls, you can buy some more in the Poke Mart in Oldale Town. If you buy 10 at a time, you'll get a free Premier Ball thrown in!
| Route 101 | Little Trainer Big World |
|---|---|
| Items | 0/3 |
| Trainers | 0/12 |
| New Pokemon | Poochyena, Wurmple, Zigzagoon |
Zigzagoon is more common on Route 102/103, so you can find one there if you're having trouble.
| Route 103 | Little Trainer Big World |
|---|---|
| Items | 0/3 |
| Trainers | 0/12 |
| New Pokemon | Wingull |
If you didn't catch Zigzagoon on Route 101, catch one here. They make a good HM friend, and they have the ability Pickup, which has a 10% chance of finding several useful items whenever you win a battle.
| Route 102 | Little Trainer Big World |
|---|---|
| Items | 1/3 |
| Trainers | 4/12 |
| New Pokemon | Ralts, Lotad, Seedot |
Route 2 heads west from Oldale Town. Here we have our first four Trainers, as well as our first item to pick up. The Trainers are hard to miss, and the item is a Potion located in the southwest part of the route. You can also grab the Berries planted in the soil, but they are not required for achievements.
Ralts is a rare encounter (4%), and Seedot is even rarer (1%). If you can, you might want to catch 2 Ralts, so you can trade one for a Seedot in Rustboro City. Seedot is only a 1% encounter on this Route, so trading for one is much easier. It's also required for an achievement!
You may have noticed that we've gone to all of the areas required for the Little Trainer Big World achievements and are still missing quite a few items and Trainers. Don't worry, the remaining ones are on the other side of Route 103 (across the water), and we'll return to them later in the story. This will happen quite a bit throughout the game.
| Petalburg City | Petals to the Wind |
|---|---|
| Items | 0/23 |
| Trainers | 0/16 |
| New Pokemon |
In Petalburg City, head to the Gym (or get forcibly taken there if you try to head west) to meet your dad, the Petalburg Gym Leader. He will send you to catch a Pokemon with Wally.
Little Brother (1)
Assist Wally in catching his first Pokémon
You don't have to do anything special, just let the event play out. After the catching tutorial, head west to Route 104. As you do, a man with sunglasses will walk up to you. This is Scott, a mysterious and important character looking for the strongest of trainers. You will need to meet him 13 times over the course of the story for an achievement. Some of these encounters are MISSABLE, so be careful! I'll point them out as they pop up - this is encounter 1/13.
| Route 104 (south) | Petals to the Wind |
|---|---|
| Items | 3/23 |
| Trainers | 3/16 |
| New Pokemon | Marill, Taillow |
There are three trainers on this section of the route. Two are on the beach (make sure to talk to the Fisherman), and one is on the path to Petalburg Woods.
There are quite a few hidden items on this route, so now's a good time to demonstrate a neat feature of the set. Press L and R at the same time, and it will activate the "Super Item Finder," a fake leaderboard that will tell you how many hidden items are in your current area! The counter should read 5, so let's track them down.
First is an Antidote, on the southwest part of the beach.

Second is a Heart Scale, in the middle of the beach southwest of the grass.

Third is a Potion, just south of the pier.

The remaining two hidden items are on the other part of Route 104, past Petalburg Woods. There's another item sitting on a ledge, but it's inaccessible for now.
| Petalburg Woods | Petals to the Wind |
|---|---|
| Items | 8/23 (including the Poke Ball from Route 104) |
| Trainers | 5/16 |
| New Pokemon | Shroomish, Silcoon, Cascoon, Slakoth |
In this route there are two Bug Catchers to fight, both of which are hard to miss.
As soon as you enter the woods, head to the right. A man will tell you about hidden items, and in the patch of grass to the right, there is a conspicuous empty spot. Search it to find a Potion.

After that, head south to exit onto Route 104 and find the Poke Ball on the ledge we couldn't get earlier.
Along the way, you can find a Paralyze Heal in the grass. About halfway, you'll run into an Aqua Grunt.
Woody Rumble (2)
Save the Devon employee from the suspicious grunt trying to rob the documents
He's just got a Poochyena, so he shouldn't be too hard to take down.
Shortly after the battle, you'll see another conspicuous empty spot in a corner - search it to find a Poke Ball.

You'll find an Ether shortly to the north after that. That's all we can find in here for now, so exit north to the other part of Route 104.
| Route 104 (north) | Petals to the Wind |
|---|---|
| Items | 11/23 |
| Trainers | 9/16 |
| New Pokemon |
You can talk to the guy near the berry patch to get TM09 Bullet Seed. This is our first of 27 "gift items" for the Gifted Kid achievement. The building nearby is the Pretty Petal Flower Shop.
Gardening Pro (1)
Receive a Wailmer Pail at the Pretty Petal flower shop on Route 104
Talk to one of the girls to receive the Wailmer Pail, a key item that lets you water planted Berries to increase their output. You can talk to the other girls to receive a random berry.
Once you're done, head behind the shop to pick up a few items - a Potion, and a hidden Poke Ball and Super Potion.
You'll find four trainers along this route, and near the berry patch in the corner an old lady will give you a Chesto Berry, which counts as a gift item (2/27).
When you're ready, head north to continue to Rustboro City.
| Rustboro City | Learning to Strive |
|---|---|
| Items | 1/17 |
| Trainers | 0/21 |
| New Pokemon |
Before you enter Rustboro City itself, you can squeeze through the fence on the east side of the entrance from Route 104 to follow a path to an X Defend.
Next, there's a pink-haired boy who gives you a gift Premier Ball (3/27) on the 2nd floor of the southwest building.
West of the Pokemon Center, you'll find the Cutter's House, where you can get HM01 Cut.
Before you head to the Gym, head to the Trainer's School east of the Pokemon Center. In the corner, you'll find Scott, in his MISSABLE second appearance. Make sure you talk to him and see the progress update to 2/13 before you beat Roxanne!
Good Student (1)
Receive a Quick Claw for attending the Trainer School
After talking to Scott, talk to the teacher to get a free Quick Claw. This held item allows the user to attack first in battles 20% of the time, regardless of Speed (although higher priority moves will still go first).
Even the Mightiest Oak (3)
Trade a Ralts for a Seedot in Rustboro City
Finally, the last thing we can do in Rustboro City before the gym is trade Ralts for Seedot. If you caught an extra Ralts, head to the house east of the gym and talk to the guy with the green hat.
It may be worth keeping DOTS as a Seedot for now to make an achievement close to the end of the game a little easier.
Once you're ready, head to the Gym. Roxanne is a Rock-type trainer, meaning Water and Grass types will be helpful.
Battle Addict - Rustboro (2)
Defeat every trainer in Rustboro gym
MISSABLE
You cannot battle the gym trainers after you defeat the leader, making this achievement missable.
There are three trainers in the gym. Apparently, all they have are Geodudes, meaning that they will go down easily to Water or Grass-type attacks. You can face two of them in a Double Battle if you'd like, or talk to them to fight them individually.
Rockin' Whiz (10)
Defeat Roxanne to earn the Stone Badge
Roxanne isn't too hard if you have Mudkip. Her 2 Geodude are 4x weak to Water moves, so a single Water Gun will likely take them out. For Nosepass, you can use Mud-Slap once or twice to lower its accuracy and then hit it with Water Gun.
If you don't have Mudkip, you can also try using a Marill or Wingull, who also learn Water Gun early. Lotad and Shroomish are also an option. Although Absorb is not as powerful as Water Gun, it will still make quick work of the 2 Geodude, who are also 4x weak to Grass-type moves.
After defeating her, she'll give you the Stone Badge and TM39 Rock Tomb. The Stone Badge also lets you use Cut in the field, so teach it to your HM friend if you haven't already!

| Rustboro City | Learning to Strive |
|---|---|
| Items | 1/17 |
| Trainers | 0/21 |
| New Pokemon |
As you exit the Rustboro Gym, you'll see a team Aqua grunt carrying some stolen goods to the north. We could go after them, but there is one IMPORTANT thing to do first - head back to the Trainer's School and talk to Scott AGAIN for another MISSABLE encounter (3/13)!
Now that we can use Cut, there are a few new items we can get in previous areas. You can get them now, but we'll be heading back that way a little later, so head to Route 116 east of Rustboro City to continue.
| Route 116 | Learning to Strive |
|---|---|
| Items | 6/17 |
| Trainers | 10/21 |
| New Pokemon | Nincada, Whismur, Abra, Skitty |
Plenty of new Pokemon to catch here. Abra is skittish and will Teleport out of battle immediately - your best bet is probably to throw a ball first thing, or try and put it to sleep or paralyze it.
For items, you can find a Repel near the Bug catcher on the southwest side, and an X Special on a rocky ledge to the east of the cave.
There's a maze of items and trainers on the northern side of the route - you'll need Cut to get in. Inside, you can find a Potion on the eastern side past two trainers, and a hidden Super Potion tucked in a corner near the ledge.

Finally, south of the Berries, there's an Ether to collect.
| Rusturf Tunnel | Learning to Strive |
|---|---|
| Items | 7/17 |
| Trainers | 10/21 |
| New Pokemon |
There's a pretty obvious Poke Ball to the north as you enter, so go ahead and take it.
Whismur is a 100% encounter in this cave, so if you didn't catch one before, now's a good time.
After that, defeat the grunt. There's nothing else to do in this tunnel for now, so go ahead and return to Rustboro City.
| Rustboro City | Learning to Strive |
|---|---|
| Items | 7/17 |
| Trainers | 10/21 |
| New Pokemon |
Amazing Tech in the Palm of Your Hand (1)
Receive the PokéNav from the Devon Corporation president
As you enter Rustboro, the Devon researcher will thank you and bring you to the president. The President will give you a PokeNav, and will ask you to deliver a letter to Steven in Dewford Town.
The PokeNav functions as a map, and (after you exit the building) a cell phone that you can register Trainers on for rematches. There are a couple of trainers we've already battled that can be registered. None of them are strictly required for any achievements (except Roxanne, but she will call you herself a little later in the story).
How About a Little Battle? (3)
Defeat your rival at Rustboro City or Route 104
MISSABLE
This battle is optional, making this achievement missable.
Your rival will be waiting right near the Poke Mart, and will talk to you if you attempt to leave to the south. They will challenge you to a battle, with their team depending on your starter choice (and your gender, apparently). This battle shouldn't be too hard, especially if you have six Pokemon. Treecko may be a threat to Mudkip, but he doesn't seem to know that using Absorb is an instant win button.
After the battle, we'll head back to Mr. Briney's House on the southern part of Route 104. Along the way, we can get the items Cut unlocked.
| Route 104 (north) | Petals to the Wind |
|---|---|
| Items | 12/23 |
| Trainers | 9/16 |
| New Pokemon |
Southeast of the water, there is a tree you can Cut to get an X Accuracy. Next, head to Petalburg Woods.
| Petalburg Woods | Petals to the Wind |
|---|---|
| Items | 16/23 |
| Trainers | 9/16 |
| New Pokemon |
Head east of the exit and cut the tree to get into the eastern section. A girl there will give you a Miracle Seed (4/27). To the west, there's a recess between two trees. Search in there to find a hidden Tiny Mushroom.

In the northeast corner you can find a Great Ball, and after hopping down a few ledges on the east side, you can find an X Attack. Southeast of there, check the empty spot in the corner of the grass patch for another hidden Tiny Mushroom.

Finally, head back to south Route 104 and talk to Mr. Briney in his hut to take the boat to Dewford Town.
| Dewford Town | Surfing Shores |
|---|---|
| Items | 0/26 |
| Trainers | 0/23 |
| New Pokemon | Magikarp, Tentacool |
In Dewford Town, you might notice some people talking about a "trendy phrase" in all-caps (like "GOING GAME" in my case). Make a note of it, but whatever you do, DO NOT CHANGE IT at this point, as you can use it to make catching Feebas much easier. If you really want to get the achievement right now, you can save before changing the trend and then reload to that save once you change it. If you want to change the trend, talk to the man directly north of the Pokemon Center.
Right when you get to Dewford Town, you can talk to the guy inside the house next to the pier to get a Silk Scarf (5/27).
Fishing Trainee (2)
Receive the Old Rod in Dewford Town
Talk to the fisherman near the Gym to get the Old Rod. You can use it in the nearby water to catch Magikarp and Tentacool.
If you'd like, you can go to the north to fight a few trainers or catch some new Pokemon in Granite Cave. Otherwise, get ready to fight Brawly.
Battle Addict - Dewford (5)
Defeat every trainer in Dewford gym
MISSABLE
You cannot battle the gym trainers after you defeat the leader, making this achievement missable.
There are six trainers in the Gym, with a mix of level 13 Fighting type Pokemon. The Gym is dark, so make sure you defeat them all before you challenge Brawly!
The Big Hit (10)
Defeat Brawly to earn the Knuckle Badge
Brawly is a little tougher, but if you evolve some of your Pokemon he shouldn't be too hard to beat. Here are some suggestions:
- Mudkip evolves at level 16 into Marshtomp and learns Mud Shot, a STAB physical move that lets it take advantage of its higher Attack stat.
- Beautifly is also a decent option, as it 4x resists Fighting moves and learns Gust at Level 13.
- Taillow is not bad. Although it is neutral to Fighting moves due to its Normal typing, it learns the powerful Wing Attack at level 13.
- Ralts is a decent option, although it won't be able to take hits very well. You could evolve it into Kirlia at level 20 if you wanted. The first floor of Granite Cave north of Dewford Town is a great place to train Ralts.
- Don't bother trying to decrease Makuhita's accuracy (or boost your own evasion with Double Team), as Vital Throw will always hit regardless of accuracy.
- As Brawly's team only knows Fighting-type moves, Sableye (catchable in B1F of Granite Cave) will actually be completely invincible.
After defeating Brawly, he'll give you the Knuckle Badge, which allows you to use Flash outside of bettle. He'll also give you TM08 Bulk Up.

| Route 106 | Surfing Shores |
|---|---|
| Items | 3/26 |
| Trainers | 2/23 |
| New Pokemon |
After defeating Brawly, head north to the beach of Route 106. There are two Fishermen here to defeat, and a couple of Hidden Items.
Southeast of the first fisherman, there is a hidden Heart Scale.

On an isolated rock, there is a hidden Stardust

On the end of the path north of the cave, there is a hidden Poke Ball.

Next, head into Granite Cave.
| Granite Cave | Surfing Shores |
|---|---|
| Items | 6/26 |
| Trainers | 2/23 |
| New Pokemon | Makuhita, Zubat, Geodude, Aron, Sableye |
As you enter, talk to the Hiker to get HM05 Flash. It's not strictly necessary, but it will be helpful in navigating the lower floors.
On the first floor, near the ladder, is an Escape Rope.
On B1F, turn south at the first intersection to find a Poke Ball.
On B2F, you'll pass by an elevated ledge with a light gray rock. Search it to find a hidden Everstone.

Rocky Courier (4)
Deliver the Letter to Steven
Hand over the Letter to Steven, and this achievement should pop. At this point, you can use the Escape Rope to exit, or walk all the way back out.
Devon Delivery (3)
Receive the Exp. Share
After delivering the Letter to Steven, you can return to Rustboro City to get the EXP Share item from the Devon President. You don't have to do it right away if you don't want to, though.
You can talk to Mr. Briney in Dewford Town to head to Slateport City. He'll drop you off on Route 109, just south of the city.
| Route 109 | By Ship and by Bike |
|---|---|
| Items | 6/15 |
| Trainers | 9/30 |
| New Pokemon |
There are five hidden items on the beach. First, west of Mr. Briney's ship, there is a Revive.

On the eastern edge of the beach, near two tubers, is an Ether.

Under an umbrella on the western side is a Heart Scale.

Directly north of the old man with the Zigzagoon is another Heart Scale.

Finally, under a towel (?) on the western edge of the beach is a Great Ball.

There's also a Potion out in the open, and a female Tuber will give you a Soft Sand (6/27).
There are six trainers out on the beach. Some of them are hiding under umbrellas, so watch out!
Drinks on the House (3)
Complete the Seashore House challenge and receive a prize
The remaining three trainers are located in the Seashore House. After defeating them, talk to the guy in the north to get a 6-pack of Soda Pops.
| Slateport City | By Ship and by Bike |
|---|---|
| Items | 6/15 |
| Trainers | 9/30 |
| New Pokemon |
There are quite a few things to do in Slateport City.
Crush Those Berries (2)
Receive a Powder Jar in Slateport's Market
In the northeast corner of the market, a woman in red will give the Powder Jar to you.
Friendship Is Amazing! (3)
Receive the Soothe Bell for showing a friendly Pokémon to a woman in the Pokémon Fan Club
The Pokemon Fan Club is located west of the Poke Mart. If you show a Pokemon with a high Friendship value to the woman near the north wall, she will give you a Soothe Bell. I was able to get it at this point with my Marshtomp. If your friendship isn't high enough, you can grind it out by walking back and forth repeatedly (or just come back later).
Pinnacle of Training (5)
Be awarded an Effort Ribbon in the Slateport Market
If you talk to the woman next to the Energy Guru in Slateport Market, she will give your Pokemon a ribbon if it has maxed-out Effort Values. This likely isn't the case unless you've been doing some serious grinding, but make sure to come back later.
Once you're ready to continue, head to the Shipyard, talk to the balding man a little north, and then head to the Oceanic Museum to find Captain Stern.
On the first floor, there's a grunt near the entrance that will give you TM46 Thief (7/27). This isn't actually missable - he will hang around after all the other grunts leave. How conscientious!
Fight at the Museum (3)
Defeat Team Aqua at the Oceanic Museum
Stern is on the second floor - just talk to him and defeat two team Aqua grunts to get this achievement.
As you exit the museum, you will run into Scott again (4/13). After that, immediately head over to the Battle Tent in the northwest part of the city. As you enter, Scott will again walk out, in a MISSABLE encounter (5/13).
As you enter the Battle Tent, you can talk to the sailor on the left to get TM41 Torment (8/27). After that, you can challenge the Battle Tent.
Trainer Extraordinaire - Slateport (5)
Win at the Slateport Battle Tent and receive a prize
The Slateport Battle tent is reminiscent of the Battle Factory in the Battle Frontier. You'll be presented with six random level 30 Pokemon, and must choose three. Note that the Pokemon you choose first will be the one that is sent out first. You can look at the summaries of the Pokemon to see which moves they have.
You'll battle against three trainers. At the end of each battle, you can choose to swap out one of your Pokemon with one of the previous trainer's.
It's possible to get unlucky with the Pokemon selection, but it shouldn't be too hard to get a team you can win three battles with. Once you win, you'll be rewarded with a Full Heal.
(Funnily enough, there's a guy right outside that says he's going to compete in the Battle Tent, but he needs to catch some Pokemon first. Does he know?)
Before you leave Slateport, you may want to buy a Harbor Mail at the Poke Mart for an upcoming achievement. After that, you can head north to Route 110.
| Route 110 | By Ship and by Bike |
|---|---|
| Items | 6/15 |
| Trainers | 11/30 |
| New Pokemon | Electrike, Minun, Gulpin, Oddish, Plusle |
Plusle is a little rare on this route (2%), but you can get one later in a trade, so don't worry too much if you don't catch it.
On Route 110, after beating a pair of trainers, you'll come across the Trick House. There are 8 puzzles to do in the Trick House, and one unlocks after every badge from here on out. Enter to challenge the first puzzle.
Trick Master Is Fabulous (3)
Defeat every trainer and find every item in the first Trick House puzzle
MISSABLE
Once you beat the Trick House puzzles, any items and Trainers you missed will be inaccessible.
Make sure you bring a Pokemon with Cut for this one. There are three trainers and one item (an Orange Mail) in this maze. They're pretty obvious, so it shouldn't be too hard.
After the Trick House, we can take a quick detour to the west onto the other half of Route 103 to finish up our first item achievement.
| Route 103 | Little Trainer Big World |
|---|---|
| Items | 3/3 |
| Trainers | 10/12 |
| New Pokemon |
There are six trainers to battle here (the final two are swimming in the water).
In the maze to the north, you can find a PP Up and a Guard Spec. This should finish up the Little Trainer Big World - Items achievement!
Head back out to Route 110 to continue.
| Route 110 | By Ship and by Bike |
|---|---|
| Items | 12/15 |
| Trainers | 17/30 |
| New Pokemon |
Past the Trick House, there is a Dire Hit near the Youngster. In one of the empty patches northeast of the Youngster, there is a hidden Full Heal.

Continue north to our next Rival battle.
Long Time No See! (5)
Defeat your Rival on Route 110
This time (assuming you chose Mudkip), they will come with a Slugma, Wingull, and Grovyle. Of these three, Grovyle is the threat. Marshtomp can probably get some damage in with Mud Shot, but might not be able to survive an Absorb, as it is 4x weak to Grass moves. If you have a few level ~20 Pokemon, it probably shouldn't be too hard to combine their efforts and take Grovyle down, especially if they're evolved. Kirlia, Golbat and Hariyama are good options.
After the fight, they'll give you the Itemfinder. Put it to good use by finding a hidden Great Ball north of the battle site.

You can also find a hidden Revive north of the double battle with the Collector and Guitarist.

West of the Triathlete and Psychic battle, you'll find an Elixir, and there is a hidden Poke Ball in one of the empty patches to the north.

| Mauville City | Hoenn Meridian |
|---|---|
| Items | 1/12 |
| Trainers | 0/16 |
| New Pokemon |
Again, there's a few things to do in Mauville City. First of all, head east to the gap in the southern fence to find an X Speed. After that, head to the nearby house to get HM06 Rock Smash from the self-proclaimed Rock Smash Dude.
Aw Dang It (2)
Exchange a Harbor Mail for a Coin Case
In the other southern house (next to the Poke Mart), you can trade a piece of Harbor Mail for a Coin Case. If you don't have a piece of Harbor Mail, you can buy one at the Poke Mart in Slateport.
Rydel Rydel Rydel Rydel Rydel Rydel Rydel Rydel (1)
Receive a bike of your choice at Rydel's Cycles
Rydel's Cycles is the shop with all of the bikes next to it. Simply talk to him, and he'll give you a bike, free of charge. There are two types: the Mach Bike and the Acro Bike. There are obstacles that require both, but choose the Mach Bike for now.
Next, head to the Game Corner. Before you buy any coins, talk to the guy to the east near the trash can. He'll give you 20 coins as a gift (9/27), but as user kirbopolous notes in the Gifted Kid comments, he'll only give them to you if you have zero coins.
The girl to the left of the counter will give you a doll matching your starter (10/27).
You can play at the Game Corner a bit if you'd like, but there aren't any achievements to earn right now.
Finally, you can challenge Wally in front of the Mauville Gym for an achievement.
Still a Novice (2)
Defeat Wally at the entrance to the Mauville Gym
He just has a level 16 Ralts, so he shouldn't be too hard. If you have a Dark type, he won't be able to hit it at all.
After the battle, Scott will appear (6/13). If you're not at 6/13, reset your save and head back to the Battle Tent in Slateport!
With Wally defeated, you can either explore the areas around Mauville City or go ahead and challenge the Gym. For this guide, I'll challenge the gym first.
Battle Addict - Mauville (5)
Defeat every trainer in Mauville gym
MISSABLE
You cannot battle the gym trainers after you defeat the leader, making this achievement missable.
There are five trainers in the Gym, and they shouldn't be too hard to maneuver to.
Swell Shock (10)
Defeat Wattson to earn the Dynamo Badge
Wattson is a cinch with Marshtomp. Mud Shot will likely KO the first three Pokemon in 1-2 hits, and won't have much trouble KOing Manectric either. The only thing to watch out for is Supersonic from Magneton.
If you don't have Marshtomp, things will probably be a little harder. Geodude from Granite Cave is an option if you're looking for a Ground type. You can also evolve it into Graveler at level 25. Graveler may also be useful for the next few gyms too, so it might not be a bad idea to grab one. Bringing a Fighting type like Hariyama or Combusken may also be useful for Magneton. Grovyle resists Electric attacks, so it may also be useful.
Like Brawly's Vital Throw, Shock Wave will always hit regardless of accuracy, so trying to raise your Evasion is not very useful in this fight.
After defeating Wattson, he will give you the Dynamo badge, allowing you to use Rock Smash outside of battle. He'll also give you TM34 Shock Wave.

The way to progress the story is north from Mauville City, but for completion's sake (including a MISSABLE Scott encounter), there's plenty of places to explore. We'll first head east from Mauville onto Route 118, and then complete a clockwise circle around the map to get all the rest of the things that have opened up. You can try to go counter-clockwise, but you'll get stuck at Route 104, as the boat won't be there. Before leaving, make sure you have the Mach Bike and a Pokemon with Rock Smash.
If you're just interested in the missable Scott encounter and want to leave the rest for later, he's in the Battle Tent in Verdanturf Town.
| Route 118 | Hoenn Meridian |
|---|---|
| Items | 2/12 |
| Trainers | 4/16 |
| New Pokemon |
You won't be able to get very far onto the Route, but there's a few trainers and a Heart Scale hidden in one of the rocks on the beach.

Once you're finished, head south of Mauville to Route 110.
| Route 110 | By Ship and by Bike |
|---|---|
| Items | 12/15 |
| Trainers | 23/30 |
| New Pokemon |
Now that you have the Mach Bike, you can enter Cycling Road and defeat a few Trainers.
As deltagamer026 notes, there is a Psychic that's easy to miss in the trees under Cycling Road near the Mauville entrance. Enter Cycling Road on the Mauville side, then head east under the road to find her.
Once you're done, you can head to the Trick House to do the next puzzle.
Trick Master Is Smart (3)
Defeat every trainer and find every item in the second Trick House puzzle
MISSABLE
Once you beat the Trick House puzzles, any items and Trainers you missed will be inaccessible.
To start the second puzzle, examine the eastern plant.
In this puzzle, there are 2 items (a Wave Mail and a Harbor Mail), and three trainers to defeat. They're all pretty conspicuous. Step on the switches to close the holes in the floor.
For your efforts, you'll be rewarded with a Timer Ball.
After that, use Mr. Briney's boat south of Slateport to head back to Dewford Town. Our next stop is B2F of Granite Cave, where the Mach Bike opens up a few items. Make sure you bring a Pokemon with Flash and Rock Smash, and an Escape Rope.
| Granite Cave | Surfing Shores |
|---|---|
| Items | 9/26 |
| Trainers | 2/23 |
| New Pokemon | Nosepass |
On the northern wall of B1F, there's a slope you can ride the Mach Bike up if you have enough speed. After you get there, climb down the ladder (or fall through the floor) to find a Repel.
Climb back up the ladder, and you'll see that the ground is cracked in a few spots. You'll have to use the Mach bike to ride over them with enough speed to not fall down. On the later two sections, you'll have to change directions in the middle of the floor. Here's the layout (from Bulbapedia):
Once you make it through, you'll find a Rare Candy, and you can search the nearby rock for another Everstone.

Before you leave the cave, if you head down to the regular part of B2F, you can find breakable rocks. If you use Rock Smash on them, you can encounter Nosepass. This is the only way to catch Nosepass, so we might as well do it while we're here. It seems to be quite rare to get an encounter, but once you do, Nosepass is very easy to catch. If you need to reset the rocks, use either of the ladders to travel to B1F and back.
Once you've caught it, use an Escape Rope and take the boat to Route 104.
On northern route 104, outside the flower shop, there's a girl who will give you a White Herb (11/27). If she's not there, make sure you talk to all of the girls inside (including the cashier).
Next, head to Rusturf Tunnel on Route 116 (stopping to get the EXP. Share in Rustboro City if you haven't already). Talk to the guy in green right outside the cave entrance, and he'll give you a Repeat Ball (12/27). You can also now buy Repeat and Timer Balls at the Poke Mart in Rustboro City! We'll become very familiar with Timer Balls later in the set.
| Rusturf Tunnel | Learning to Strive |
|---|---|
| Items | 10/17 |
| Trainers | 11/21 |
| New Pokemon |
After entering Rusturf Tunnel from Route 116, head down the hallway. You'll find two people next to some breakable rocks. Use Rock Smash to break one of them and reunite the two, and my man will give you HM04 Strength. After that, continue down the tunnel to fight a Hiker and find a Max Ether.
The eastern exit leads to Verdanturf Town, but take the western exit first. That will lead to a previously-inaccessible part of Route 116, where you'll find a hidden Black Glasses by the bottom of the stairs and an HP Up on the ledge.

Didn't See It Coming (1)
Attempt to return some lost glasses
After picking up the Black Glasses, If you talk to the guy with the glasses, he'll tell you to keep them, as they're not his (maybe he should look on his face).
| Verdanturf Town | Hoenn Meridian |
|---|---|
| Items | 2/12 |
| Trainers | 4/16 |
| New Pokemon |
Once you enter Verdanturf town, visit the Verdanturf Battle Tent. Inside, you'll find Scott, in a MISSABLE encounter (7/13). There's also a woman who will give you TM45 Attract (13/27). The Verdanturf Battle Tent might be a little difficult for the moment, but I'll leave its details here in case you want to give it a try.
Trainer Extraordinaire - Verdanturf (5)
Win at the Verdanturf Battle Tent and receive a prize
The Verdanturf Battle Tent is reminiscent of the Battle Palace in the Battle Frontier. In this mode, Pokemon will use moves by themselves. Moves are grouped into three categories: Attack, Defense, and Support, and a Pokemon's Nature will determine how often each category is used. If a Pokemon doesn't have a move in a category, its turn will be skipped. It should also be noted that while you can't control your Pokemon's moves, you can switch them out at will.
This mode can be very frustrating, and your normal team may not be well-suited for the challenge. Ideally, you'd want a mix of Attack Defense, and Support moves, which you may not have right now. If you're looking to brute-force it, it might be easier to wait and come back with fully-evolved Pokemon and stronger moves.
The Pokemon encountered in this mode will all be at least Level 30, so if you're underleveled you also may want to come back later.
(Funnily enough, in the Verdanturf Poke Mart there's an old lady who says to win in the Battle Tent you must "rely on your own wits." Does she know?)
| Route 117 | Hoenn Meridian |
|---|---|
| Items | 5/12 |
| Trainers | 13/16 |
| New Pokemon | Illumise, Volbeat |
Volbeat is a rare encounter (1%) on this route. You can alternatively get one by breeding an Illumise (which creates both Illumise and Volbeat eggs). Try and get one while you're here, as you'll need it for a trade later on.
Speaking of breeding, the Day Care is on this route. If you'd like, you can breed Illumise with any Pokemon in the Bug or Human-like egg groups.
There are plenty of Trainers on this route, and a few items. Behind a Cut tree north of the northern flower patch, there is a Revive. South of the southern patch, there is a path leading to a Great Ball, and on the other side a hidden Repel.

Now that we've finally completed our circle of backtracking, head north onto Route 111.
| Route 111 (south) | Hot, Hotter, Hottest |
|---|---|
| Items | 1/14 |
| Trainers | 6/33 |
| New Pokemon | Goldeen |
You can catch Goldeen by fishing with the Old Rod.
If you try and enter the Trainer Hill, you'll be told it's not quite ready yet (but you can still use the Pokemon Center!)
There's one solitary item to look out for right now: an Elixir near the Winstrate home. Speaking of the Winstrates, you can talk to the father right outside the house to challenge them.
Whole Winstrate Won (5)
Receive a reward for beating the Winstrate family on Route 111
When challenging the Winstrates, you'll have to fight them back to back and get 4 wins straight (get it?)
They only have seven Pokemon between the four of them, though, and the highest is level 18. So it's not too bad.
After you defeat them, talk to the mother to get a Macho Brace and the achievement!
If you try to continue north into the desert, you'll get cut off by a sandstorm, so head west onto Route 112.
| Route 112 (south) | Hot, Hotter, Hottest |
|---|---|
| Items | 1/14 |
| Trainers | 10/33 |
| New Pokemon | Numel |
Just a few trainers here before you're forced to go into the Fiery Path.
| Fiery Path | Hot, Hotter, Hottest |
|---|---|
| Items | 1/14 |
| Trainers | 10/33 |
| New Pokemon | Koffing, Torkoal, Machop, Slugma, Grimer |
Lots of new Pokemon here! Grimer is a rare encounter (2%), but this is the only place to get one.
Other than that, there's nothing to do here, so exit to the north part of Route 112.
| Route 112 (north) | Hot, Hotter, Hottest |
|---|---|
| Items | 1/14 |
| Trainers | 12/33 |
| New Pokemon |
Just two trainers, then continue on to rejoin Route 111.
| Route 111 (north) | Hot, Hotter, Hottest |
|---|---|
| Items | 1/14 |
| Trainers | 15/33 |
| New Pokemon |
A boy standing in front of a tree will give you TM43 Secret Power (14/27). You can teach this move to one of your Pokemon and use them to create a Secret Base, if you'd like. Don't worry too much about who you teach it to - you can now purchase unlimited Secret Power TMs in Slateport.
There's one tricky trainer on this route - Black Belt Daisuke is on the rocky ledge in the northeast accessible with the Mach Bike. The slope is north of the Old Lady's Rest Stop. Besides him, the trainers are pretty obvious.
| Route 113 | Cinder Path |
|---|---|
| Items | 6/17 |
| Trainers | 10/24 |
| New Pokemon | Spinda, Skarmory |
Route 113 is a striking Route characterized by the falling ash from Mt. Chimney.
Northeast of Youngster Jaylen, you can find a hidden Ether in a pile of ash.

Head across the ledge east from there and you'll find a double battle. The northern trainer is a Ninja Boy, who will hide in hiding spots like piles of ash. Make sure you pay attention to spot them hiding.
After the battle, a Pokemaniac will challenge you (too bad Triple Battles haven't been invented yet). After you defeat him, loop around and check the ash pile he walked over for a hidden Nugget.

Then, head east to find a Super Repel.
Continue down the route. East of the twins, you'll find a Max Ether.
Pretty soon you'll come across a building. Talk to the man inside to get a Soot Sack.
While walking through soot-covered grass, you'll automatically collect it in your sack. If you want every flute, you'll have to collect 3250 steps' worth of soot. That's a bit of a grind, so don't think you need to do it all now. You might want to wait until the postgame, where you'll have to grind wild encounters anyways.
After that, you'll still need to get 14000 steps' worth of soot to get the base decorations, which are also required for mastery.
Head west from the workshop and hop down a ledge to find another pile of ash containing a hidden TM32 Double Team.

Finally, right before the soot ends, there is a sneaky Hyper Potion in the trees to the south.
| Fallarbor Town | Cinder Path |
|---|---|
| Items | 7/17 |
| Trainers | 10/24 |
| New Pokemon |
In Fallarbor Town, you can find a hidden Nugget in the crater in the southeast of town.

You can also talk to a woman using the PC in the Pokemon Center. This is Lanette, the developer of the PC storage system (truly a momentous occasion). She'll ask you to meet her in her house on route 114.
Finally, you can head into the Battle tent and talk to Scott for a MISSABLE encounter (8/13). You can also try and challenge the Battle Tent while you're here.
Trainer Extraordinaire - Fallarbor (5)
Win at the Fallarbor Battle Tent and receive a prize
The Fallarbor Battle Tent is reminiscent of the Battle Arena at the Battle Frontier.
In this tent, if you don't KO the opponent's Pokemon within three turns, judges will give you points based on the amount of offensive moves used, the accuracy of moves, and the remaining HP. The Pokemon with the fewest points will be disqualified. Also, Pokemon cannot be switched, and will be sent out in the order you register them.
Because of the points system, all-out offense will likely work better than playing defensively. Still, a setup move may be worth it - if you boost your attack by one stage and attack twice, that's about the same amount of damage as attacking three times, and you get to keep the boost if you stay in.
This tent wasn't too bad - I managed to get though with a level 29 Breloom, Level 27 Marshtomp, and Level 27 Kirlia. If you have fully-evolved Pokemon and good moves it should be a breeze.
(Funnily enough, there's a girl in the tent who says she wants to put all her faith in her Pokemon. Sounds like she needs to visit Verdanturf Town.)
| Route 114 | Cinder Path |
|---|---|
| Items | 11/17 |
| Trainers | 22/24 |
| New Pokemon | Swablu, Seviper, Nuzleaf |
Nuzleaf is a rare encounter (1%) on this route, but there's nowhere else you can catch it.
As you enter Route 114, you'll come across the Fossil Maniac's house. Head inside and visit his brother, who will give you TM28 Dig (15/27). Whatever you do, MAKE SURE you hold onto it until later in the game. You'll need a Pokemon with Dig for a puzzle, and it can be a little painful if you don't have the TM.
Next, you can get TM05 Roar (16/27) from an old man with a Poochyena. Head east from the north end of the bridge to find a double battle, and beyond it, an Energy Powder.
After crossing the bridge, head west to find a hidden Revive at the end of a path on the edge of the lake.

Lotad Tower (2)
Receive a Lotad Doll from Lanette
South of the bridge, you can find Lanette's house. She'll give you a Lotad doll, which does not count as a gifted item.
In a rock south of the southern grass patch, you can find a hidden Carbos.

After you head up the nearby stairs, you can smash a rock to follow a path to a Protein.
Finally, enter the cave at the end of the Route to reach Meteor Falls.
| Meteor Falls | Cinder Path |
|---|---|
| Items | 13/17 |
| Trainers | 22/24 |
| New Pokemon | Solrock |
Upon entering Meteor Falls, head north to find a Full Heal.
Free Falling (1)
Help out Professor Cozmo at Meteor Falls
After crossing the bridge, you'll witness a cutscene between Team Magma and Aqua, and this achievement will pop. Afterwards, continue to the northwest to find a Moon Stone. MAKE SURE you hang on to it, as it is required to evolve a Pokemon for the Pokedex achievement (either Jigglypuff or Skitty). If you lose it, you can't get another one!
Head south from the Moon Stone to enter Route 115.
| Route 115 | Learning to Strive |
|---|---|
| Items | 14/17 |
| Trainers | 15/21 |
| New Pokemon |
Head south of the exit to find a breakable rock that leads to a ledge containing a Great Ball.
Next, head northwest on the route, and go down the stairs onto a beach. You'll find a Battle Girl to fight, and north of her a hidden Heart Scale.

South of a Double Battle, you'll find a PP Up.
Finally, head down the stairs onto the southern beach (near the entrance to Rustboro City) and follow the beach around to find a Super Potion.
After that, make your way back to Route 112 north of Mauville City. The Cable Car will now be operational, letting you go to the summit of Mt. Chimney. There aren't any trainers or items to worry about for now, so simply head to the middle of the volcano to challenge Team Magma.
Geothermal Power (5)
Interfere with Team Magma on Mt. Chimney
Maxie is the threat here, but he's honestly not too bad. He has a level 24 Mightyena and Zubat (one wonders why he doesn't evolve it) and a level 25 Camerupt. As long as your team is reasonably diverse and properly leveled, you should be able to take him down pretty easily. I myself used Hariyama to take down Mightyena, Kirlia to KO Zubat, and Marshtomp to take down Camerupt (although pretty much any Water type would do, as Camerupt is 4x weak to Water.)
Once you beat him, make sure you interact with the machine to get the Meteorite.
Next up is heading to Lavaridge Town to defeat Flannery. Head south from the volcano, towards the Jagged Pass.
Volcano Baked (1)
Buy a cookie on Mt. Chimney
On the way, you'll see an old lady selling Lava Cookies near the cable car station. Buy one from her for 200 Pokedollars to earn this achievement. The Lava Cookie is basically a cheaper Full Heal, so feel free to buy a few if you'd like!
| Jagged Pass | Hot, Hotter, Hottest |
|---|---|
| Items | 4/14 |
| Trainers | 20/33 |
| New Pokemon | Spoink |
Note that this route has plenty of one-way ledges. It is possible to get all of the items and trainers in one go, but you'll have to choose the correct path. The Great Ball at the end is a little tricky - see my photo, and compare it with this map. If you miss anything, you can either go back to the summit with the Cable Car, or jump up the rocks with the Acro Bike.
Spoink is exclusive to this area, so try and catch one while you're here.
Jump down the first two ledges, and head to the patch of grass to the west. In the northwest corner is a hidden Full Heal.

Amoonguss Would Debute 6 Years Later (1)
Defeat the suspicious Magma grunt on Jagged Pass
MISSABLE
As doomhiker notes in the comments, this grunt will disappear upon receiving the Magma Emblem later in the story.
A little bit down the pass, you'll see a Magma grunt staring at the wall. Talk to him to intiate a battle.
After the exciting grunt battle, head east and down some stairs to find a Burn Heal.
This next part can be a little tricky. Head down the ledge to challenge the Picnicker and the Triathlete. Next, jump down the next two ledges, then head all the way to the west and jump off the ledge to find a hidden Great Ball.

After that, it's a straight shot to Lavaridge town (just don't jump down the ledges on Route 112).
| Lavaridge Town | Hot, Hotter, Hottest |
|---|---|
| Items | 5/14 |
| Trainers | 20/33 |
| New Pokemon |
A few things to do here. First of all, you can enter the Hot Springs through a door in the back of the Pokemon Center. Inside, you can find a hidden Ice Heal. Strange.

Next, head to the south part of town to find the Pokemon Herb Shop. Talk to the old man to get a gift Charcoal (17/27).
Why Not? (1)
Receive an Egg from the old lady at the Lavaridge Springs
Finally, talk to the old woman in front of the Hot Springs to get a Pokemon Egg. This egg will hatch into Wynaut, the baby form of Wobbuffet.
Once you're ready, head into the Gym.
Battle Addict - Lavaridge (5)
Defeat every trainer in Lavaridge gym
MISSABLE
You cannot battle the gym trainers after you defeat the leader, making this achievement missable.
There are 8 trainers in Lavaridge Gym, all hiding in holes. The image on this page of psypokes.com shows their locations
Who Turned Up the Temperature? (10)
Defeat Flannery to earn the Heat Badge
Again, Marshtomp makes the Gym very easy. Use Water Gun for Numel and Camerupt, and Mud Shot for Slugma and Torkoal. If Flannery manages to get a Sunny Day up, Water moves will only do half damage, so switch to Ground moves for the rest of the fight. Torkoal may be the biggest problem, as its Attract will cause Marshtomp to become infatuated if it is male. Still, you should be able to KO it with 2-3 Mud Shots, so it's not too much of a problem.
If you don't have Marshtomp, a strong Water-type and/or Ground-type Pokemon is likely your best bet. Of the options available at this point, Graveler, Tentacruel, or Pelipper may be worth considering. Just remember that Numel has Magnitude (which Graveler is weak to) and that Sunny Day cuts the power of Water type moves in half.
After defeating her, Flannery will give you the Heat Badge, which lets you use Strength outside of battle. She'll also give you TM50 Overheat.
As you exit the Gym, your rival will give you the Go-Goggles, allowing you to access the desert part of Route 111.

| Route 112 | Hot, Hotter, Hottest |
|---|---|
| Items | 6/14 |
| Trainers | 20/33 |
| New Pokemon |
Once you're finished in Lavaridge Town, head east to Route 112. After jumping two ledges, head north to find a Nugget. After jumping the rest of the ledges, you'll be near the entrance to the Fiery Path.
| Fiery Path | Hot, Hotter, Hottest |
|---|---|
| Items | 8/14 |
| Trainers | 20/33 |
| New Pokemon |
Using Strength, you can move some boulders to find TM06 Toxic and a Fire Stone. Next, you can exit the same way you came in, and head to the cable cars to return to the summit of Mt. Chimney. There, you'll find a few new trainers.
| Mt. Chimney | Hot, Hotter, Hottest |
|---|---|
| Items | 8/14 |
| Trainers | 25/33 |
| New Pokemon |
There are five trainers scettered around the volcano area. After you're done fighting them, head back down the cable car (or through Lavaridge again) to get to the desert portion of Route 111. Make sure you have the Mach Bike, a Pokemon with Rock Smash, and a few Repels.
| Route 111 (desert) | Hot, Hotter, Hottest |
|---|---|
| Items | 13/14 |
| Trainers | 33/33 |
| New Pokemon | Sandshrew, Trapinch, Baltoy, Cacnea |
As you enter the desert, you'll see a Stardust sitting in the open. There's also a hidden Protein north of Mirage Tower.

Heading south, you can find a hidden Stardust in the rock near Ruin Maniac Dusty:

And a hidden Rare Candy in the rock near Picnicker Becky:

Finally, in the far south of the route you can find TM37 Sandstorm.
There are a total of 8 trainers scattered throughout the desert. If you've fought all the trainers up to this point, the Hot, Hotter, Hottest - Trainer achievement should pop! There's still one item left for the item achievement, but that requires Surf.
Once you're done outside, you can head into the Mirage Tower.
| Mirage Tower | Hot, Hotter, Hottest |
|---|---|
| Items | 13/14 |
| Trainers | 33/33 |
| New Pokemon |
Amateur Archaeologist (1)
Acquire a fossil in the Mirage Tower
Just like Granite Cave, if you ride the Mach Bike at max speed over the cracked ground, you won't fall through. I recommend using Repel so that a wild encounter doesn't interrupt you. It may take a few tries to get the timing down, but that one stretch on the second floor is the only one you'll have to navigate to get to the Fossil at the top.
You can choose whichever you like - the Root Fossil will give the Rock/Grass Lileep, while the Claw Fossil will give the Rock/Bug Anorith. You'll be able to get the one you didn't pick after the Pokemon League, so don't worry too much about missing out. Anorith/Armaldo is more of an offensive Pokemon, while Lileep/Cradily is more defensive. Lileep's Suction Cups ability also makes it easier to find Fishing encounters, which may be useful for finding Feebas (especially if you need to check every spot). However, a Gulpin with Sticky Hold will do the same thing.
At this point, if you'd like, you can make the trek north to Fallarbor Town to drop off the Meteorite with Professor Cozmo. It's probably easier to wait until you have access to Fly, though. Otherwise, our next goal is the Gym in Petalburg City, so head back there however you like. If you head south through Mauville and onto Route 110, you can visit the Trick House and do the third puzzle while the EXP is still useful!
Trick Master Is Coveted (3)
Defeat every trainer and find every item in the third Trick House puzzle
MISSABLE
Once you beat the Trick House puzzles, any items and Trainers you missed will be inaccessible.
To start the third puzzle, examine the drawers in the northeast corner.
There are three trainers and two items: a Shadow Mail and a Wood Mail, both in the northwest corner.
If you stop by Rustboro City, you can also revive your Fossil Pokemon on the second floor of the Devon Corporation building (and grab the EXP. Share from Mr. Stone on the third floor if you haven't already).
Battle Addict - Petalburg (10)
Defeat every trainer in Petalburg gym
MISSABLE
You cannot battle the gym trainers after you defeat the leader, making this achievement missable.
The Petalburg Gym consist of a bunch of rooms, each containing one gym trainer. See the image below (courtesy of Bulbapedia):
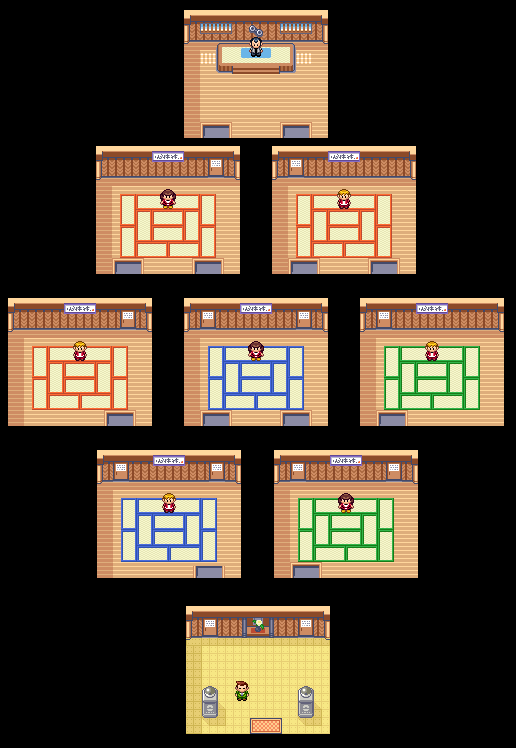
There are seven trainers total. Watch out for the Gym Trainer on the top left (in the "Strength Room"), as she has a Zangoose that knows Swords Dance and can wipe out your whole team if you're not careful. Or maybe I'm just bad.
Taking Down a Vanilla Team (10)
Defeat Norman to earn the Balance Badge
Norman isn't too bad - he has a level 27 Spinda and Vigoroth, a level 29 Linoone, and a level 31 Slaking. A Fighting type like Hariyama or Breloom can do pretty well (just watch out for Spinda's Psybeam). Try to take down Linoone before it can use Belly Drum (or on the same turn), or else it might go on a rampage. Slaking has a high Attack stat, but its ability Truant is easily exploited. Truant means Slaking can only attack every other turn, so a Pokemon with Protect/Detect or Dig can completely shut it down. Otherwise, just use a Special attacker like Marshtomp/Swampert and heal with items as necessary on the off turn.
If you happen to have a Gardevoir with Trace, you can send it out against Spinda, who will uselessly attempt to confuse you. Use that time to set up with Calm Mind, and you'll sweep through the rest of the battle.
Be careful about burning/poisoning/paralyzing Norman's Pokemon, as they all know Facade, which doubles in damage if the Pokemon is afflicted by a status condition!
After beating Norman, he will give you the Balance Badge, which allows you to use Surf outside of battle, as well as TM42 Facade.
Immediately after defeating Norman, Wally's dad will give you the Surf HM. At 95 base power, Surf is also a powerful move in its own right. I'd recommend teaching it to Marshtomp/Swampert right away!

Surf opens up a lot of places to explore. If you'd like, you can head back to previously-explored areas and finish up a few item/trainer achievements!
If you just want to get on with the story, feel free to skip this and the Sidequest: New Mauville section. There aren't any missable encounters or anything, so it's completely up to you! I would recommend swinging by Littleroot town at the very least to pick up the Amulet Coin, though.
| Petalburg City | Petals to the Wind |
|---|---|
| Items | 19/23 |
| Trainers | 9/16 |
| New Pokemon |
Before you leave Petalburg City, Surf across the northeast pond to find a Max Revive. Surf across the southwest pond to find an Ether and a hidden Rare Candy in the conspicuously empty patch.

Growing Stronger Every Day (3)
Receive a special prize from your Mom for defeating your Dad
Next, head back to Littleroot Town and talk to your mom to get an Amulet Coin. The Amulet Coin doubles prize money earned from battles! I highly recommend putting it on a Pokemon you use often (like Marshtomp/Swampert) and keeping it on for the rest of the game.
| Route 103 | Little Trainer Big World |
|---|---|
| Items | 3/3 |
| Trainers | 12/12 |
| New Pokemon |
Next, head back north to Route 103. There are two Swimmers in the water, who should be the last trainers you need for the Little Trainer Big World - Trainers achievement!
Continue east to Route 110. If you don't have the Mach Bike, head to Mauville City and get it while you're close.
| Route 110 | By Ship and by Bike |
|---|---|
| Items | 13/15 |
| Trainers | 23/30 |
| New Pokemon |
One of the islands in this route has a Rare Candy to pick up.
You can also do the latest Trick House challenge while you're here.
Trick Master Is Cool (3)
Defeat every trainer and find every item in the fourth Trick House puzzle
The Trick Master will be hiding in the window in the northwest corner of the room.
This puzzle is a Strength puzzle. It shoudln't be too bad (just make sure you don't trap yourself at the end). There's a Mech Mail in the northwest corner near a Battle Girl, and two other trainers throughout the room.
For your trouble, the Trick Master will give you a Smoke Ball.
Next, head south to Slateport City, and then on to Route 109.
| Route 109 | By Ship and by Bike |
|---|---|
| Items | 13/15 |
| Trainers | 22/30 |
| New Pokemon |
There are a total of seven Trainers swimming in the water and on the islands. The Bird Keeper on the southern island is easy to miss - he's hiding under an umbrella.
On one of the eastern islands, you can find a PP Up. On the island with the young couple, you can find a hidden Heart Scale in front of the girl.

These items and trainers should finish up both By Ship and by Bike achievements! After that, continue west onto Route 108.
| Route 108 | Surfing Shores |
|---|---|
| Items | 11/26 |
| Trainers | 8/23 |
| New Pokemon |
On the northern island with the Sailor and Cooltrainer, there's a Star Piece. South and a little bit west, there's an island with a lone rock. Search it for a hidden Rare Candy.

After finding the items and trainers outside, you can enter the Abandoned Ship. We can't fully explore it yet, but there are a few items and trainers to find right now.
| Abandoned Ship | Surfing Shores |
|---|---|
| Items | 17/26 |
| Trainers | 15/23 |
| New Pokemon |
As you enter, head in either door in front of you to fight two trainers. Exit, and enter the northwest door to find a Harbor Mail.
After heading down the stairs, search the southwest room for an Escape Rope, and then search the room to the north for a Dive Ball.
Head back up the stairs on the western side. Enter the room to fight a few trainers and find a Revive.
Go to the outside of the ship through the nearby door, and then go up the stairs to the second floor to find a Storage Key (which counts as an item pickup). Finally, head back to the basement and use the key to unlock the northeast door for TM13 Ice Beam.
Exit the ship, and continue west to Route 107.
| Route 107 | Surfing Shores |
|---|---|
| Items | 17/26 |
| Trainers | 21/23 |
| New Pokemon |
No items on this route, but there are quite a few trainers swimming in the water.
Stop in Dewford Town to heal, and to pick up TM36 Sludge Bomb (18/27) from a guy with glasses inside Dewford Hall.
Then, head north to Route 106.
| Route 106 | Surfing Shores |
|---|---|
| Items | 18/26 |
| Trainers | 23/23 |
| New Pokemon |
The final two trainers for Surfing Shores are swimming in the water here. South of the female swimmer is a Protein.
Next, head north to Route 105.
| Route 105 | Petals to the Wind |
|---|---|
| Items | 22/23 |
| Trainers | 16/16 |
| New Pokemon |
Head west as you enter the route to find an island with an Iron. On the smaller island to the northeast, you can find a hidden Heart Scale.

As you head north, you'll see a long island. West of that is a smaller island with a Bird Keeper and a Ruin Maniac. In the gap in the trees between them, you can find a hidden Big Pearl.

The final seven trainers for Petals to the Wind are located here. Make sure you fully explore the route (including the western section) to find them!
Next, head north (through Petalburg Woods) to get to the northern part of Route 104.
| Route 104 (north) | Petals to the Wind |
|---|---|
| Items | 23/23 |
| Trainers | 16/16 |
| New Pokemon |
You can Surf on the eastern side of the pond to find a PP Up, which is the last item required for Petals to the Wind!
Next, head north through Rustboro City to Route 115.
| Route 115 | Learning to Strive |
|---|---|
| Items | 17/17 |
| Trainers | 21/21 |
| New Pokemon | Jigglypuff |
You may see an icon pop up in the corner as you enter the route. That means Black Belt Nob is ready for a rematch (which will eventually be required for an achievement), so make sure to fight him while you're here!
Use Surf to head to the northernmost part of the route. You'll find a maze with the remaining six trainers for Learning to Strive, as well as a Heal Powder. Head up the stairs onto a rocky outcropping to find TM01 Focus Punch, and then head east to ride up a slope with the Mach Bike and follow the path to find an Iron.
There aren't any items we can get in northern Hoenn at the moment, so head back to Mauville. On the way, If you weren't able to beat the Verdanturf Battle Tent earlier, you may want to give it a try with your stronger Pokemon!
Once you get to Mauville City, head north to Route 111 for one final item.
| Route 111 | Hot, Hotter, Hottest |
|---|---|
| Items | 14/14 |
| Trainers | 33/33 |
| New Pokemon |
West of the Winstrate house is a small lake. Surf to the western side to find a HP Up, which is the last of the items required for Hot, Hotter, Hottest!
Finally, head back to Mauville to start a small sidequest.
New Mauville Maintenance (5)
Disable the generator in New Mauville and obtain your reward
Near the Pokemon Center in Mauville City, you'll find Wattson. Speak to him, and he'll tell you about an area known as New Mauville, and ask you to shut down a generator there.
The entrance to New Mauville is located on Route 110. Surf east under the road to find it.
| New Mauville | Hoenn Meridian |
|---|---|
| Items | 10/12 |
| Trainers | 13/16 |
| New Pokemon | Magnemite, Voltorb |
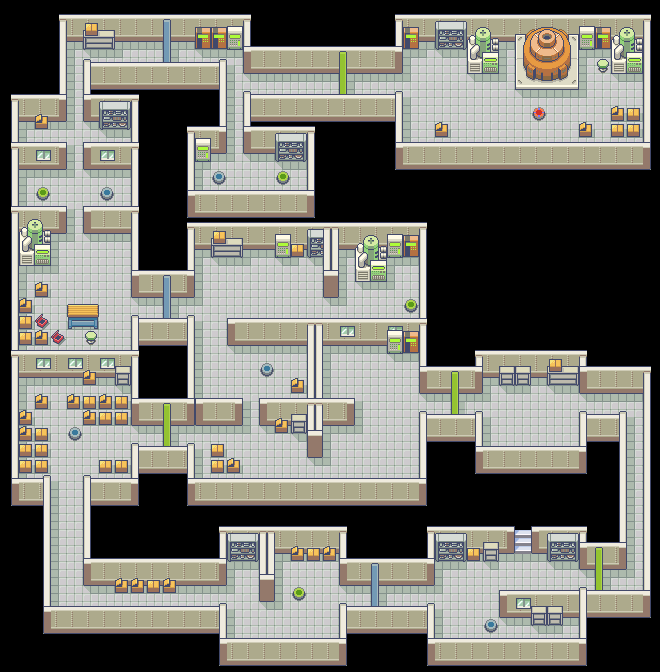
Image courtesy of Bulbapedia.
The items are mostly pretty straightforward. You'll find an Escape Rope in the central room, an Ultra Ball in the room east of there (north of the entrance), a Paralyze Heal in the room with two switches in the northeast, a Full Heal in the central north room with two switches, and a Thunder Stone east of the generator. You'll also find three Voltorbs sitting on switches disguised as Poke Balls - make sure to defeat them, as they're required for an achievement!
Once you power down the generator, you can use an Escape Rope to leave, and talk to Wattson to get your reward: TM24 Thunderbolt.
At long last, we're ready to continue the story. While you're in Mauville City, switch out the Mach Bike for the Acro Bike. After that, head east to Route 118.
| Route 118 | Hoenn Meridian |
|---|---|
| Items | 12/12 |
| Trainers | 16/16 |
| New Pokemon | Carvanha, Kecleon |
Fishing Enthusiast (3)
Receive the Good Rod on Route 118
Right after Surfing to the other side of the Route, talk to the nearby Fisherman to obtain the Good Rod. You can immediately use it in the nearby water to catch a Carvanha, if you'd like!
Don't worry too much about trying to catch Kecleon - it's a 1% encounter, and there are some guaranteed spawns later in the game.
A little bit southeast of the Fisherman who gives you the Rod is a hidden Iron inside a rock.

There are three trainers on the route, and they're all pretty easy to spot. On a ledge northeast of a Bird Keeper, there's a Hyper Potion. Collecting these trainers and items should unlock both Hoenn Meridian achievements!
Route 119 is to the north, but it's probably worth visiting Route 123 to the east first.
| Route 123 | Finisterre |
|---|---|
| Items | 2/34 |
| Trainers | 4/26 |
| New Pokemon | Wailmer |
Using the Good Rod, you can catch Wailmer in the water. You'll need a Wailord for a puzzle later in the game, so it might not be a bad idea to train it up. Alternatively, you can wait until you get the Super Rod to get one at a higher level.
Here, you can find the Berry Master's house. Not only does he have a large plot perfect for growing Berries, but he will also give out two free berries every day.
Also of interest is his wife. if you tell her the correct 2-word phrase, you can get a rare berry. The only phrase you can access now is "GREAT BATTLE," which will give you a Spelon Berry. You may actually want to tell her a non-special phrase, though, as if you do that you have a 1 in 10 chance of receiving the Lum Berry. The Lum Berry is a very useful Berry that cures any status condition. Make sure you hold onto it (or grow multiple copies), as it will come in handy later on in the Battle Frontier. You can get one berry a day from her, so you can either come back on different days or save in front of her and reload until you get the berry.
For Contests, if you'd like to use my strategy, you're going to need 10-15 Pomeg, Kelpsy, and Grepa berries, so you can get started planting them here if you'd like. There are plenty of plots here, and the location is easy to remember, so it's a pretty ideal spot for growing berries!
Items-wise, there's an Ultra Ball behind the southern fence, and a hidden Revive at the end of the path north of the berry garden.

Once you're ready, backtrack a bit and head north to Route 119.
| Route 119 | Welcome to the Jungle |
|---|---|
| Items | 7/31 |
| Trainers | 14/40 |
| New Pokemon | Tropius, Feebas |
Route 119 is a huge jungle route with plenty of trainers and items to collect! The route is long and sprawling, so having a map open might be helpful.
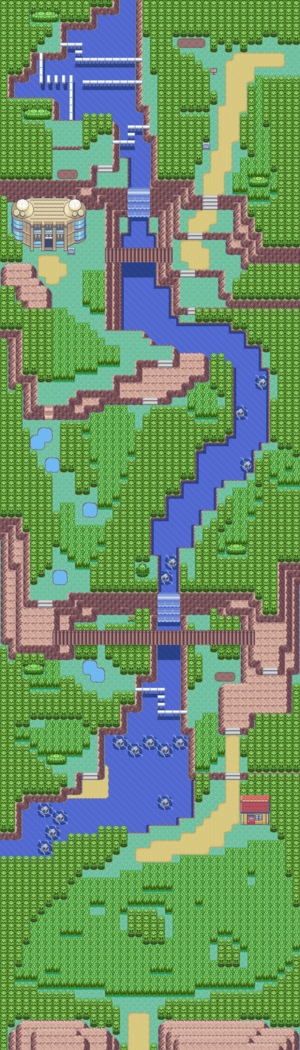
(from Bulbapedia)
There are two Pokemon exclusive to Route 119. Tropius is a 9% encounter in the tall grass, which shouldn't be too hard to find. Feebas, on the other hand, has the potential to be much worse.
One Tile Away from Beauty (25)
Catch a wild Feebas
Route 119 is home to the infamous Feebas. Feebas is found as a Fishing encounter on 6 specific tiles in the river on Route 119. The problem is that there are 437 total potential tiles, making it very hard to track Feebas down. Thankfully, there are ways to even the odds.
The first is preparing your party. If you have a Pokemon with the ability Suction Cups (Lileep) or Sticky Hold (Gulpin/Swalot) in the first slot of your party, they will increase your chance of fishing successfully from 50% to 92.5%. This can save a lot of time in the long run (especially if you need to check every spot).
Next, you should use the Old Rod instead of the Good or Super Rod. You can find Feebas with any rod, but the Old Rod will only require you to hit A once to land it.
Finally, you should check out this tile calculator shared by Spagg and GoJamBe in the comments. This calculator only works if you didn't change the trendy phrase in Dewford Town! If that's true, it should help narrow down the spots to search considerably. Make sure you select "Emerald," then enter your Trainer ID (found on your Trainer Card, accessible by selecting your name in the menu) and the Dewford trendy phrase, and it should label a few spots on the map. Try the red spots first. Fish a couple times in each spot, as Feebas has a 50% chance of appearing. If the red spots don't work, try the yellow spots, and if that doesn't work, try the green spots.
If none of those spots work or you've changed the trendy phrase, you'll have to find Feebas the old-fashioned way by checking tiles one-by-one. I would recommend following this strategy, and fishing only once per tile.
Several users recommend getting a beneficial Nature for evolving Feebas. A Feebas with a Modest, Quiet, Rash, or Mild Nature will prefer Dry Pokeblocks, increasing its Beauty stat more effectively. However, if you use Kelpsy berries to make the Pokeblocks, you'll be able to max out Beauty with any Nature, so it doesn't really matter unless you want a beneficial Nature on Milotic for the Battle Frontier.
The tiles Feebas spawns in will not change unless you change the trendy phrase in Dewford town, so if you do want to catch multiple Feebas later on, you may want to note down the spot you found (or use the calculator again).
In the large southernmost grass patch, there's a total of six trainers. They will mimic your actions, so try and drive them into a corner of their wander radius to challenge them.
In the northwestern area of the patch, there is a Super Repel. In the northeastern corner, there is a Hyper Potion and a hidden Full Heal in a 1-square clearing.

Next, surf northwest across the river to challenge a fisherman, and pick up a Zinc from the clearing behind him.
After that, continue on the eastern side of the route. Before you head up the rocky slope, you can head west through the grass to find a bridge you can cross with the Acro Bike. To jump across, press the direction you want to go and B at the same time. Once you're on the western side, head north to a Secret Base entrance. Search the nearby flowers for a hidden Calcium.

Go back across the river, and go up the rocky slope and across the bridge. There's a Parasol Lady in the nearby tall grass - don't miss her! Head northwest to a muddy slope, and nearby will be a Hyper Potion. Head back south and then northeast to continue. When you reach another rocky slope, head east to find an Elixir.
As you reach the Weather institute, you should have 14 trainers defeated and 7 items. If you don't make sure you check the tall grass at the beginning of the route - some of those trainers could be easy to miss!
Meteorological Interest (5)
Deal with Team Aqua at the Weather Institute
Panic! At the Institute (3)
Defeat every grunt at the Weather Institute
MISSABLE
After Shelly is defeated, the remaining grunts will clear out. If you skipped any of thim, you will miss this achievement.
Once you enter, you can rest in the bed in the northwest room (which also has a PC, for whatever reason).
There are five Aqua Grunts to fight - two on the first floor, and three on the second floor. They're all pretty hard to miss.
On the second floor, you'll face off against Aqua Admin Shelly, who shouldn't be too challenging. She brings a level 28 Carvanha and Mightyena, both of which can be dispatched by a Fighting type.
After defeating her, the staff will give you a Castform. It holds a Mystic Water, which boosts the power of Water-type moves. Make sure you heal again before leaving the Weather Institute, as your Rival will challenge you pretty soon after you cross the bridge.
| Route 119 | Welcome to the Jungle |
|---|---|
| Items | 11/31 |
| Trainers | 17/40 |
| New Pokemon | Tropius, Feebas |
After crossing the bridge, head south to find an Elixir. Surf south along the river to find a hidden Ultra Ball in a grass patch:

Surf further south to find a Leaf Stone near the waterfall. Finally, Surf all the way north to find a hidden Max Ether on a ledge southeast of the waterfall.

Return to the path, and head north of the bridge to trigger a Rival battle.
How Much Stronger Have You Gotten? (5)
Defeat your Rival on Route 119
Assuming you picked Mudkip, your rival will show up with Slugma, Grovyle, and either Pelipper (Brendan) or Lombre (May).
At this point, your team should either be diverse enough or highly-leveled enough to blast through without many problems. If you bring a Flying type, you should be pretty good.
After the fight, your rival will give you HM02 Fly, although you're unable to use the field move until after the next Gym. Scott will also come congratulate you (9/13). There's a few more trainers on the path ahead to Fortree City.
The Gym isn't accessible quite yet, but there are still a few things to do here in Fortree City. First of all, talk to the guy in the northeast house to watch him send his Wingull out. This will lead to an achievement down the line.
Next, talk to the old woman in the house northwest of the Gym:
Right or Left? (3)
Receive the TM10 Hidden Power from playing a guessing game with an old woman
You'll have to guess which hand she has the coin in three times in a row. The correct answer is Right, Right, Left. She'll give you TM10 Hidden Power.
After that, head to the house next to the Pokemon Center:
Positively Charged (3)
Trade a Volbeat for a Plusle in Fortree City
The boy inside wants to trade his Plusle for a Volbeat. Go ahead, as it's required for an achievement.
If you don't have a Volbeat, you can rarely catch one on Route 117 west of Mauville City, or breed an Illumise in the Day Care (also on Route 117). You may want to wait until you beat the Fortree Gym, though, so you can quickly and easily Fly back.
That's all we can do right now, so head east onto Route 120. There are a few items and trainers here, but I'll hold off on listing them until after we beat the Gym.
Who You Gonna Call? (2)
Defeat the invisible obstacle with the help of the Devon Scope
Not too far down the route, you'll come across Steven standing on a bridge. Talk to him, and he'll trigger a battle with an invisible Kecleon. This is a good opportunity to catch one if you haven't already (although there are quite a few more Kecleons to find, so don't sweat it if you can't catch it).
After defeating the Kecleon, he'll give you the Devon Scope, which will allow you to identify and defeat invisible Pokemon blocking the way. This will open the way to Fortree City Gym. You don't technically have to beat it now (in fact, you can get through the rest of the game before beating it), but having access to Fly will make your life a lot easier. Head back to challenge it.
Battle Addict - Fortree (10)
Defeat every trainer in Fortree gym
MISSABLE
You cannot battle the gym trainers after you defeat the leader, making this achievement missable.
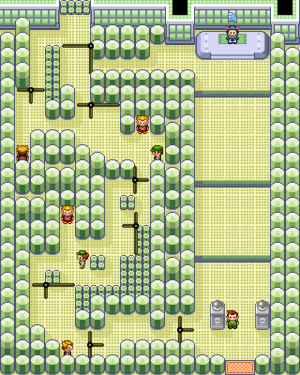
(From Bulbapedia)
There are six trainers in this gym. They're all on the main path, so they're pretty hard to miss!
Sky Tamer (10)
Defeat Winona to earn the Feather Badge
Winona has five Pokemon: a level 29 Swablu and Tropius, a level 30 Pelipper, a level 31 Skarmory, and a level 33 Altaria. Here are some notes:
- If you have an Electric type Pokemon like Manectric or Electrode, they'll probably come in handy for this gym and the final one (which is Water-type).
- Swampert can hold its own against many of the Pokemon, and Surf is a pretty good answer for Skarmory in particular.
- Tropius might appear difficult, but it's honestly not too bad. On the first turn, it will likely either use Sunny Day or Solar Beam. If it uses Solar Beam, you can just switch a Pokemon in that resists Grass (Crobat, in my case) for free, and go from there. If it uses Sunny Day, you should try and KO it as quickly as possible, as it will be able to use Solar Beam without a charging turn.
- Pelipper seems to like spamming Protect. You can take advantage of this and use stat-boosting moves (or X items) to set up a Pokemon to sweep the rest of the battle. I used Calm Mind with Gardevoir.
- Skarmory has sky-high Defense and a good defensive typing, but its Special Defense is its weakness. Fire or Electric moves will take it down, as will Surf (or a Calm Mind-boosted Psychic).
- Altaria will use Dragon Dance to boost its Attack and Speed. Try to KO it sooner rather than later - if it manages to get enough boosts up it can be very difficult to take down! Setting up on Pelipper can help you avoid this.
After the fight, Winona will give you TM40 Aerial Ace. Shortly after exiting the Gym, you'll receive a call from Scott (10/13)!

Now that we have access to Fly, there's a few things we can do before we move on. First of all, fly back to Dewford Town to change the trendy phrase.
Everyone Knows (1)
Set a new trendy phrase
If you've already caught Feebas, you can set a new trendy phrase in Dewford Town without making things harder for yourself. Still, if you want to have a predictable Feebas location for whatever reason, you can save before changing the trend and then reload your save afterwards.
To set a new phrase, talk to the man directly north of the Pokemon Center. When he asks you if the current trendy phrase is the biggest happening thing, select "No." He'll then ask you for a new phrase. Input whatever you'd like, and the trend will be changed. Bulbapedia seems to say that it's possible for the change to not be accepted if it's not trendy enough, so if one phrase doesn't work, try another.
Next, you can head to Route 110 to do the next Trick House puzzle, if you'd like. There's no achievement for this specific puzzle and no Trainers to fight, so you won't miss out on much if you save it for later.
To start the puzzle, search the left plant.
There are actually no items/trainers in this puzzle, so there's no individual achievement for it.
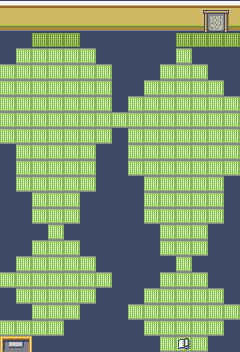
(From Bulbapedia)
Each person seen in the picture above is a robot that will ask you a trivia question. You'll have to answer them all correctly to pass. The answers can be found here on Bulbapedia.
For solving the puzzle, Trick Master will give you TM12 Taunt.
Finally, you can Fly back to Fallarbor Town to give the Meteorite back to Prof. Cozmo if you haven't already.
I Found This Rock and Thought About You (3)
Return the stolen meteor to Professor Cozmo
In Fallarbor Town, Cozmo is in the southwestern house, west of the Poke Mart. Simply talk to him to give him the Meteroite in exchange for TM27 Return.
Once you're ready to continue the story, fly back to Fortree City. Before moving on, there are a few hidden Kecleon in the surrounding area that we can defeat to progress an achievement. See this excellent map, courtesy of zeras13:

It may help to open the image in a new tab to zoom in more. There are two Kecleon to find on Route 119, and five on Route 120 (not counting the one on the bridge). The Kecleon in Fortree City on the path to the Gym doesn't count for the achievement either, as DragonCurse4 notes. If you defeated all three Voltorb in New Mauville, defeating all of these Kecleon should put you at 10/13 for the Eagle Eye achievement.
| Route 120 | Welcome to the Jungle |
|---|---|
| Items | 21/31 |
| Trainers | 30/40 |
| New Pokemon | Absol |
Before the bridge, there are two trainers (as well as Gabby and Ty, who aren't included in the count). You may have fought them the last time you were here. You'll also find two Kecleon: one north of the sign, and one at the top of the stairs south of the tall grass.
For items, there is a path on the north side of this area with a few trees to Cut. At the end of the path is a hidden Rare Candy.

In the southenmost one-tile clearing in the tall grass is a hidden Revive.

Head down the stairs south of the grass (where you found a Kecleon) to find a Nest Ball. Then, you can Surf across the pond to a cave opening. Inside the cave, you'll find TM11 Sunny Day. There's nothing else inside this cave (not even Pokemon), so head back out to the route.
After crossing the bridge, you'll come across an area with a lot of puddles. In this area, you can find six trainers and a Revive near one of the puddles.
Next is a maze through tall grass. At the first intersection, head west to find a hidden Zinc.

There's another hidden Kecleon on the western path, and a Nugget in the southwestern corner.
After crossing the second bridge, you'll find Bug Maniac Jeffrey. He's one of the trainers you need to rematch a few times (to steal his Silver Powder), so make sure to battle him!
Near Jeffrey, there's a Hyper Potion north of a patch of grass. After that, head southwest and up some stairs to an elevated area. Surf across the pond to find a Full Heal in the open and a hidden Rare Candy on the southwest side of the pond.

North of the berry patch is another hidden Kecleon. After defeating it, head northeast to find a Ninja Boy, then head through the grass an up the stairs to find a Ruin Maniac, and the final Kecleon north of the stone structure. If you defeated all of the Voltorb in New Mauville and all of the Kecleon, you should be at 10/13 for the Eagle Eye achievement!
| Route 121 | Welcome to the Jungle |
|---|---|
| Items | 29/31 |
| Trainers | 40/40 |
| New Pokemon | Shuppet |
As you enter Route 121, head south of the fence to find a hidden HP Up in the empty spot of grass.

As you go east, you'll come across a stone dock. East of the dock is a Zinc. Continue east to a fence maze area. Near two trainers, you'll find a Revive. Past an old man, you'll find a Carbos. North of a Poke Fan, there's an area blocked by a Cut tree. Enter that area, and search the southwest corner for a hidden Nugget.

East of the Poke Fan, search the bare spot for a hidden Full Heal.

Finally, search the bare spot near the two Cooltrainers for a hidden Max Revive.

There are ten trainers on this route, and defeating them all should earn you the Welcome to the Jungle Trainer achievement!
For whatever reason, my progress on the item achievement went from 21 to 29 despite only picking up 7 items. It may be possible that one of the Berry plants or a story event on the route counts for the items achievement.
This route also contains the Safari Zone, an area with plenty of new Pokemon and items of its own. Before we go there, though, let's head to Lilycove City for a little bit.
| Lilycove City | Finisterre |
|---|---|
| Items | 6/34 |
| Trainers | 4/26 |
| New Pokemon |
The most pressing thing to do in Lilycove City is to head to the Cove Lily motel in the southeast part of the city. On the second floor, you'll find Scott, in a MISSABLE encounter (11/13).
After that, there are a few things you can do. If you head to the Lilycove Department store, you'll find your rival sitting out front. Talk to them for the fifth and final Rival battle.
I'll Battle with You (5)
Defeat your Rival in Lilycove City
MISSABLE
This achievement is apparently missable, as your Rival will disappear at some point. I'm not sure at what point they disappear - you can at least beat the Aqua Hideout and Tate and Liza and they'll still be there. Selecting "No" or losing the fight also doesn't seem to make them disappear, either.
In any case, this is the final fight with May/Brendan. If you chose Mudkip, they will bring a level 31 Tropius, a level 32 Slugma and Pelipper, and a level 34 Grovyle. Again, as long as you have an answer for Grass types, this fight shouldn't be too hard. You can also abuse Pelipper's love for Protect to try and set up.
Lilycove is also the home of the Pokemon Contest Hall. I've put all information about Contests in Step 3. If you'd like, you can get started on them now, but it might be better to wait so you can have access to things like the cloning glitch. For now, you can talk to one of the receptionists in the Hall to get a Pokeblock Case, which will let you enter the Safari Zone.
There are a few items to pick up in Lilycove. First, head to the south side of the city and follow the path to a shrine. In front of it will be a Max Repel.
Next, head to the northeast part of the city and jump down the nearby ledge. In the nearby house, there's a sleepy man who will give you TM44 Rest (19/27).
Next, head south down the stairs to a beach area. There, you can head north to find a hidden PP Up in a rock.

Head to the southeast side of the beach and search a rock for a hidden Poke Ball (how useful):

On the southwest side of the beach, search the rock for a hidden Heart Scale:

There's not much else to do in Lilycove right now, so head back to Route 121 to explore the Safari Zone.
| Safari Zone | Finisterre |
|---|---|
| Items | 9/34 |
| Trainers | 4/26 |
| New Pokemon | A lot (click to expand)Pikachu, Doduo, Dodrio, Natu, Xatu, Girafarig, Psyduck, Golduck, Rhyhorn, Pinsir, Heracross, Phanpy |
The Emerald Safari Zone is divided into six areas. Here's a map, courtesy of Bulbapedia:
Areas 5 and 6 are inaccessible until after defeating the Pokemon League. Area 3 requires the Mach Bike to access, and Area 4 requires the Acro Bike. There's an item in both area 3 and 4, so you'll have to make a few trips if you want both of them.
For information on Safari Zone mechanics and strategies, check out the Safari Zone section of this guide.
I'll go through each Area, and note which new Pokemon and items you can find.
AREA 1/2
The grass Pokemon in Area 1 and 2 are the same as each other. The new Pokemon you can find are Pikachu, Doduo, Natu, Girafarig, and Wobbuffet (if you didn't evolve your Wynaut from earlier).
In Area 2, you can find Psyduck while surfing on the water.
In Area 2, you can Surf across the water in the southwest to find a Max Revive.
AREA 3
Area 3 is located in the northwest, and is only accessible with the Mach Bike. In the grass, you can find Dodrio, Rhyhorn, and Pinsir, and Surfing on the water you can find Golduck. Golduck and Dodrio are 5% encounters and are a bit harder to catch, so I'll leave it up to you if you'd rather catch them here or evolve their lower forms. Doduo evolves at 31, and Psyduck evolves at 33, so there aren't too many levels to grind. Pinsir is also a 5% encounter and hard to catch, but it's exclusive to the Safari Zone, so you don't really have a choice.
Surf across the lake in the northern part to find TM22 SolarBeam.
AREA 4
Area 4 is north of Area 1, and is only accessible with the Acro Bike. In the grass, you can now find Xatu, Heracross, and Phanpy. Again, Xatu is a 5% encounter and hard to catch, so you might want to evolve a Natu instead (especially since Natu evolves at only level 25!). Heracross is also 5%, but like Pinsir is a Safari Zone exclusive.
In the northern part of the area, you can find a Calcium in a patch of grass.
Once you've caught all the Pokemon you'd like, head southe of Route 121 to Route 122 to continue the story. You should bring a Grass Pokemon with you, as well as one that knows Cut.
| Route 122 | Finisterre |
|---|---|
| Items | 9/34 |
| Trainers | 4/26 |
| New Pokemon |
Route 122 is pretty short, with no new Pokemon or items. Head into Mt. Pyre.
| Mt. Pyre | Finisterre |
|---|---|
| Items | 20/34 |
| Trainers | 15/26 |
| New Pokemon | Duskull, Vulpix, Chimecho |
Head north from the entrance and talk to the old woman in the northeast corner to be gifted a Cleanse Tag (20/27).
Go up the northern stairs to continue on the interior of the building. On the second floor, in the southwest corner you can find an Ultra Ball..
On the third floor, you can find a Super Repel to the west.
On floors 4-6, you can find Duskull as a 10% encounter
Head up to the sixth floor, and in the southern portion you'll find TM30 Shadow Ball. Drop through the nearby hole to return to the fifth floor. Near where you land, you'll find a Lax Incense. Next, head through the southern hole to go to the fourth floor. Along the path, you'll find a Sea Incense. Importantly, DO NOT sell the Sea Incense or toss it, as you need it to breed an Azurill for the Pokedex!
Once you've collected all the items, head back to the first floor and use the western exit with the red carpet to go to the exterior portion of Mt. Pyre. In this section, you can find Vulpix in the grass.
Continuing along, you'll find TM48 Skill Swap and a Max Potion slightly off the path. From where you found the Max Potion, head west past the stairs. The southern grassy path leads to a headstone with a hidden Max Ether.

The northern path leads to a headstone with a hidden Ultra Ball.

Finally, head up the stairs to the summit. On the summit, you can find Chimecho as a rare 2% encounter. This is the only area they appear, so you might as well get one while you're here!
Follow the path west of the first grunt to find an area with four headstones. Search the southwest one for a hidden Zinc.

In the northeast corner, past a female Aqua grunt, you'll find a patch of grass with a hidden Rare Candy. If the grunt is in the way, just talk to Archie and she'll leave.

Orbs of Power (5)
Witness the events on Mt. Pyre's summit
After talking to Archie, he'll leave with the Red Orb. Once you've grabbed all the items, head back out of Mt Pyre, and head south to Route 123.
| Route 123 | Finisterre |
|---|---|
| Items | 27/34 |
| Trainers | 26/26 |
| New Pokemon |
After entering the route, use Cut to cut down a tree to the east. You'll find a path with three branches. The southern branch leads to a hidden Rare Candy.

The middle branch leads to a trainer battle and a hidden PP Up.

The northern branch leads to another trainer.
Head west, and next to the berry patch you'll find a girl. Speak to her with a Grass-type Pokemon, and she'll give you TM19 Giga Drain (21/27).
Head west past a grass patch, and check the nearby rock for a hidden Hyper Potion.

Head north to find another berry patch, and jump down the ledge to the west to find an Elixir and a hidden Super Repel in the empty spot in the grass.

Next, jump down the ledge to the west. Here you have two different paths. You can head through the grass patch at the southeast and continue on the southern road, or jump down the ledge to the southwest and continue on the northern path. You'll have to do both eventually, so let's go north first.
Jump down the ledge, and you'll see a cooltrainer to your left. Battle him, and continue past the ledges to your west to reach a pond area. West of the pond, you'll find a Calcium. To go down the southern path, you'll have to fly back to Lilycove and make your way to the entrance of Route 123 again.
Once you get back to Route 123, follow the dirt road on the south side of the route to take the other path. You'll find a few extra trainers, a Revival Herb, and a PP Up at the end of the path. You should also unlock the Finisterre trainer achievement!
Next, Fly to Lavaridge Town and make your way to Jagged Pass to enter the Magma Hideout. You'll need a Pokemon with Strength.
| Magma Hideout | Earth Exterminator |
|---|---|
| Items | 7/7 |
| Trainers | 16/16 |
| New Pokemon |
Earth Exterminator (10)
Defeat every grunt and find every item in the Magma Hideout
MISSABLE
Once you defeat Maxie, all of the grunts will disappear, making this achievement missable. Items will still remain, though.
In the entrance area, you'll fight 1 Magma grunt. Head through the southeast exit.
In this cliffside area, you'll fight four grunts. Head down the stairs, and enter the first cave you see facing north.
In this area, there are four grunts on either side of a lava pool, as well as a Full Restore and a Max Elixir nearby. Head east and into the door to return to the entrance area.
Follow this path around to find a grunt and a Rare Candy. Backtrack through the lava pool room, and head south through the cliffside area, exiting through the door at the very bottom.
Fight the first grunt you see in this room, and head east to a doorway.
In this room with a lot of machinery, you'll find a grunt at the back, and a PP Max in the west, Return to the previous room.
Head down the stairs to face another grunt. Head west to find a Nugget, then head south through the nearby door.
Follow the path. You'll fight three more grunts, and then Magma Admin Tabitha. Tabitha won't count towards the trainers. Continue on the path, and pick up a Max Revive. At this point, you should be at 22/23. Head south and you'll find Maxie. Don't worry, the last item we need is on the way out! When you're ready, go ahead and talk to him.
Expanding the Earth (5)
Defeat Maxie in Team Magma's hideout
This time, Maxie brings a level 37 Mightyena, a level 38 Crobat, and a level 39 Camerupt. None of them can stand up very well to Swampert's Surf, especially Camerupt. If you don't have Swampert, a fully-evolved Water type will do.
After defeating Maxie, head through the nearby door. To your west, you'll find an Escape Rope, which should be the last item you need. Either use it right away to get out, or take the shortcut to the north to end up back in the entrance area.
Once you exit the Magma Hideout, Fly to Slateport City (make sure you've met Scott in Lilycove City first, though). Northeast of the Pokemon Center, you'll see a commotion. Talk to Capt. Stern in the center, and Team Aqua will steal his submarine in a cutscene. Archie will give a very subtle hint that Team Aqua's base is in Lilycove City.
Head to Lilycove City, and surf northeast of the beach to find the Aqua Hideout.
| Aqua Hideout | Valiant Vigilante |
|---|---|
| Items | 4/4 |
| Trainers | 8/8 |
| New Pokemon |
Valiant Vigilante (5)
Defeat every grunt and find every item in the Aqua Hideout
MISSABLE
After you defeat Archie in the Seafloor Cavern, all grunts will disappear, making this achievement missable. Items will still be there, though.
As you enter the Hideout, you'll find a grunt circling around a barrier. Defeat him, then head through the door in the northeast.
In this room, you'll find two teleporters. Take the eastern one to find a Max Elixir, then head through the western one to find a room with three grunts. Defeat them, then take the portal in the southwest corner.
You'll find a room with several portals. Take them in this order: Left, Center, Left, and Left. You'll reach Archie's office, where you'll find four items. Two are actually Electrode - defeat or capture them to make progress (12/13) in the Eagle Eye achievement. The other two are a Nugget, and the Master Ball. I highly recommend you save the Master Ball for Latios, especially if you're going to reset or RNG manipulate for a better Nature/IVs.
Backtrack to the room with the three grunts, and head through the eastern portal. Head down the stairs, and you'll find a room with machinery and a single grunt. defeat him, and enter the southwestern portal. This will bring you to a Nest Ball. Return to the machinery room, and take the eastern portal, then head up the stairs.
You'll enter a room with computers and a single grunt. Beat him, then head down the northeastern stairs to reach a room with a grunt Double Battle. Defeating them should pop the Valiant Vigilante achievement. Make sure you have it before continuing.
Head through the portal, and talk to Matt to challenge him.
Expanding the Seas (5)
Defeat the Admin in Team Aqua's hideout
Matt at the end is pretty easy - he just brings a level 32 Mightyena and a level 34 Golbat. Swampert (or any Water type) with Surf should do just fine.
After the fight, Archie will escape with the submarine.
| Route 124 | Too Much Water |
|---|---|
| Items | 0/17 |
| Trainers | 8/16 |
| New Pokemon |
With Team Aqua defeated, head east of Lilycove city onto Route 124.
There are no items we can obtain quite yet, but there are eight trainers spread throughout this route.
| Mossdeep City | Too Much Water |
|---|---|
| Items | 1/17 |
| Trainers | 8/16 |
| New Pokemon | Sharpedo |
Welcome to Mossdeep City! Before you do anything else, head towards the Mossdeep Space Center on the east side of town. On the way, you'll run into Scott, in a MISSABLE encounter (12/13)!
South of where Scott was, you'll see an item on a lower ledge. Take the stairs to the west, and you'll see it's a Net Ball.
In the lobby of the Space Center, you can talk to a sailor, who will give you a Sun Stone (22/27).
Fishing Master (4)
Receive the Super Rod in Mossdeep City
Northwest of the Space Center, and east of the Gym, there is a house on a ledge. Talk to the fisherman inside to get the Super Rod.
Wingull Postal Service (4)
Receive a Mental Herb for checking on the successful return of Wingull
Next to the Space Center's stairs, there's a house. Talk to the Wingull inside, and it will fly back to Fortree City. Quickly Fly back there yourself. Check the northeast house to talk to the man inside to get a Mental Herb, and this achievement!
Go ahead and fly back to Mossdeep City. Northwest of the Pokemon Center, a boy will give you a King's Rock (23/27).
Once you're ready, head to the Mossdeep City Gym.
Battle Addict - Mossdeep (10)
Defeat every trainer in Mossdeep gym
MISSABLE
You cannot battle the gym trainers after you defeat the leader, making this achievement missable.

(from Bulbapedia)
There are a total of 12 trainers within the Mossdeep Gym. To challenge them all, you'll have to press the colored buttons on the ground to rotate them to face you. All of the trainers are on the critical path, so it shouldn't be too difficult to face them all.
Mystic Duo (10)
Defeat Tate and Liza to earn the Mind Badge
Tate and Liza are unique in that their Gym Battle is a Double Battle! They bring a level 41 Claydol and Xatu, and a level 42 Lunatone and Solrock. They can be a little difficult, unless you use items. Here are my notes:
- The two count as one Trainer, and all four Pokemon of theirs are in the same "pool." That is to say, unlike other Double Battles, you can't focus one side of the battlefield and exhaust it of Pokemon to make the rest of the fight a 2-on-1.
- Claydol, Lunatone, and Solrock are all weak to Water-type moves, which is good news for Swampert. The bad news is that Xatu/Solrock like to use Sunny Day and Claydol/Lunatone like to use Light Screen, leading to Surf's power being 1/3 of what it normally is. Still, Surf's high power combined with hitting both enemies (and not your ally, in this generation) makes it a great choice.
- The two have 4 Hyper Potions, meaning you'll likely have to take out multiple health bars on several Pokemon, especially if you're relying on a weakened Surf.
- Watch out for Solrock's SolarBeam, especially if you're running Swampert.
- If you don't have Swampert (or maybe even if you do), Sharpedo is a decent option - it has access to STAB Surf, as well as Crunch, which is a powerful Dark-type move that has a chance of lowering Special Defense. What's more, you can fish one up right here in Mossdeep City using the newly acquired Super Rod!
- Crawdaunt is another option - you can fish up to a level 45 Corphish in Petalburg City using the Super Rod. Unfortunately, it doesn't learn any Dark-type attacks besides Knock Off in this game (It learns Crunch in FR/LG, but not in RSE for whatever reason).
- Because they like to use setup moves, you can take the opportunity to boost your own Pokemon using Calm Mind or X items. They managed to wipe 5 of my Pokemon (mostly because I don't like using items) and I still managed to win with my +4 Calm Mind Gardevoir.
- If you want, you can bring a Pokemon that knows Rain Dance to boost the power of Surf (at least until they use Sunny Day again, that is). Castform knows it by default, and Milotic learns it by level up at level 35.
- Finally, you can try and bring a Grass-type Pokemon (potentially one that can use Solar Beam) to hit Claydol/Solrock/Lunatone without being hampered by the sun.

While we're still in Mossdeep City, head to the Mossdeep Space Center to challenge Team Magma.
Not the Space, Not the Time (4)
Defeat every grunt at the Space Center
There are four grunts on the first floor, and three on the second. They're pretty difficult to miss. The grunts on the second floor will automatically challenge you back-to-back once you walk up the stairs, so be prepared!
The Planet from Above (5)
Help Steven Stone in the Mossdeep Space Center
When you talk to Steven, you'll select three Pokemon to use. This is a Multi Battle - you'll bring three Pokemon and Steven will bring three to use in a Double Battle against Maxie and Tabitha.
Steven shows up with a few powerful Steel types, so this battle shouldn't be too hard. Surf will do work against the enemy Pokemon (and absolutely wreck the Camerupt that both Tabitha and Maxie bring).
After clearing the Space Center, Steven will give you HM08 Dive when you visit him in his house on the northwest part of the island.
Now that we have Dive, there are quite a few things that are unlocked.
First of all, you can head north of Mossdeep City to Route 125 and Shoal Cave.
| Route 125 | Too Much Water |
|---|---|
| Items | 2/17 |
| Trainers | 16/16 |
| New Pokemon |
There are 8 trainers spread throughout Route 25. Defeating them all should earn you the Too Much Water trainer achievement.
On an eastern island with a Bird Keeper and an Expert, you can find a Big Pearl.
Once you've cleared the route, head into Shoal Cave.
| Shoal Cave | Too Much Water |
|---|---|
| Items | 7/17 |
| Trainers | 16/16 |
| New Pokemon | Spheal, Snorunt |
Shoal Cave has two forms: high-tide and low-tide. The items available depend on which form is currently active.
Chime of the Sea (5)
Craft a Shell Bell in Shoal Cave
To craft the Shell Bell, you'll need to grab 4 Shoal Shells, available at high tide, and 4 Shoal Salts, available at low tide. The cave changes between the 2 forms every 6 hours, at 3:00 and 9:00. The ingredients respawn every day, so you can actually get multiple Shell Bells if you'd like.
The Shoal Salts and Shoal Shells don't count towards Too Much Water, but there are a few items that do.
High tide:
In the second room, you can find four Shoal Shells, as well as a Rare Candy in the middle of the room. South of the southeast Shoal Shell, there is a door back to the entrance room, which will put you on a ledge with a Big Pearl.
Low tide:
The startingg path through the cave is mostly linear.
An Ice Heal can be found near a Shoal Salt.
After crossing some bridges and going down a ladder, you can talk to a Black Belt to receive a Focus Band (24/27). After getting the nearby Shoal Salt, head through the western doorway to find an area with the final two Shoal Salts. Then, head back to the Black Belt and head northeast (using Strength to move a boulder).
Descend the ladder to enter the Ice Cavern. Slide across the ice, and you can find a NeverMeltIce and TM07 Hail. This is also the only place in the game to catch Snorunt, so grab one while you're here!
If you've collected all four Shoal Shells and Shoal Salts, you should be able to have the old man make you a Shell Bell at this point.
Before moving on, you can head back to Route 124 to get some items and Pokemon from underwater areas using Dive.
| Route 124 | Too Much Water |
|---|---|
| Items | 17/17 |
| Trainers | 16/16 |
| New Pokemon | Clamperl, Chinchou, Relicanth |
All items located underwater are hidden.
It's a little difficult to convey where the items are by text, so I made an accompanying image (from Bulbapedia's maps) that shows the underwater paths overlaid on the surface route. Items in white text are underwater, and items in black text are above water.

Underwater, you'll be able to find Clamperl, Chinchou, and Relicanth. You'll need to catch a Relicanth in order to find the Regi trio, so keep that in mind. That being said, the underwater encounters are the same on every route, so you have a little bit of time.
In the first Dive spot coming from Mossdeep City, you can find a hidden Heart Scale.

Northwest of that dive spot, Dive down near the island with the house to find a hidden Big Pearl.

Southwest of that spot, Dive down to find a short trench. Follow it and surface on the other side to find yourself in an enclosed area. This will lead onto Route 126. Dive through another path and surface again to find a Green Shard (that counts for Diving Expedition, not Too Much Water).
Return to the main area of Route 124. The Dive spot directly north is completely empty.
Head to the northernmost of the two Dive spots northeast of the islands to find Pearl underwater.

Head north from where you found the Pearl to Dive into an underwater chasm. Follow it to the other side, and on the surface you'll find an island with a Yellow Shard.
Return to the main area, and head southwest. You'll find a Dive spot that leads to an underwater chasm that leads north and west. Immediately after diving, you'll find a Heart Scale.

In the northern part of this chasm, you'll find a Calcium in a light area. There's nothing on the surface here, so keep moving to the northwest.

Surface at the northwest, and on a nearby island you'll find a Red Shard.
Return to the main area. A little bit to the northwest, you'll see a Dive spot that leads to a chasm heading south. Head east at the first fork to come across a patch of seaweed. In the empty spot is a Carbos.

Follow this chasm to the end (ignoring the middle dive spot), and surface to find another island with a Blue Shard.
Head back to the main area, and then head west to find a small dive spot that leads to a large circular underwater area. South of the dive spot, there's an empty patch of seaweed that contains a Green Shard. This should be the last item for Too Much Water!
(I apparently forgot to get a screenshot of this one. Oops. If you remember to get a screenshot, feel free to send it to me and I'll put it in the guide with credit.)
The next Trick House puzzle has also opened, so fly to Slateport to challenge it.
Trick Master Is My Life (3)
Defeat every trainer and find every item in the sixth Trick House puzzle
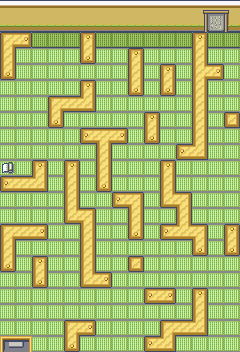
(From Bulbapedia)
To start the puzzle, examine the cupboard in the northeast corner.
There are three trainers and just one item in this puzzle (a Glitter Mail in the southeast corner)
For defeating the puzzle, Trick Master will give you a Magnet.
You can also fully explore the Abandoned Ship on Route 108 east of Dewford Town now that you have Dive.
| Abandoned Ship | Surfing Shores |
|---|---|
| Items | 26/26 |
| Trainers | 23/23 |
| New Pokemon |
There's a Dive spot in one of the cabins on the B1 floor of the Abandoned Ship. Dive and follow the path to enter a new area. Several of the doors in this area are locked, and we need to find the keys to them. In this area, Rooms 1-3 are in the south, and 4-6 are in the north.
Enter Room 3. On the ground, you will see a Water Stone, and a blinking light to the northeast that is the hidden Room 1 Key (which counts towards Surfing Shores)

Head to Room 1. There is TM18 Rain Dance out in the open, and two blinking lights. The western one is the Room 4 Key, while the northeastern one is nothing.

Head to Room 4. There are three flashes, but the only one that's real is the Room 6 Key located in the northwest trash can.
(I forgot this one too, but hopefully it should be obvous enough)
In Room 6, there's a Luxury Ball, and head west into Room 5. In Room 5, the Room 2 Key is hidden a few steps south of the left trashcan.

Finally, in Room 2, you will find the Scanner, which should also be the final item for Surfing Shores! Leave the Abandoned Ship, and head back to Slateport City.
Salvaging Mission (5)
Retrieve the Scanner from the Abandoned Ship and deliver it to Captain Stern
Captain Stern is located in the Slateport Harbor northeast of the Pokemon Center in Slateport City. Hand the Scanner to him, and choose either the tooth or the scale - we can't trade Clamperl to evolve, so it doesn't matter too much.
When you're done exploring with Dive, head to Route 127 south of Mossdeep City.
| Route 127 | Diving Expedition |
|---|---|
| Items | 8/16 |
| Trainers | 8/16 |
| New Pokemon |
Note that the item count includes the Green Shard from Route 126, which we got while exploring Route 124.
Again, I've created an image to help explain where items are:

In the northwest corner of the route, there is an island with trees. On this island are two trainers, and a Rare Candy. North of that island is another island with a Zinc.
South of the island with the trees, you can dive into a trench which has a Star Piece hidden in a rock.

Next, head to the large trench in the middle of the map. Inside the trench, you can find a Heart Scale inside a rock to the south:

In the trench directly to the east of the large one, you can find an HP Up.

In the southeast part of the route, you can find a sandy island with a Black Belt. Slightly northeast, you can dive through a short passage to get to an area with a Carbos on an island.
Finally, head to the northeastern part of the route to find an island with several Fishermen. East of this island is a final trench which contains a hidden Red Shard.

Once you've cleared the route, continue south to Route 128.
| Route 128 | End of the Line |
|---|---|
| Items | 5/13 |
| Trainers | 7/28 |
| New Pokemon | Corsola, Luvdisc |
You can catch Corsola and Luvdisc with the Super Rod in this route.
On a small island with a Cooltrainer, there's a hidden Heart Scale.

On an island east of the ring-shaped island in the middle, there's another hidden Heart Scale.

On a small island in the southwest of the route, there's yet another hidden Heart Scale.

Underwater, you can dive in the middle of the ring-shaped island to find a Protein.

On the eastern side of the route, you can dive to find a Pearl.
(Forgot this one too.)
Once you've fought all seven trainers (there are two along the path east to Ever Grande City), go ahead and enter the Seafloor Cavern.
| Seafloor Cavern | Ocean Obstructor |
|---|---|
| Items | 1/1 |
| Trainers | 5/5 |
| New Pokemon |
Ocean Obstructor (3)
Defeat every grunt and find every item in the Seafloor Cavern
MISSABLE
Once you defeat Archie, the grunts will disappear, making this achievement missable.
There are five grunts throughout the Seafloor Cavern (Aqua Admin Shelly doesn't count). If you'd like specific directions on how to get through, check out the Bulbapedia walkthrough In a foggy room right before you fight Archie, you'll find TM26 Earthquake. Make sure you've earned the achievement before you continue!
Submarine Showdown (5)
Defeat Archie in the Seafloor Cavern
Follow the Bulbapedia guide's instructions to traverse the Seafloor Cavern.
In the final battle, Archie brings a level 41 Mightyena and Golbat, and a level 43 Sharpedo. Swampert should be able to hold its own. If you want, you can switch out to reset the Intimidate boost. Or Sharpedo will just use Swagger and do it for you.
After clearing the Seafloor Cavern, head to Route 126 to continue the story.
| Route 126 | Diving Expedition |
|---|---|
| Items | 16/16 |
| Trainers | 8/16 |
| New Pokemon |
The final trainers and items for Diving Expedition are in this route.
All items in this route are underwater. In the northeast of the large underwater area, you can find a Stardust.

In the northern part of the large underwater area, you can find an Ultra Ball.

In the northwest of the large central area, you can find a Heart Scale.
Surface in this area to enter an isolated western area with a trainer and an additional dive spot. In this dive spot, you can find a hidden Yellow Shard,

a Pearl,

and an Iron!

Returning to the large central underwater area, on the southeast side, you can find a Big Pearl.

Finally, there's an isolated Dive spot in the southwest part of the route. Dive to find a Blue Shard in an empty spot among seaweed.

Fully exploring this route should award you the Diving Expedition trainer and item achievements! Once you're ready, you can Dive to enter Sootopolis City from the south part of the central underwater area.
| Sootopolis City | Diving Expedition |
|---|---|
| Items | 16/16 |
| Trainers | 8/16 |
| New Pokemon |
In Sootopolis, there's not too much to do besides talking to Steven and continuing the story.
You'll have to go to Sky Pillar to awaken Rayquaza. The first step is heading to Route 129.
| Route 129 | End of the Line |
|---|---|
| Items | 5/13 |
| Trainers | 12/28 |
| New Pokemon |
Route 129 is short and simple. There are five trainers and no items.
| Route 130 | Southern Currents |
|---|---|
| Items | 0/7 |
| Trainers | 3/34 |
| New Pokemon |
Another simple route. Three trainers, and no items (well, unless Mirage Island is there...)
| Route 131 | Southern Currents |
|---|---|
| Items | 0/7 |
| Trainers | 10/34 |
| New Pokemon |
Yet another simple route. Seven trainers to fight, and yet again no items. The entrance to Sky Pillar is on this route, but we can keep going to Pacifidlog Town to unlock Flying there.
| Pacifidlog Town | Southern Currents |
|---|---|
| Items | 0/7 |
| Trainers | 10/34 |
| New Pokemon |
There's one achievement we could potentially pick up here in Pacifidlog at the moment.
Ferocious Fiend (3)
Receive the TM21 Frustration by showing a wild and untamable Pokémon to a man in Pacifidlog Town
A man in the southwest house will measure the friendship between you and your lead Pokemon, and will give you TM27 Return if it is high, and TM21 Frustration if it is low.
According to BodaciousBecc in the comments, any Pokemon with a friendship below 50 will give you Frustration. Several Pokemon have a base friendship level of 35, and many legendary Pokemon have a base friendship of 0. If you're looking for the easiest option, Sharpedo has a base friendship of 35 and can be caught right here in Pacifidlog Town with the Super Rod. Alternatively, you could bring any of the legendary Pokemon straight here after you catch them, as several users suggest.
If you're trying to catch Sharpedo, you may also want to try to catch a Wailmer as close to level 40 as possible if you come across one.
As WaveKnight notes in the comments, you can only get 1 TM per week, so save before you talk to the man. However, if he says your Pokemon's friendship is neither good nor bad, then you can try again immediately with a different Pokemon.
In Pacifidlog Town, there's also a guy who wants to trade his Horsea for a Bagon (what a deal), but we can't catch a Bagon yet, so he'll have to wait.
| Routes 132/133/134 | Southern Currents |
|---|---|
| Items | 7/7 |
| Trainers | 34/34 |
| New Pokemon | Horsea |
Routes 132/133/134 contain strong currents that sweep you along a predetermined path. Honestly, it's probably too difficult to describe in writing exactly how to get to the items and trainers on these routes, so I went ahead and edited a map made by bigbeanos on Reddit to show the location of all items and trainers:

This map should hopefully show you how to get to all of the items and trainers on this route. You may want to open the image in a new tab to view it in full resolution.
There are a few things that might still be a little tricky. To get onto the long island with the Carbos, you'll have to get to the northwestern part (via the green current), then surf south through the current marked in yellow. I put an arrow there to make it more obvious. To get to the small island with the Dragon Tamer and Cooltrainer, you have to go through the maze of rocks to the south, which you enter by following the yellow current from the east.
Also on Route 134 is the entrance to the Sealed Chamber, which unlocks the Regi trio for capture.
Ün Ün Ün (5)
Unlock the Sealed Chamber
In order to unlock the Regi trio, you'll need a Pokemon that knows Dig, a Wailord, and a Relicanth. You'll also need a Pokemon that knows Surf and Dive.
The Dig TM is found on Route 114, and is compatible with many Pokemon. If you didn't hold onto the Dig TM, things get a lot harder. Nincada (not Ninjask!) learns Dig at level 45, and Trapinch (not Vibrava/Flygon!) learns Dig at level 41. If you're in that situation, it might be worth waiting to catch the Regis until after the Pokemon League, where you can grind levels easier (or duplicate Rare Candies). I'd also recommend choosing Trapinch, since you'll have to grind it to level 45 anyways to get Flygon.
You'll also need a Wailord. Wailord evolves from Wailmer at level 40, or is a 1% encounter while Surfing on Route 129. Wailmer can be caught at pretty high levels (up to 45) using the Super Rod in many locations. Getting a level 40+ one seems to be rare, though, so you might want to just catch a level 35 one and level it up. If you fish in Dewford Town, Wailmer has a 100% encounter rate when using the Super Rod, albeit with a higher level spread (25-45). Otherwise, you can try fishing with the Super Rod in other locations. If you want to fill out your Pokedex, Route 128 has Corsola and Luvdisc, and Horsea is found on Routes 132, 133, and 134 west of Pacifidlog Town. When fishing, remember that having a Pokemon with the Suction Cups or Sticky Hold ability at the front of your party will greatly increase the chance of success!
Relicanth is found in patches of seaweed while Diving. Its catch rate is a little low, so you can buy some Dive Balls or Net Balls in Mossdeep City. Dive Balls have a 3.5x catch rate while underwater, and Net balls have a 3x catch rate on Water or Bug type Pokemon. Dive Balls are more useful for catching Relicanth specifically, but Net Balls are probably more useful in the long run.
Once you have all the Pokemon you need, follow the map above to get to the Sealed Chamber and awake the Regi trio. You'll need to use Dig at the northern wall of the first room, and read the message in the northern wall of the second room while Wailord is first in your party and Relicanth is last.
After that, three doors will open in the Route 111 desert, Route 105, and Route 120.
Before getting ready to capture the trio, you should probably stock up on Revives, healing items, and Timer Balls (found in the Rustboro City Poke Mart). If there aren't any Timer Balls in Rustboro, you need to talk to the Devon researcher outside Rusturf Tunnel. Timer Balls give an increasing bonus depending on how many turns have passed, up to 4x at 30 turns. You'll need quite a few for capturing the Regis and Rayquaza, so go ahead and buy 60+ of them if you can afford it. Thankfully, they're actually cheaper than Ultra Balls! You can also pick up X Defends at the Rustboro Poke Mart, which you can use to boost up your defenses to tank the Regi's attacks.
Rock Solid Golem (10)
Catch Regirock in the Desert Ruins
MISSABLE
This achievement is missable if you KO Regirock, as it won't respawn.
To catch Regirock, you'll need a Pokemon with Rock Smash. Head to the Desert Ruins on Route 111 north of Mauville City. Once inside, read the message, walk two steps west and two steps south, and then use Rock Smash (from the Pokemon menu).
Make sure you save before fighting Regirock, as it won't respawn if you KO it!
To capture Regirock, I used a Lanturn to paralyze it with Thunder Wave, then used a combination of Surf / Normal type moves to whittle its HP down. If you have a Pokemon with False Swipe, that may be helpful. Once Regirock was low enough, I sent Swampert in, used 6 X Defends to tank Regirock's attacks, and chucked Timer Balls, healing as necessary. You may need a lot of Timer Balls (30+), so make sure you come prepared.
Crystal Clear Golem (10)
Catch Regice in the Island Cave
MISSABLE
This achievement is missable if you KO Regice, as it won't respawn.
Regice is located in the Island Cave on Route 105 north of Dewford Town. You don't need anything special to challenge Regice - simply read the sign, and run around the whole chamber staying right next to the wall.
Again, make sure you save before fighting Regice, as it won't respawn if you KO it!
For Regice, the strategy is similar to Regirock. Paralyze it, then use Surf to bring it down to the red. Switch in Swampert, use 6 X Defends, and chuck Timer Balls.
Advanced Alloy Golem (10)
Catch Registeel in the Ancient Tomb
MISSABLE
This achievement is missable if you KO Registeel, as it won't respawn.
Finally, Registeel is in the Ancient Tomb on Route 120 east of Fortree City. You'll need to bring a Pokemon with Flash. After reading the message, head to the center of the cave and use Flash.
Again, make sure you save before fighting Registeel, as it won't respawn if you KO it!
My strategy for Registeel was similar to the other two. Paralyze it, use Surf to bring it down to the red, and then switch in Swampert, use 6 X Defends, and chuck Timer Balls.
Anyway, weren't we supposed to be saving the world or something? Head to Sky Pillar on Route 131, and you'll meet Wallace. After the cutscene, make your way to the top of the tower to wake Rayquaza.
Ozone Peacekeeper (5)
Watch Rayquaza put an end to the legendary showdown in Sootopolis City
Fly back to Sootopolis, and the cutscene will start automatically, earning this achievement.
For your trouble, Wallace will give you HM07 Waterfall.
Found Machines (5)
Obtain every Hidden Machine
Assuming you got every other HM, this achievement should pop now.
At this point, you can either challenge the Sootopolis Gym, or head back to Sky Pillar to catch Rayquaza.
Emerald Dragon (10)
Catch Rayquaza at the top of the Sky Pillar
MISSABLE
This achievement is missable if you KO Rayquaza, as it won't respawn.
If you return to Sky Pillar on Route 131, you'll be able to capture Rayquaza. You'll need to bring the Mach Bike, Repels, Hyper Potions, and a boatload of Timer Balls. You may also want to bring Leppa Berries or Ethers if you have them.
Rayquaza is a difficult encounter if you don't use the Master Ball. I recommend you don't, so you can save it for Latios! It's Level 70, and knows Rest, allowing it to reset any damage and statuses you may give it. To take it on, I used a level 40 Lanturn with Thunder Wave and Flash, and Regice, who I leveled to 41 for Amnesia. Another bulky electric type would probably also do the trick (Magneton, maybe?). I also taught Regice Ice Beam via TM, and gave it the NeverMeltIce (found in Shoal Cave at low tide) to hold. Don't worry too much about using the Ice Beam TM - you can always get another one at the Mauville Game Corner!
As user dumbFKNidiot notes in the comments, getting to Rayquaza is a challenge in and of itself. The tower is damaged from Rayquaza landing on it again, and is full of cracked ground that you will fall through if you walk on. To get across, you need to use the Mach Bike. In order to build up enough speed, you'll have to have at least two tiles of space in between you and the cracked ground. Try to follow this video or dumbFKNidiot's guide in the comments if you're having trouble.
Once you reach the top floor make sure you save, as Rayquaza will not return if you KO it!
Here is my strategy for the battle:
- Open with Lanturn, and use Thunder Wave. If Rayquaza uses Rest or Fly, Lanturn should be able to survive and get the Thunder Wave off. If Rayquaza uses ExtremeSpeed or Outrage, Lanturn will likely go down, at which point you can either reset or move on to Regice.
- If Rayquaza tries to use Rest at full health, it will fail, allowing you to keep it paralyzed.
- Now that Rayquaza is paralyzed, start spamming Flash until you either hit 6 accuracy drops, or Lanturn goes down.
- Switch in Regice. Use Amnesia once or twice, then start using X Defends until you get to +6 Defense. Then, use Amnesia until you hit +6 Special Defense. Heal as necessary.
- If all went well, Regice should be pretty invincible. Now, use Ice Beam to bring Rayquaza's health down. If you're holding the NeverMeltIce, it should land somewhere in the yellow, which is good enough. You don't want to go too low, as Rayquaza could KO itself with confusion damage from Outrage if you're not careful. Once Rayquaza's health is down, start chucking Timer Balls like there's no tomorrow.
- If Rayquaza uses Rest, it will remove the paralysis. The good news is that Sleep is even better for catching! Use another Ice Beam to bring its health down again, and then resume throwing Timer Balls.
- Remember to heal as necessary, and use Ethers or Leppa Berries if you need to restore Ice Beam's PP.
- If Regice goes down (due to a critical hit, most likely), you can switch to other Pokemon and keep throwing Timer Balls until you catch Rayquaza or white out. This will probably be more effective if you managed to get several Flashes off.
Next up is the Sootopolis City Gym, led by Juan.
Battle Addict - Sootopolis (10)
Defeat every trainer in Sootopolis gym
(From Bulbapedia)
There are 10 trainers total, located on the basement level.
In order to challenge the gym trainers, you'll have to fail the puzzles. If you fail the last puzzle, you can face all of the trainers in one go.
It's well worth using the Amulet Coin in these battles, as they pay a lot!
Dandy Charm (10)
Defeat Juan to earn the Rain Badge
Juan has a level 41 Luvdisc and Whiscash, a level 43 Sealeo and Crawdaunt, and a level 46 Kingdra.
If you caught Rayquaza, congratulations, you've won! If you haven't, then bringing Swampert and an electric type is probably your best bet. Swampert learns Earthquake at level 52, which will be pretty devastating to anything that doesn't resist it (so, everything on Juan's team). Luvdisc's moveset is a little annoying, but it's weak enough that you can set up with X Attacks if you so choose. Just watch out for confusion - if your Pokemon hurts itself, it uses the boosted Attack stat to determine the damage! You can use a Persim berry to heal confusion if you have one.
Kingdra likes to set up with Double Team, so try and KO it sooner rather than later (or bring a never-miss move).
If you don't have Swampert, then an Electric type might be your best bet. At this point, you have access to quite a few, like Lanturn or Magneton. Just watch out for Whiscash.
After defeating Juan, a few things open up in Sootopolis City:
Size Matters (10)
Break the records of both size-obsessed brothers in Sootopolis City
Northeast of the Pokemon Center, there's a house with two brothers arguing whether Seedot or Lotad is bigger. You'll have to bring them a bigger-than-average Seedot and Lotad. One would imagine there's a 50% chance of a Pokemon being bigger than average, and it seems that is indeed how it works. Basically, you have a 50/50 chance that each Lotad or Seedot will be big enough for them.
As DarbazMahmood suggests in the comments, you can use the traded Seedot from Rustboro Town. DOTS the Seedot has fixed IVs and a fixed Nature, so it may in fact be guaranteed that he's bigger than average.
As Johan suggests, you can also breed Seedot if you already have a Nuzleaf or Shiftree. Otherwise, the only place to get Seedot is as a 1% encounter on Routes 102, 117, and 120.
Lotad is much easier to find, as Johan suggests in the comments. Lotad is a common encounter on Routes 102 and 114.
In the house east of the two brothers, a woman will give you a Wailmer Doll (25/27)
In a house in the far northwest of the city, a Black Belt will give you TM31 Brick Break (26/27).
Thank You Berry Much (5)
Receive every daily berry gift
We now have access to every daily Berry gift. To earn this achievement, you'll have to get all of them in one day. As firkinblin notes in the comments, the locations are:
- Kiri, in the western grassy area in Sootopolis City
- The Berry Master on Route 123
- The Berry Master's Wife, in the same house on Route 123
- One of the girls inside the Flower Shop on Route 104
- A woman on the northern part of Route 111, north of the Old Lady's Rest Stop, near the berry patch.
- The Beauty in the southwest corner of Route 120, near the Berry patch
- The guy in front of Lanette's house on Route 114
- An old man in a suit in the northeast corner of Lilycove City
The next Trick House Puzzle has also opened up.
Trick Master Is Huggable (3)
Defeat every trainer and find every item in the seventh Trick House puzzle

To start the puzzle, examine the rightmost window on the back wall.
There are six trainers, and one item (a Tropic Mail).
The puzzle isn't too bad. Make sure you move the statue out of the way using the blue switch.
For your efforts, the Trick Master will give you a PP Max.
Now that we can use Waterfall, we can finish up a few item and trainer achievements. Grab the Acro Bike from Mauville, and head to Route 119 first.
| Route 119 | Welcome to the Jungle |
|---|---|
| Items | 31/31 |
| Trainers | 40/40 |
| New Pokemon |
Coming from Fortree City, go down to the river and up the northern waterfall. Across some Acro Bike platforms, you'll find a Nugget and a Rare Candy. This should unlock the Welcome to the Jungle items achievement! Next, head to Route 114.
| Route 114 | Cinder Path |
|---|---|
| Items | 14/17 |
| Trainers | 22/24 |
| New Pokemon |
Just west of Fallarbor Town, there's a waterfall. Climb up it to find a Rare Candy.
Continue down Route 114 to Meteor Falls.
| Meteor Falls | Cinder Path |
|---|---|
| Items | 17/17 |
| Trainers | 24/24 |
| New Pokemon | Bagon |
Go down to the water, and up the waterfalls to the top of the room. Enter the door to be taken to the back room. Climb down the nearby ladder.
In the next room, climb up the southern ladder to find TM23 Iron Tail.
Return to the previous room, and climb up the northern ladder to find a Old Couple and a Dragon Tamer. These should be the last trainers required for the Cinder Path trainer achievement. Head down the ledges, sticking to the west to reach another ladder going down. This leads to an area with a northern and southern exit.
The northern exit contains TM02 Dragon Claw, as well as the only area in which you can catch Bagon. Try and catch 2 if you can, as you'll need one for a trade (however ill-advised, it is required for an achievement).
The southern exit leads to a PP Up. This should be the last item for Cinder Path!
Dragon Charity (4)
Trade a Bagon for a Horsea in Pacifidlog Town
If you caught an extra Bagon, you can head back to Pacifidlog Town and execute this terrible trade. The guy you're looking for is in the southernmost house.
At this point, it's possible to have completed all trainer and item achievements besides Finisterre - Items (there are items in the postgame area of the Safari Zone), and both the End of the Line and Beyond the End achievements.
Once you're ready, head to Ever Grande City to continue. Stop by the Pokemon Center before Victory Road to talk to Scott one final time, in a MISSABLE encounter!
Teacher's Pet (10)
Meet Scott on every possible occasion during your adventure
MISSABLE
Many of Scott's encounters are missable, making this achievement missable.
If you've been diligent about meeting Scott, this achievement should pop now.
As MalevolentMinun notes in the comments, these are the 13 encounters:
- Petalburg City, after the catching tutorial
- (MISSABLE) Trainer School in Rustboro City BEFORE earning the Stone Badge
- (MISSABLE) Trainer School in Rustboro City AFTER earning the Stone badge and before receiving the Devon Goods
- Slateport City, after defeating Team Aqua at the museum
- (MISSABLE) Slateport City, in front of the Battle Tent after the museum
- Mauville City, after defeating Wally
- (MISSABLE) Inside Verdanturf Battle Tent, after defeating Wattson, but before visiting the Fiery Path
- (MISSABLE) Inside Fallarbor Battle Tent, before Team Magma steal the Meteorite
- Route 119, after battling your rival
- Phone call after beating Winona
- (MISSABLE) Upstairs in the Lilycove City motel, before Team Aqua steals the submarine.
- (MISSABLE) Mossdeep City, in front of the Space Center, before defeating Team Magma.
- (MISSABLE) The Pokemon Center before Victory Road in Ever Grande City, before defeating the Pokemon League.
Once you're ready, head to Victory Road. You'll need to bring Pokemon with Surf, Strength, Rock Smash, and Waterfall, and you'll likely want to bring a Pokemon with Flash.
| Victory Road | End of the Line |
|---|---|
| Items | 13/13 |
| Trainers | 28/28 |
| New Pokemon | Mawile |
Head north past two bridges, and then head up the northern staircase in this room. After crossing two bridges, you will come across a Max Elixir. Jump down the ledge and head west to battle a Cooltrainer. Head past him, and you should be back at the entrance.
Head north from the entrance and walk up the first stairs you see. As you cross the bridge, Wally should appear to challenge you.
Zero to Hero (5)
Defeat Wally on Victory Road
Swampert handles most of Wally's team pretty well. Altaria uses Dragon Dance, but its only physical move is Aerial Ace, so it shouldn't be too much of a problem. All in all, if you have a balanced team, this fight shouldn't be too bad.
Continue past Wally to battle another Cooltrainer and take the ladder downstairs.
Mawile exclusively appears in B1F and B2F of Victory Road, so try and catch one while you're down here!
After moving the Strength boulders, you'll come across a fork. The northern path leads to a trainer battle and a ladder to 1F, where you can find a PP Up and a hidden Ultra Ball on the nearby ledge:
Head back downstairs and jump the nearby ledge. Head north for a trainer fight and a Full Restore beyond some Strength boulders. The nearby stairs and bridge just lead back to the fork from earlier, so head back to the ledge in the southeast corner and head west to find a ladder to B2F.
On B2F, head north to fight a trainer, and then Surf north (but don't go up the waterfall). Head up the northeast stairs, and follow the path to a nook in the northern wall, which contains a hidden Max Repel.
Continue down the path, and go up the ladder in the north to find TM29 Psychic. Head back down the ladder, and then head south for another trainer battle. Head across the nearby bridge to trigger a Double Battle. Continue on the path to fight another trainer, and then you will be above a waterfall. Surf north then east, and you'll find another trainer and a Full Heal. East of that is a small indent in the wall that contains a hidden Elixir. This should be the final item for End of the Line.
Surf back to the western waterfall and head down it to find another ladder back to B1F. There are three trainers here. After defeating them, head southeast to find a ladder to 1F behind some boulders.
On 1F, there are three trainers on the way to the exit. Defeating them all should award you the End of the Line trainer achievement!
After traversing Victory Road, you'll find yourself at the Pokemon League.
Before you challenge the League, note that the Latios event will happen immediately upon loading your save after defeating the League. Therefore, if you want to reset for a good Nature on Latios (or use RNG Manipulation), make sure you're prepared. You should bring the Master Ball, loads of Max Repels, a few Rare Candies (if you want to test for IVs), and a Pokemon below level 40 to put in the front of your party. You can visit a PC before catching Latios to switch out items/Pokemon, but it will make resets slightly more tedious.
If you've already used the Master Ball, catching Latios is a lot more difficult. You'll probably want to prepare a Pokemon (or several) that can trap Latios. Arena Trap doesn't work on Latios (as he has Levitate), so your best option is to bring a Pokemon with Mean Look or Shadow Tag. Basically, there are two options for that while staying below level 40:
- Leveling Zubat (not Golbat!) up to 36, where it learns Mean Look, then evolving into Golbat then Crobat over the next two levels. You'll need to outspeed Latios for Mean Look to work, so evolving to Crobat is pretty essential.
- Using Wobbuffet.
Both approaches have their disadvantages: Crobat is weak to Latios' Psychic-type moves (which are even more powerful with the right Nature and IVs), and Wobbuffet has no method to inflict status (all Crobat has is Toxic via TM, though), and no means of dealing direct damage. Wobbuffet is probably the easier choice, as all of Latios' moves are Special, and you can use Encore (if you kept it from Wynaut) to lock Latios into a non-damaging move. You could even breed several of them to switch out if one of them gets too low (especially because Luster Purge causes SpD drops).
You could also use a binding move (eg Wrap, Bind, Whirlpool, Fire Spin, Sand Tomb), which would also help whittle Latios' health down. However, if Latios is at low health, this would obviously not work.
All that is to say, using the Master Ball is by far the best method to catch Latios, especially if you're trying to reset for a good Nature/IVs.
Before that, though, we'll have to take down the Pokemon League itself. If you caught Rayquaza, it can sweep through the League without too much effort, especially if you're willing to use X items. Otherwise, you may need to strategize a litttle.
In Emerald, the Pokemon League consists of the Dark-type trainer Sidney, the Ghost-type trainer Phoebe, the Ice-type trainer Glacia, the Dragon-type trainer Drake, and the Water-type Champion, Wallace. My recommendation would be to bring an Ice type (useful against Sidney and Drake), an Electric type (useful against Glacia and Wallace), and perhaps a Fighting-type (useful against Sidney and Glacia). Swampert is also not bad, although it may struggle a bit against Drake and Wallace. I would recommend bringing along some PP restoring items like Ethers or Leppa berries, especially if you're planning on primarily using 1 Pokemon.
League Champion (25)
Defeat the current champion and become the Pokémon League Champion
The Bulbapedia walkthrough has good tips for every battle. Here's some of my own tips:
- Most of Sidney's Pokemon have pretty pitiful Special Defense (55-70), so a special attacker could make pretty short work of them. Their Defense isn't that much better, either.
- Sidney leads with a level 46 Mightyena, whose Intimidate will lower the power of physical attacks. You may want to start with a special attacker, or just switch out to reset the debuff.
- Shiftry doesn't know any Grass moves, so Swampert can pretty safely stay in against him. Cacturne, on the other hand, does know Needle Arm, so watch out.
- Crawdaunt and Absol both know Swords Dance, so try and take them down quickly.
- Phoebe's first Dusclops knows Curse, so don't try to set up against it, as you might need to switch.
- The second Dusclops and Sableye aren't too much of a threat, as their attacking stats are pretty pitiful. They might be good to set up on, if you'd like. Just watch out for the type coverage the second Dusclops has.
- Banette has a respectable 115 Attack, so watch out for its Shadow Ball (which is physical in this generation).
- Her first Sealeo is not a huge threat, so feel free to set up. Just watch out if it starts to use Ice Ball back-to-back, as it doubles in power every turn like Rollout.
- The level 52 Glalie knows Explosion, so try and take it out quickly if you can.
- Ice attacks are very good here, as 3 Pokemon take 4x damage from them.
- Shelgon is pretty okay to set up on. Just watch out for Rock Tomb if you have an Ice type.
- Altaria and Kingdra both know Dragon Dance, so make sure you take them down quickly if possible.
- Wallace sends out Wailord first. Its STAB Water Spout can be very dangerous, especially if it uses Rain Dance. However, Water Spout's power will proportionally decrease with its health, so attack quickly to reduce its damage output.
- Ludicolo and Whiscash are resistant to Electric attacks, and Tentacruel is resistant to Grass attacks, so you'll probably need to bring multiple types to be effective.
Congratulations, Champion! Welcome to the post-game! When loading the game for the first time, you will wake up in your room. When you head downstairs, a cutscene will play, in which a TV report will play, saying an unidentified Pokemon has been seen. Your mom will ask you if it was red or blue - select Blue for Latios (recommended for the Battle Frontier), or red for Latias.
Note that Latios' IVs and Nature are set in stone when you press "BLUE" on the television! If you want to use RNG Manipulation or reset for a good Nature, then DO NOT SAVE until you catch the Latios you want!
Flying Through the Eons (25)
Catch either Latias or Latios
MISSABLE
This achievement is missable if you KO Latios/Latias, as they will not respawn.
If you would like to learn how to RNG manipulate Latios, check out the RNG Manipulation section. It's really not as hard as it seems!
Latios is a "roaming" Pokemon. What this means is that every time you change maps, it will move to an adjacent route (or there's a small chance for it to teleport to a random route). Once you encounter it, it will attempt to run away during its turn. Therefore, you'll either need to use the Master Ball or trap the Pokemon.
To find Latios most efficiently, follow these steps:
- Put a Pokemon above level 13 but below level 40 in the first slot of your party.
- Fly to Slateport City.
- Slightly north of Slateport City, there is a patch of grass next to an entrance to Cycling Road.
- Apply a Max Repel, so the only Pokemon you can encounter is Latios.
- Ride your Bike a few times through the patch of grass, then head into the Cycling Road entrance.
- Going into Cycling Road and back will cause Latios to move. Ride your Bike through the grass patch a few times to see if Latios has moved to this Route.
- If the Max Repel runs out, reapply.
- Repeat checking the grass and moving back into the building until you encounter Latios.
To catch Latios, use the Master Ball. This is by far the best use for it in the game, so don't feel bad about using it!
If you don't have the Master Ball, things get a lot more difficult.
- Latios will run away on its turn unless you trap it. Arena Trap doesn't work, as Latios has Levitate. That leaves three options: Mean Look, Shadow Tag, and binding moves like Wrap or Whirlpool.
- Wobbuffet with Shadow Tag is probably your best bet. It's able to take 3-5 attacks from Latios (depending on IVs, EVs, and SpD drops), and Shadow Tag is a passive effect, so you don't have to worry about outspeeding Latios.
- Use Mirror Coat to bring Latios' health down to a reasonable level, and then try and keep Wobbuffet healthy while you throw Timer Balls. You could use Encore (if you still have it from Wynaut) to lock Latios into a non-damaging move, but it's just as likely to lock Latios into a damaging move. There is no possible way for a level 39 Wobbuffet to outspeed a level 40 Latios, so you can't use Encore to lock in the move from the previous turn.
- There is no X item for Special Defense in this generation, so you can't make Wobbuffet super tanky. What's more, Luster Purge also causes SpD drops 50% of the time, so attacks will do more and more damage as the fight goes on. If you bred multiple Wobbuffets, then you can switch between them to reset the stat drops. Otherwise, switching to another Pokemon will allow Latios to flee.
After encountering Latios once, you will be able to track its movements via the Pokedex.
It can be a little daunting to try and figure out all the things you need to do to master the set after defeating the Pokemon League. To make things easier, here is an outline of the remaining requirements, divided into a few categories:
Simple Objectives:
These are miscellaneous objectives that are relatively simple to complete.
- Catch Groudon/Kyogre
- Collect all 4 special berries from the Berry Master's wife
- Receive Beldum as a gift
- Acquire the second Fossil
- Defeat Gabby and Ty at their strongest
- Receive 4BP from Scott
- Trade Skitty for Meowth at the Battle Frontier
- Catch Sudowoodo at the Battle Frontier
- Defeat Steven Stone at Meteor Falls
- Finish the Trick House puzzles and collect the final reward
- Collect the items in the new Safari Zone Areas to finish Finisterre
- Collect all items/trainers in the S.S. Tidal and the Battle Frontier for Beyond the End
- Finish all matches at Trainer Hill
Grindy Objectives:
These objectives are more grindy. You'll probably be able to complete some of them passively by doing other things, but eventually you will likely need to grind them out. Try to save the active grinds for last if you can, and try to combine grinds if possible (e.g. leader rematches and ash collection).
- Gym Leader rematches
- Wally/Trainer rematches
- Daily events
- Collecting ash
Contests:
You'll need to win a Master Rank Contest of every type, with enough points to get a painting of each type. Full details are in the Contests section.
Battle Frontier:
In the Battle Frontier, you'll need to earn every Gold Symbol
Catch 'em all:
Secret Base Decorations:
Right after you defeat the Pokemon League, you'll
Milotic
Tackle Surf Dive Waterfall
10-12 Kelpsy Pokeblocks
Beauty: Surf-Dive-Surf-Dive-Surf?
Tough: be last, then Waterfall-Tackle-Dive-Surf-Tackle?
Pomeg (Spicy + Bitter)
Grepa (Sour + Sweet)
Qualot (Sweet + Spicy)
Hondew (Dry + Bitter)
Under normal circumstances in the Battle Frontier, you can
| Number of Items | |
| Requires |
List of Items (click to expand)
| Item | Location | Requires |
|---|---|---|
(hidden, click for image)
Little Trainer Big World - Items (10)
Find every item and hidden item in Littleroot Town, Route 101, Oldale Town, Route 103 and Route 102
| Number of Items | 3 |
| Requires | Cut |
List of Items (click to expand)
| Item | Location | Requires |
|---|---|---|
| Potion | Route 102 | |
| PP Up | Route 103 (east) | |
| Guard Spec | Route 103 (east) | Cut |
Petals to the Wind - Items (10)
Find every item and hidden item in Petalburg City, Route 104, Route 105 and Petalburg Woods
Learning to Strive - Items (10)
Find every item and hidden item in Rustboro City, Route 115, Route 116 and Rusturf Tunnel
Surfing Shores - Items (10)
Find every item and hidden item in Dewford Town, Granite Cave, Route 106, Route 107, Route 108 and the Abandoned Ship
By Ship and by Bike - Items (10)
Find every item and hidden item in Slateport City, Route 109 and Route 110
Hoenn Meridian - Items (10)
Find every item and hidden item in Mauville City, Verdanturf Town, Route 117, Route 118 and New Mauville
Hot, Hotter, Hottest - Items (10)
Find every item and hidden item in Lavaridge Town, Route 111, Route 112, Fiery Path, Mt. Chimney and Jagged Pass
Cinder Path - Items (10)
Find every item and hidden item in Fallarbor Town, Route 113, Route 114 and Meteor Falls
Welcome to the Jungle - Items (10)
Find every item and hidden item in Fortree City, Route 119, Route 120, Scorched Slab and Route 121
Finisterre - Items (10)
Find every item and hidden item in Lilycove City, Safari Zone, Route 122, Mt. Pyre and Route 123
Too Much Water - Items (10)
Find every item and hidden item in Mossdeep City, Route 124, Route 125 and Shoal Cave
Diving Expedition - Items (10)
Find every item and hidden item in Sootopolis City, Route 126 and Route 127
End of the Line - Items (10)
Find every item and hidden item in Ever Grande City, Route 128, Route 129 and Victory Road
Southern Currents - Items (10)
Find every item and hidden item in Pacifidlog Town, Route 130, Route 131, Route 132, Route 133 and Route 134
Little Trainer Big World - Trainers (10)
Defeat every trainer in Littleroot Town, Route 101, Oldale Town, Route 103 and Route 102
Petals to the Wind - Trainers (10)
Defeat every trainer in Petalburg City, Route 104, Route 105 and Petalburg Woods
Learning to Strive - Trainers (10)
Defeat every trainer in Rustboro City, Route 115, Route 116 and Rusturf Tunnel
Surfing Shores - Trainers (10)
Defeat every trainer in Dewford Town, Granite Cave, Route 106, Route 107, Route 108 and the Abandoned Ship
By Ship and by Bike - Trainers (10)
Defeat every trainer in Slateport City, Route 109 and Route 110
Hoenn Meridian - Trainers (10)
Defeat every trainer in Mauville City, Verdanturf Town, Route 117, Route 118 and New Mauville
Hot, Hotter, Hottest - Trainer (10)
Defeat every trainer in Lavaridge Town, Route 111, Route 112, Fiery Path, Mt. Chimney and Jagged Pass
Cinder Path - Trainers (10)
Defeat every trainer in Fallarbor Town, Route 113, Route 114 and Meteor Falls
Welcome to the Jungle - Trainers (10)
Defeat every trainer in Fortree City, Route 119, Route 120, Scorched Slab and Route 121
Finisterre - Trainers (10)
Defeat every trainer in Lilycove City, Safari Zone, Route 122, Mt. Pyre and Route 123
Too Much Water - Trainers (10)
Defeat every trainer in Mossdeep City, Route 124, Route 125 and Shoal Cave
Diving Expedition - Trainers (10)
Defeat every trainer in Sootopolis City, Route 126 and Route 127
End of the Line - Trainers (10)
Defeat every trainer in Ever Grande City, Route 128, Route 129 and Victory Road
Southern Currents - Trainers (10)
Defeat every trainer in Pacifidlog Town, Route 130, Route 131, Route 132, Route 133 and Route 134
This guide was written with the assistance of the Achievement Block Generator, created by Wes Copeland.
No generative AI was used in the creation of this guide.