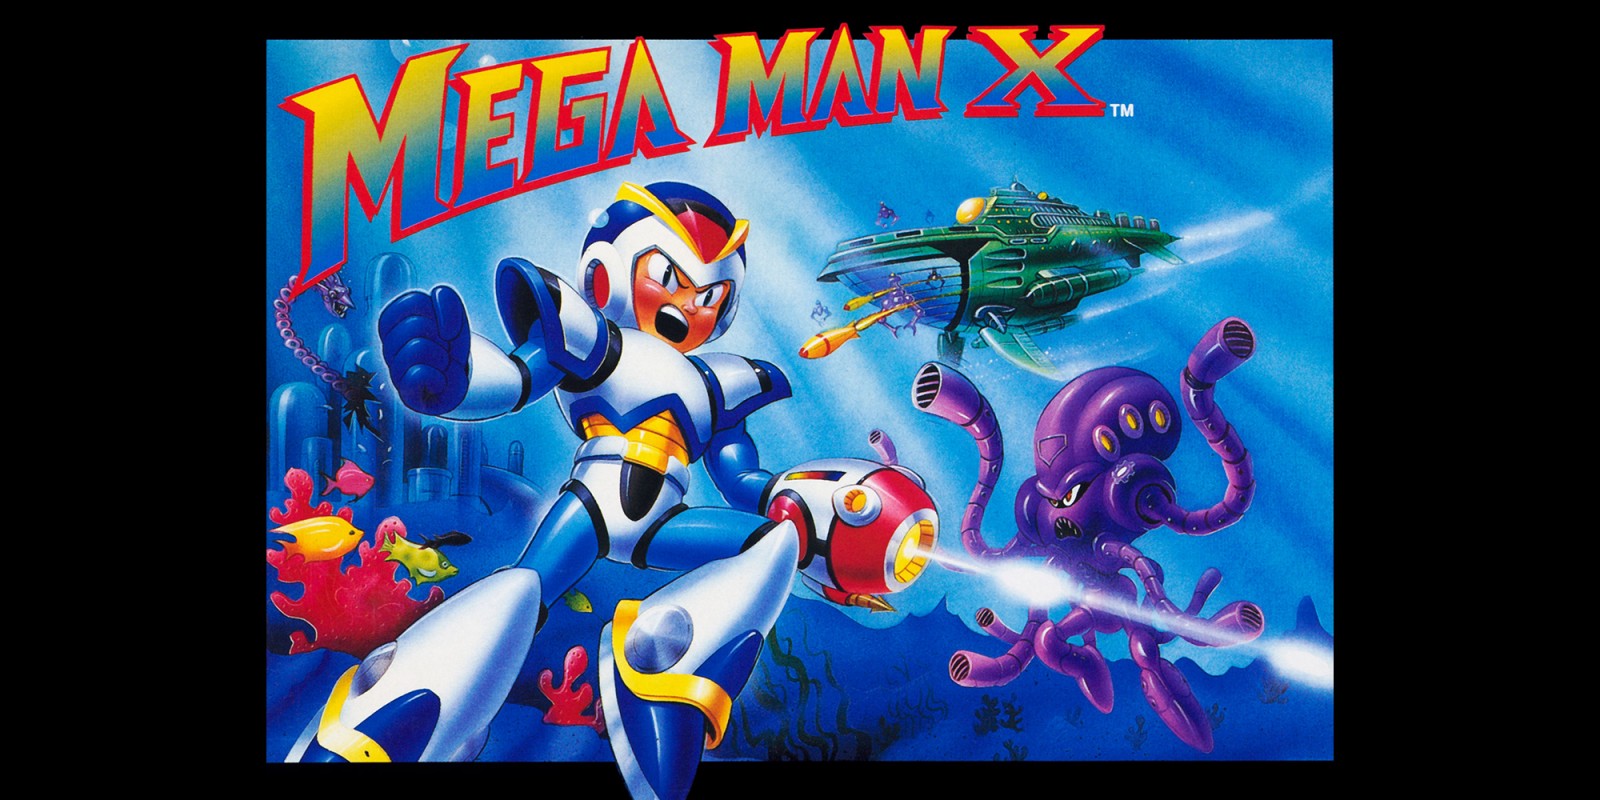
(WIP) Mega Man X - RetroAchievements/guides GitHub Wiki
| Set Difficulty | 5/10 |
| Approx. time to master | 15 hrs |
| No. of missables | N/A |
| Does difficulty affect achievements? | N/A |
| Minimum numbers of playthroughs needed | At least 2-3 and some password usage. |
| Hardest achievement of the set | ZERO Mode (50) |
Mega Man X is the first game in the Mega Man X series. It was released during 1994, a time where Mega Man was oversaturated due to his 6 same-y NES entries, and helped revitalize the series in the public conscious. It takes place years after the original series and stars X, a Reploid (an advanced robot) who is a part of a team of Maverick Hunters, a military task force who stops other Reploids who have gone rogue (Maverick).
The set has 57 achievements worth 521 points. It also has 20 leaderboards.
Takoyaki Time (5)
Defeat Launch Octopus
Just Chill, Bro (5)
Defeat Chill Penguin
Ironskin (5)
Defeat Armored Armadillo
Coming Down like a Lightning Bolt (5)
Defeat Storm Eagle
Legend of Zelda Crossover (5)
Defeat Boomer Kuwanger
Bursting Flame (5)
Defeat Flame Mammoth
Chamouflage (5)
Defeat Sting Chameleon
Spooky Mecha (10)
Defeat Bospider in Sigma's Fortress
Awakened Trap Room (10)
Defeat Rangda Bangda in Sigma's Fortress
Good Boy Gone Down (10)
Defeat D-Rex in Sigma's Fortress
Commander Chased and Conquered (10)
Defeat Sigma's final form
Gotta Go Fast (2)
Get the ability to dash with the boots upgrade!
You will get all of these achievements by completing the game normally. Uniquely, the dash boots are in a capsule, but they are straight in your path in Chill Penguin's stage, so they can't be skipped without passwords.
Hardheaded Android (4)
Get the ability to headbutt blocks with the helmet upgrade!
The head upgrade is located in Storm Eagle's stage. After the section with the floating platforms, there will be a large wall you need to climb. Fall in between the gap at the top and the higher platform.
Advanced Alloy (4)
Take half damage with the body upgrade!
The body upgrade is located in Sting Chameleon's stage. It's above the rock cave area, and you need to defeat a miniboss to claim it.
X-Buster Upgrade (4)
Get the X-Buster upgrade from a capsule
The arm upgrade is located in Flame Mammoth's stage. You need the head upgrade to access it. There will be a spot with breakable blocks, dash and headbutt through the blocks to a secret alcove which contains the capsule.
Gotta Go Fast (2)
Get the ability to dash with the boots upgrade!
The leg upgrade is located in Chill Penguin's stage. As said above, this upgrade is mandatory. If you need a guide to get this one... this may not be the game for you, my friend.
It's Dangerous To Go Alone! Take This! (5)
Get the X-Buster upgrade from Zero
The arm upgrade IS necessary to beat the game, (the final boss can only be damaged by fully charged buster shots unless you use weapons.) so if you didn't get it in Flame Mammoth's stage, Zero will give it to you in Sigma 1.
Durable! (3)
Find your first Heart Container without using a password
Invincible! (10)
Find all eight Heart Containers without using a password
Tanks! (3)
Find your first Sub Tank without using a password
Tanks Four Every Tanks! (10)
Find all four Sub Tanks without using a password
There is a heart tank in every stage. The sub tanks are located in Flame Mammoth, Storm Eagle, Spark Mandrill, and Armored Armadillo's stage.
Did He Just...? (10)
Find the "Secret Technique"
The Secret Technique (Hadoken) is located in Armored Armadillo's stage. It requires you to have every item and to be stocked up on lives. At the end of the stage, there is a ledge above the boss door. You need to get up to that ledge with full health and then fall down the pit below repeatedly. Repeat this enough times and a capsule will appear and give you the Hadoken, which has the power to instantly kill bosses. At full health and with the X-Buster equipped, press ↓↘→ and Attack to execute this move.
This section is achievements with specific requirements which are obtained within the levels.
Almost a Perfect Run, but Vile Just Ruined It (10)
From the beginning of the game, reach Vile without taking damage
As simple as it sounds, get through the opening stage without taking damage. The only thing I could see being an issue is the bee minibosses. Stay to the far left and react to what they do. You also don't have to defeat Vile considering it's impossible to do so.
Be Careful to Not Be Electrocuted! (5)
Play through Spark Mandrill's stage before defeating Storm Eagle
This Factory Is on Fire! (5)
Play through Flame Mammoth's stage before defeating Chill Penguin
Interestingly enough, beating certain stages affects others. Storm Eagle's ship crashes into Spark Mandrill's stage, shutting off the power. And defeating Chill Penguin causes Flame Mammoth's stage to freeze over... for some reason. The stages are relatively the same, with a few extra hazards thrown in that shouldn't cause much issue. You're allowed upgrades if you so wish.
Spark Mandrill (i die a couple times because i was playing recklessly)
Deja Blue Bomber (5)
Find and destroy the unique enemy from the classic Mega Man games
There is a lone Batton enemy within Armored Armadillo's stage near the beginning. Defeating it earns the achievement. This enemy is a good way to grind for lives, as it drops 1-ups frequently.
I Don't Want to Play This Level Again! (5)
Get the Heart Container in Boomer Kuwanger's stage before defeating Boomer Kuwanger
Demonstrated in the upgrades video. Charged Shotgun Ice creates a sled which slides along the ground. Use it to jump up to where the heart is. Easy peasy.
Who Needs Water? (10)
Get the Heart Container in Sting Chameleon's stage before defeating Launch Octopus
Another example of a stage that changes upon beating another: Sting Chameleon's stage is flooded when you defeat Launch Octopus. This makes grabbing the heart trivial, but through the power of charged Shotgun Ice, you can get it without the flood. Break the 4 topmost blocks, then stand on the highest block and release a charged Shotgun Ice. It should be high enough for you to dash off and grab the heart.
Delayed Flight (5)
Get the Heart Container in Storm Eagle's stage without using the dash ability
Harder than it seems. Once again, you use charged Shotgun Ice (use a password to get the weapon without dash). On the platform that says AIR PORT on it, stand around where the space is and fire a charged Shotgun Ice. You have to time it so the moving platforms don't catch you and interfere. Once that's over, you just need to jump to the left platform and get the heart.
This section is achievements with specific requirements which are obtained in boss fights.
There are 8 achievements for defeating each of the 8 Mavericks buster only. The only restriction is you must only use the X Buster.
Busting the Octopus (10)
Defeat Launch Octopus using only the X-Buster
Uuuuugh... I hate this boss. Launch Octopus is pretty much just a spamfest as his main attacks are missiles and these homing fish that he shoots out of his tentacles. Whenever he's on the ground, stay away and keep shooting. You will destroy 1 missile always this way, and the others will go above and below you. Unfortunately, you will probably get hit by the homing fish even doing this. His other attack is flying up and creating a whirlpool to suction you in and drain your health. He is not that hard but you're probably going to take some damage here.
Busting the Penguin (5)
Defeat Chill Penguin using only the X-Buster
On the opposite end of the scale, Chill Penguin is one of the easier bosses in the game. I mean, there's a reason everyone picks him first. Well, besides the dash. Chill Penguin's main form of attack is blowing icy breath and creating ice sculptures. If you're too close to Chill Penguin, you'll get frozen. Try to stick to the wall. Chill Penguin can also slide on the ground, during which he is invulnerable. He can also jump to the top of the screen and pull the hook, which blows wind into the arena, pushing both you and the ice sculptures to one side. Chill Penguin is the easiest boss in the game, and it's likely you'll get the no damage achievement as well as the buster only one on a regular playthrough.
Busting the Armadillo (10)
Defeat Armored Armadillo using only the X-Buster
Armored Armadillo is easier than it initially seems. The main gimmick of this boss is that he has armor which he uses to block shots. If you shoot him with a charged shot while he's shooting you, he will absorb it and release a spread of bullets. This is the key. You can sort of lock him in a loop of shooting a green shot at him, then jumping over his spread and releasing a fully charged shot right in his face. He can also roll around the arena, although this attack is pretty easy to dodge considering it's the exact same pattern every time he does it. The only difficulty in this fight is patience, as Armored Armadillo only takes 1 damage from the buster. Just keep at it.
Alternatively, you can utilize dash lemons (shooting while dashing does more damage) to deal 2 damage instead of 1 provided you have the patience. This is the relatively safer strategy but it will take quite a while because Armored Armadillo doesn't leave a ton of openings.
Busting the Eagle (5)
Defeat Storm Eagle using only the X-Buster
Another fairly easy Buster only battle. Storm Eagle usually starts the fight with flapping his wings to blow you into the pit on either side of the arena. This is what you want to happen, as you can quickly tear through his health bar with dash lemons this way. He can also blow Storm Tornado which is the same deal. He can fly up and spit an egg at you, which hatches into 4 small bird robots. Just jump over them when they hatch. His worst attack is easily the dive. He'll fly over the screen and try to dive into you. This attack is not too dangerous but it can waste a ton of time. Pay attention to which ear the dive sound effect plays in, then dash away from that direction and try to shoot him with a charged shot. This is tricky, so you may just want to hope he doesn't dive at all.
Busting the Boomer (10)
Defeat Boomer Kuwanger using only the X-Buster
Boomer Kuwanger can be a tricky boss. Generally, you are going to want to stick to the wall whenever he does just about anything. He can dash towards you, throw his boomerang and teleport. He's invincible while teleporting so just keep on the move and search for an opening in between teleports. Other than that, just be on the move. If you let him get too close, he will grab you and throw you upward, dealing a lot of damage. Important thing to note is that Boomer Kuwanger takes extra damage from the buster.
Busting the Mammoth (5)
Defeat Flame Mammoth using only the X-Buster
Another fairly simple boss. Flame Mammoth's room is very wide, so you shouldn't have too much trouble evading his attacks. He can shoot oil and fire from his trunk. If the fire hits the oil, it erupts into flame. He can also jump which causes the ground to shake, briefly tripping X. Flame Mammoth can also trumpet to make the conveyor belt change directions. Just stay in a safe distance and use dash lemons.
Busting the Mandrill (10)
Defeat Spark Mandrill using only the X-Buster
Like Boomer Kuwanger, this is another fight where you want to be on the move. Spark Mandrill is very erratic. He can climb the top of the screen and jump at you. He can also punch the ground creating Electric Sparks and jump at you. His most dangerous attack is his dashing punch. This move comes out very quick and will knock you off the wall. You need to always be charging your buster as hitting him with a charged shot will knock him out of it. You can also try walljumping over him before the punch connects with the wall, but this is tricky and usually results in you getting hit.
Busting the Chameleon (10)
Defeat Sting Chameleon using only the X-Buster
Sting Chameleon spends most of the fight climbing the background like Vega in Street Fighter II. He can grapple to the ceiling with his tongue and swing around, causing spikes to fall down. You'll probably get hit by this attack as the spikes come down really quickly. If he climbs to the upper corner, he will use Chameleon Sting. It's much easier to dodge than the spikes. He can also climb down closer to the ground and lash his tongue at you. I like to stay above him when he does this, as the tongue can be hard to react to. In between his attacks, he will disappear, although you can still tell where he is because the background warps around him. He is invulnerable when he does this, so your only openings are when he is attacking you. Be careful, there's damaging spikes on the ceiling.
There are 9 no damage boss achievements. Obviously the 8 Mavericks, but there's also one for defeating Vile in Sigma 1 without taking damage for some reason. The tips given in this section will focus more on weakness interactions with bosses as I already gave indepth explanations for what each boss does in the Buster Only section.
Stir the Calamari (25)
Defeat Launch Octopus without taking damage [No Secret Technique]
Launch Octopus' weakness is Rolling Shield. One of the tougher achievements in the set. As mentioned earlier, Launch Octopus is a huge spamfest. The way I did this initially was using Storm Tornado to clear his missiles and fish, and waiting for an opening to use Rolling Shield when he spins (I even commented this under the achievement). What I hadn't tried then was using Boomerang Cutter, which makes everything way easier! Same strategy as the one mentioned, only instead of using Rolling Shield, you use Boomerang Cutter. This chops off his tentacles and makes it so he can only jump and shoot missiles. From there, just keep shooting your buster at him and he will go down. Weakness recommended, depending on the strategy.
Melt the Ice (5)
Defeat Chill Penguin without taking damage [No Secret Technique]
Chill Penguin's weakness is Fire Wave. You do not need it, though, and in fact, it makes the fight harder as it forces him to slide a lot more often. Refer to the Buster Only strategy. Weakness not recommended.
Shock the Tank (10)
Defeat Armored Armadillo without taking damage [No Secret Technique]
Armored Armadillo's weakness is Electric Spark. Hitting Armored Armadillo with his weakness causes his armor to fall off. From there, you can very quickly melt his health bar with Electric Spark. You can even hit him while he's rolling around the arena, ensuring no matter what he does, the fight is over fast. If you despised this boss fighting him buster only, this will probably feel cathartic. Weakness recommended.
Armored Armadillo (with weakness)
Hunt the Bird (10)
Defeat Storm Eagle without taking damage [No Secret Technique]
Storm Eagle's weakness is Chameleon Sting. It's a fine weakness, although you have to get close to do the maximum damage as only hitting one projectile deals less damage. I would just stick with the buster. Refer to the Buster Only strategy above. Weakness not recommended.
Lock-On to the Ninja (10)
Defeat Boomer Kuwanger without taking damage [No Secret Technique]
Boomer Kuwanger's weakness is Homing Torpedo... or, erm, Horming Torpedo as it's called in game. Anyways, Boomer Kuwanger's teleport gets interrupted when hit by his weakness, so try to keep shooting it in order to deal with his teleporting. It shouldn't be very difficult, however. Weakness recommended.
Boomer Kuwanger (with weakness)
Blow Out the Candle (10)
Defeat Flame Mammoth without taking damage [No Secret Technique]
Flame Mammoth's weakness is Storm Tornado. An easy boss made easier with his weakness. He doesn't have any special reaction to getting hit by it, but it does deal heavy damage to him, dealing with him in seconds. Keep a safe distance from him and he should go down easily. Weakness recommended.
An alternative strategy is hugging the corner and charging Storm Tornado. Wait until Flame Mammoth is under you, then blast him with a charged Storm Tornado. This strategy kills my thumb after a while, though.
Freeze the Circuits (5)
Defeat Spark Mandrill without taking damage [No Secret Technique]
Spark Mandrill's weakness is Shotgun Ice. Ever heard of the term "Spark Mandrill syndrome"? Shotgun Ice makes this boss a complete joke. Just keep freezing him over and over. Weakness recommended.
Spark Mandrill (with weakness)
Cut the Camouflage (10)
Defeat Sting Chameleon without taking damage [No Secret Technique]
Sting Chameleon's weakness is Boomerang Cutter. This fight is pretty much a guessing game. If you guessed what his opener would be, congratulations! You can then proceed to juggle him. If you miss, it's still possible to recover, but chances are you'll get hit before you can. Just hope you get lucky on the opener and he shouldn't be too much of an issue.
Sting Chameleon (with weakness)
Where Is Your Ride Armor Now? (10)
Defeat Vile in Sigma Fortress 1 without taking damage [No Secret Technique]
Vile's weakness is Rolling Shield. Another boss where you're going to want to stay on the move. Success is entirely dependent on what Vile wants to do. He can shoot electric orbs which stun you, he can jump and dash at you. He can also shoot bombs which explode and sweep the floor which is the attack you don't want him to do. It's tough to dodge and he can mix it up by regular jumps. It's difficult, but Rolling Shield does a lot of damage, so provided you get the right pattern, he shouldn't be much of an issue.
Defenceless Armadillo (3)
Destroy Armored Armadillo's armor in his stage
Armored Armadillo's armor falls off when hit with his weakness, Electric Spark.
Torpedos Disabled (4)
Cut off Launch Octopus' tentacles in his stage
Flame Pig (4)
Cut off Flame Mammoth's snout in his stage
When hit with Boomerang Cutter, these bosses lose appendages and thus attacks.
Five Mavericks, One Lifebar, One Buster (25)
In Sigma Fortress 3, reach D-Rex without dying, recovering health, switching weapons or using the Secret Technique
You have to defeat 5 bosses (Armored Armadillo, Sting Chameleon, Spark Mandrill, Launch Octopus, Flame Mammoth) in a row without dying and only using the X-Buster. You are allowed the armor upgrade so that damage is halved. You can refer to the Buster Only strategies listed above. Assuming you get favorable RNG, you'll probably do this first try. The hardest part of this achievement is the enemies in between that drop health pickups as you're not allowed to heal at all. They can VERY EASILY ruin a perfectly good run. Be careful!
Sending Him to the Farm (5)
Defeat Velguarder, Sigma's pet, using the Secret Technique
Psycho Power! (5)
Defeat Sigma's first form using the Secret Technique
Use the Hadoken on the first two phases of the final boss. Not difficult at all if you're good at the input.
This section is for achievements that either require a full playthrough or I couldn't categorize elsewhere.
Leave the Best For The Last! (10)
In a single session, defeat every Maverick except Chill Penguin without picking up the boots upgrade
This is the achievement I couldn't put elsewhere. It's not a full playthrough of the game without the dash, only 7 Mavericks. You can't do Chill Penguin because you're forced to get the dash. There aren't any other restrictions, though. You can use boss weapons, sub tanks, any heart tanks provided you can actually get to them... It's all fair game. I can't remember what the order was when I first got this achievement... Boomer Kuwanger's weapon allows you to get certain heart tanks which you desperately need for certain bosses, especially Spark Mandrill. The main goal is to get as much padding through subtanks and hearts as you can for harder bosses.
Storm>Armored>Boomer>Flame>Sting>Launch>Spark is the route shown in this video.
Survival Mode (25)
In a single session, beat the entire game without dying
Honestly... this achievement is pretty easy when you understand what you're doing, get every item, and know how to exploit boss patterns and weaknesses. Just be careful. Much easier than X2's version of this achievement. The only issue I can see is Sigma 1's bottomless chasm near the beginning of the stage. Use charged Rolling Shield, it takes the enemies out in 1 shot. Take it slow. Dashing on the moving platforms doesn't work for some reason.
I Need Something Else? (25)
In a single session, beat the entire game using only the X-Buster (Changing weapons by accident is fine, just don't use them)
Somewhat tougher. You're still allowed to get items but they have to be obtainable with only the Buster. The items you can't get are Chill Penguin's heart and Spark Mandrill's subtank. Everything else is possible to obtain. (although I'm kind of pushing it with Boomer Kuwanger's heart... but hey, Iceless is possible!) The only dangerous part is Sigma's final form. He deals a lot of damage and you need to use a fully charged shot (pink) in order to deal a single point of damage to him. You're in for the long haul, but it's pretty doable. There's a safe spot on the edge of the hand and you can stay there to avoid most damage. Always be ready to use a subtank, though, as the hands can pull some shenanigans forcing you to take damage.
MegaMAN Mode (25)
Beat the game without getting the body upgrade
ZERO Mode (50)
Beat the game without any Sub Tanks, Heart Containers, or the body upgrade. Passwords are allowed
Pretty easily the hardest achievement in the set. You are allowed passwords, though.
4367 6837 8646
This starts you at the Sigma stages with only the dash and buster upgrades. Everything is going to hit like a freight train this late in the game, so good luck. The main issue is, once again, Wolf Sigma. This time, pray that nothing funny happens, because he can take off more than half of your health if RNG decides he should. Rolling Shield deals 2 damage and should be your weapon of choice here. It's really just a matter of surviving.
If you've reached the end of this guide, congratulations on your mastery of Mega Man X! This guide was quicker to make than my previous one, Mega Man X2. It's balanced out by me having completed the set a year ago and thus not remembering the strategies I used then. I doubt they were much different than now, though.
Special thanks to:
Mega Man Home Page's X Password Generator
Jaarl, GalacticSpear, Telerophon, and Thoreau for their fantastic work on this set.
Guide by emmjay86. All footage is mine unless otherwise stated. Recorded off an original SNES with authentic cartridge.