Qosmetics General Setup - RedBrumbler/Qosmetics GitHub Wiki
Qosmetics is finally here! and that means it's time for me to communicate how to use the exporters for the mod. for each type of exporter it will be split across 2 guides, this one, and the specific guide for that exporter. The reason for this is that the project and initial setup for all exporters is the same, and that way I can write a guide more specific to each exporter without repeating too much information. This will also go for information directly related to just the project and not the specific exporters, so here we go:
Needed files:
- Unity project
- Unity Hub
- Unity 2019.3.2f1 Get the Unity hub version and: Don't forget to add android build support in unity hub!
After downloading files
After installing Unity Hub, you will want to click the unity link up there, and make sure to add android build support.

After that's installed you want to unzip the unity project to a location that suits you, then you'll be able to open the project by heading to the Assets/Scenes/questsaber.unity file and opening that. (going forward you'll be able to open the project from unity hub too)
Now that you've hopefully opened the project, you'll find a template file and a qosmetics cam in the scene, we will come back to the camera later in this guide, and the template is for that cosmetics specific exporter guide.
All Qosmetics specific Editor GUIs can be found in the top bar in Tools->Qosmetics.
Qosmetics Config Editor
For the project I have decided to make some things configurable, which I will now show based on the GUI that you should find here:

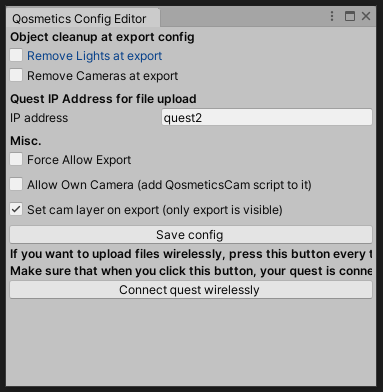
object cleanup at export config
The top two options are Remove Lights at export and Remove Cameras at export, all these options will do is if you export your object with either lights or cameras still on it (from a blender export maybe) it will remove these so that you will not accidentally have these in your exported object and have to re export. This can be left disabled if you are doing this on purpose however.
Quest IP Address
This field is where you can input your quest IP address to make it work with wireless adb. This way when testing qosmetic items you can press the Export And Upload button, and that way you don't even have to upload and update the saber yourself!
Make sure to have this be the correct IP address before you Click the Connect Quest Wireless Button though.
Misc.
the last of the config doesn't fit into a specific category, so this falls in the misc. category, although all of it has to do with exports.
- Force Allow Export will always allow an export. I've built in checks to disable the export if what you are about to export is not going to work, but I wanted to provide an override to export anyways. I recommend keeping this option disabled.
- Next there is the Allow Own Camera option, it does exactly what it says on the tin, remember that Qosmetics Camera I talked about? well this is where that comes into play. To allow model makers to position a camera however they want to, I've made this option that the camera in the scene with the QosmeticsCam script on it will be used in the export instead of a default configured cam!
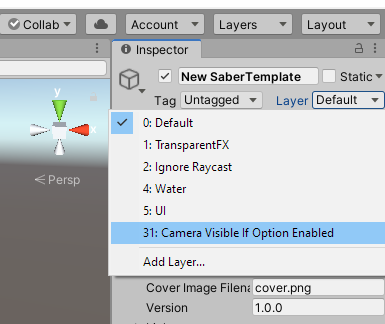
- Lastly there's the option Set Cam layer on export, this option will set the culling mask and the object layer on export so that ONLY the object you exported is visible. This uses a layer mask of 31, so if you want other objects to be visible set their layer mask to layer 31 (named
Camera Visible If Option Enabled) Adding objects to this layer is done by clicking the layer option at the top of the inspector and setting their layer:
Scene Changer
Next up is the scene changer UI, it can be found in the same menu as the config editor:

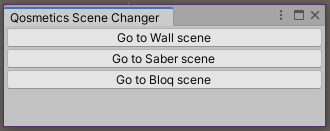
From this window 3 buttons are visible:
- Go to Wall scene will take you to the scene named questwalls.unity in the Scenes folder
- Go to Saber scene will take you to the scene named questsabers.unity in the Scenes folder
- Go to Bloq scene will take you to the scene named questnotes.unity in the Scenes folder
Color Tester
Then we get to the color tester. This can be found in the same menu as the Scene Changer and the config editor:
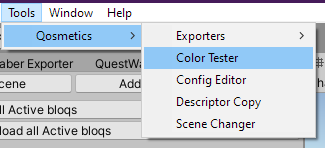
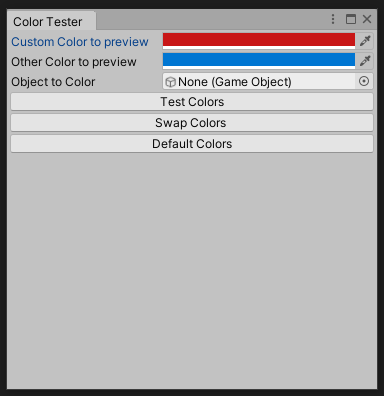
This script will set the right and left colors on the object you put in, and has a few fields and buttons:
- Custom Color the main color you want to test out, this is the _Color property of any materials
- Other Color the secondary color you want to test out, this is the _OtherColor property of any materials
- Object To Color Here you can drag in your GameObject that you want to color
- Test Colors Will apply the colors selected in the way qosmetics would do it on the quest
- Swap Colors Swaps the Custom Color and the Other Color
- Default Colors Sets the colors to the default red and blue from the game
Descriptor Copy
Lastly there is the Descriptor Copy UI. This is only relevant if you have any pre-UI qosmetic items, as this will move the descriptor that previously was used into the right place on the qosmetic item. It can be found here:
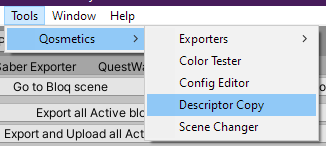
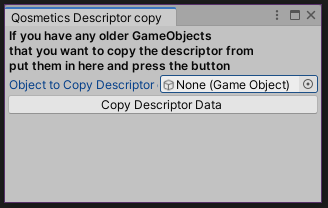
It is fairly self explanatory, drag the gameObject onto the OBject field, and click the Copy Descriptor Data button. If nothing happens or you get errors, then the item you just tried to use didn't have an old descriptor. These old descriptors may be removed in a future update so I recommend you change them over before they get removed.
Exporters
Now onto the Main part of the project, the Exporters. These can be found here:

And the links to their specific guides are here: