Creating Qsabers - RedBrumbler/BMBFCustomSabers GitHub Wiki
RedBrumbler's Guide to creating Qsabers for beat saber on quest
Hey! it's RedBrumbler back at it again with another tutorial for beat saber sabers. This time it's about making Sabers for the QuestSaber mod that rugtveit is working on.
First off you will want to download the following unity project, as well as the unity editor for Unity version 2019.3.2f1, when installing unity, MAKE SURE that you add android platform build support, otherwise you will not be able to make sabers for the quest.
Needed files:
- Unity project
- Unity 2019.3.2f1 (Windows)
- Unity 2019.3.2f1 (Mac)
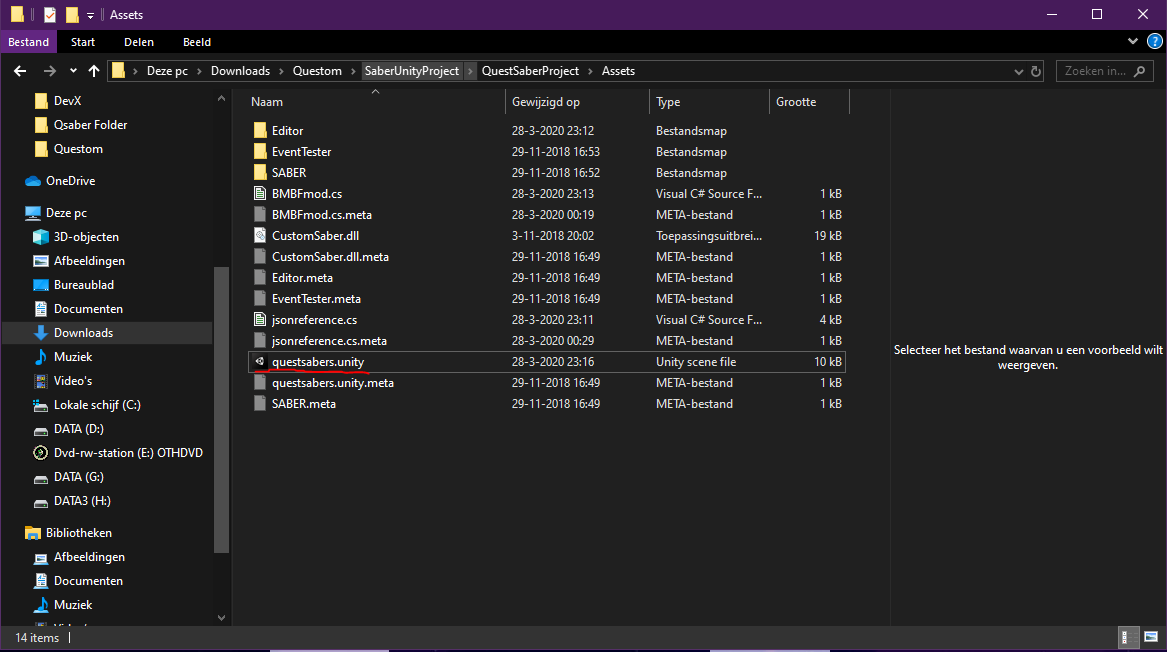
To start you want to open the downloaded Unity project by unzipping the file and clicking the QuestSaber file in the project/assets folder:
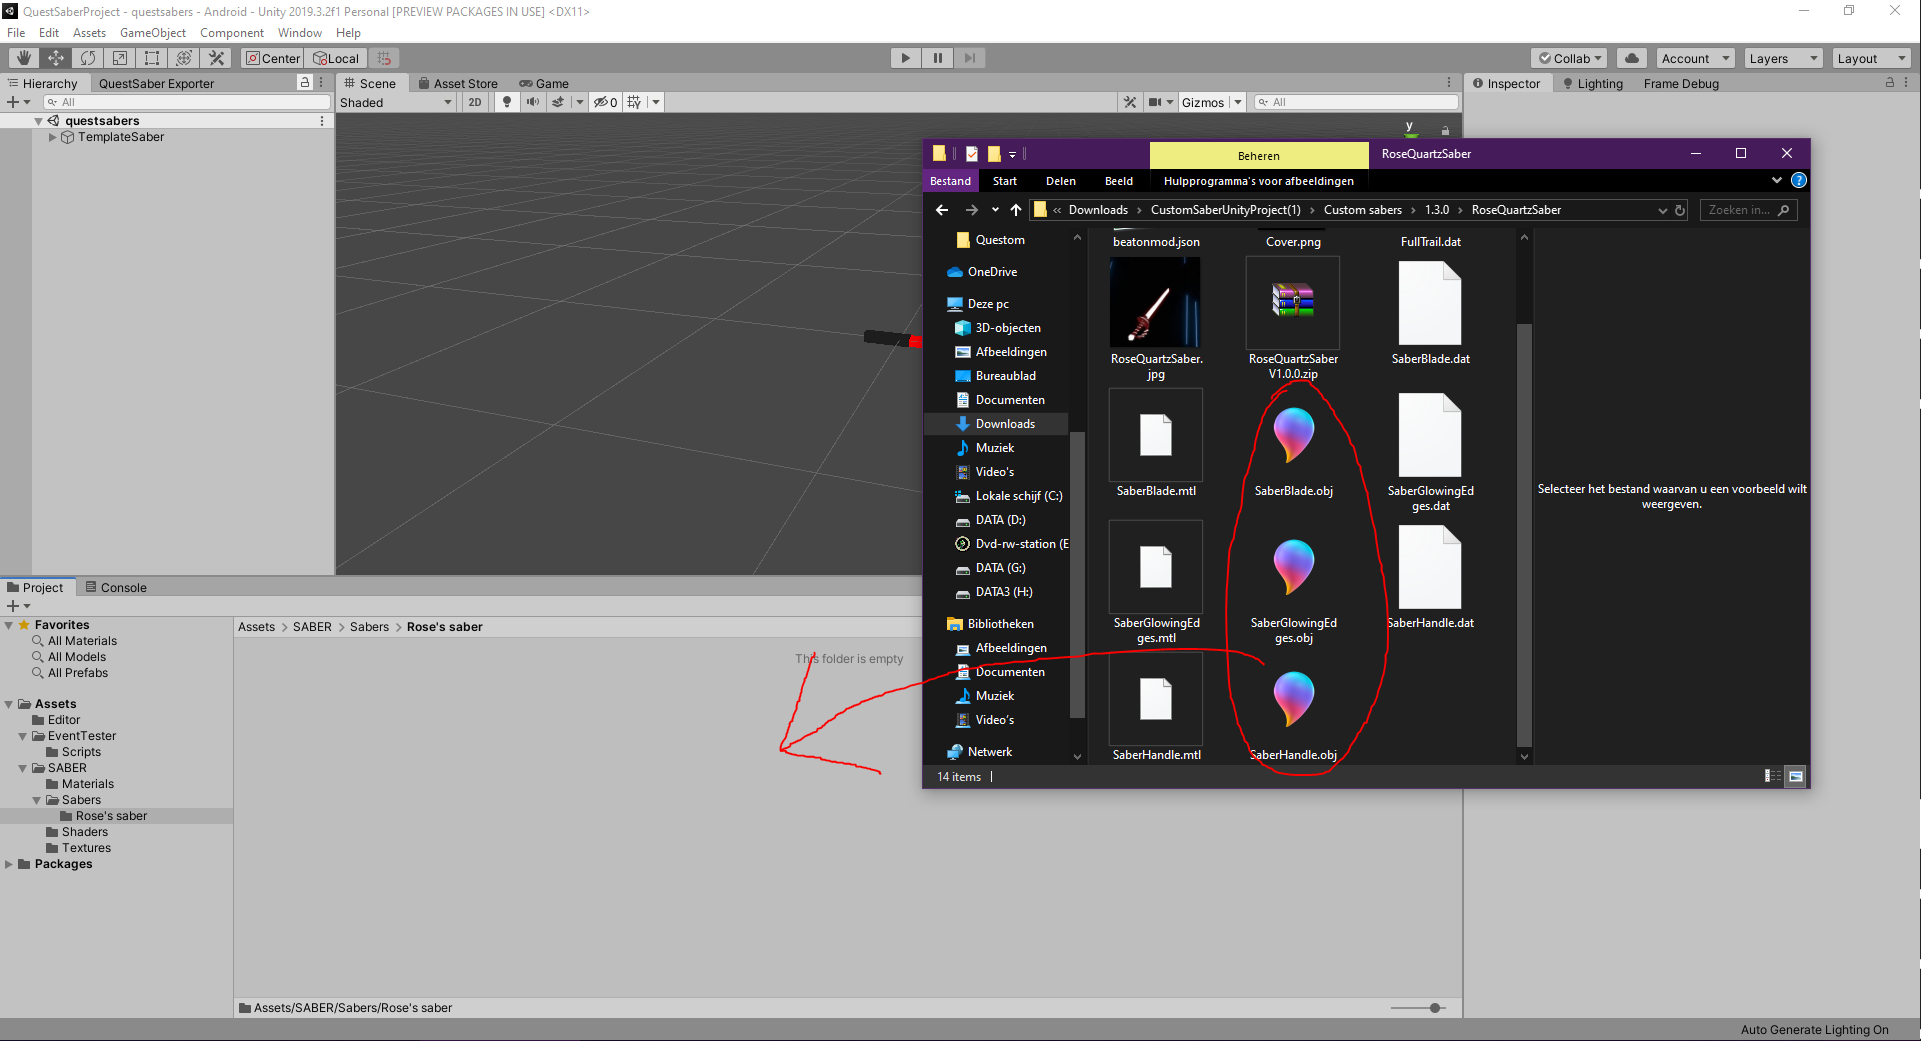
After the project is loaded you will want to import your saber model into the project (this of course means you'll have to either download a model or make one!), by dragging it down into the assets folder.
Now that your saber is inside the project, you can drag it into the scene hierarchy on the left, and make sure it is parented to the gameObject called "LeftSaberMesh".
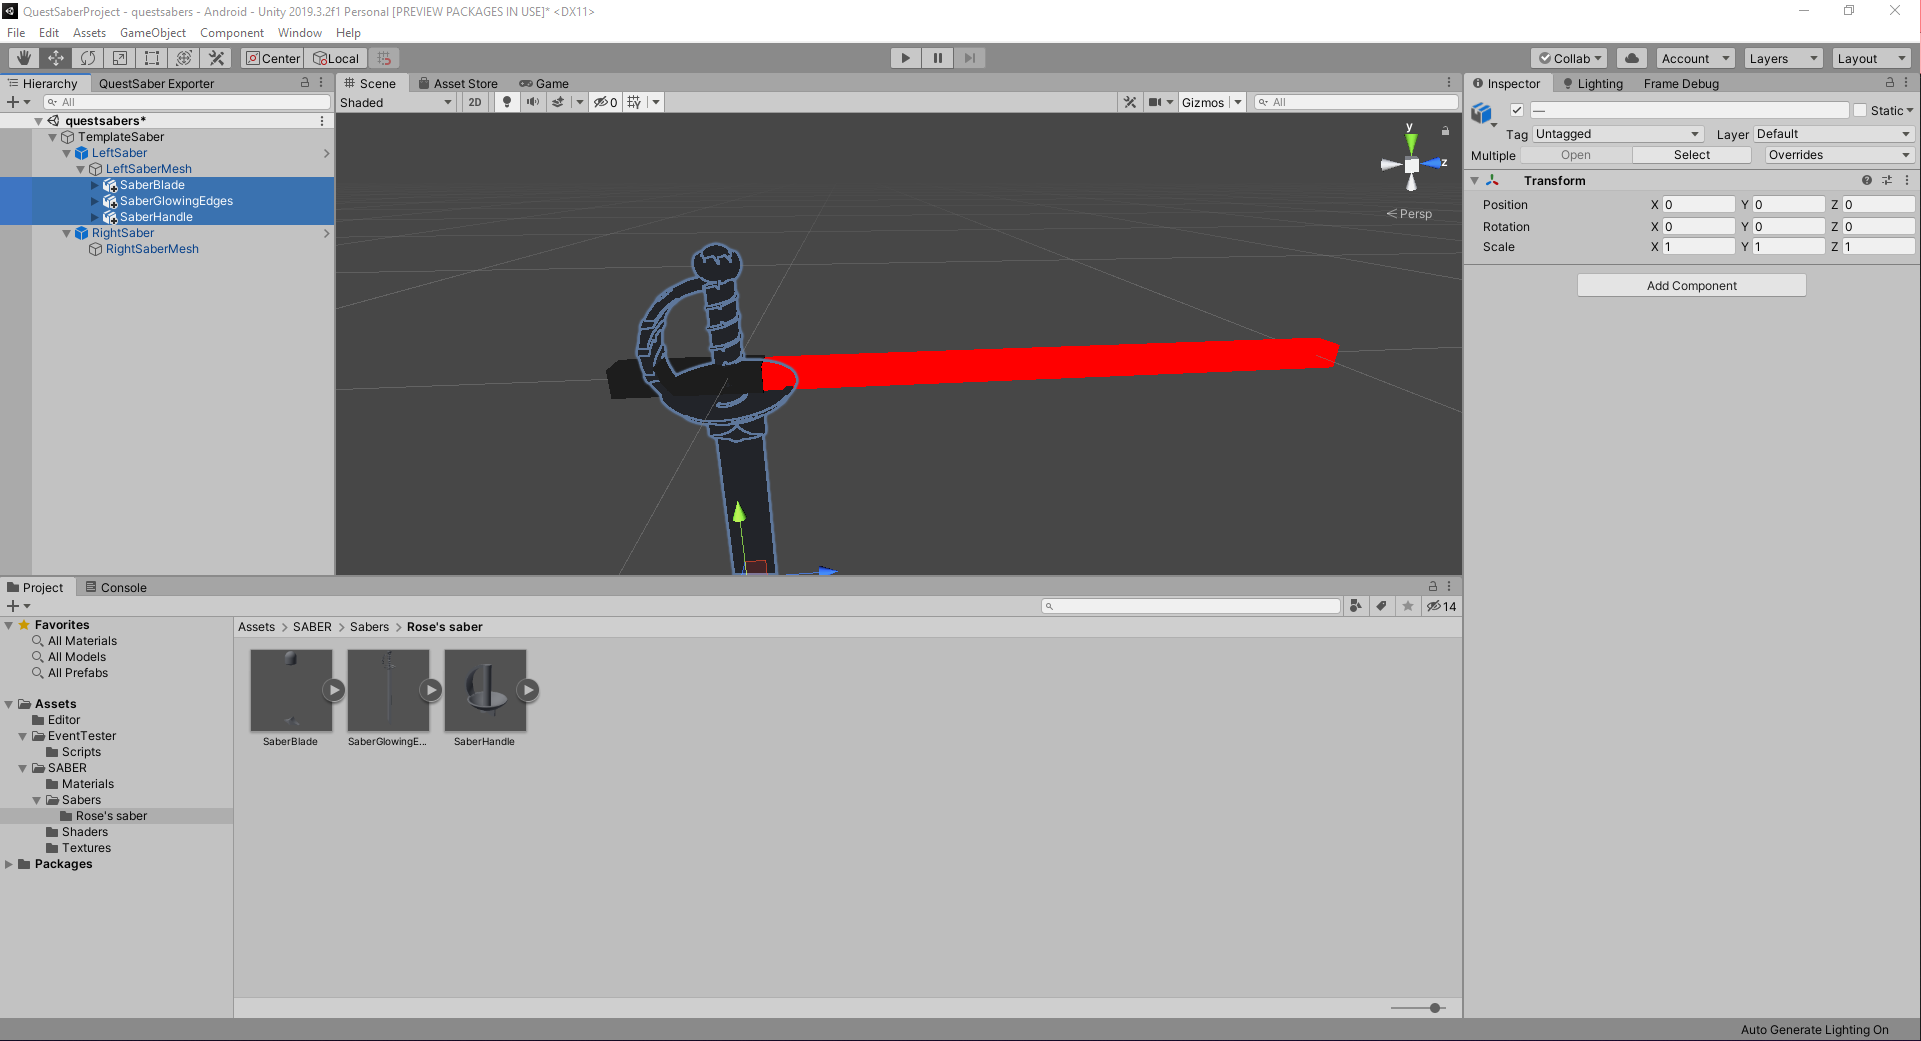
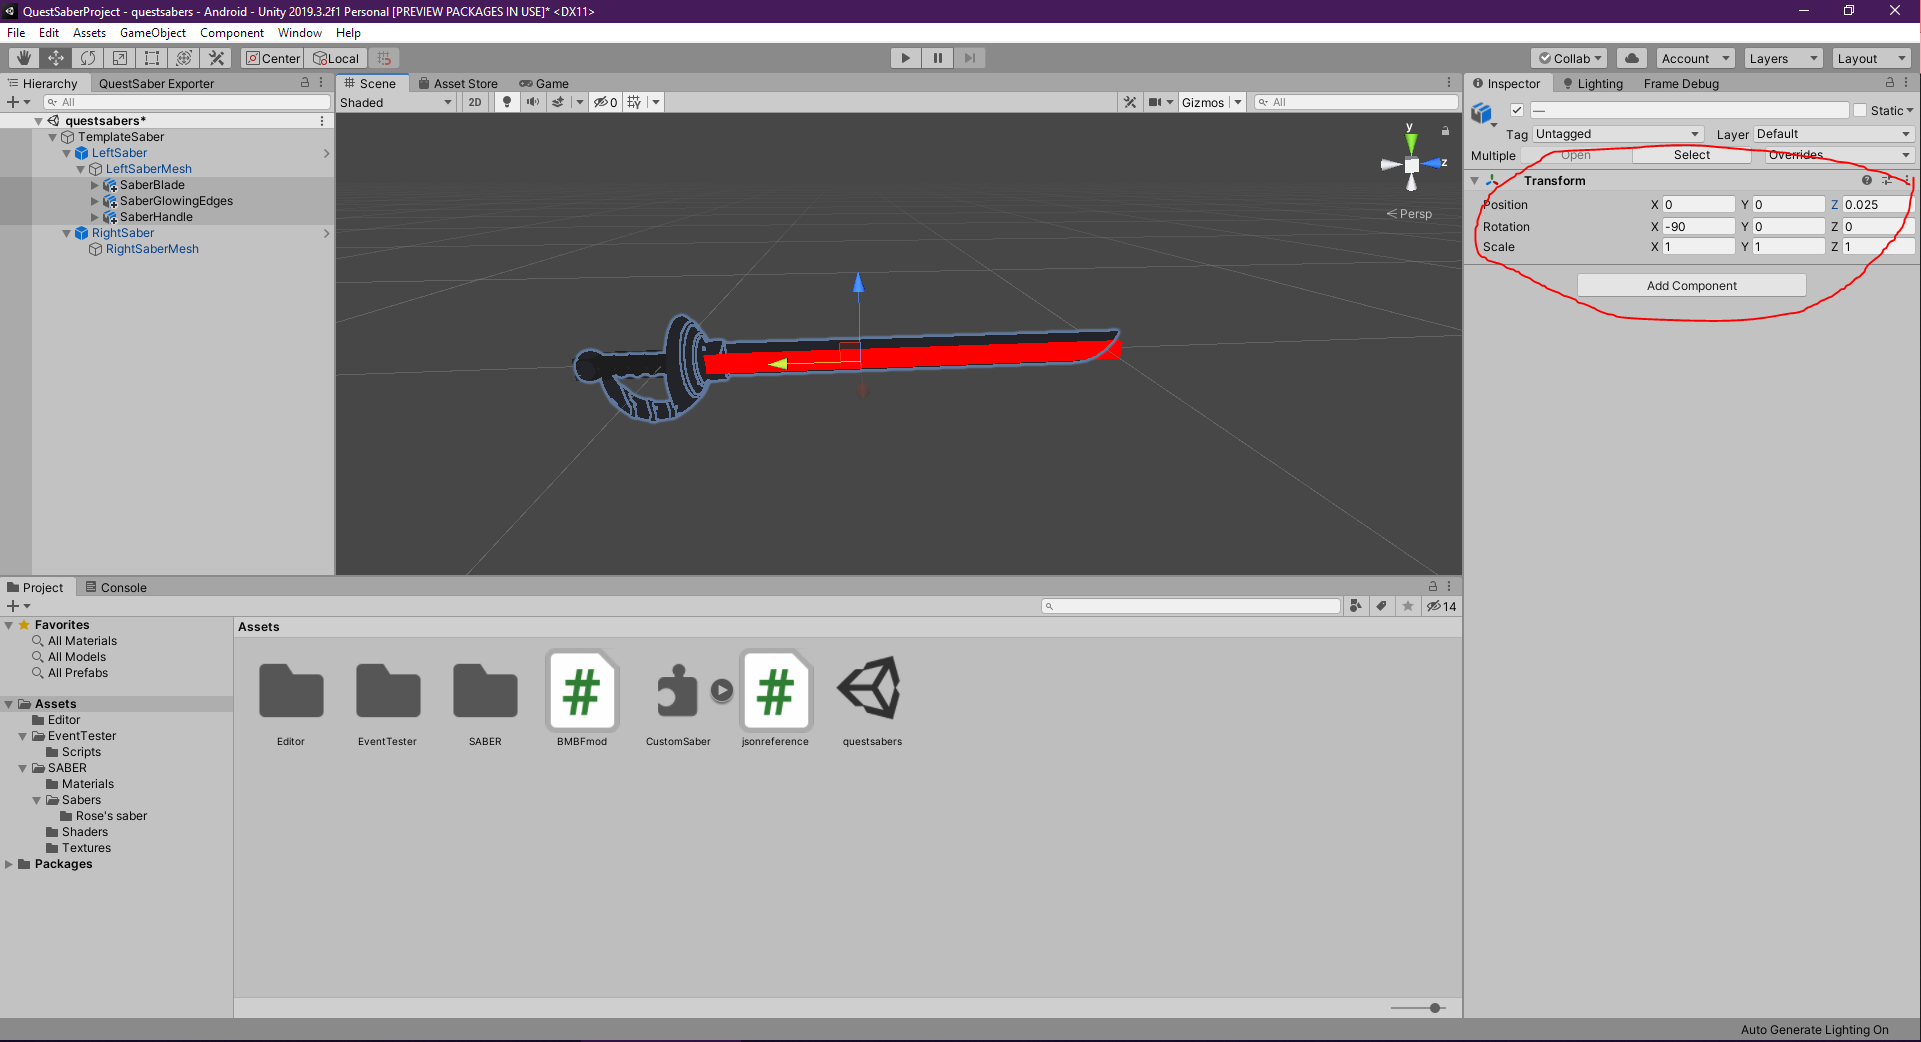
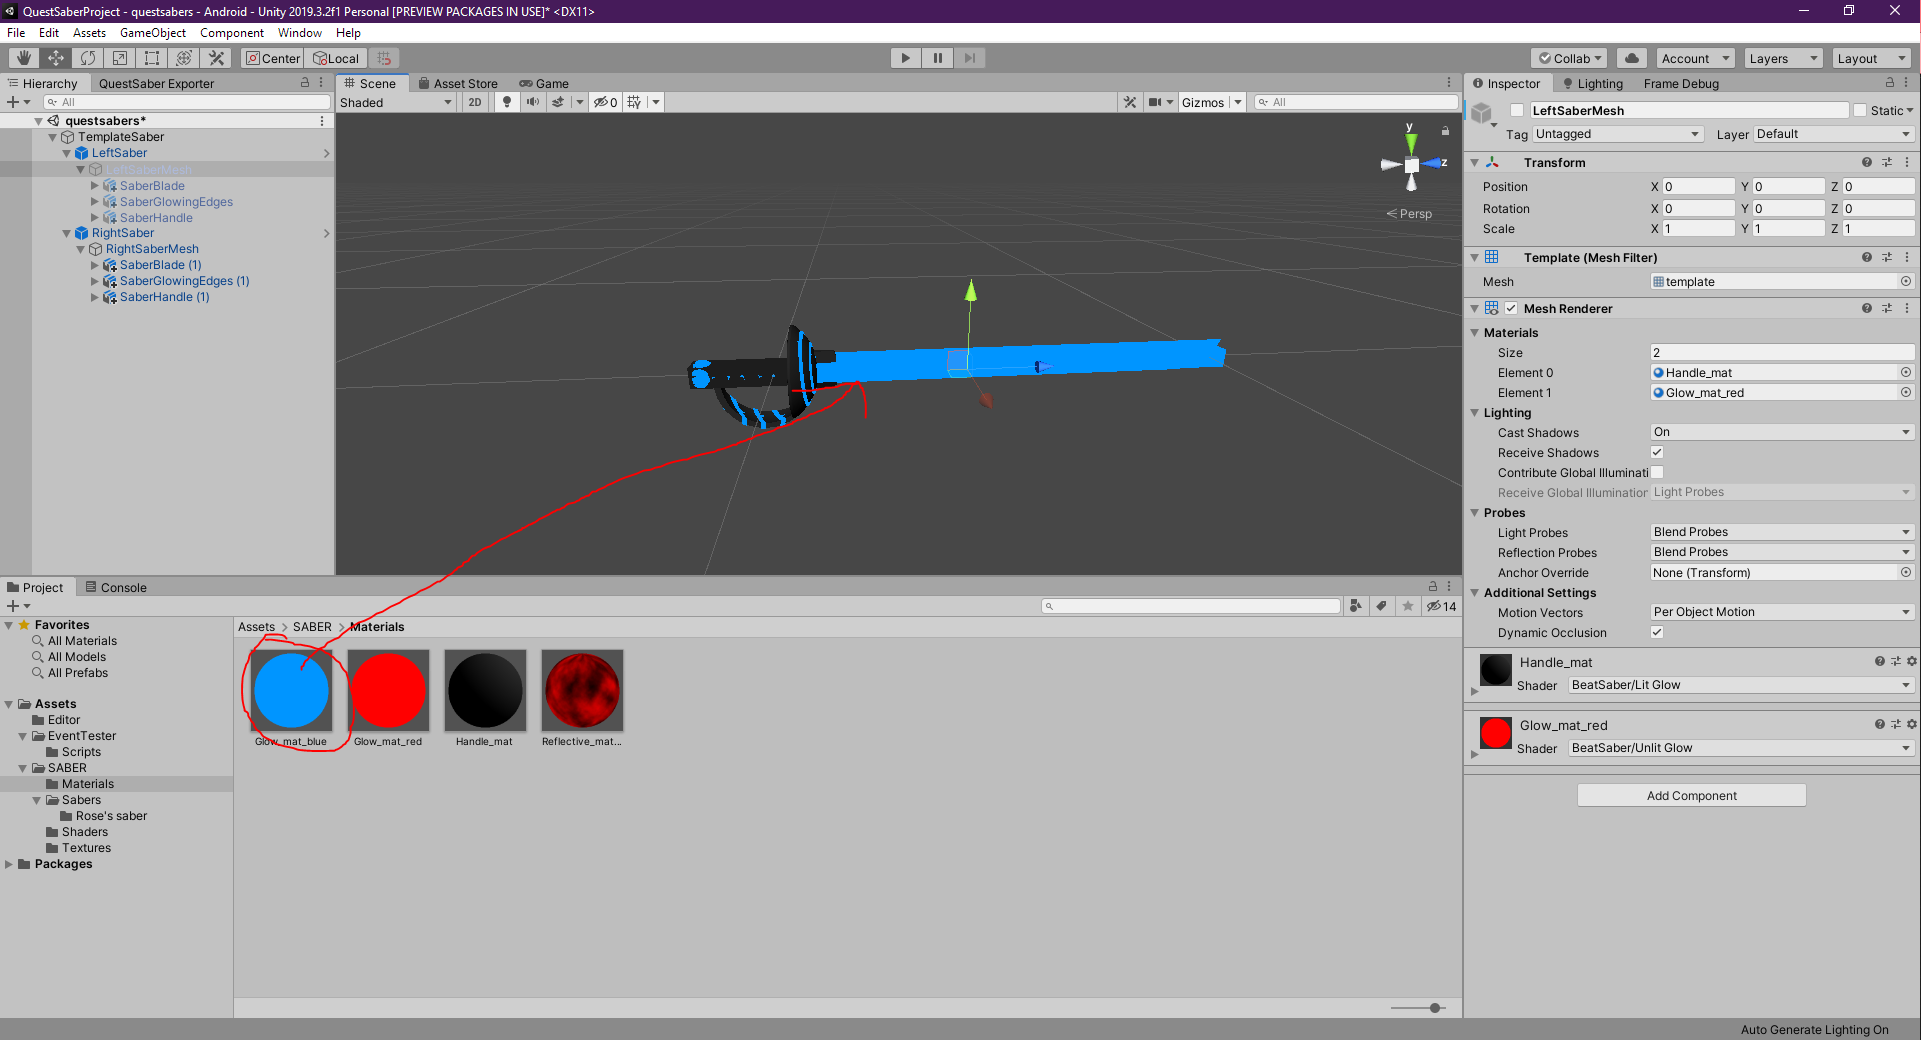
Now this is where the fun begins. You'll now want to line up the saber to the provided template to get a correct alignment in the game. the cutting edge so to speak of the saber is facing downwards, and the saber's handle is clearly shown.
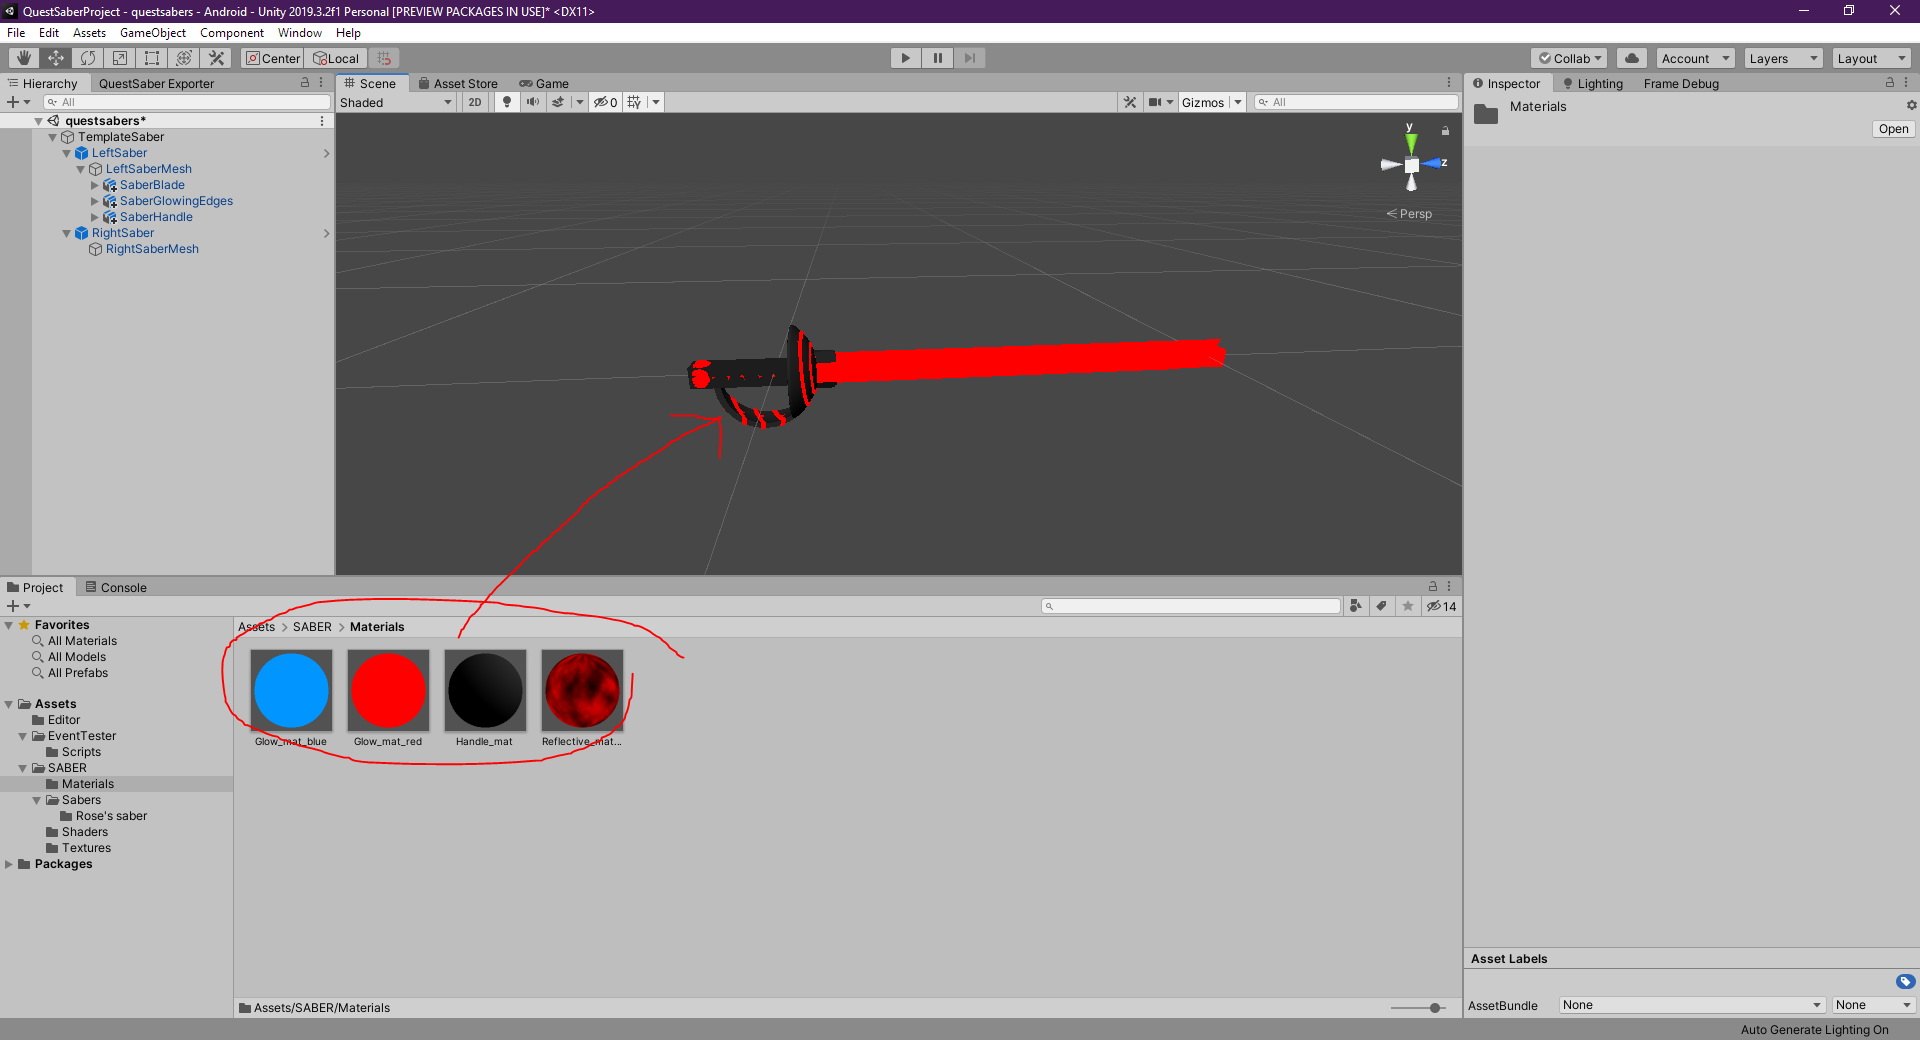
Once you have the saber aligned you can start applying the materials to it (or do it the other way around, this really is not that important), to get the saber to do custom colors you can use the provided shaders in the project, but you are of course welcome to use any other shaders, like the ones from My shader pack!
if you want to learn more about materials and are completely lost as to what they are, I recommend watching Unity's own material explanation video
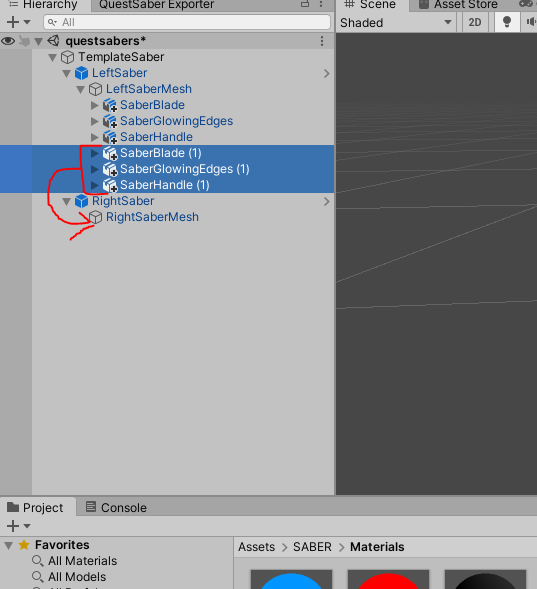
now that your left saber is aligned and has the materials applied, you're ready to make your right saber. If you want the same saber twice then you can just copy the saber, and then move it in the scene to be under "RightSaberMesh". If your saber is not symmetrical you will have to open it in a model program to mirror the model to make it look it's best.
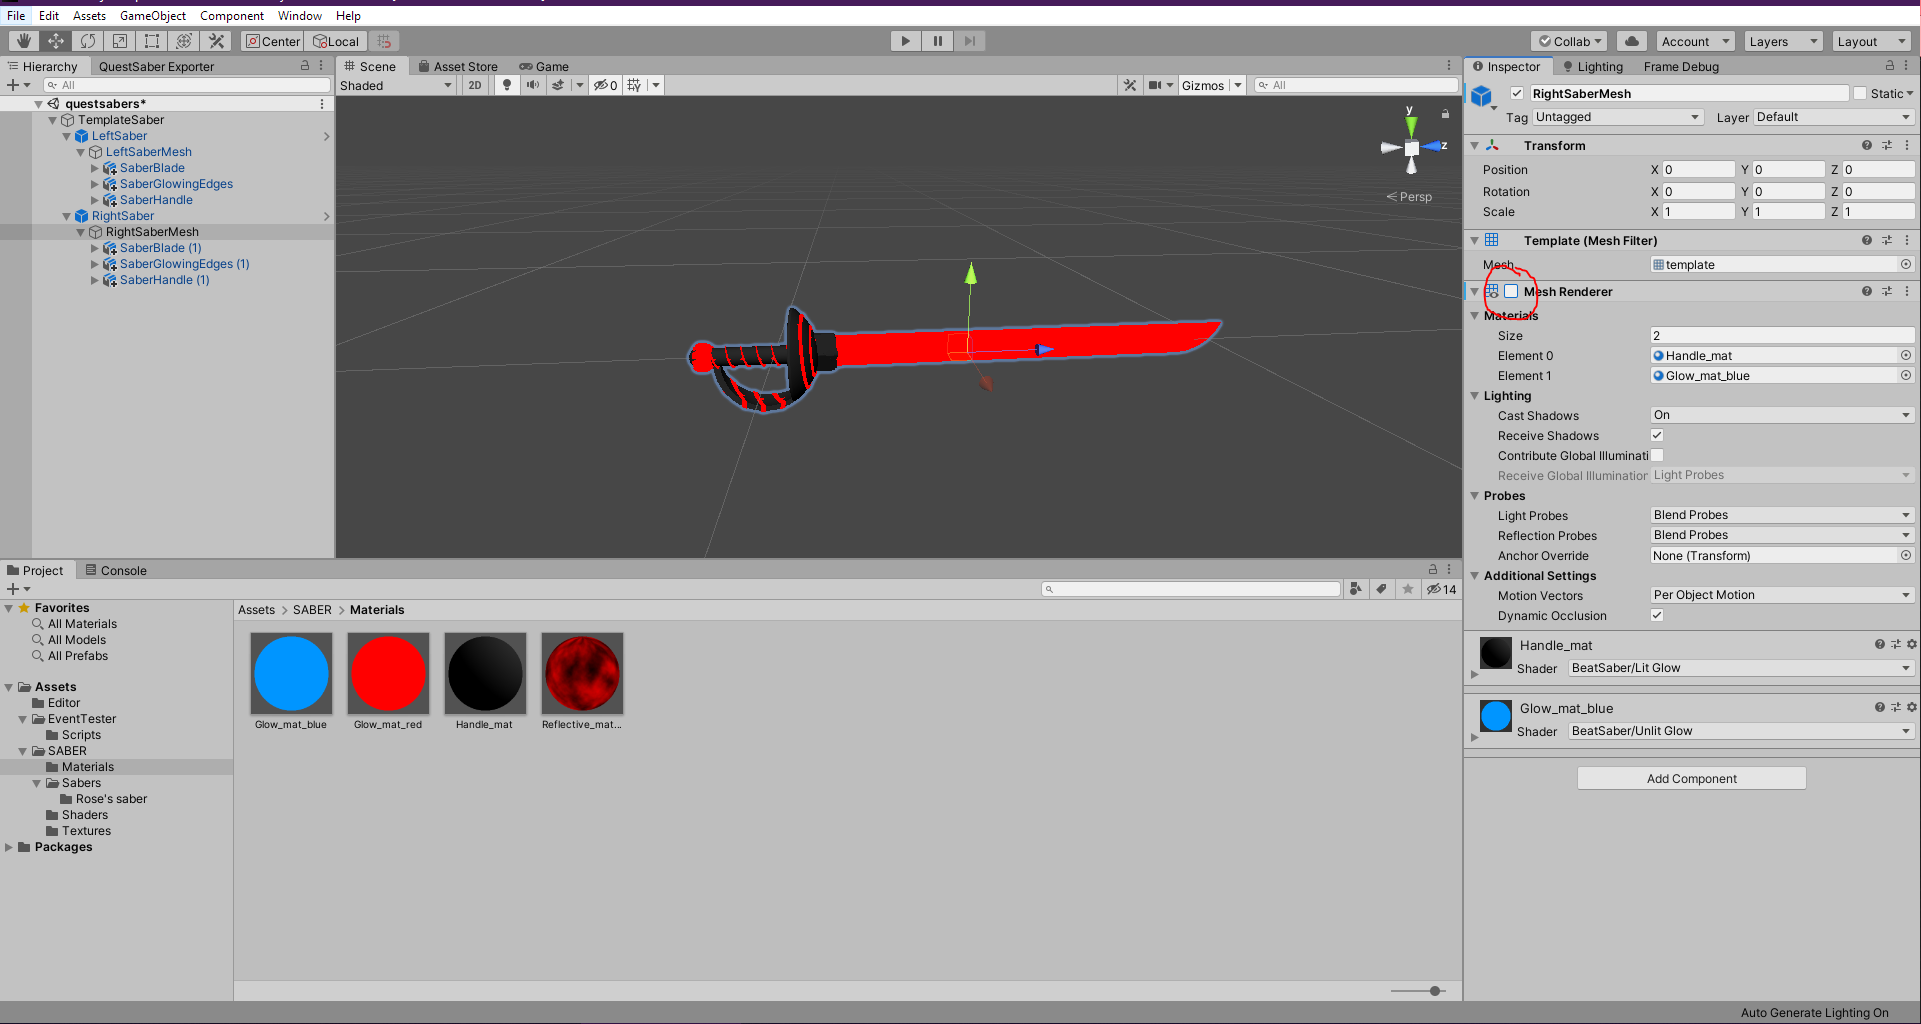
Now that your Blue saber is in the scene, you want to click back to "LeftSaberMesh" and head to the inspector on the right, and in the top left of the inspector toggle the active state of the red saber. This way we have a clear view of the blue (Right) saber.
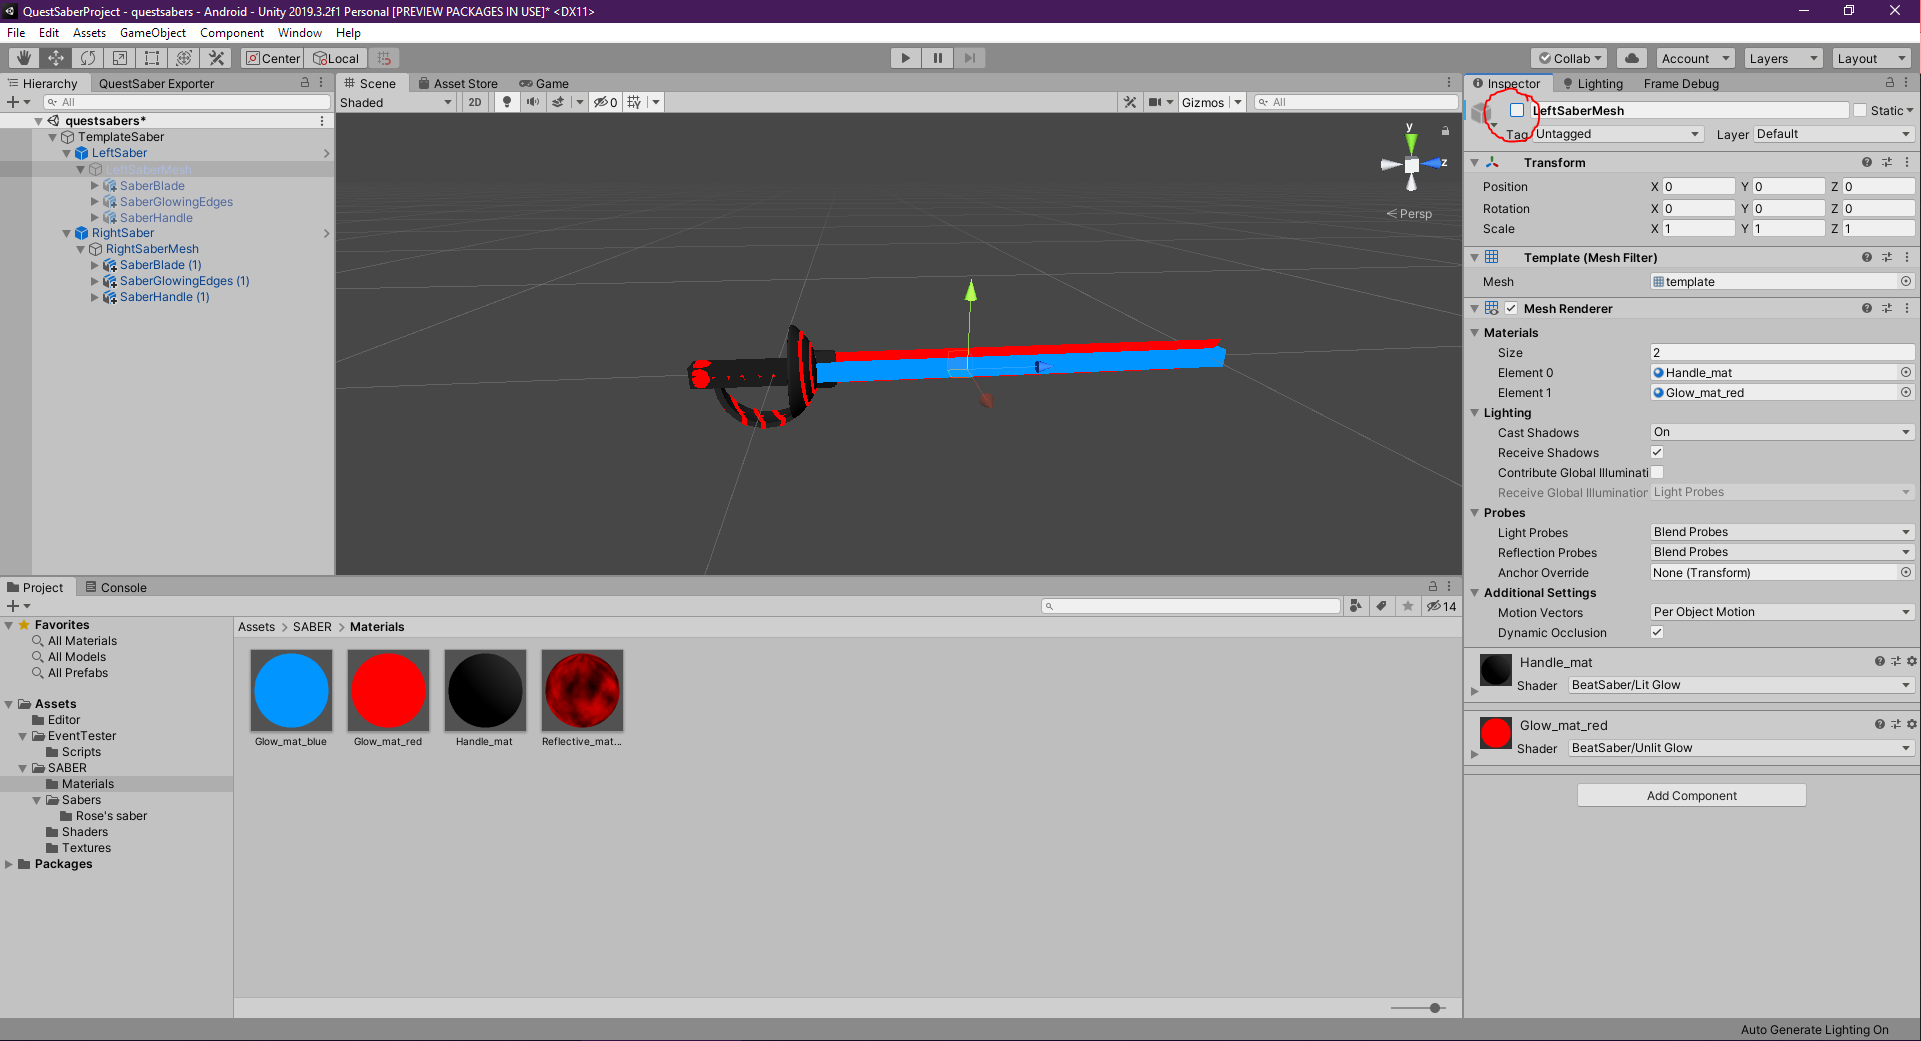
Now that we can see this saber so well, we can give the parts of this saber we initially gave the red shader materials, the blue version of these to make sure the saber will color along correctly to the games set colors. Again, you can use any shaders here instead.
Now that we have set the sabers on their positions, it's time to re-enable the "LeftSaber" gameObject, and disable the mesh renderers on "LeftSaberMesh" and "RightSaberMesh". so click on "LeftSaber" and find that same tick box again, and toggle it back on. For "LeftSaberMesh" and "RightSaberMesh" find the Mesh Renderer in about the middle of the Inspector and toggle it.
With our Sabers correctly configured we can go on to exporting the Saber as a QuestSaber. Up until this point the process has been very similiar to making pc sabers, but this is where the difference is. for quest there are some special settings that need to be configured so that the saber will not cause any issues when loaded into beat saber. These settings are as follows:
- Make sure the build platform is set to android, otherwise the sabers will not load into the game as Sabers built for pc are incompatible with quest.
- Go to project settings -> player and disable multithreaded rendering
- In the same menu disable Auto Graphics API
- Again in the same place, adjust the XR settings to have Virtual Reality supported, and set Stereo Rendering Mode to single pass.
Now that these settings have been taken care of, you can head to Tools -> QuestSaber exporter and fill out your info, and export the Qsaber!
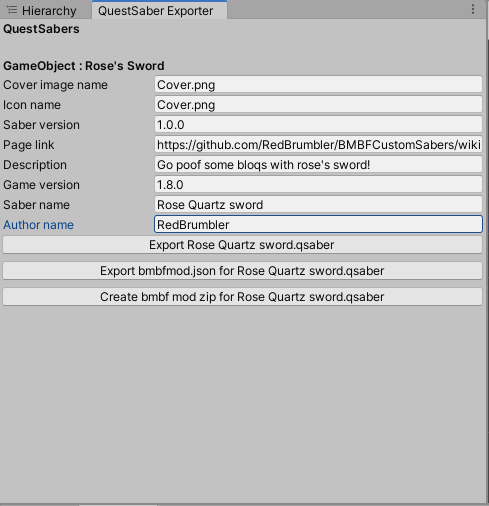
Store the qsaber in a place that suits you, and when you save the qsaber you can also export a bmbfmod.json with the second button to turn the qsaber into a bmbf compatible saber! just zip the qsaber with the bmbfmod.json that the unity project generated and you should be fine. Alternatively you can also directly export a mod zip with the 3rd button in the gui, just press it, and save your zip! This zip should be ready to upload to bmbf and use with the QuestSaber mod.
Qsaber Server Shader Pack
Recently Me and Brinch (sorry brinch but I guess it was mostly me) have made a shader pack to make materials. Once you're more comfortable with making sabers you can use these to spice them up and make some awesome sabers! The pack can be downloaded When you Click this text

You just have to drag it into your unity project and unpack it, and you should be able to find the shaders when making materials under Qsaber server. Happy Sabering!