diaries 2022 03 05 how the new units are made helmets baking and painting - RTR-Imperium-Surrectum/ris-wiki GitHub Wiki
How the new units are made: helmets, baking and painting
2022-03-05 · tony25931
Hello and welcome to another developer diary. This one will focus on the unit creation work that's underway to improve the unit models and textures. First section is from @Grimbold who's been working on helmets for the past few months.
Howdy folks, name’s @Grimbold and I’m one of the unpaid scrubs the modding team suckered in into providing 3D assets for the mod that we all hope will fill in that deep, dark void within us. I’m here today to describe the creative process that a nooblet artist goes through until eventually they manage to stumble onto something somewhat acceptable. Niceties and pleasantries aside, let’s get down to it. The way I create these helmets usually consists of the following phases: • Research • Creating and modelling your low poly mesh • Creating and sculpting details in your high poly mesh • Baking • Painting your mesh
Research The making of, well, basically anything starts with research, in this case by primarily checking any (visual) sources that you may find or are provided to you, so that you may have some idea of what you’re meant to model. In my case, it’s usually a mix of imagery on Pinterest, google images or stuff given to me by those in charge of research. Sounds easy, right? Well, it is, assuming the Spanish Inquisition approves of the sources you’re using. That would be, of course, the bourgeoisie in charge of historical research and fidelity. Let’s move on to some pictures, shall we?
Creating and modelling your low poly mesh Any object starts with a basic shape. I tend to choose a rounded cube, or if that isn’t suitable, a sphere.
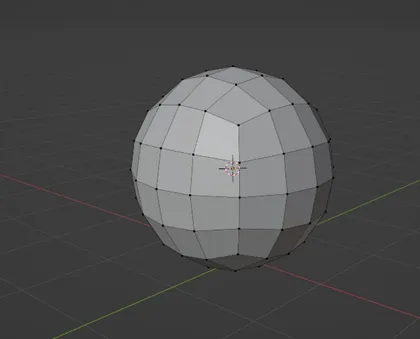
One crucial thing you need to consider though: you’re going to have hundreds (or thousands) of these assets on screen simultaneously. Why does it matter? Well, you can’t simply go crazy and model insanely detailed helmets, otherwise your game would slow down to a snail’s pace and battles would be unplayable, and no one wants that, right? Well maybe myself and those who enjoy some good old auto resolve. Look at the picture. See those black dots? Those are vertices and the more of those an object has the more detailed it will be. Typically, we tend to model within a range of 400 – 1000 vertices. It depends on the helmet. It can be a basic shape that doesn’t need that much detail. It also depends on how much detail you want to actually model into the object, rather than do some illusionary sneaky business. But I’ll come to that in a bit. So, you got your approved images sources, your primitive shapes. Time to move, scale and delete things around until you have the shape of the helmet at a satisfactory point. Ta da!
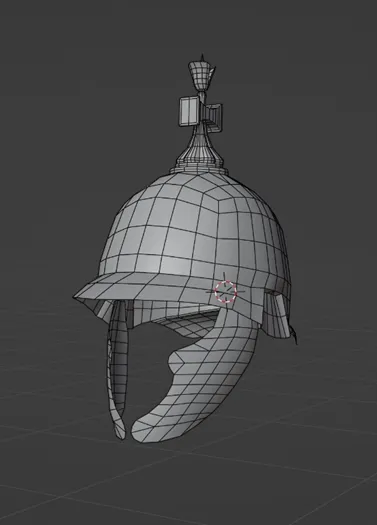
What we have here is one of the latest additions. It’s a helmet of the Konos type and it sits at 1070 vertices. It’s on the high end. Usually, objects with wacky curvatures and added decorative smaller pieces push the vert count a bit higher. At this point I feel good about it and all the picky princesses have given it the thumbs up. A great deal of helmets have some sort of decorative detail on them. Remember when I said you either model them in or you do some funny stuff? Well, I tend to go for the latter. I’m not going to bore you with UV unwrapping commentary cause that’s boring and annoying.
Creating and sculpting details in your high poly mesh
What I do next is make a copy of my Low-poly (that’s low detail) model and then I crank up immensely the number of vertices with a Multiresolution modifier. That means a 1k vertices object goes up to anywhere between 300.000 to over a million. Why? Because the higher it is the more geometry you have to work with when you’re sculpting in those details. Let’s have a closer look. The image isn’t dark, rather it’s how dense the mesh is. You’re looking at nearly 4 million vertices, which reminds me that I need a better computer.
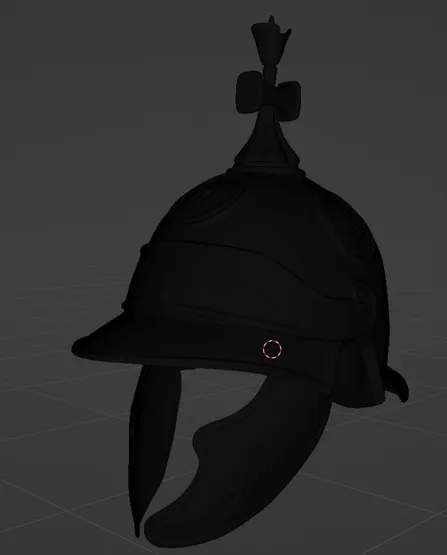
After that, you bring out your graphics tablet and start sculpting in any details you want. At the end you should have a pretty close representation of what the actual thing is. In this case, I sculpted all the “lips” around the helmet, made some curvatures more pronounced and, of course, added the different decorative motifs you see. Now we come to the illusionary trick I mentioned before. After all, there’s no way to have this dense of a mesh in the game. So what we do is use something called Baking.
Baking Technicalities aside, what happens is: you make sure both your Low and High poly are in the exact same position, on top of each other. Then you make a 2nd copy of your Low poly object and this is called a cage. Imagine a bird cage with your 2 helmets inside of it, that’s pretty much it. You’ve taken this other copy and scaled it up to the point where the other 2 objects are entirely withint your cage. Then, a few extra technical steps and you begin your Baking. What this does is, in essence, copy all the stuff from the High Poly onto your Low Poly object. You see, you haven’t actually embedded your low mesh asset with all this detail, rather it’s more like, well, an illusion. Let me see… Imagine a good quality tatoo and one you might get from some candy, and you later “tatoo” it onto your arm with some water. It’s basically that. Take a look… It's still your 1k vertices mesh, but now I’ve added a kind of coat of paint that I remove at any time I want.
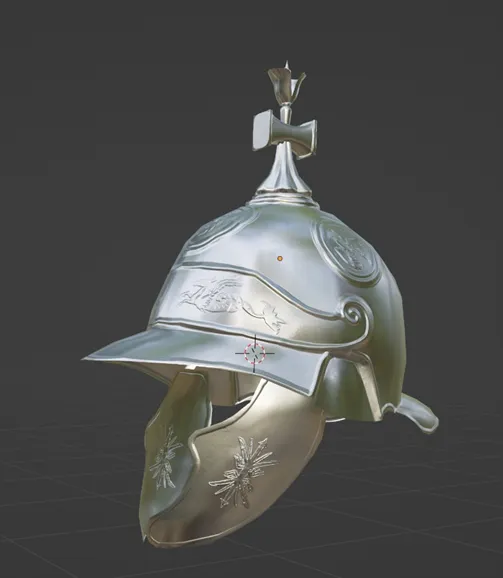
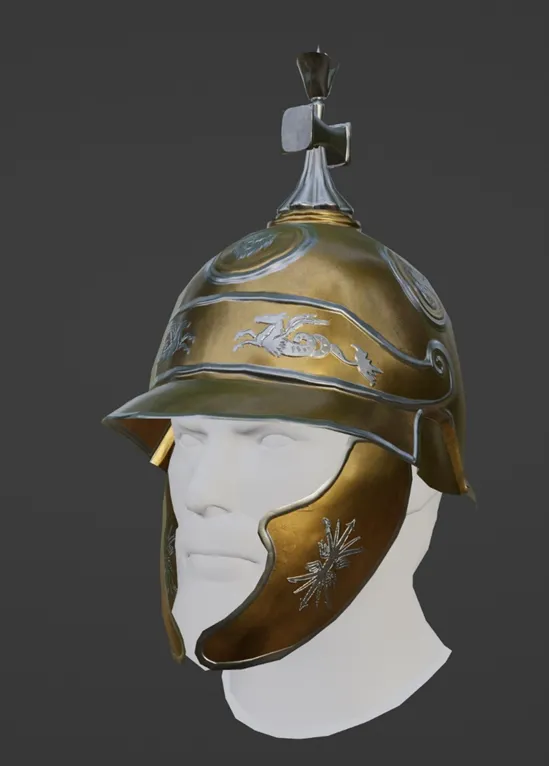
Painting Still with me? Alright, won’t be long now. After all this we come to the last part of the process: Painting. Time to add some character to our piece. It’s as simple as it sounds: you take a look at your sample of images, see what kind of material and color scheme they were rocking back in the day, and you paint away. In this particular case, we have a helmet made of bronze with the detailed parts either made of iron or painted in some sort of silvery tone. I don’t know, take it up with the historical research crew.
PART 2
Hi I’m @tony25931 . Some of you may know me from Roma Surrectum 1, 2 and 3, one of the big mods on the original Rome Total War platform. I got involved in Rome Remastered about a year ago and have been performing a number of different tasks since then, but more recently my focus has been mainly on developing new units models and textures, starting with Greek factions. So what’s the process? Well, as with Grimbold, there’s a number of phases to development.
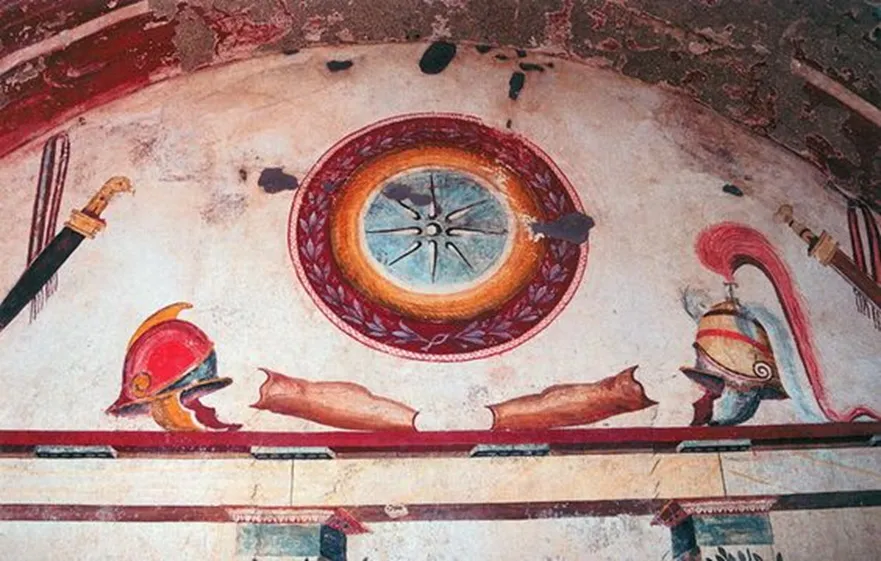
**1) Find source materials. ** These come from a number of places: graphic artist’s impressions of units (there’s a lot about on the internet now), tomb paintings, funeral stones, pottery, coins, archaeological remains of shields or helmets.
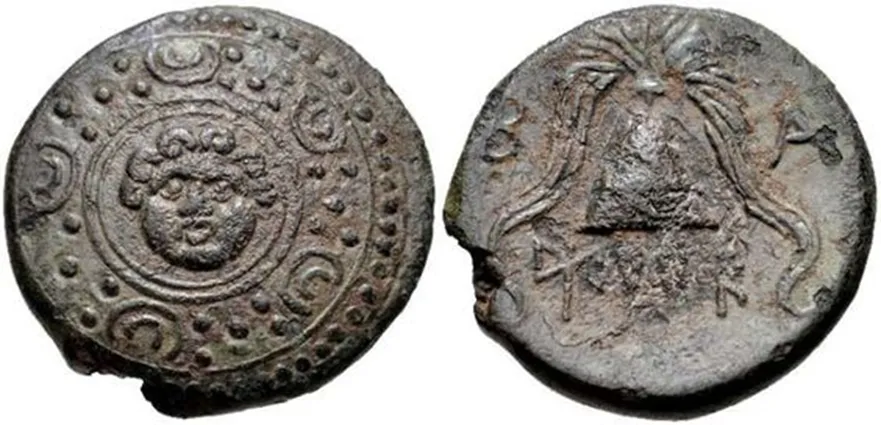
**2) Planning. **
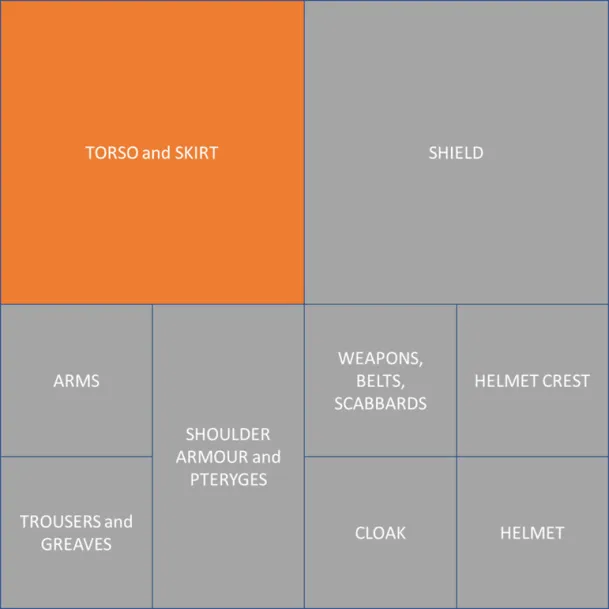
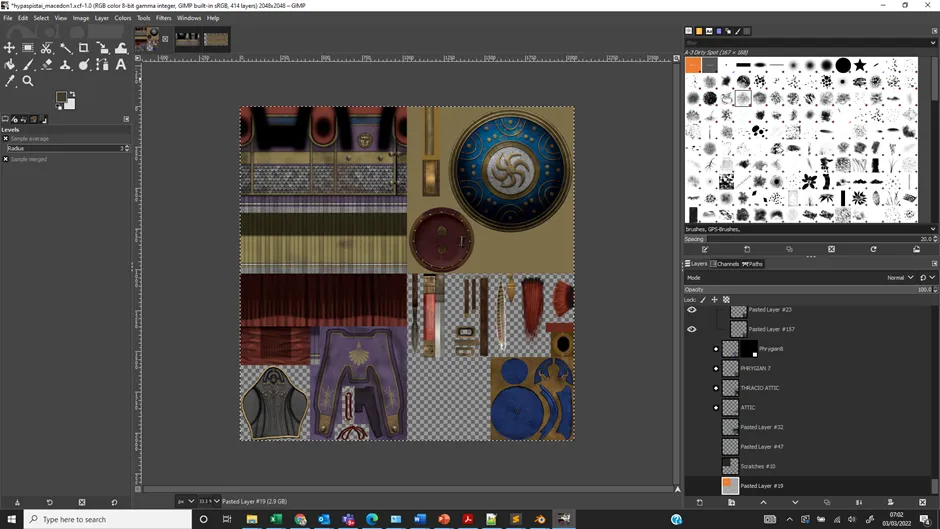
Given that we now have about 20 greek factions, each with at least 6-8 units per faction (in many cases far more), and needing at least 4 texture variants per unit, we’re looking at around 500+ unit textures just for the Greeks. That’s a lot. Clearly some organisation is needed and ways of streamlining workflow and enabling mass production. Some time invested up front in thinking about efficient approaches will reap dividends in the future. Some of the things that I’ve done to allow this include: a. Use of layers, layer masks and overlays for unit texture files. This allows for reuse of some components and easy changes of colours or patterns, and greater flexibility and speed for creating variant textures. Some of my unit texture files have well over 700 layers in them. b. Breaking the unit texture and unit model down into modular parts e.g. torso, head, linothorax shoulder padding. These need to be interchangeable between units. Unit textures need to be laid out in a structured and consistent way in order to streamline the process, and a spreadsheet is used to track which bits are going on which unit. For the unit textures the modular layout looks more or less like this:
**3) Modelling. ** As with a lot of artistic work, the beginning of the process sees a lot of creating, refining, creating again, refining again, and the last two months have really been a process of working on processes, workflows, refining unit textures and unit models. With the Greek units, we’ve needed to create some new parts including the shoulder protection and pteryges, as well as some variants on these. @El Santo Padre helped in creating the initial shoulder armour and pteryges models, which I’ve then created some variants on.
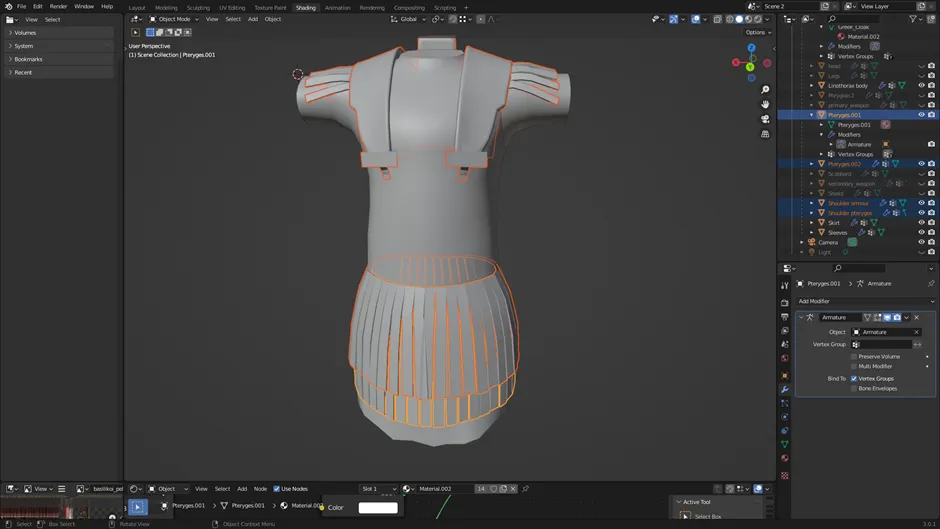
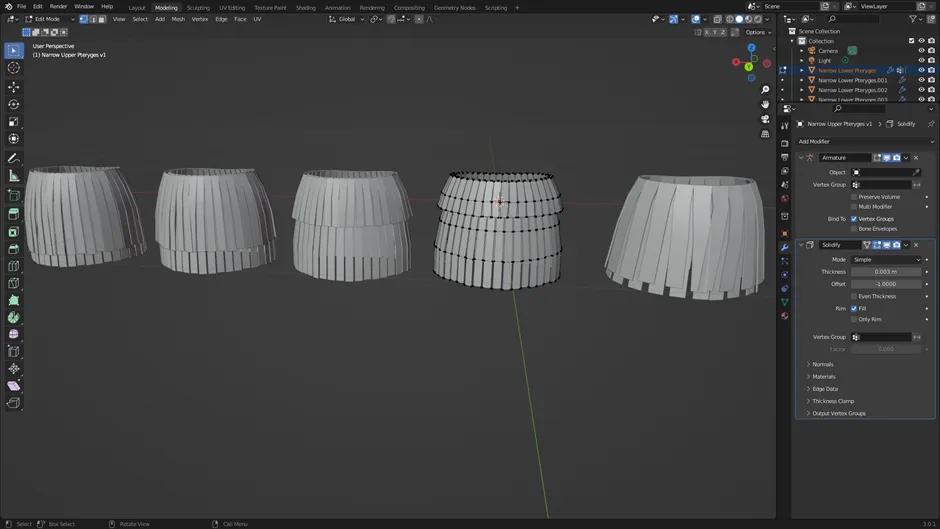
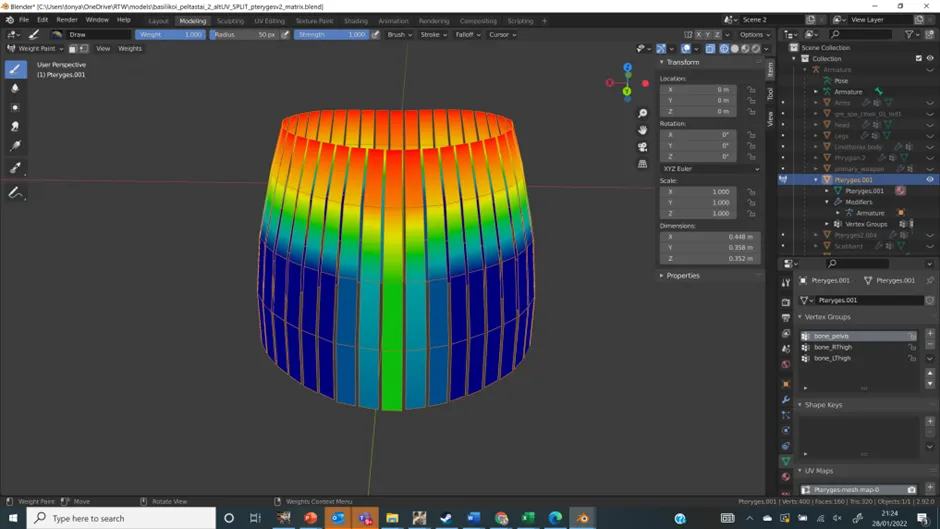
Once the model components are created there’s the challenge of doing the vertex weighting in order to get the models animated as they should. Each vertex on a model component needs to be weighted to one of the skeleton “bones” within Blender. Vertices can be partially weighted to more than one vertex which helps create more natural movement but also increases the complexity of the process. Here you can see the weights assigned to a set of pteryges – in this case weighting to the pelvis bone (red represents a weighting of one and blue a weighting of zero):
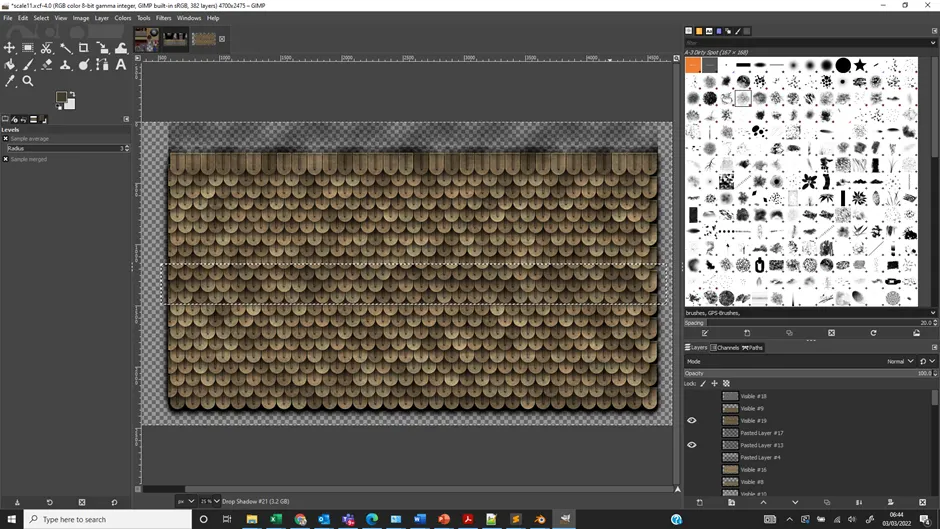
4) Albedo/diffuse texturing The albedo or diffuse texture is the main colouring you can see on a unit. As explained above, I’ve taken a modular approach to creating the unit textures, so that it will be possible to swap parts and textures across models more easily, speeding up the creative process. Some of the texture components have needed to be created from scratch, like this scale armour, which is built literally one scale at a time (OK, so once you’ve done one row, you can then duplicate rows rather than individual scales!)
Once the scale is completed it gets put into an overall linothorax texture like this:
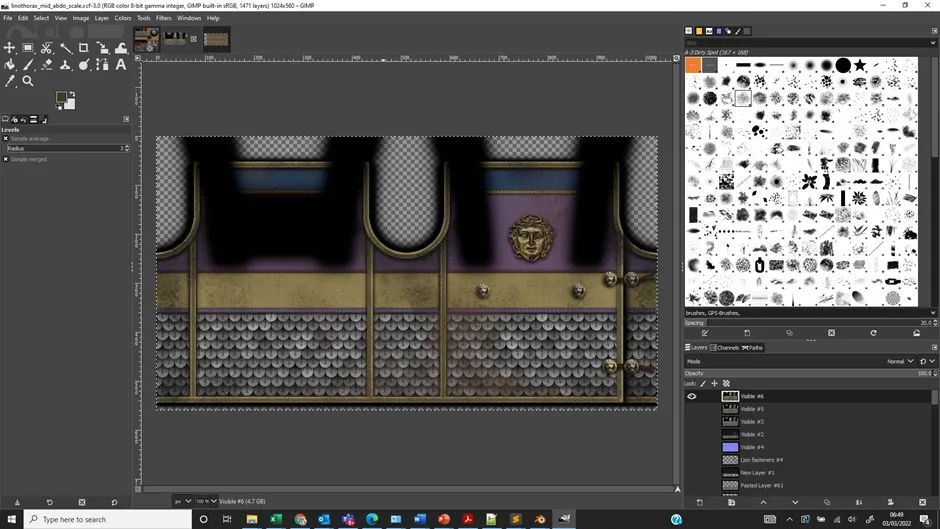
As you can see, this linothorax file has over 1400 layers to it. What? Part of this is to allow for all the variations we are likely to see in a linothorax – different patterns of scale armour, different decorations, different bands of colour, different edging colours and so on. You can see some of this in the layer tree down the side on the right here, showing layer groups and the layer masking (the black and white shapes) that defines where the colours will show on this texture if that layer or layer group is made visible. Overall this is a long process of setting up, but once done it allows for speedier production.
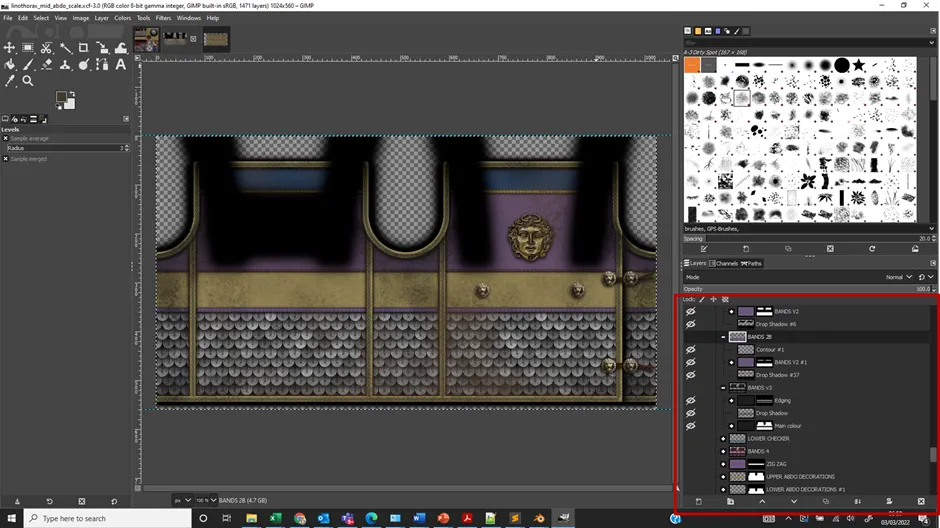
You can see how I’ve added shading to the texture where it needs to be there, in order to represent how shadows would appear in game. Although the game lighting engine does include some ambient occlusion (creating shadows where they should be), it’s really not as good yet as having them added in the texture as well.
So once done with the individual components, it’s a question of assembling them on the master texture. The result is something like this:
PART 3
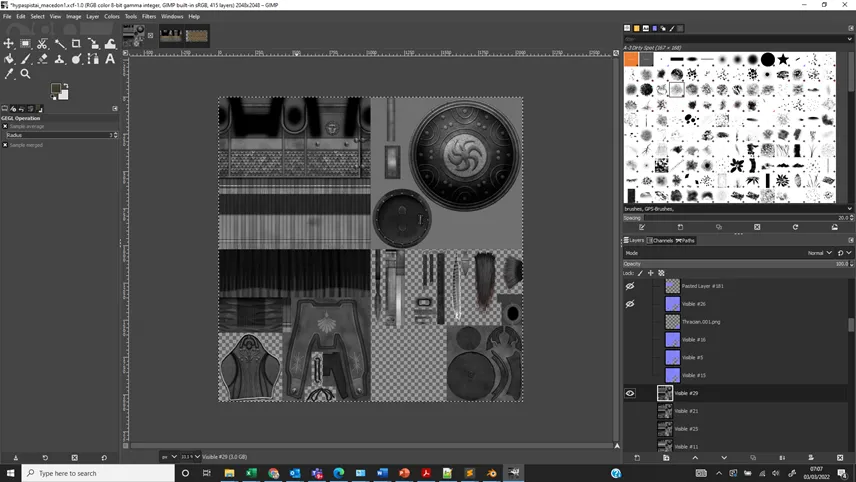
5) PBR Texturing This is where the fun begins, because in addition to the diffuse texture, we also have to create the PBR (physically based rendering) texture which defines the bumps (normal map), which parts are metallic (metalness map) and which parts are smooth or rough (roughness map). With the units in the game so far, the PBR textures have been created by swagger using an automated Photoshop script. Although it looks pretty good, it’s not perfect and doing this from the original textures, mostly manually, is going to look way better. So how is this done? There are a number of steps: a) Create a monochrome version of the diffuse texture:
b) Apply a normal filter to it
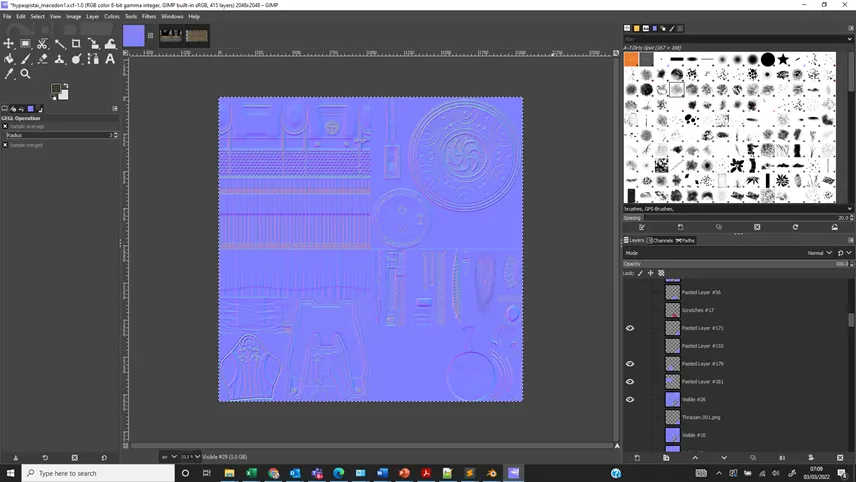
Some of the elements like the helmet and other parts already have their own normal maps which are better than what’s produced here, so I overwrite that part of the normal texture.
c) Create a metalness map to mask out parts of the texture which aren’t metallic then adjust the grey scale in order to create the metalness and roughness textures. You can see in this metalness map that only the bits which need to be metallic are showing as lighter.
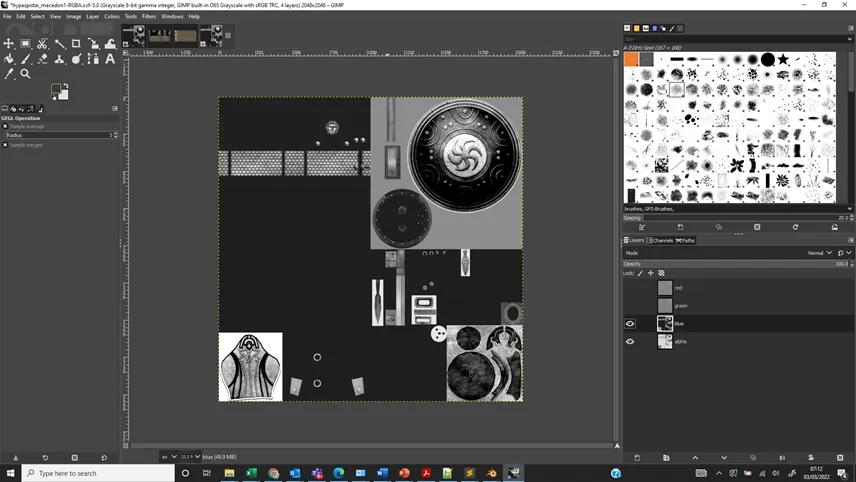
The 4 channels (red, green, blue and alpha) are then composed back into the single layered PBR texture:
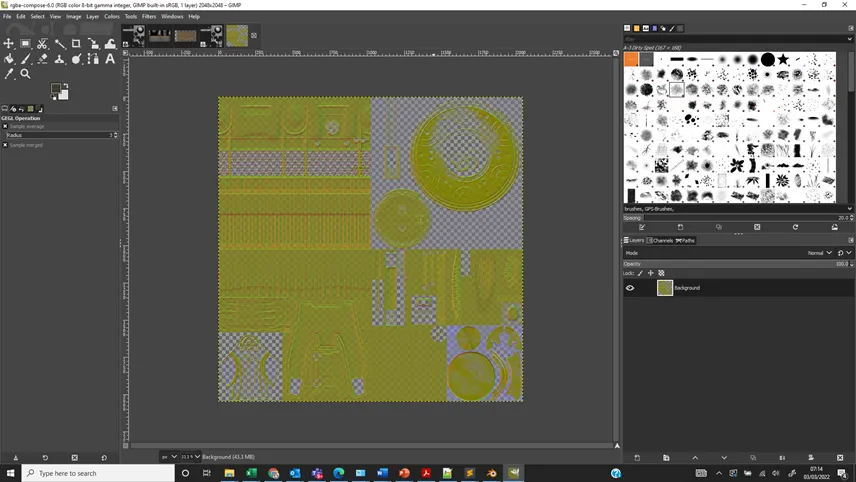
PART 4
6) Putting it all together OK, OK, so this is the bit you’ve been waiting for. What’s the end result? What have we got to show for all this effort? Well here are one or two unit textures to get started with – these are a couple of variations on a Macedonian Royal Peltast.
Variant 1
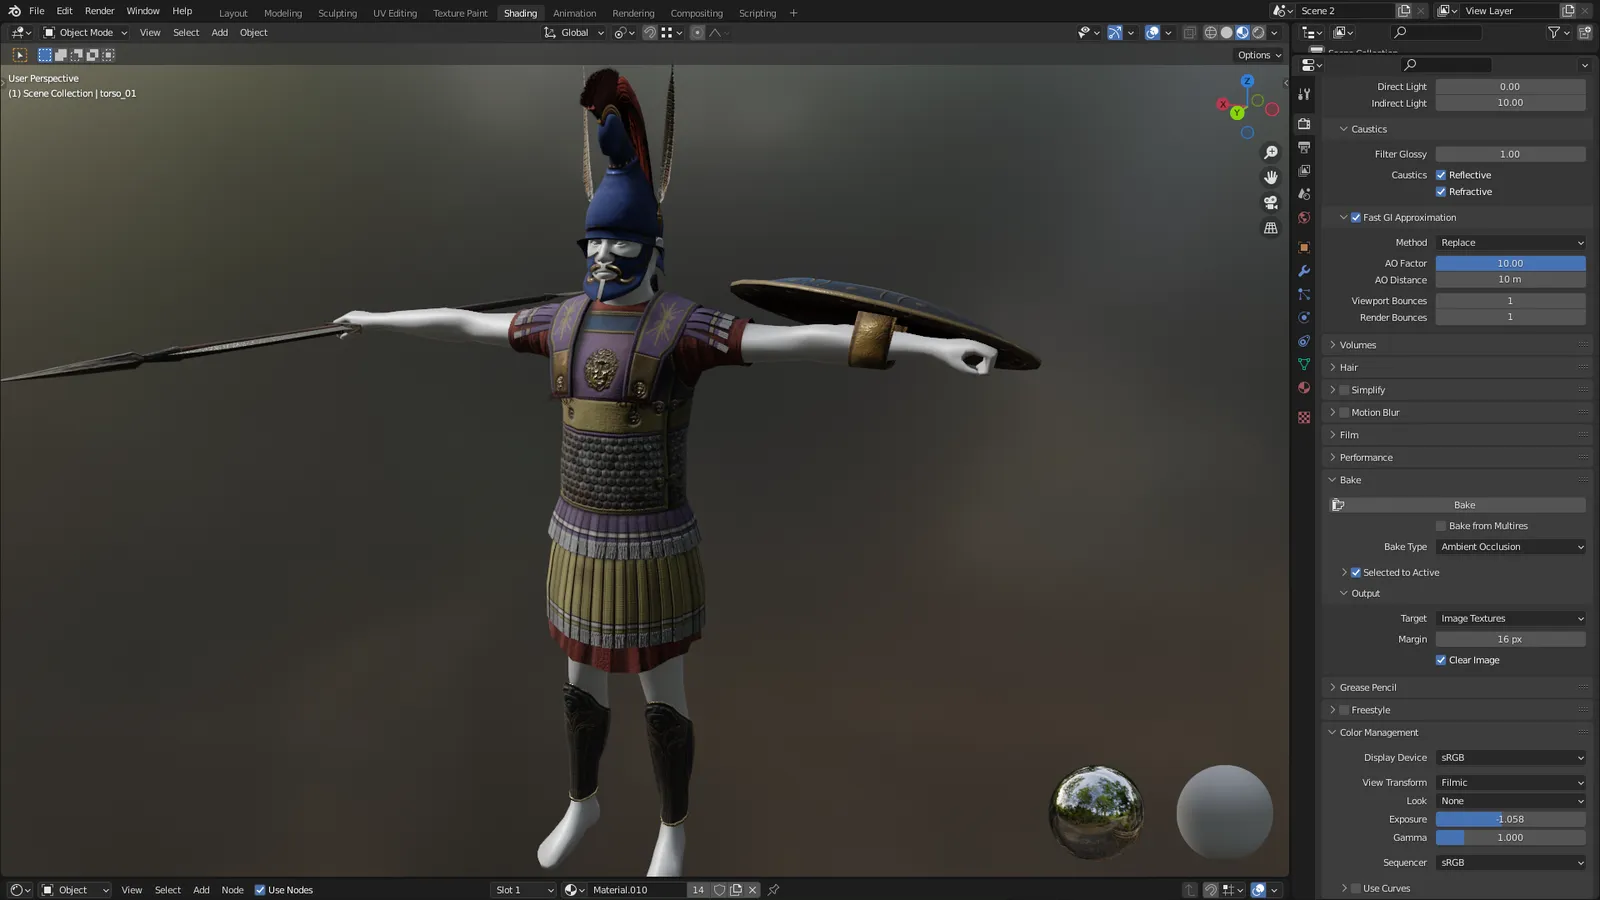
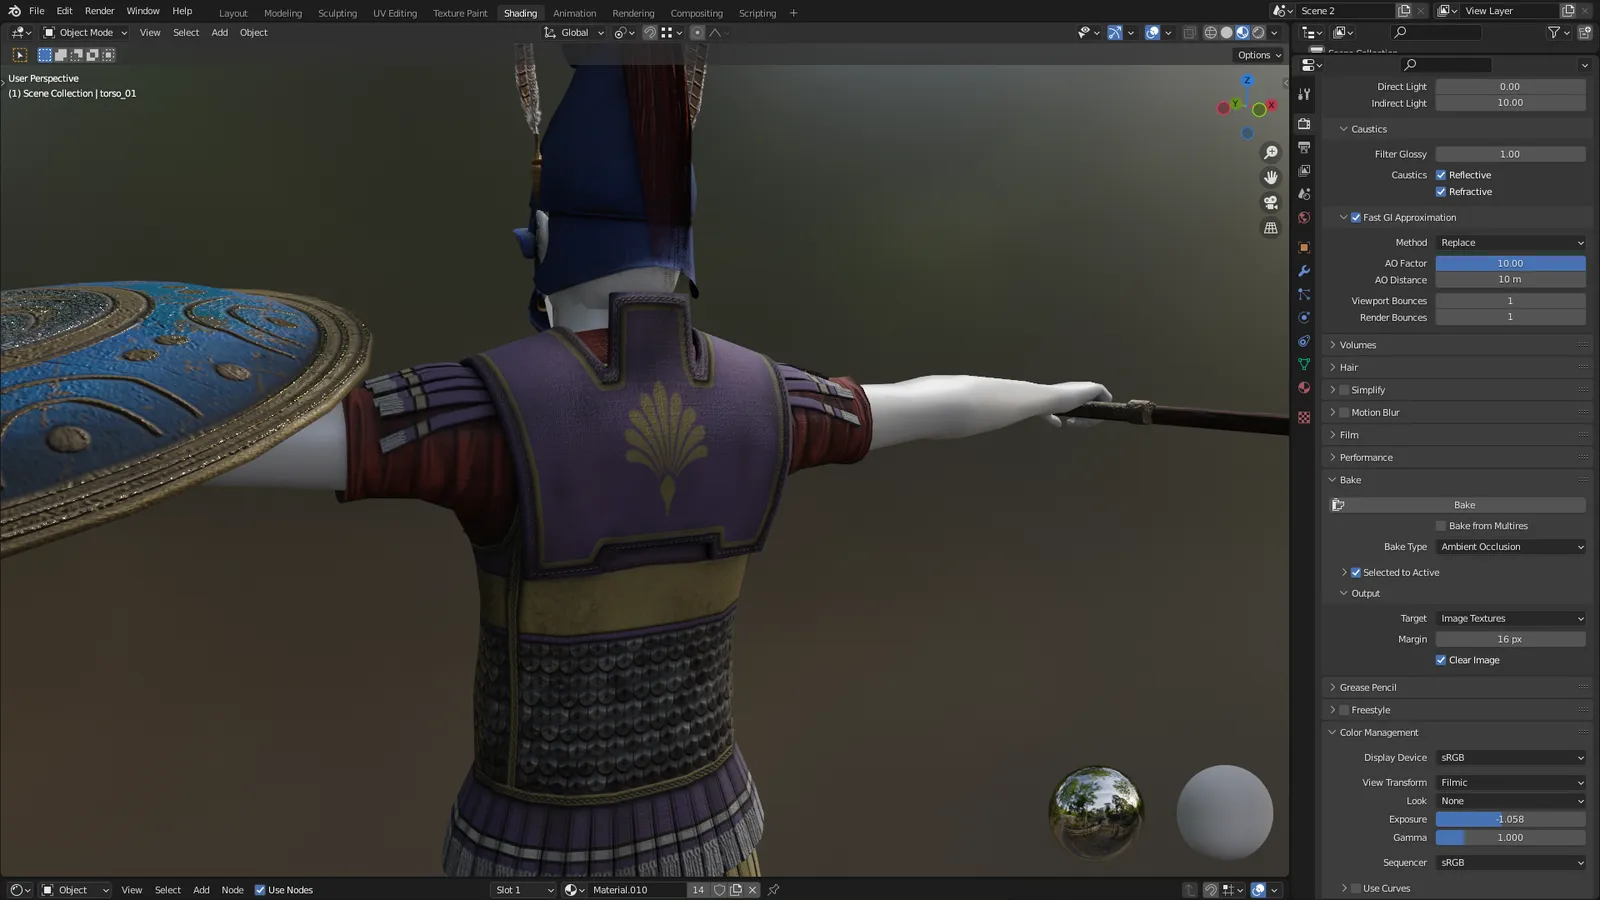
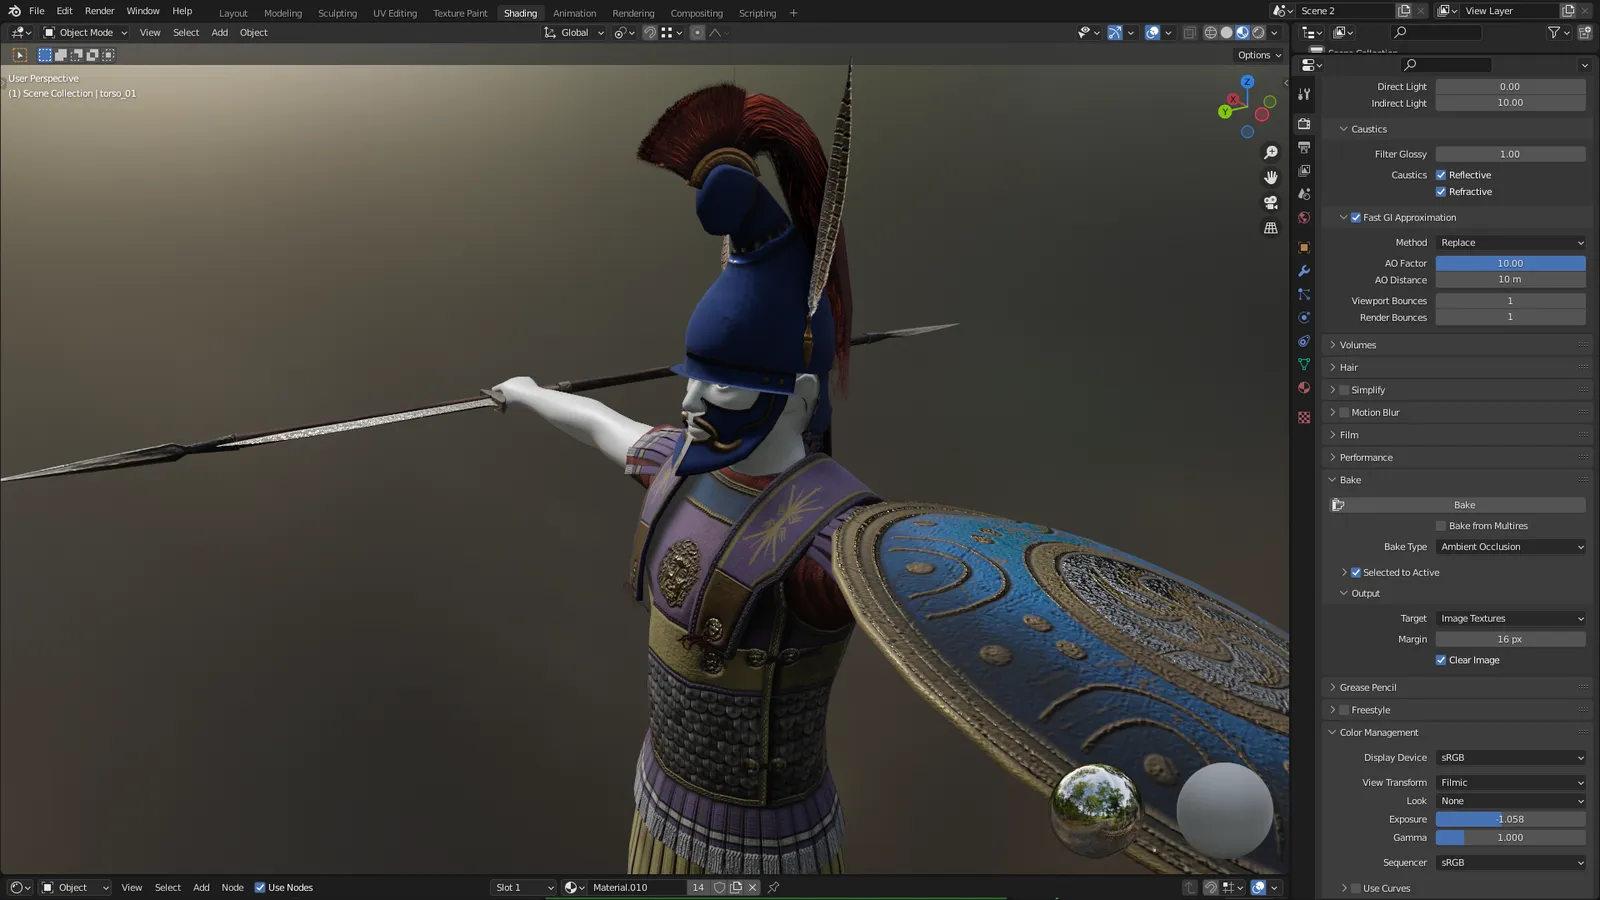
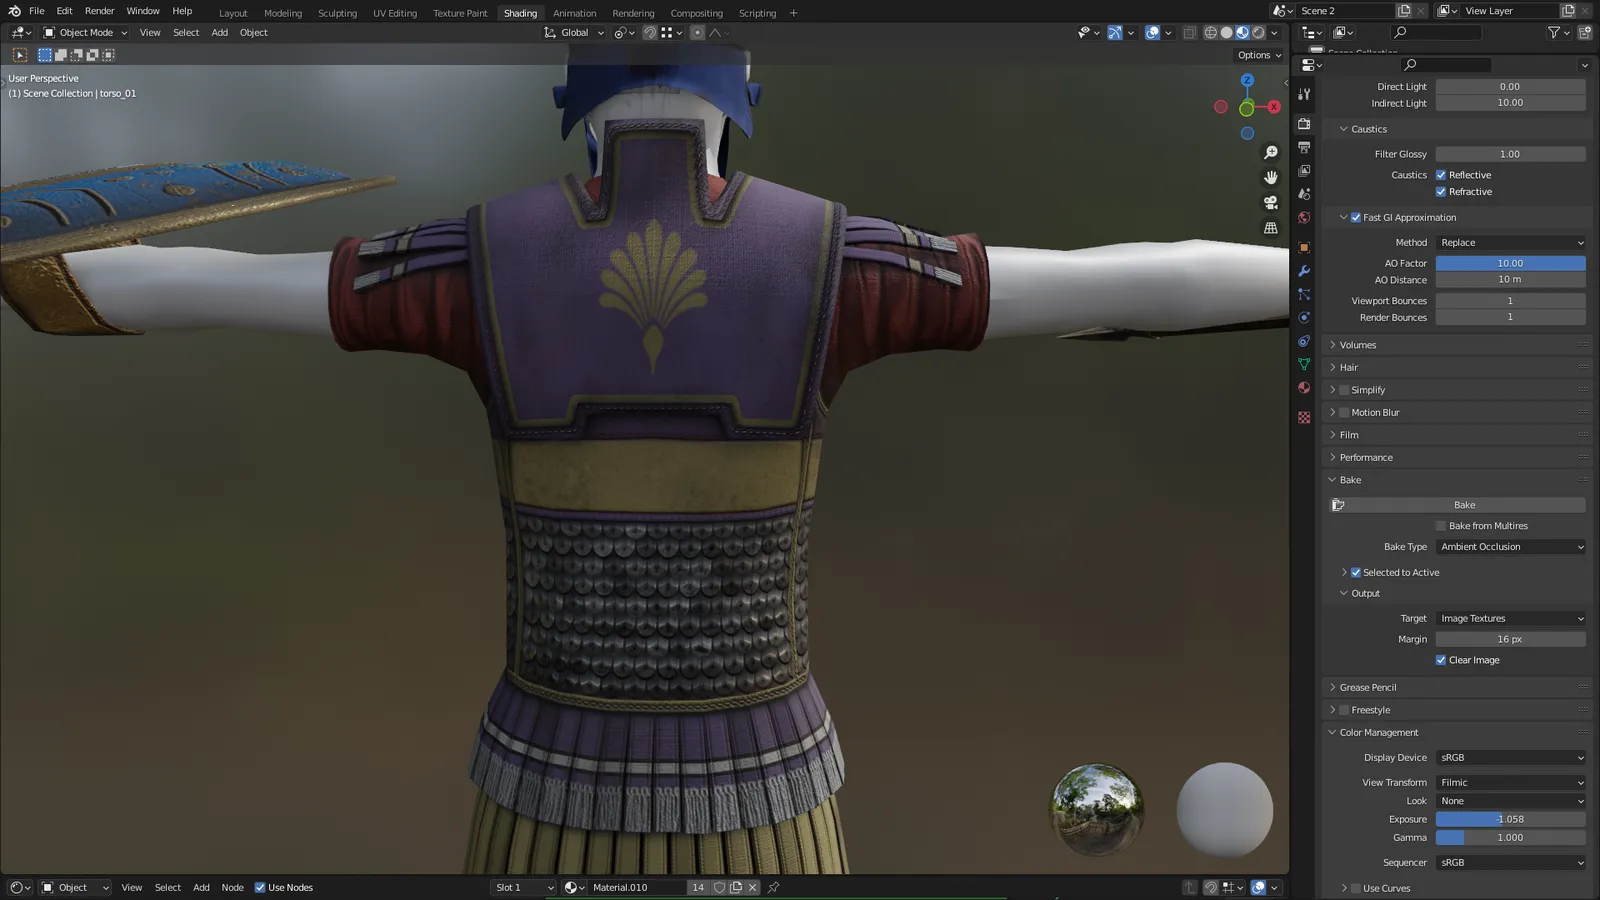
Variant 2
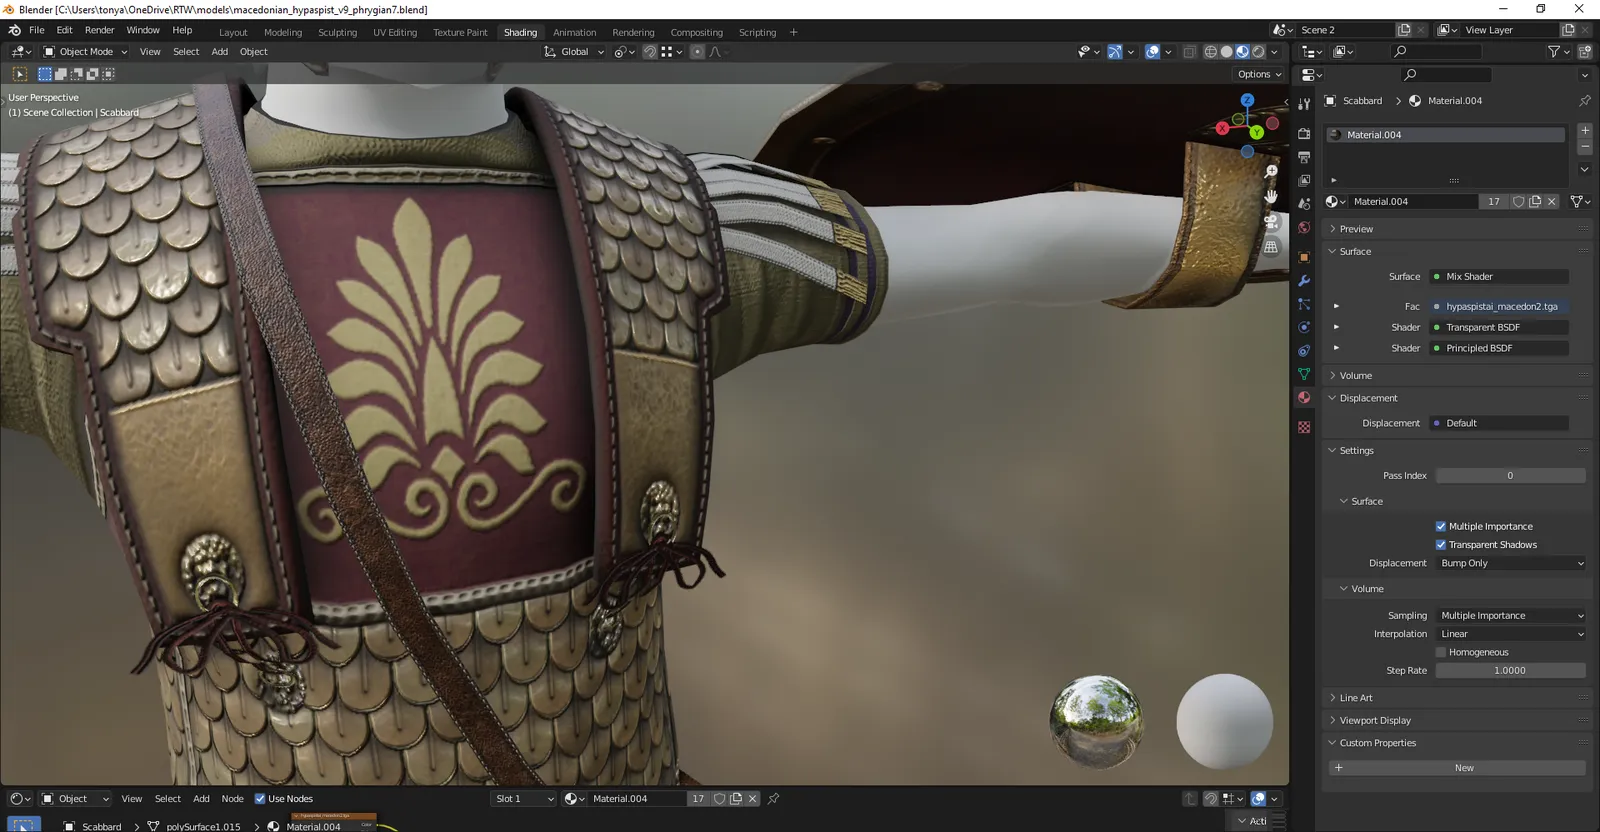
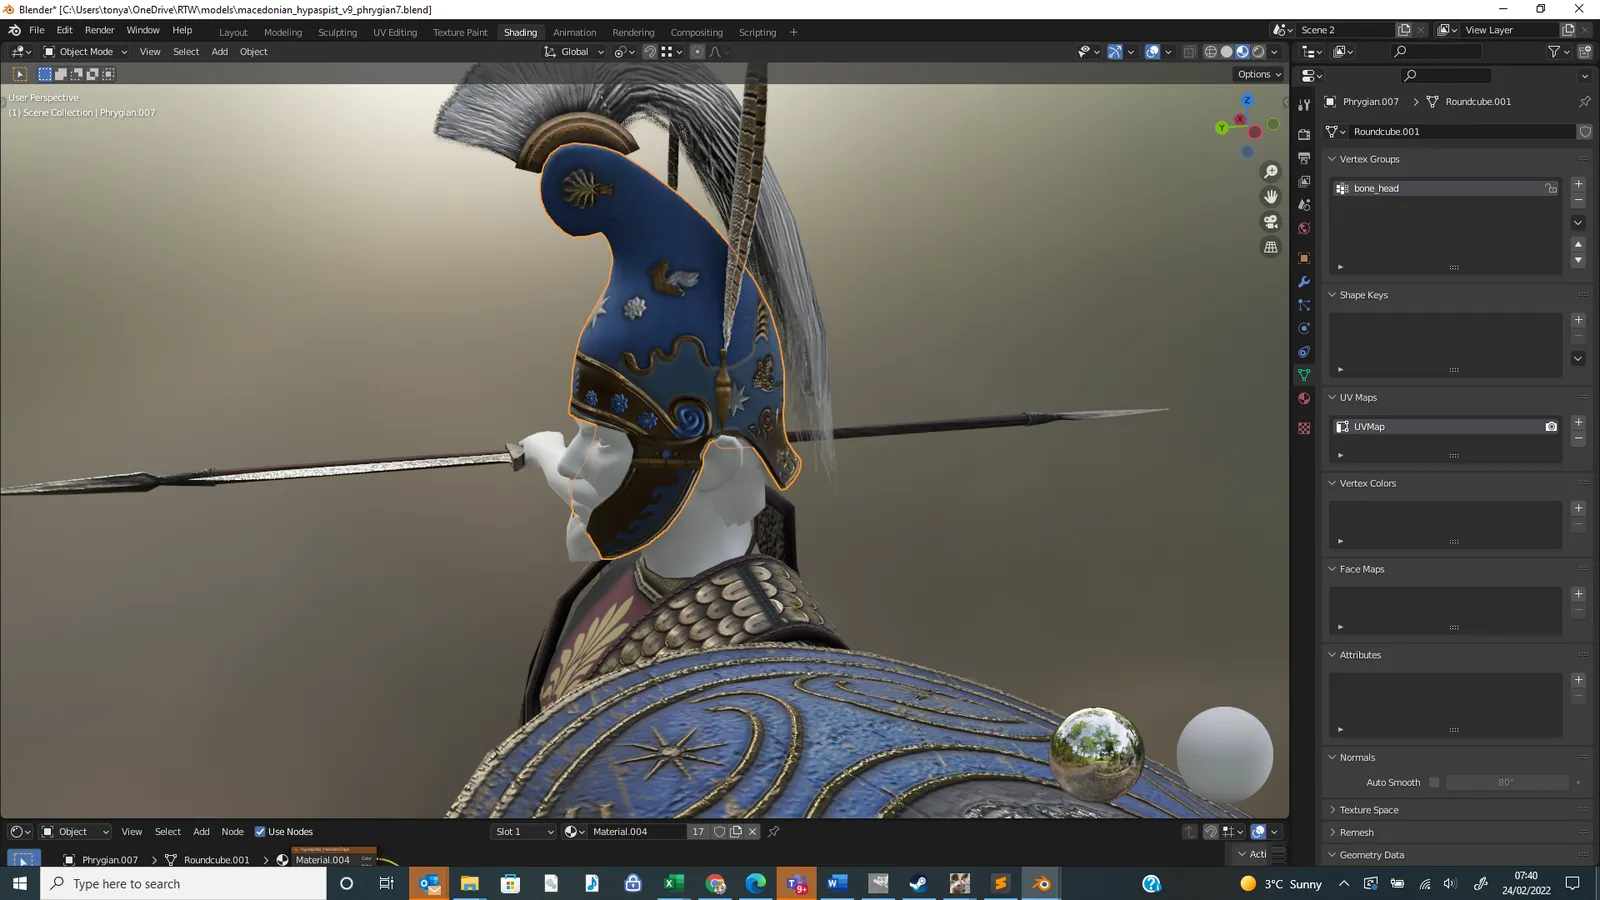
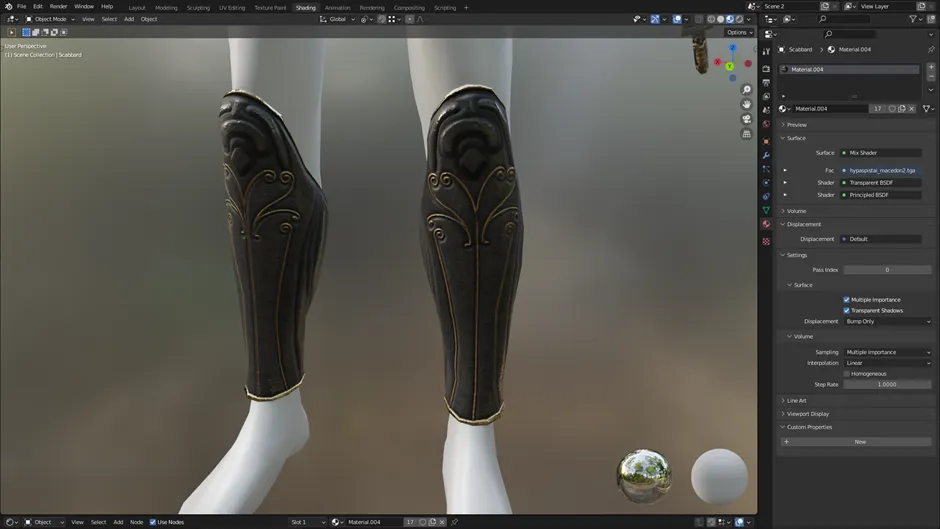
And just for fun some more parts and components and work in progress, including some of Grimbold's amazing helmets, including both the raw creations:
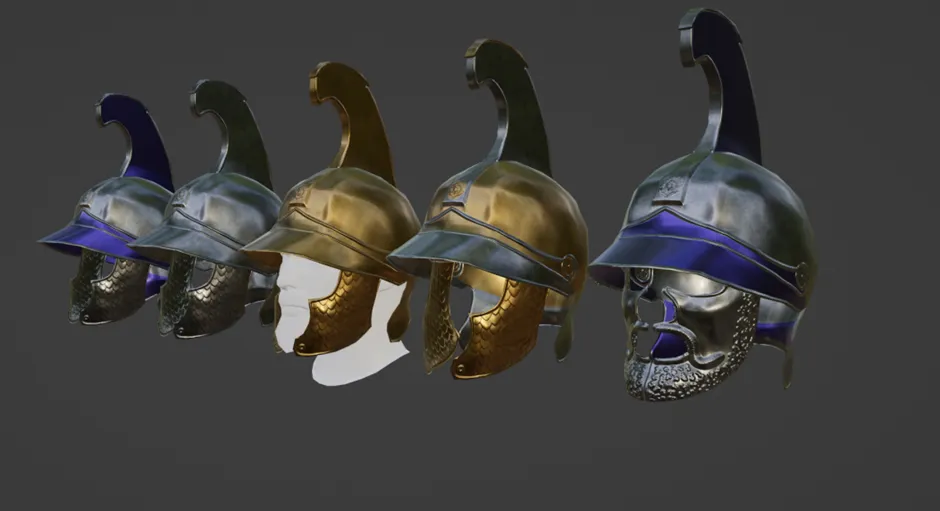
and ones where I've started adding additional wear, ageing and shadowing:
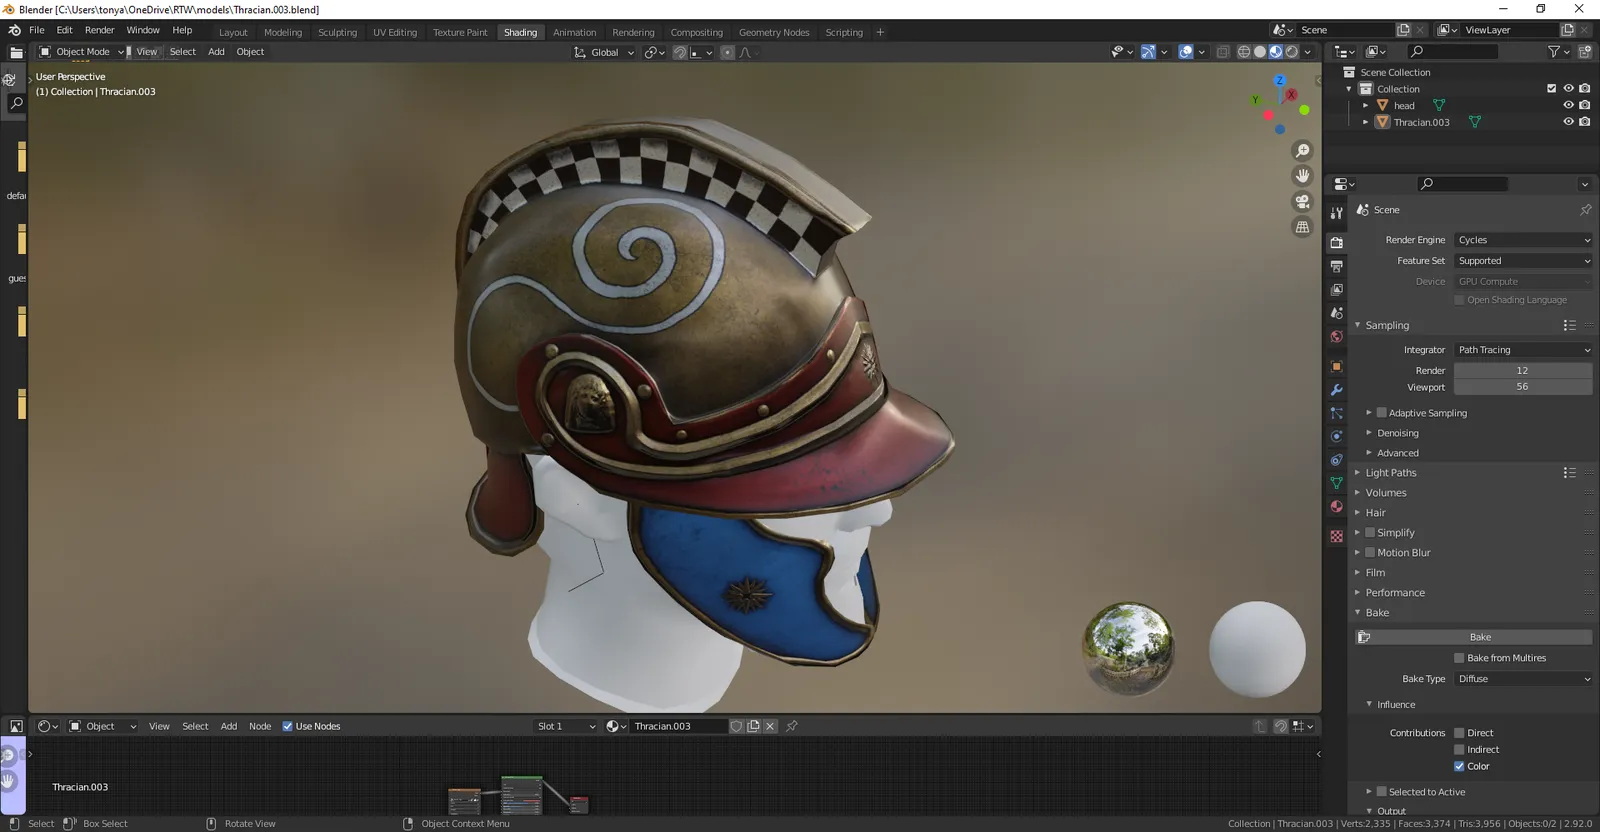
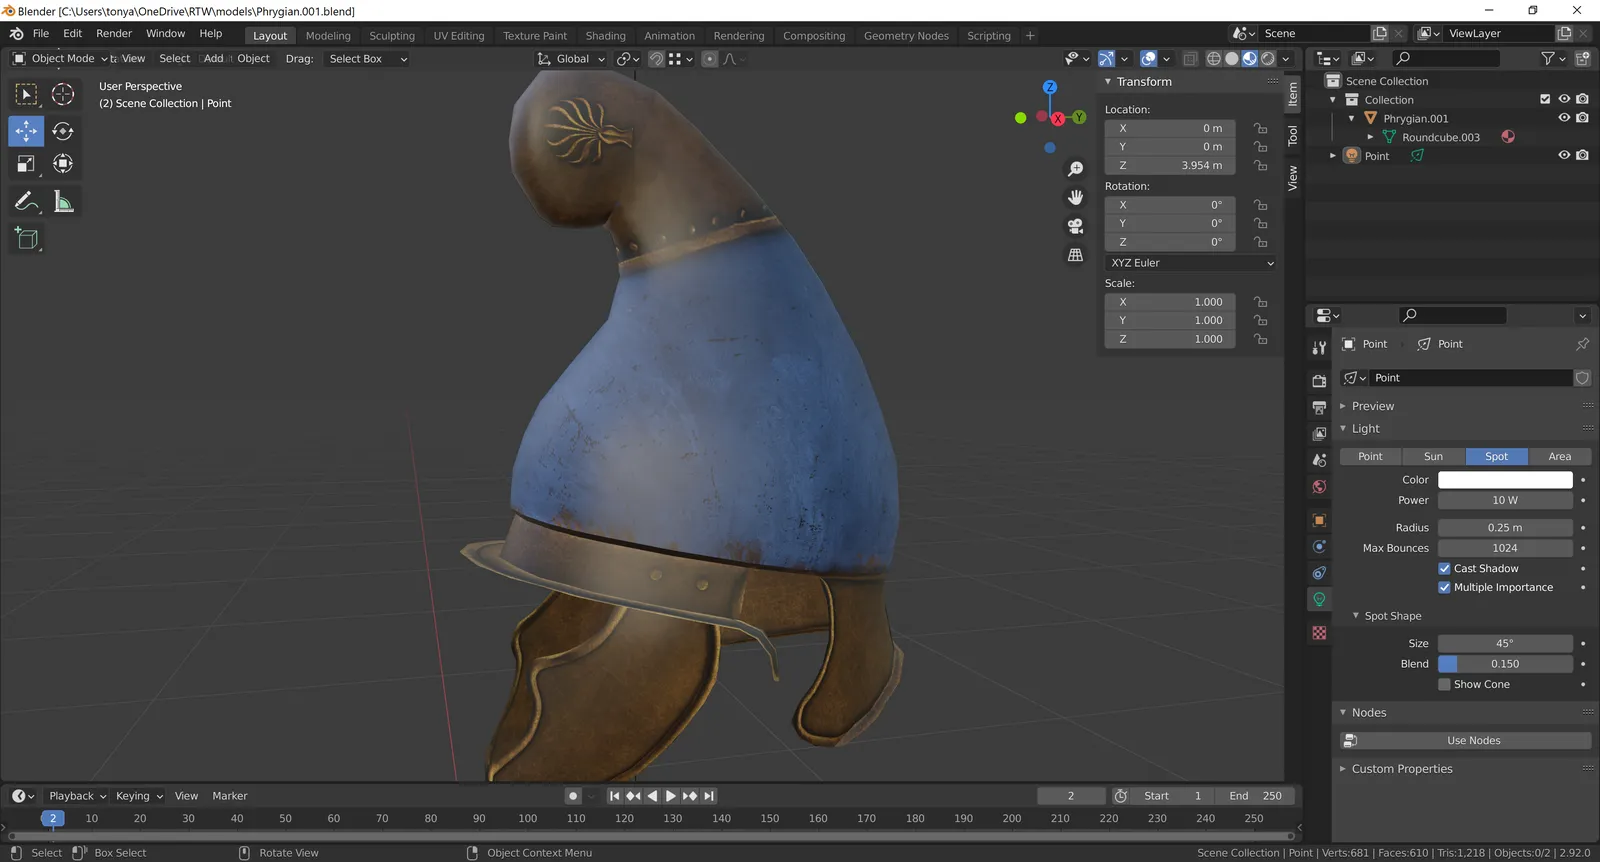
And here's showing some of the linothorax variants that are underway:
These are just a few of the many many variants that will be worked up
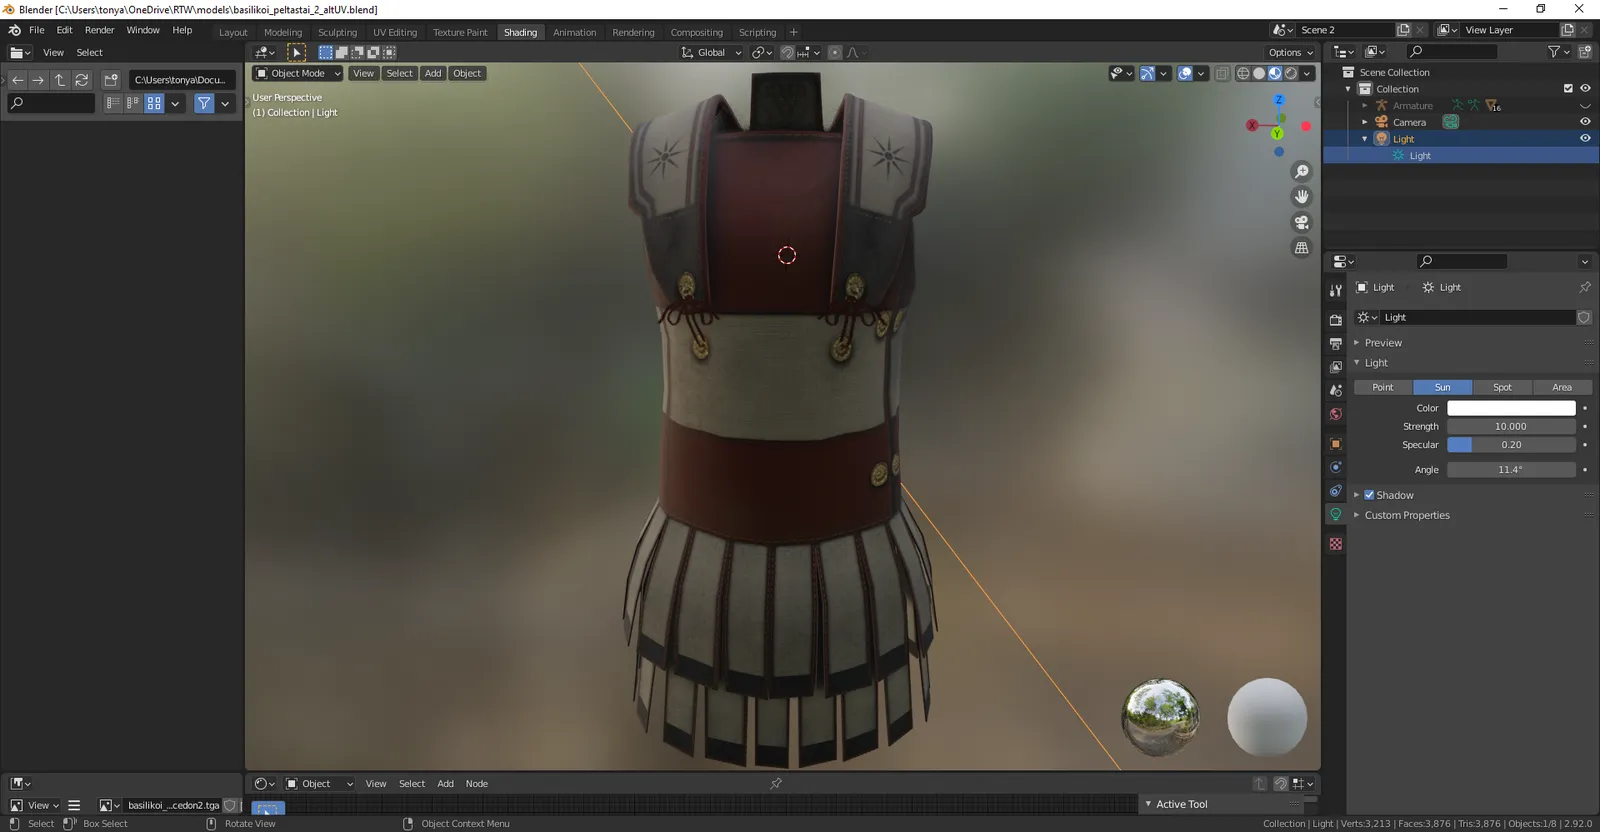
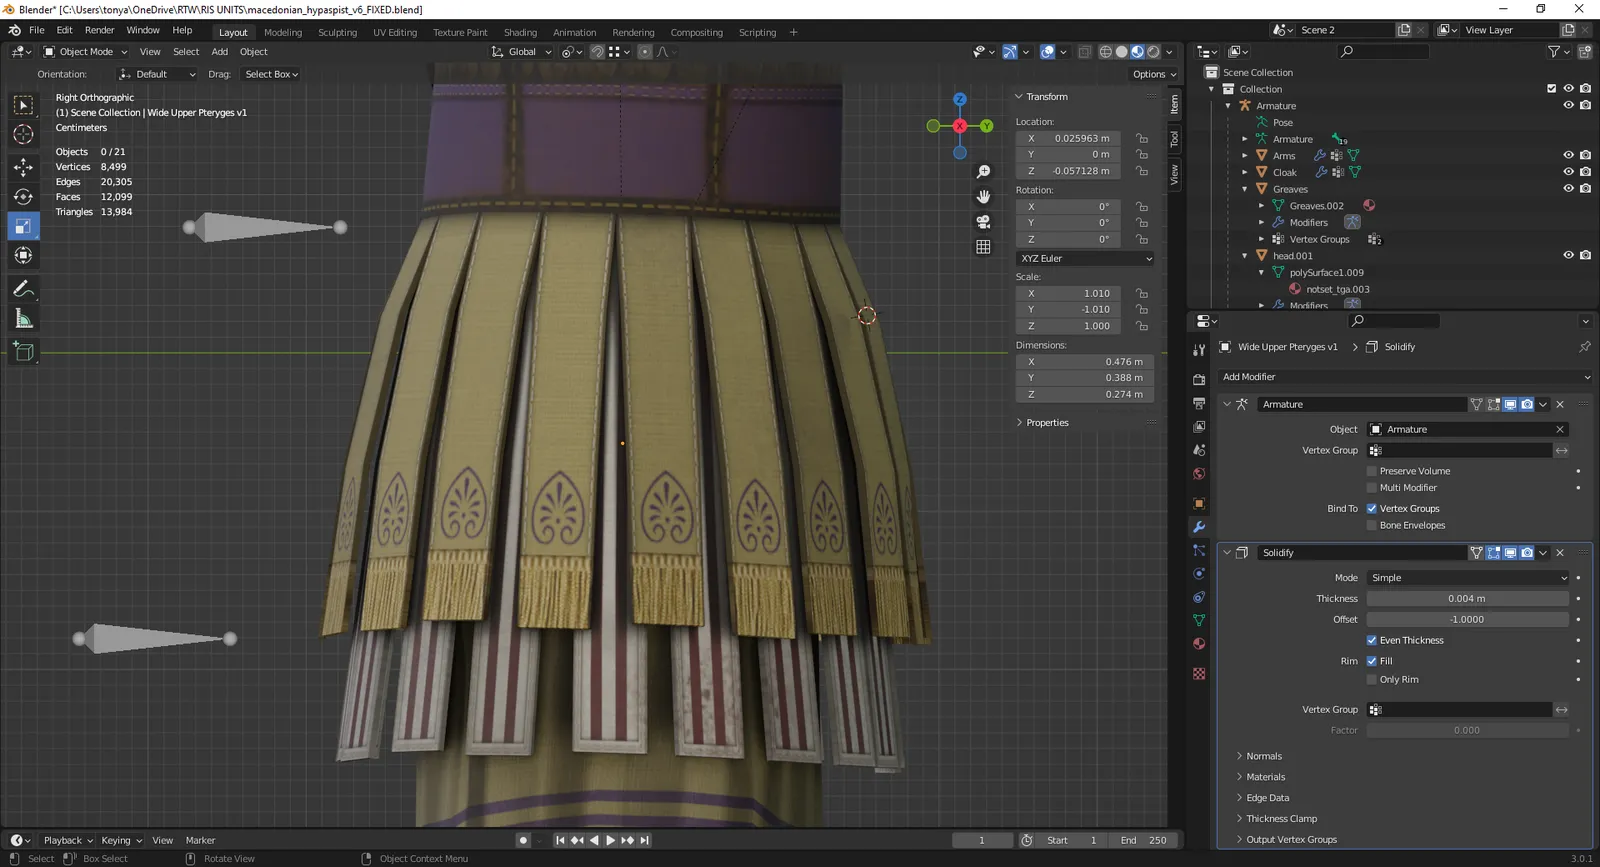
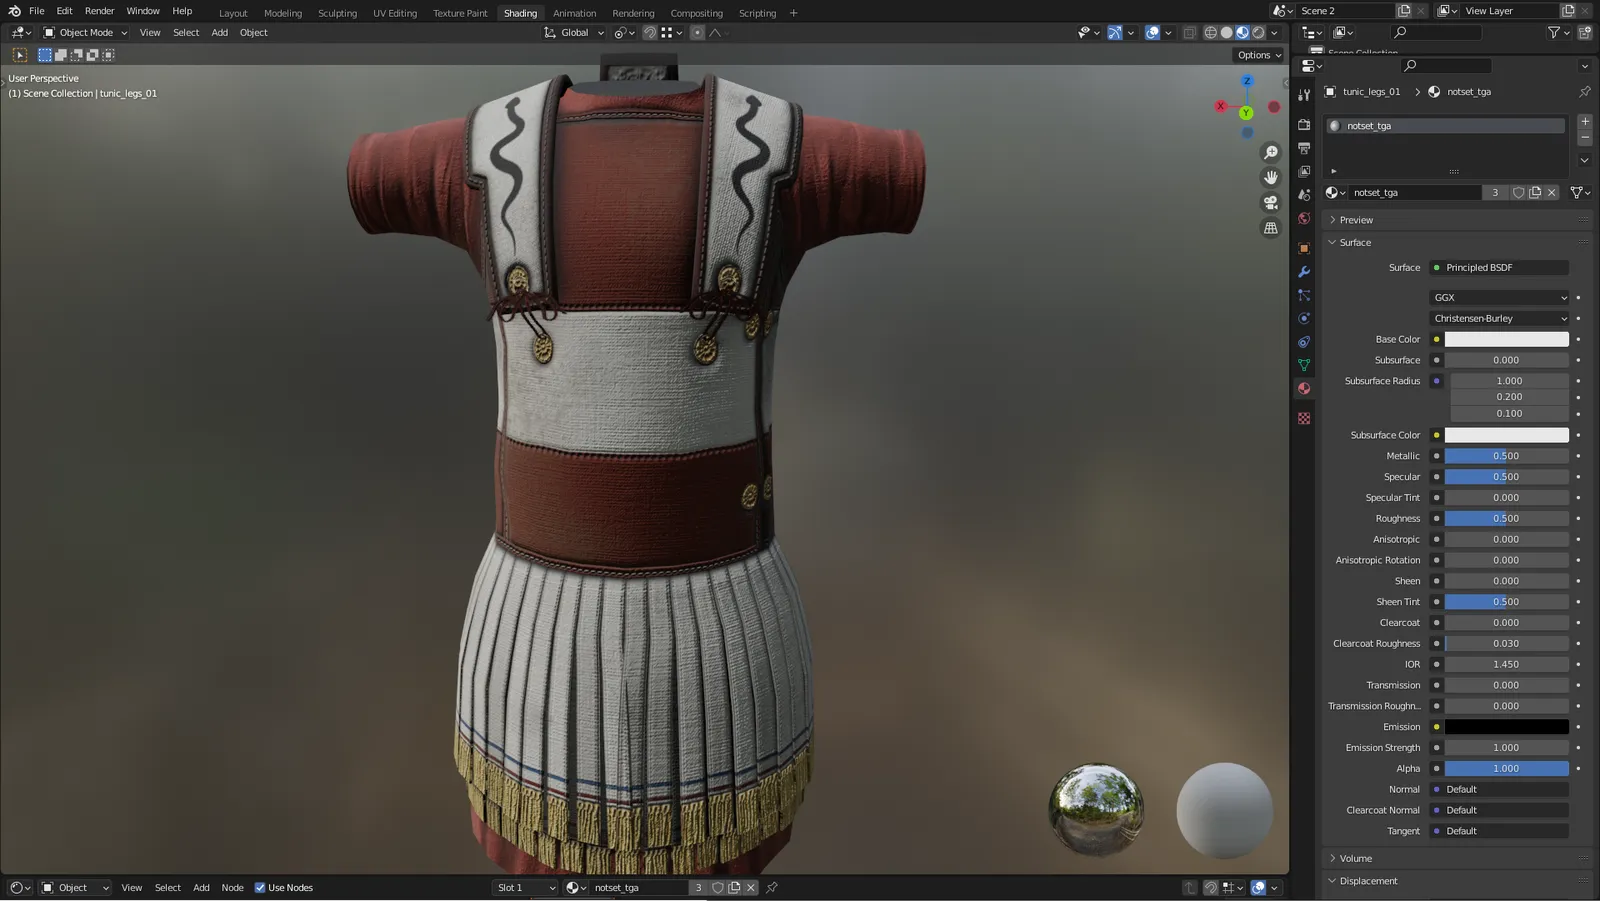
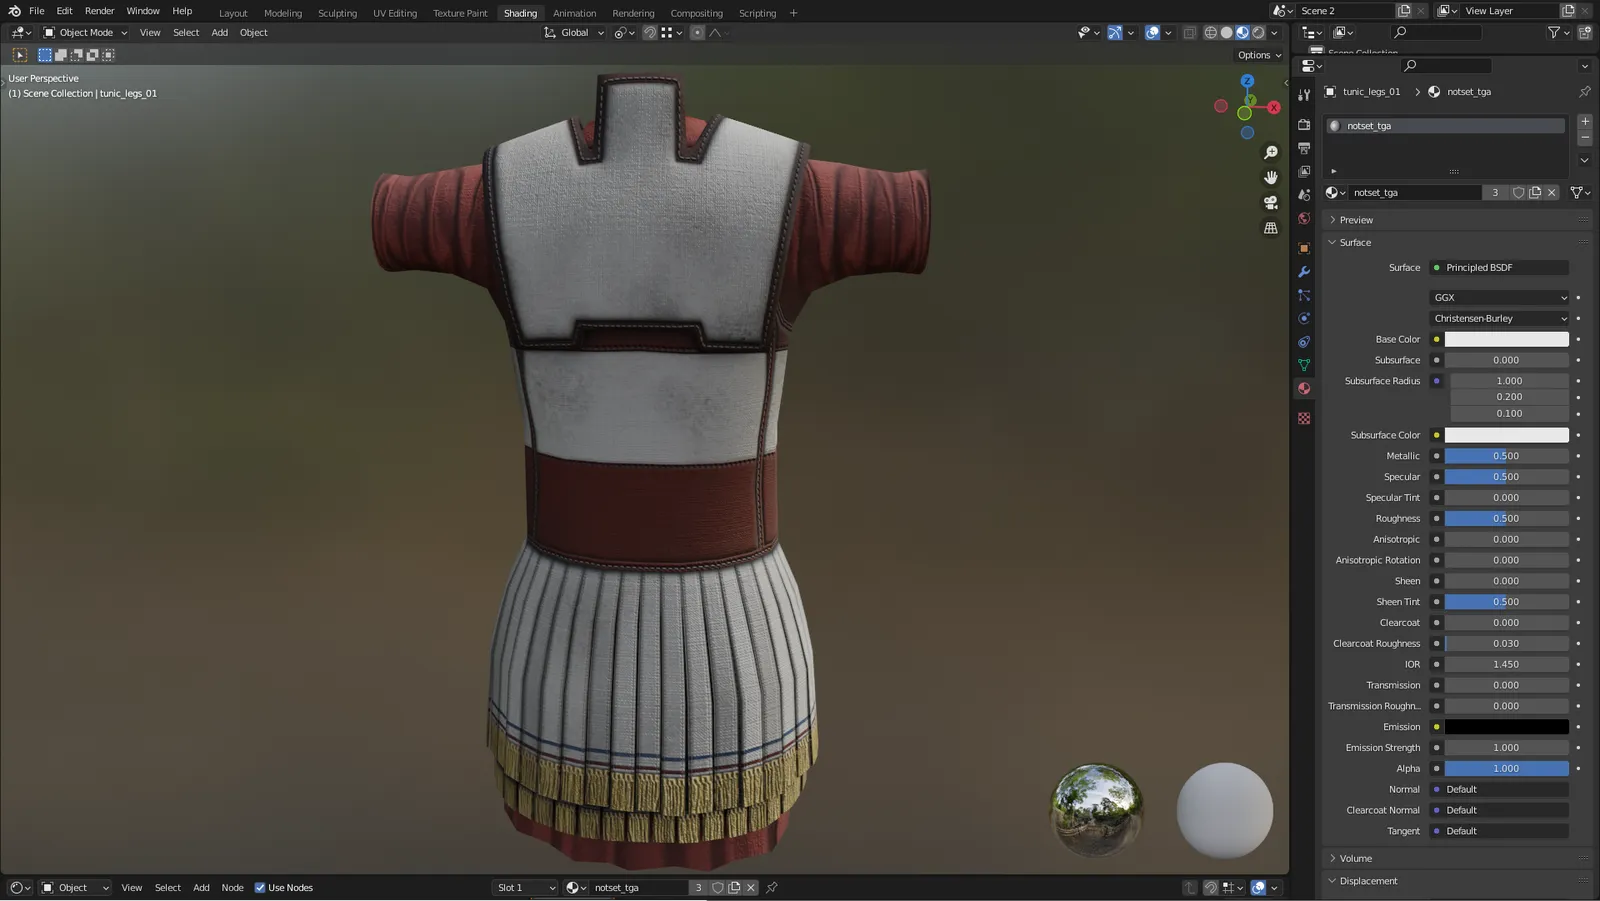
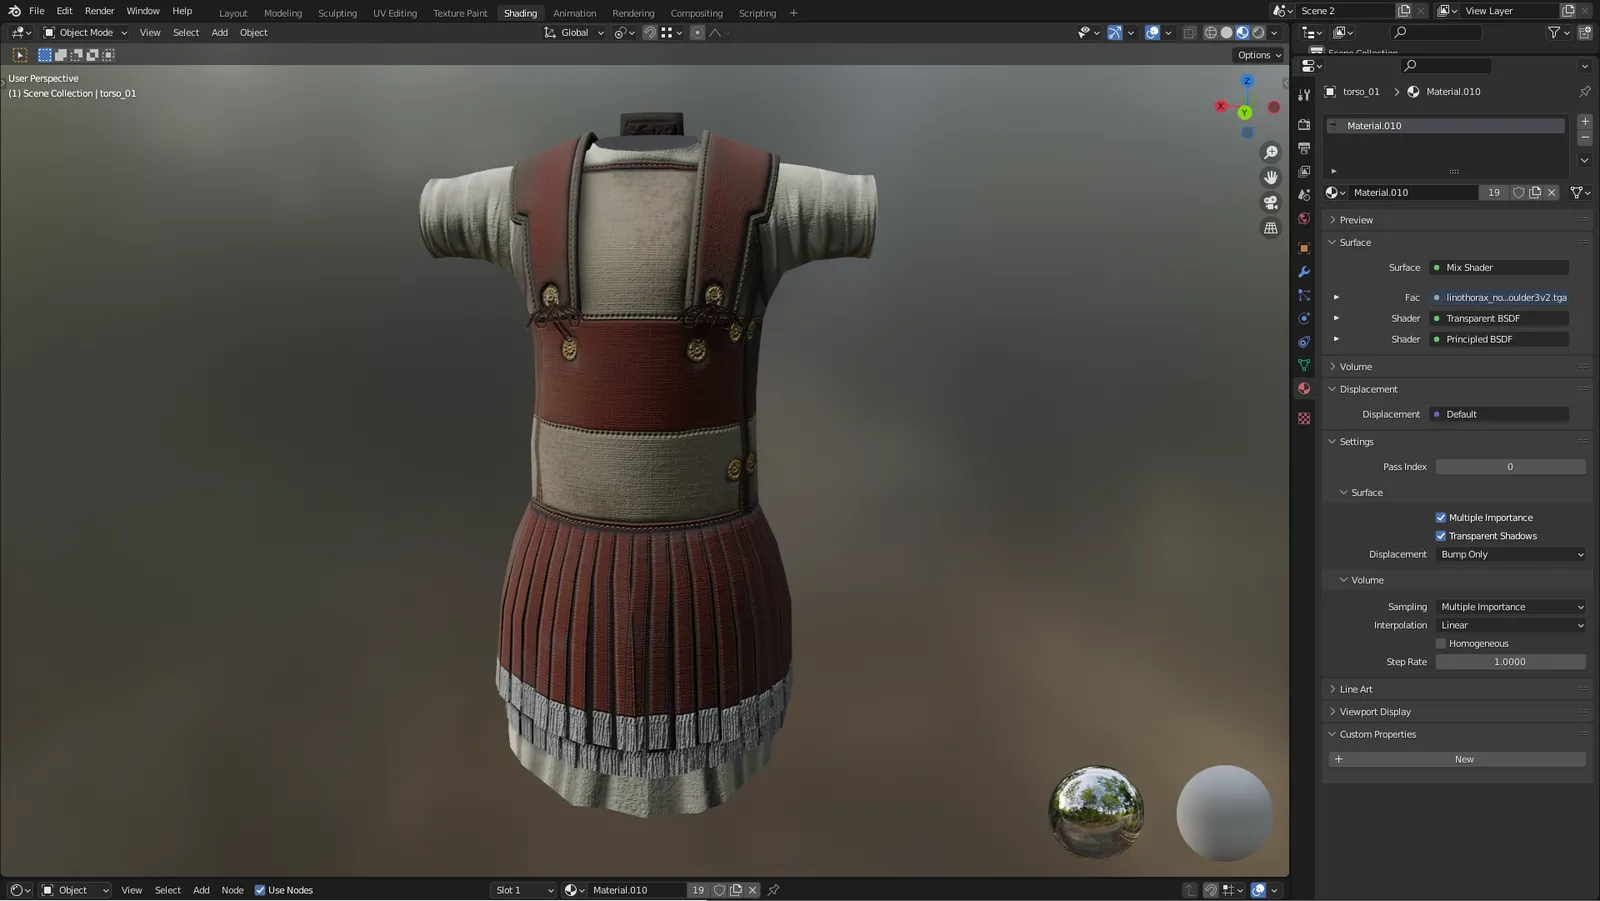
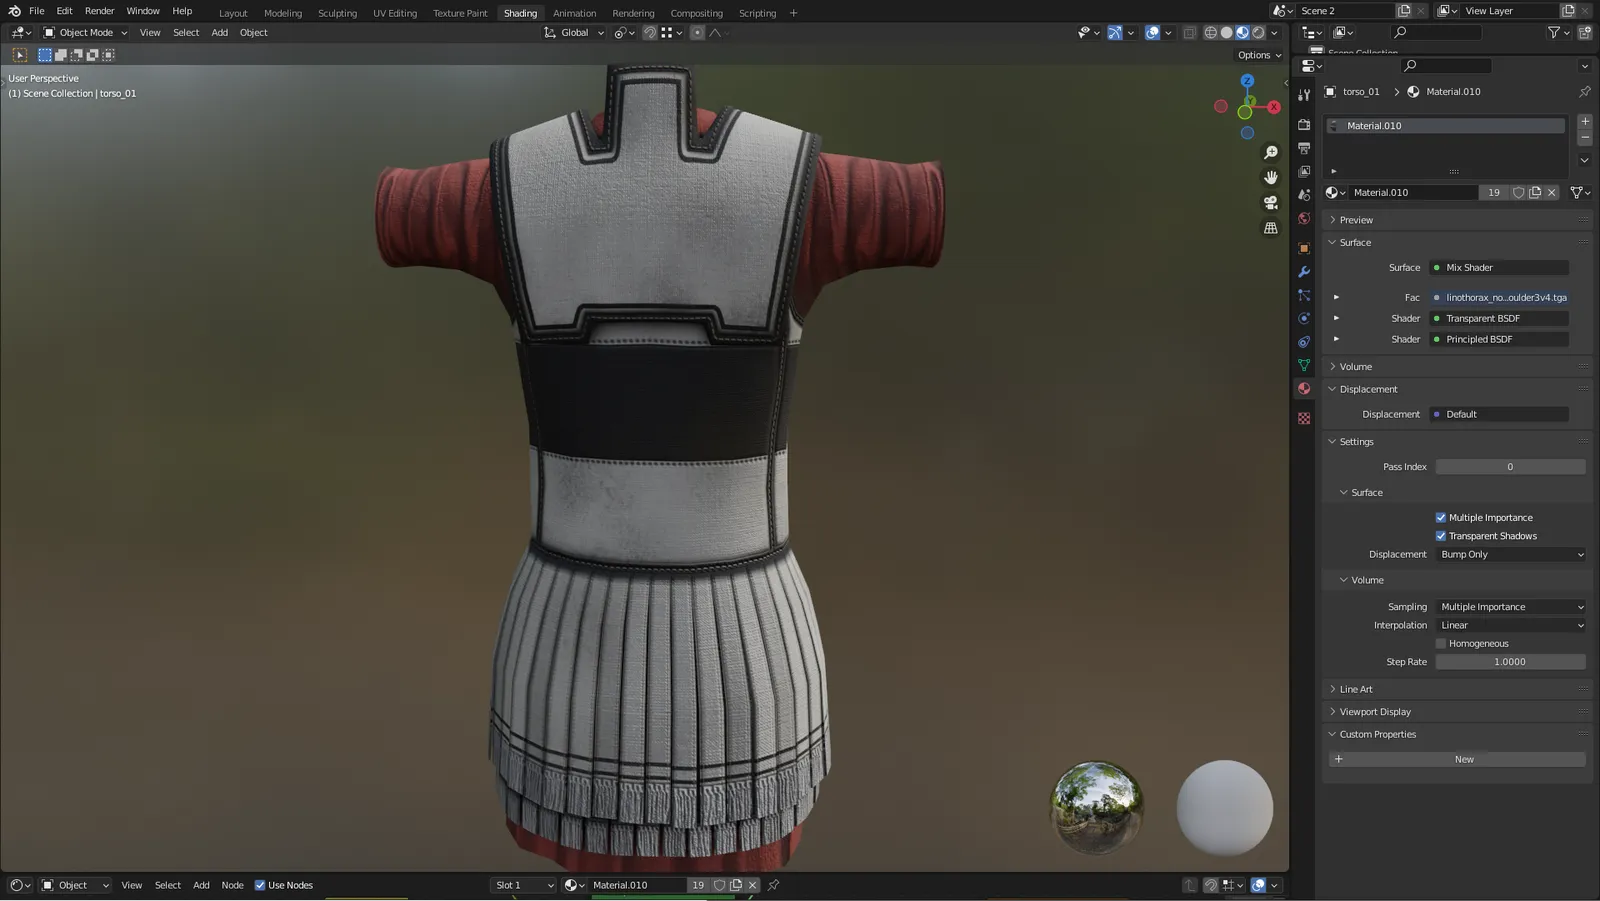
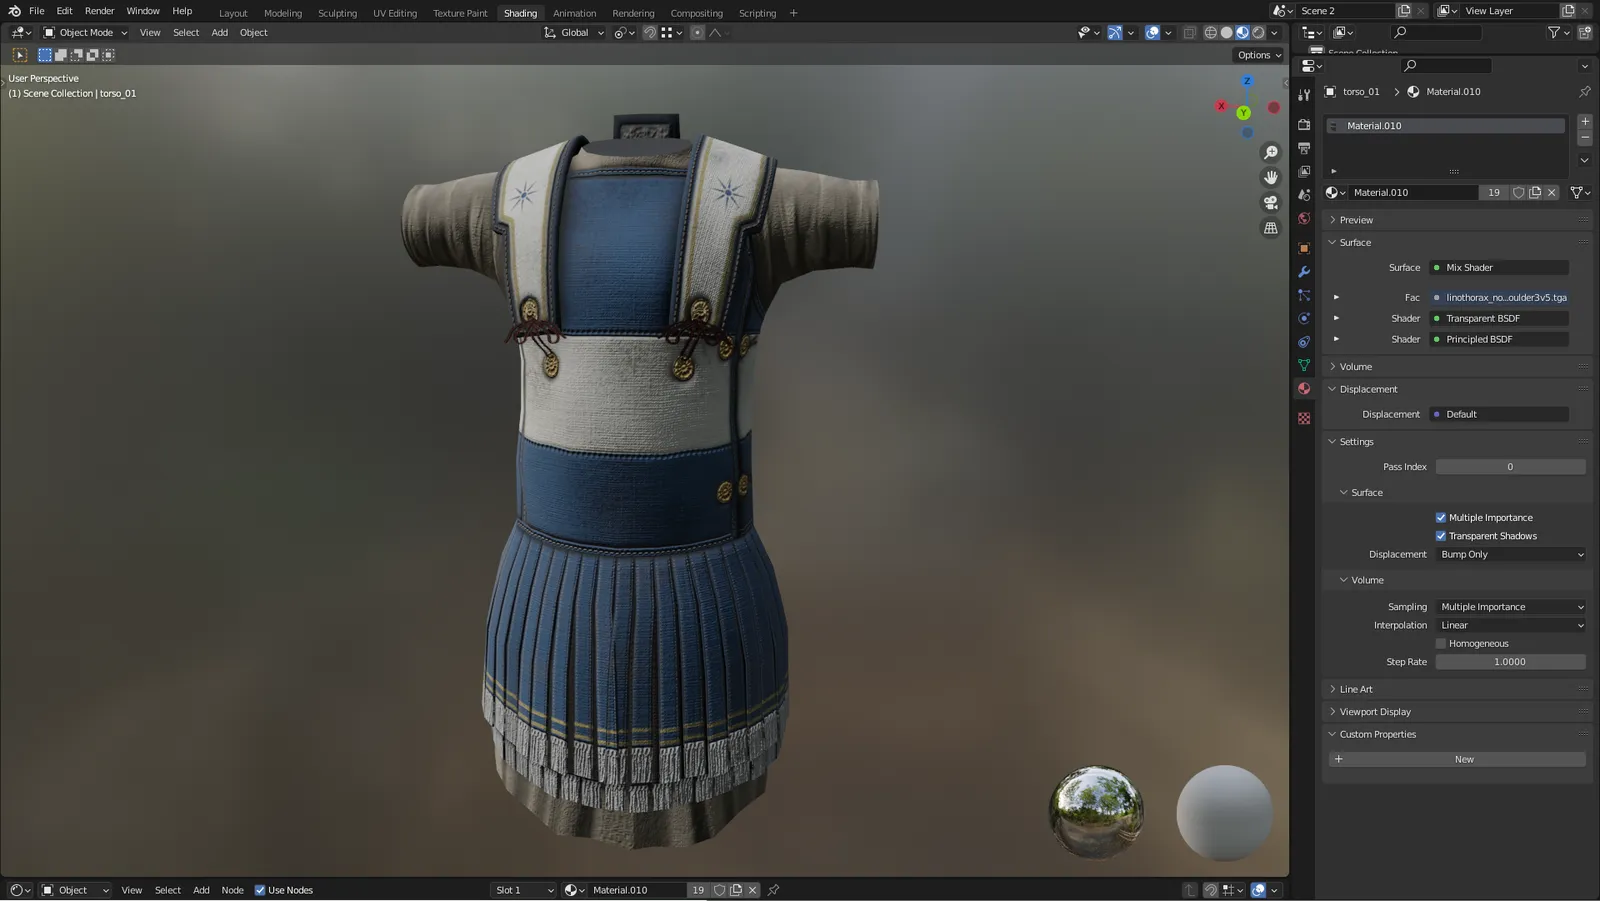
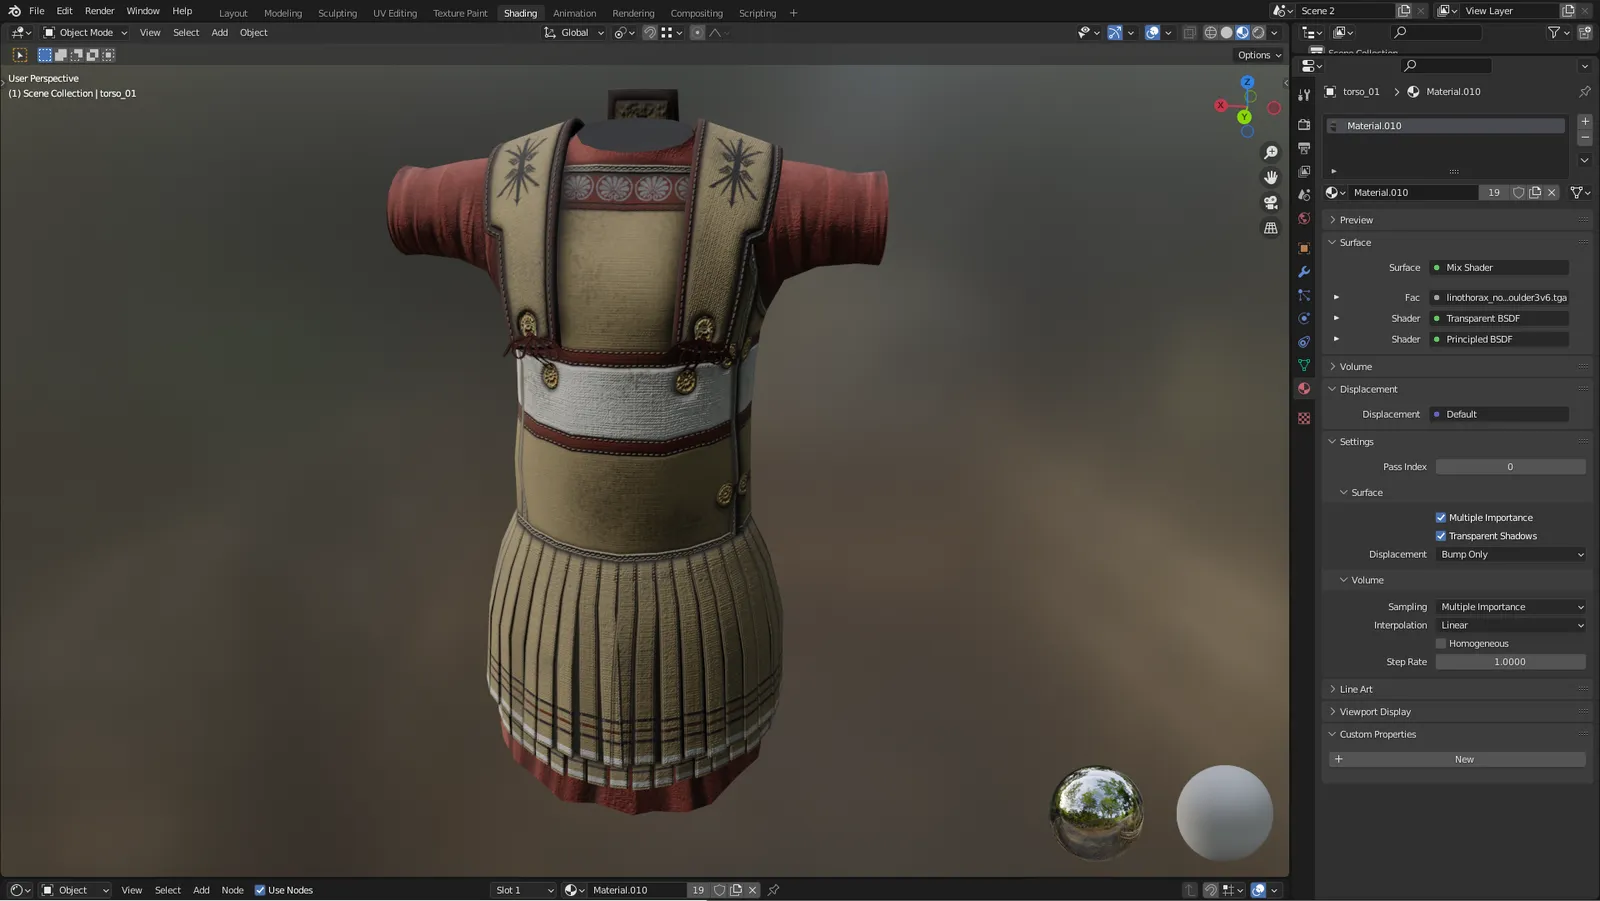
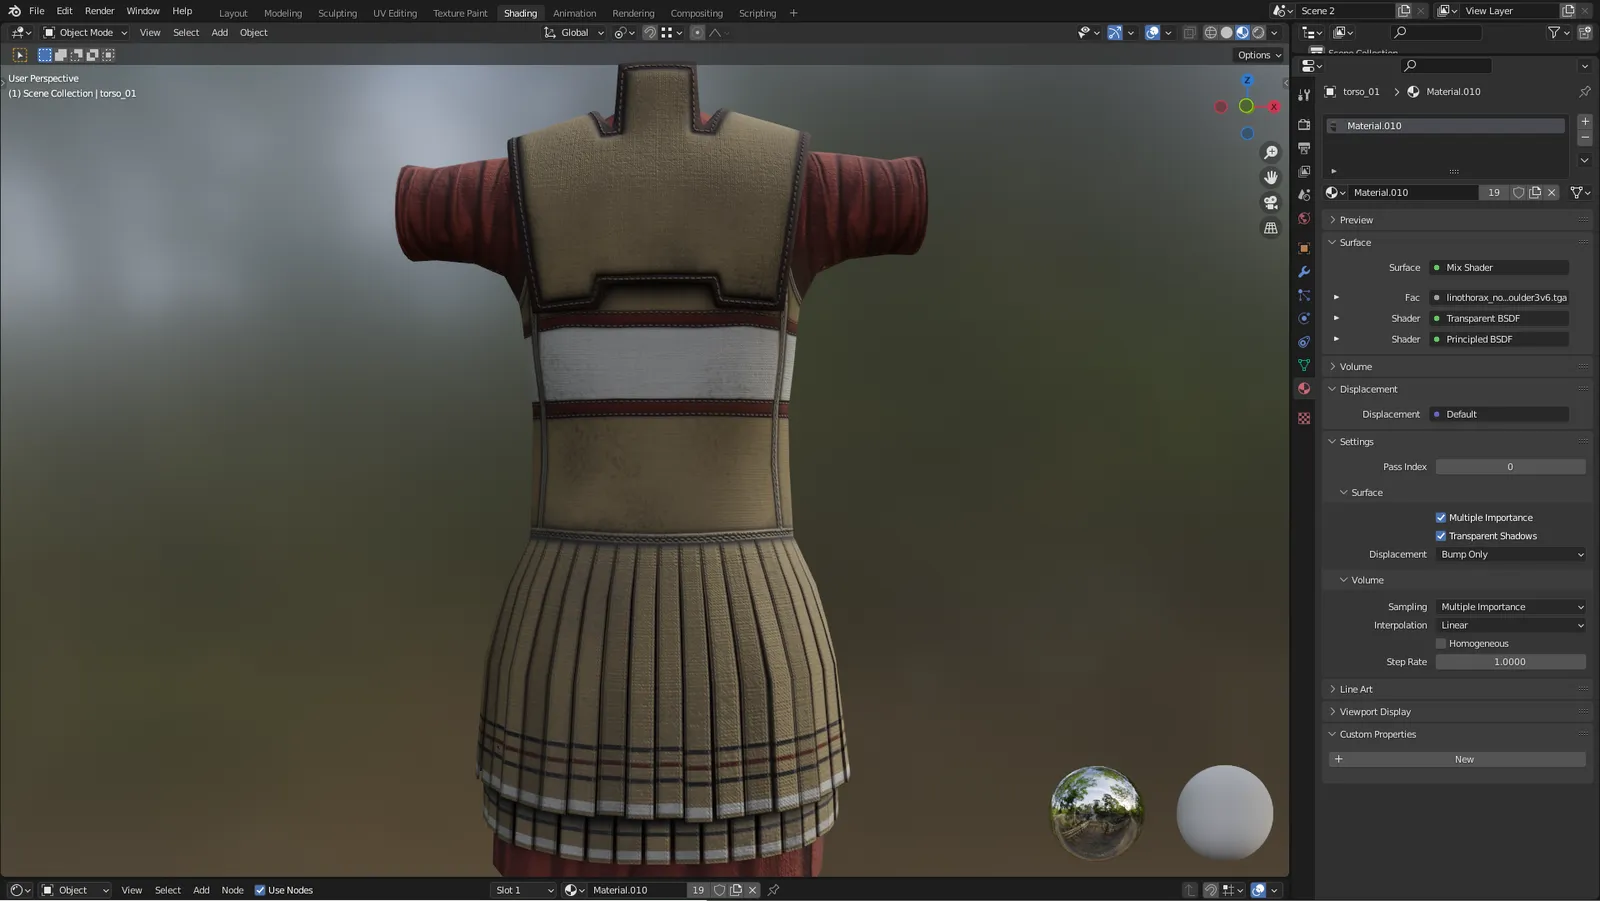
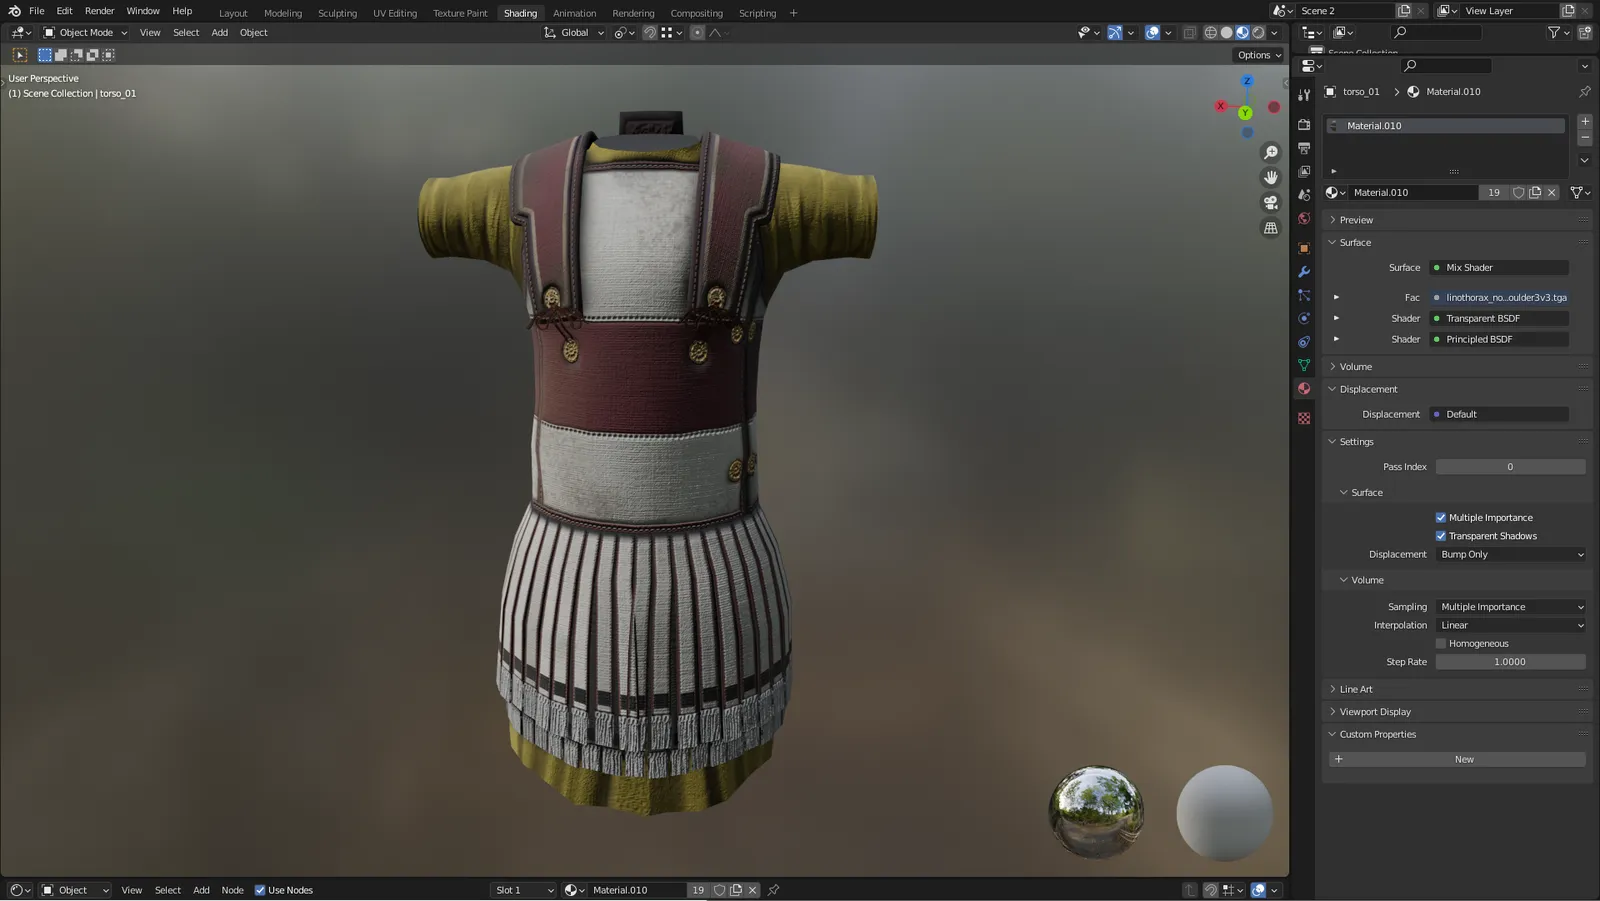
And finally some shots of some of these unit textures in game - there's still a bit of work needing doing to tweak the colour saturation, metalness and roughness to optimise the look under game lighting, but it's getting pretty close.
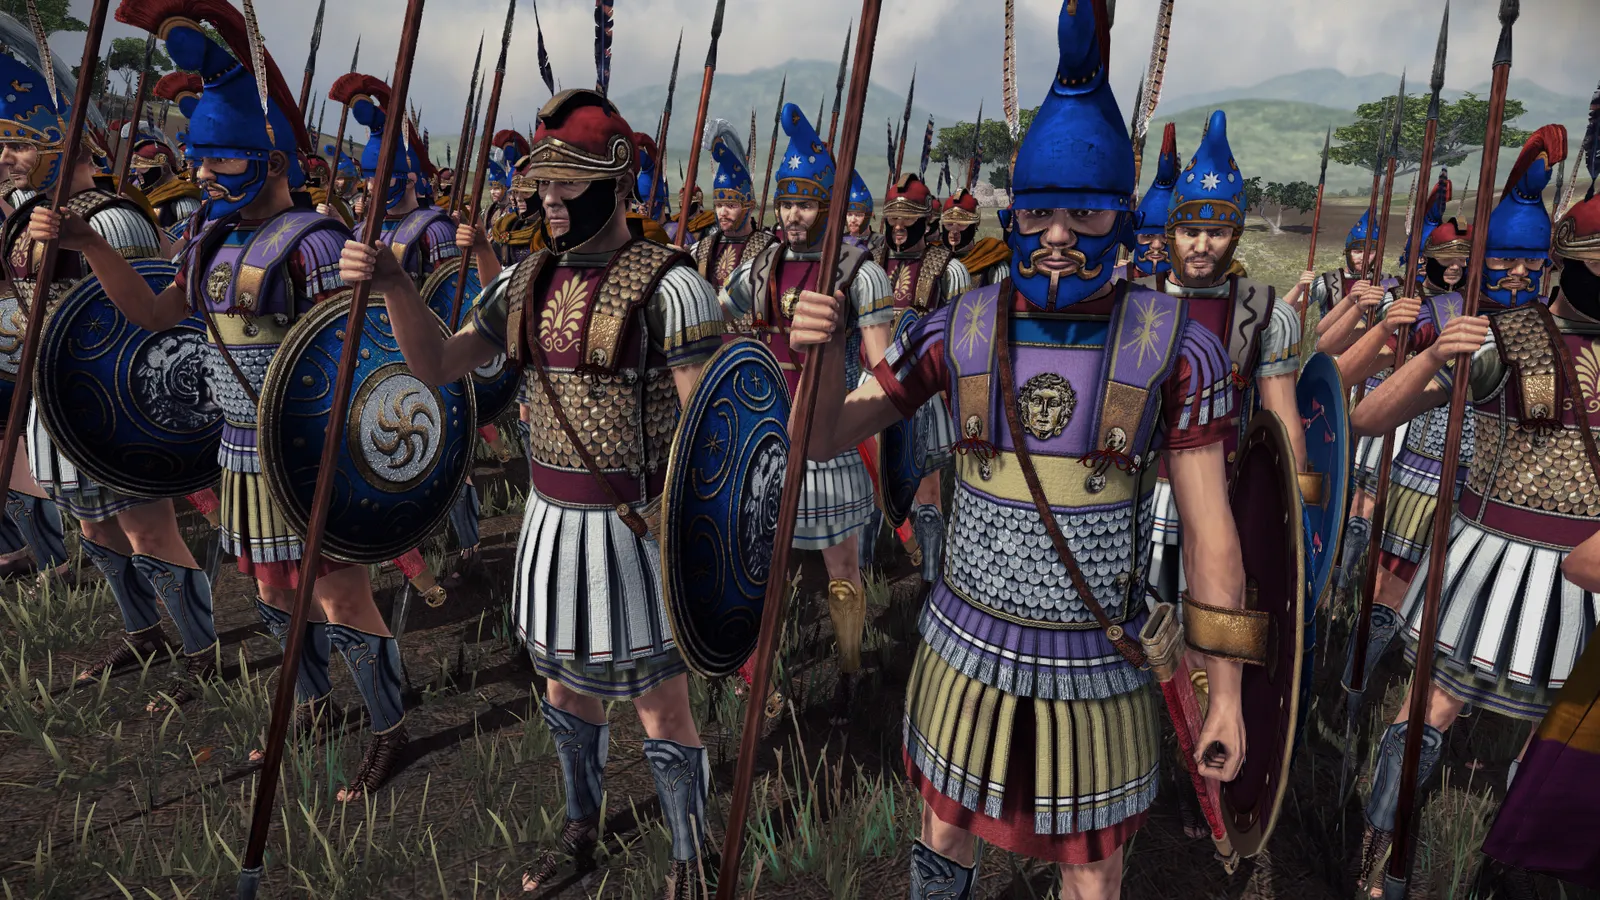
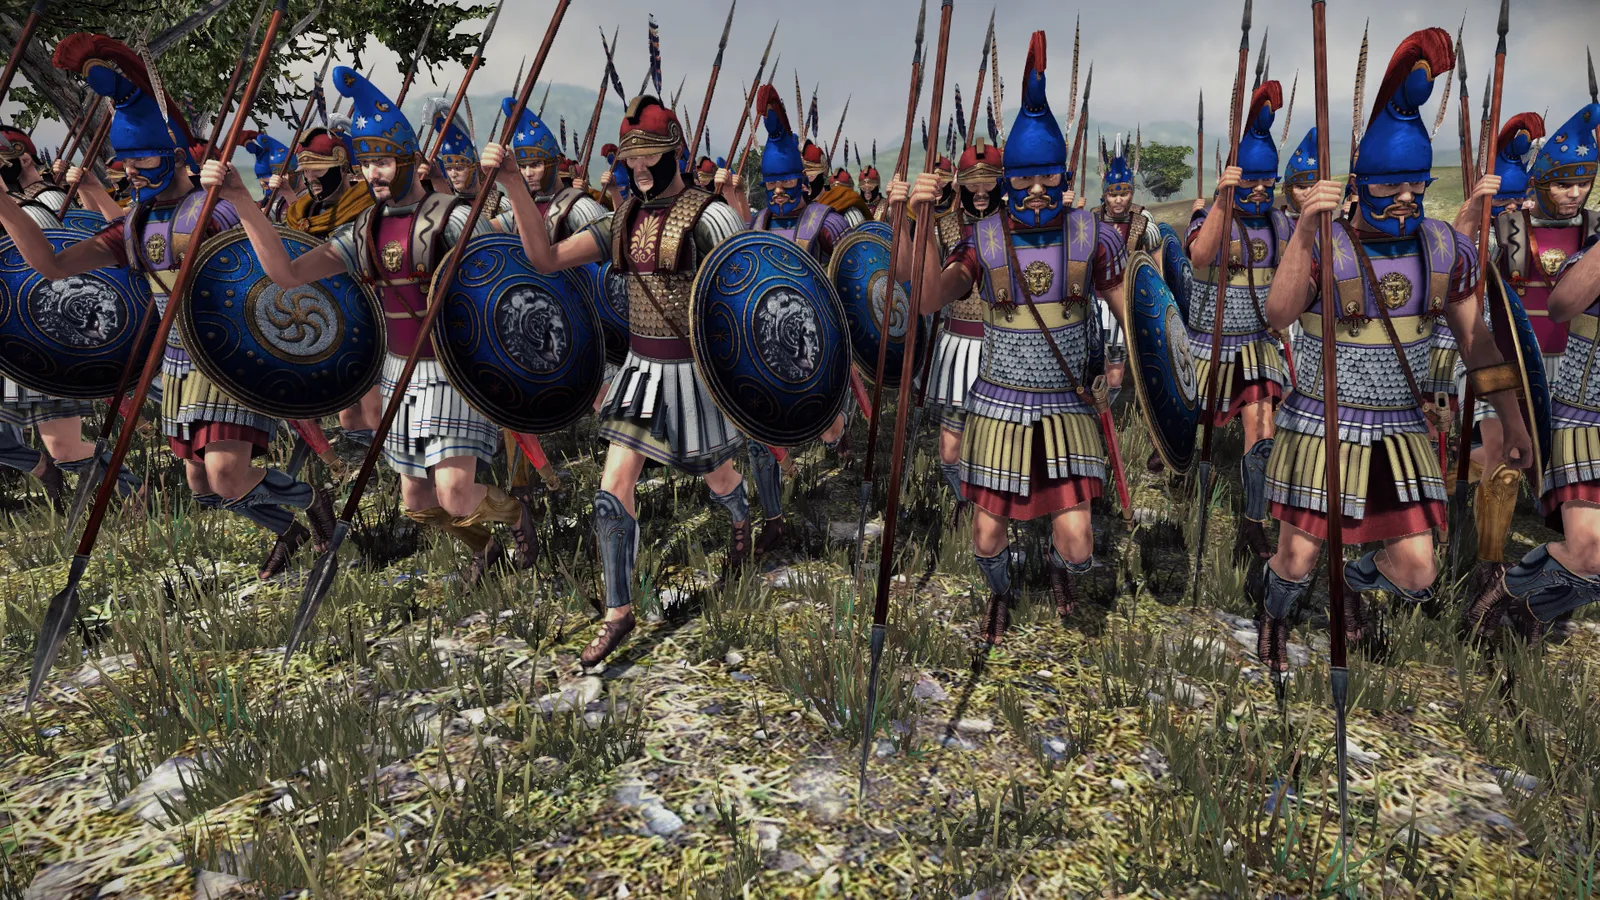
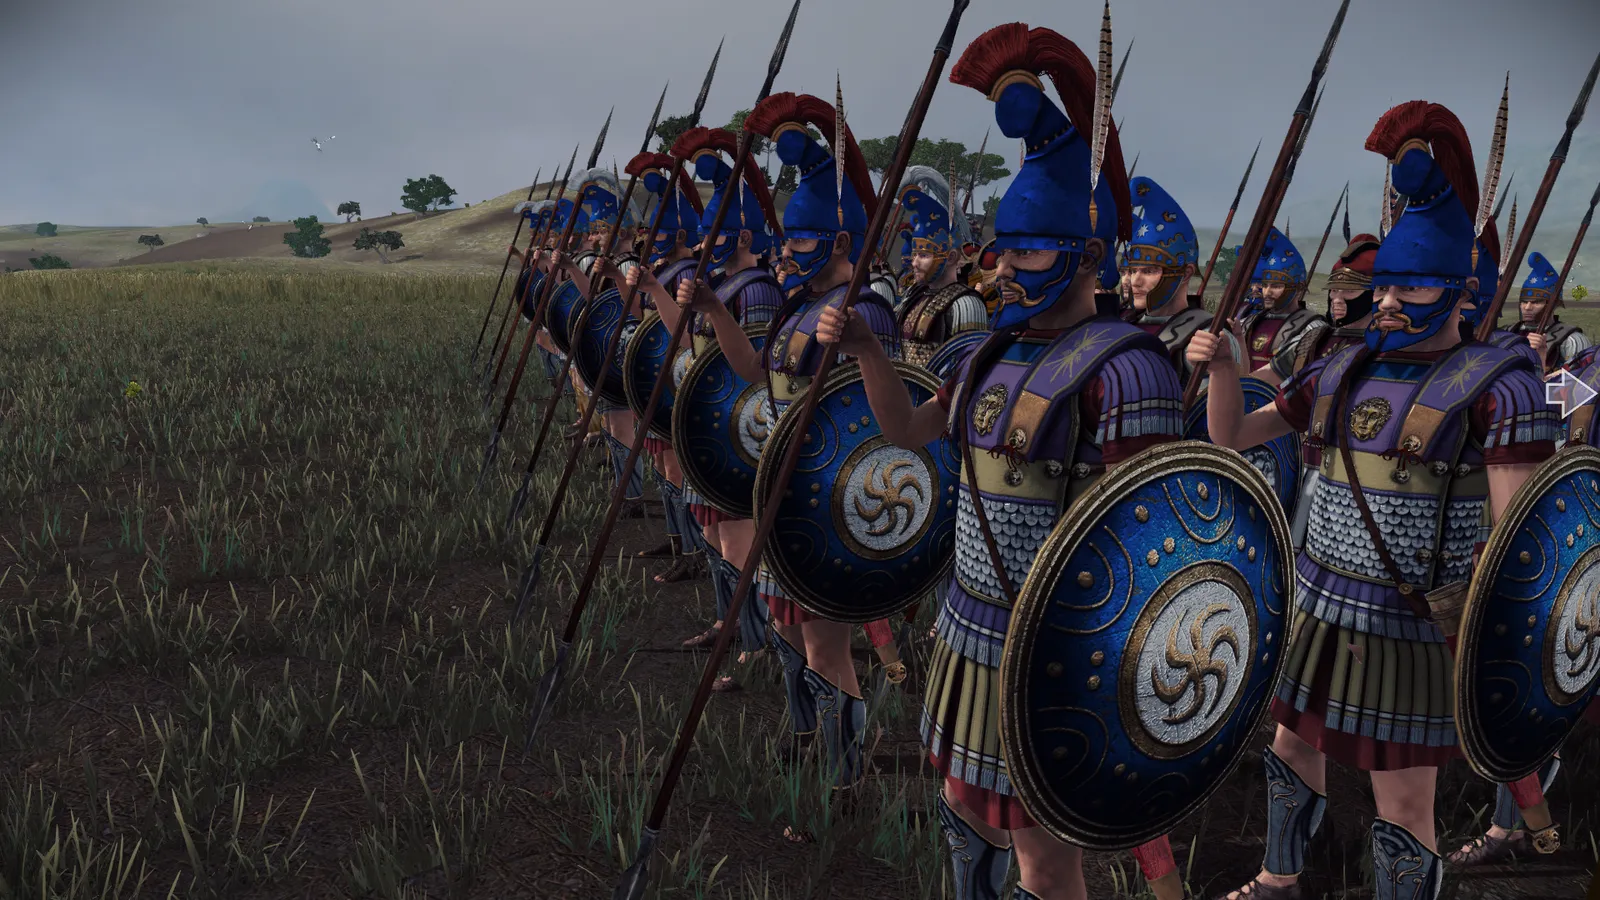
So hopefully that’s enough to give you a flavour of what we’re doing and what will be coming in the future. If you’d like to join the creative process, please message me.