How to get started with Openstack - RIT-GCI-CyberRange/Openstack-Guides GitHub Wiki
First. Lets get a basic Ubuntu VM online so you can use the openstack CLI clients and related tools. These can be installed on Windows or Mac but work best in Linux.
After you are logged in and got your password changed. Lets launch a instance and log into it.
First you will need to create a SSH key and provide the public key for it to openstack. You can do this directly in openstack as well to generate your key. We will cover both.
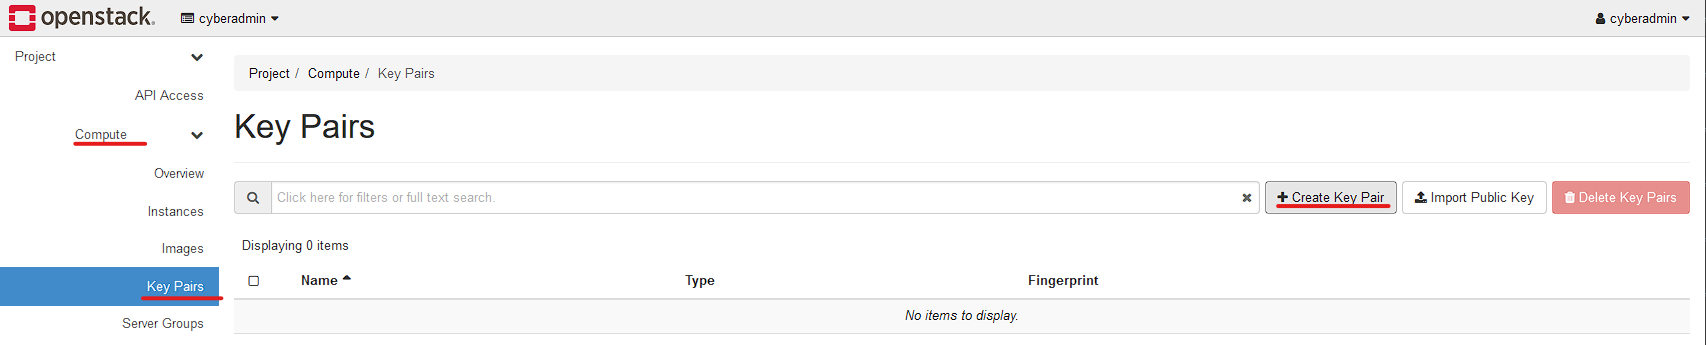
Select Compute, Select Key Pairs, Click "Create Key Pair"
Then enter a friendly key name. Then select SSH Key.
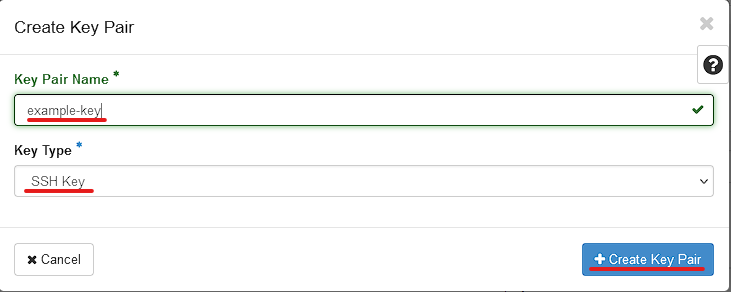
Once completed and submitted, it will have you copy or download the PEM file for you.
Keep this file safe, you will need it later!
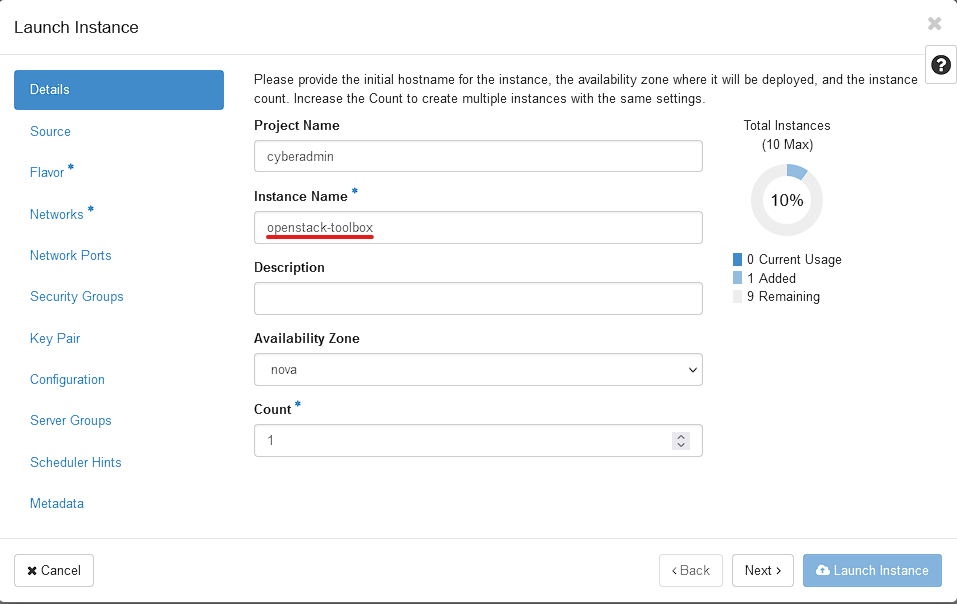
Select Compute, Select Instances, and click " Launch Instance "
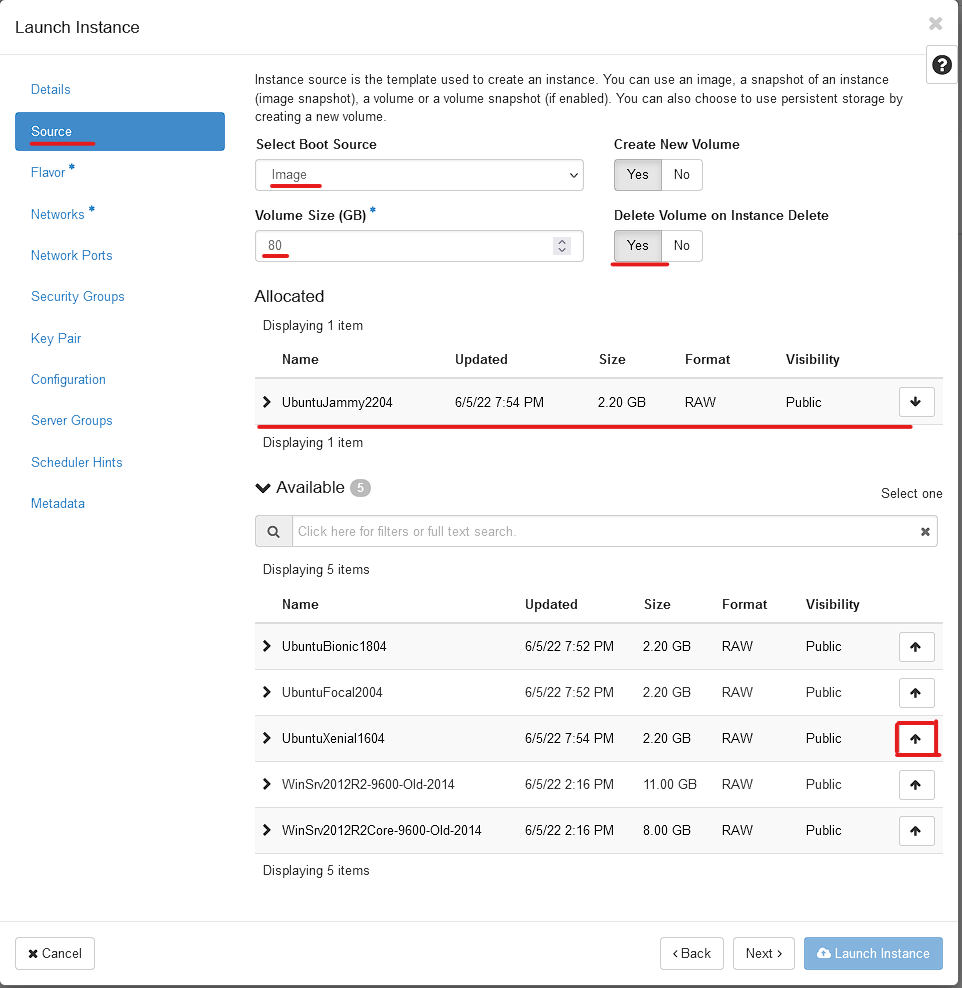
We will be creating a Ubuntu 22.04 VM. Select Source, Select the UP Arrow under Available related to the UbuntuJammy2204 Image.
Set the Volume Size to 80(GB) and Select "Delete Volume on Instance Delete"
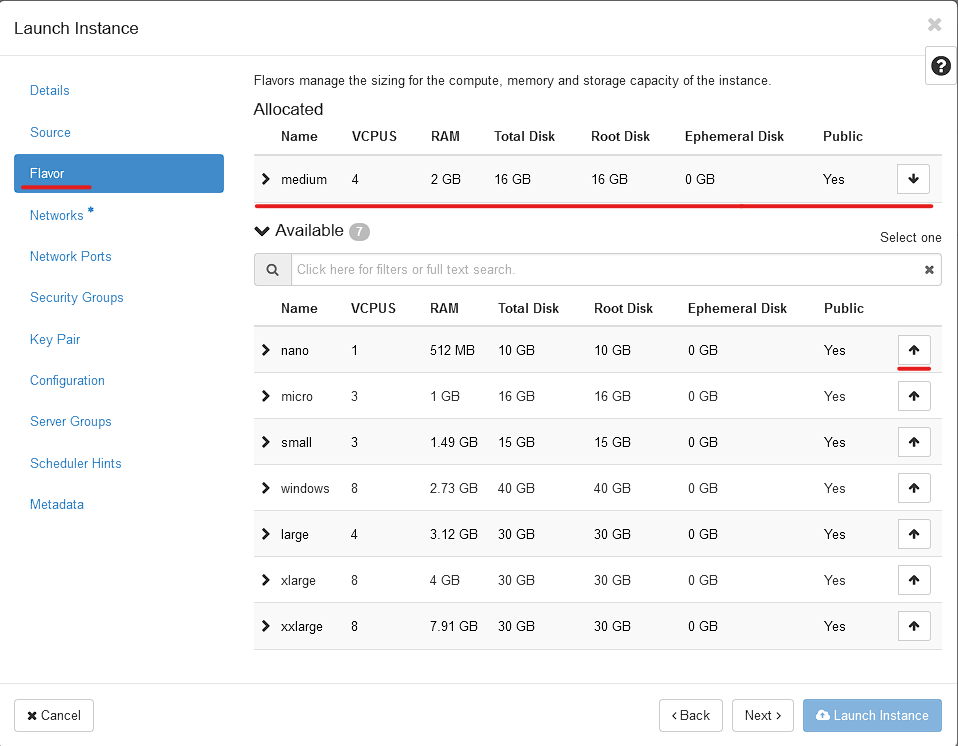
Next is "Flavor". This is the "Size" of the VM you are creating. The vCPU, RAM are set in stone. the rest are just minimums (like Disk sizes)
Select the "Medium" flavor using the UP array next to it. This will create a VM with 4 Cores and 2GB of ram.
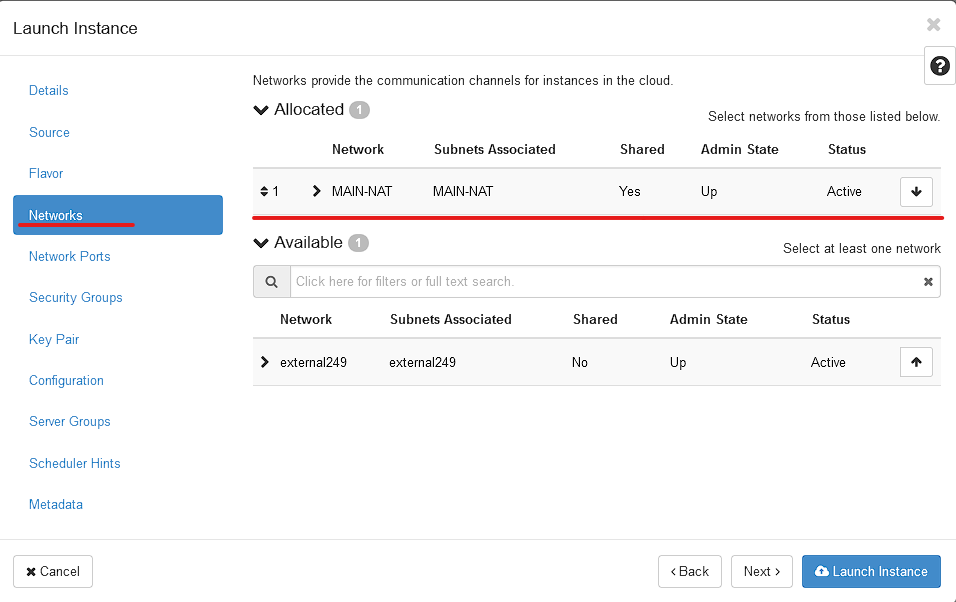
Next is the Networks. You should have access to MAIN-NAT. MAIN-NAT is a very large internal network with internet access. Getting a public IP for your instance will come later.
Select MAIN-NAT using the UP Arrow.
All other settings are at their defaults. Feel free to explore the options. You can always create a new VM!
Once Completed the Launch Instance button should be able to be clicked and your instance will start to be created!
You will see it listed on the instances page with its details. Click on the Instance Name to see more details about the instance.
To be able to SSH into your VM, we will need to open the firewall up in openstack
First, Select Network, Then Security Groups. Then Manage Rules for the "Default" Security Group.
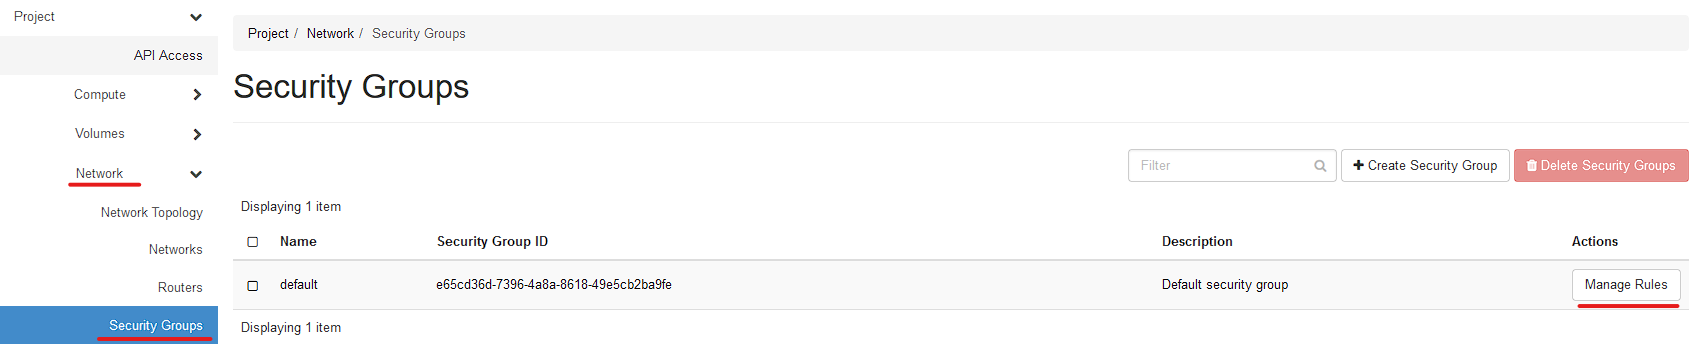
This will change the main firewall rule that all future VMs will be spawned under unless changed at the time of the instance creation.
We are going to allow all SSH Traffic inbound to the VM. To do this Click "Add Rule" to get started.
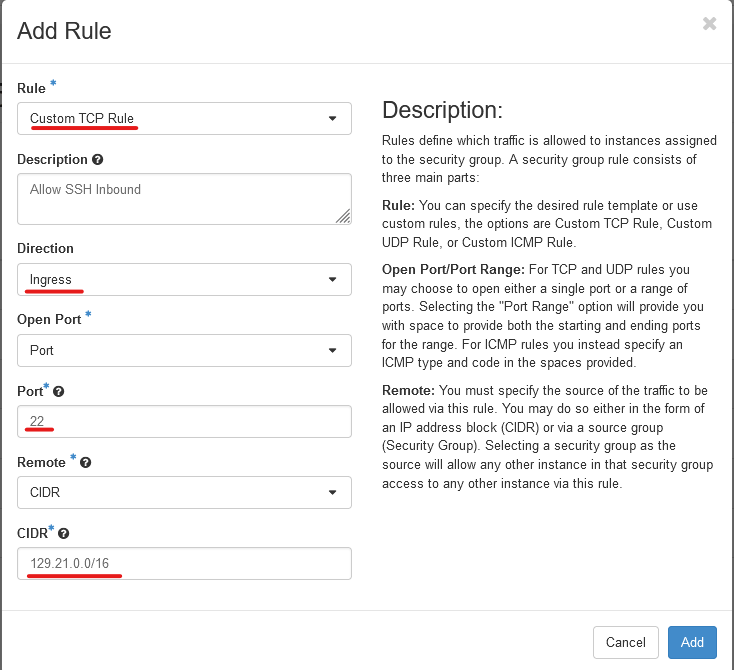
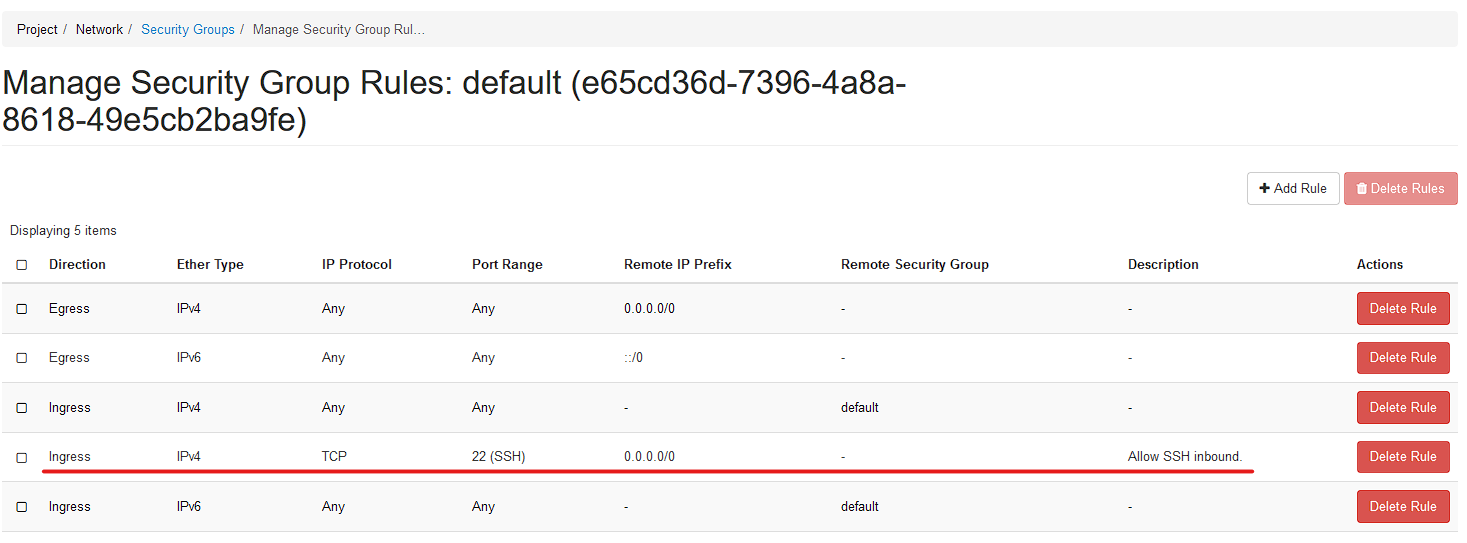
Select the Rule "Custom TCP Rule", Then put a Description, Select the Direction of "Ingress", Select Open Port "Port", Type Port "22", Remote should be "CIDR" and CIDR should be "129.21.0.0/16" (To allow the only RIT IPs to access it, You can also put your IP/32 in there as well to lock it down.)
Once completed. Your rules should look like this:
To get a Public IP for your VM you should have the quota for a Floating IP. These do 1:1 NAT to the VM you have select. They require a Router to work and only work on ONE hop (One Router in between the public internet and the VM) For the default MAIN-NAT this is the case.
You can change what VM your IP goes to at any time.
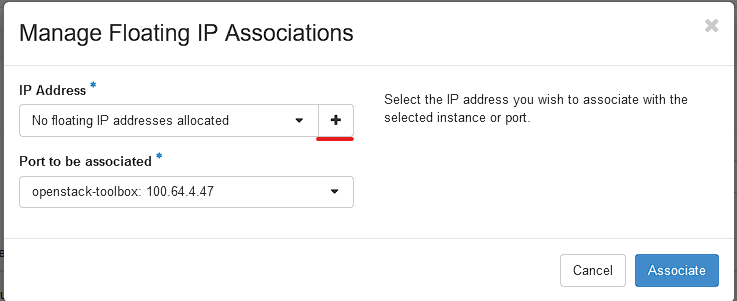
First go to Compute, Instances, then the dropdown arrow and select "Floating IP Associations"

Then you will want to create a floating IP if you don't have one already. To do this. Click the PLUS Icon next to IP Address.
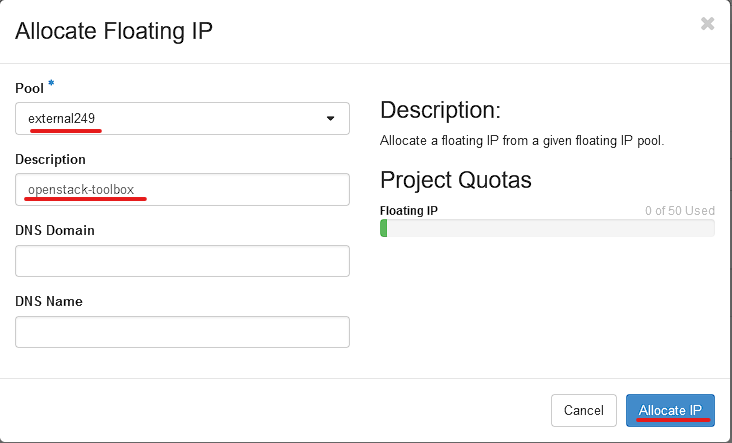
You will be greeted with selecting the Pool, Set it to "external249" and give it a friendly description. Once completed. Click Allocate IP.
You should now have your new IP selected under IP Address. Go ahead and click "Associate".
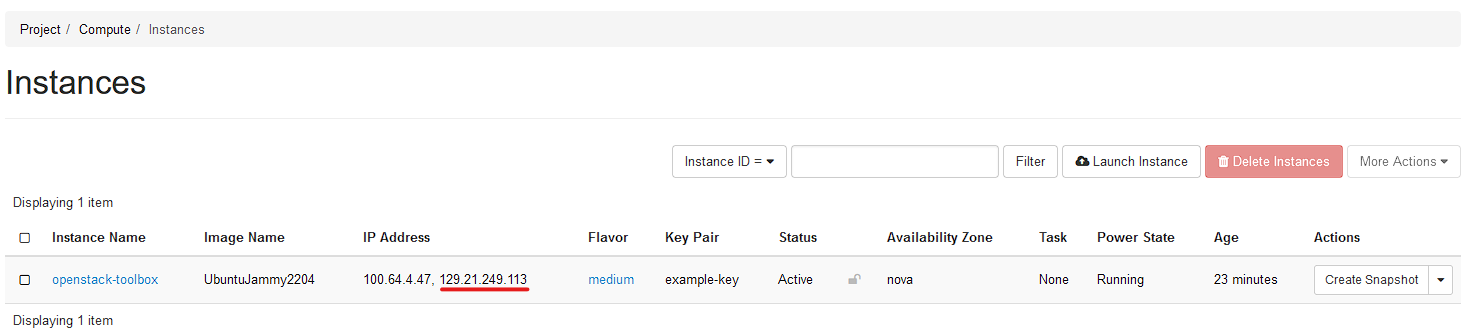
You will now note that the public IP is listed in the instances list now.
Taking that PEM file provided before as your SSH private key. you should be able to log into your ubuntu VM now!
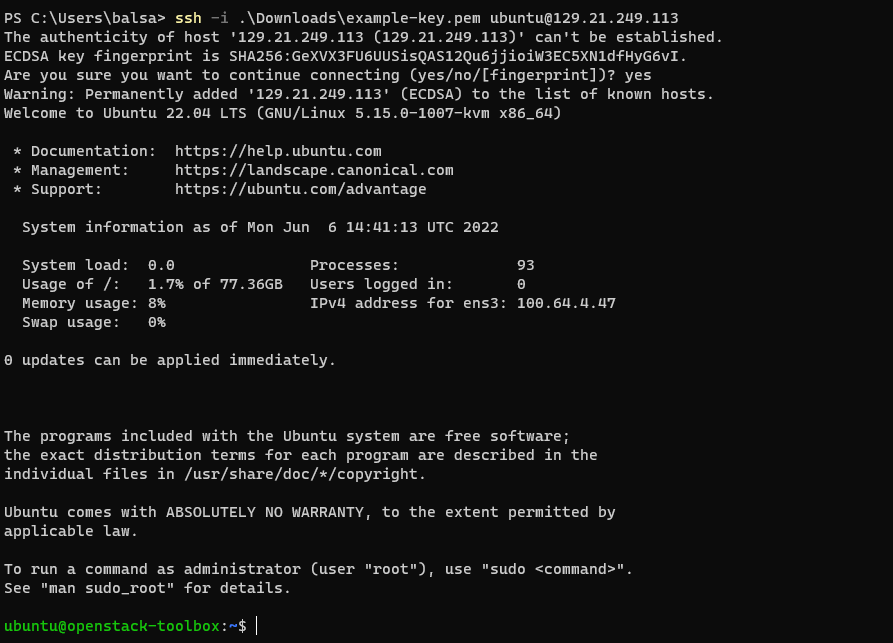
give it a try. you will need a command like ssh -i example-key.pem ubuntu@<FLOATINGIP>
It may complain that your SSH key is insecure. to fix this do chmod 700 example-key.pem
Here is a example of logging in using Windows and the downloaded private key.
As the Cyber Range has a limited number of public IPv4 addresses, it is not practical to assign a public address to every machine in a project. To mitigate this issue, we have created a SSH Jump Box that allows you to SSH to your instances without a public IP address.
Attach your machine to the MAIN-NAT network. SSHJump lives at 100.65.1.84.
It is not a given that your machine will gain an IP address automatically via DHCP on a secondary network, so it may be required to either set MAIN-NAT as your default/primary network interface or manually assign an IP address to the interface (e.g. using cloud-init to run ip a add 100.65.x.x/16.)
Use a Floating IP to hop a router to the inside of your network to communicate with your machine. a great way to get in.
Once your machine has an IP address on MAIN-NAT, you can SSH to your instance using the following command:
ssh -J [email protected] <sshusername>@100.65.X.X
You can also access the Web based SSH Client at https://ssh.cyberrange.rit.edu - This website allows direct access to machines on MAIN-NAT as well
Here is a example ~/.ssh/config to use with SSHJump system. this will automatically use SSHJump when trying to access anything on the 100.65.0.0/16 network.
Host ssh.cyberrange.rit.edu
    HostName ssh.cyberrange.rit.edu
    User sshproxy
    Port 22

Host 100.65.*
    Port 22
    IdentityFile ~/openstackkey.pem
    ProxyJump ssh.cyberrange.rit.edu
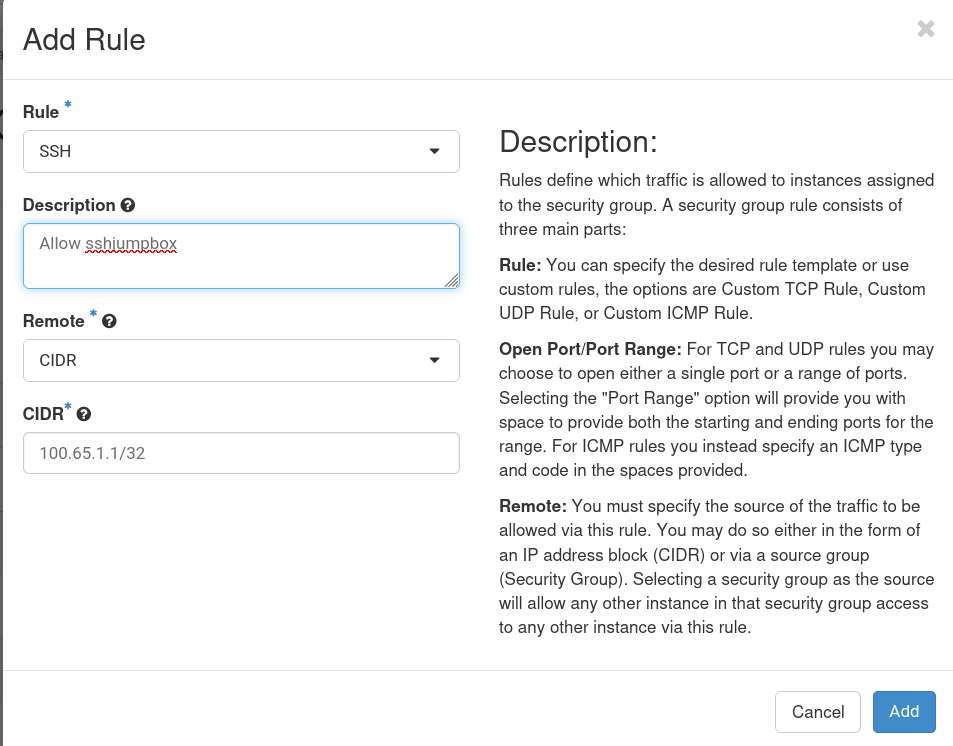
One important note is that there is no client isolation on MAIn-NAT, which means that your machine, by default, will be able to communicate with any other machine on the network. This is not only a security risk (which will make people be disappointed in you) but could easily impact other users of the stack as well (which makes people angry at you.) The method to prevent this is to ensure that the security groups applied ONLY permit traffic from the jump host (100.65.1.84) over your SSH Port (TCP 22 by default) via the MAIN-NAT network. Any other MAIN-NAT traffic must be dropped. The rule that accomplishes this task is shown below:
Since Openstack does not have the ability to create DROP rules in security groups, you must ensure that you do not have any ingress rules to allow traffic from 0.0.0.0 through. It is much preferred that you only whitelist RIT's network (which is detailed below.)
If you have a need to have a service open to the whole internet, you can set the Port Security Group on the port attached to MAIN-NAT separately. It's also desired that, if anything you are running has the ability to negatively affect other machines on the network, you specifically create a security group for that machine that only allows traffic from the jump host, including denying all egress traffic over the MAIN-NAT network. As Security Groups are stateful, there's no need to be concerned with Egress rules.
Common Errors
-
<sshusername>@100.65.X.X: Permission denied (publickey).- Your VM Rejected your key. Please check your settings, Don't forget about the caveats with
ssh -i
- Your VM Rejected your key. Please check your settings, Don't forget about the caveats with
-
channel 0: open failed: connect failed: No route to host or other connection type errors- Your VM is unable to be reached by SSHJump, Please check your network settings, and make sure your VM has picked up its MAIN-NAT IP. The Openstack dashboard only says if an IP address has been assigned, you must utilize the console if you want to verify if the VM actaully acquired an address. Some linux distros only have a serial console, you can take the dashboard url of the VM and add /serial to access its serial console.
All examples below are using Ubuntu 22.04
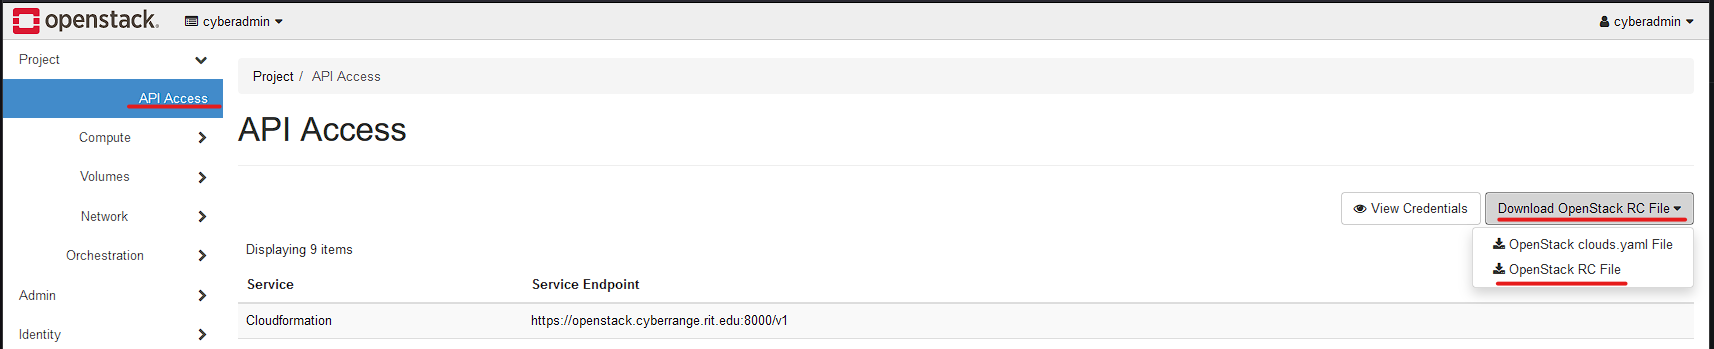
First, we need to download and copy over our openrc file. This file contains all the details for the openstack cli to connect to our instance.
Go to "API Access" and select Download OpenStack RC File, Then select "OpenStack RC File". This will then download a file like <projectname>-openrc.sh.
Upload this file to your Ubuntu VM you created before. You can use SCP, or even just copy and paste it into a new file on the VM over SSH. A example SCP command scp -i .\Downloads\example-key.pem .\Downloads\cyberadmin-openrc.sh [email protected]:/home/ubuntu/
Next we will install the CLI clients. on most systems you can use "pip" for this.
run the following commands on the Ubuntu box to get everything started.
sudo apt update
sudo apt upgrade
sudo apt install python3-pip
sudo pip3 install python-openstackclient
Once installed every time you log in to SSH you need to run source ~/<projectname>-openrc.sh It should ask for your password and return you to the command line. This will keep you logged in until you close the SSH connection.
For details on how to use the CLI, Please see the Docs: python-openstackclient
For basic commands try openstack server list or openstack server create --help
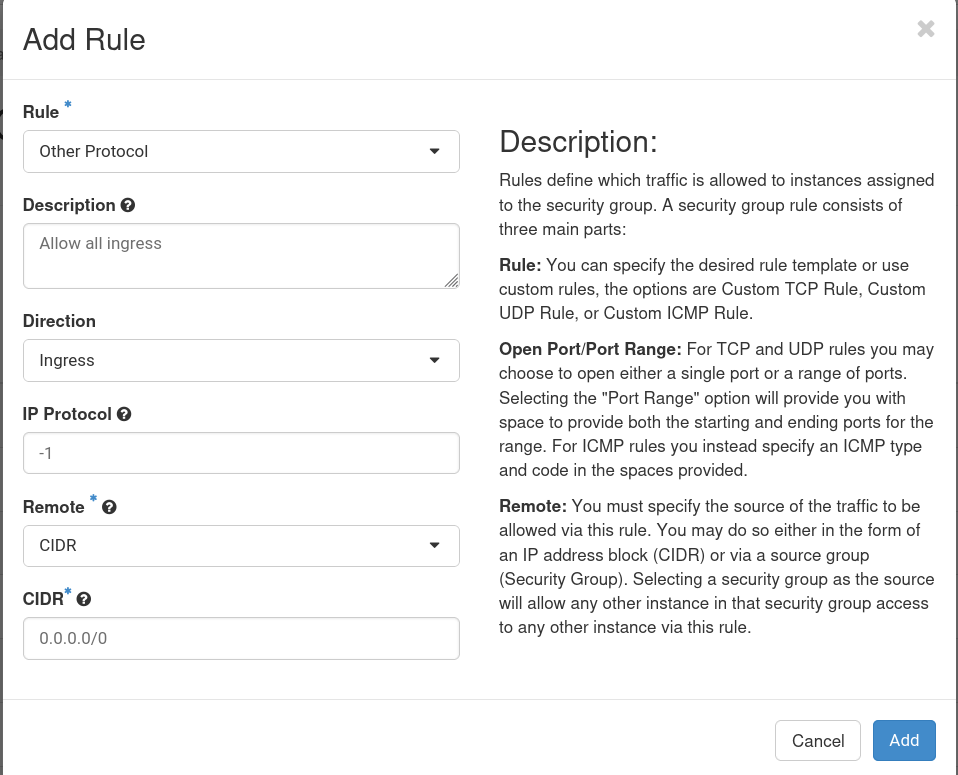
While it's generally unwise to allow all ingress traffic via all protocols and ports, there may be reasons to do so. If you do need to do this, you can create a security group that allows all traffic via all protocols and ports. This is done by creating a security group selecting on the protocol of -1 which Openstack sees as a wildcard. This is shown below. Note that this allows all protocols from any address which is almost never what you want. You should STRONGLY consider only whitelisting RIT's network (129.21.0.0/16) instead.
For additional examples that cover both Openstack CLI deployments as well as Ansible Openstack deployments, please see these examples. Included in these scripts are thorough comments as well as a detailed README file that discusses each script in detail.