01. Gathering Pertinent information - R-division-2021-2022-odd/Repo-14 GitHub Wiki
NEED STATEMENT:
A local mall has been planning on setting up a gaming bot. they have already been asked for the installing a Claw Crane game and they have rejected the idea.
1. DIY BOWLING ALLEY

MATERIALS REQUIRED FOR THIS PROJECT ARE AS FOLLOWS:
| SI NO | COMPONENTS | QUANTITY REQUIRED |
|---|---|---|
| 01 | Glue gun with glue sticks | 01 |
| 02 | Scissor | 01 |
| 03 | Cardboard | 01 |
| 04 | Bowling pins | 06 |
| 05 | Marbles | 05 |
| 06 | Bamboo stick | 01 |
| 07 | Evive | 01 |
| 08 | obstruction detection sensors | 03 |
| 09 | Wires | 03 |
| 10 | Thread | 01 |
| 11 | Bottle cap | 01 |
STEPS TO BE FOLLOWED:
| SI NO | STEPS | BUILDING GUIDE |
|---|---|---|
| 01 | STEP 01 | Making the ground |
| 02 | STEP 02 | Making the ball holder |
| 03 | STEP 03 | Attaching the thread to the bowling pins |
| 04 | STEP 04 | Attaching the thread to the card board |
| 05 | STEP 05 | Attaching the bottle cap for the cardboard |
| 06 | STEP 06 | Adding the sensors |
| 07 | STEP 07 | Adding the scoreboard |
| 08 | STEP 08 | Coding the instructions |
| 09 | STEP 09 | Testing of the bowling game |
| 10 | STEP 10 | Conclusion |
REFERENCE:
https://www.youtube.com/watch?v=_j2xwidx_Wg
2. ARCADE BASKETBALL GAME
Make this cardboard basketball game. The best part of this will be that you have made it all by yourself and even coded it. Make your own DIY cardboard game that counts the scores automatically using an IR sensor, evive- an Arduino embedded platform and some art and craft materials to make your mini basketball arcade

Components Required
| Components | Quantity |
|---|---|
| evive | 1 |
| PictoBlox | 1 |
| IR Sensor | 3 |
| Micro Servo Motor with Accessories | 1 |
| Ice Cream Stick | 5 |
| Thick Cardboard | 1 |
| Colour Chart Paper | 2 |
| Glue Gun and Glue Sticks | 1 |
| Jumper Cable 20cm | Few |
Steps to be followed
| Sl. no. | Steps |
|---|---|
| Step 1 | The cutouts |
| Step 2 | Making the Ground |
| Step 3 | Attaching the Servo |
| Step 4 | Attaching the Roof and the Window |
| Step 5 | Making the Basketball Nets |
| Step 6 | Making the Catapult |
| Step 7 | Making the Garage |
| Step 8 | Beautification of the Arena |
| Step 9 | Adding the Scoreboard |
| Step 10 | Code the Rules |
| Step 11 | Conclusion |
Reference
3. MARBLE ARCADE

THINGS REQUIRED FOR THE PROJECT ARE AS FOLLOWS:
| SI NO | COMPONENTS | QUANTITY REQUIRED |
|---|---|---|
| 01 | Evive | 01 |
| 02 | Wires | 05 |
| 03 | Card board | 01 |
| 04 | A4 size sheets | 02 |
| 05 | Blue marbles | 05 |
| 06 | Hot glue gun and glue sticks | 01 |
| 07 | Yellow marbles | 05 |
| 08 | Obstruction detection sensors | 02 |
STEPS:
| SI NO | STEPS | BUILDING GUIDE |
|---|---|---|
| 01 | STEP 01 | Printing the satellite on a blank paper |
| 02 | STEP 02 | Building up the machine apparatus |
| 03 | STEP 03 | Adding the sensors and scoreboard |
| 04 | STEP 04 | Attaching the cover to the sides |
| 05 | STEP 05 | Beautification of the machine |
| 06 | STEP 06 | Coding the rules |
| 07 | STEP 07 | Testing of the gaming machine |
| 08 | STEP 08 | Conclusion |
REFERENCE:
https://www.youtube.com/watch?v=vRHE6fEZAro&t=0s
4. MAGNETIC TABLE HOCKEY
You must have played Air Hockey! Pay few Rupees to the gaming zone and just start scoring goals to beat your friends. Isn't it very addictive? You must have thought of keeping one table at home, but hey! ever thought of making it yourself?
 We will be making our own automated DIY magnetic table hockey. We will add a micro-controller, obstacle detection sensors to count goals and keep track of time. No need to keep track of goals, the sensors and evive will do it while we enjoy playing and concentrating on the ball. RGB LEDs add vibrant colors to this cool DIY creation.
What All We Need to Make Magnetic Table Hockey?
We need following stuffs:
- Thick Cardboard (we used 5mm corrugation sheet) (1 sq meter)
- Hard Cardboard (should be very flat)
- Glue gun and Glue gun stick
- Colored paper (prefer to use 3 different colored papers for playing arena and two opponents)
- Ruler
- Permanent Marker
- Paper Cutter
- Few All-pins
- Glue
- Ball
- 4 Strong Neodymium Magnets (about 10mm dia and 4mm height)

We need some electronics to automate timing, lights and goal scoring:
- evive (or an Arduino with LCD/TFT screen)
- https://store-usa.arduino.cc/products/arduino-mega-2560-rev3?selectedStore=us
- https://thestempedia.com/shop/evive-kits/evive/
- 2 IR Sensors
- Jumper wires
- 5V RGB LED stripe (evive's inbuilt Li-ion battery can give 5V or else 12V RGB LED stripe with power adapter/6 AA batteries)
The Gameplay
- Each game will be of 3 minutes and a toss will decide who is going to start.
- Each player will be given a magnetic striker and a stick with magnetic tip. The stick will be inserted from the slot made in the Shorter Side Mount. It will be below the Arena Bed and controlling the striker placed on top of Arena.
- The ball will be placed inside the rectangular region at the start of game or after each goal, on the side opposite to the one who scored the goal.
- Winner will be the team who score more goals or else the game will be drawn.


REFERENCES:
- https://create.arduino.cc/projecthub/evive/diy-magnetic-table-hockey-with-rgb-lights-and-sensors-c940f1?ref=tag&ref_id=game&offset=15
- https://www.youtube.com/watch?v=90Bo8-p4h84
5. SUBWAY SURFER
*
THINGS REQUIRED FOR THIS PROJECT ARE AS FOLLOWS:
| SI NO | COMPONENTS | QUANTITY REQUIRED |
|---|---|---|
| 01 | Evive | 01 |
| 02 | Servo motor | 01 |
| 03 | Wires | 05 |
| 04 | Card board | 01 |
| 05 | A4 size sheets | 02 |
| 06 | Aluminium foil | 01 |
| 07 | Hot glue gun and glue sticks | 01 |
| 08 | IR sensor | 04 |
| 09 | digital clock | 01 |
STEPS:
| SI NO | STEPS | BUILDING GUIDE |
|---|---|---|
| 01 | STEP 01 | Printing the path on a blank paper |
| 02 | STEP 02 | Attaching the paper to the cardboard in the form of a conveyor belt |
| 03 | STEP 03 | Attaching the servo motor to the board |
| 04 | STEP 04 | Making of the characters |
| 05 | STEP 05 | Attaching the characters to the motor |
| 06 | STEP 06 | Attaching the cover to the sides |
| 07 | STEP 07 | Adding the digital clock |
| 08 | STEP 08 | Adding the scoreboard |
| 09 | STEP 09 | Beautification of the runway path |
| 10 | STEP 10 | Coding the rules |
| 11 | STEP 11 | Testing of the gaming machine |
| 12 | STEP 12 | Conclusion |
REFERENCE:
https://www.youtube.com/watch?v=YK9_i47t6_8
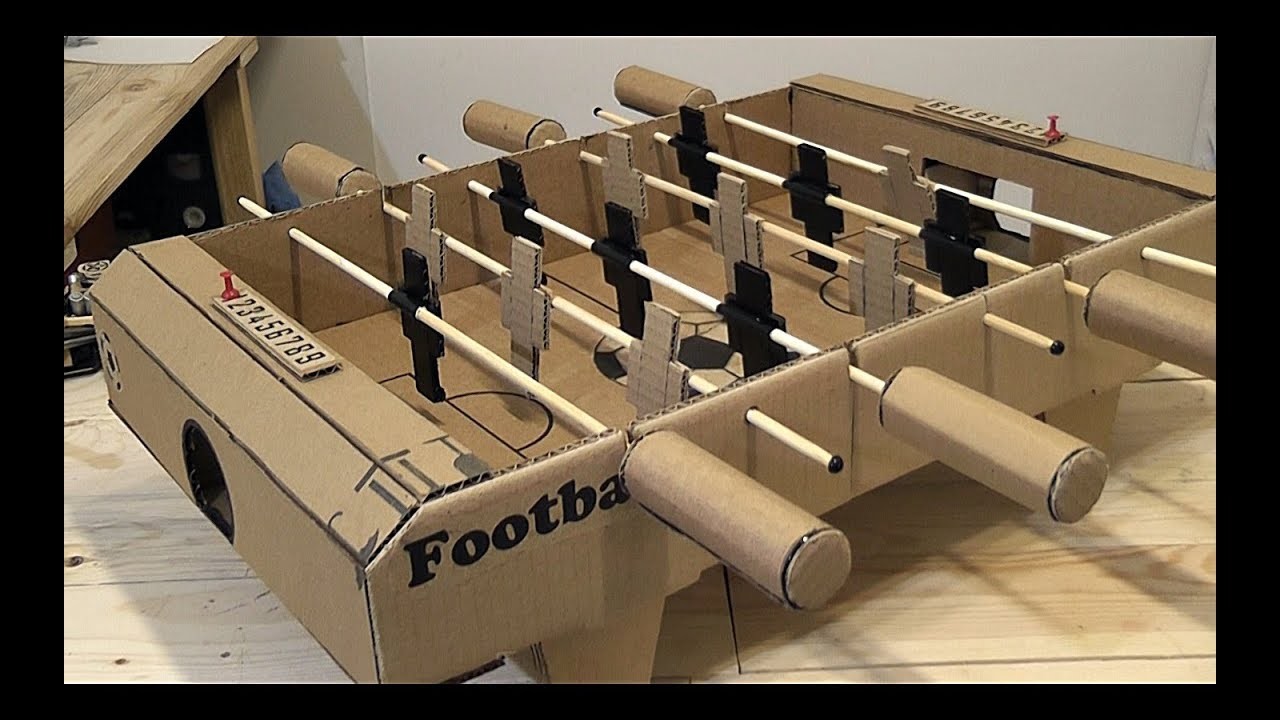
6. FOOTBALL

THINGS REQUIRED FOR THIS PROJECT ARE AS FOLLOWS:
| SI NO | COMPONENTS | QUANTITY REQUIRED |
|---|---|---|
| 01 | Evive | 01 |
| 02 | Wires | 05 |
| 03 | Card board | 01 |
| 04 | A4 size sheets | 02 |
| 05 | Obstruction detection sensor | 01 |
| 06 | Hot glue gun and glue sticks | 01 |
| 07 | Ping pong balls | 05 |
STEPS:
| SI NO | STEPS | BUILDING GUIDE |
|---|---|---|
| 01 | STEP 01 | Making the arena |
| 02 | STEP 02 | Creating the characters |
| 03 | STEP 03 | Positioning of the characters |
| 06 | STEP 06 | Attaching the cover to the sides |
| 07 | STEP 07 | Adding the sensors to the goal post |
| 08 | STEP 08 | Beautification of the arena |
| 09 | STEP 09 | Adding the scoreboard |
| 10 | STEP 10 | Coding the rules |
| 11 | STEP 11 | Testing of the gaming machine |
| 12 | STEP 12 | Conclusion |
REFERENCE:
https://www.youtube.com/watch?v=QJxZWJAA9sc
7. CARDBOARD GAME

THINGS REQUIRED FOR THIS PROJECT ARE AS FOLLOWS:
| SI NO | COMPONENTS | QUANTITY REQUIRED |
|---|---|---|
| 01 | Evive | 01 |
| 02 | Rubber bands | 05 |
| 03 | Wires | 05 |
| 04 | Card board | 01 |
| 05 | A4 size sheets | 02 |
| 06 | Obstruction detection sensor | 01 |
| 07 | Hot glue gun and glue sticks | 01 |
STEPS:
| SI NO | STEPS | BUILDING GUIDE |
|---|---|---|
| 01 | STEP 01 | Making the arena |
| 02 | STEP 02 | Creating the characters |
| 03 | STEP 03 | Positioning of the characters |
| 06 | STEP 06 | Attaching the cover to the sides |
| 07 | STEP 07 | Adding the sensors to the board |
| 08 | STEP 08 | Beautification of the arena |
| 09 | STEP 09 | Adding the scoreboard |
| 10 | STEP 10 | Coding the rules |
| 11 | STEP 11 | Testing of the gaming machine |
| 12 | STEP 12 | Conclusion |
REFERENCE:
https://www.youtube.com/watch?v=qOsJnkr9ep0
8. BUZZ WIRE GAME

MATERIALS REQUIRED FOR THIS PROJECT ARE AS FOLLOWS:
| SI NO | COMPONENTS | QUANTITY REQUIRED |
|---|---|---|
| 01 | Glue gun with glue sticks | 01 |
| 02 | Copper wire | 01 |
| 03 | Cardboard | 01 |
| 04 | Evive | 01 |
| 05 | Alarm | 01 |
| 06 | Wires | 03 |
STEPS TO BE FOLLOWED:
| SI NO | STEPS | BUILDING GUIDE |
|---|---|---|
| 01 | STEP 01 | Making the cardboard machine |
| 02 | STEP 02 | Adding copper wire |
| 03 | STEP 03 | Adding the final arrangements |
| 04 | STEP 04 | Adding the sensors and alarms |
| 05 | STEP 05 | Adding the scoreboard |
| 06 | STEP 06 | Coding the instructions |
| 07 | STEP 07 | Testing of the game |
| 08 | STEP 08 | Conclusion |
