Installation - QlikPreSalesDACH/Qlik-Sense-Agent GitHub Wiki
General
- Qlik Sense June 2017
- Governed Metrics Service 2.0.5
- Node.js 6.11.0
Frontend (Mashup)
This sections describes how to install physically all necessary project files from the zip package to your local drive using npm (node package manager).
-
After downloading the project please extract the content of the zip package to a dedicated folder on your harddisk (e.g. C.\node\QSA).
-
Run command line prompt (cmd) as an administrator and navigate to your dedicated folder.
-
Run "npm install" npm will install all required packages in the folder node_modules

-
All files are stored now.
The app will gather all necessary metadata from your BI environment. The app is stored under "bin/QSA - Metadata App NOV 2017.qvf". (Please import the app which matches to your Qlik Sense Version)
- Import the application into your Qlik Sense QMC.
- Open the imported application through the Qlik Sense HUB.
- In order to gather all information from your Qlik Sense Enterprise System you need to create a Dataconnection for the Qlik PostgreSQL Database.
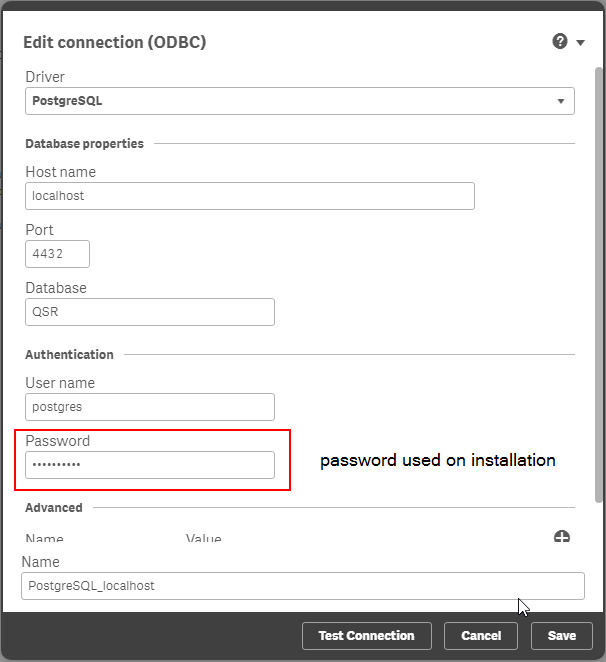
- Test the connection. If it is possible to connect to the database successfully insert the connection-string, comment/delete the old connection-string and reload the application.
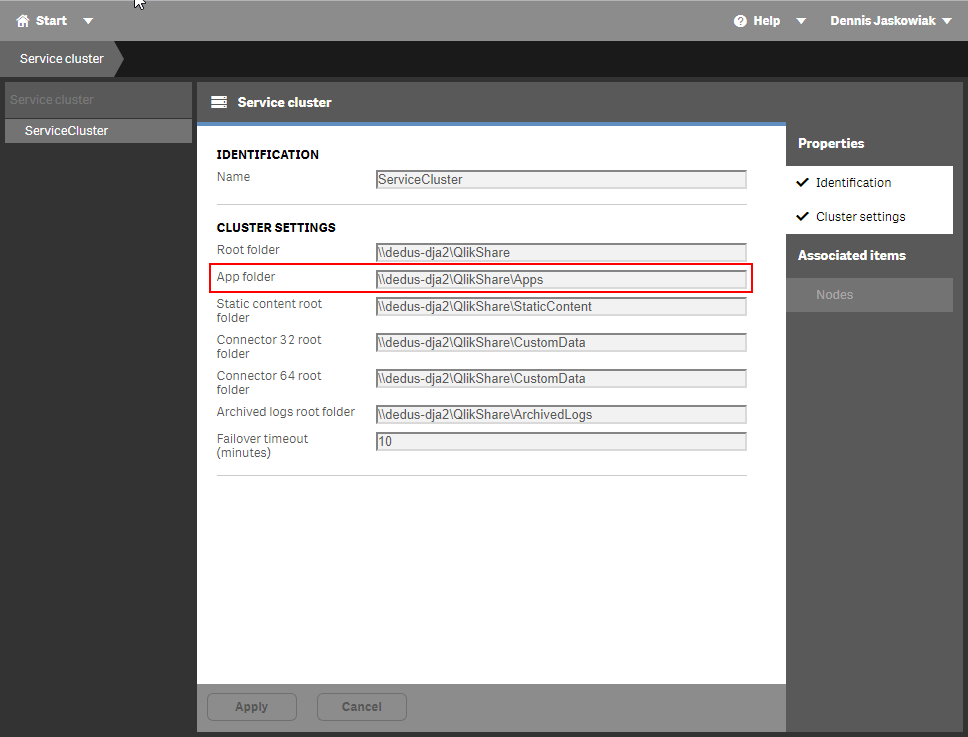
- Create a new folder-dataconnection to your binary-app-folder. Create a security-rule to ensure that other users can read from this dataconnection. The binary-app-folder is part of your "shared persistence". You can find the path to this folder in your QMC under "Service cluster"
-
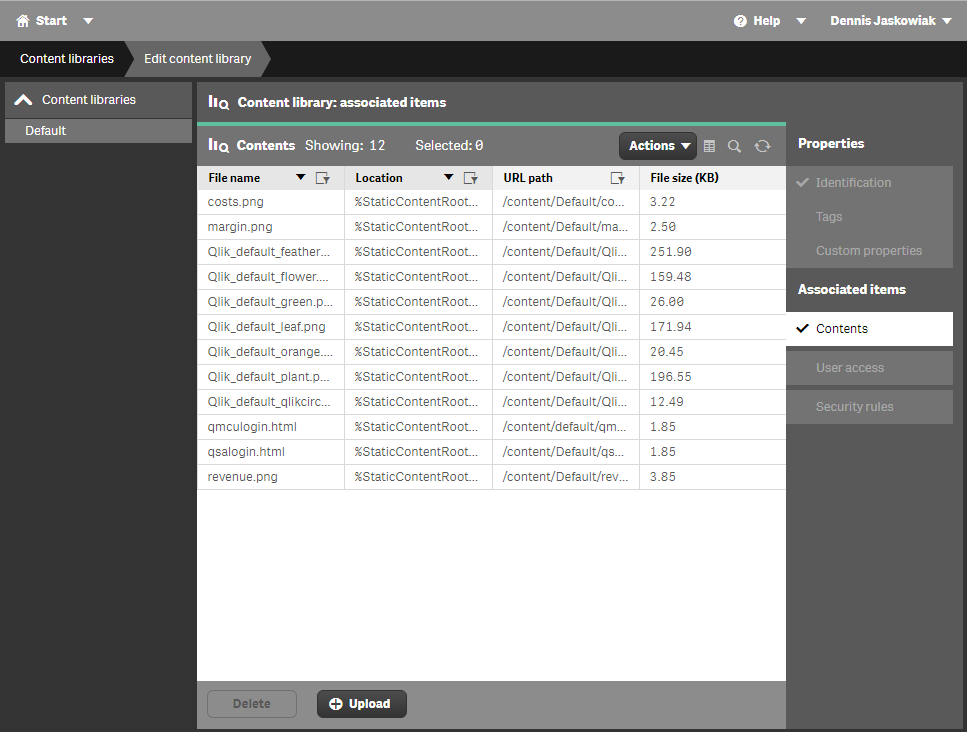
Import qsalogin.html into the "content library" named "Default" in QMC on your PROD system.
-
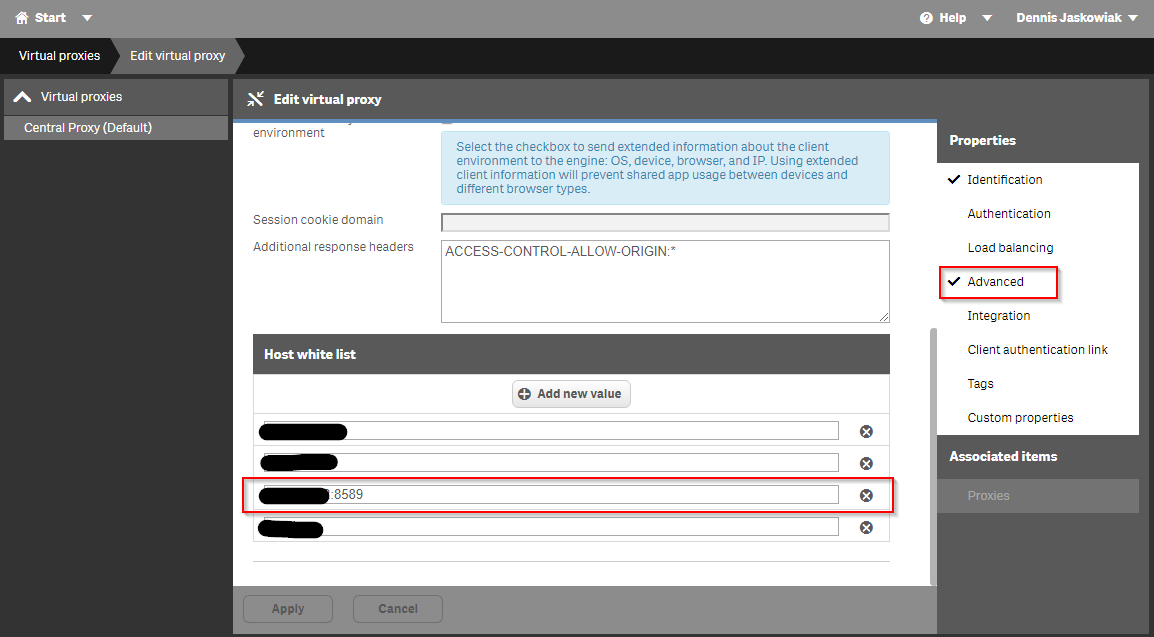
Add a Host white list entry to the whitelist of your virtual proxy. It needs to include the your port (eg. localhost:8589).
-
Now we need to import the certificates to ensure that during the Self-Service dialogue a new app gets created on a Qlik Sense System.
- Important: You need to use the certificates from the environment where you like to create the new applications on (Single- Node Installation: PROD; Multi- Node Installation: SANDBOX)
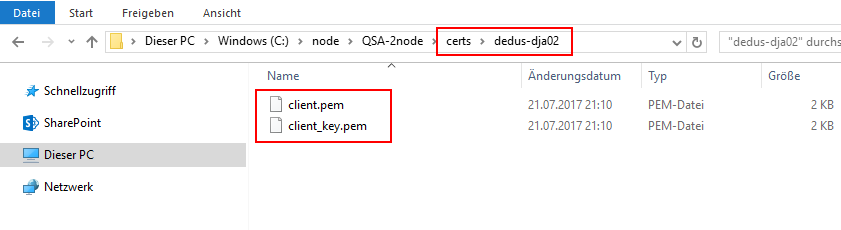
- Open the folder called certs
- Rename the folder hostname to the hostname of the destination-server where you want to create the new applications on.
- Pick your client.pem and your client_key.pem from your destination-server (Default path: C:\ProgramData\Qlik\Sense\Repository\Exported Certificates\ .Local Certificates) an copy them into the folder you have renamed in step 2.3.
-
Now it's time to set the parameters for your environment in the config files You need to modify 3 files in the QSAFolder.
-
/config/config.js: This file sets parameters related to the backend.
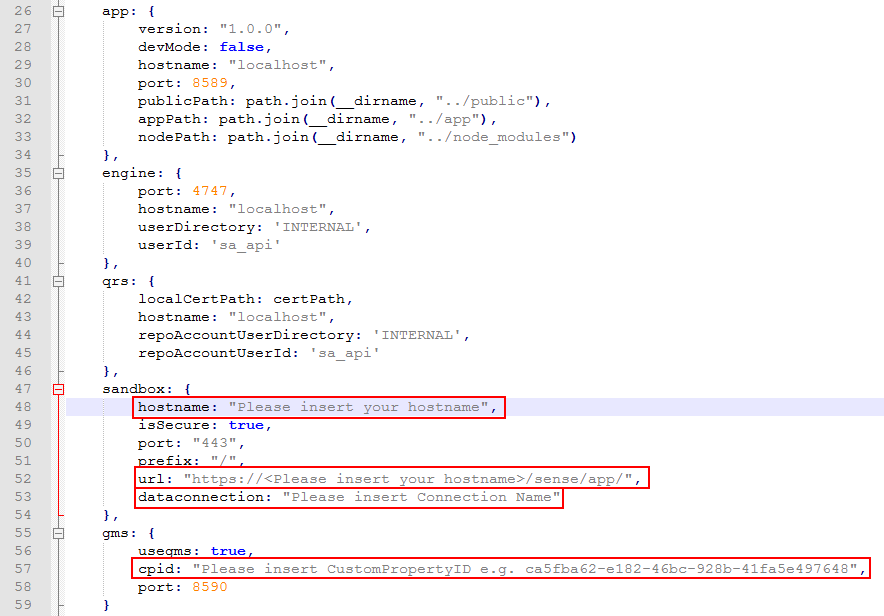
- sandbox.hostname - enter the hostname of your sandbox-maschine (if you are running a singel deployment insert the hostname of your PROD maschine)
- sandbox.url - add the sandbox.hostname into the url (remove "<>")
- sandbox.dataconnection - insert the name of your binary-app-folder dataconnection (configuration app point 5)
-
/app/config.json: This file sets parameters related to the mashup.
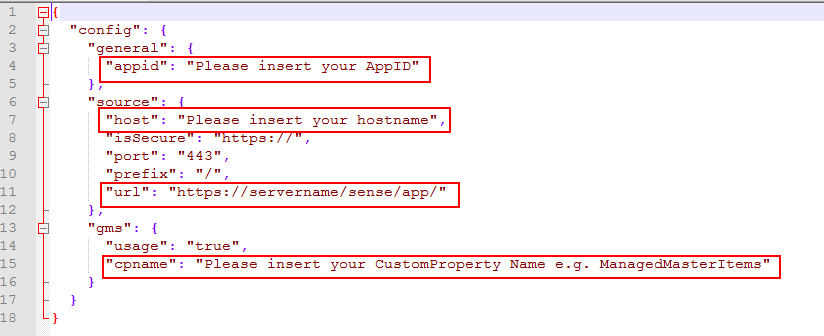
- general.appid - ID of the imported QSA - Metadata App.qvf App
- source.host - hostname of your PROD system
- source.url - url to open your app in Qlik Sense
- gms.cpname - Name of the CustomProperty you are using within Governed Metrics Service. By default this is "ManagedMasterItems". We highly recommend to keep the default name.
- gms.usage - In case you don't like to work with Governed Metrics Service set the parameter to "false".
-
/app/index.html: This files requires some ressources from your Qlik Sense System (require.js)
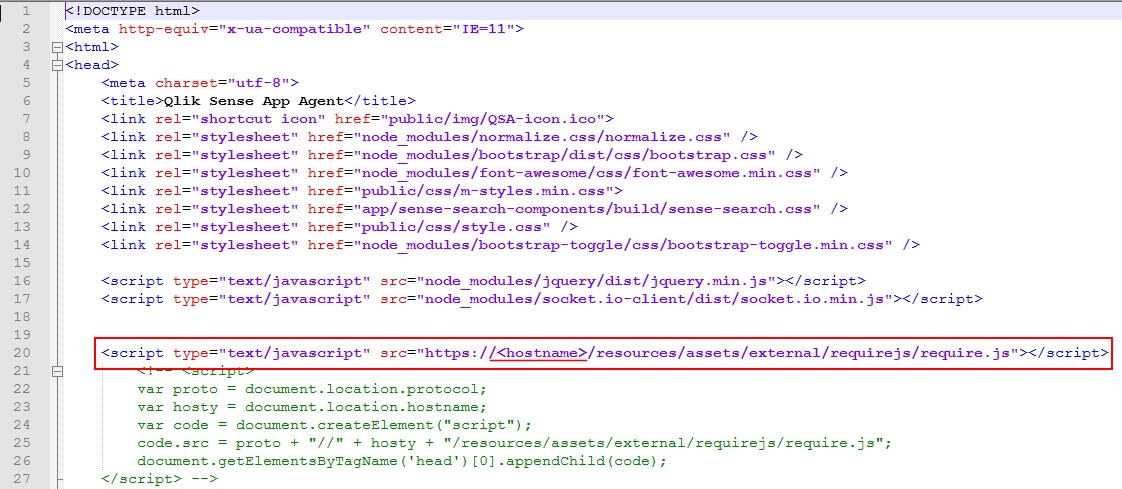 Please exchange "< hostname >" with the name of your Qlik Sense PROD System.
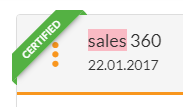
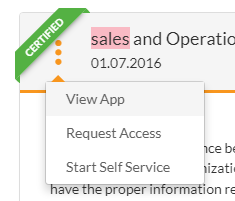
As you might have noticed some apps within the QSA have a certified ribbon on the left upper corner or some apps have the possibility to run the self-service process and others not.
 This functionality get's managed through Tags in the QMC of the Qlik Sense PROD system.
- At first you need to create 2 new Tags within the QMC
- Certified
- SelfService
- Now tag your applications in the apps section of the QMC.
- Once your application has a "Certified" Tag in the QMC it will appear within QSA with a "CERTIFIED ribbon"
- If an application has the Tag "SelfService" you can start the Self-Service process for this particular application.
! Please keep in mind to reload your application before the Tag impacts the behaviour in QSA. !
In order to run "Request Access" you need to embed your own requestion function. To do so go to the file ./app/sense-search-components/build/sense-search.js.
