Cascade Site Migration to 2.0 Templates - PurdueMarketingAndMedia/purdueTemplates-2015 GitHub Wiki
Introduction
With the release of the new templates, users may want to migrate their existing Cascade sites that were using the previous 1.6 templates. We’ve made as few changes in Cascade as possible to make the transition as easy as we could for everyone.
Disclaimer: This is not a one-size-fits-all solution, and will only work the best for the base templates we provide. If you have any customizations to your site’s Content Types, there may be further steps you’ll need to take that won’t covered in this guide.
Changes
We have updated formats, blocks, and templates; any formats that were updated will now have a -3.0.0 Suffix; blocks will have a -2.0 suffix; all new templates are now named as v3.0.0 and kept in a folder named by the template type.
We have created new Configurations, now stored in the Purdue Global Cascade project, that all Cascade users should be able to view, named by each template type.
Note: Even though the template assets have been updated, the system-regions have stayed consistant. This is what makes swapping to the new templates so easy, and stops content from being deleted or changed.
Step-by-step Guide For Updating Your Site
- First you will need to make sure that your site is compatible with the easy upgrade by making sure you are using our 1.6 base templates and Cascade site structure.
a. Check that your site uses the Site Information block.
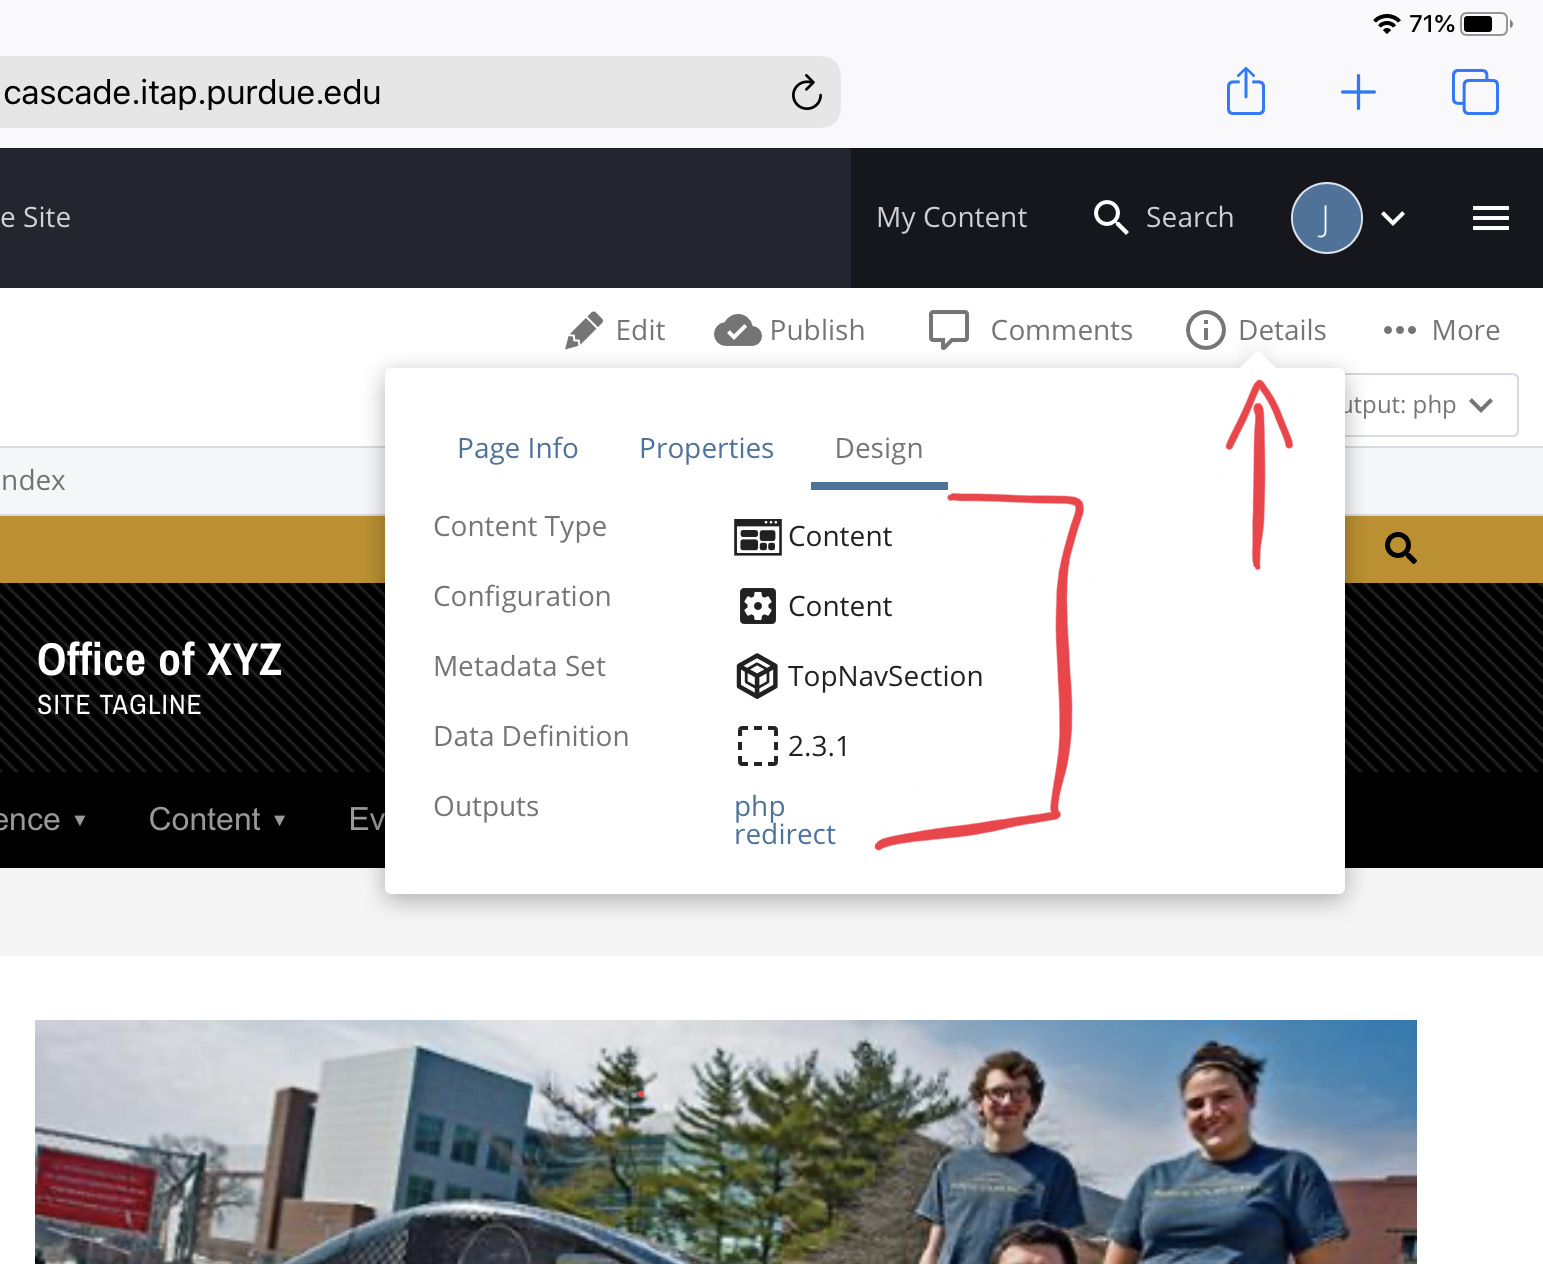
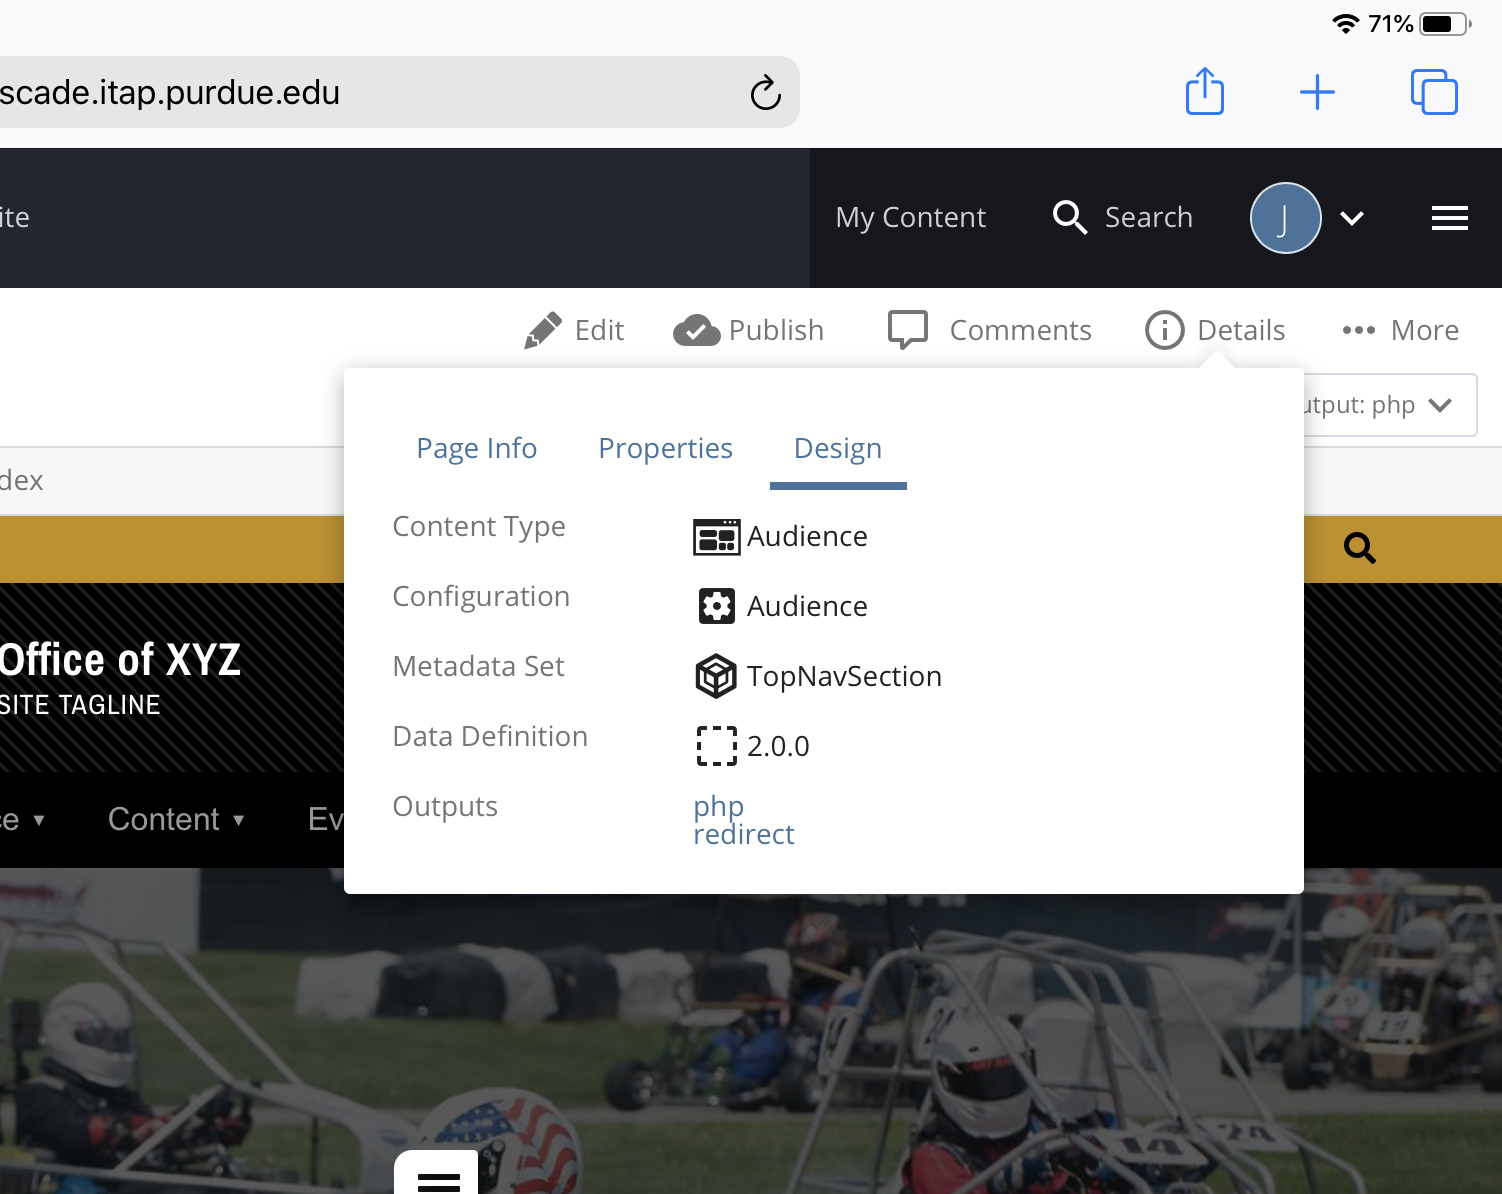
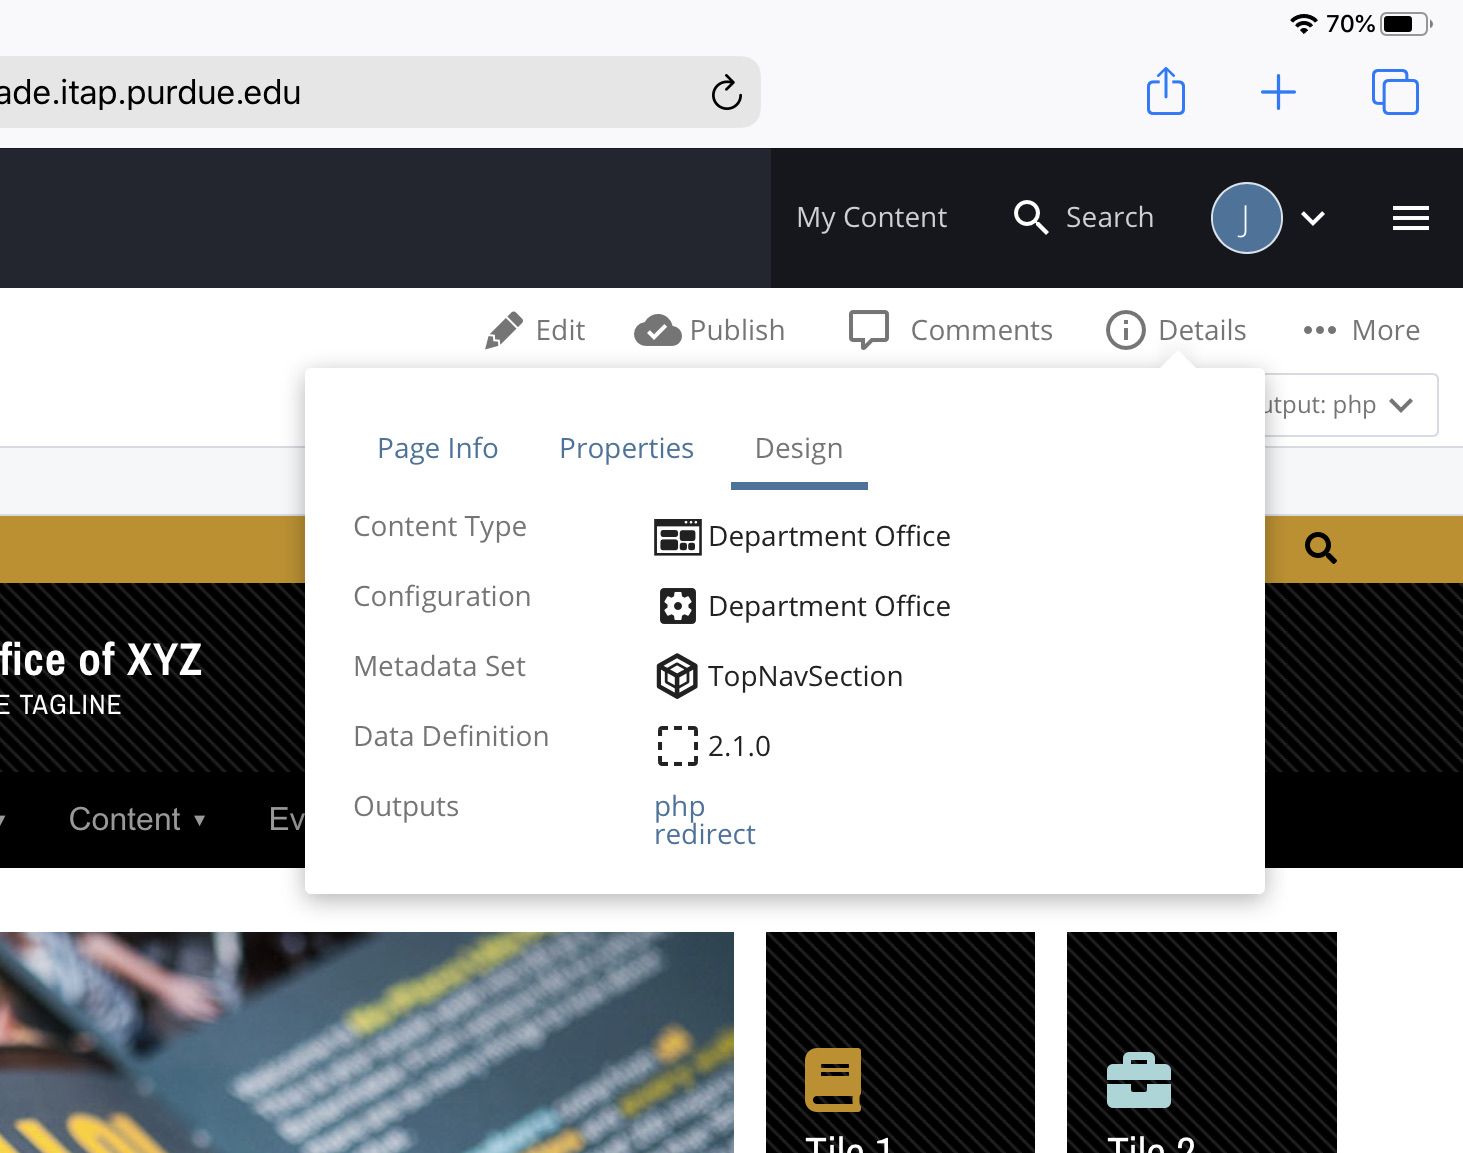
b. Check that your pages are using the base Content Type, Configuration, Metadata Set, Data Definition, and Outputs by clicking the ‘Details’ tab on a page. Yours should be similar to the below screenshots for each page major type:
-
Content Page:
-
Audience Page:
-
Department/Office Homepage:
-
College Homepage:
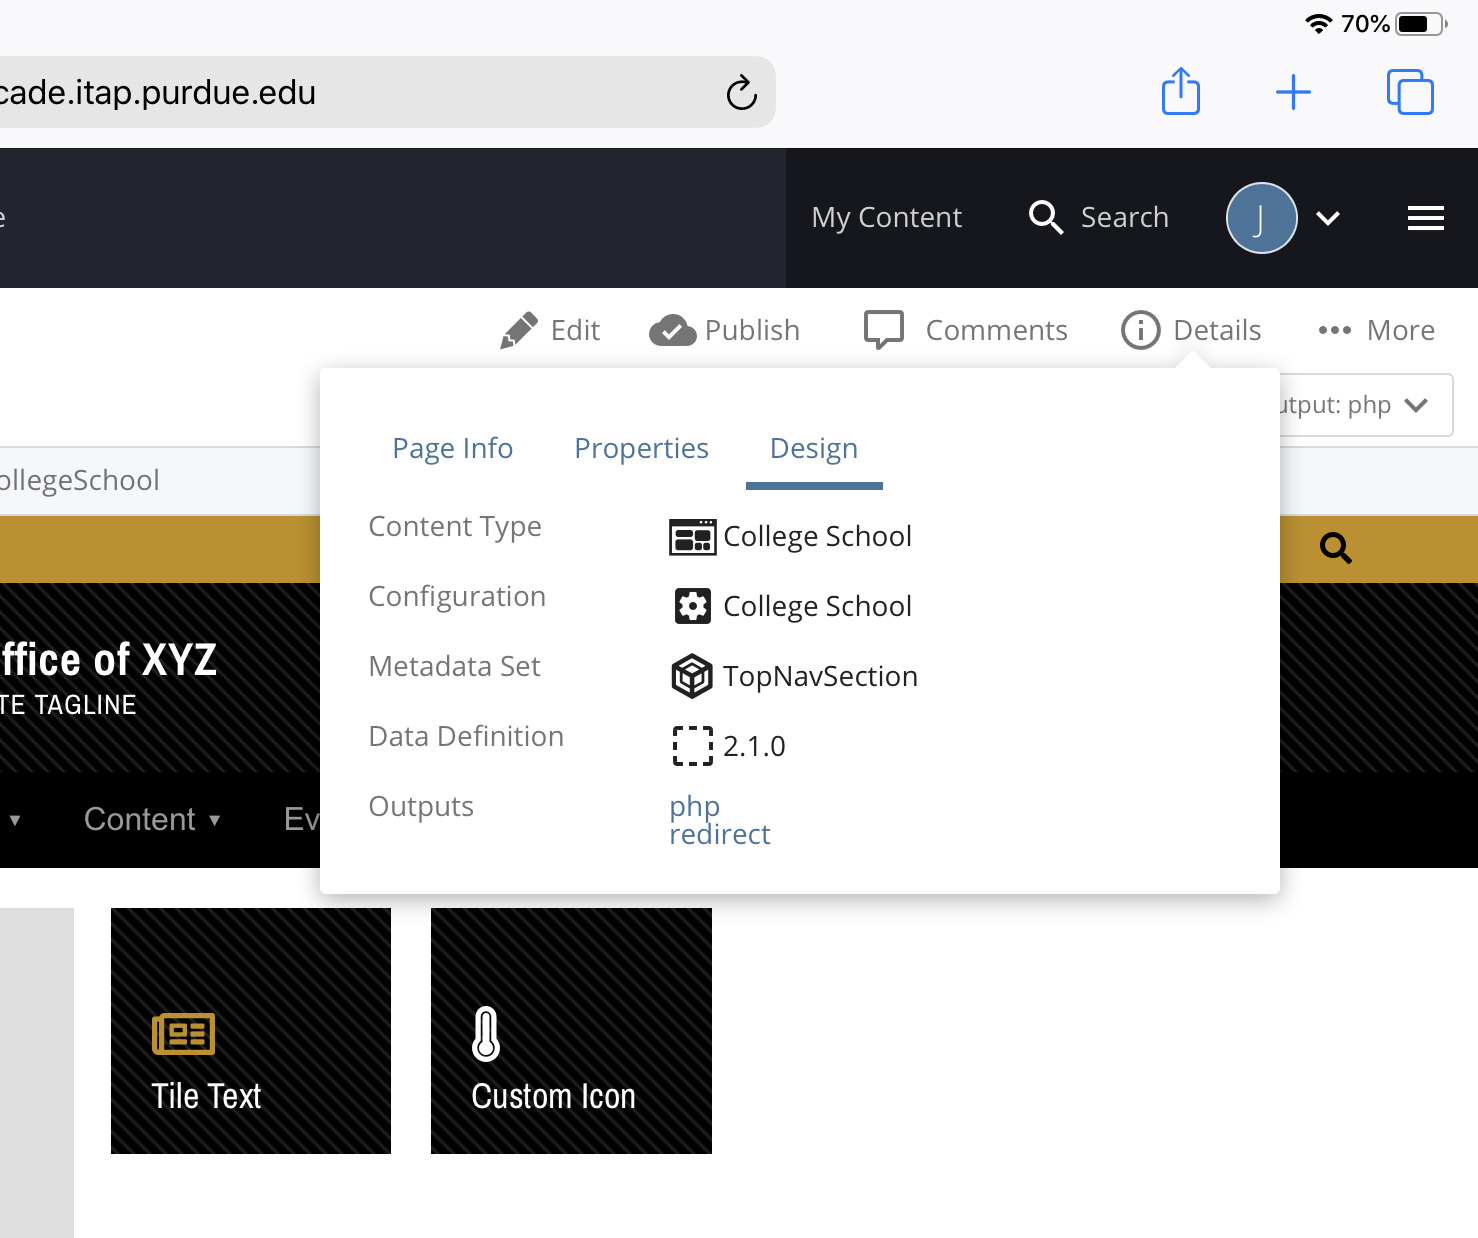
Note: Your Data Definition version may be slightly different than shown in the screenshots, but as long as the rest of the items are correct, then the data definition version shouldn’t matter.
- Next you’ll be copying the new Configurations to your own site.
a. Navigate to the Purdue Global project
b. Click the ‘Manage Site’ tab at the top navigation.
c. Select the ‘Configurations’ option in the left menu.
d. Select all listed Configurations, then click the copy button.
See steps in Fig. 1
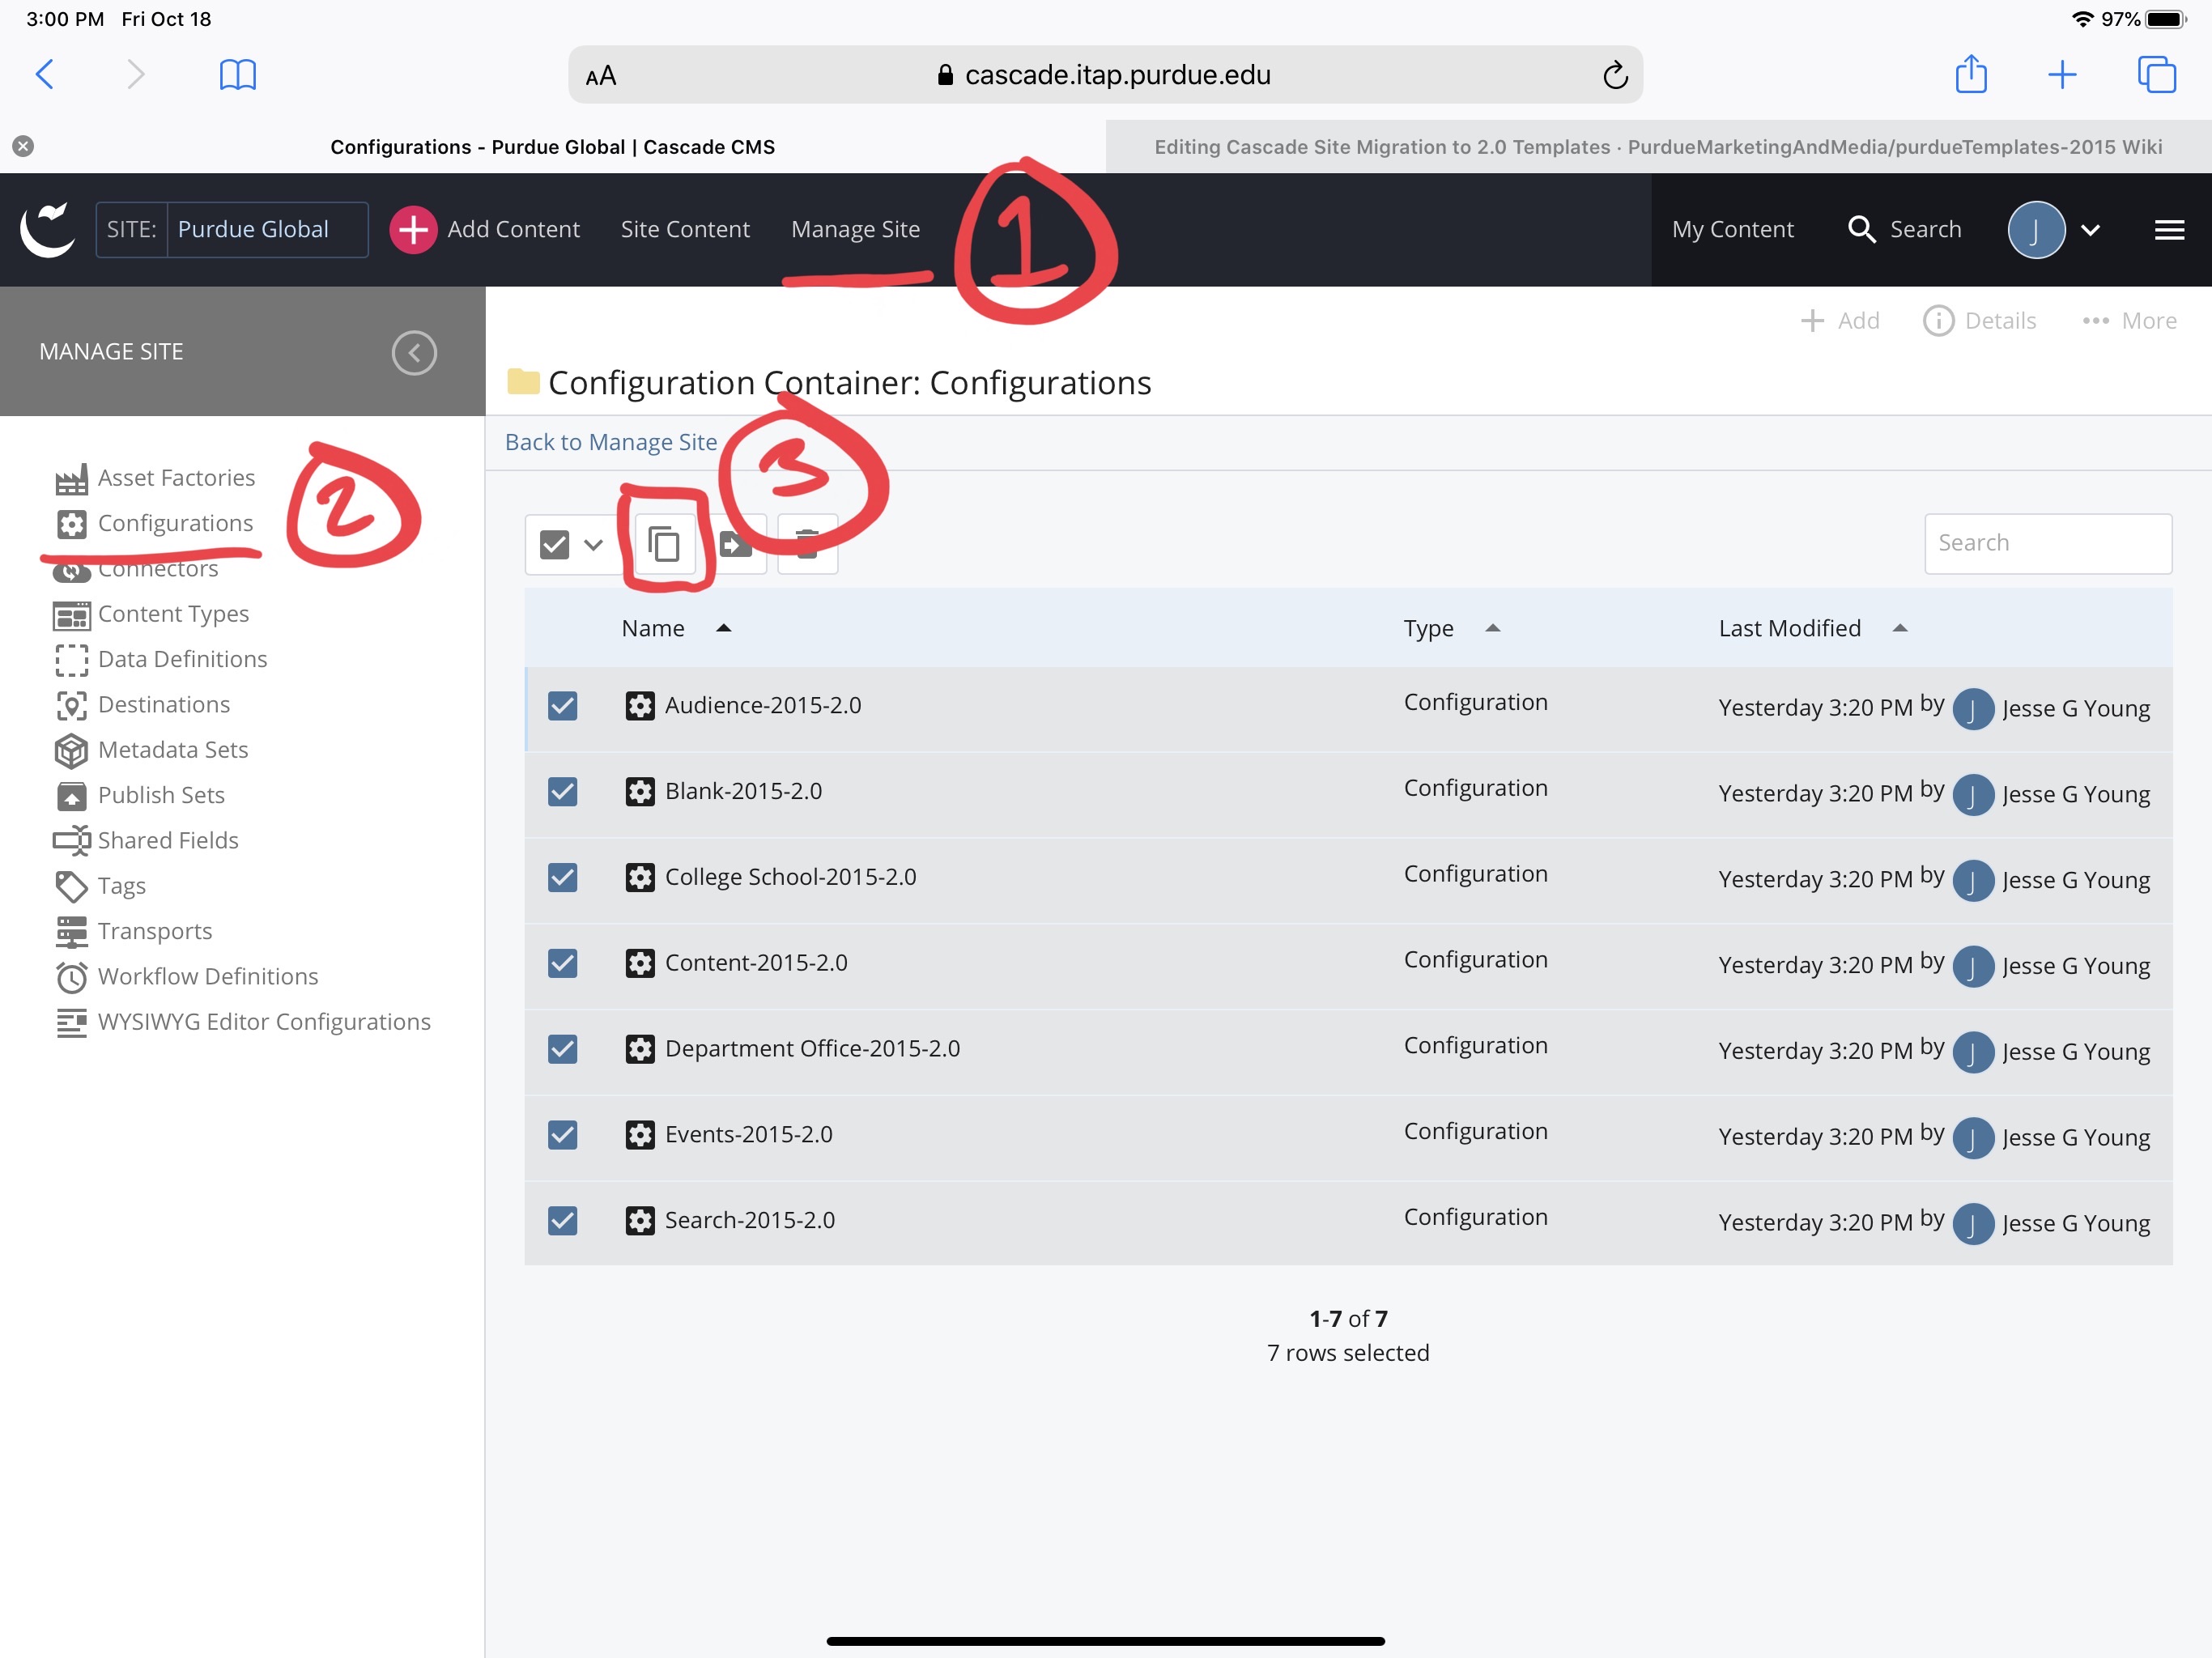 Fig. 1
e. A dialog will appear where you will need to select the destination for the assets. Select your site in the dropdown (you can type in the dropdown field to help find your site), then select the ‘Configurations’ folder, and click ‘Copy’
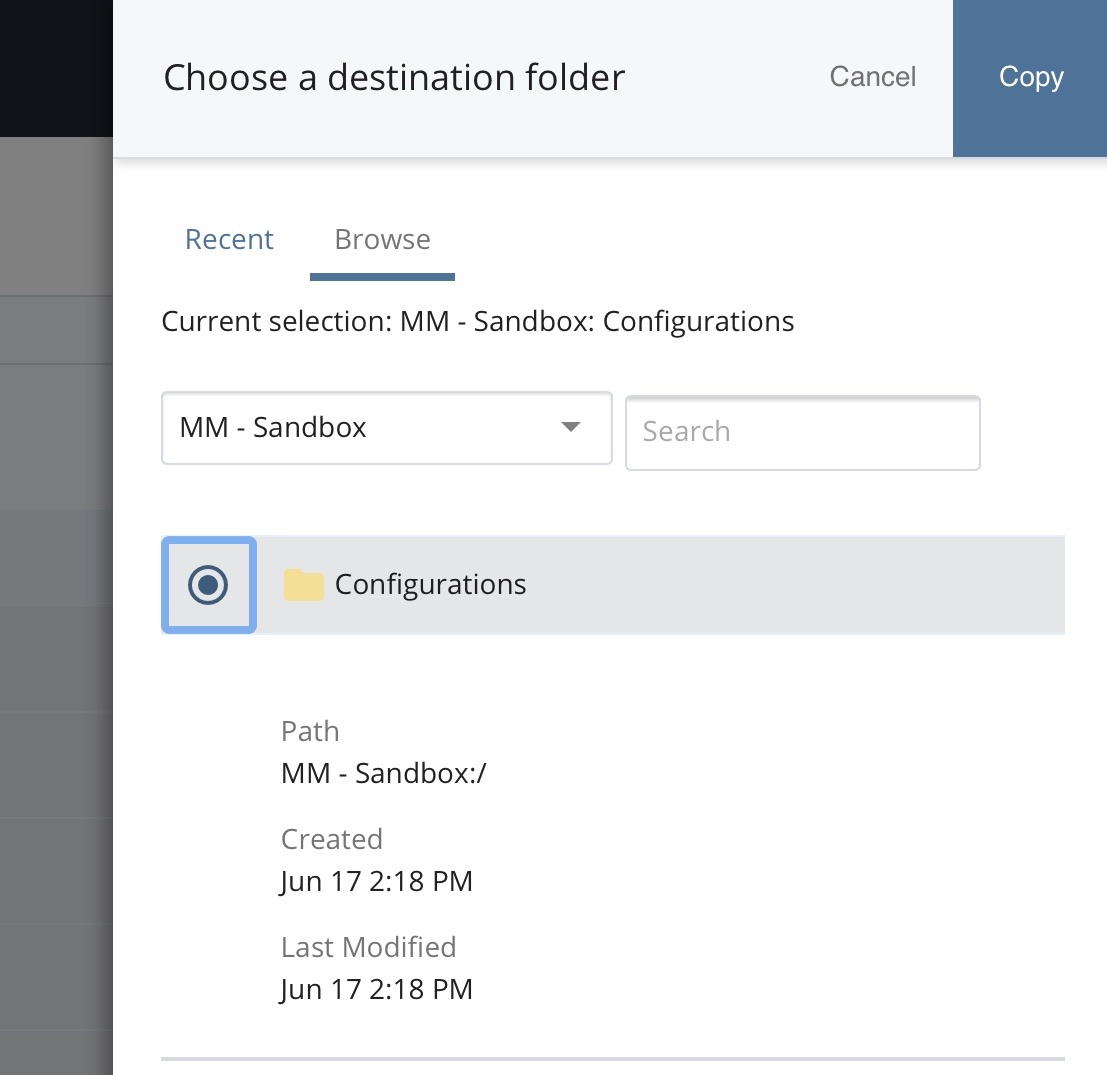 Fig. 2
- Before connecting your site’s Content Types to the new Configurations, there are some system regions that you will want to reconnect to corresponding assets that are stored on a site-by-site basis.
a. For each new configuration, edit the configuration, then as you scroll down you will be going down the list of system regions associated with the configuration based on the connected template. Most blocks and formats are connected at the template level. Some extra defaults are set at the configuration level. You’ll be connecting your site-specific blocks to these configurations so that you won’t have to connect them for each and every page.
b. Look for items such as this:

Here we see the name of the system region and the block and format connected to that region. On the left it shows that this setting is currently set at the Configuration level. All, and only, the system regions you will need to edit will have this indicator.
c. The only system regions you need to edit are as follows:
Site Informationblock- body_scripts-site
- footer_column-3
- footer_column-4
- footer_signature
- footer_social-icons
- head_css-site
- head_google-analytics
- head_scripts-site
- head_sitename
- header_goldbar-google-search
- header_identity
head_metablock- head_meta-opengraph
- head_meta-schema
- head_meta-twitter
nav-mainblock- nav-main
For each simply click the existing block, then browse and select the corresponding block from your own site.
Site Informationis found in the root of your project:/Site Informationhead_metais found at path:/_internal/blocks/head_metanav-mainis found at path:/_internal/blocks/nav-main
Helpful Note: Once you browse to and select each block once, they will each show up in the recent tab of the selector dialog at the top of the list, which saves you from a lot more tedious clicking.
- Now you’ll want to go through your site’s Content Types and connect them with the new Configurations.
a. Select the Manage Site tab, then choose “Content Types” in the left menu.
b. For each Content Type, edit the Content Type, click the existing Configuration, then in the dialog that pops up, browse to and select the corresponding new Configuration.
See steps in Fig. 3
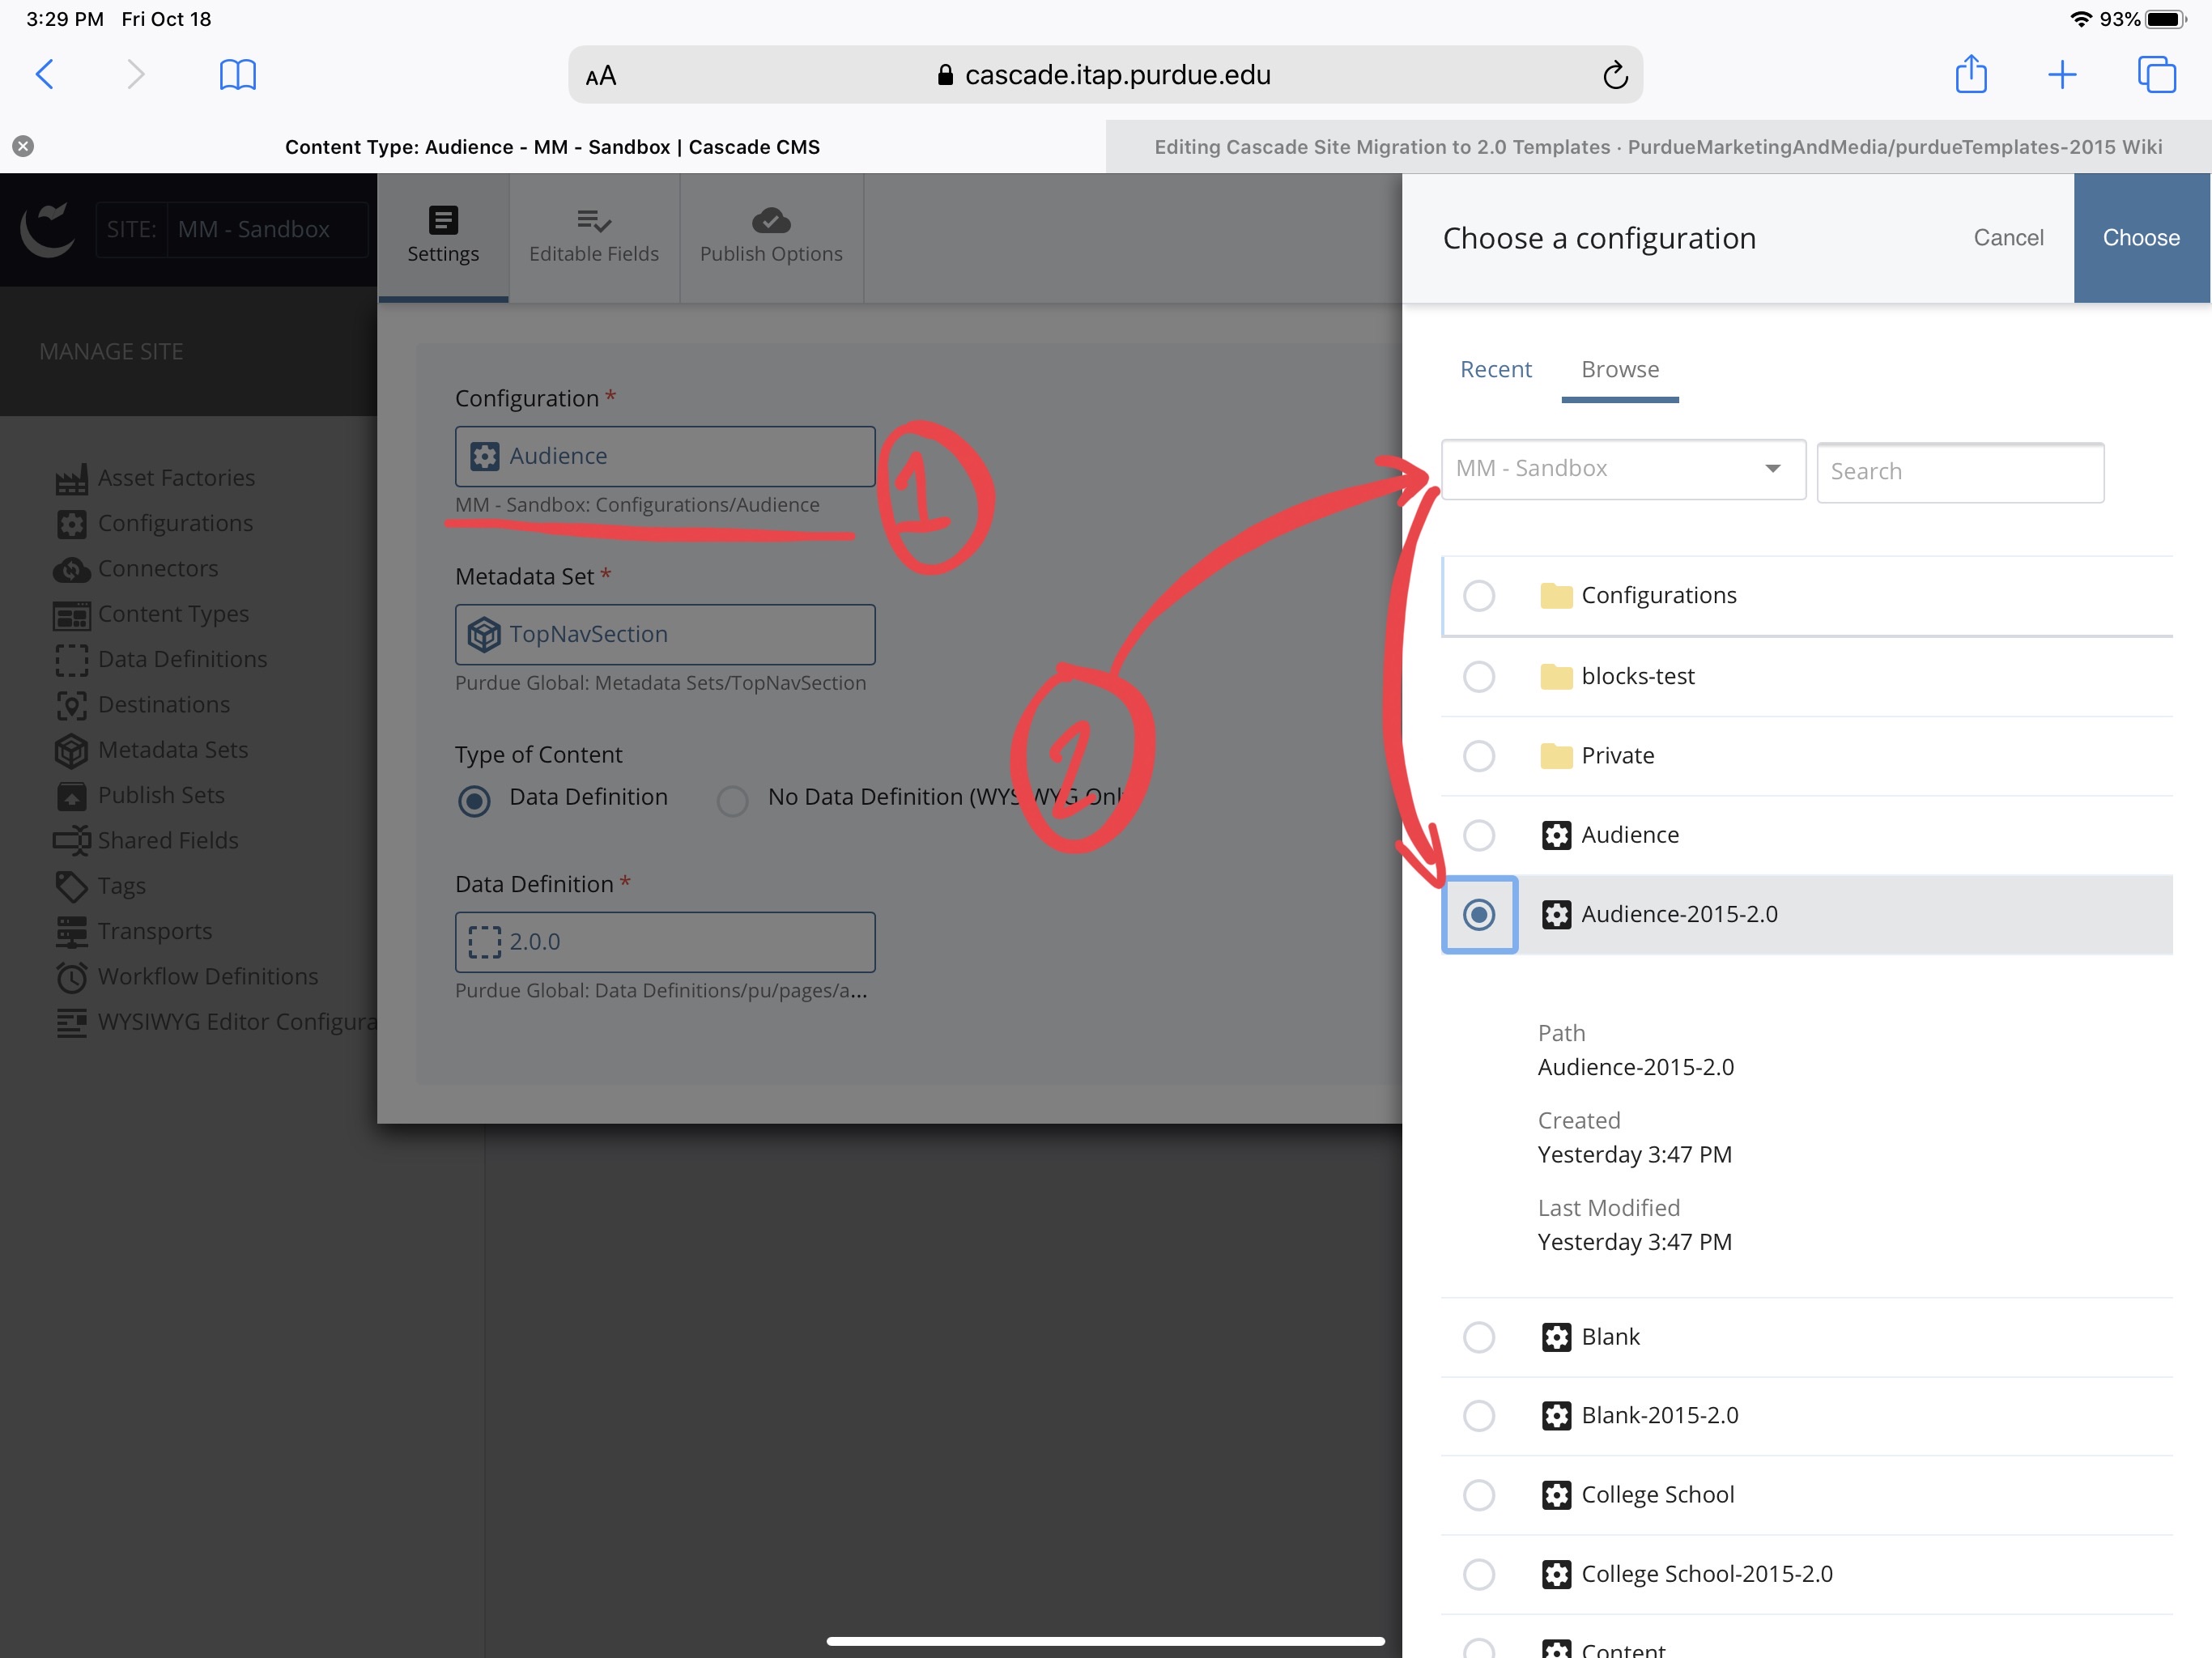 Fig. 3
Conclusion
Once you have connected each of the Content Types in your site to the new Configurations, your pages will have the new templates! 🎉
Be sure to test your pages and make sure everything is still working as you intended before publishing your site.
If you have any issues or further questions, email us at [email protected] and we will be happy to help!