Writing a Configurable Effect - PintaProject/Pinta GitHub Wiki
Most effects and adjustments allow the user to customize settings to achieve the desired effect.
This guide builds on the effect written in Writing an Effect or Adjustment. In that sample, the effect provided a basic night vision effect. This guide will expand that effect to be configurable, so that the user can customize the brightness of the effect.
The Basics
In order to make the effect configurable, there are two properties that we must override:
public override bool IsConfigurable => true;

public override void LaunchConfiguration ()
{
    // Invoke the ConfigDialogResponse event when the user accepts or cancels the configuration.
}
In the LaunchConfiguration method, you can do whatever is necessary for configuring the effect, such as showing a dialog with options for the user to manipulate.
Making it Easier
Most effects use the same types of options, such as value ranges, checkboxes, and combo boxes. Instead of creating a new dialog from scratch for each effect, Pinta provides the SimpleEffectDialog that will automatically construct a dialog for you based on the options that the effect supports.
For our effect, we want to provide a custom brightness that ranges from 0 to 1. To do this, we'll create a class that inherits from EffectData and contains our options. Additionally, we will provide the MinimumValue and MaximumValue attributes to indicate the possible range of values to Pinta (for a complete reference of the supported attributes and data types, see SimpleEffectDialog Reference):
public class NightVisionData : EffectData
{
    [MinimumValue(0), MaximumValue(1)]
    public double Brightness = 0.6;
}
In the effect's constructor, we will create a new instance of the class and assign it to the BaseEffect.EffectData property:
public NightVisionEffect ()
{
    EffectData = new NightVisionData ();
}
Next, we call BaseEffect.LaunchSimpleEffectsDialog in LaunchConfiguration to launch the effect dialog, and we also pass in the addin's localizer so that any strings in the dialog can be translated properly:
public override void LaunchConfiguration ()
{
    LaunchSimpleEffectDialog (AddinManager.CurrentLocalizer);
}
Finally, we can update our rendering algorithm to use the custom settings that the user selected:
protected override ColorBgra Render (in ColorBgra pixel)
{
	var data = (NightVisionData) EffectData!;
	return new ColorBgra () {
		G = Utility.ClampToByte ((int) ((float) pixel.B * 0.1 + (float) pixel.G * data.Brightness + (float) pixel.R * 0.2)),
		B = 0,
		R = 0,
		A = pixel.A
	};
}
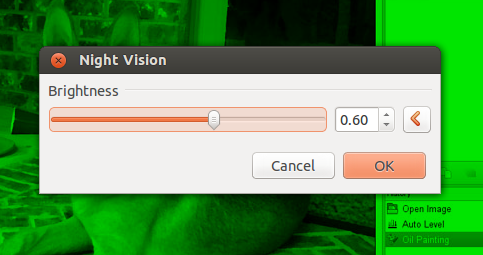
Now, we can compile and launch our effect to see the dialog being created for us! As you adjust the options, Pinta will update the canvas to show a live preview of the effect. Clicking OK will apply the effect, while clicking Cancel will cancel the effect.
Another Example
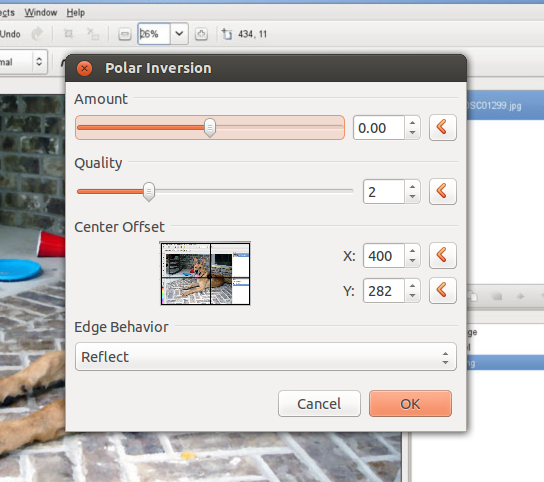
The above example is fairly simple, but the SimpleEffectDialog can be used to create complex dialogs. For example, here are the settings for the Polar Inversion effect in Pinta:
public class PolarInversionData : BaseEffect
{
    [MinimumValue(-4), MaximumValue(4)]
    public double Amount = 0;

    [MinimumValue (1), MaximumValue (5)]
    public int Quality = 2;

    public Gdk.Point CenterOffset;

    public WarpEdgeBehavior EdgeBehavior = WarpEdgeBehavior.Wrap;
}
Those settings produce the following dialog:
For a complete reference of the supported options, see SimpleEffectDialog Reference.