Pixhawk Autopilot - PS9888-2020-Sensors/Documentation GitHub Wiki
Set Up
For autopilot we are running Ardupilot flight stack on Pixhawk 2. We are using Mission Planner for Ground Control Station.
There is another option for ground control station, QGroundControl.
Quick Start Guide
It is highly recommended to read the documentations for Ardupilot and be familiar with it.
Remember to ALWAYS remove your props during setup!
The following procedure is a general guide for any types of vehicle.
- Flash a firmware according to your vehicle type
- Confirm motors and servos are connected in the correct order and are moving in the right directions
- Calibrate ESC and servo end points
- Calibrate compass
- Calibrate accelerometer
- Set appropriate flight modes
You may reverse servo direction from
Config --> Servo Outputs
Your vehicle should be able to achieve decent position estimate without any error.
Mission Planner Interface
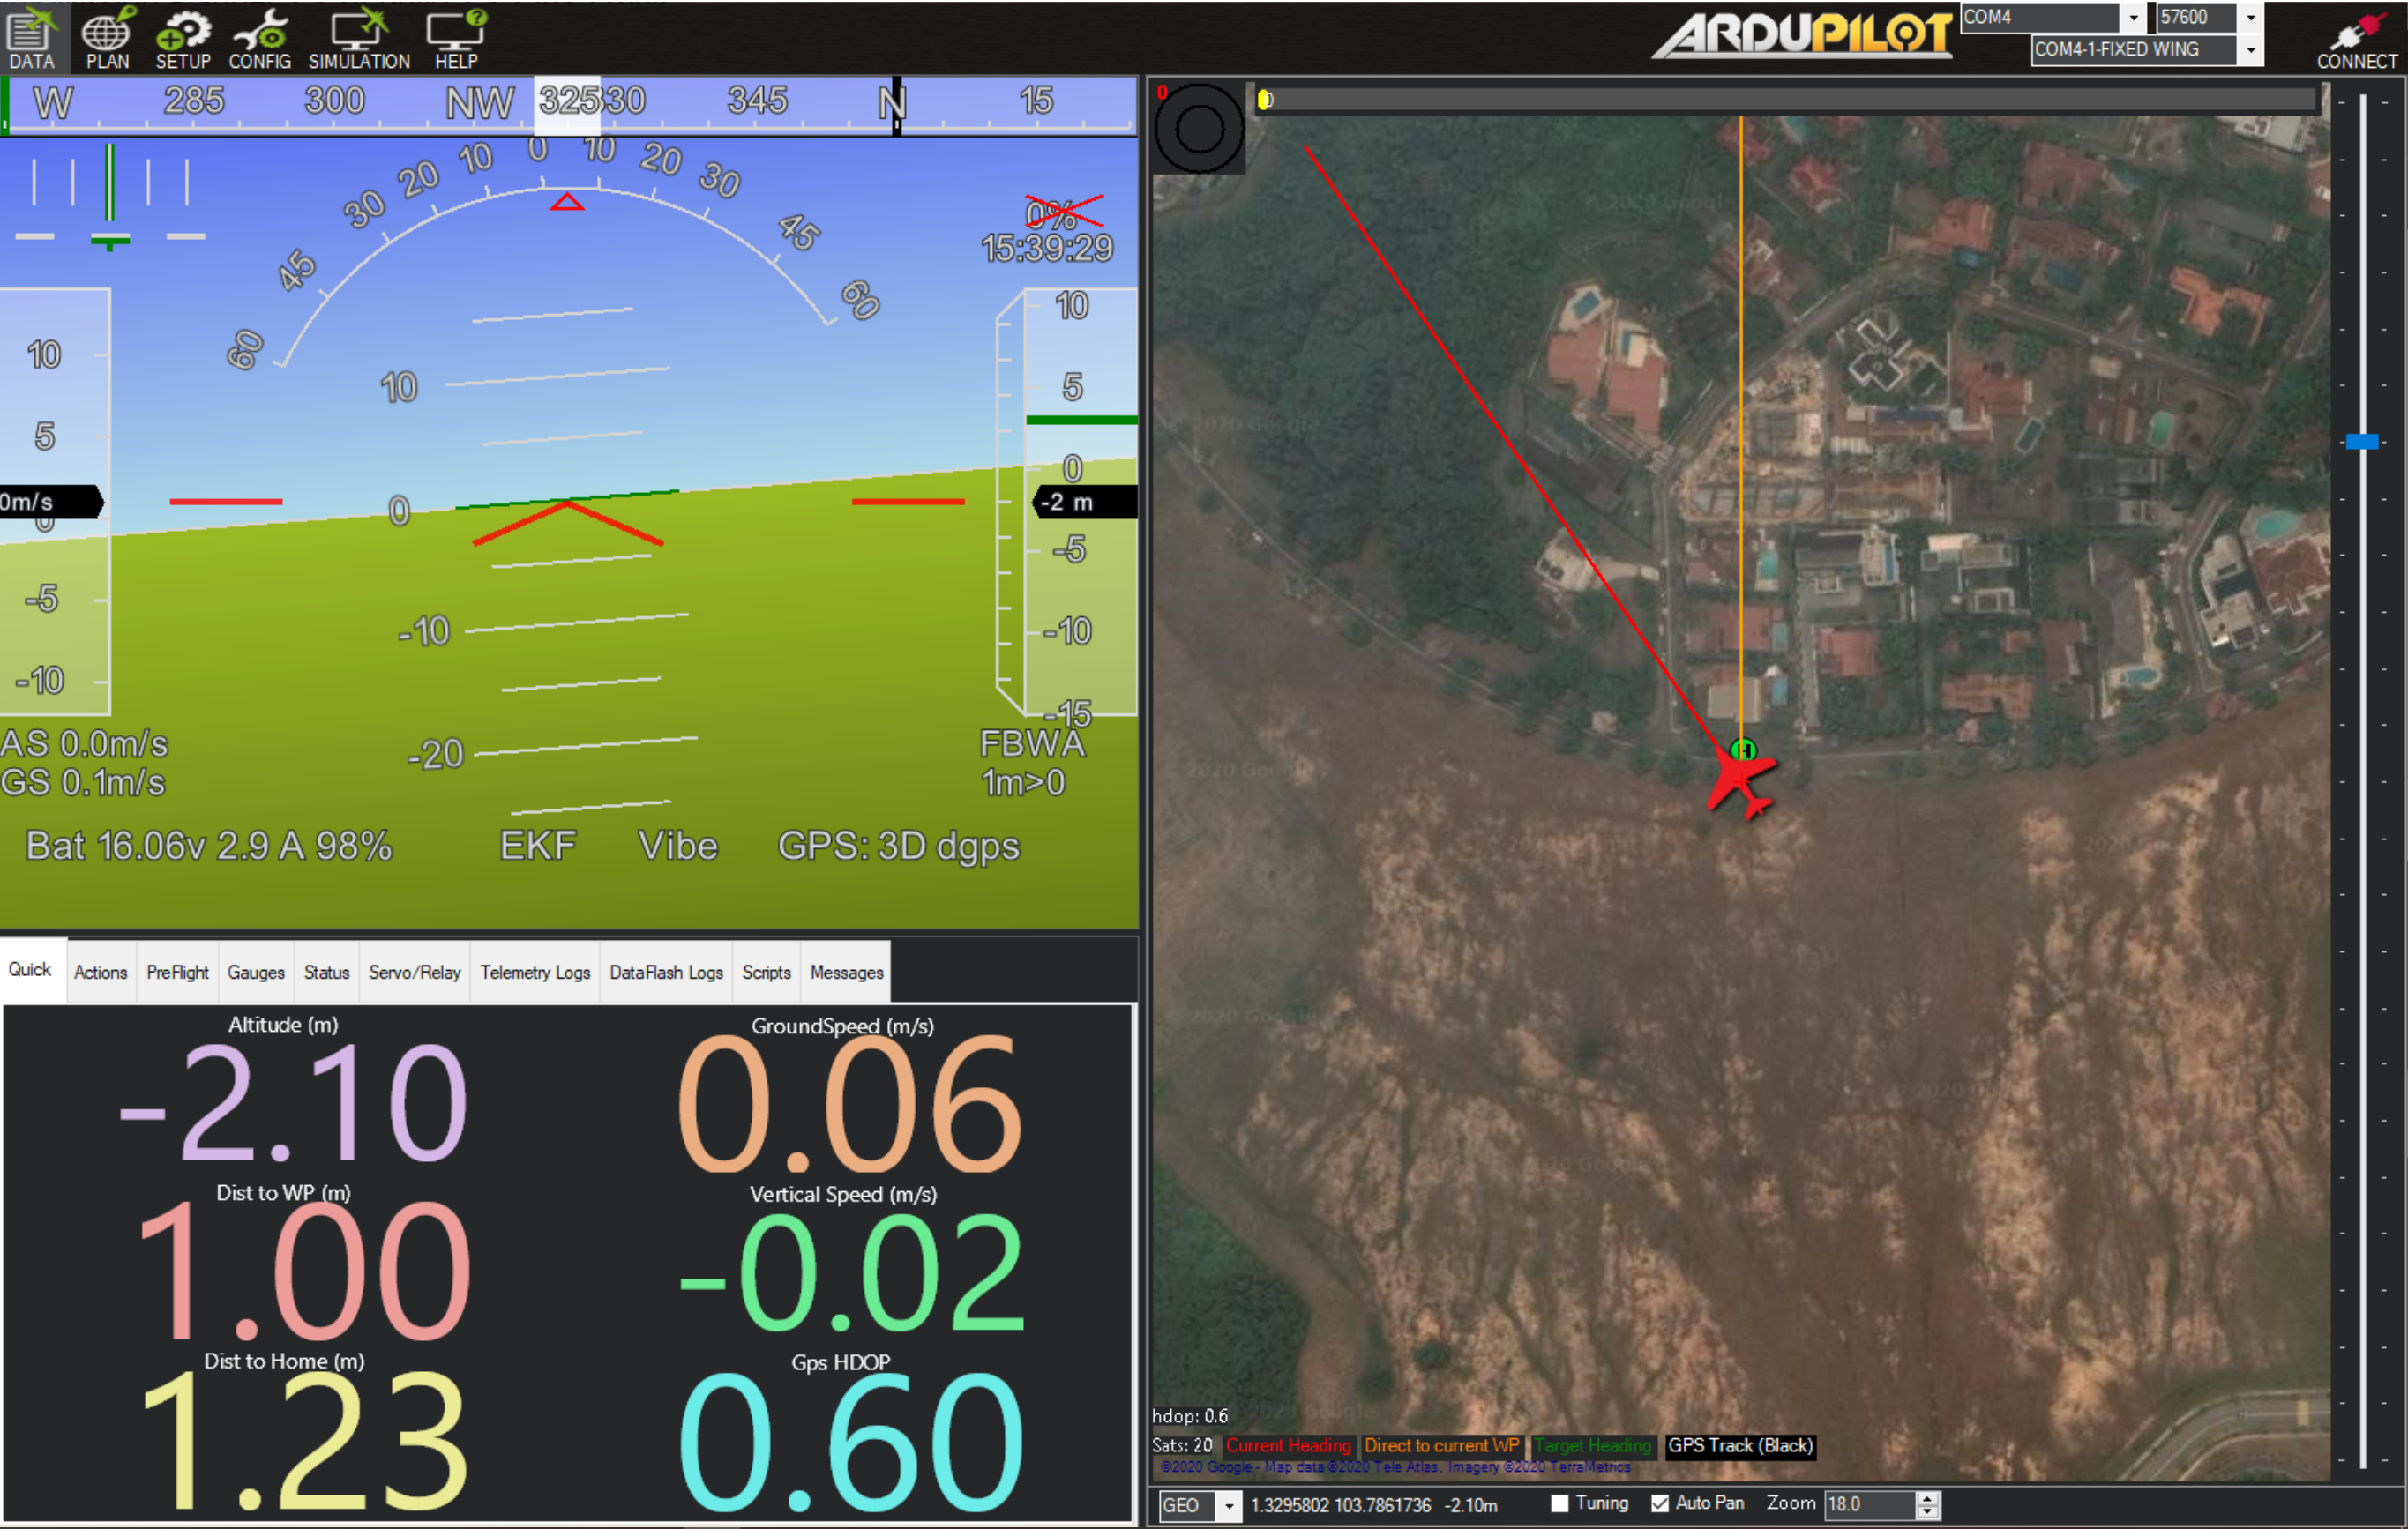
The main page of Mission Planner is divided into the flight status on the left and the mission status on the right. The left displays all important indicators such as flight mode, GPS accuracy, EKF status, altitude, battery status etc. The right panel shows details such as current position, heading and flight plans.
You may reorganize the quick readout on the bottom left by double clicking it. I personally like to have altitude, ground speed, climb rate, distance to home and GPS HDOP (GPS accuracy) in my quick readout.
On the top left panel, is the HUD (heads up display). It shows the vehicle's heading, roll angle, altitude, climb rate, air speed and ground speed over-layed on top of an artificial horizon.