Authentication in a Single‐Page Application via OpenAM using OAuth2 OIDC Protocol - OpenIdentityPlatform/OpenAM GitHub Wiki
This article is intended for developers of single-page applications (SPAs) who seek to configure user authentication. The authentication process will utilize the OAuth2/OIDC protocol with PKCE for enhanced security. OpenAM will serve as a designated authentication server.
Let OpenAM hostname is openam.example.org Before starting, add the hostname and IP address to the hosts file, for example 127.0.0.0.1 openam.example.org.
On Windows systems, the hosts file is located at C:Windows/System32/drivers/etc/hosts , on Linux and Mac it is located at /etc/hosts.
Next, start the OpenAM Docker container. Run the following command:
docker run -h openam.example.org -p 8080:8080 --name openam openidentityplatform/openamThere is no need to configure OpenAM manually via UI. The following command helps to automate the process:
 docker exec -w '/usr/openam/ssoconfiguratortools' openam bash -c \
'echo "ACCEPT_LICENSES=true
SERVER_URL=http://openam.example.org:8080
DEPLOYMENT_URI=/$OPENAM_PATH
BASE_DIR=$OPENAM_DATA_DIR
locale=en_US
PLATFORM_LOCALE=en_US
AM_ENC_KEY=
ADMIN_PWD=passw0rd
AMLDAPUSERPASSWD=p@passw0rd
COOKIE_DOMAIN=example.org
ACCEPT_LICENSES=true
DATA_STORE=embedded
DIRECTORY_SSL=SIMPLE
DIRECTORY_SERVER=openam.example.org
DIRECTORY_PORT=50389
DIRECTORY_ADMIN_PORT=4444
DIRECTORY_JMX_PORT=1689
ROOT_SUFFIX=dc=openam,dc=example,dc=org
DS_DIRMGRDN=cn=Directory Manager
DS_DIRMGRPASSWD=passw0rd" > conf.file && java -jar openam-configurator-tool*.jar --file conf.file'
After successful configuration, you can proceed with further customization.
Go to the OpenAM administrator console at
http://openam.example.org:8080/openam/XUI/#login/
In the login field enter the value amadmin, in the password field enter the value from the ADMIN_PWD parameter of the setup command, in this case passw0rd.
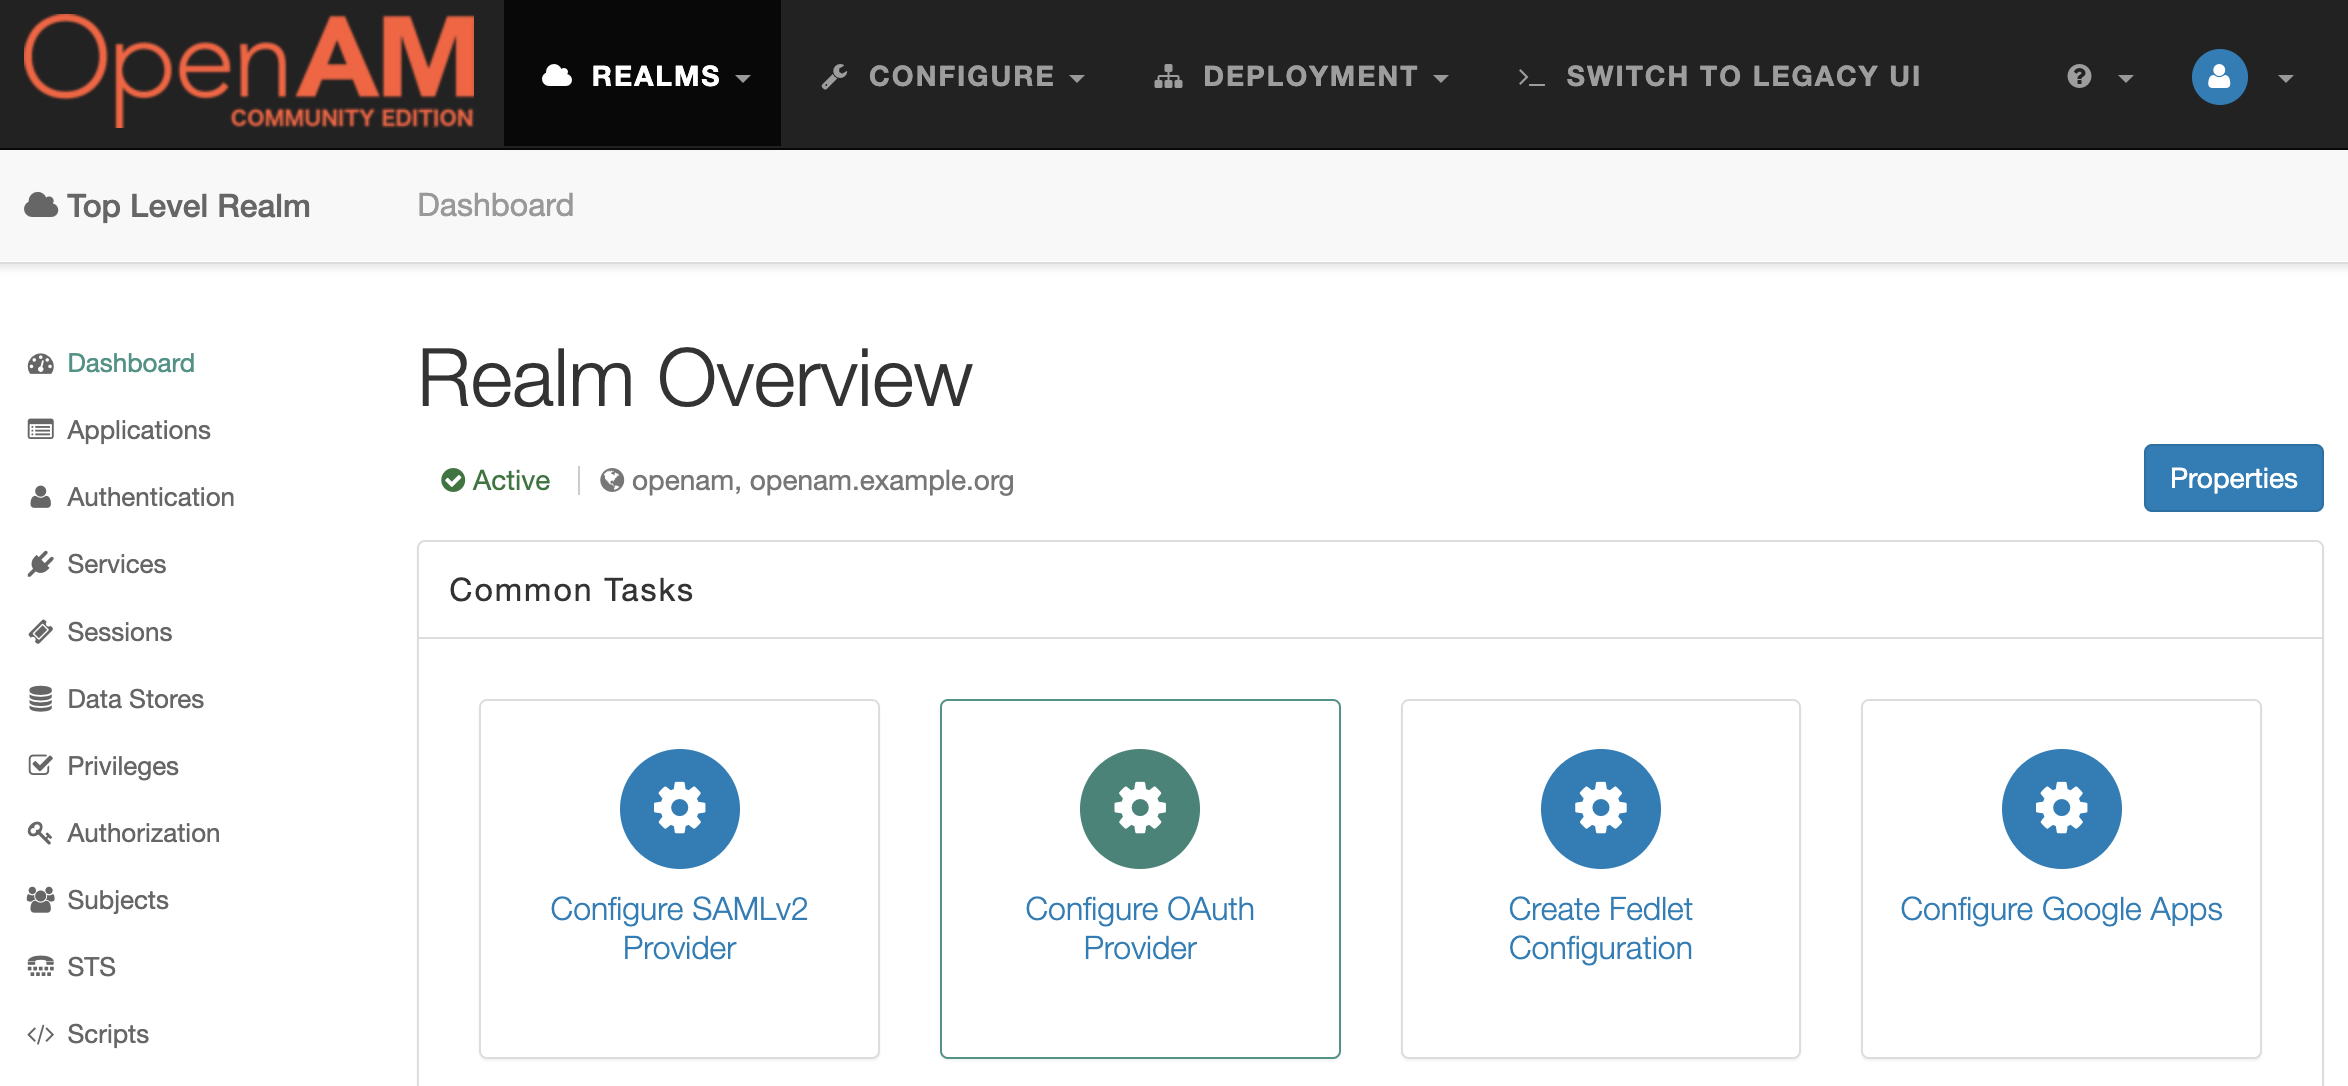
Select the desired realm. In the Dashboard section, click the Configure OAuth Provider item.
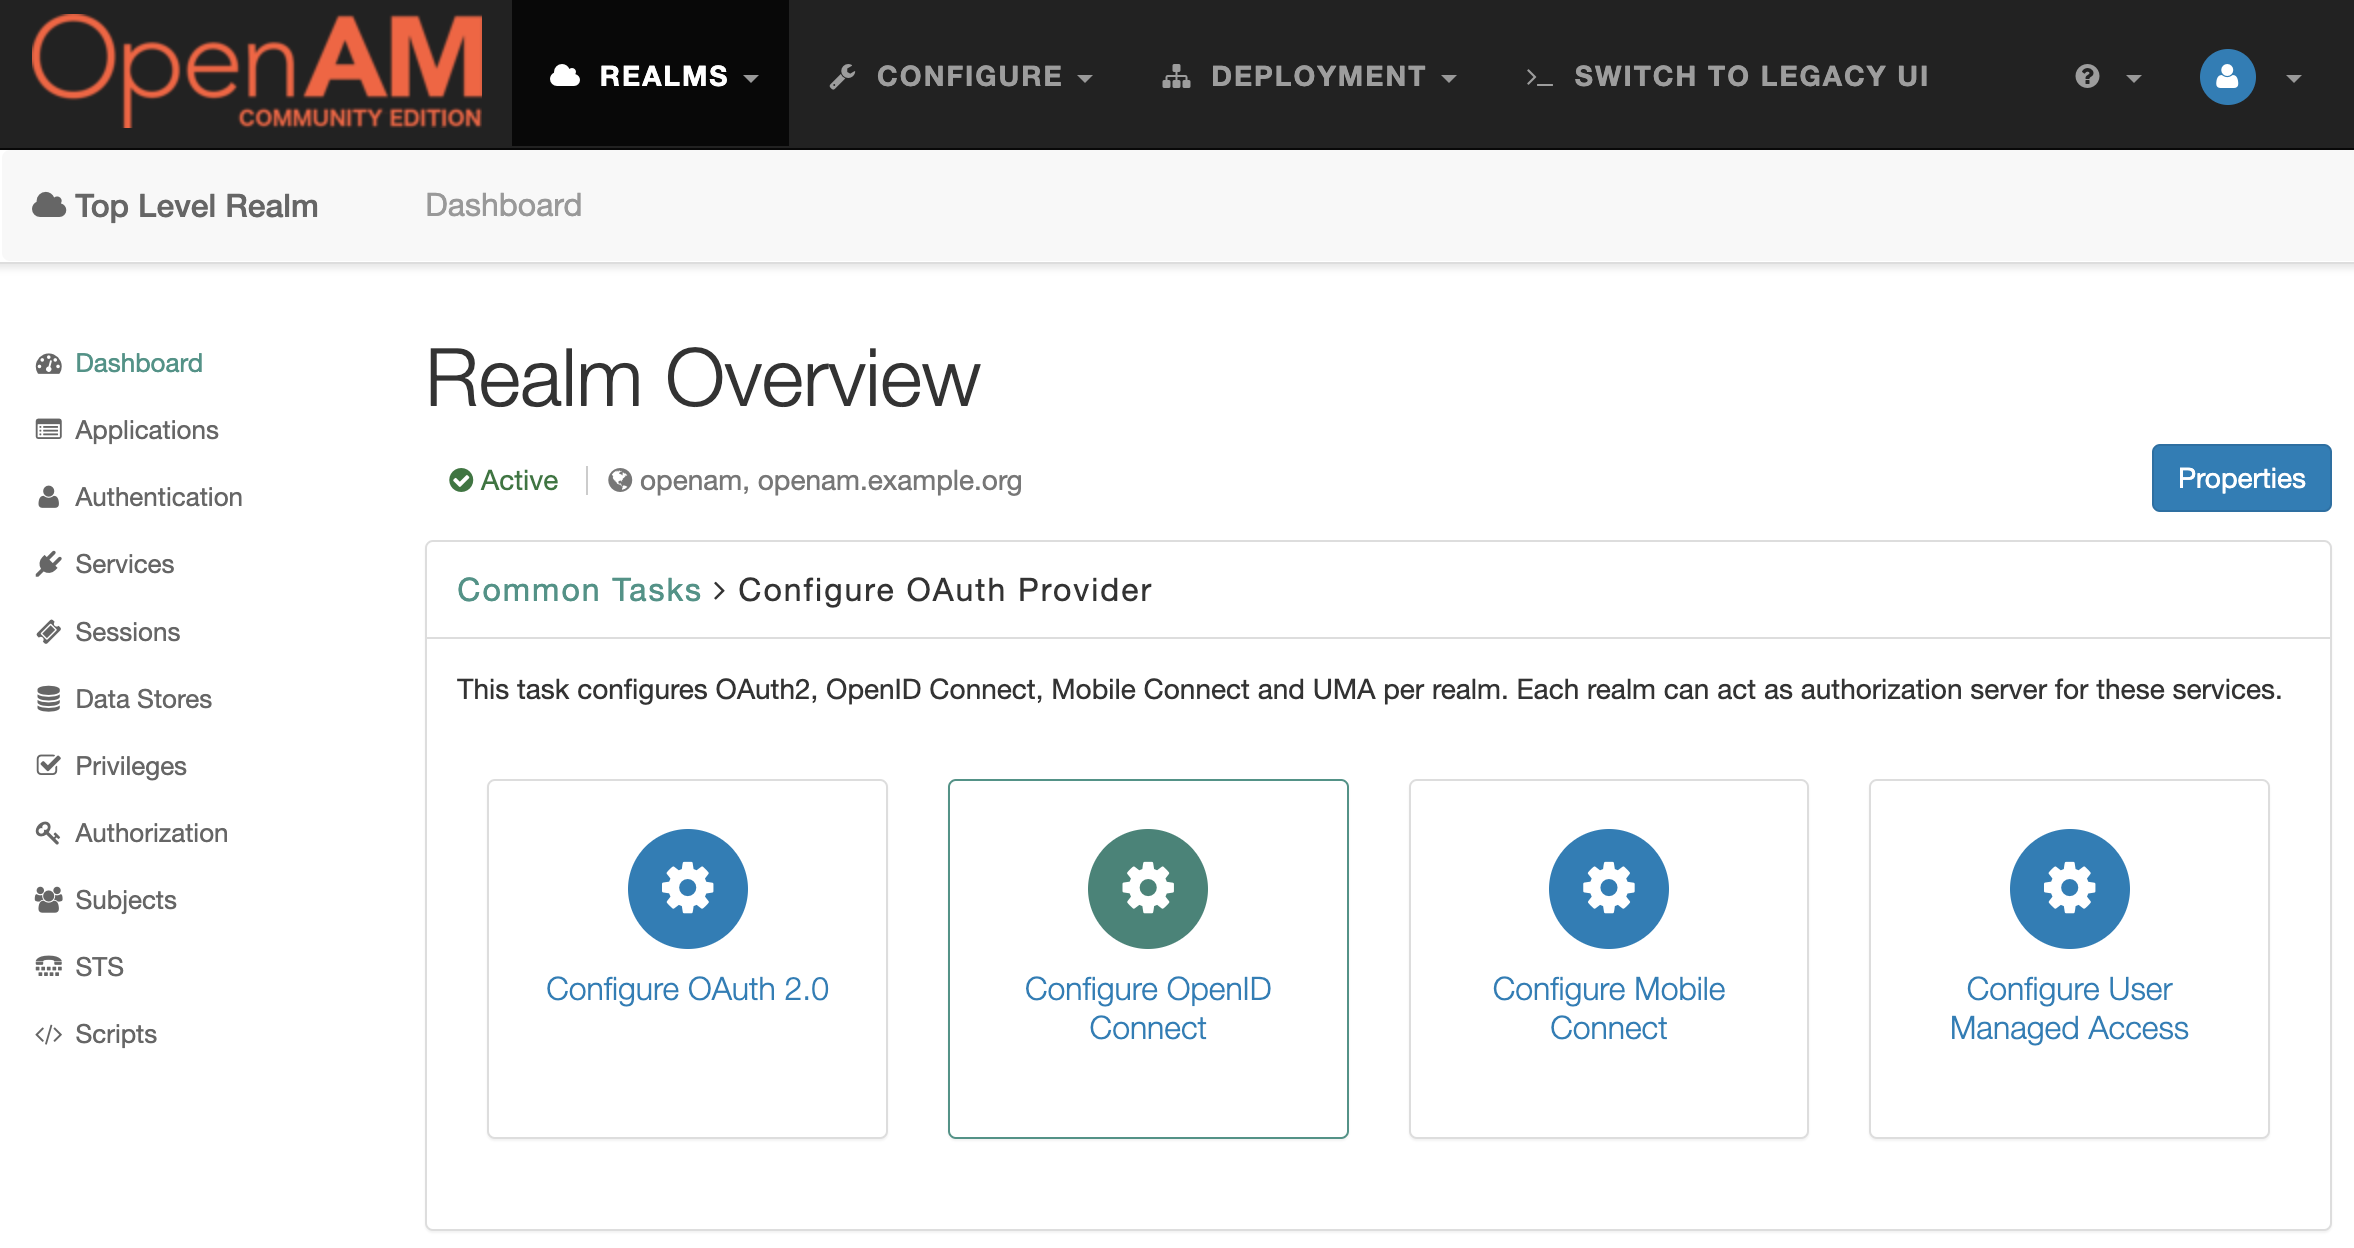
Next, Configure OpenID Connect
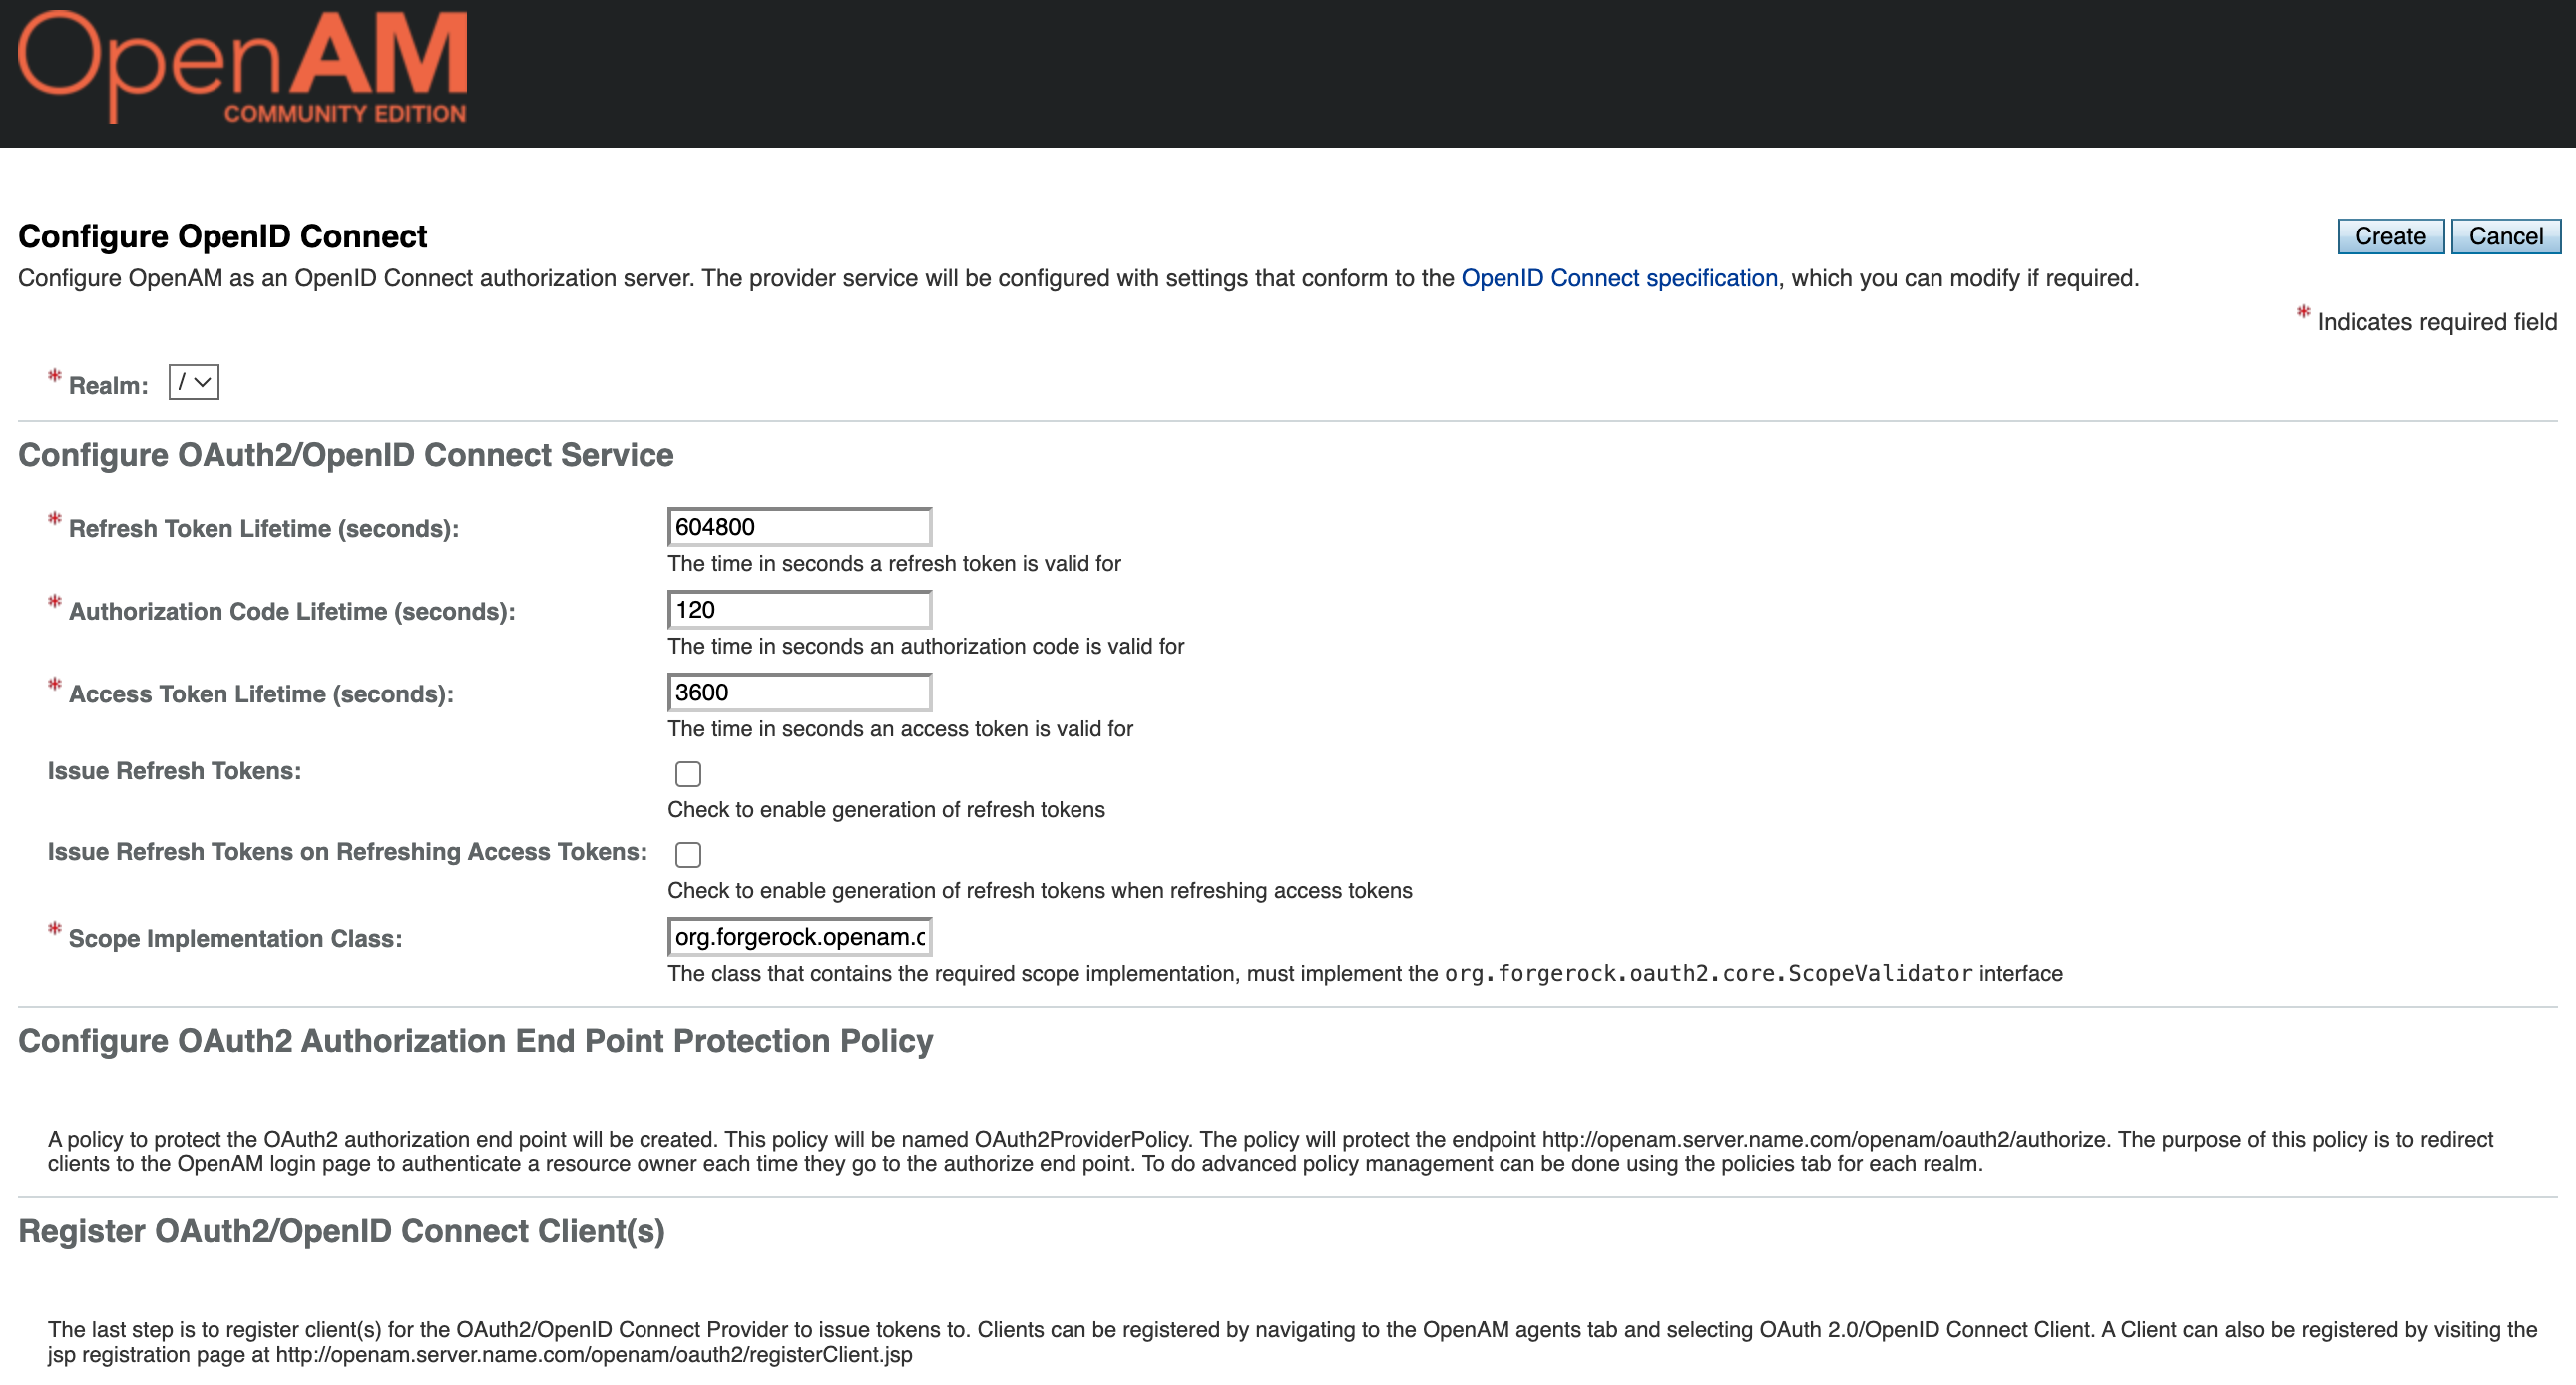
In the opened form, leave all settings unchanged and click the Create button
Now let's create an OAuth2/OIDC client that will use SPA application for authentication.
Go to the admin console, select the required realm, select Applications and then OAuth 2.0 from the left menu
In the Agents table click the New button

- Enter the Name (client_id)
test_client_idand Password (client_secret)changeitof the new application - Open the application settings
- Set Client type to Public
- Add the URI of your SPA application to the list of Redirection URIs. In our case, it will be http://localhost:5173/
- Add the
openidvalue to the scope list, this is to get the user ID from the returnedid_tokenobject. - Token Endpoint Authentication Method, set
client_secret_post.
SPA performs cross-domain queries to get access_token and id_token. To prevent these requests from being blocked by the browser, you need to enable CORS support in OpenAM.
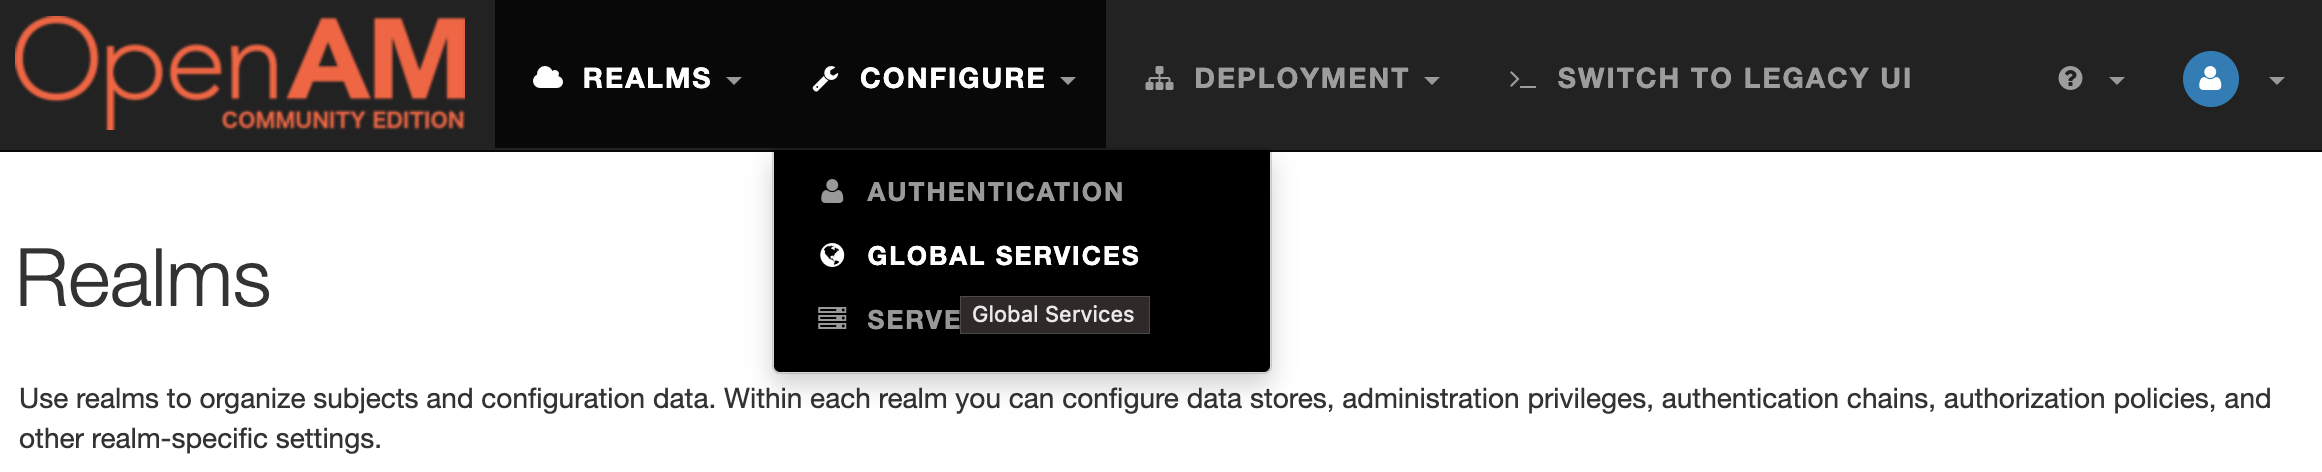
Open the administrator console. In the top menu, select Configure → Global Services.
Next, go to CORS Settings and enable CORS support
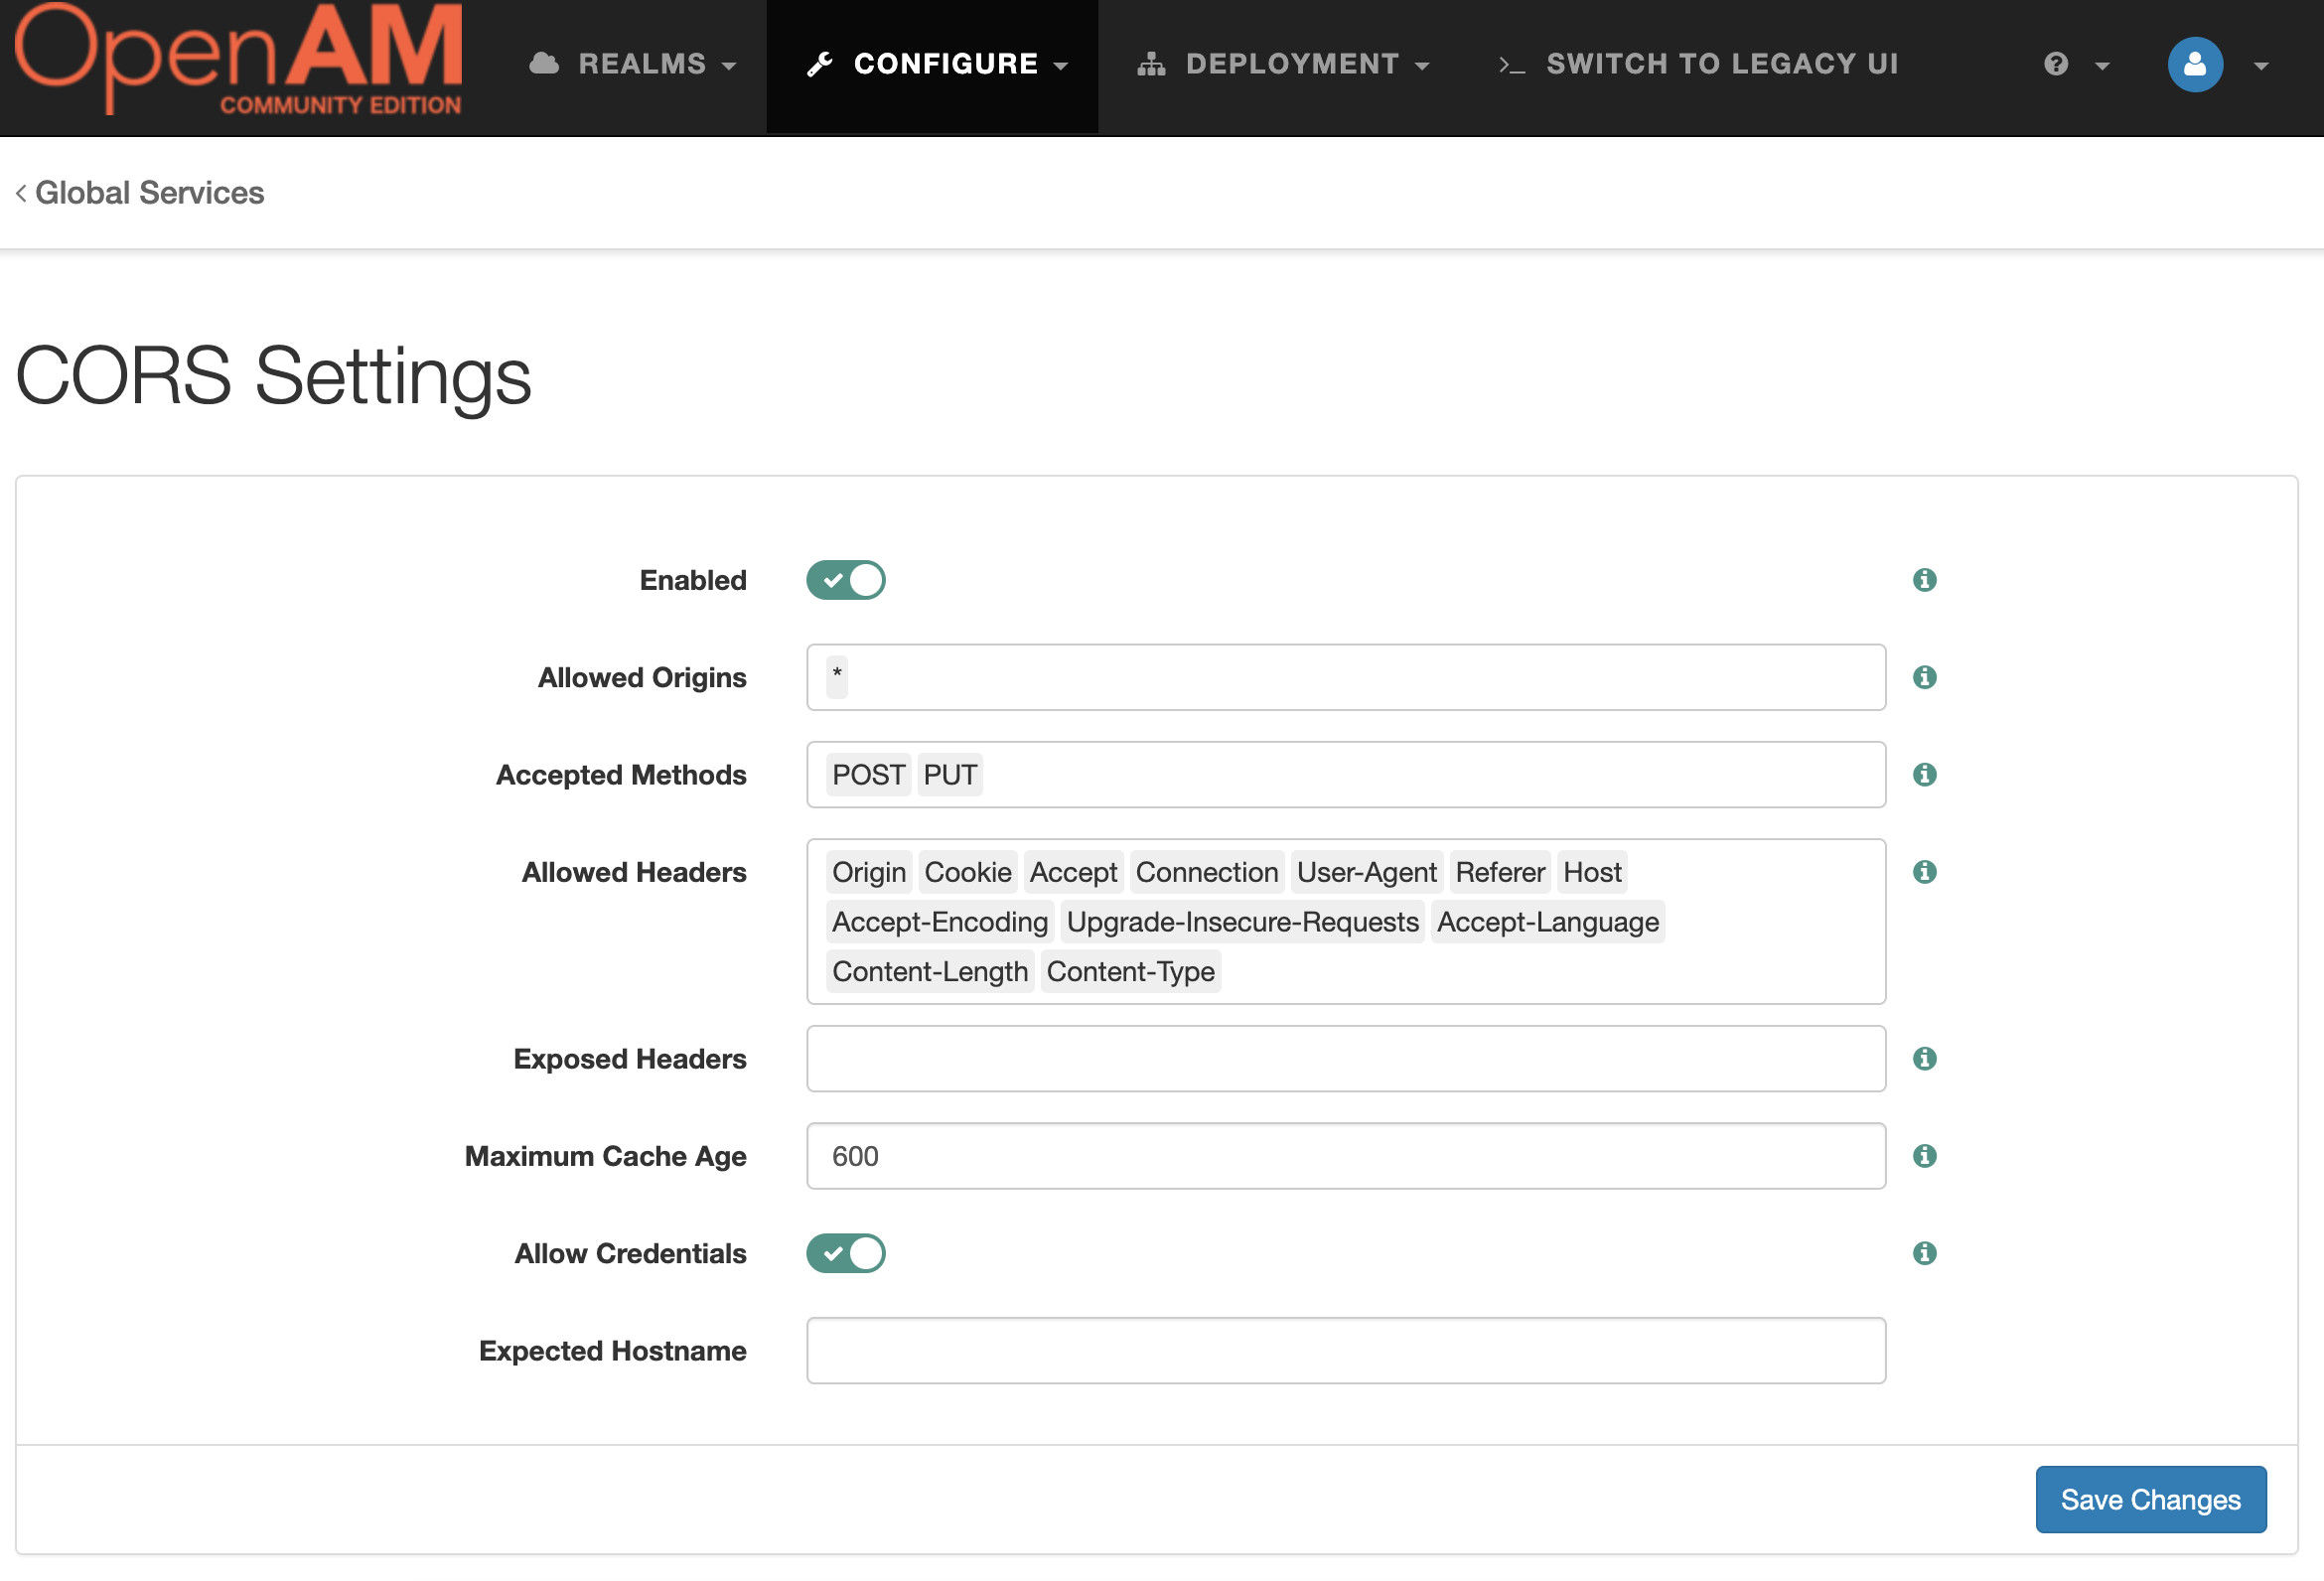
Pres the Save Changes button.
As an example, we will use a React application. For simplicity, we will not validate the state parameter, verify the correctness of the signature of the returned id_token, and so on. However, in a production environment, we highly recommend doing so.
To create a new application, execute the following command in the console:
npm create vite@latest react-openam-example -- --template reactAdd the CryptoJS library to the dependencies. It will be needed for code_challenge generation.
cd react-openam-example
npm install crypto-js
Replace the contents of the react-openam-example/src/App.jsx file with the following code:
import { useEffect, useState } from 'react'

import CryptoJS from 'crypto-js';

import './App.css'

const OPENAM_URL = "http://openam.example.org:8080/openam";
const OAUTH2_ENDPOINT = OPENAM_URL + "/oauth2";
const OAUTH2_AUTHORIZE_ENDPOINT = OAUTH2_ENDPOINT + "/authorize";
const OAUTH2_TOKEN_ENDPOINT = OAUTH2_ENDPOINT + "/access_token";
const CLIENT_ID = "test_client";
const SCOPE = "openid";

function App() {

  const [user, setUser] = useState("");

  //TODO should be randomly generated, saved and then restored in production evironment
  const codeVerifier = "a116cb8c-5a1e-4918-a164-255ae3d8f1b1";

  useEffect(() => {
    const params = new URLSearchParams(window.location.search)
    const code = params.get('code')
    if(!code) {
      return;
    }
    getToken(code)
  }, [])

  const getToken = async (code) => {
    const resp = await fetch(OAUTH2_TOKEN_ENDPOINT, {
      method: "POST",
      mode: "cors",
      cache: "no-cache",
      credentials: "include",
      headers: {'content-type': 'application/x-www-form-urlencoded'},
      redirect: "follow",
      referrerPolicy: "no-referrer",
      body: new URLSearchParams({
        grant_type: 'authorization_code',
        client_id: CLIENT_ID,
        code_verifier: codeVerifier,
        code: code,
        redirect_uri: window.location.origin
      }),
    });
    if(resp.ok) {
      const accessToken = await resp.json()
      //TODO verify id_token signature
      const idToken = accessToken['id_token'];
      const parts = idToken.split('.')
      const payload = parts[1];
      const jsonPayload = JSON.parse(atob(payload));
      const sub = jsonPayload["sub"]
      setUser(sub)
      console.log(sub, "authenticated")
    } else {
      console.log(resp.status)
    }
  }


  const authOpenAM = () => {
    const state = "state";
    const codeChallenge = CryptoJS.SHA256(codeVerifier).toString(CryptoJS.enc.Base64url);
    console.log(codeChallenge);
    const queryString = "?redirect_uri=" + encodeURIComponent(window.location.origin) +
    "&client_id=" + CLIENT_ID +
    "&response_type=code" +
    "&state=" + state +
    "&scope=" + encodeURIComponent(SCOPE) +
    "&code_challenge=" + codeChallenge +
    "&code_challenge_method=S256";
    window.location = OAUTH2_AUTHORIZE_ENDPOINT + queryString;
  }

  const getComponent = () => {
    if (!user) {
      return <>
      <div>
        <h1>Not authenticated</h1>
      </div>
      <button onClick={authOpenAM}>Login</button>
    </>
    } else {
      return <h1>User {user} authenticated</h1>
    }
  }
  return getComponent()
}

export default AppStart the SPA with the following command:
npm run devOpen the application in your browser by URL http://localhost:5173/

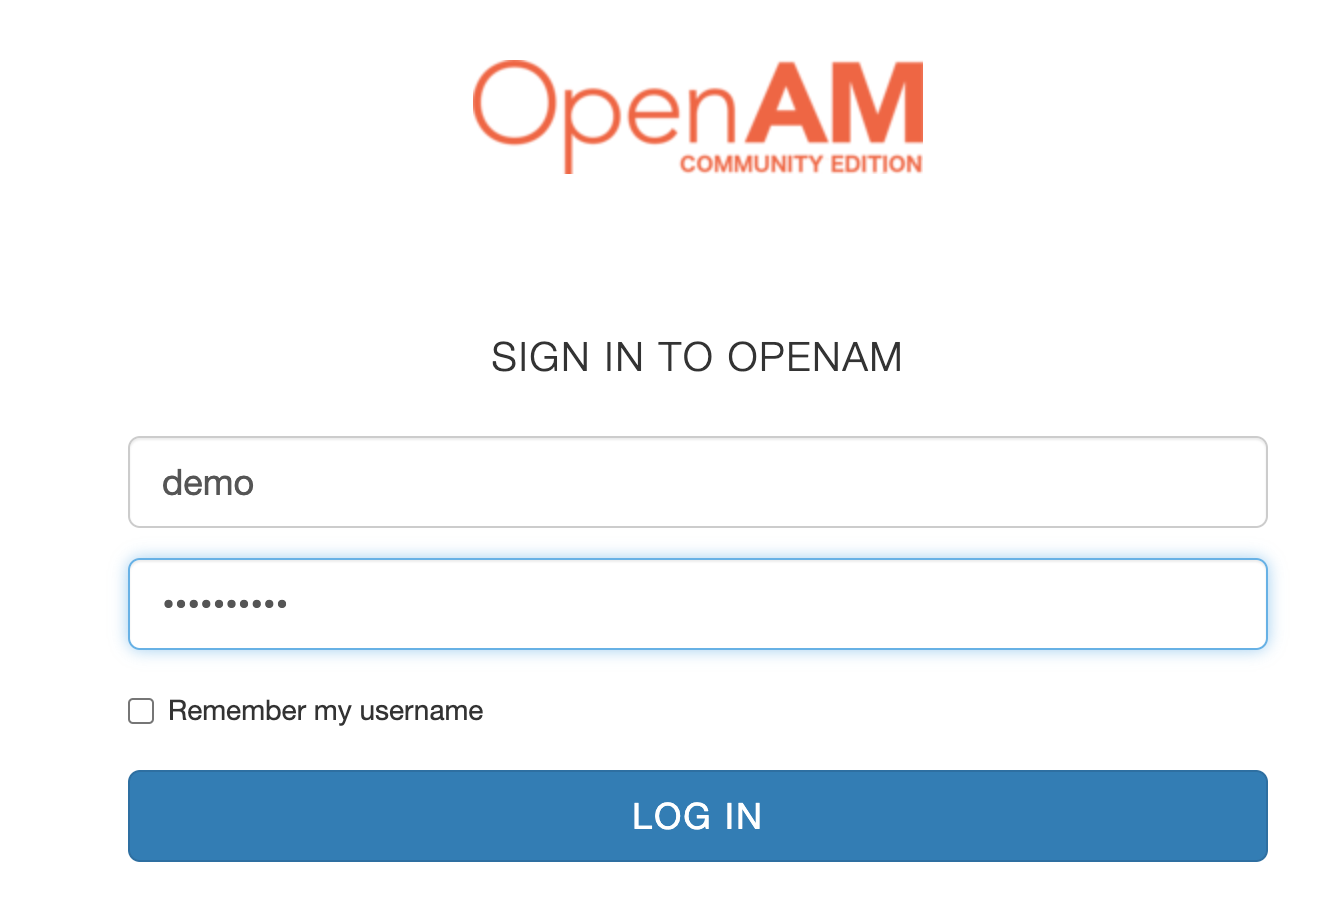
Click the Login button. You will be redirected to OpenAM authentication. Enter the user login demo and password changeit.
Confirm consent to access the data
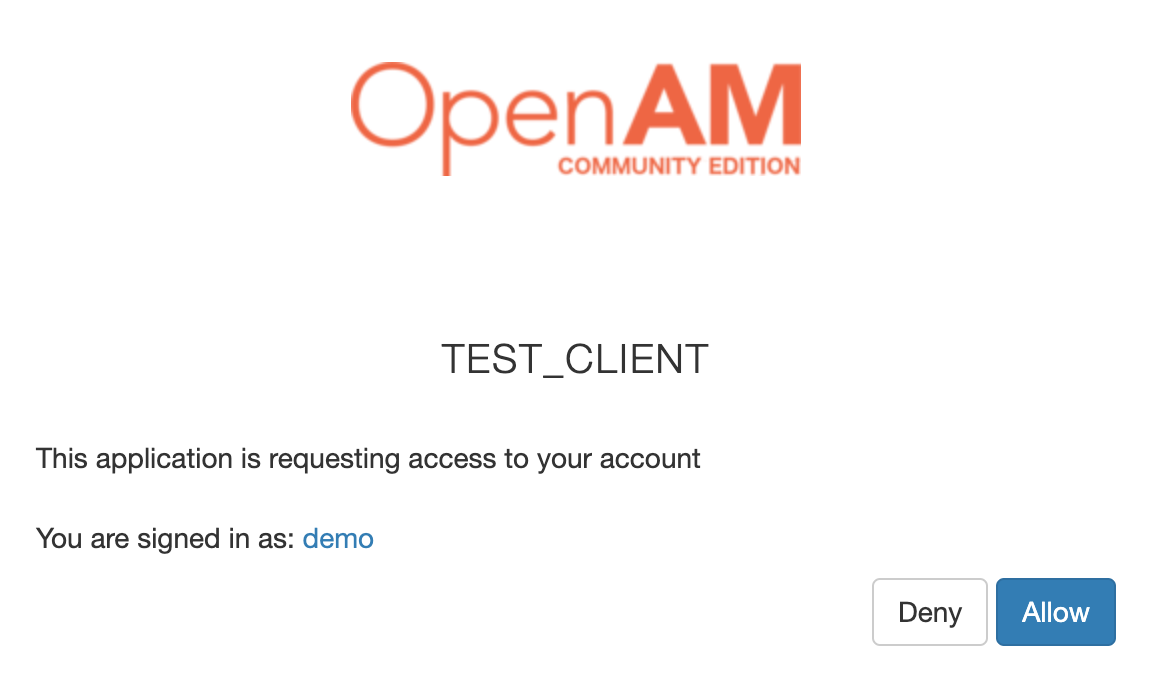
After that, the browser will redirect back to the SPA application and successfully authenticate the user. If everything is configured correctly, the SPA application will display a message about successful authentication:


