Skyrim: Eldryn - Omni-guides/Jackify GitHub Wiki
Eldryn is a modlist designed to be utilized with Skyrim's Anniversary Edition Upgrade, featuring high-quality quest-based content, followers, and generalized vanilla improvements, all while being optimized for performance. The AE content included in this pack has been partially integrated into the world of Skyrim. Most quests have either been delayed, removed, or expanded upon to enhance the experience.

Automated Configuration
While this guide contains the step by step process to get the modlist up and running, Eldryn has been tested against my automation script successfully.
If you wish to carry out the steps manually because you want to learn the process, or simply enjoy tinkering, then absolutely feel free to follow the below steps. Otherwise, you can find the Automation Script and instructions for use here - Using the Omni-Guides Automation Script.
Instructions
This guide is currently listed as EXPERIMENTAL. I am still testing and tweaking, but it should be mostly complete. Feedback is welcomed.
The following has been tested on Eldryn 2.0.0
This guide only covers getting the Modlist running. It does not cover downloading the Modlist via Wabbajack, or how to copy the Modlist to your Steam Deck/Linux system. Once you have the list downloaded and installed on a Windows system, and then copied to your Linux/Steam Deck system, these steps will need to be carried out in Desktop mode. Once complete, you will be able to launch the Modlist and play the game from Game Mode. For Eldryn, you will need to own the Anniversary Edition of Skyrim, and have launched the vanilla Skyrim game to download the Creation Club content. I also assume that you have set a user password on the Steam Deck.
Eldryn only supports Skyrim AE, Anniversary Edition is not optional.
The steps below may seem wordy and plentiful, but they can be carried out relatively quickly - I just wanted to give context and description to each step.
Step 1 - Create the directory
Once Wabbajack has successfully completed the download and installation of the Modlist on your Windows system, create a new directory on the Steam Deck to house the required files - this can either be on the internal storage, or with the use of a specific launch parameter described below, can live on the SD Card. Open up Konsole terminal and run only one of the following, depending on where you want to store the Modlist:
Create Directory on Internal Storage:
mkdir -p /home/deck/Games/Skyrim/Eldryn
OR
Create Directory on SD Card:
mkdir -p /run/media/mmcblk0p1/Games/Skyrim/Eldryn
(Note: Valve plan to change the default mount point of SD Cards within SteamOS soon, I'll update this guide once that chance is in place)
Technically you can use any path or naming convention you like, but for simplicity of following this guide it may be best just to copy the paths I use. I recommend not including any spaces in the Directory Name - it does not play well with the Proton/MO2 combination even with the spaces being escaped, for whatever reason..
Copy the Modlist directory from Windows into this newly created directory. There are many ways to do this. I chose to enable ssh on my Deck, and then use rsync to transfer. There are too many options to discuss here, but it should be relatively easy to search for methods. I copied the Modlist Install directory contents from Windows to the newly created directory on the Deck: /home/deck/Games/Skyrim/Eldryn/
Finally for this step, it's best to make sure that the newly copied files have sufficient permissions for your user. Run only one of the following for each action (owner and permissions), depending on where you want to store the Modlist:
Change the owner and permissions of the directory on Internal Storage:
sudo chown -R deck:deck /home/deck/Games/Skyrim/Eldryn
sudo chmod -R 755 /home/deck/Games/Skyrim/Eldryn
OR
Change the owner and permissions of the directory on SD Card:
sudo chown -R deck:deck /run/media/mmcblk0p1/Games/Skyrim/Eldryn
sudo chmod -R 755 /run/media/mmcblk0p1/Games/Skyrim/Eldryn
Step 2 - Add ModOrganizer.exe as a Non-Steam Game
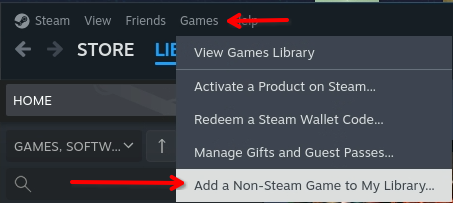
The next step is to add ModOrganizer.exe to Steam as a non-steam game. In Steam, click Games, then "Add a Non-Steam Game to My Library":
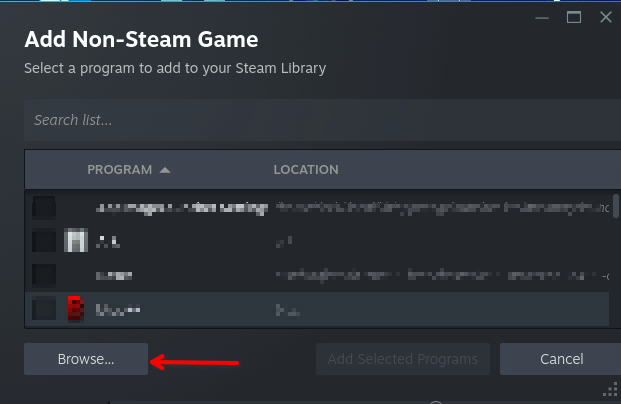
Click Browse:
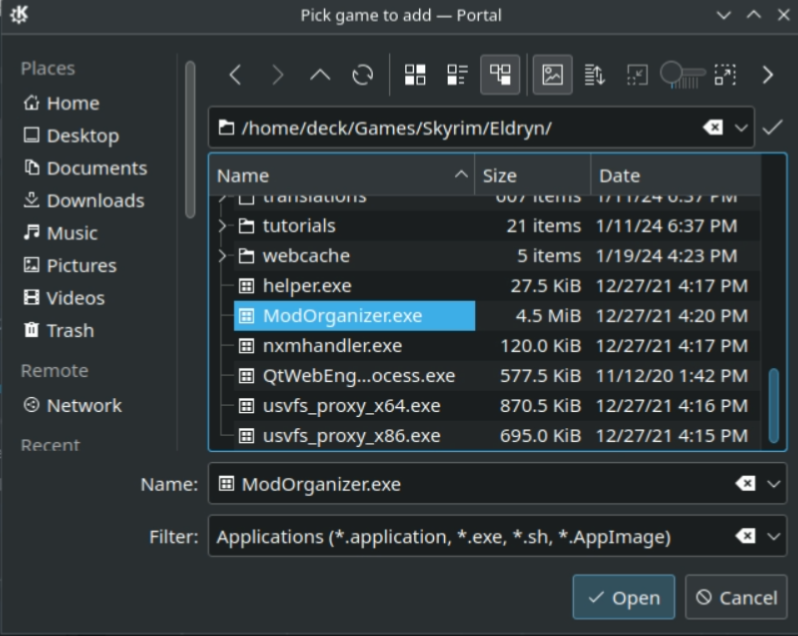
Browse to the path of your modlist. e.g. /home/deck/Games/Skyrim/Eldryn, select ModOrganizer.exe, and click Open.
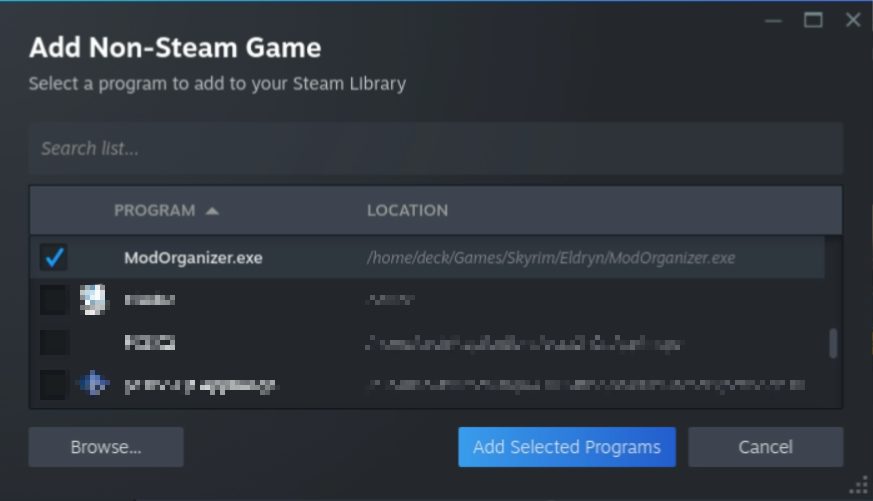
Ensure ModOrganizer.exe is present and ticked, and then click Add Selected Program.
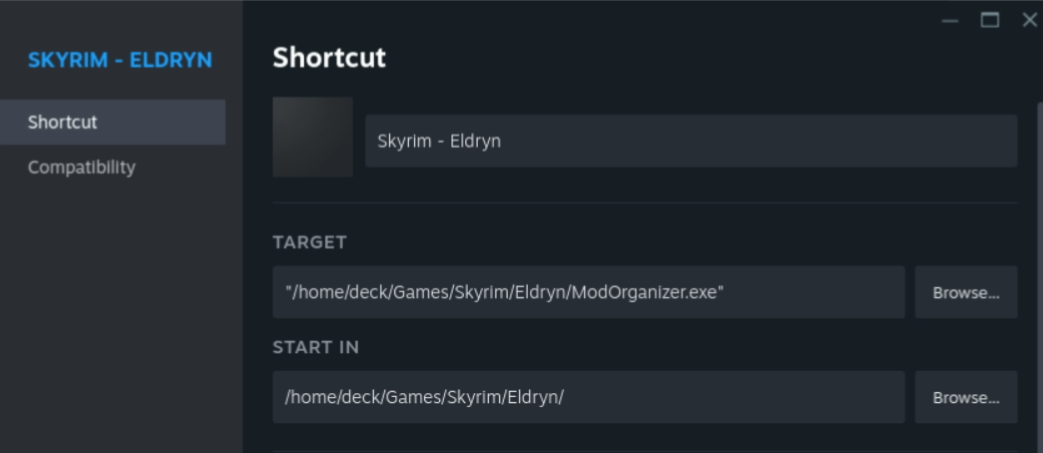
Once added, edit the properties of the new ModOrganizer.exe entry. You can give it a more sensible name - I used "Skyrim - Eldryn":
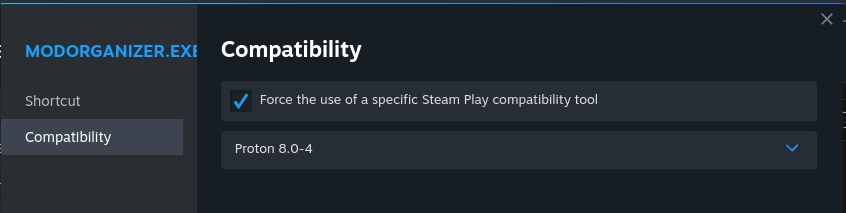
Then in the Compatibility tab tick the box for 'Force the use of a specific Steam Play compatibility tool', then select the Proton version - I use Proton 8.0-4 which was the latest stable Proton version provided by Valve at time of writing.
IMPORTANT FOR SD CARD USERS - You must add the following to the Launch Options for the ModOrganizer.exe Non-Steam game, otherwise the Proton environment won't have access to your SD Card contents:
STEAM_COMPAT_MOUNTS=/run/media/mmcblk0p1 %command%
Like so:

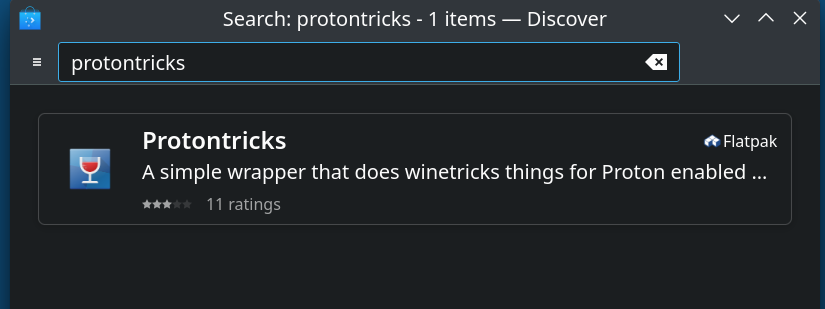
Step 3 - Install Protontricks and enable visibility of (.)dot files
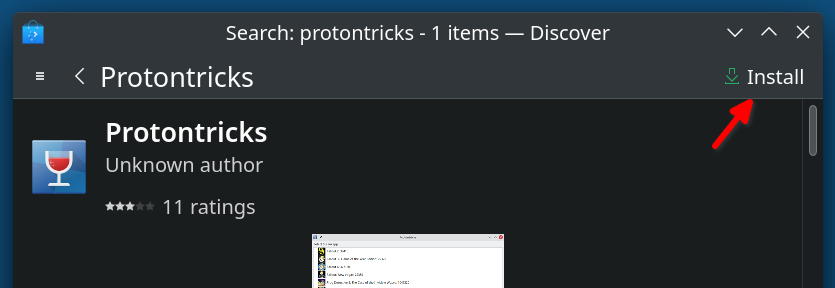
If you don't already have it installed, ProtonTricks can be installed via the Discover store as a flatpak:
To enable the use of protontricks via the command line, open a Konsole terminal and run the following command to add an alias:
echo "alias protontricks='flatpak run com.github.Matoking.protontricks'" >> ~/.bashrc
then close and reopen Konsole. We can now invoke protontricks from the command line. Next, we need to allow protontricks access to the filesystem location (adjust as needed if you used a different path):
sudo flatpak override com.github.Matoking.protontricks --filesystem=/home/deck/Games
That should be protontricks installed and ready to use later in the guide. To add the ability to see dot files and folders inside the Proton prefix, run the following command in a terminal (replace "Skyrim - Eldryn" below if you called it something else):
APPID=`protontricks -l | grep -i "Skyrim - Eldryn" | awk {'print $NF'} | sed 's:^.\(.*\).$:\1:' | tail -1` ; protontricks --no-bwrap -c 'wine reg add "HKEY_CURRENT_USER\Software\Wine" /v ShowDotFiles /d Y' $APPID
With this setting now in place, MO2 will have visibility of the required .local directory path to point MO2 at when you first launch it.
Step 4 - Start and Configure ModOrganizer2
Click play on this new entry "Skyrim - Eldryn" (or whatever you renamed it to) in Steam - Depending on the path on Windows that you copied the Modlist files from, you may see an error pop-up about your account lacking permission:
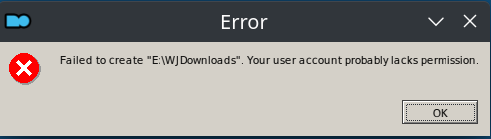
To fix this, we just need to strip the now incorrect download directory from the ModOrganizer.ini file. in Konsole terminal, run:
sed -i "/download_directory/c\download_directory =" /home/deck/Games/Skyrim/Eldryn/ModOrganizer.ini
then re-run "Skyrim - Eldryn" from Steam.
Another error box will appear, complaining that it "Cannot open instance 'Portable'. This is because we copied the Modlist directory (inclusive of the built-in MO2) from Windows, so the path has changed:
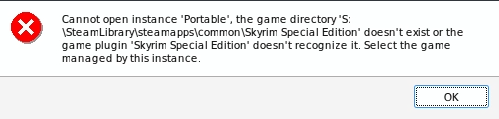
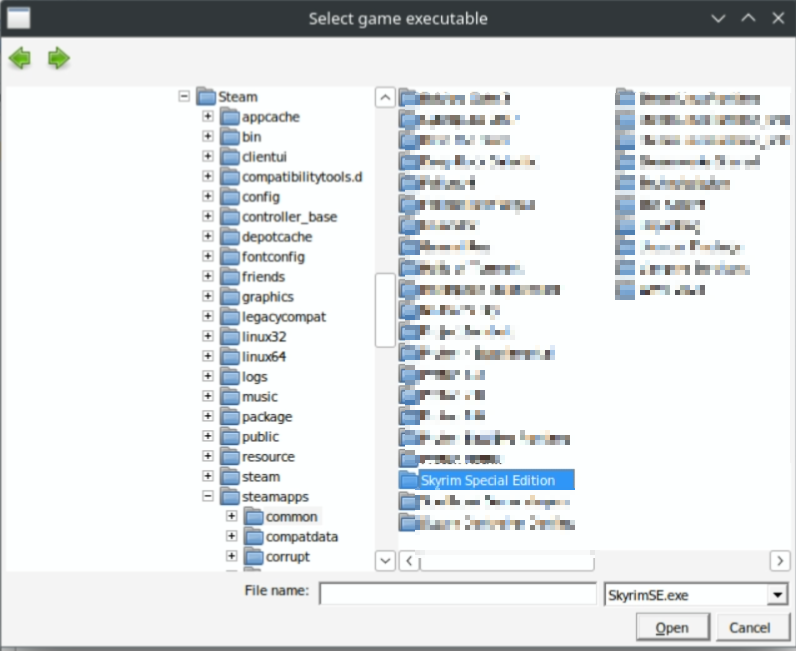
To fix this, we need to point MO2 to our new location. Click OK, and then Browse. The path we are looking for is:
Z:\home\deck\.local\share\Steam\steamapps\common\Skyrim Special Edition
If you installed vanilla Skyrim to an SD Card or a different Library location, then you will have to browse to that location, or the equivalent SD Card path in /run/media/mmcblk0p1, which will be mounted inside Proton as the E: Drive.
The splash screen for Eldryn should hopefully now appear:

You may also get a pop-up asking if you want to Register for handling nxm links, like so:
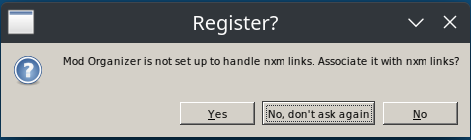
I usually just hit "Yes" and move on with my life.
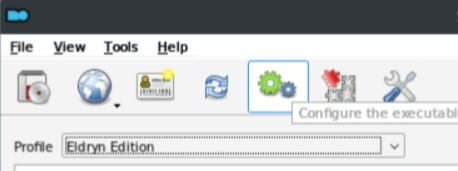
Getting close now. Next, we have to ensure that ModOrganizer2 is pointing to the correct location for the required executable. In MO2, click the little two-cog icon at the top, which will bring up the Modify Executables window (please note that this icon may differ for some Modlists that use custom icon sets):
For the Eldryn executable, we need to point MO2 at a file that may not actually exist yet (but it will exist, once Rootbuilder does it's thing when you click launch - and is then removed again when the game closes).
The path you need for the Eldryn application will be:
Z:\home\deck\.local\share\Steam\steamapps\common\Skyrim Special Edition\skse64_loader.exe

If you installed vanilla Skyrim to an SD Card, then you will have to replace with the above with the equivalent path in /run/media/mmcblk0p1.
Step 5 - Install Required Wine Additions
There is an issue with missing NPC Voices - apparently this is an issue with Proton, so it may ultimately be resolved in time with a newer version of Proton without needing these steps. For now though, we need to install xact and xact_x64 to the Wine/Proton environment Steam created for our "Skyrim - Eldryn" entry, and a few others for the use of Community Shaders. Eldryn also requires Microsoft Visual C++ Redistributable 2022 for some of it's mods.
The easiest way to install what we need is to use ProtonTricks, which should be installed already from Step 3 earlier in this guide.
Adding the required packages can be done via the ProtonTricks gui, but perhaps the easiest way is via command line. You can run the following one-liner to do it for you, or if you prefer, you can manually run the individual steps noted below (replace "Skyrim - Eldryn" with the name of your Non-steam game entry, if you called it something else):
APPID=`protontricks -l | grep -i "Skyrim - Eldryn" | awk {'print $NF'} | sed 's:^.\(.*\).$:\1:'` ; protontricks --no-bwrap $APPID xact xact_x64 d3dx11_43 d3dcompiler_47 d3dcompiler_43
Alternatively, If you prefer to run this manually, see an alternative step-by-step method in the Additional Notes section below.
Step 6 - Install VCREDIST2022
Next up is the requirement of vcredist2022. Unfortunately this isn't available directly through protontricks as per xact, so we will have to install it semi-manually. The following one-liner should do everything you need (replace "Skyrim - Eldryn" with the name of your Non-steam game entry, if you called it something else):
APPID=`protontricks -l | grep -i "Eldryn" | awk {'print $NF'} | sed 's:^.\(.*\).$:\1:' | tail -1` ; wget https://aka.ms/vs/17/release/vc_redist.x64.exe -O '/home/deck/.local/share/Steam/steamapps/compatdata/'"$APPID"'/pfx/drive_c/vc_redist.x64.exe' ; protontricks --no-bwrap -c 'wine /home/deck/.local/share/Steam/steamapps/compatdata/'"$APPID"'/pfx/drive_c/vc_redist.x64.exe /Q' $APPID
Step 7 - Set Resolution
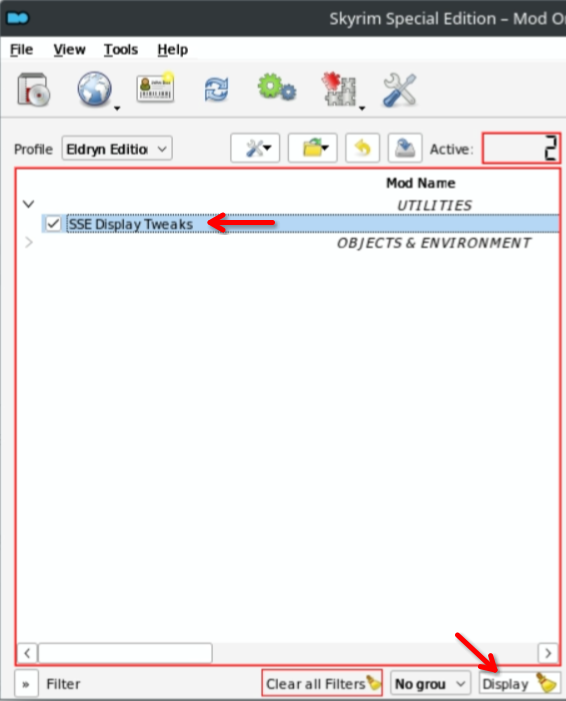
Next, we should set the resolution so that the deck isn't doing more work than it needs to. There's no point in asking Skyrim to render at 1440p, and then have the game squeezed into an 800p screen on the deck. To do this in MO2, filter for the entry for "SSE Display Tweaks", and double-click it:
Switch to the INI Tab, highlight the INI File on the left, and then scroll down until you see the line that reads "#Resolution=1920x1080". Remove the # at the start of the line, and then set the resolution to be 1280x800:
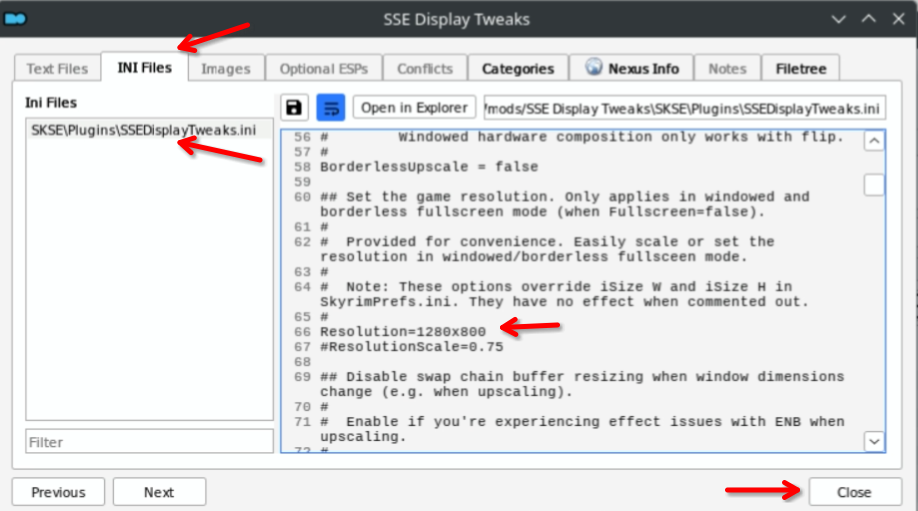
Finally, click the Close button and select "Yes" to save the changes.
Step 8 - Disable ENB (and optionally enable ReShade)
While ENB can work under Linux, it is likely going to badly impact performance on the Deck so I would advise you just disable it. However, if you do want to, you can see my guide to do so here
To disable ENB for Eldryn, we just need to disable all the mods listed in MO2 under the "ENB OPTIONS" category:
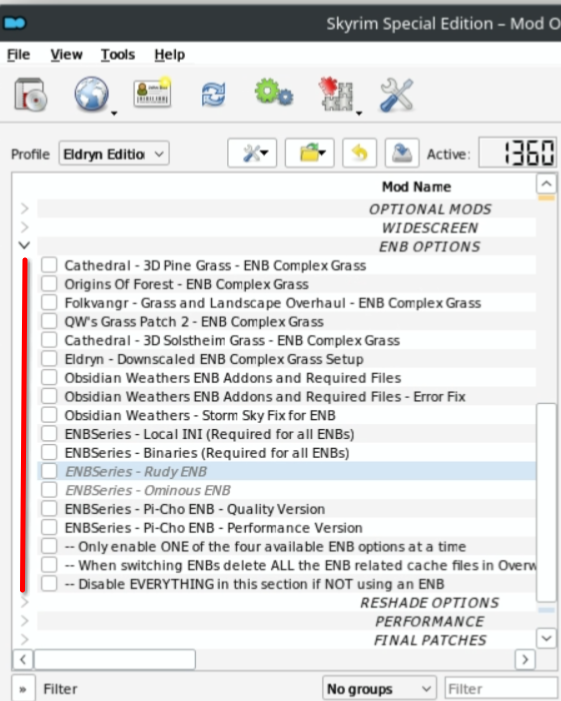
Optionally, you can enable the included ReShade, though if your preference is for as many FPS as possible, you may wish to leave them disabled also. To enable ReShade, we just need to enable all the mods listed in MO2 under the "RESHADE OPTIONS" category:

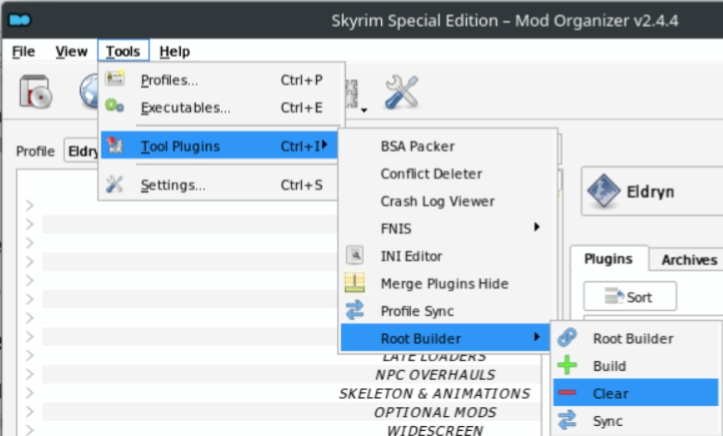
It's also a good plan to make sure that there are no Game Root leftovers. Click the Tools menu at the top of MO2, then select Tool Plugins, Root Builder, then Clear:
Step 9 - Fix for Custom Skills Framework
The current version of Custom Skills Framework does not work via proton and will cause a full game crash as soon as you open the Skills menu. However, thanks to a user named colinswrath, there is a fix proposed that will hopefully make it's way into the overall Custom Skills Framework mod itself. In the mean time, we can replace two files using the following commands, and Custom Skills Framework should no longer crash! A huge thanks to colinswrath for this fix!
Replace CustomSkills.dll:
wget https://raw.githubusercontent.com/Omni-guides/Wabbajack-Modlist-Linux/main/docs/CustomSkillsFix/CustomSkills.dll -O /home/deck/Games/Skyrim/Eldryn/mods/Custom\ Skills\ Framework/SKSE/Plugins/CustomSkills.dll
Replace CustomSkills.pdb:
wget https://raw.githubusercontent.com/Omni-guides/Wabbajack-Modlist-Linux/main/docs/CustomSkillsFix/CustomSkills.pdb -O /home/deck/Games/Skyrim/Eldryn/mods/Custom\ Skills\ Framework/SKSE/Plugins/CustomSkills.pdb
Step 10 - Optional but Recommended
Increase Steam Deck Swap Space, Swappiness and adjust Steam Deck VRAM
This may be optional, but there have been reports of far better stability and performance after increasing the swap space available to the deck when running Modlists. This is an optional step, but if you are experiencing stability issues, it might be worth investigating. How to do so is outside the scope of this guide, but there is plenty of information available elsewhere on how to do it - CryoByte33 has an excellent set of utilities available on github that can take care of this, and more!
Personally I have increased the VRAM in the deck bios to 4GB (see here for details), 16GB Swap space, and a Swappiness of 1 - the recommended settings when you run Cryobyte33's Steam Deck Utilities. In fact, the full video of Cryobyte33 explaining what this all means, is definitely worth a watch!
Conclusion
At last!
If you've read this far, then well done! I'd very much appreciate a Star for this guide, just to show if I'm on the right track. I'm also open to any feedback, positive or negative.
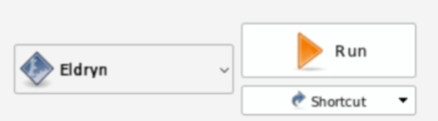
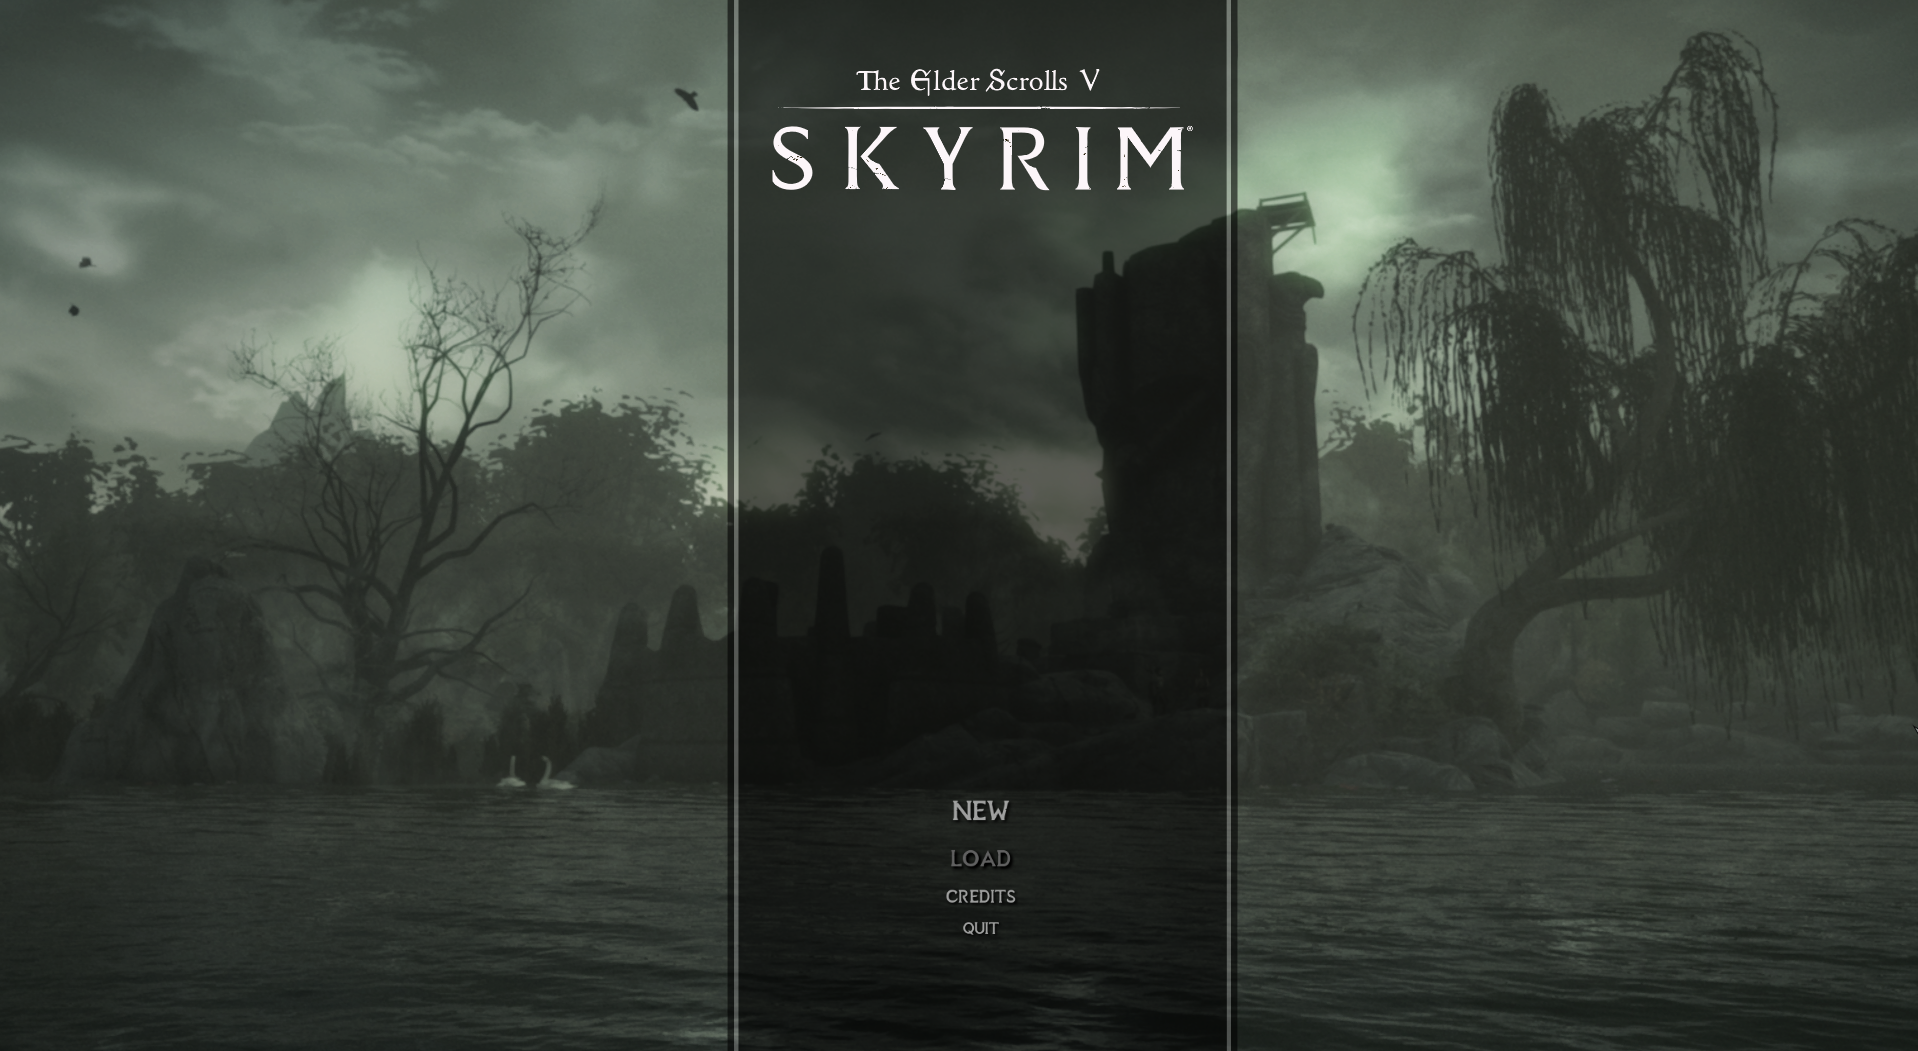
With NPC Voices fixed, and vcredist2022 installed, we should now be ready! Click the Play button in Mod Organizer, and wait....
This takes quite a bit of time to start. Once it had loaded though, performance was as expected in the menus.
As an addition to the disclaimer at the top of this guide, I have no visibility of longer term stability, so save often, and maybe even make backups of your save-games, just in case ;)
If you need help with any of the above, or better yet have another fix, tweak or workaround to help get these Modlists running on Linux, then please do stop by the #unofficial-linux-help channel on the Wabbajack Discord, I should be around so just @ me (@omni) on there!
Enjoy!
Additional Notes
Install VCREDIST2022 manually
If you prefer to install vcredist manually instead of using my one-liner, you can follow these steps. Unfortunately this isn't available directly through protontricks as per xact, so we will have to install it semi-manually. The following one-liner should do everything you need (replace "Eldryn" with the name of your Non-steam game entry, if you called it something else):
APPID=`protontricks -l | grep -i "Skyrim - Eldryn" | awk {'print $NF'} | sed 's:^.\(.*\).$:\1:' | tail -1` ; wget https://aka.ms/vs/17/release/vc_redist.x64.exe -O '/home/deck/.local/share/Steam/steamapps/compatdata/'"$APPID"'/pfx/drive_c/vc_redist.x64.exe' ; protontricks --no-bwrap -c 'wine /home/deck/.local/share/Steam/steamapps/compatdata/'"$APPID"'/pfx/drive_c/vc_redist.x64.exe' $APPID
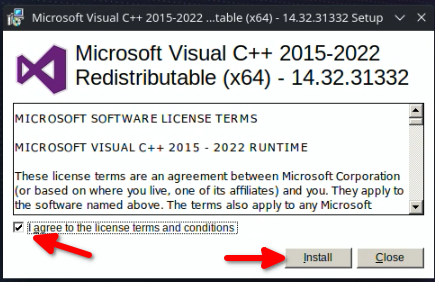
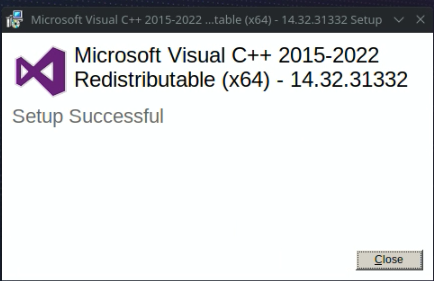
Check the box to agree, and then click install. It should complete quickly.
Alternatively, If you prefer to run this manually, step-by-step, you can do the following. Firstly, we need to download the vc_redist.x64.exe installer inside the Proton prefix. Run the following command, replacing my Game ID (3595949753) with your own which you can get by running protontricks -l in Konsole:
wget https://aka.ms/vs/17/release/vc_redist.x64.exe -O /home/deck/.local/share/Steam/steamapps/compatdata/3595949753/pfx/drive_c/vc_redist.x64.exe
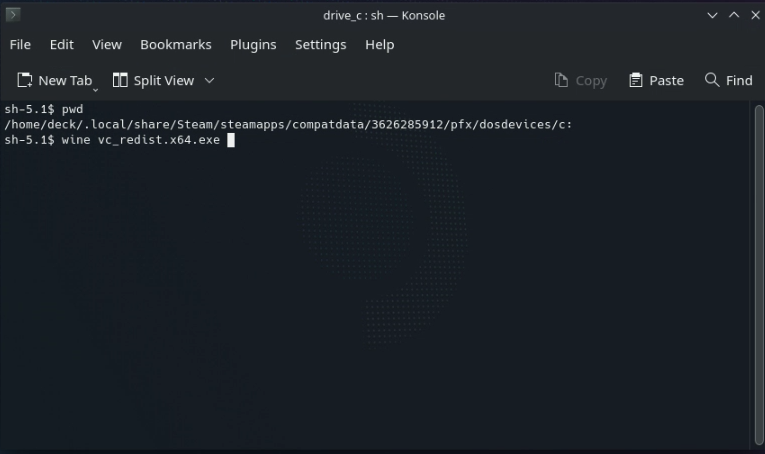
Then we can enter the shell of our Proton environment:
protontricks --no-bwrap 3595949753 shell
If successful, it should display a little C: prompt in your terminal window. Your terminal may misbehave after running the wine command - you can regain control by typing 'reset', even if you can't see the characters as you type.
Finally, run the installer:
wine vc_redist.x64.exe
Check the box to agree, and then click install. It should complete quickly.
When running wine commands in Konsole, it usually mangles the terminal a bit - text you type wont be shown (though it technically is still being printed in the terminal) - to get out of that state, either close and reopen Konsole, or just type 'reset' and hit enter, even if you can't see the characters.
Install wine requirements manually (xact, xact_x64)
first find the AppID of the Non-Steam Game we added for Eldryn. In a terminal run:
protontricks -l | grep -i "Skyrim - Eldryn"
Replace "Eldryn" if you have renamed the Non-Steam Game added earlier. The output should look something like below, though your AppID will differ from mine:
Non-Steam shortcut: Skyrim - Eldryn (3595949753)
With the AppID now known, install the required xact and xact_x64 packages into this Proton environment (use your own AppID from the command above):
protontricks --no-bwrap 3595949753 xact xact_x64 d3dx11_43 d3dcompiler_47 d3dcompiler_43
This may take a little time to complete, but just let it run the course. Your terminal may misbehave after running the protontricks/wine command - you can regain control by typing 'reset', even if you can't see the characters as you type.