User Guide - Omni-guides/Jackify GitHub Wiki

Wiki | Nexus | Download | Wabbajack Discord | Jackify Issues | Legacy Guides | Ko-fi
New to Jackify? Read our Introduction to understand what Jackify is and why it exists.
This guide provides step-by-step instructions for using Jackify to install, configure, and manage Wabbajack modlists on Linux and Steam Deck.
IMPORTANT: MOST Modlists are not supported on Linux, so please do not go to the Modlist Author for support, unless they specifically do support running their modlist on Linux.
Jackify is primarily distributed through Nexus Mods. Releases on Github are planned in the very near future, but for now the preference is to download Jackify from Nexus Mods.
- Visit the Jackify mod page on Nexus Mods - You can download Jackify from NexusMods.
- Download the latest version - Click the "Download" button to get the latest Jackify 7z archive. While I'd prefer to just supply the AppImage file itself, Nexus Mods does not support this file type directly, so it has to be zipped up.
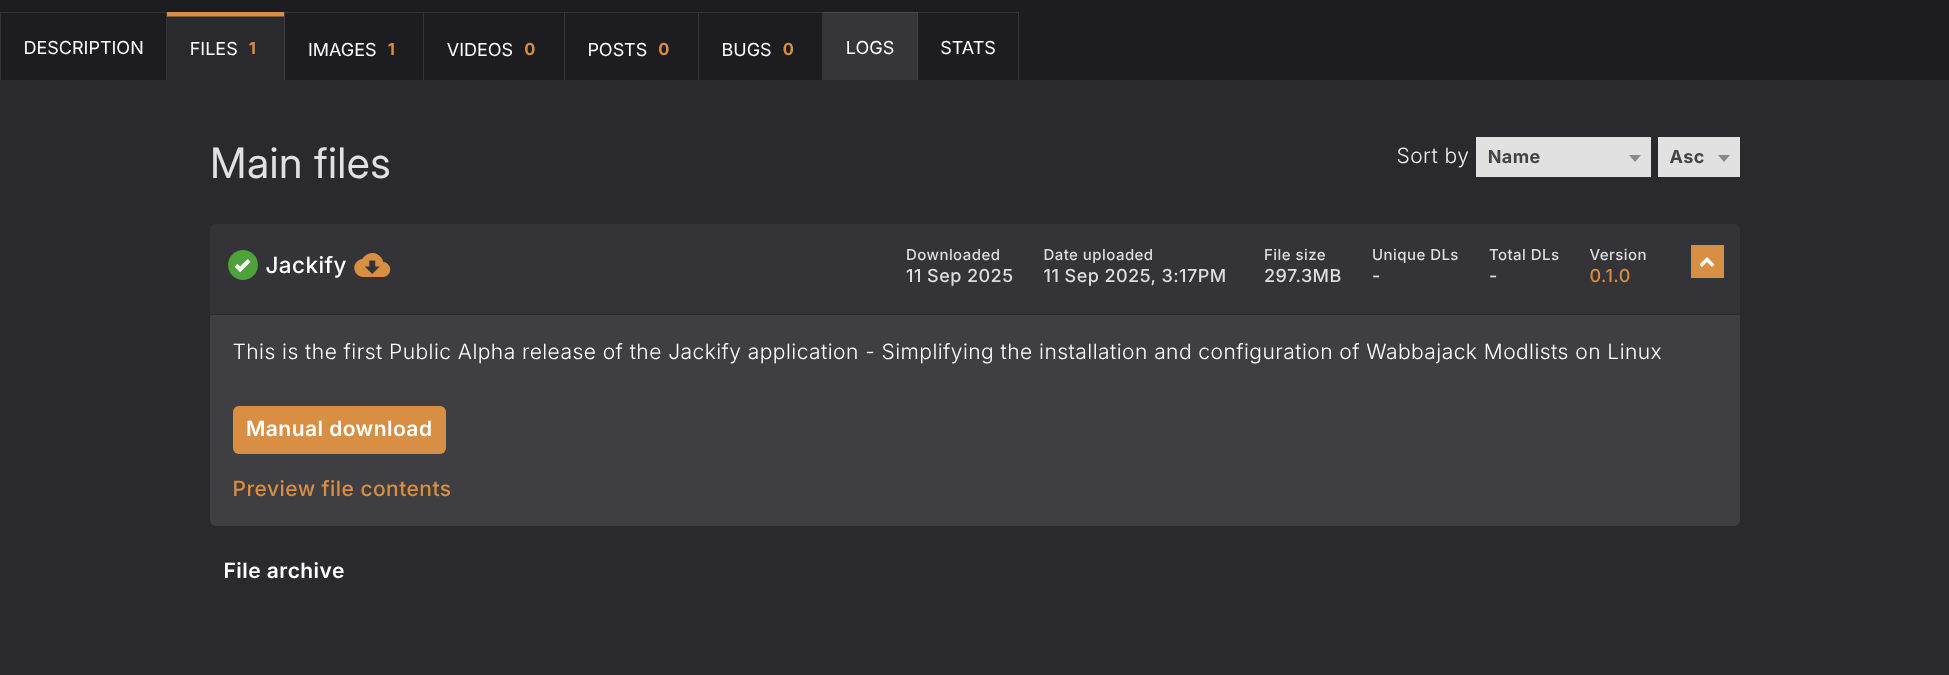
Nexus Mods page showing Jackify mod with download button highlighted
Once you've downloaded the 7z archive, you'll need to extract the AppImage and make it executable. This is a standard process for AppImage applications on Linux:
# Extract the AppImage from the 7z archive
7z x Jackify.7z

# Make the AppImage executable
chmod +x Jackify.AppImage

# Run Jackify
./Jackify.AppImage
You could chose to create a specific Jackify directory in your home directory, like so:

Screenshot: Terminal showing the 7z extraction command, chmod command, and successful AppImage execution
If you encounter permission issues or the AppImage fails to run, make sure FUSE is installed on your system. Most modern Linux distributions include FUSE by default, but some minimal installations might require manual installation.
As mentioned, GitHub Release versions will be available soon.
For users who want to get started immediately after installation:
-
Launch Jackify:
./Jackify.AppImage -
Install a Modlist:
- Click "Modlist Tasks" → "Install a Modlist (Automated)"
- Select your game (e.g. Skyrim Special Edition)
- Choose a modlist
- Set directories and enter Nexus API key
- Click "Start Installation"
- Play: Launch from Steam when installation completes
That's it! Jackify handles everything else automatically.
When you first launch Jackify, you'll see the main menu with two primary options:
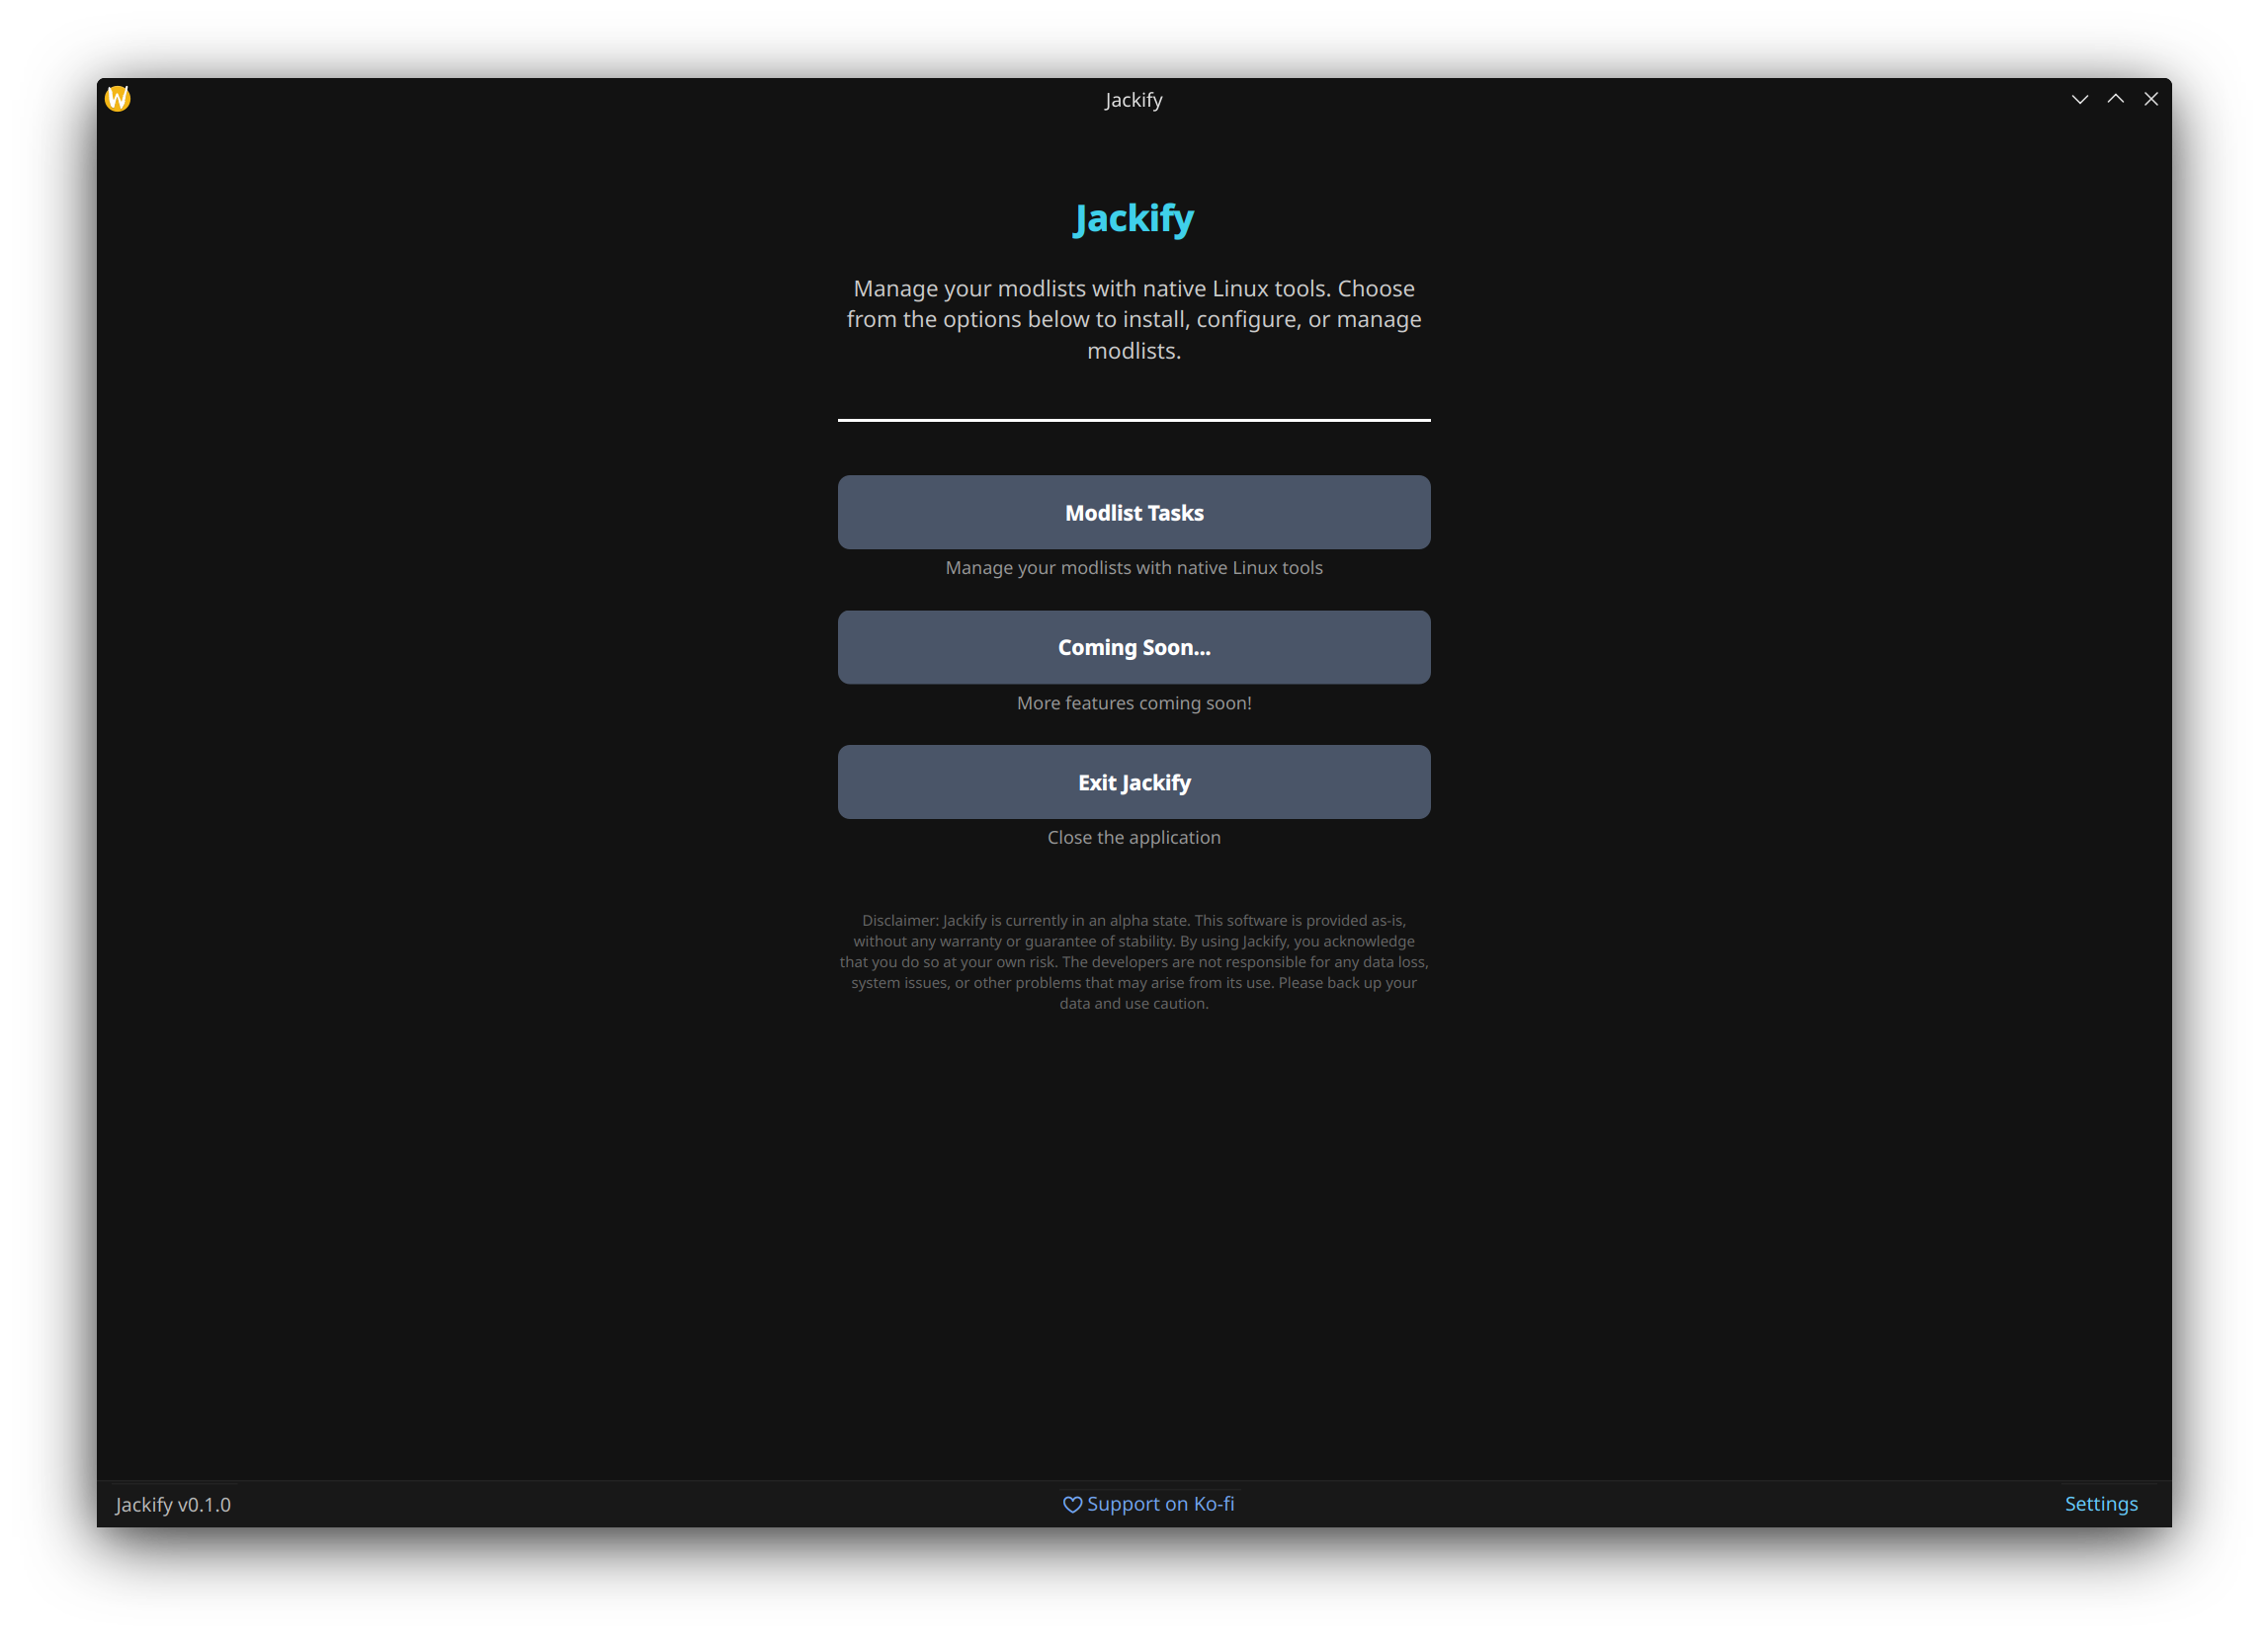
The Jackify main menu presents two options: Modlist Tasks for all functionality, and Coming Soon for future features
- Modlist Tasks: Access all modlist installation and configuration features
- Coming Soon...: Shows information about upcoming features (currently displays a dialog explaining that all current functionality is available through Modlist Tasks)
- Exit Jackify: Quit the application
All current modlist operations are accessed through "Modlist Tasks".
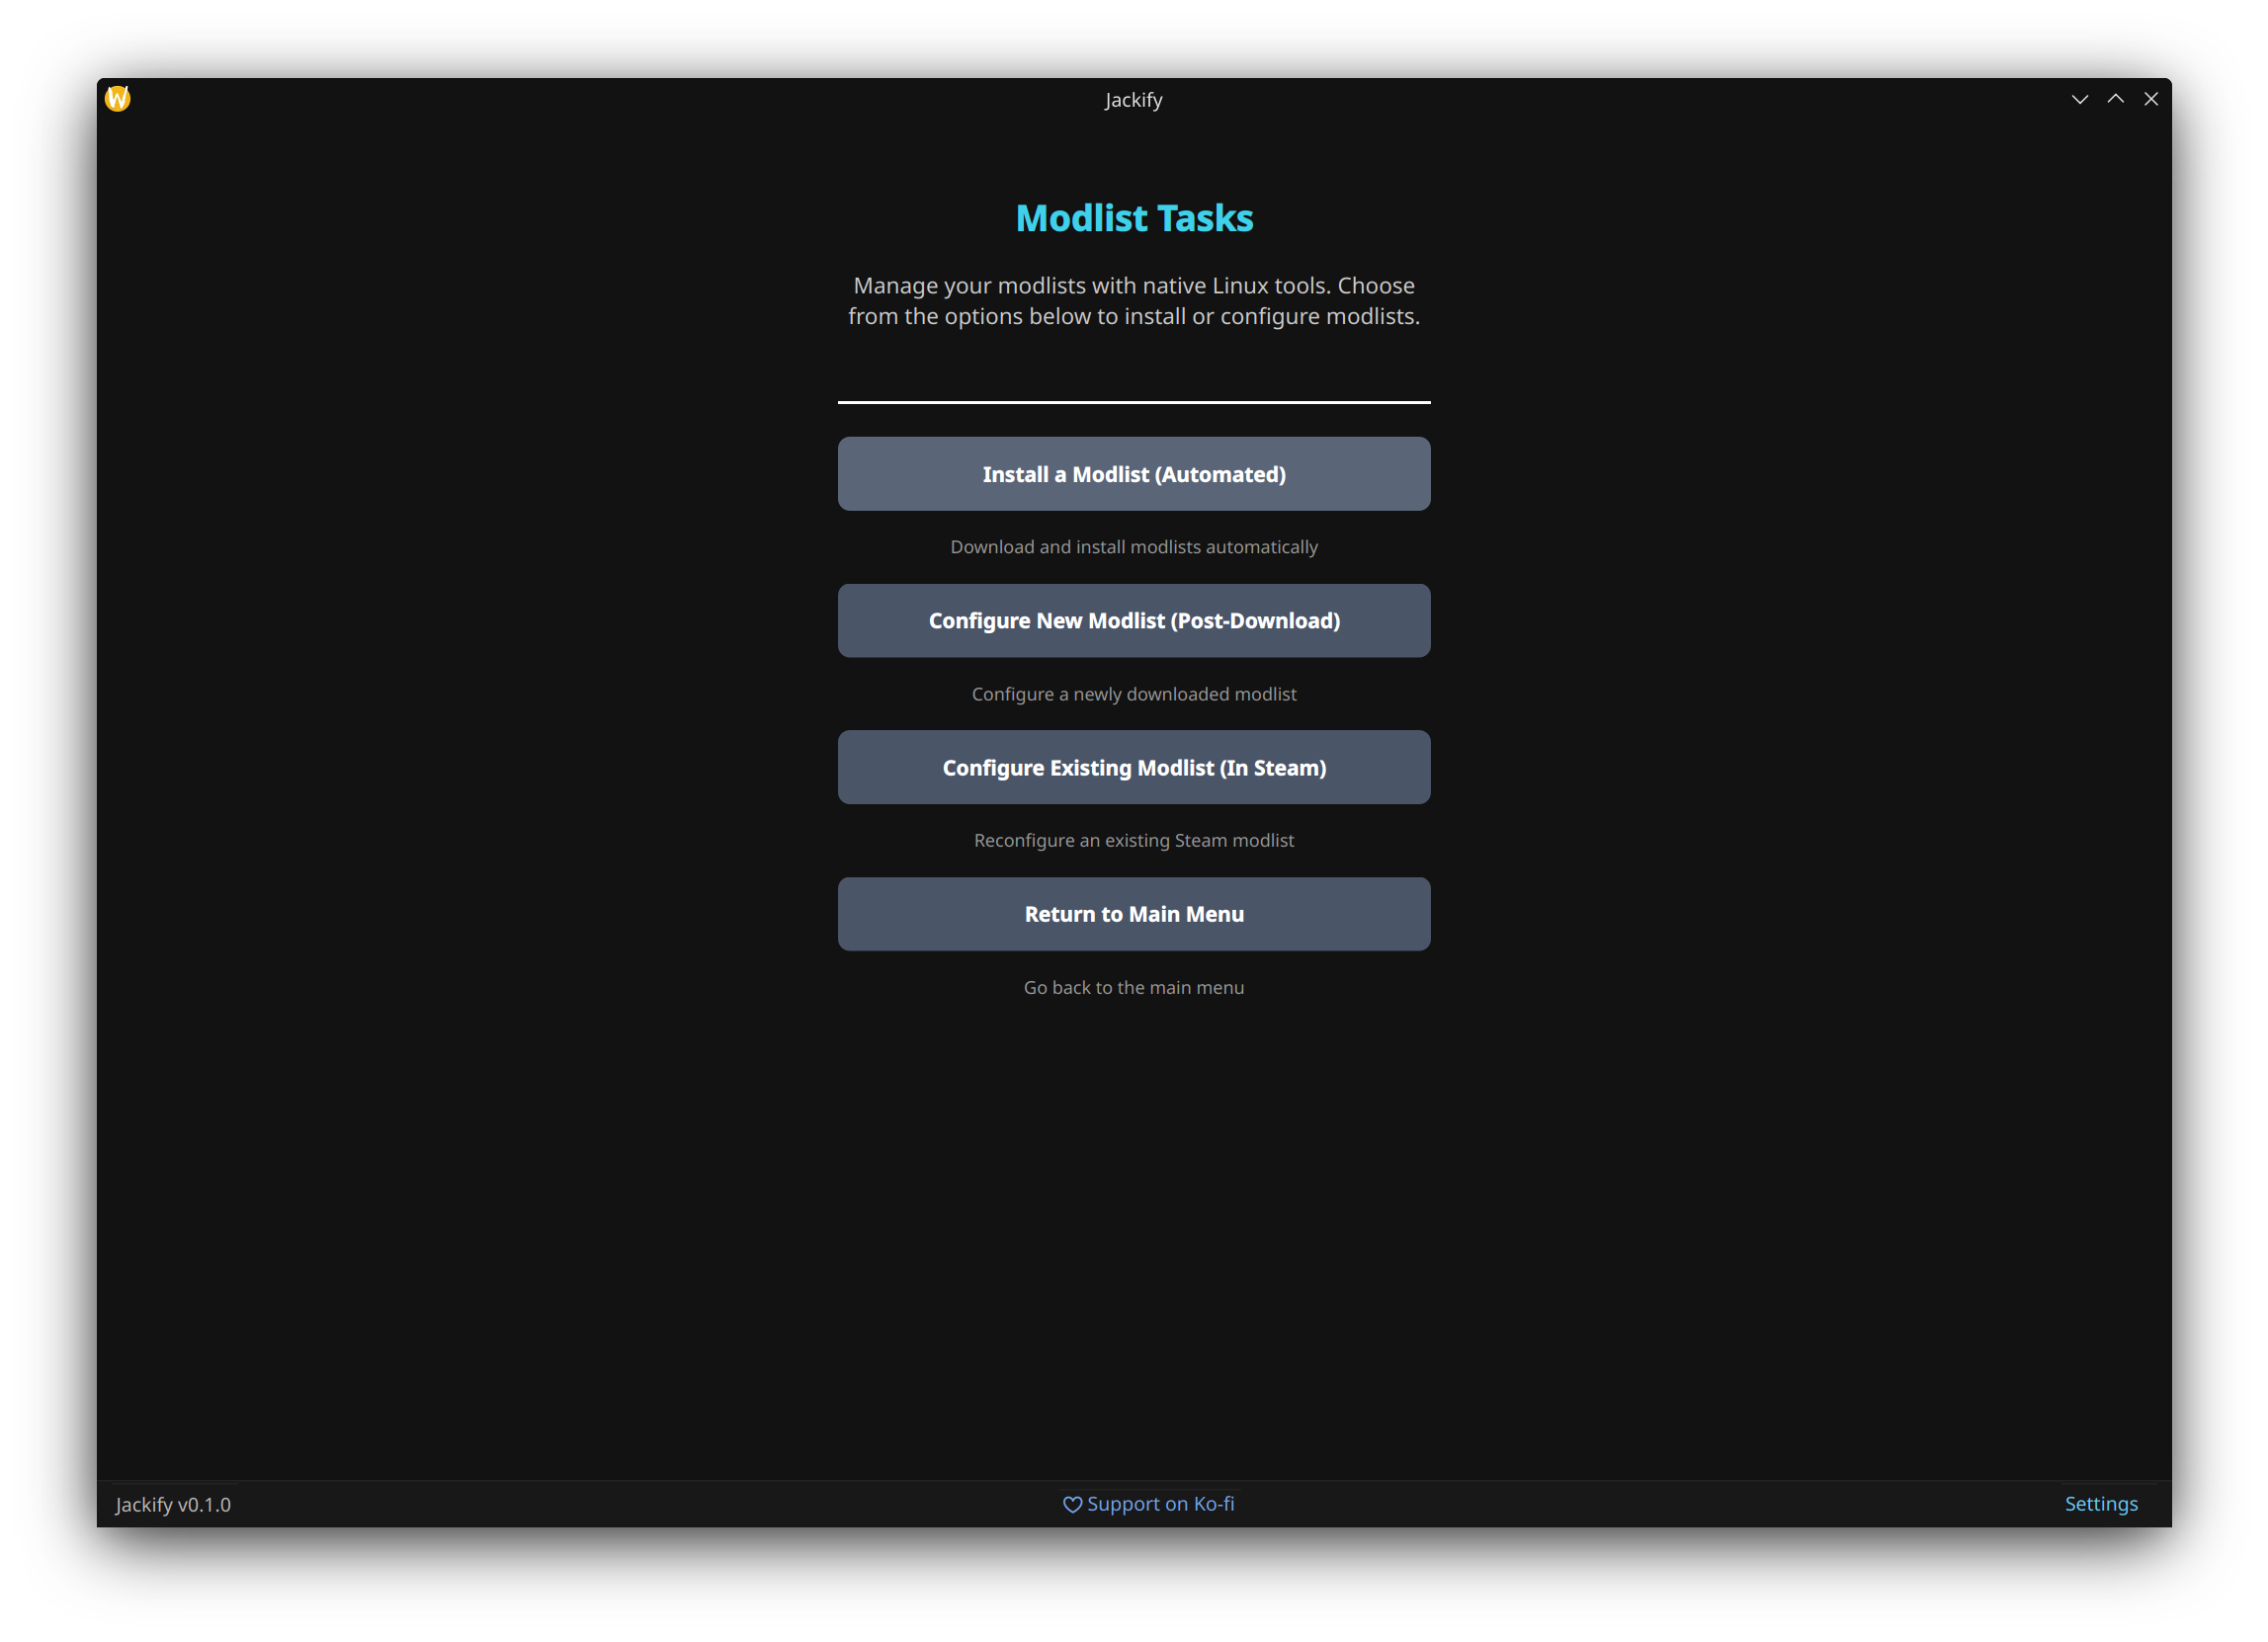
The Modlist Tasks menu provides access to installation and management functions
The Modlist Tasks menu provides three main workflows:
- Install a Modlist (Automated): Download and install any modlist from scratch with full automation
- Configure New Modlist (Post-Download): Set up Steam integration for manually installed modlists
- Configure Existing Modlist (In Steam): Reconfigure existing Steam shortcuts
Let's start with the most common scenario - installing a modlist from scratch. This workflow demonstrates Jackify's full automation capabilities.
From the Modlist Tasks menu, click the Install a Modlist button.
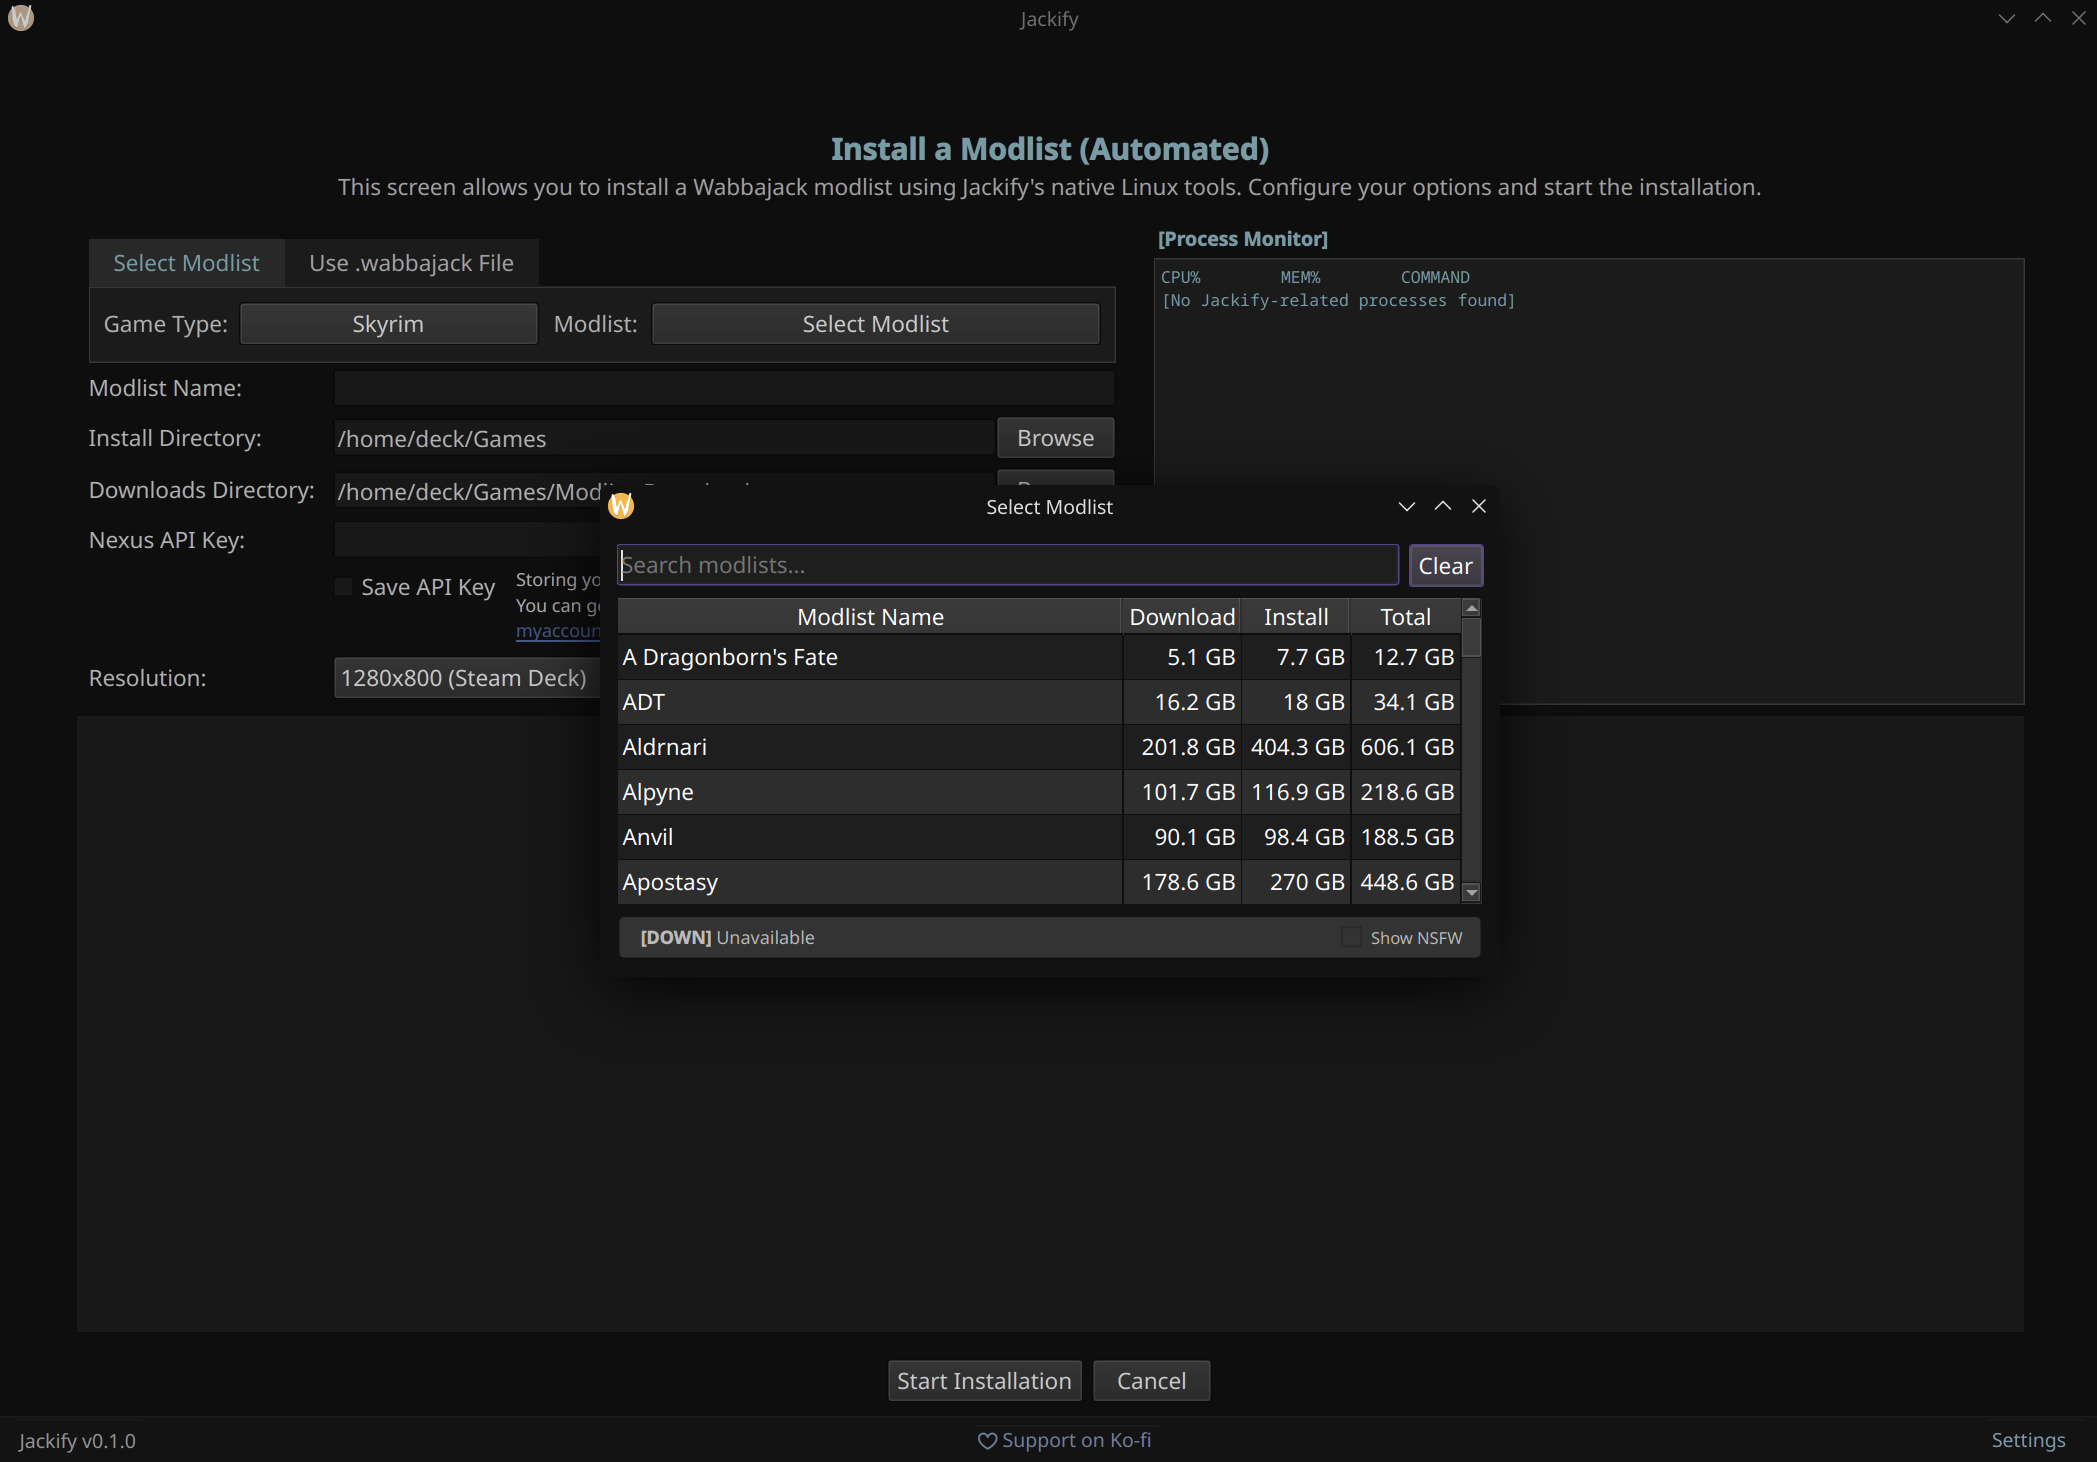
The installation interface contains all the configuration options needed to install and configure a modlist:

The initial installation screen shows all the configuration options you'll need to complete: game selection, modlist choice, directories, API key, and preferences
Start by choosing which game you want to install a modlist for.
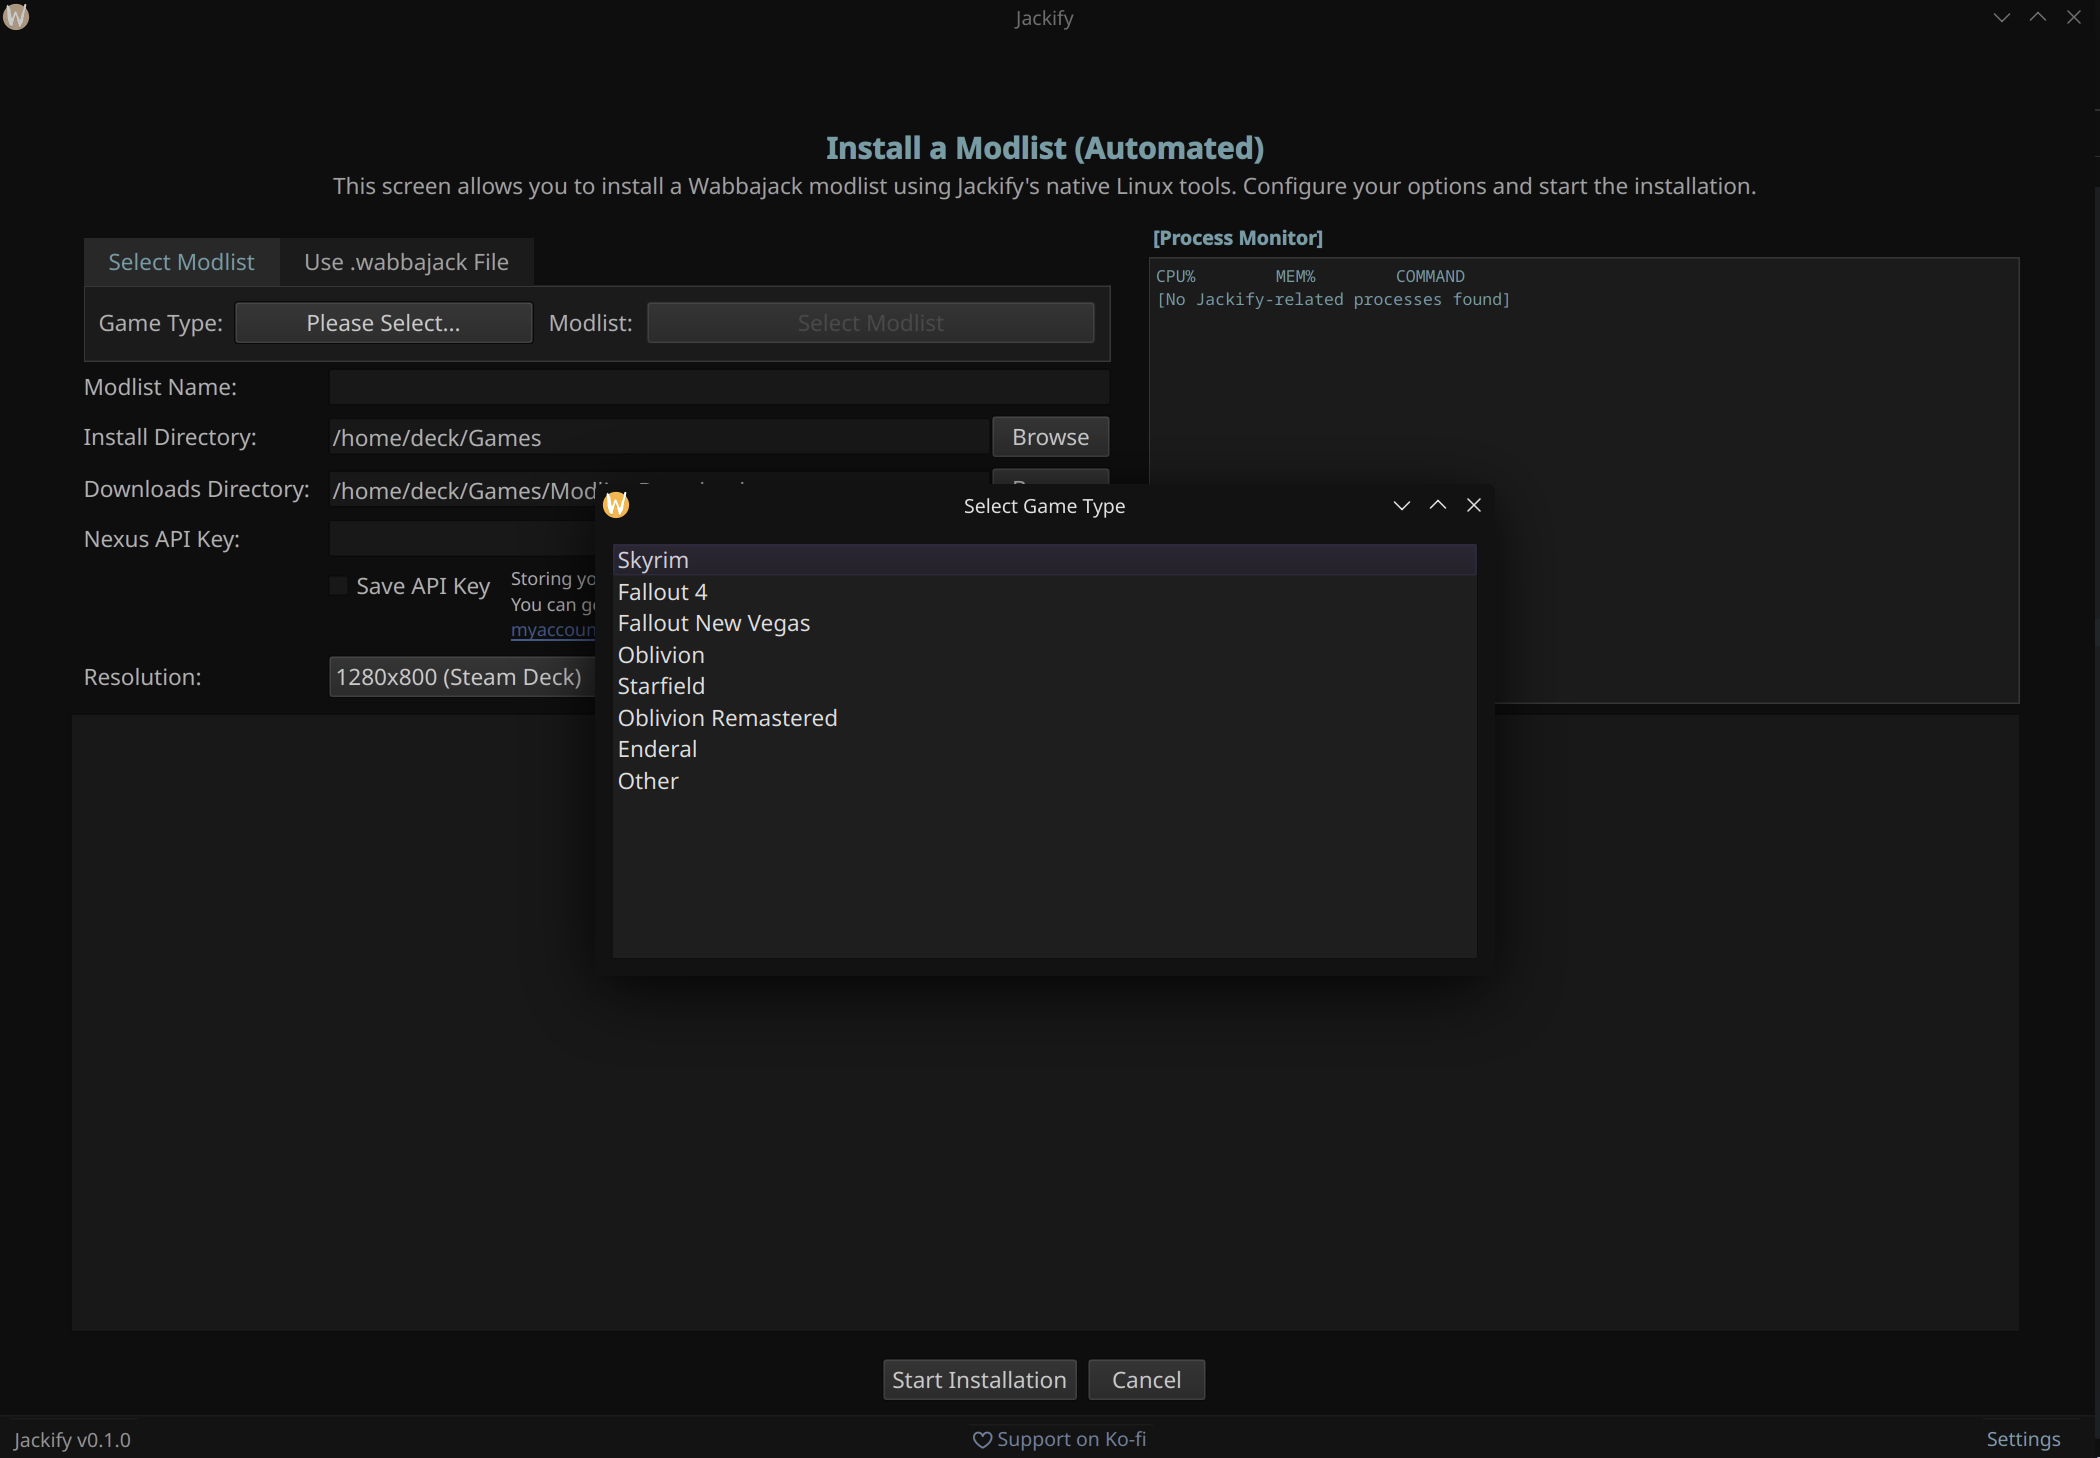
Game selection showing the full range of supported titles
Fully Supported Games (complete automation including Steam integration):
- Skyrim Special Edition: Full automation with post-install configuration
- Fallout 4: Full automation with post-install configuration
- Fallout New Vegas: Full automation with post-install configuration except for TTW creation.
- Enderal: Full automation with post-install configuration
- Oblivion: Full automation with post-install configuration
- Starfield: Installation works, Steam configuration coming soon
Download & Install Only (automation coming in future updates):
- Cyberpunk 2077: Basic modlist installation support. Manual configuration needed
- Baldur's Gate 3: Basic modlist installation support. Manual configuration needed
Once you've selected your game, you can browse available modlists. This is where Jackify's integration with the Wabbajack ecosystem comes through - it pulls live data about modlist availability, sizes, and status.
The modlist browser shows comprehensive information including download sizes, install sizes, total space requirements, and current status
The table provides crucial information for planning your installation:
- Download Size: How much you'll need to download from Nexus
- Install Size: How much disk space the final installation will use
- Total Size: Combined space needed during installation (usually download + install)
- Status: Whether the modlist is currently available and working
Jackify provides a modlist search function, as well as NSFW filtering:
Search and Filtering
When you're looking for specific modlists or want to narrow down options, the search function lets you filter by name:
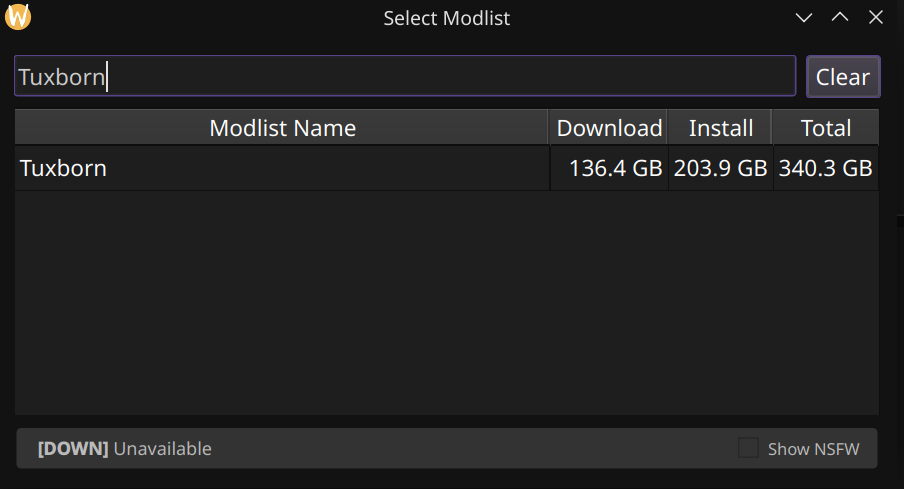
Search functionality helps you quickly find specific modlists in large catalogs
Content and Status Filtering
Jackify respects user preferences around content and shows clear indicators for modlist status:
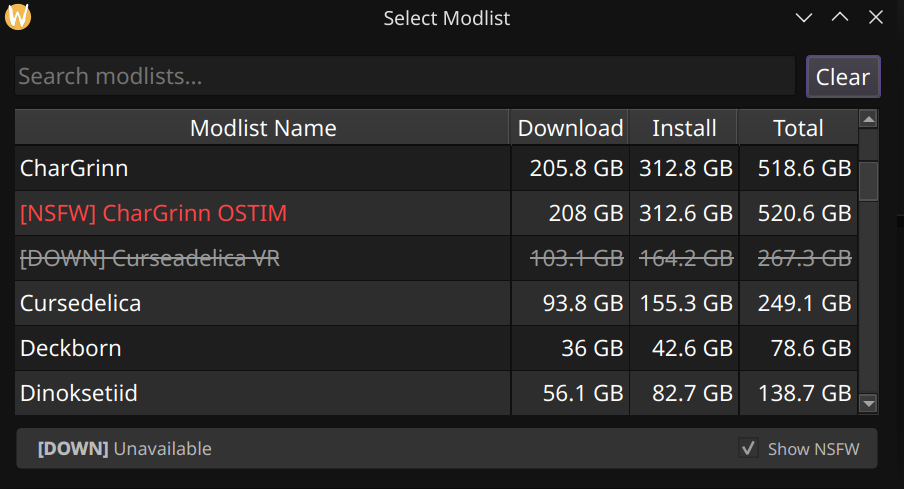
NSFW filtering and status indicators help you avoid unsuitable or unavailable content
By default, NSFW content is hidden to maintain family-friendly defaults, but you can enable it by checking the box at the bottom of the window. [DOWN] Status indicators clearly show when modlists are temporarily unavailable.
Custom .wabbajack Files
If you already have the .wabbajack file for your desired modlist downloaded, or it's just not available via the Wabbajack Modlist List, you can use your own .wabbajack file using the "Use .wabbajack file" tab at the top:

The custom file option supports community modlists, beta versions, or personal modlist projects
This is particularly useful for:
- Beta versions of modlists not yet in the public catalog
- Community-created modlists not distributed through Wabbajack's ecosystem
- Personal modlist projects
Directory configuration is where you will select where you want the modlist installed, and where you want the mod archives to be downloaded to:
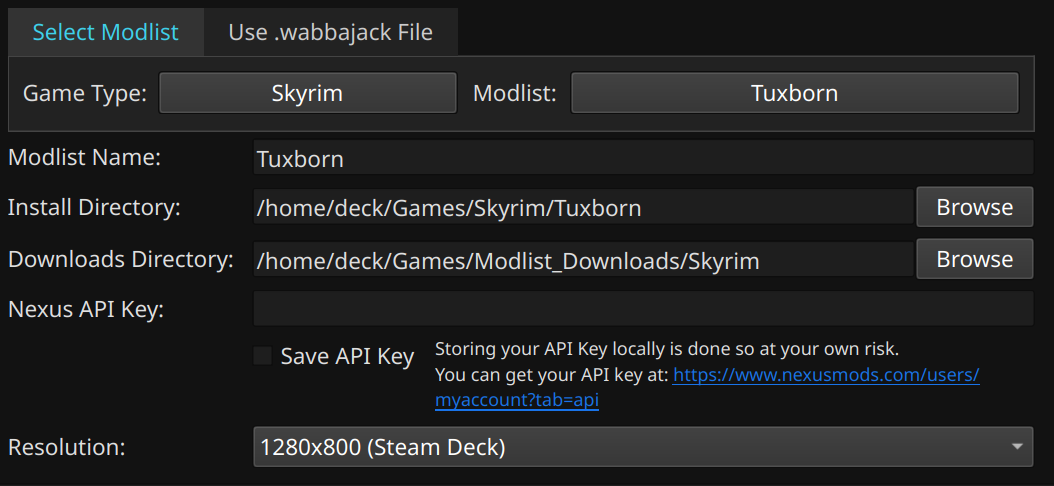
Directory configuration showing the distinction between installation location (where the modlist lives) and download location (temporary storage for mod files)
Installation Directory: This is where your final modlist will be installed. It contains ModOrganizer, the game files, and all configured mods. This directory should be on fast storage if possible since it's accessed during gameplay.
Download Directory: This is temporary storage for downloaded mod files during installation. These files can be deleted after installation completes if you wish, so this can be on slower/cheaper storage if you have a multi-drive setup.
Tips for Directory Selection:
- Place installation directories on SSDs for better performance
- Download directories can be on traditional HDDs to save SSD space
- Consider creating a dedicated
~/Gamesor~/Modlistsdirectory structure - Keep the modlist Install and Download directories separate
Jackify has built-in protection to ensure you don't accidentally overwrite the wrong directory if you select one as the install directory by mistake.
This step connects Jackify to your Nexus Mods account for automated downloads. The API key is like a passcode that lets Jackify download mods on your behalf. While there are plans to replace this API Key requirement, this is the only option for now. The UI provides a link to where you will find your Nexus API Key, and has an optional Save function to keep the key stored locally on your system, encrypted.

The API key input includes helpful instructions and links to generate your key
Getting Your API Key:
- Browse to the Nexus Mods API Key page - https://www.nexusmods.com/users/myaccount?tab=api
- If prompted, log in with your account
- Scroll down to the very bottom to find your Personal API Key
- Copy the key and paste it into Jackify
- Optionally save your key by checking the box

Once entered, the API key is validated and stored securely for future use
Jackify validates your API key and optionally stores it securely for future modlist installations. You won't need to enter it again unless you generate a new key or switch Nexus accounts.
Security Note: Your API key is stored locally and encrypted. Jackify never transmits your key to any servers other than Nexus Mods for legitimate mod downloads.
The final configuration step involves setting display preferences:
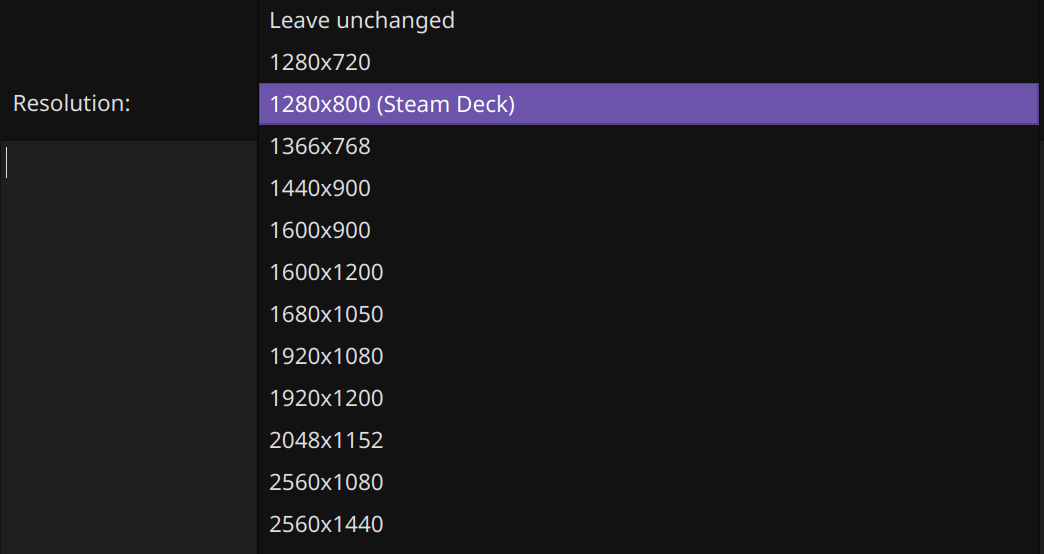
Resolution configuration ensures your modlist is optimized for your display setup
Resolution Settings: Choose the resolution that matches your monitor or your preferred gaming resolution. This can be changed later, but setting it correctly now saves configuration time. Jackify will remember the last resolution you set to make future modlist installs easier.
Once all configuration options are set, the actual installation begins. This is where Jackify's automation kicks in.
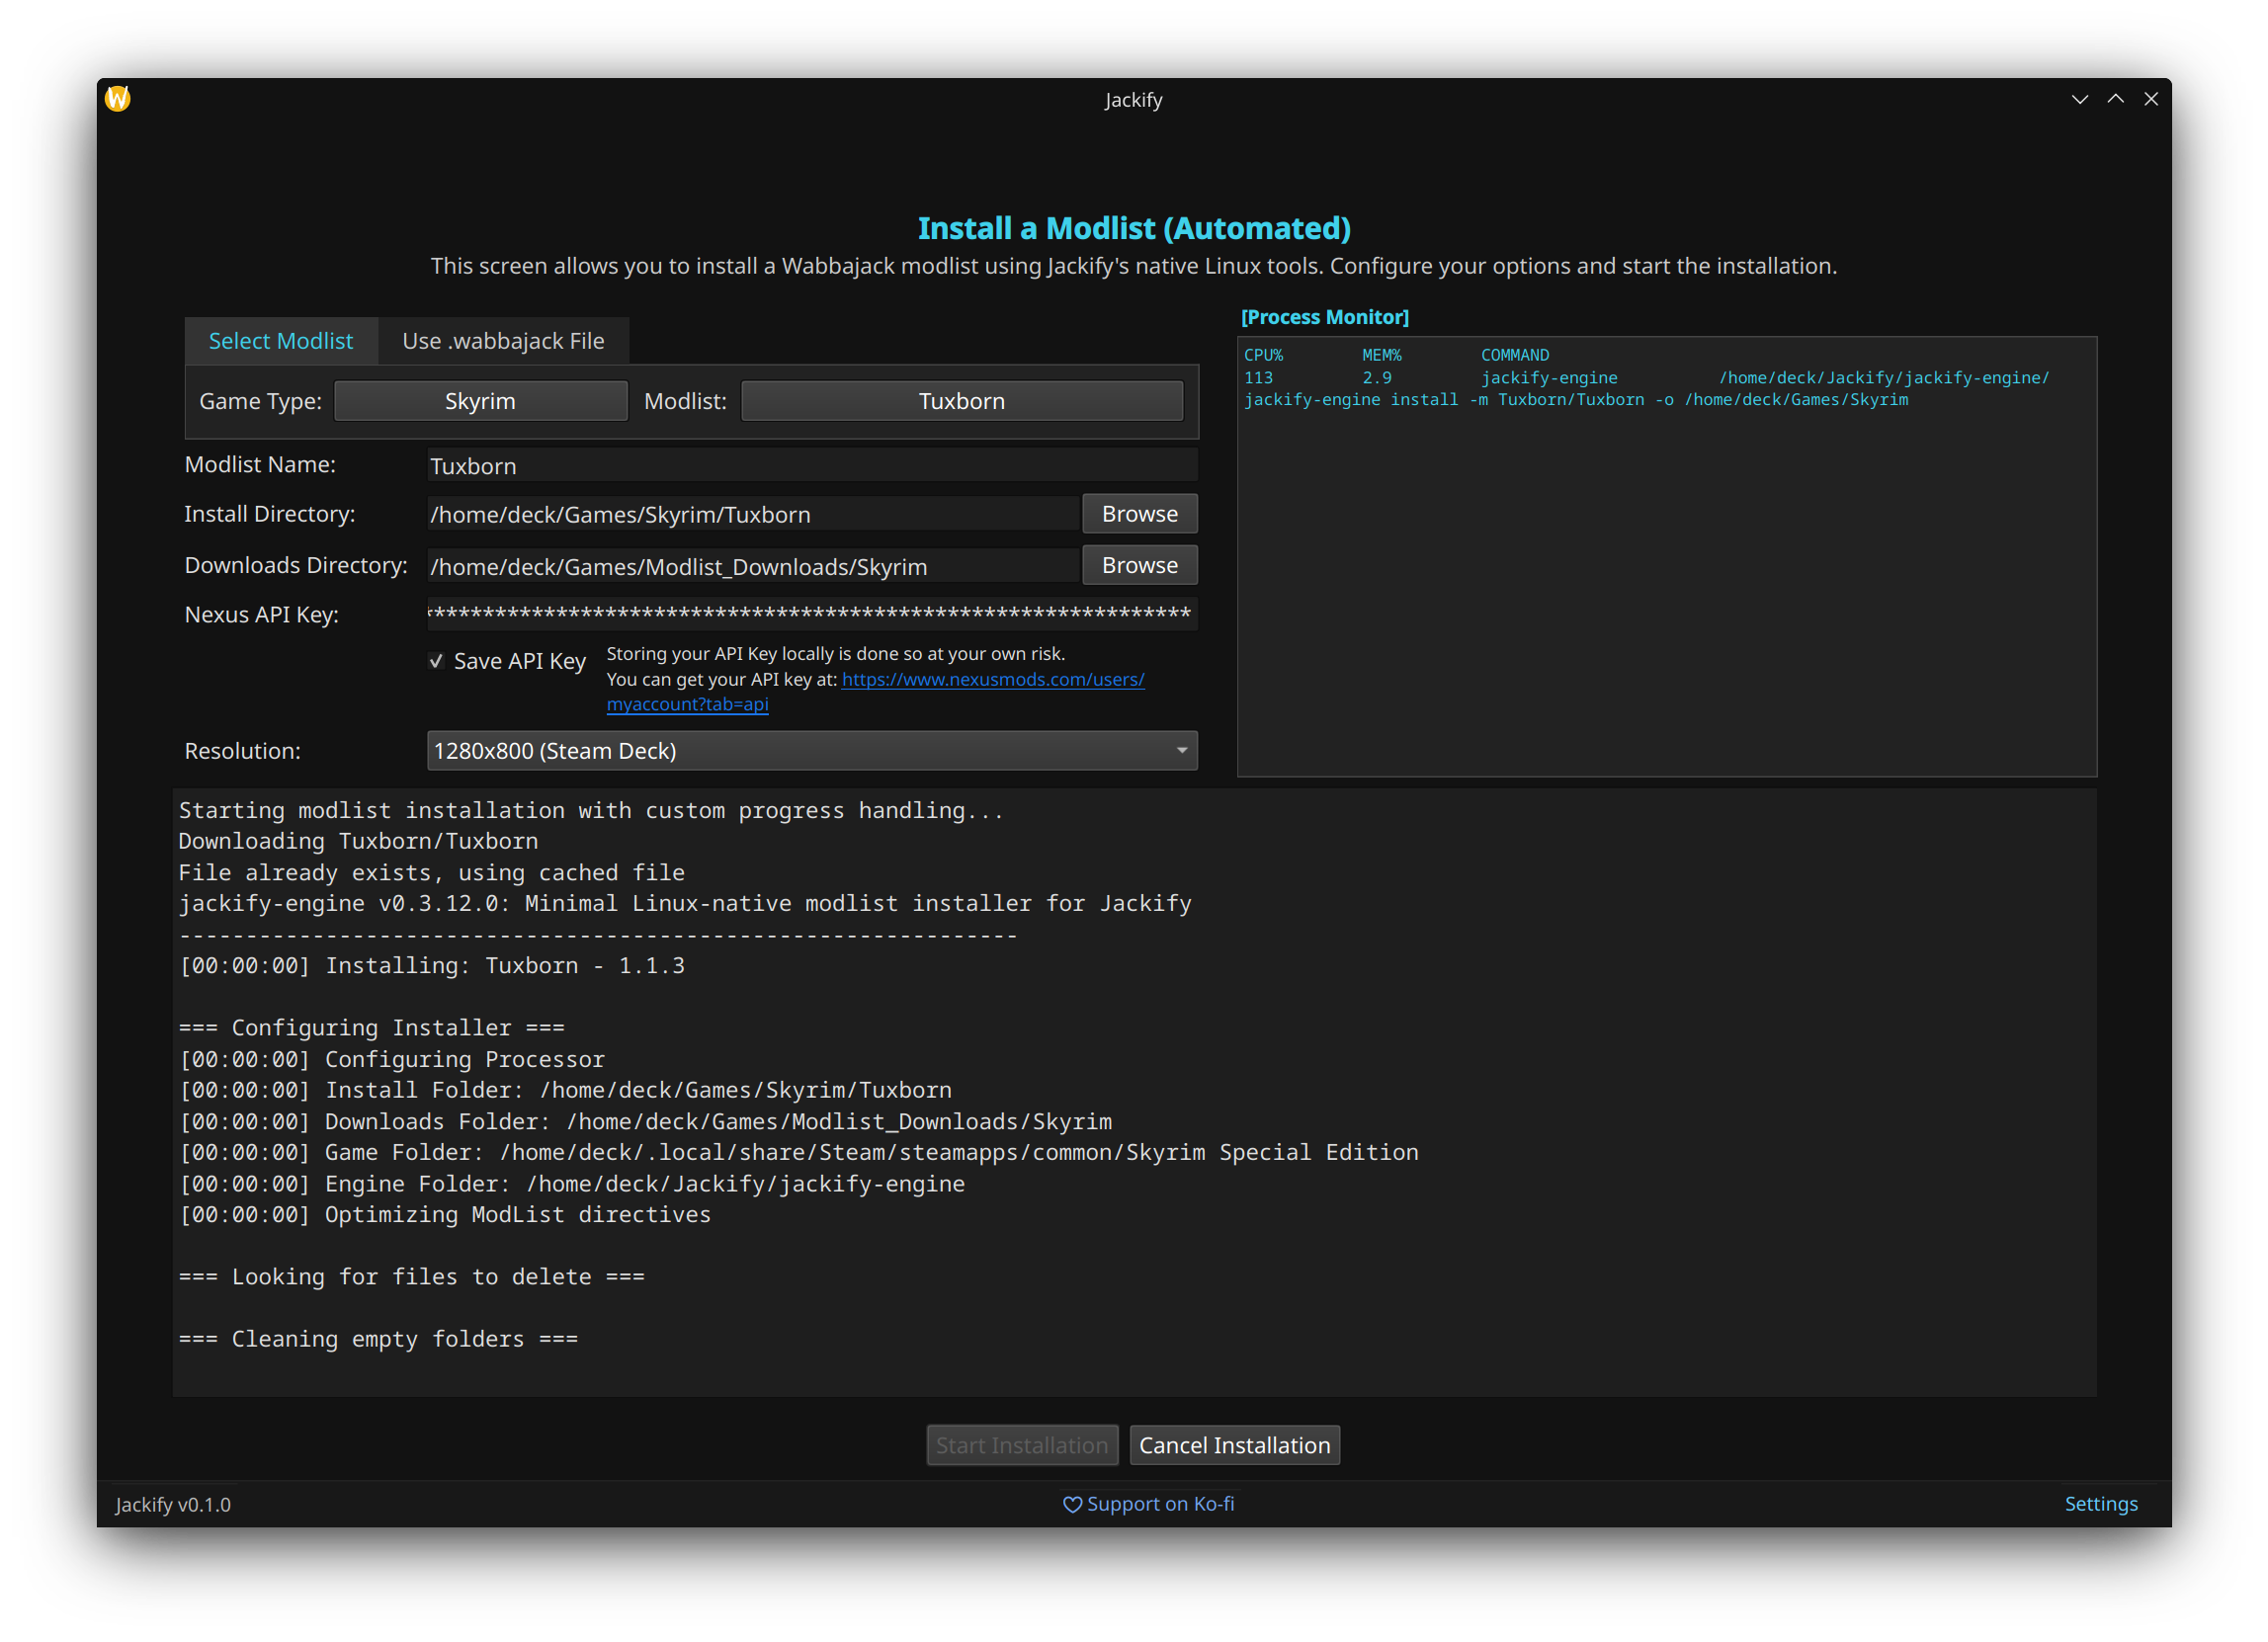
The installation progress screen provides real-time feedback on download and installation status
What Happens During Installation:
- Modlist File: If needed, the modlist .wabbajack file is downloaded
- Download Phase: Mods are downloaded from Nexus Mods using your API key
- Extraction: Downloaded archives are extracted and organized
- Installation: Files are moved to their final locations, textures are converted, BSAs are built and configured
- Steam Integration: Steam shortcuts are created with proper Proton configuration
- Final Configuration: Launch options, compatibility tools, and artwork are set up, where possible
Time varies significantly based on your internet connection, disk speed, processing power. The process is designed to be resumable if interrupted - simply reuse the same Install and Download directory paths and the modlist installation will analyse the current status, and pick up where it left off.
Not everyone starts from scratch - you might have modlists from previous installations, or you might want to reconfigure existing Steam shortcuts. Jackify handles these scenarios with dedicated workflows.
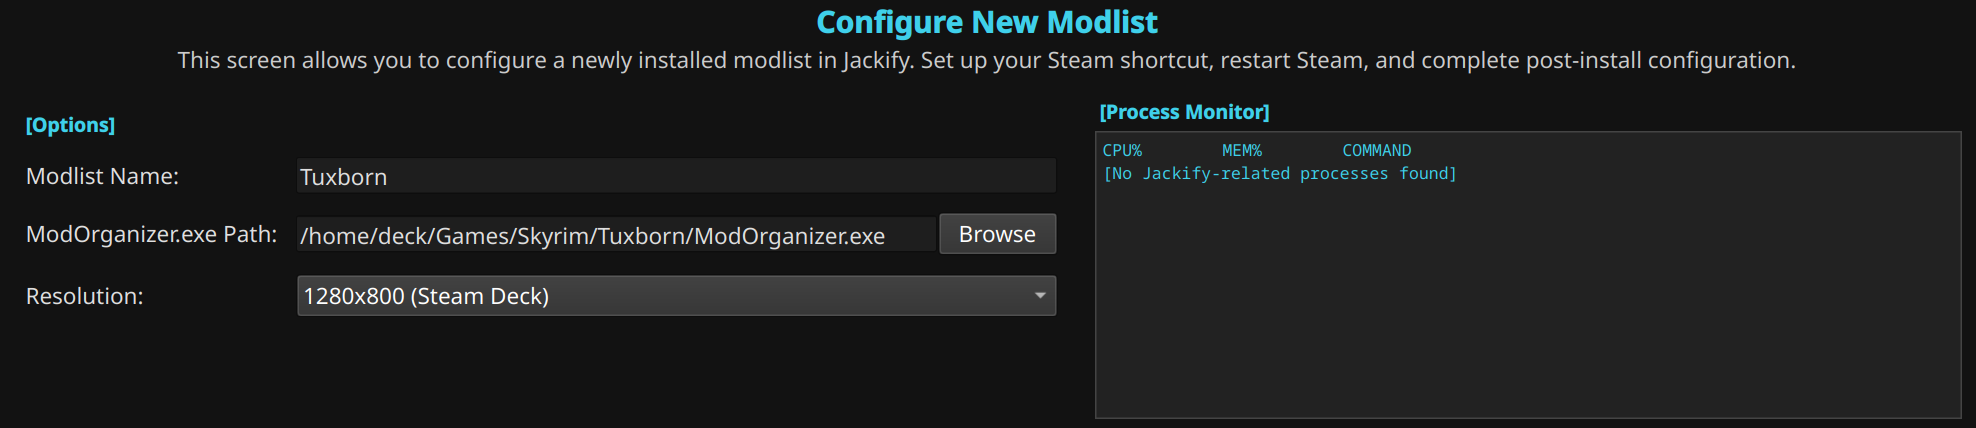
If you have a modlist that was installed with some other method (perhaps following old guides) and want to integrate it properly with Steam, the "Configure New Modlist (Post-Download)" option is what you need.
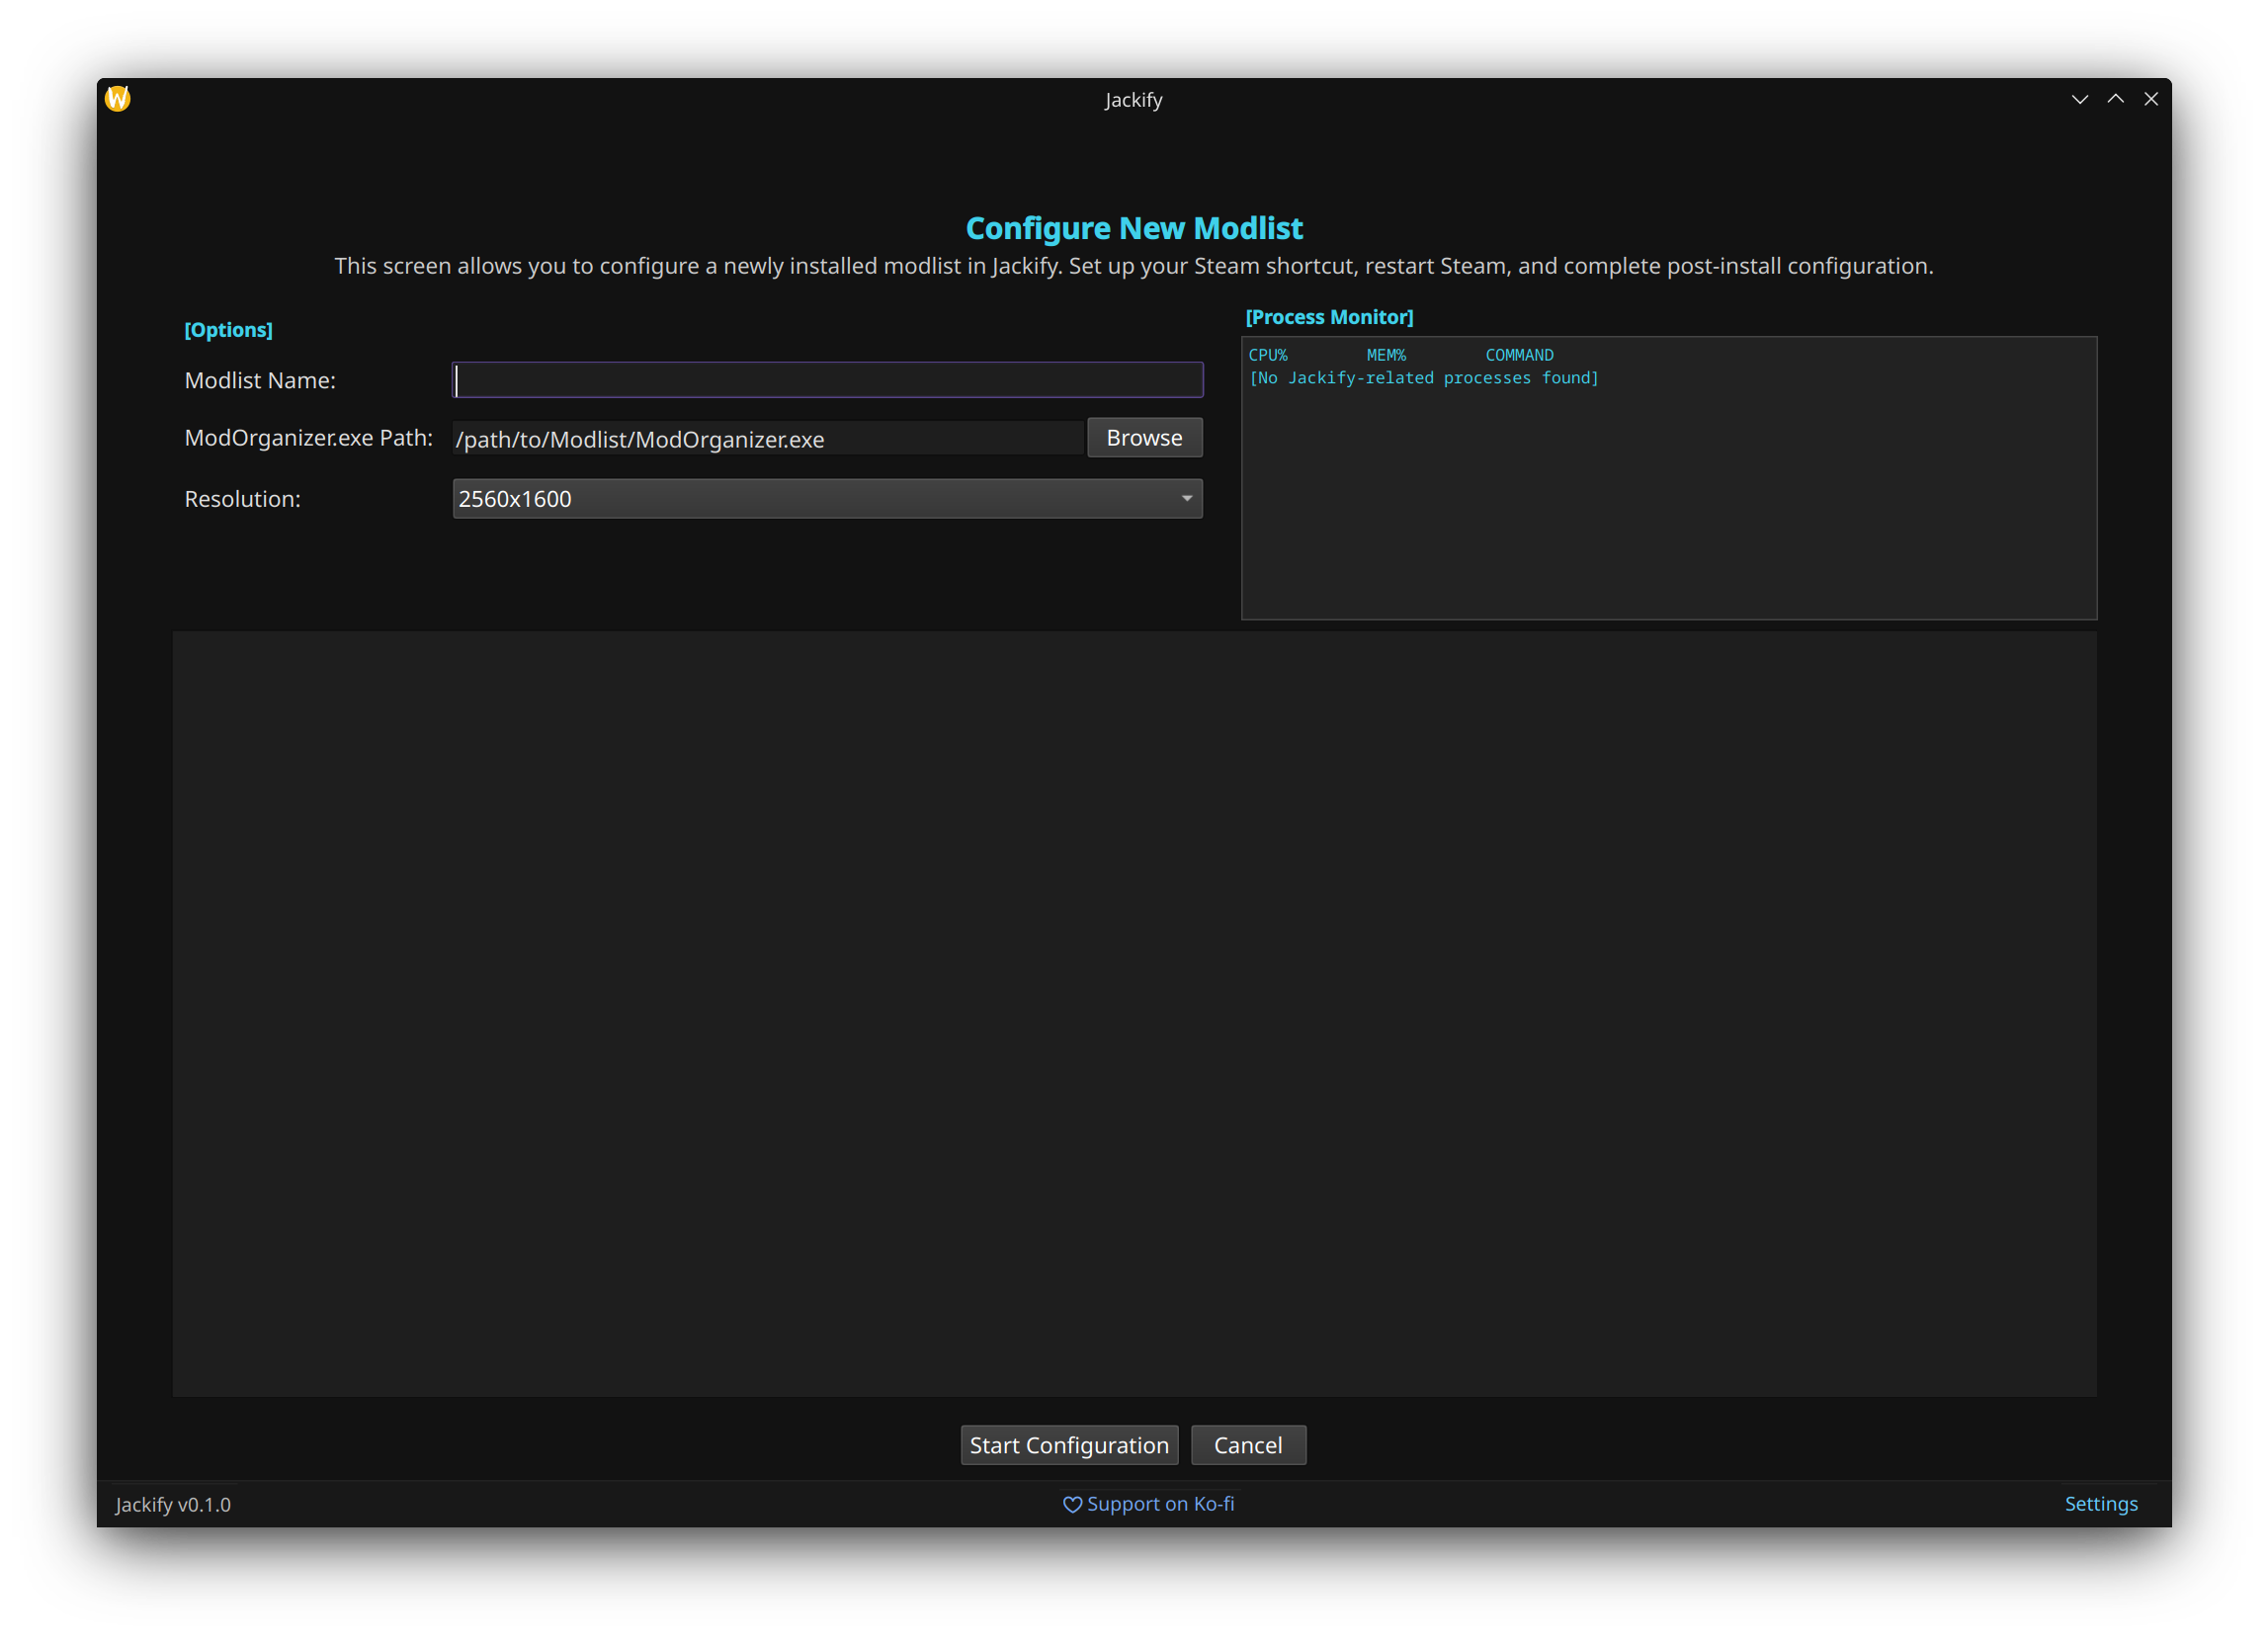
The initial configuration screen for existing modlists focuses on locating your installation and setting up Steam integration
This workflow assumes you have a working modlist installation but need Jackify to:
- Create proper Steam shortcut
- Configure Proton settings
- Set up launch options
- Install any missing compatibility components
The key step is pointing Jackify to your existing ModOrganizer.exe file. This tells Jackify where your modlist is installed and lets it analyze the configuration:
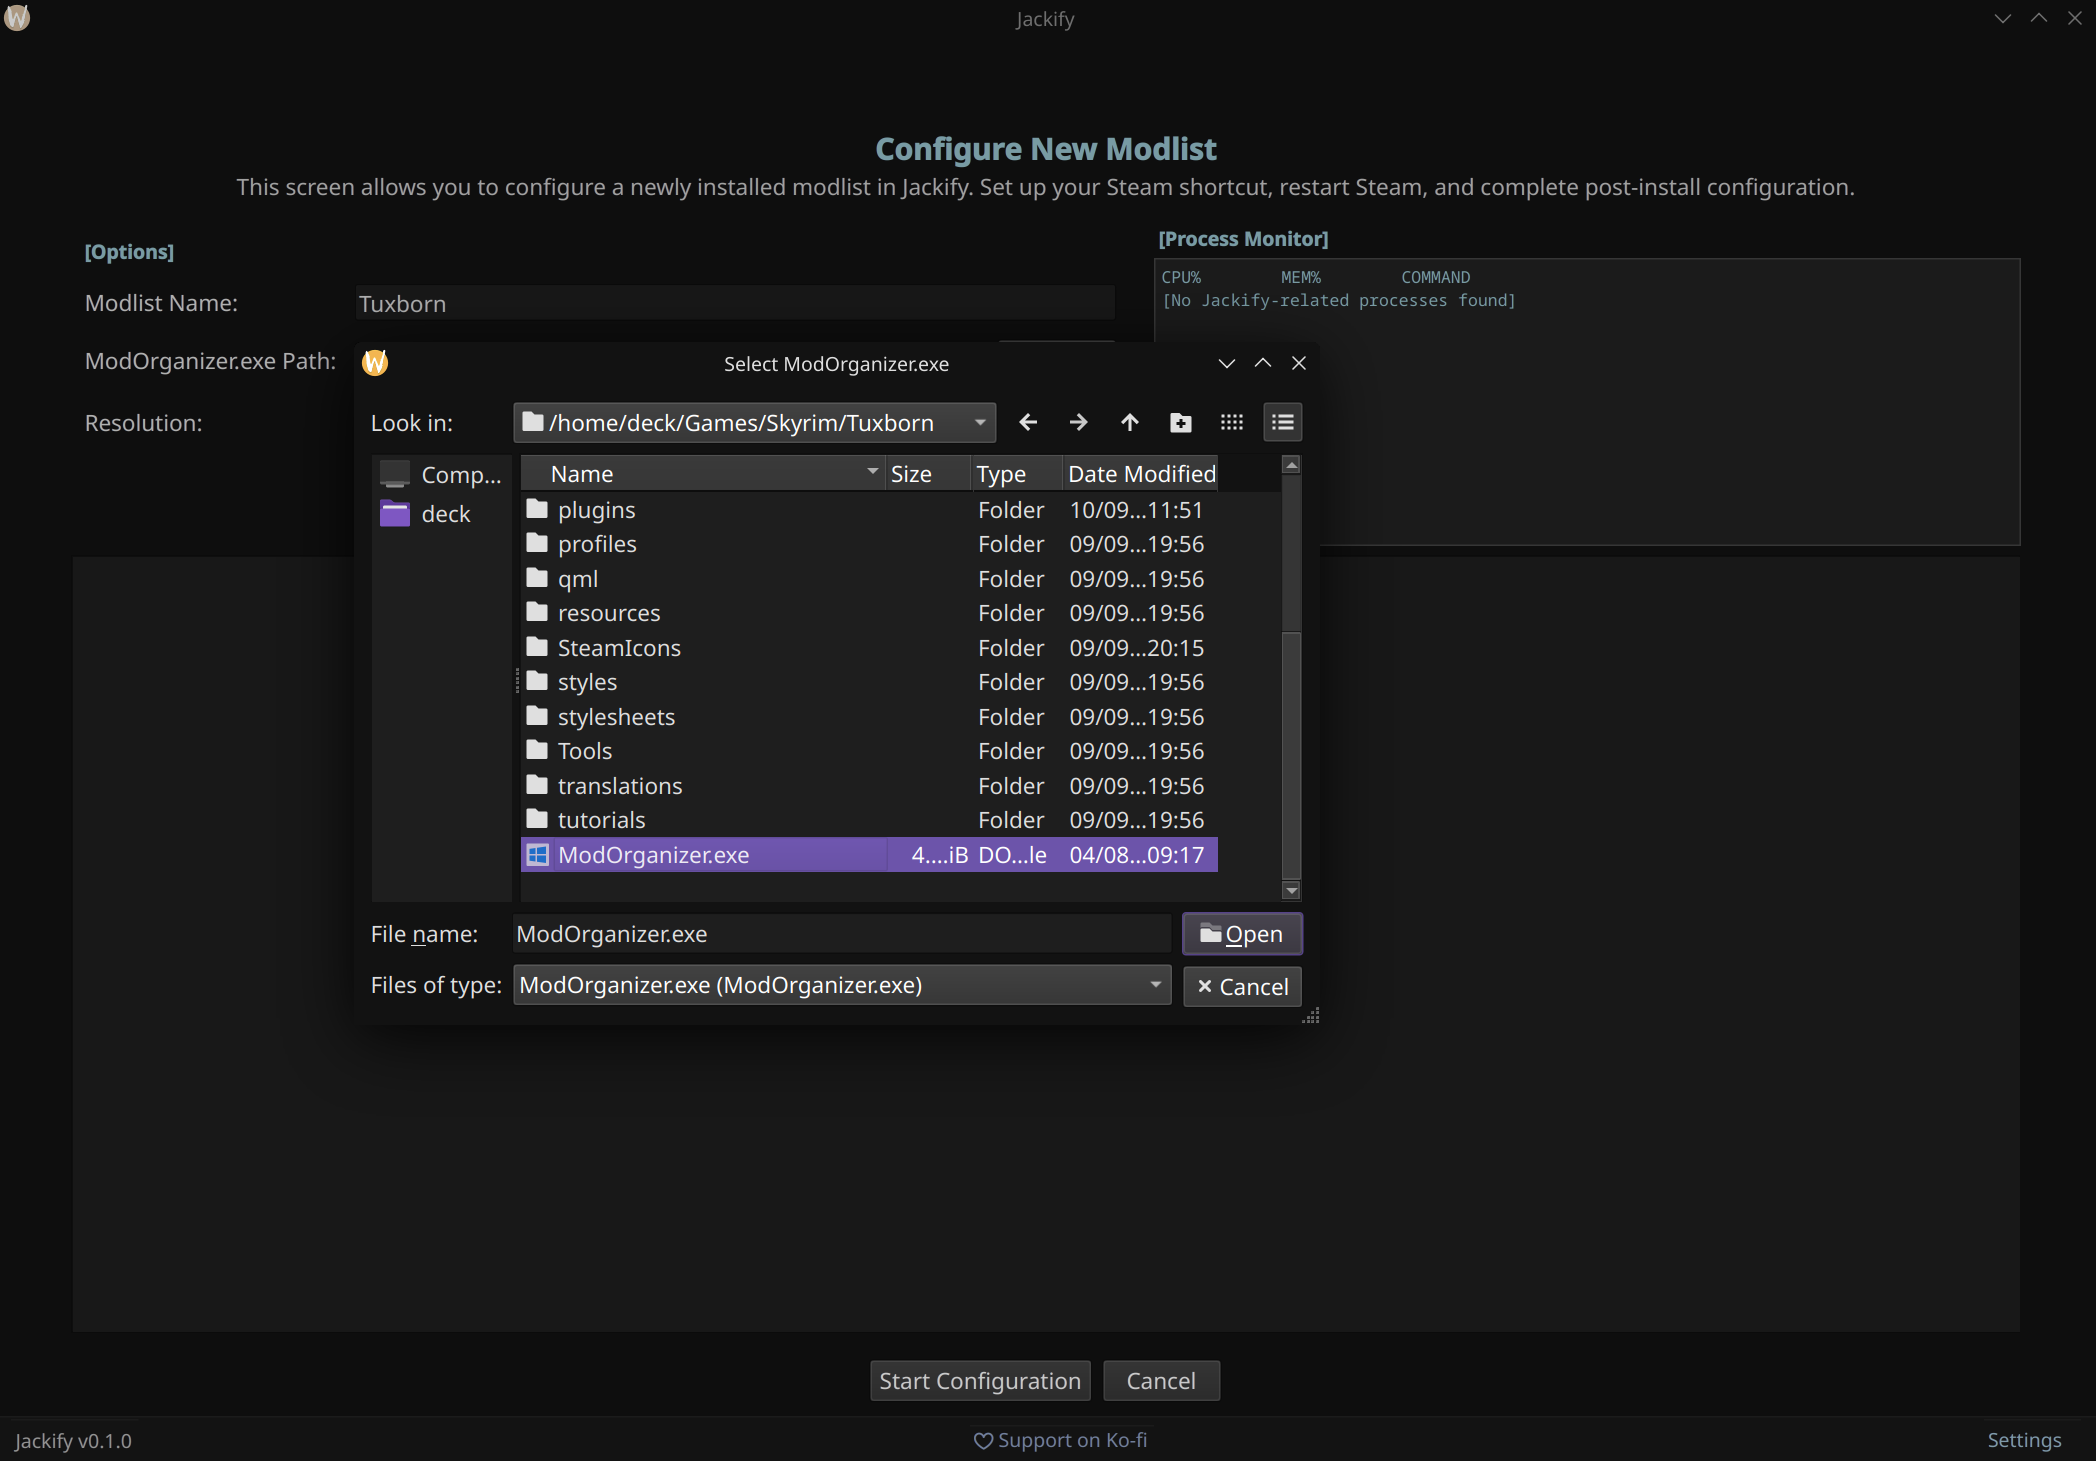
Browse to locate your ModOrganizer.exe file - Jackify will analyze the installation and configure Steam integration automatically
What Jackify Analyses:
- Game type and version
- Required compatibility components
- Steam integration requirements
The completed configuration shows Jackify's analysis of your existing installation and proposed Steam integration settings
With the Name, path and resolution set, click Start Configuration. Jackify will:
- Create proper Steam shortcut
- Configure Proton settings
- Set up launch options
- Install any missing compatibility components
Once complete, you should be good to click play in steam, and launch the modlist from MO2!
Sometimes you may want to reconfigure modlists that are already in Steam, perhaps from a previous install, or if something went wrong during the install process.

The reconfiguration interface lets you update settings while preserving existing Steam integration
Jackify detects existing modlists in your Steam library and presents them for reconfiguration.
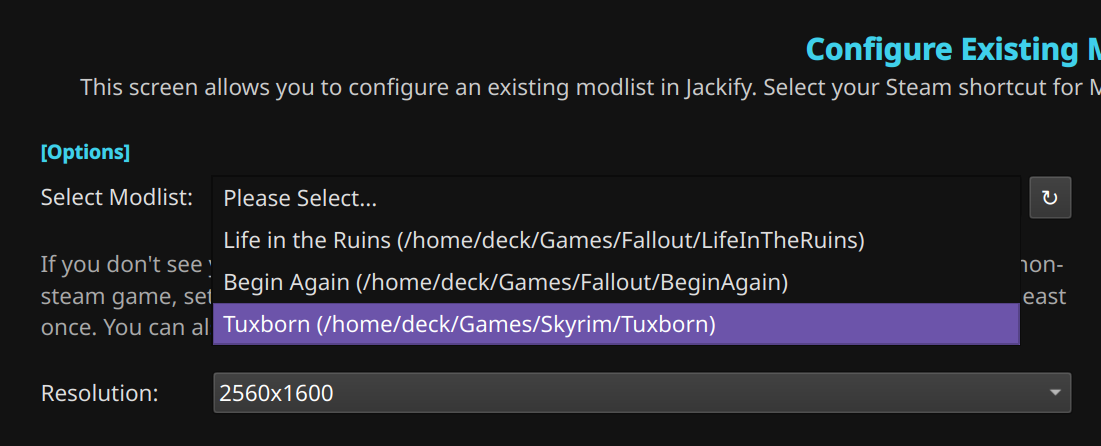
Jackify can detect existing modlist shortcuts in Steam and reconfigure them
Common Reconfiguration Scenarios:
- Moving modlist installations to new locations
- Fixing corrupted Steam shortcuts
While the GUI is designed for ease of use, Jackify also provides a full-featured command line interface.
Launch Jackify with the --cli flag to access the text-based interface:
./Jackify.AppImage --cli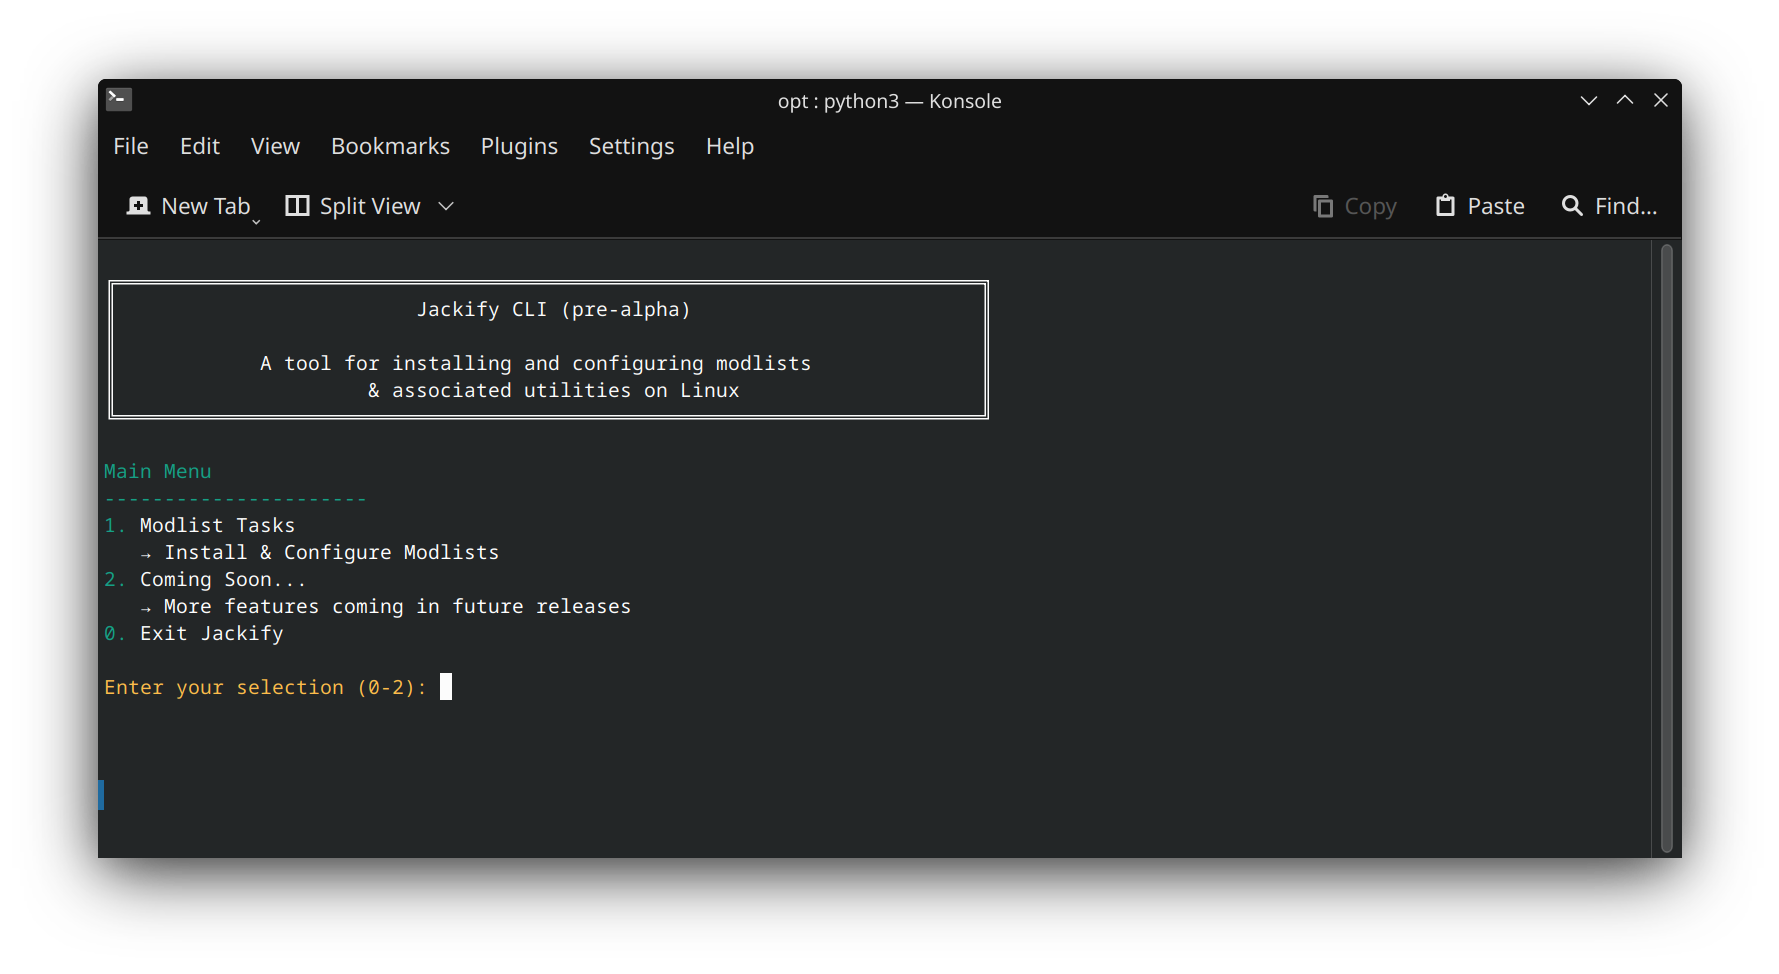
The CLI main menu provides the same functionality as the GUI but in a text-based interface suitable for remote access or automation
The CLI uses a menu-driven approach that mirrors the GUI functionality:
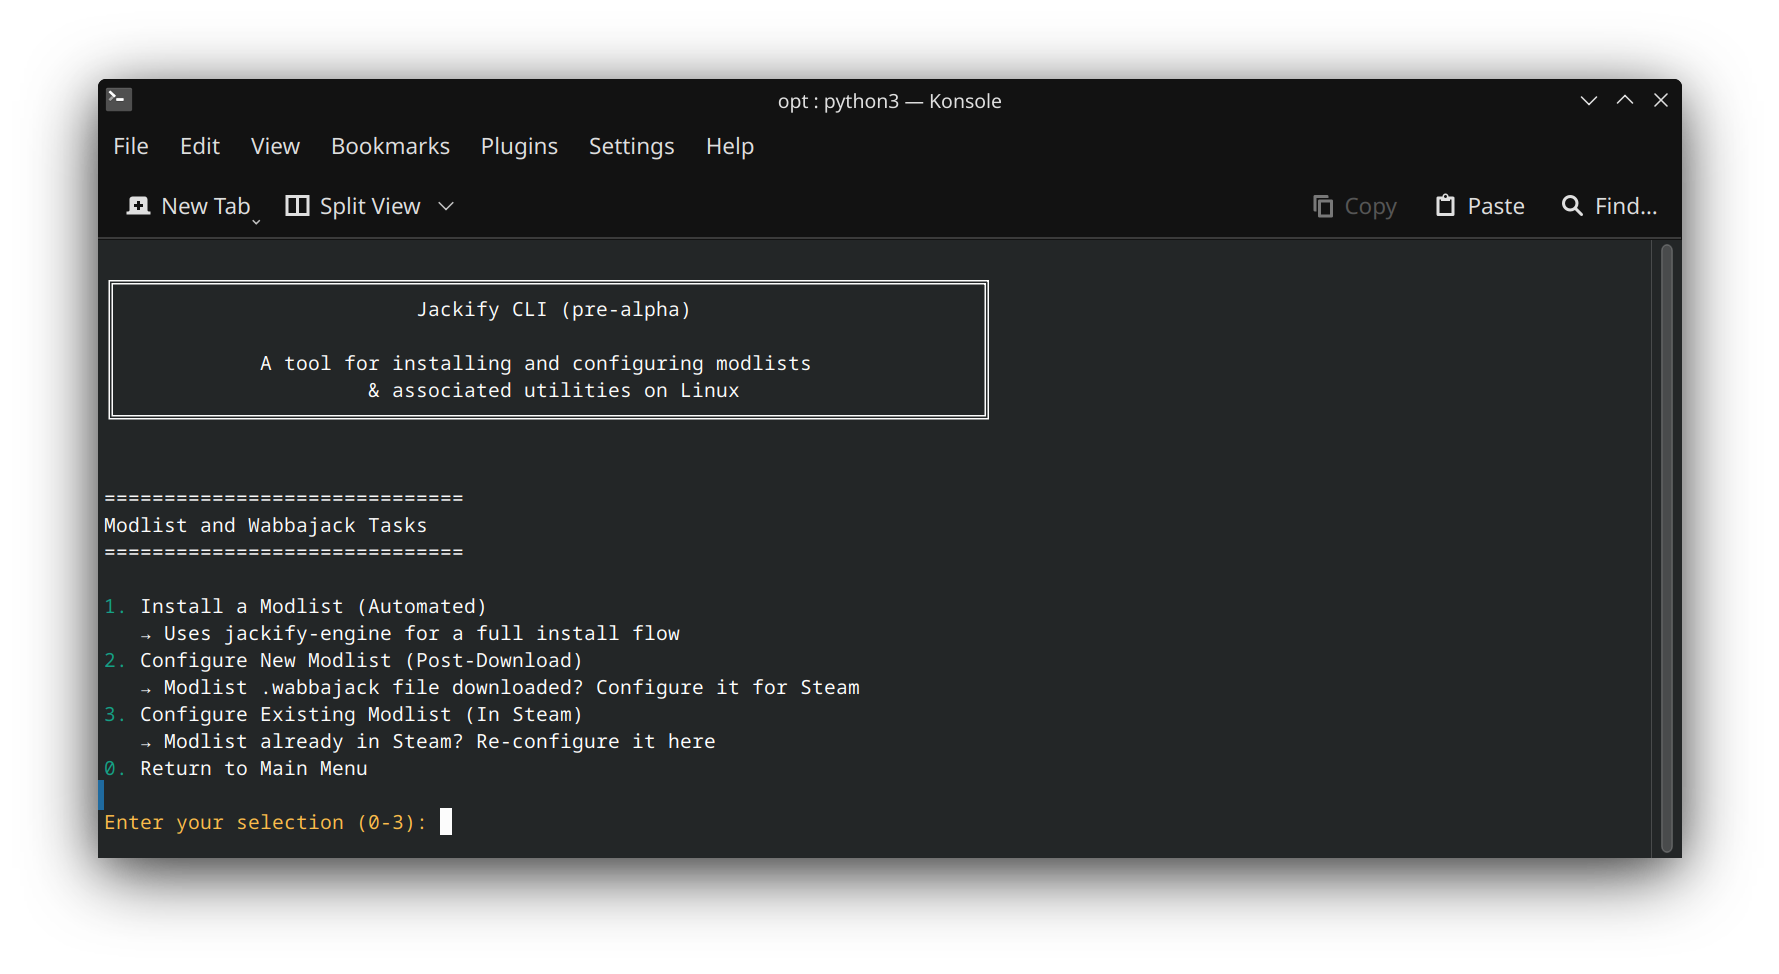
CLI installation menus provide step-by-step text interfaces with the same configuration options as the GUI
Main Menu Options:
- Modlist Tasks: Same functionality as GUI version
- Coming Soon...: For now this only displays a message about future features and returns to main menu
- Exit Jackify: Quit the application
Navigation:
- Use the numbered menu options to select an option
- Press Enter to select items
- Follow the on-screen prompts
- All GUI features are available through text menus
The GUI has a Settings menu that allows you to configure certain aspects of Jackify, such as:
Settings Menu Options:
- Resource Limits: Similarly to Wabbajack, you can configure the threads available for various actions
- Enabling Debug Mode: Check this box to enable debug logging, mostly if asked to do so as part of a support issue
- Set/Clear Nexus API Key: Set or clear the stored API Key
- Default Directory Paths: Set the default directories that will be shown in the Install a Modlist workflow, this can make it simpler for future modlists if you have a standard directory structure.
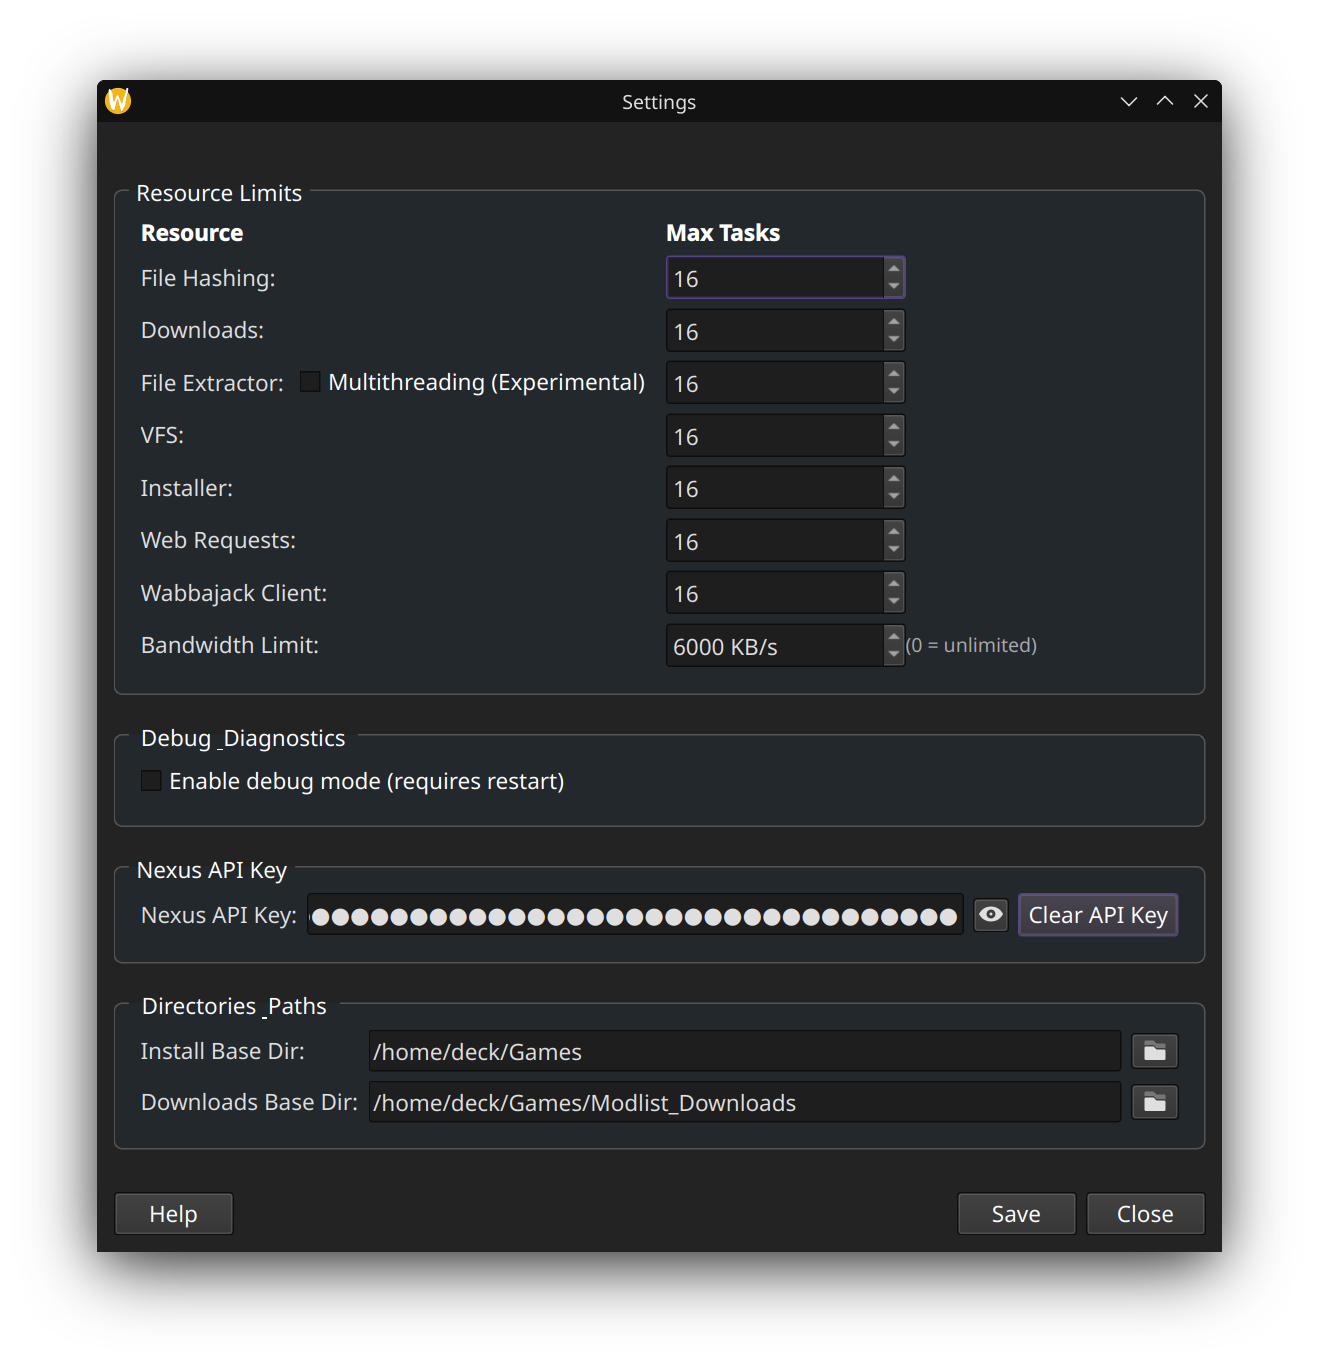
GUI Settings Menu that allows various configuration and default setting
Even with all of Jackify's automation, things can still go wrong. There are just too many distros, system set ups, modlists and potential differences to have tested them all.
Details and guidance for common issues and solutions will be entered into the FAQ Wiki Page (coming soon)
When you encounter issues that aren't covered by basic troubleshooting:
Check the Logs: Jackify creates detailed logs in ~/Jackify/logs/. These often contain specific error messages that point to solutions.
Community Support: Join the #unofficial-linux-help channel in the Wabbajack Discord. The Linux modding community is helpful and experienced with troubleshooting.
GitHub Issues: For bugs or feature requests, the GitHub Issues page is the best place to report problems and track fixes.
Wiki Documentation: Check the project wiki for detailed guides, FAQ, and community-contributed solutions.
For more information about Jackify's history, philosophy, and technical details, see the Introduction.