Ubuntu setup docker setup notes - Oliver-Mustoe/Oliver-Mustoe-Tech-Journal GitHub Wiki
In this page I detail the basic configuration of my Ubuntu 20.04 cloud server VM, then the setup of Docker & Docker-compose (with tests)
Notes
Ubuntu
First I changed the VM's adapter to LAN, then booted up the system and logged in with the credentials found here.
Then I setup the proper networking configuration (static IP, Gateway, DNS server, domain search suffix) by editing the file "00-installer-config.yaml" by entering the command:
- sudo vi /etc/netplan/00-installer-config.yaml
(NOTE: if you forget to enter "sudo" on the above command and now cannot save the file, enter the command ":w !sudo tee %", enter the sudo password for your user, then press "L" and your file will be saved !!!)
Here is what I edited the file to look like (MAKE IT LOOK EXACTLY LIKE THIS):

(NOTE: In editing the file I only ever pressed enter after each line which automatically indented the line properly. NEVER PRESS TAB, ONLY SPACES IF NEED BE.)
I then made a sudo enabled user "olivermustoe" with the following commands in order:
- sudo adduser olivermustoe
- sudo usermod -aG sudo olivermustoe
Then I restarted the VM, with the command "reboot now", and signed in with my new user and used the command "ip a" to ensure that I had a static IP address.
I then edited the file "/etc/hosts" with the command "vi /etc/hosts" and added the following line to the file:
- 127.0.0.1 docker01-oliver persistent-hostname
I saved and exited the file, then ran the following command in the terminal:
- sudo hostnamectl set-hostname docker01-oliver
I would then once again restart the VM to ensure that my hostname has changed. While the VM was rebooting I went into mgmt01 and gave it an a record, information on that in the last paragraph of the "MGMT01" section here.
On my docker01, I would then run the command "hostnamectl" where I saw that my static hostname is "docker01-oliver". After this I would ping machines to test network connectivity (ad01-oliver, google.com, nmon01-oliver) and use mgmt01 to ping it's A record "docker01-oliver".
Docker
First I would update my existing package list with the command:
- sudo apt update
Then I installed prerequistite packages with the command:
- sudo apt install apt-transport-https ca-certificates curl software-properties-common
I then added the GPG key for the Docker repository with the command:
- curl -fsSL https://download.docker.com/linux/ubuntu/gpg | sudo apt-key add -
After that I added the docker repository to APT sources with the command:
- sudo add-apt-repository "deb [arch=amd64] https://download.docker.com/linux/ubuntu focal stable"
As I double check to make sure I was installing from the Docker repo instead of the Ubuntu repo, I ran the command "apt-cache policy docker-ce" and got the following results:
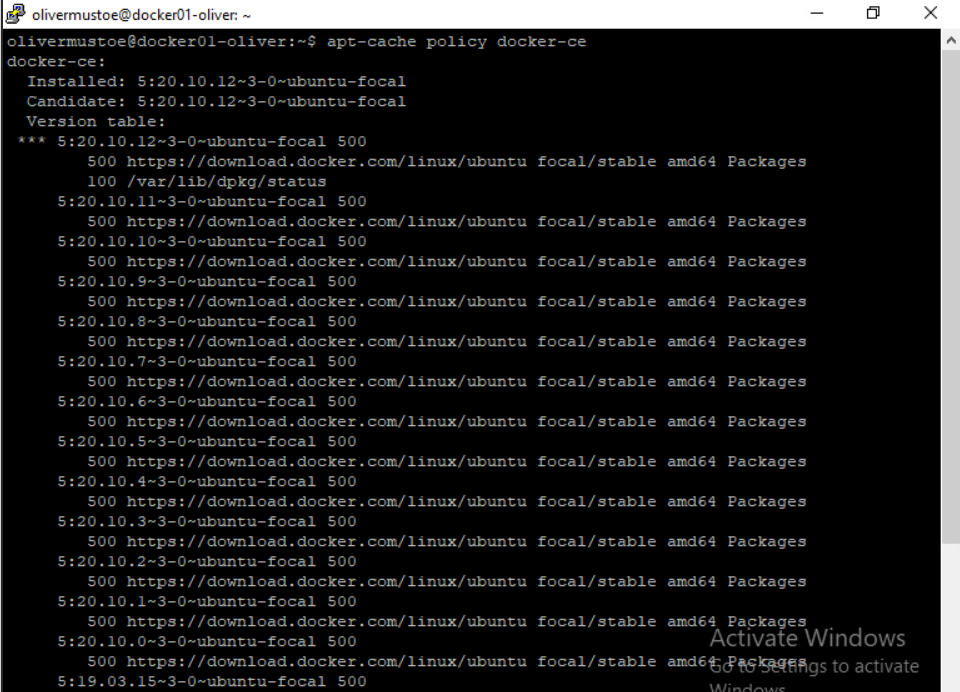
After that was checked, I installed docker with the command:
- sudo apt install docker-ce
And check it's status with the command:
- sudo systemctl status docker
I decided to add my user to the group "docker" (to avoid having to type sudo when using the docker command) with the following command:
- sudo usermod -aG docker olivermustoe
Then I entered the command "su - olivermustoe" to relog into my user and checked my current groups with the command "groups" where I saw the docker group added.
(NOTE: It is recommended to run test 1 here!!!)
Docker Compose
I download Docker Compose with the following command:
- sudo curl -L "https://github.com/docker/compose/releases/download/1.27.4/docker-compose-$(uname -s)-$(uname -m)" -o /usr/local/bin/docker-compose
(NOTE: The version I installed of Docker Compose was "1.27.4". If I wanted to install a later or earlier version I would substitute "1.27.4" in the command with the version of my choice.)
Then I set the correct permissions so "docker-compose" was executable with the command:
- sudo chmod +x /usr/local/bin/docker-compose
To double check that Docker Compose was installed and working I ran the command "docker-compose --version" and got the following output:

Tests
These are some good tests to ensure that Docker is working how it should. (NOTE: The commands are visible in the screenshots and those are what should be run)
-
Running the hello world application
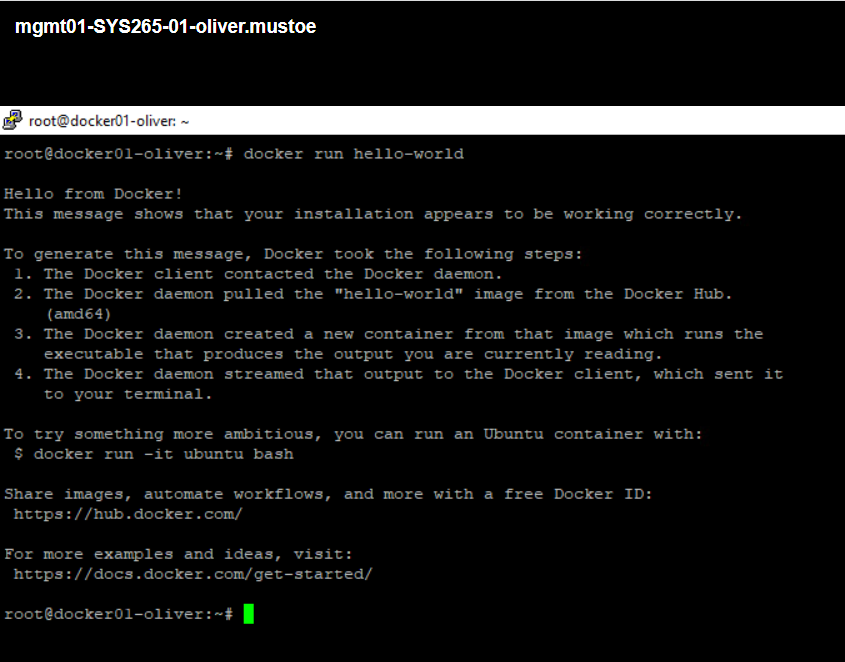
-
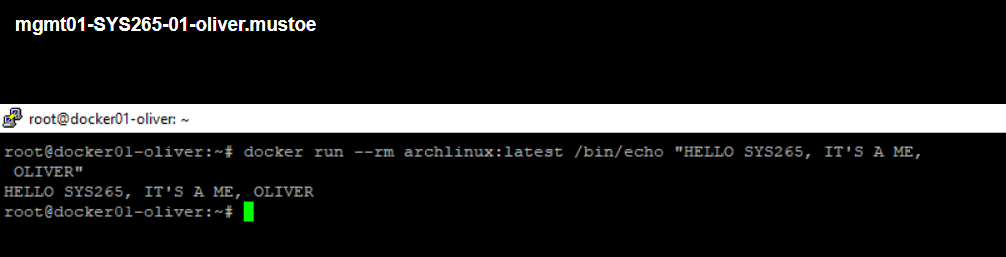
Pulling a Arch Linux based docker image, invoking a container, running /bin/echo "HELLO SYS265, IT'S A ME, OLIVER" before deleting the container
Docker Compose example: WordPress
First I created a directory for my project, for example if I wanted the directory to be named "mywordpress" I would run the command "mkdir mywordpress".
Then I opened up notepad, on mgmt01, populated it with the following:
version: "3.9"

services:
  db:
    image: mysql:5.7
    volumes:
      - db_data:/var/lib/mysql
    restart: always
    environment:
      MYSQL_ROOT_PASSWORD: somewordpress
      MYSQL_DATABASE: wordpress
      MYSQL_USER: wordpress
      MYSQL_PASSWORD: wordpress

  wordpress:
    depends_on:
      - db
    image: wordpress:latest
    volumes:
      - wordpress_data:/var/www/html
    ports:
      - "8000:80"
    restart: always
    environment:
      WORDPRESS_DB_HOST: db
      WORDPRESS_DB_USER: wordpress
      WORDPRESS_DB_PASSWORD: wordpress
      WORDPRESS_DB_NAME: wordpress
volumes:
  db_data: {}
  wordpress_data: {}
Then I clicked "File" > clicked "Save As..." > save it as "docker-compose.yml" AND MAKE SURE THAT "Save as type:" WAS SET TO "All Files (.)".
I then made use of the scp command and ran the following to send the .yml file to docker01-oliver with the command (NOTE: In this command the file is located on the desktop, this command is ran from powershell NOT navigated to the desktop, use TAB when navigating):
- scp .\Desktop\Test-file.txt olivermustoe@docker01-oliver:/home/olivermustoe/mywordpress
(This will ask for the password for the account set above)
Then on docker01, inside the directory "mywordpress", I ran the following command to pull the needed Docker images and start wordpress and the mysql database containers:
- docker-compose up -d
Before I was able to access the wordpress web configuration, I first needed to allow the port through the firewall. I checked the port that was assigned to the container with the command:
- docker ps
Which gave the following result:
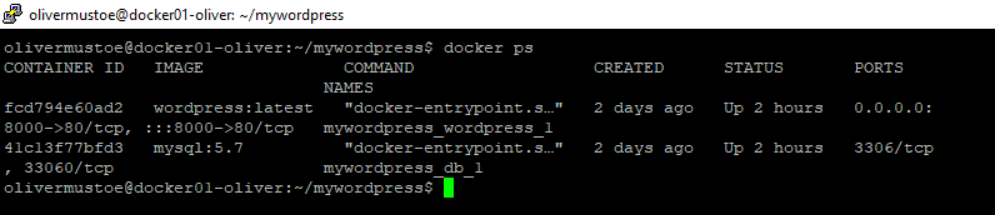
(NOTE: The "8000" is the port number we are looking for in this example, could be different based on different applications)
I then added the port to the firewall (and the port 22 since I was using ssh) with the commands:
- sudo ufw allow 8000
- sudo ufw allow 22
Then I started the firewall with the command:
- sudo ufw enable
On mgmt01 I used a web browser and navigated to "http://docker01-oliver:8000" where I was greeted with the setup for wordpress.
Sources
https://www.linuxtechi.com/assign-static-ip-address-ubuntu-20-04-lts/
https://askubuntu.com/questions/1068467/how-to-set-domain-search-on-ubuntu-18-04
https://aws.amazon.com/premiumsupport/knowledge-center/linux-static-hostname/
https://www.digitalocean.com/community/tutorials/how-to-install-and-use-docker-on-ubuntu-20-04
https://linuxize.com/post/how-to-use-scp-command-to-securely-transfer-files/