Milestone Bare Metal 1 ESXi Setup - Oliver-Mustoe/Oliver-Mustoe-Tech-Journal GitHub Wiki
This page journals content related to NET/SEC/SYS-480 milestone 1.
Table of contents
VM Inventory
ESXi Installation
DNS 192.168.4.4 .5
My ESXi hostname = super15
ESXI IP = 192.168.7.25
From my IPMI IP, I logged in with the user "cncs-sysadmin" (with a password I was emailed). After logging in, I went to the "Remote Control" section to access iKVM (this is shown below.)
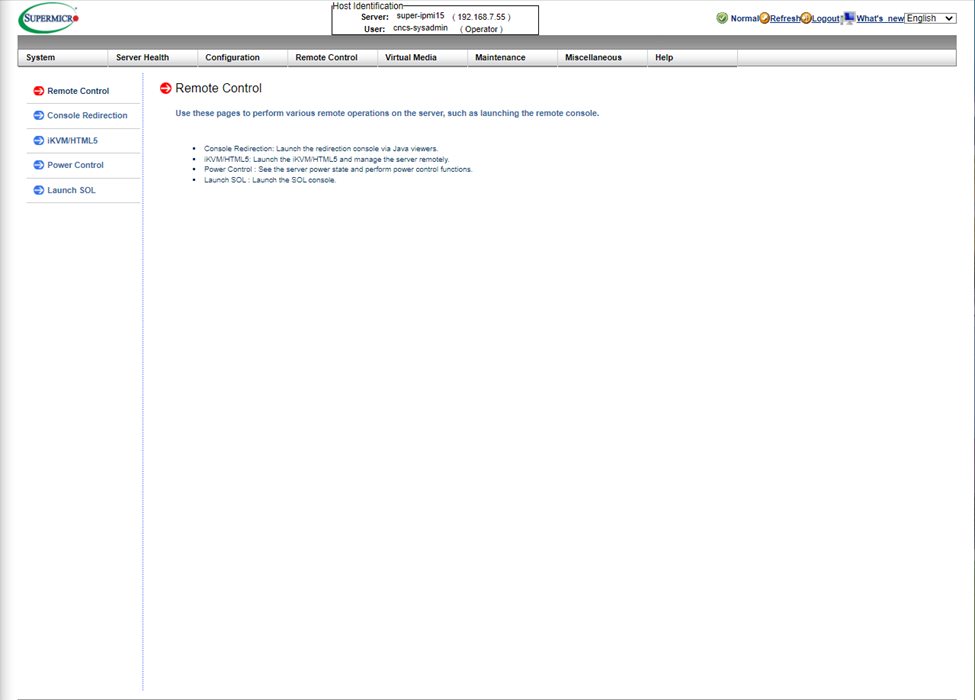
Then I accessed iKVM, and used the Power control setting “Set power reset” to reboot the machine. Then I waited for the 2nd supermicro screen and used the virtual keyboard to press F11, from there I selected the UEFI selection of "General Udisk 5".
Once selected, I waited and then I would use the “Samsung SSD” storage device to install ESXI:

I would then go along with the installer, making sure that I set a root password that I saved. Afterwards, I confirmed the install and the installation progress went along:
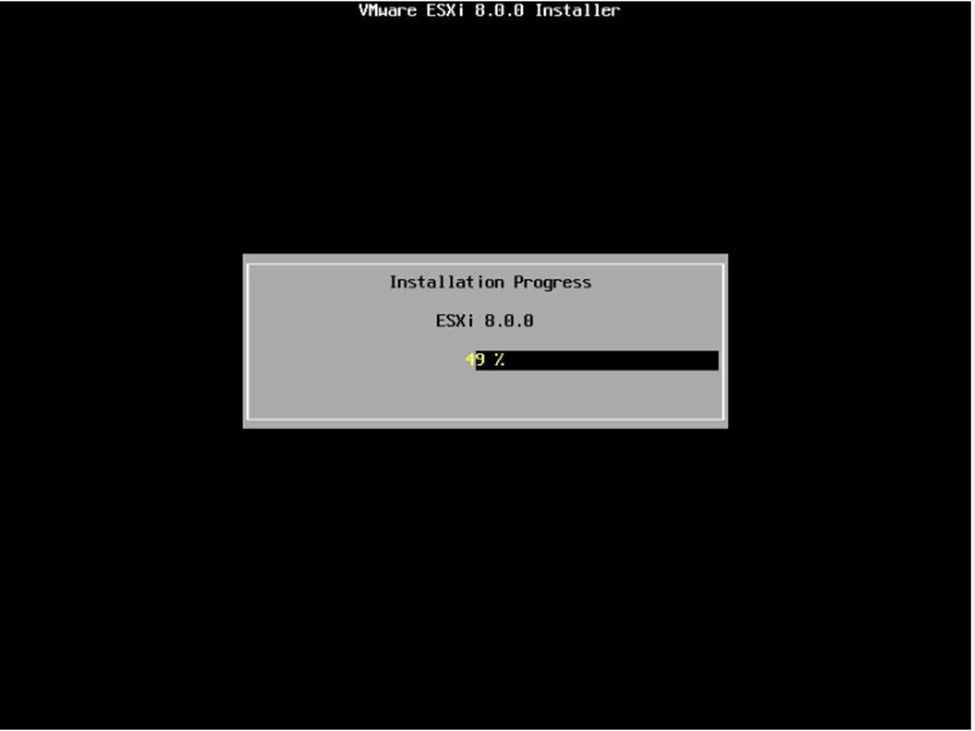
Once the process is finished, I would then press Enter and wait for it to reboot.
Once it rebooted, I used F2 to login, and used my root password at the login screen. Then using F2 again and was met with this screen:
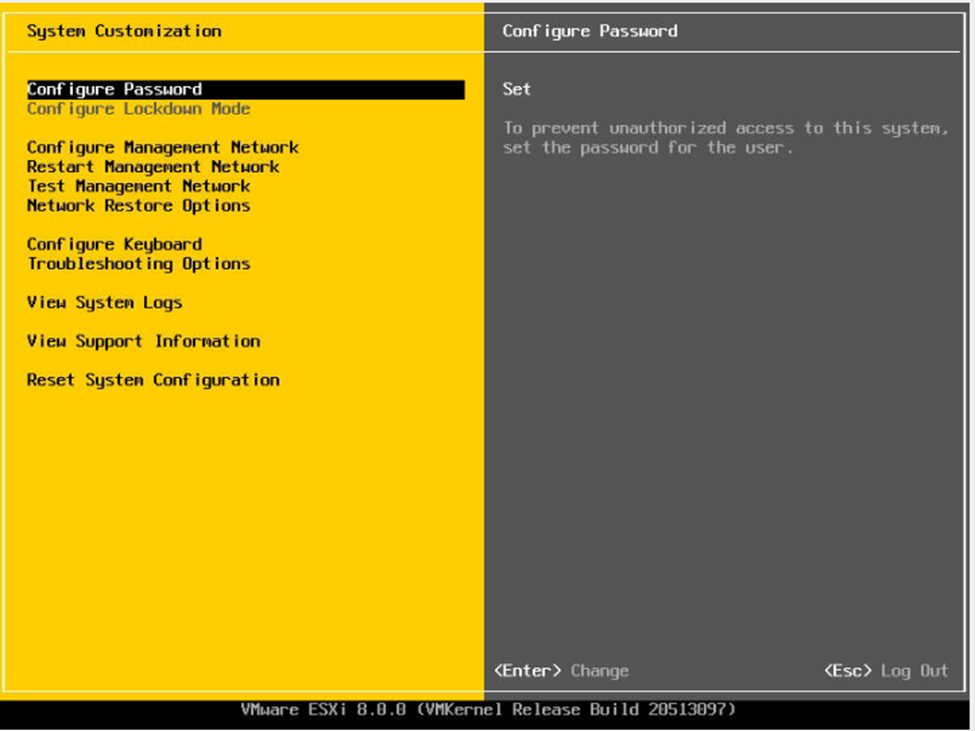
Then I went from “Configure Management Network” > “Network Adapters” and changed the selection to "vmnic1" (once I had access to a cable) and pressed Enter. Following shows this:

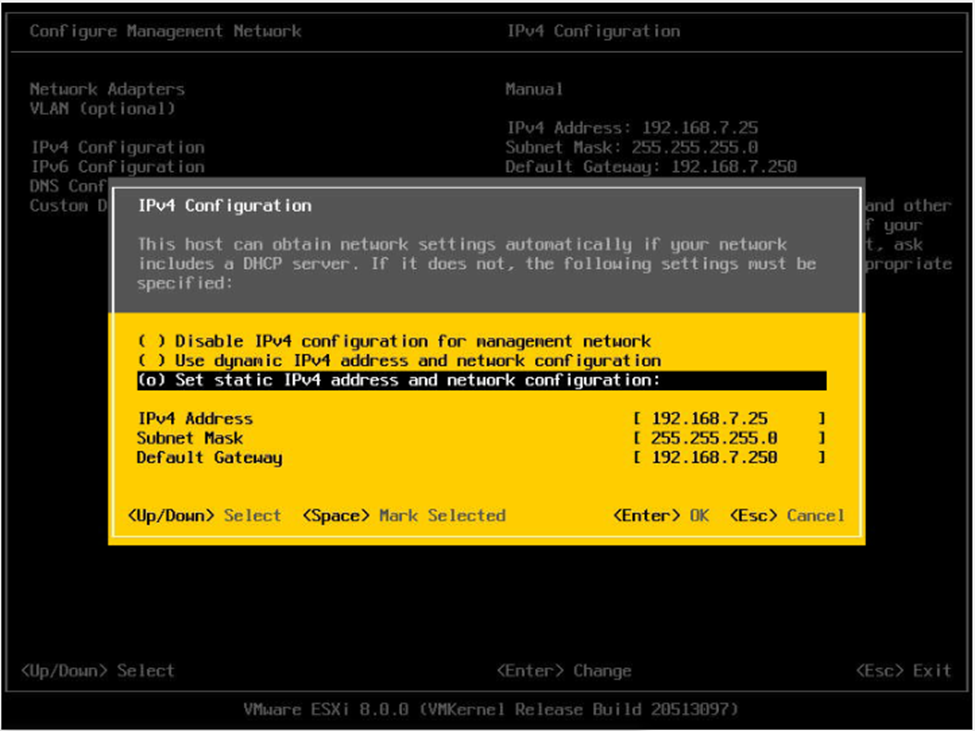
Inside the management network, I would use the following menus to setup the appropriate network configurations for my host:
IPv4 Configuration:
DNS Configuration: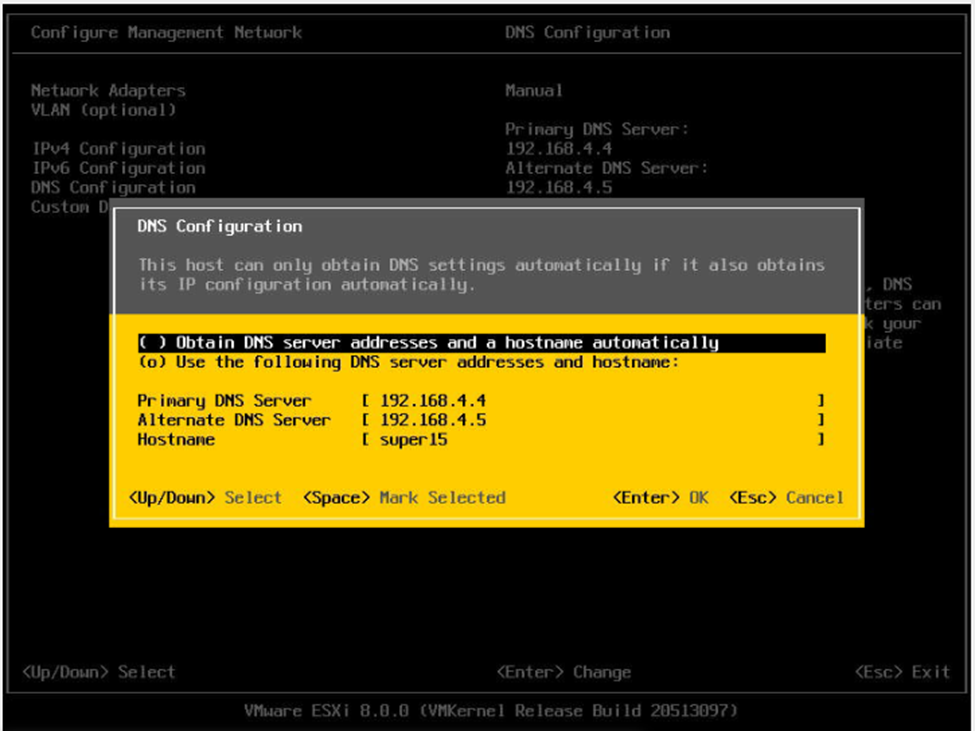
Custom DNS Suffixes: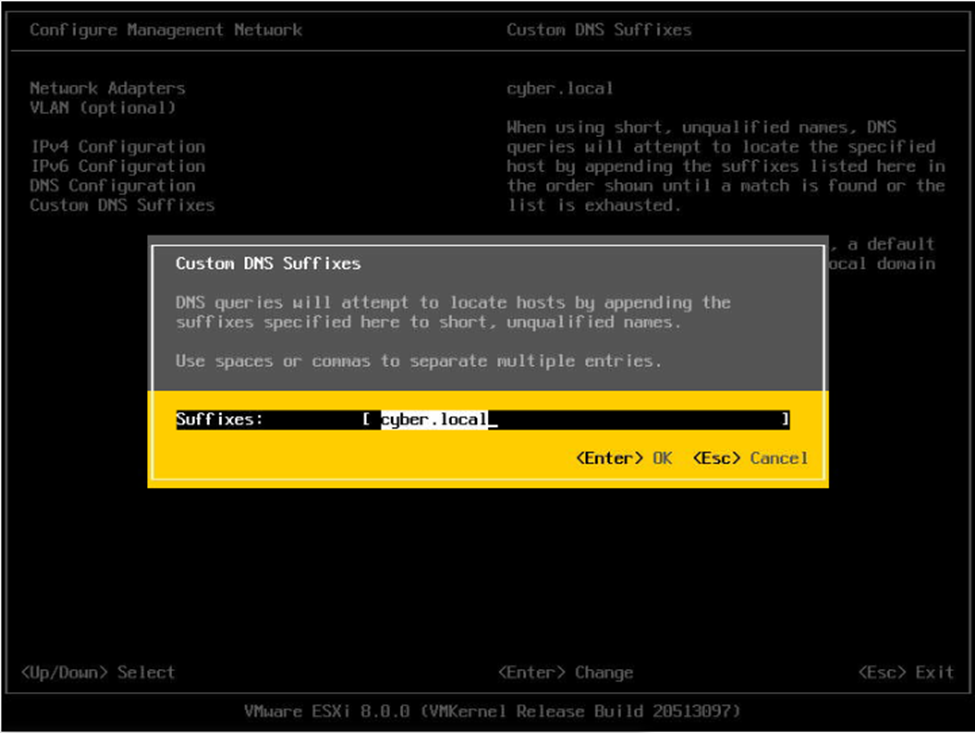
With these options set, I would then use the Esc key to exit, making sure to apply and restart the management network at the popup.
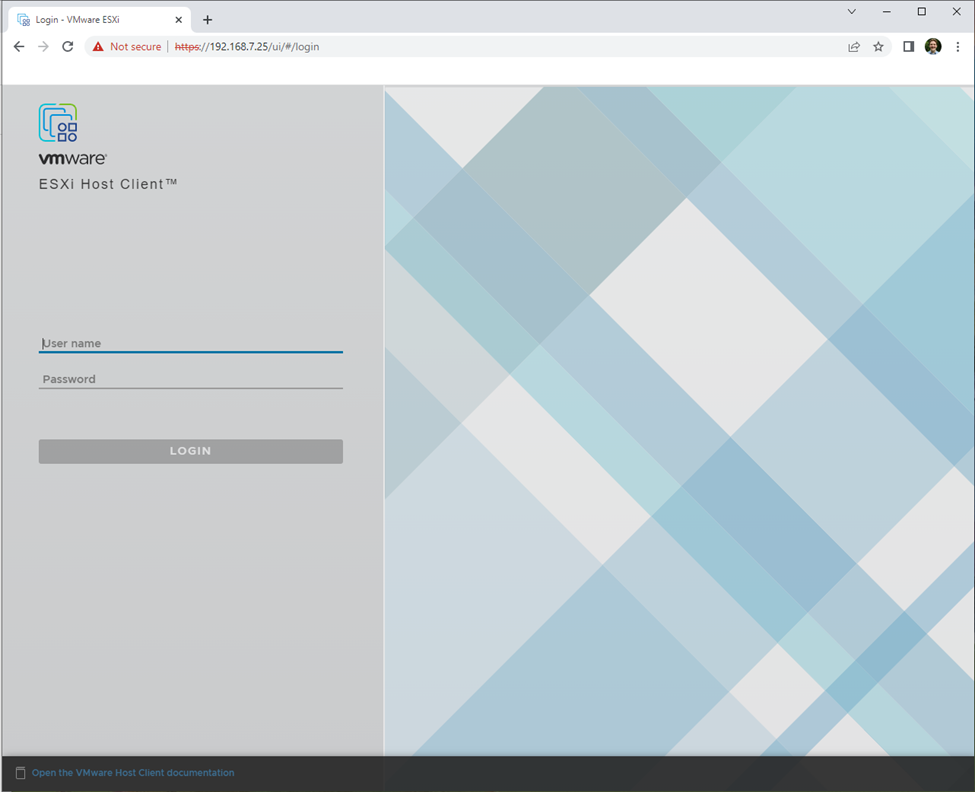
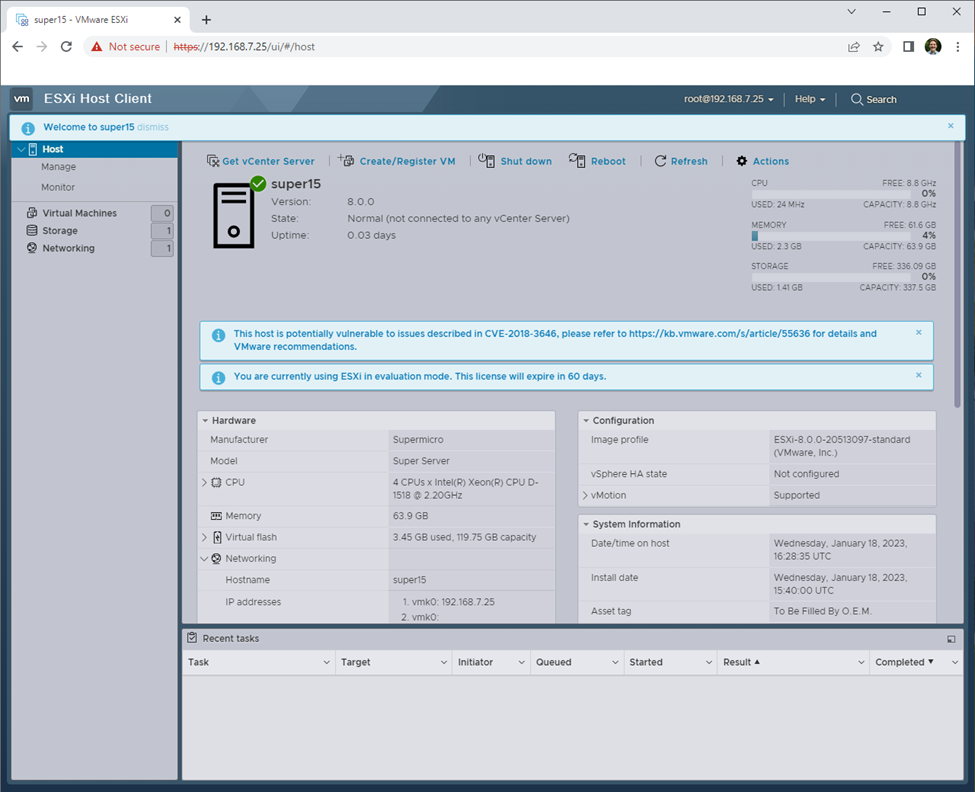
With this set, I went to my IP address "192.168.7.25" and I was met with the following, in which I could login with my root account/password set earlier:
Reflection: The setup of ESXi was a very cool and enlightening experience for me. Having not worked with this technology before, I was expecting a harder installation process. The process was fairly self-explanatory, and besides having to wait for certain cables, took very little time. I also appreciated my colleagues during this time, as the more experienced ones took time to make sure that everyone was on the same page. There was also a good amount of time spent organizing everyone getting their production IP addresses working on time as well. This part of Milestone 1 was overall a good introduction to the basic ESXi installation.
ISOS and Networking
Devin-jump IP:port = 192.168.3.120:8000
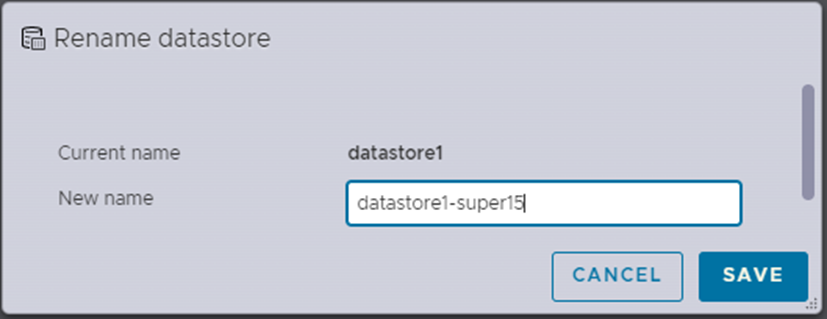
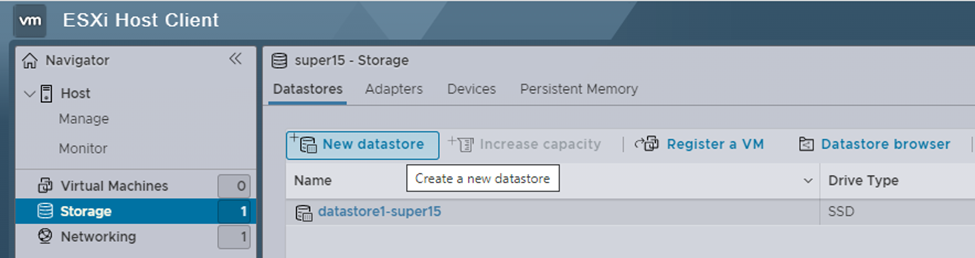
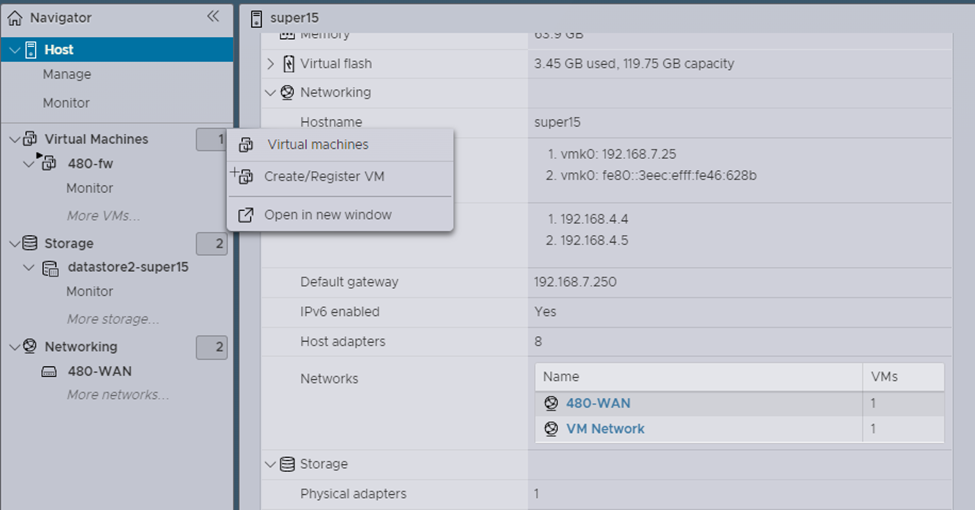
After logging into my ESXi host, I then went into the storage menu of my sidebar, right-clicked "datastore1", and selected to "Rename" the datastore to “datastore1-super15”:

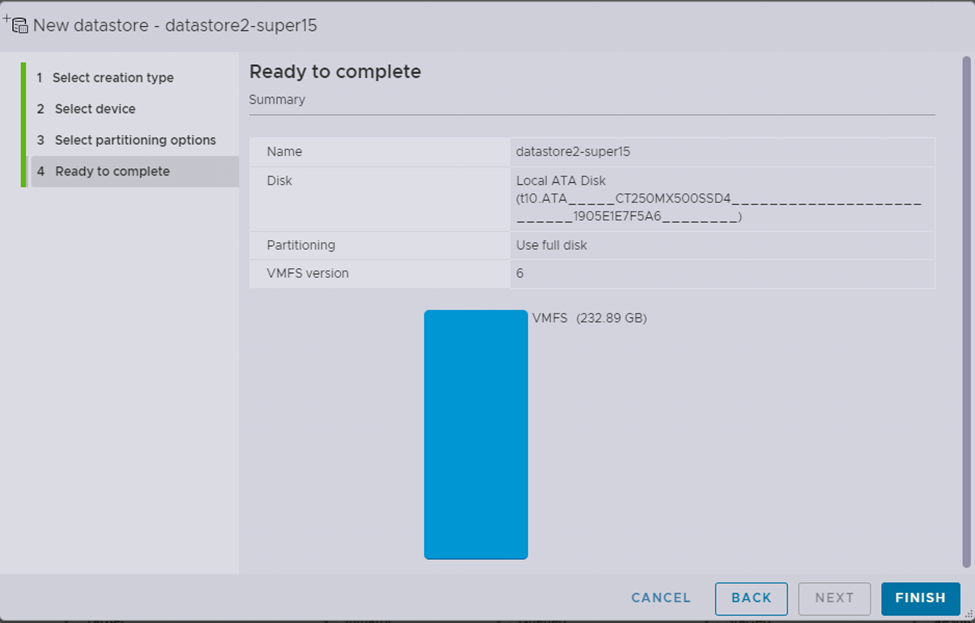
Then, in the same menu, I created a new datastore, using the “New datastore” option, with the name “datastore2-super15”. All of the rest of the configuration I left default (automatically selects correct creation type, the other storage device, etc.) and just pressed “NEXT” and then pressed “FINISH”.
The end screen of the creation of datastore2:
A warning screen will popup about erasing the entire contents, I pressed “YES” on this.
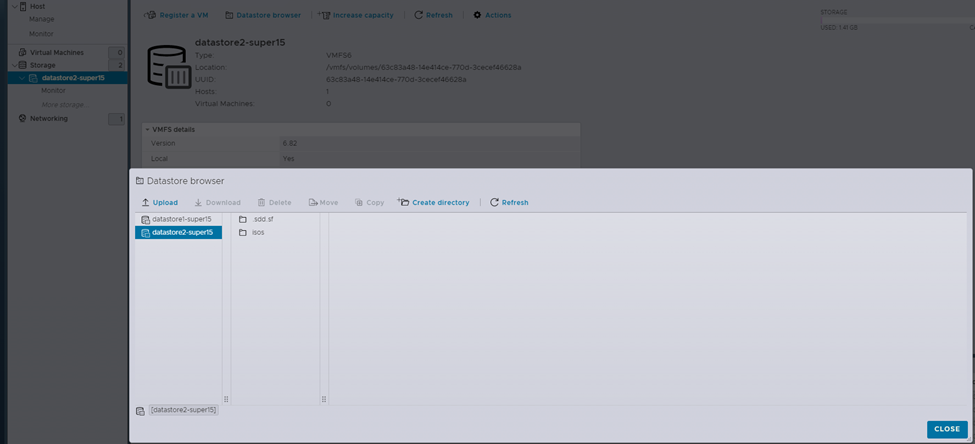
I then double clicked the newly created datastore2 from the storage menu, which opened the datastore in a a dropdown that allowed me to select datastore2 > click “Datastore browser” where I used the "Create directory" option to create a directory called “isos”:
I could also access the datastore browser by right clicking “Storage” in the sidebar > selecting “Browse datastores”.
I then enabled SSH by going to the “Host” menu > selecting “ACTIONS” > then selecting “Services” > then selecting “Enable Secure Shell (SSH)”:
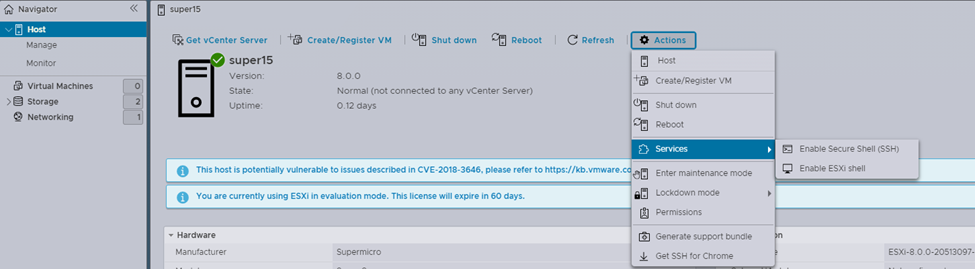
NOTE: I would make sure to DISABLE SSH while not in use!
Similarly, to the datastore browser, I could have accessed the “Services” section by right clicking the “Host” tab on the sidebar.
Before SSHing, I double checked connectivity with my ESXi host with a ping:
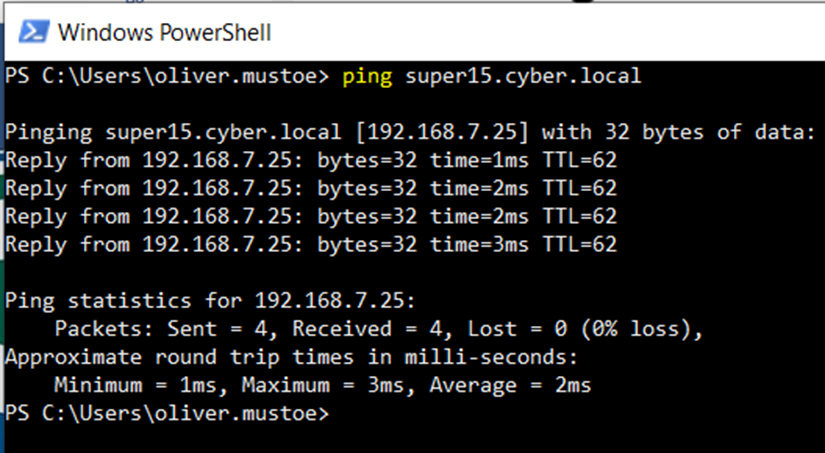
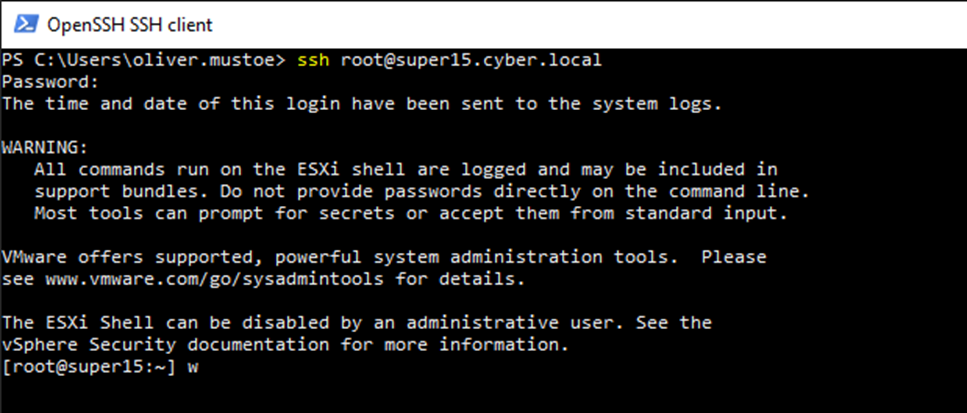
With this being successful, I SSH’d into my ESXi host:
ssh [email protected]
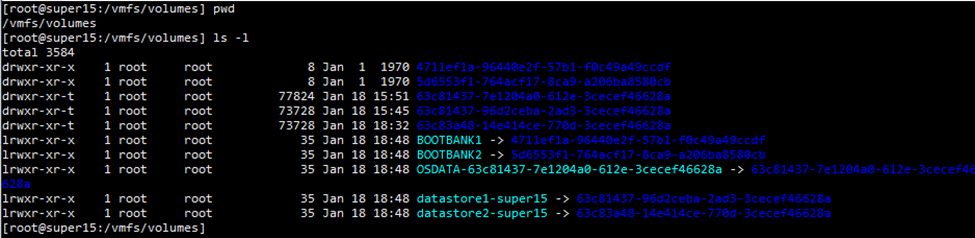
And I moved into the created “isos” directory located in datastore2 on the host:
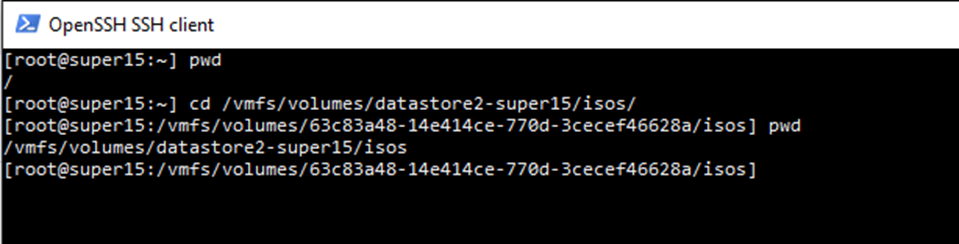
NOTE: datastores are accessed from “vmfs/volumes”, where a link will be made between the pretty name, EXP. “datastore1-super15”, and the actual name:
I then visited “http://192.168.3.120:8000/”, and acquired the link for the iso for “vyos-1.4” by right clicking the link > selecting “Copy link address”:
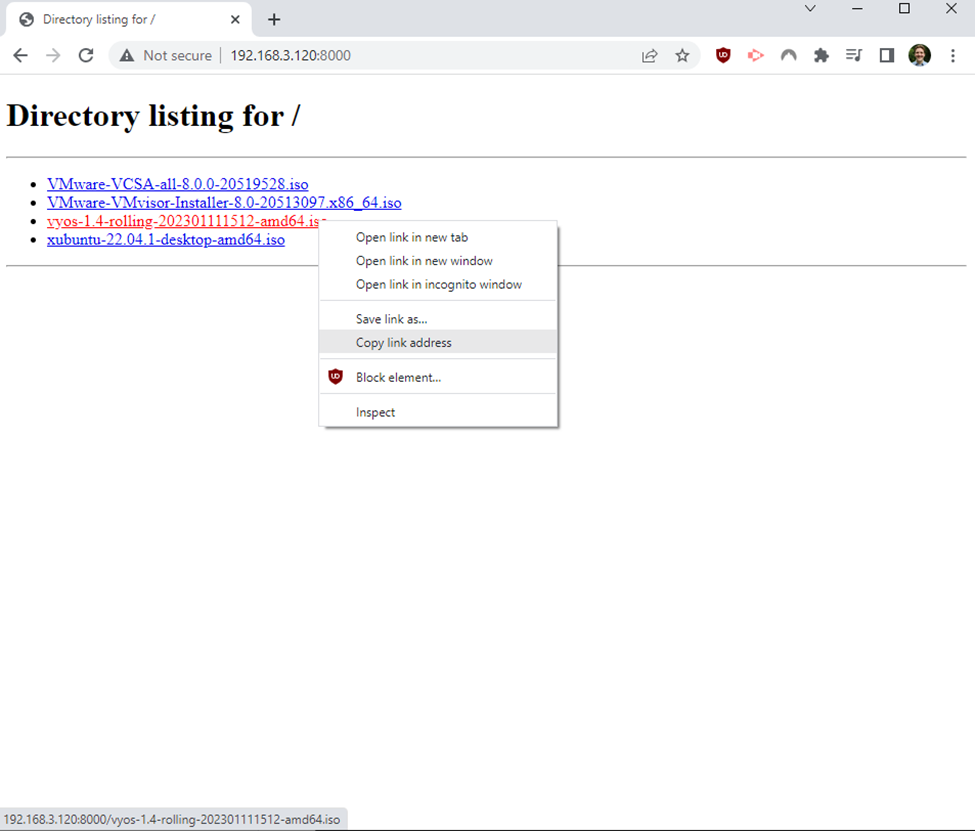
I would then used the following command to download my iso!:
wget http://192.168.3.120:8000/vyos-1.4-rolling-202301111512-amd64.iso

I would then redo this process to acquire the “xubuntu” iso (Copy link from website > same wget command from above with a different link:

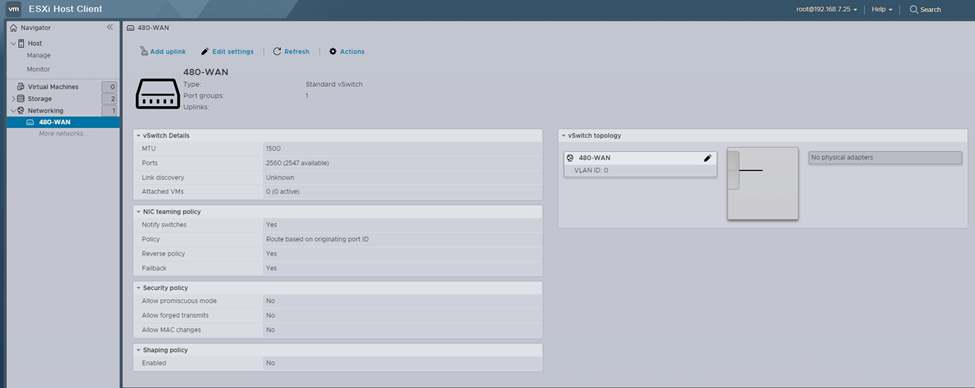
With this completed, I went back into my ESXi Host client, selected the “Networking” menu from the sidebar > selected “Virtual switches” where I setup the following virtual switch “480-WAN” and pressed “ADD”:
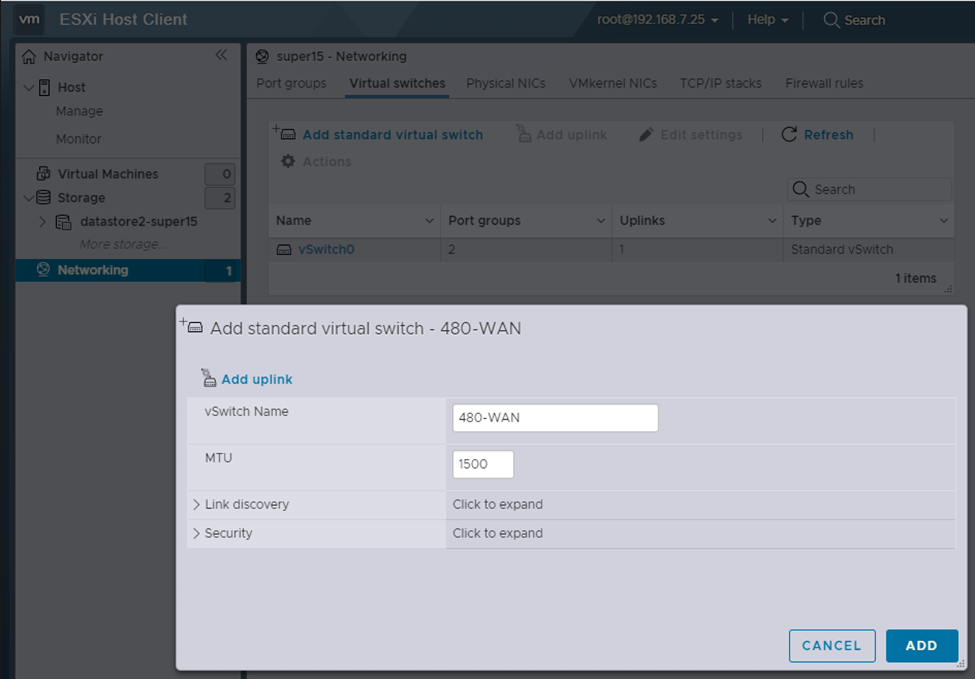 NOTE: Removed the Uplink
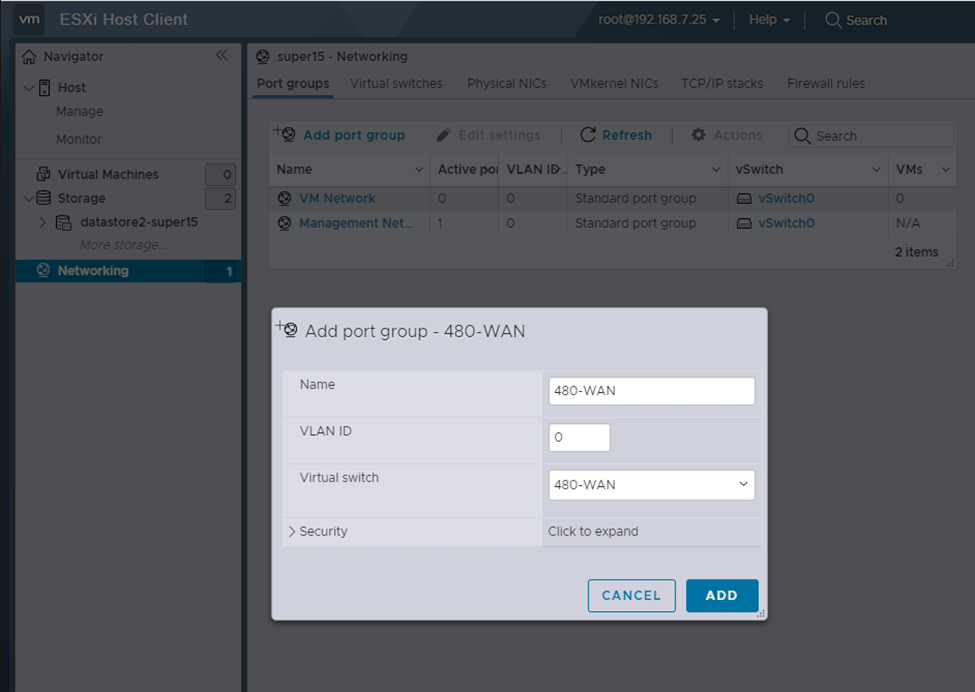
Then I added the following port group to my “480-WAN” virtual switch by, in the “Networking” menu, going to the “Port groups” section, selecting "Add port group" and setting the options below for a group called “480-WAN”. After I would click “ADD”:
With this completed, I was able to select the created switch from the “Virtual switches” category in networking and see the following:
Reflection: Having never worked with ESXi before this, learning about basic datastores and the beginning of networking was very interesting. A major note I have about this step is that a lot of the actions I made can be accomplished by right clicking on the sidebar and selecting one of the options. As I move through the course, I will make sure to explore this as it might be faster than going into the menu/category. The introduction to networking during this step was also very enlightening, even though I don't fully understand the virtual switches/port groups yet. I will later research to resolve the ambiguity for myself!
480-fw
From inside the “Virtual Machines” menu, I selected the “Create / Register VM” option > then I selected the default creation type, and gave the VM the name “480-fw” and set the following options. Clicked “NEXT”:
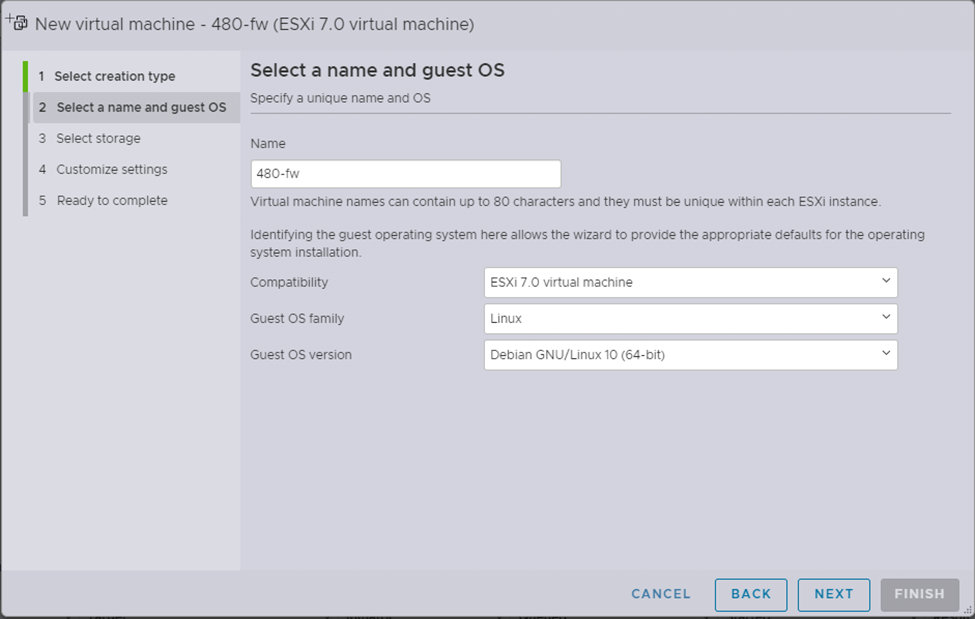
NOTE ABOUT COMPATIBILITY: Even though the ESXi host I am working on is ESXi 8, it is recommended to set the compatibility to the lowest common denominator among a group of ESXi hosts (like if you have a mix of 6,7 and 8s, you would choose 6) to not have hardware compatibility issues.
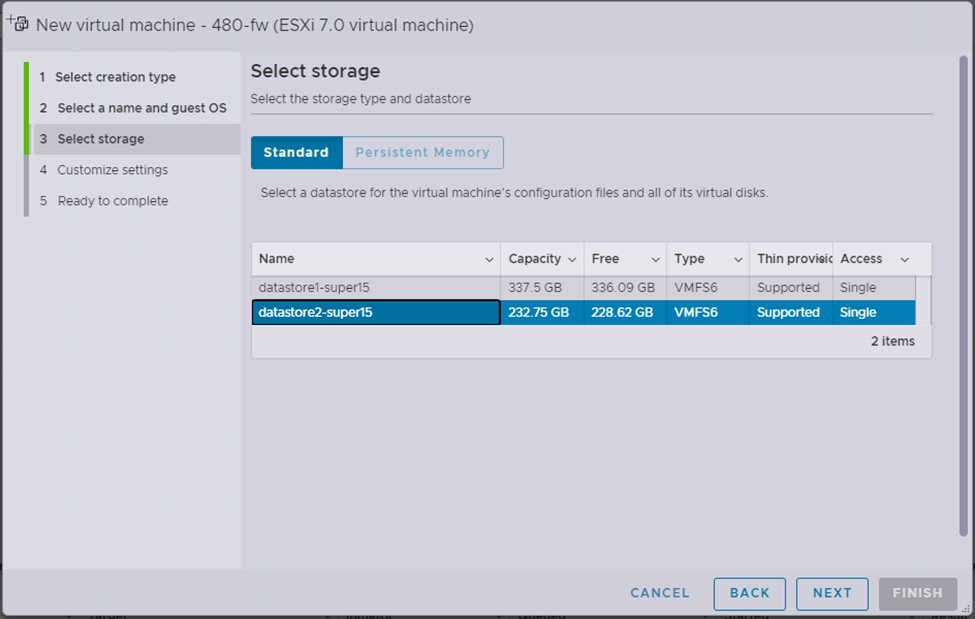
Then I selected datastore2 as the storage for the VM. Clicked “NEXT”:
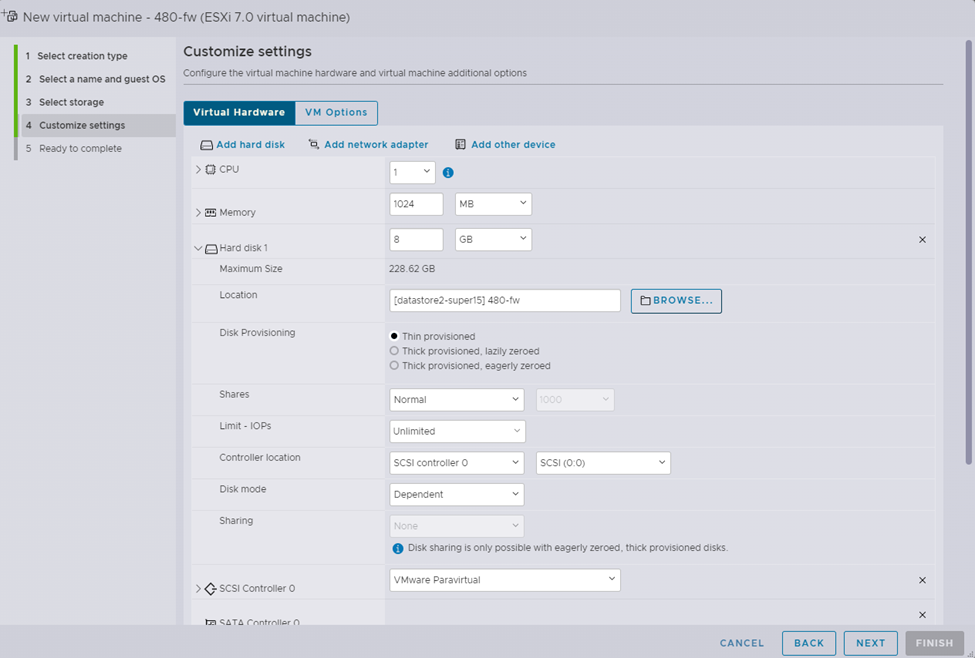
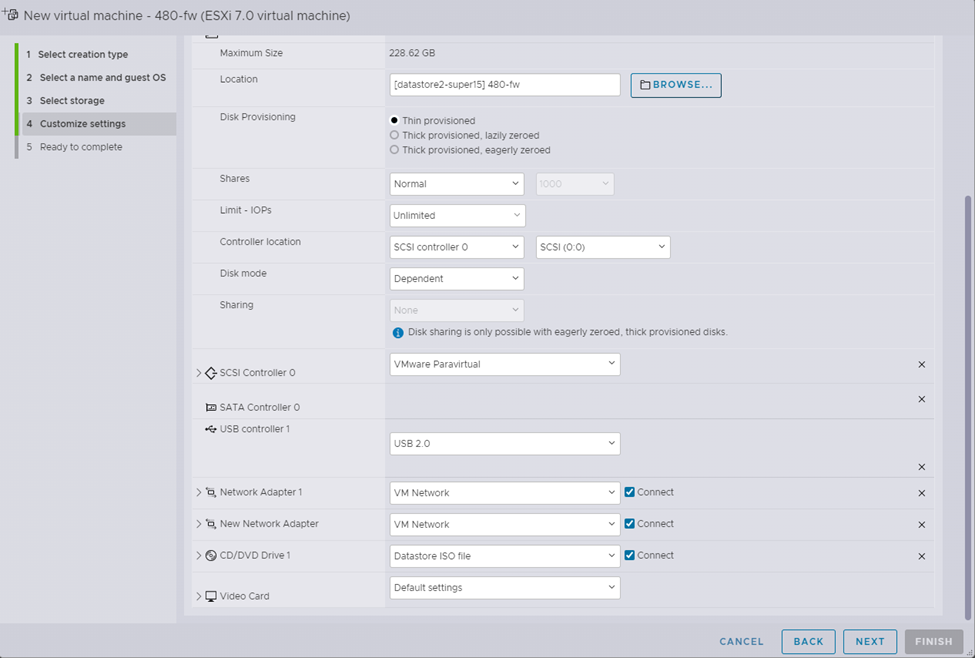
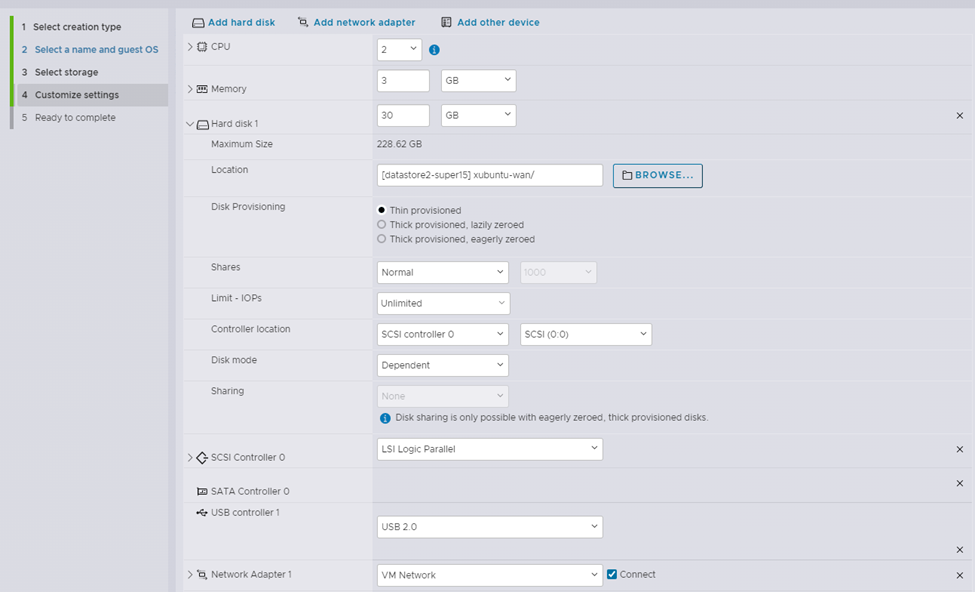
I then set the following customized settings with the following notes:
-
Second network adapter was added with the “Add network adapter” option
-
Memory and Hard disk tweaked
-
In the Hard disk drop down menu, made sure to select “Thin provisioned” in “Disk Provisioning”
- Thin provisioning only takes the storage that it needs, and grows according to demand up to the specified amount. Thick provisioning takes all of the storage at once.
-
Made sure to set the 2 network adapters to “VM Network”
- Did this since I was building a base VM, so I wanted the VM to be generic.
-
When selecting the “Datastore ISO file” option in CD/DVD Drive, a pop-up appeared in the “Datastore browser” where I navigated on datastore2 to the vyos-1.4 VM.
- I also could have navigated to this via using the CD/DVD Drives drop-down in the “CD/DVD Media” selection, selecting “BROWSE…”
-
Clicked “NEXT”
After reviewing the following matched the desired setup, clicked “FINISH”: 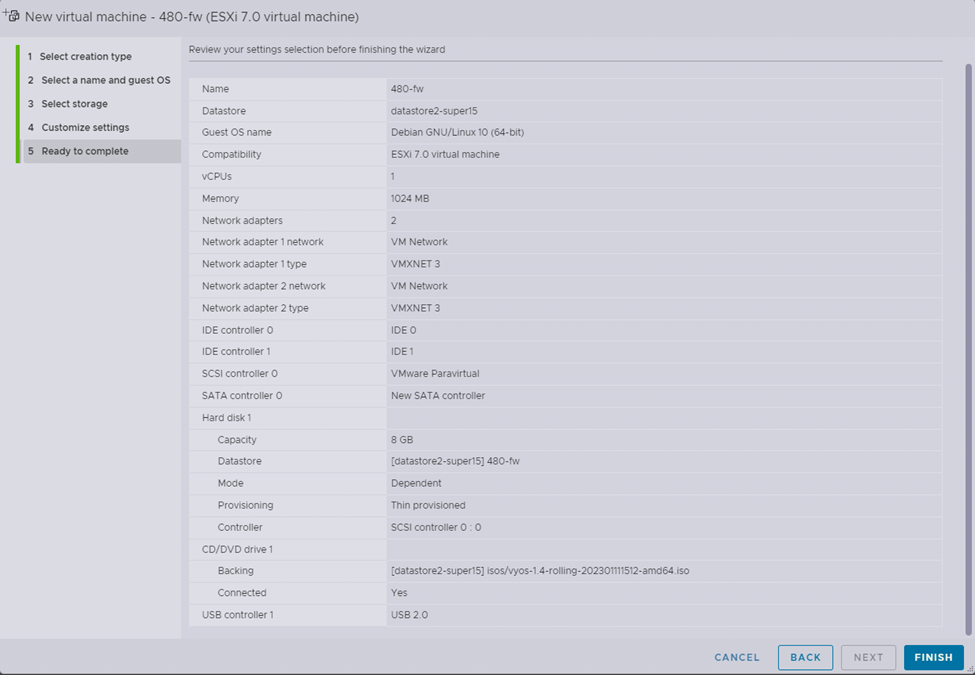
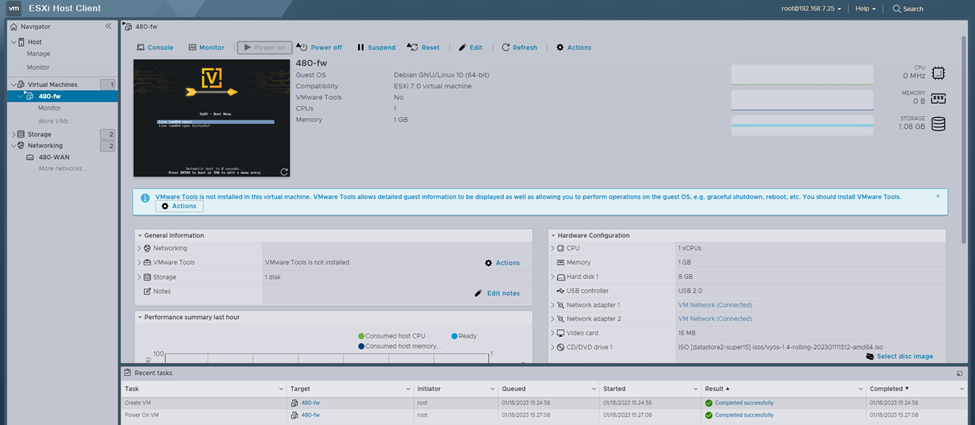
Then, from within the virtual machines menu, I selected and started the new virtual machine:
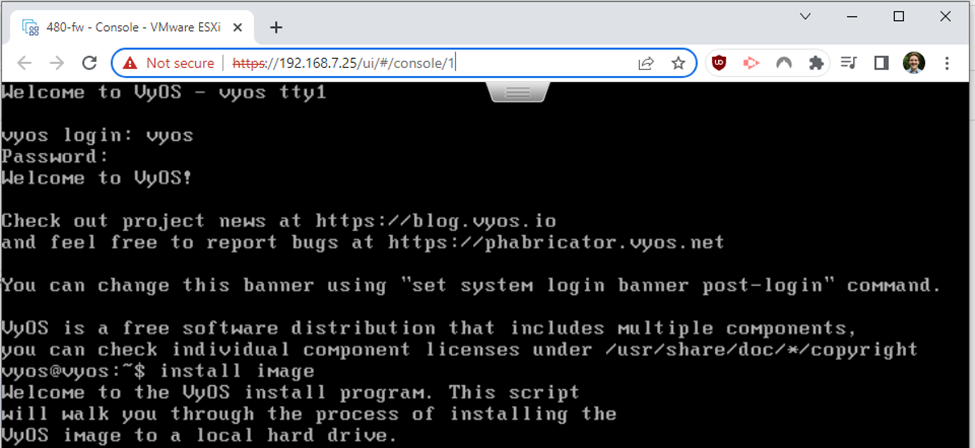
Then from the “Console” dropdown, I opened a console in a new tab, and logged into VyOS with the default user “vyos” with the password “vyos”. Once logged in, I started the VyOS install with the command:
Install image
NOTE FOR VYOS INSTALL: By choosing default options, I mean the ones automatically selected when a user presses the Enter key at prompts (the answer within the brackets.)
Along the install process, the only non-default option I would choose is the option that asks about destroying all data on /dev/sda, to which I would enter “yes”. Besides this, I answered with the Enter key:

When prompted, I would then change the password for the vyos user.
I would answer with the Enter key for default options for the rest of the prompts.
Once this is complete I would use the reboot command to restart the VM.
Once the VM had rebooted, I used the following commands to remove the MAC addresses (good for cloning):
configure
delete interfaces ethernet eth0 hw-id
delete interfaces ethernet eth1 hw-id
commit
save
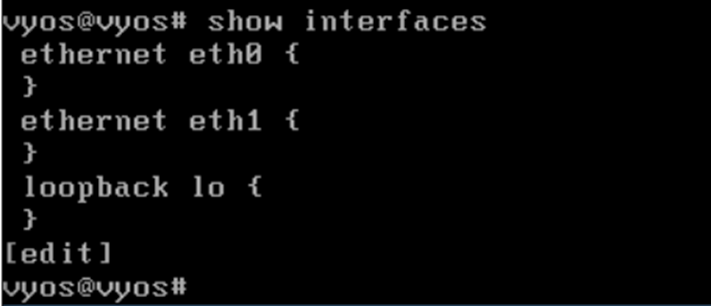
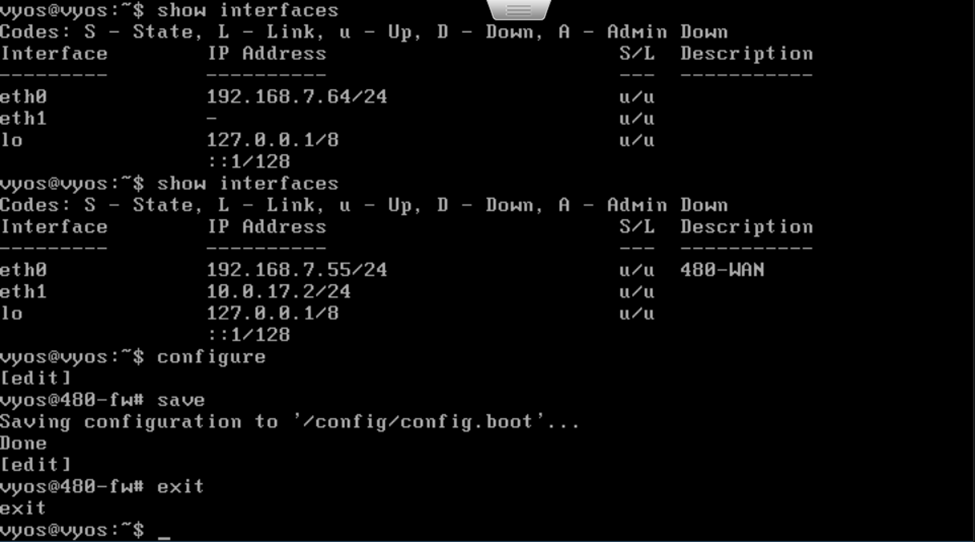
Result of above on the interfaces using the show interfaces command:
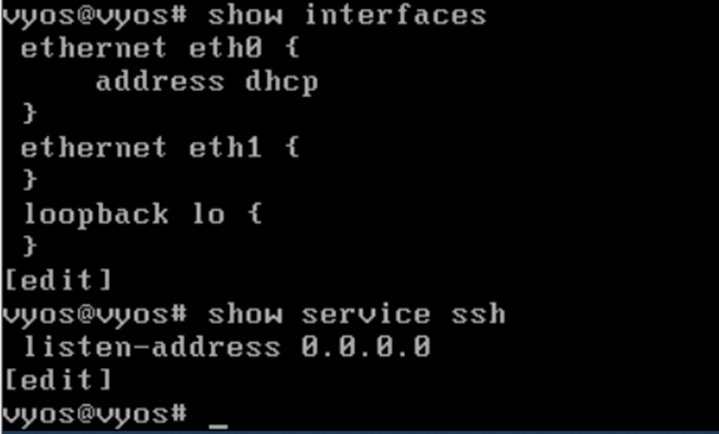
I then set eth0 to dhcp, and enabled ssh on the VM with the following commands (if already in configure mode from previous commands, skip initial “configure” command):
configure
set interfaces ethernet eth0 address dhcp
set service ssh listen-address 0.0.0.0
commit
save
Result of above using the show command:
Then I used the commands exit and poweroff to shutoff the VM.
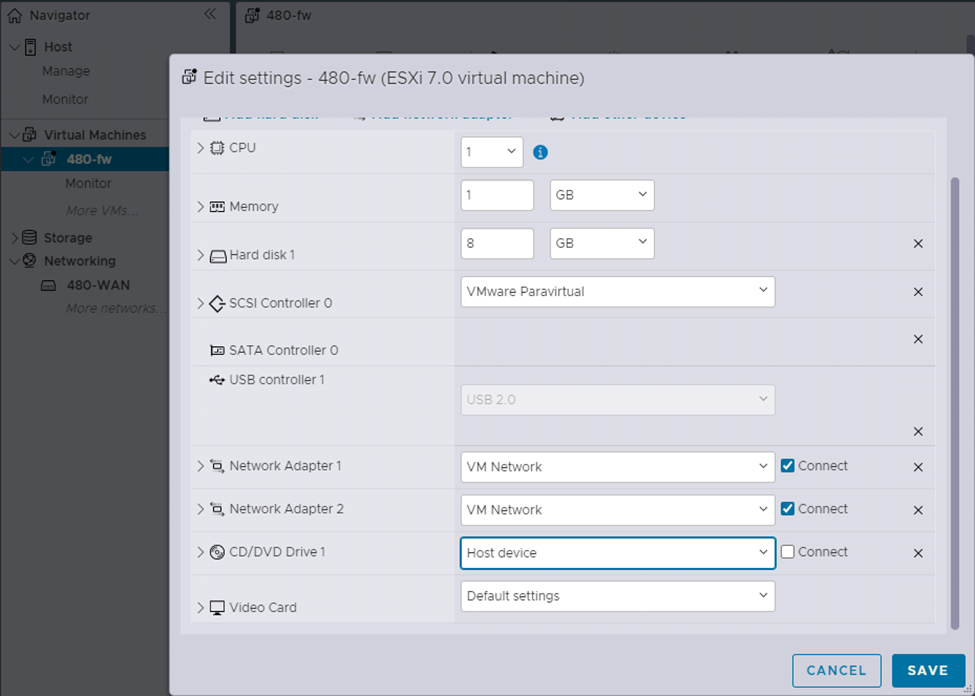
Then, from the ESXi dashboard, I right clicked the VM in the sidebar, clicked “Edit settings”, and changed the CD/DVD to “Host device”. After saved:
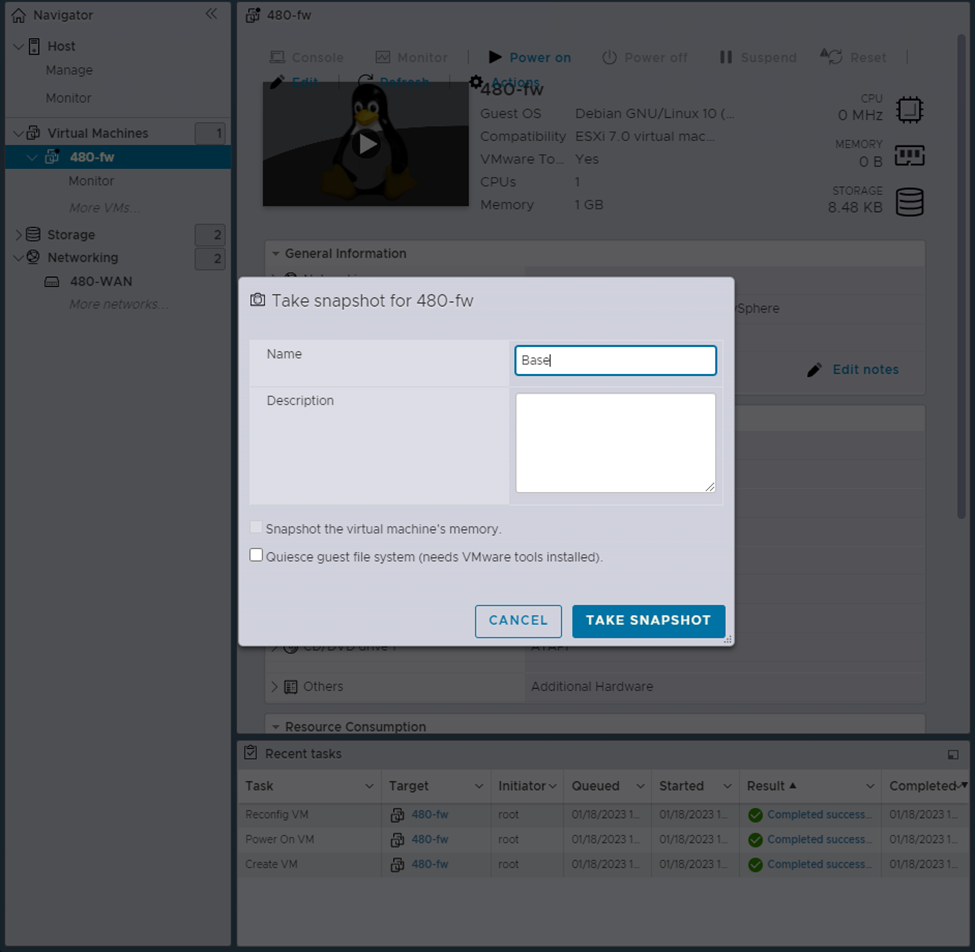
Again I right clicked the VM in the sidebar, hovered over “Snapshots” > Selected “Take snapshot” > named it “Base”:
After creating the snapshot (inside the the snapshot section mentioned before, should now be options to restore/manage snapshots) I changed the second adapter on the VM to “480-WAN” (right clicked the VM in the sidebar, clicked “Edit settings”):

Then I restarted the VM after saving.
Once I have logged back into the firewall, I checked for an address:

I would then SSH into the VM using the DHCP address above:

Then I changed the password with the following:
configure
set system login user vyos authentication plaintext-password {SECURE_PASS}
commit
save
Then I ran the following to setup the IP addresses on both interfaces with descriptions/setup gateway and dns for the system/ setup DNS and NAT forwarding:
# Interface setup for eth0
delete interfaces ethernet eth0 address dhcp
set interfaces ethernet eth0 address 192.168.7.55/24
set interfaces ethernet eth0 description CYBERLAB
# Interface setup for eth1
set interfaces ethernet eth1 address 10.0.17.2/24
set interfaces ethernet eth0 description 480-WAN
# Gateway and DNS setup
set protocols static route 0.0.0.0/0 next-hop 192.168.7.250
set system name-server 192.168.4.4
set system name-server 192.168.4.5
# DNS forwarding setup
set service dns forwarding listen-address 10.0.17.2
set service dns forwarding allow-from 10.0.17.0/24
set service dns forwarding system
# NAT forwarding setup
set nat source rule 10 outbound-interface eth0
set nat source rule 10 source address 10.0.17.0/24
set nat source rule 10 translation address masquerade
# Setting system hostname
set system host-name 480-fw
commit
After the commit, my SSH session closed. So I resumed using the web console from earlier where I checked my interfaces were set, then I used configure and save to save the config:
Reflection: Having used VMs on Vcenter, it was nice to see what the backend setup of it looks like. By doing so, I feel I have a deeper understanding and appreciation for the VMs that I use at Champlain everyday. I have in previous courses worked with the idea of VMware cloning, so setting VyOS as a base image very much made sense to me. My experience in VyOS in other classes was also very handy in this setup of the firewall. Getting experience with ESXi so far has been a very fun and rewarding experience!
xubuntu and proof
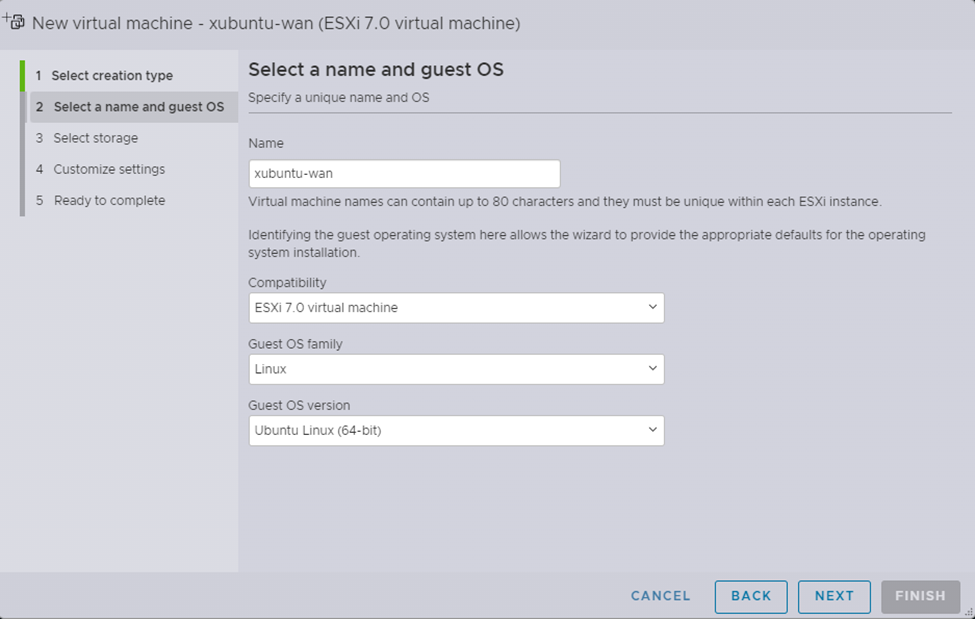
From my ESXi host client, I right clicked the “Virtual Machines” sidebar and selected “Create/Register VM”:
With this I would use the default creation type, set the name to “xubuntu-wan” and configured compatibility and guest OS settings as follows:
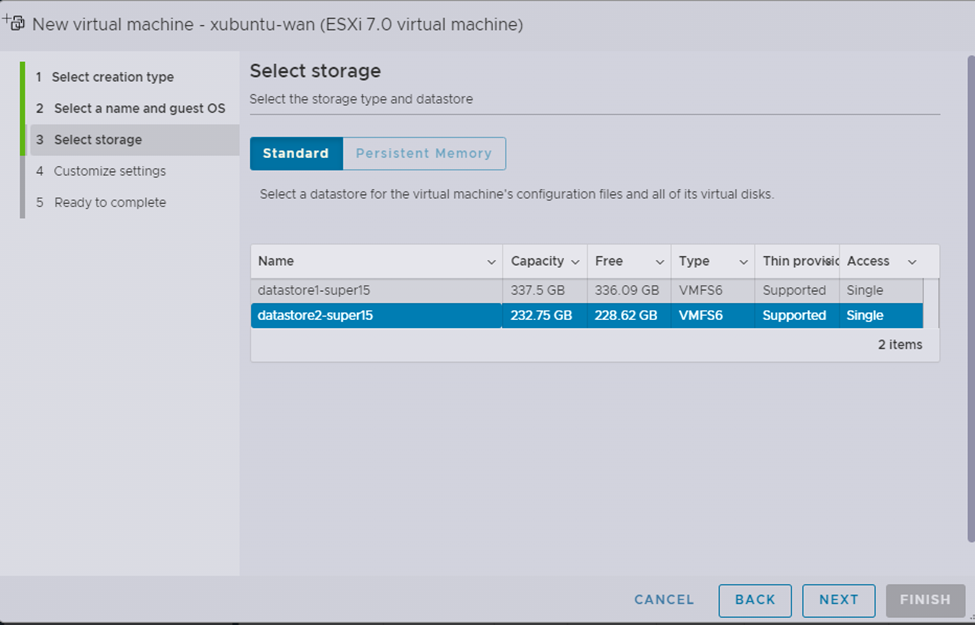
I would select to place it onto datastore2:
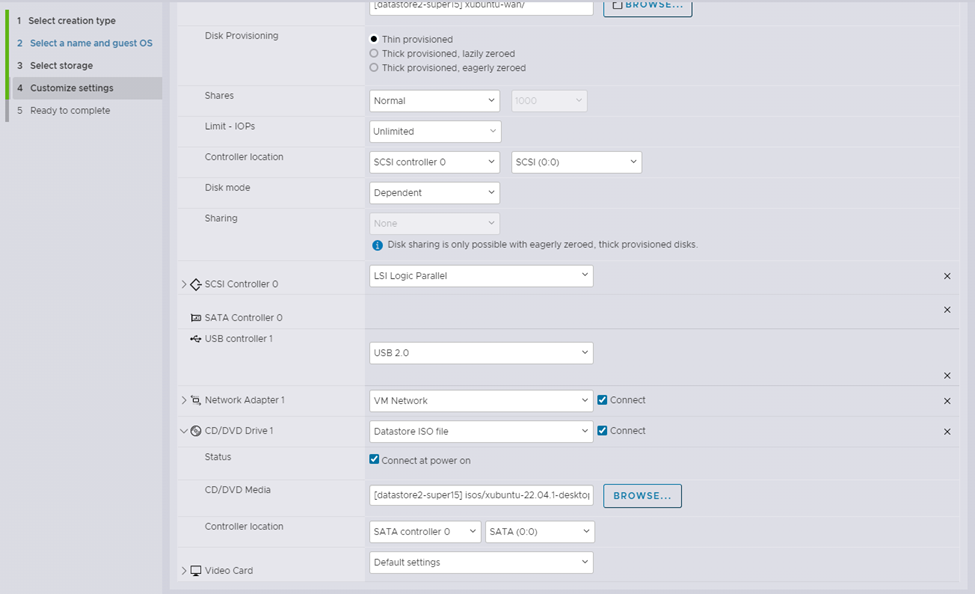
Then I set the virtual machine settings as follows with the following points (same points from VyOS VM setup apply EXCEPT for anything regarding the extra network adapter!):
-
Use thin provisioning
-
Make sure to select the VM in CD/DVD (can use the dropdown and “BROWSE..” in the CD/DVD media section as well)
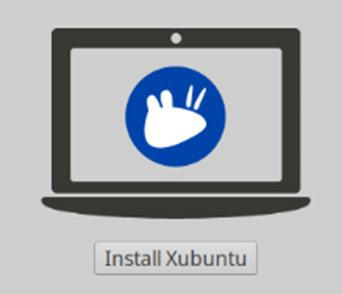
I then finished, then I accessed the console for xubuntu, and followed this setup:
- Selected to install xubuntu
- Used the default keyboard layout
- Kept the default settings and pressed “Continue” in “Update and other software”
- In “Installation type", chose to “Erase disk and install Xubuntu” (default), pressed “Install Now”
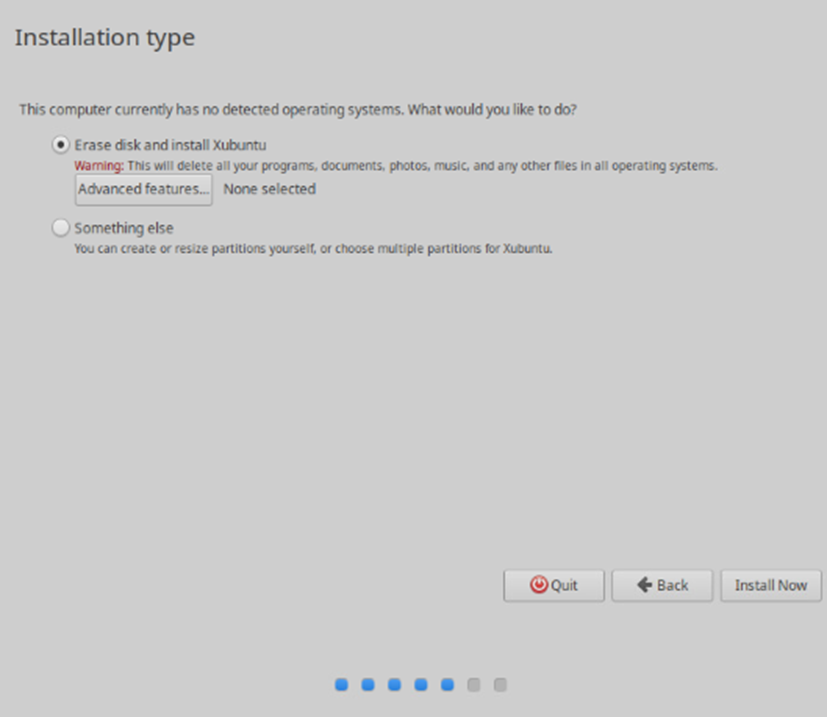
- When asked about disk changes, just continued on
- Selected “New York” timezone
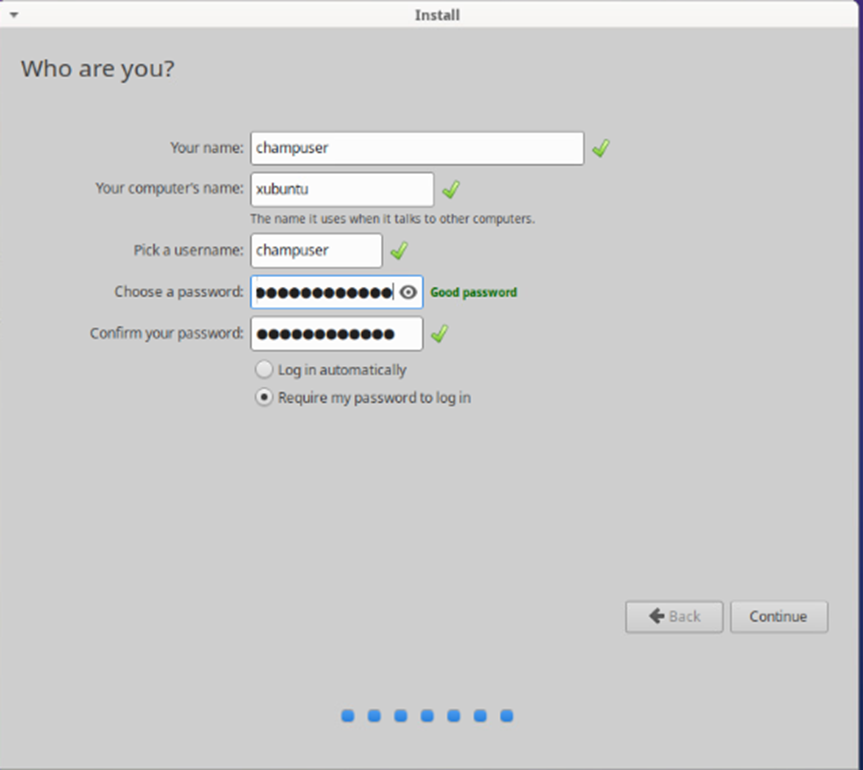
- Setup the following user
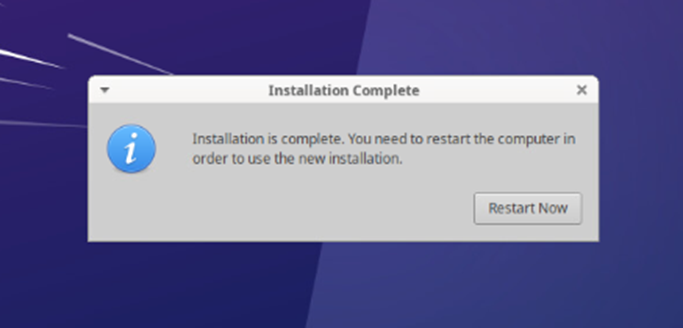
- Once installation was complete, I chose to restart
NOTE: I did have to manually turn the VM off and on from the dashboard since the Logo to Xubuntu came up like it SHOULD have loaded, but after leaving it for 5 minutes and checking the performance graph on the VMs menu, I power cycled it. This solved the issue.
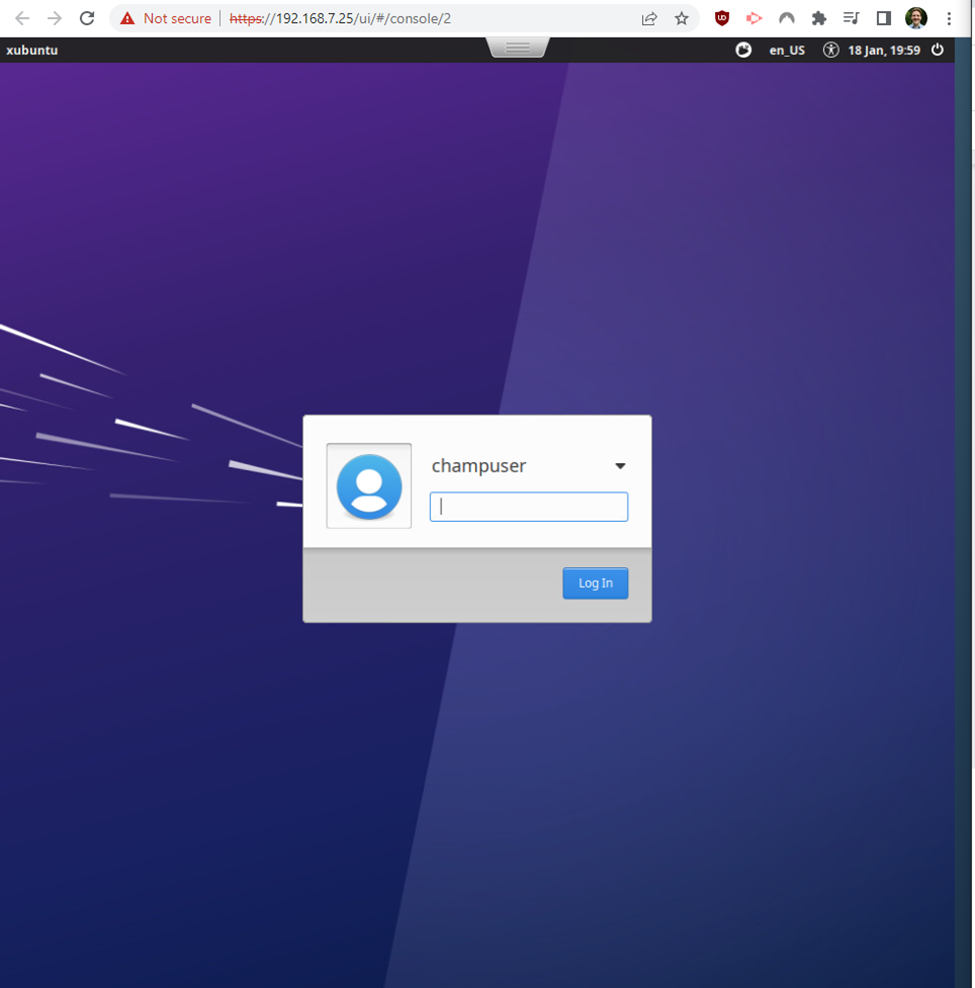
With all of this set, I was met with a login screen and was able to login and use the Desktop:
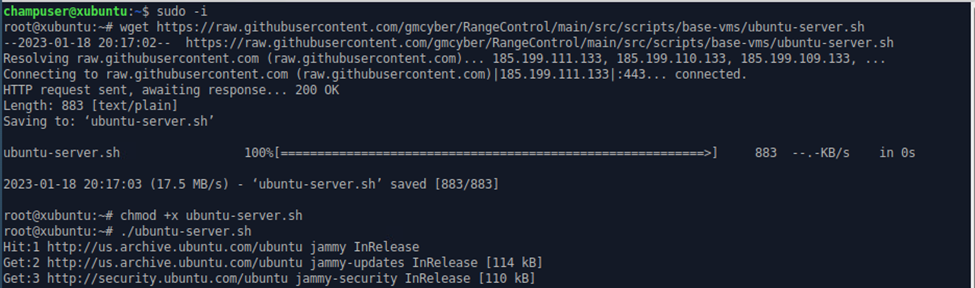
Then I ran the instructors provided script to prepare ubuntu desktop for linked cloning:
sudo -i
wget https://raw.githubusercontent.com/gmcyber/RangeControl/main/src/scripts/base-vms/ubuntu-desktop.sh
chmod +x ubuntu-desktop.sh
./ubuntu-desktop.sh
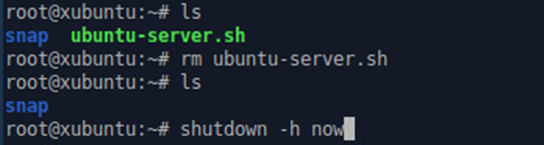
I then cleaned up with rm and shutdown the VM:
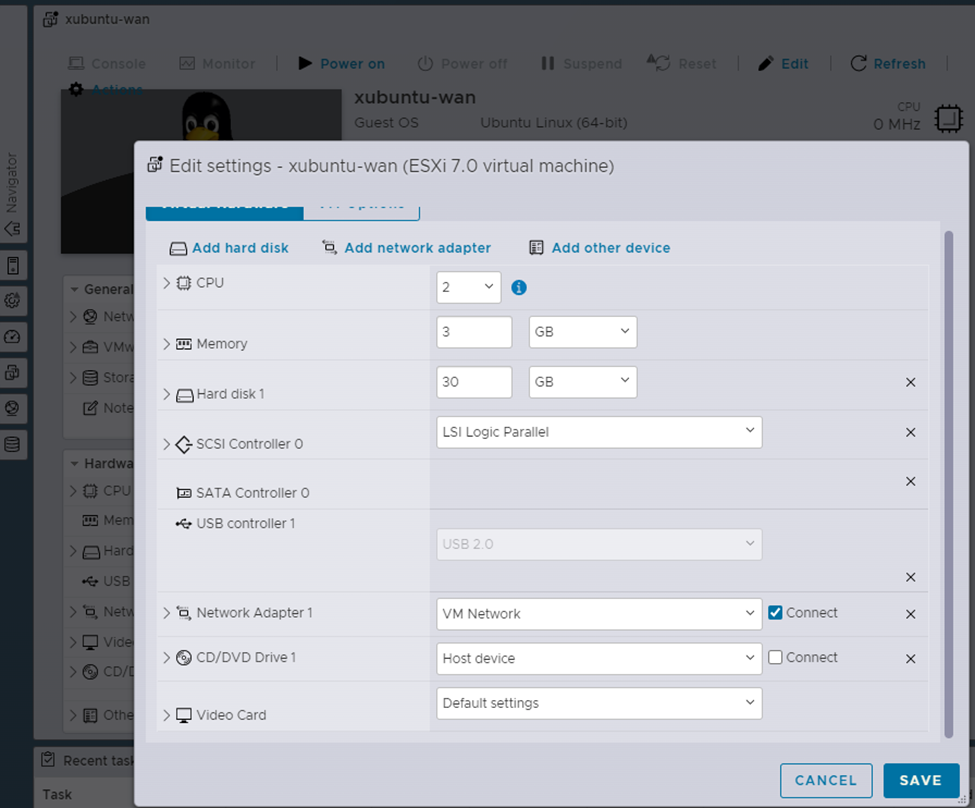
I would then go back to the VMs menu, select “Edit” and change the CD/DVD drive to “Host device”:
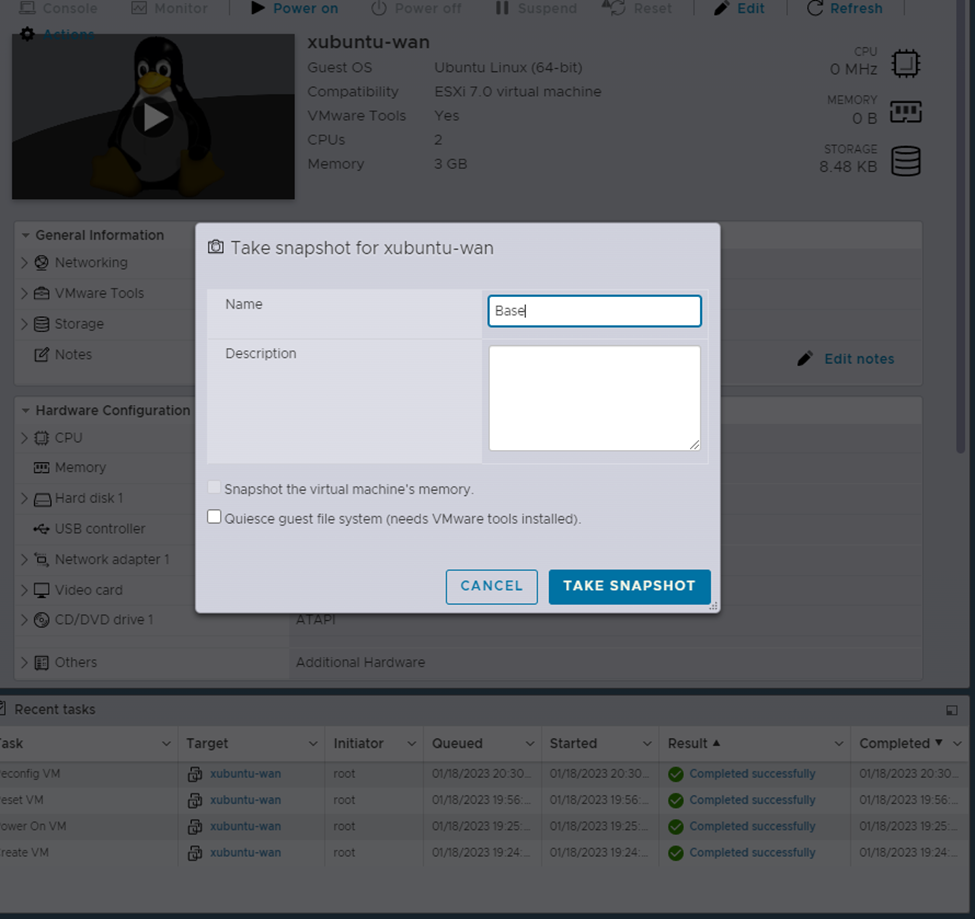
And then I would select “Actions” from the VMs menu and take a Base snapshot like the following:
 NOTE: Seemingly anywhere on the VMs menu I can right click and get the same menu as “Actions”
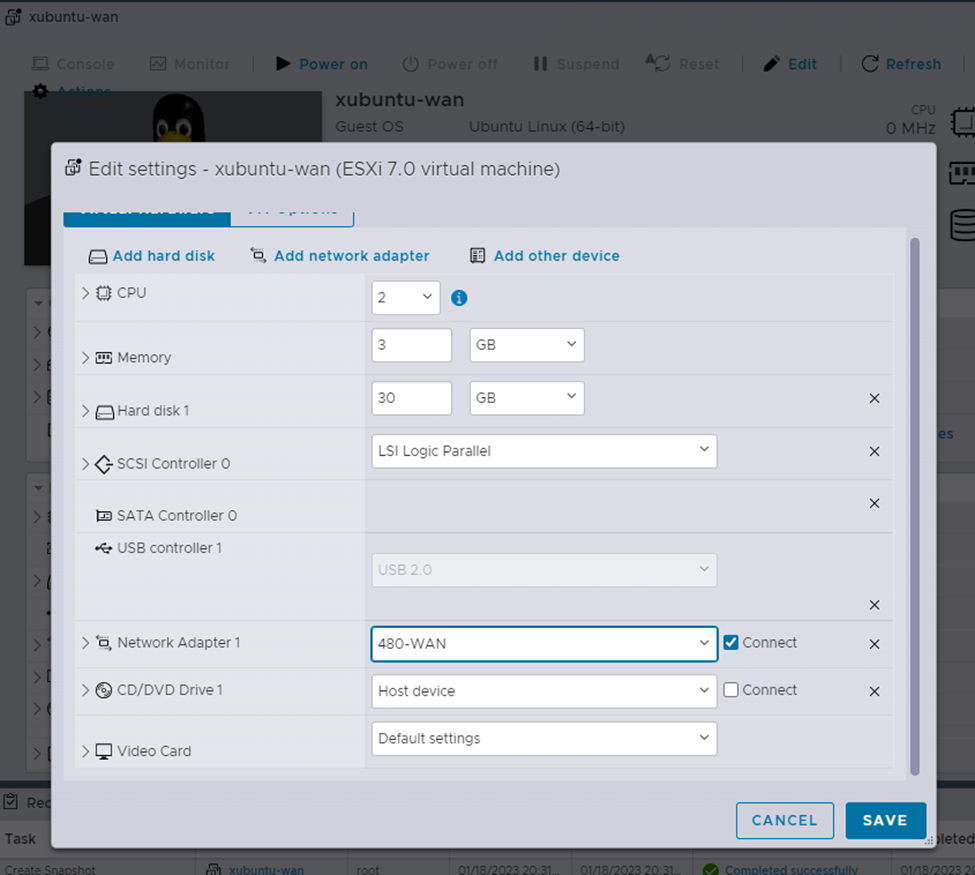
Afterwards I would go back to the VMs menu, select “Edit”, and set the network adapter to “480-WAN”, saved:
I then powered on the system and ran the following commands as root to add a sudo user/add that user to the sudo group:
adduser olivermustoe
usermod -aG sudo olivermustoe
Then I powercycled the VM, logged in as “olivermustoe” and removed the champuser user:
sudo userdel -r champuser
End result:

NOTE: Ran userdel command once before a power cycle, but it said the "champuser" account was used by a process, so I powercycled the machine again and was able to effectively remove the user with the same command.
I then (from the network connections > wired connection 1) added the following static IP address:
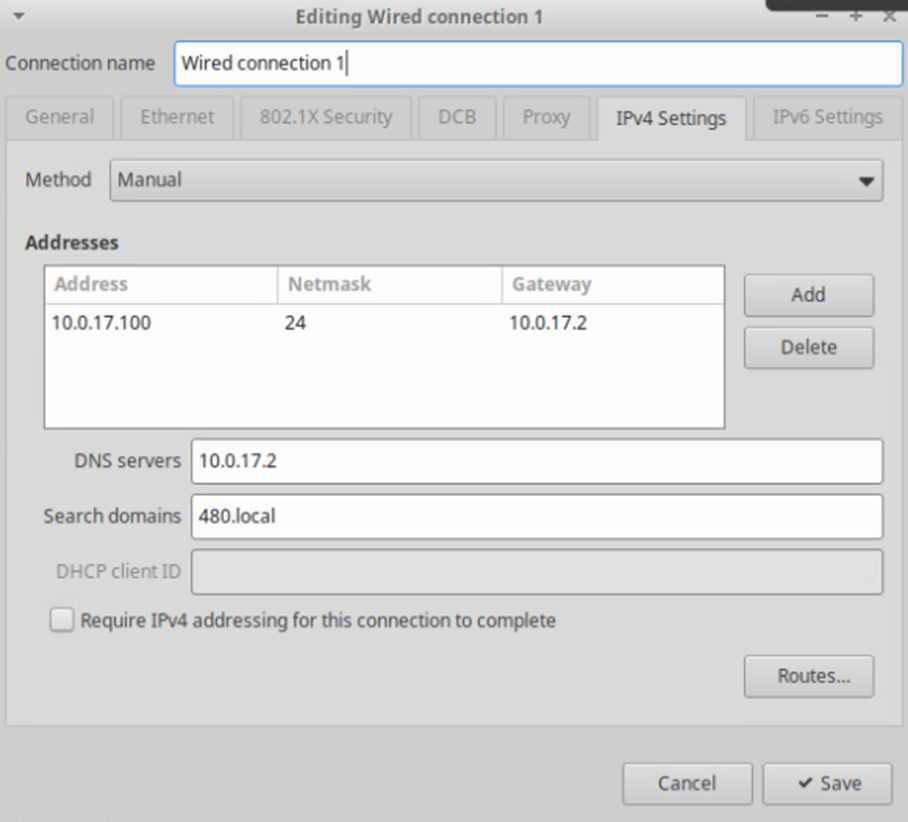 NOTE: Make sure that Method is set to “Manual” or else even if you have an address listed, xubuntu will still try for a DHCP address.
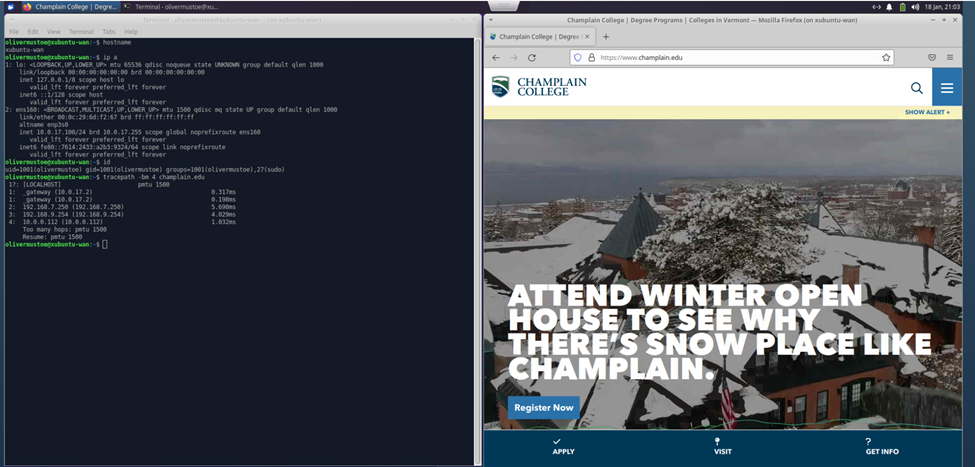
I would also set my hostname to “xubuntu-wan” with the following command:
sudo hostnamectl set-hostname xubuntu-wan
Reflection:
Having only setup 2 VMs, I can say that the process of manually setting up VMs can be a fun, but time-consuming process on ESXi. The install of xubuntu was very smooth, except for when I tried to restart the VM, it froze on startup. This may have been due to the installation media still being inside?!? But after checking that the VM was not consuming resources for a good amount of time, I decided to power cycle it and it worked flawlessly from there! The instructore provided script was also very interesting to me, as I wonder if there are guides that exist to prep VMs for this, or it is just general Linux knowledge. As I go through the course, I might develop a resource for this if it becomes a bigger part of the course. With the base setup done, I can't wait to see any more additions we make to it/how we start automating the process in future weeks!
Milestone 1 proof:
Sources for all:
Can't find something? Look in the Backup file