Milestone 7 Deploying and Post Provisioning of BlueX Linux Servers - Oliver-Mustoe/Oliver-Mustoe-Tech-Journal GitHub Wiki
This page journals content related to NET/SEC/SYS-480 milestone 7.
Table of contents
VM Inventory
7.1 Create a Rocky 9.1 Base VM
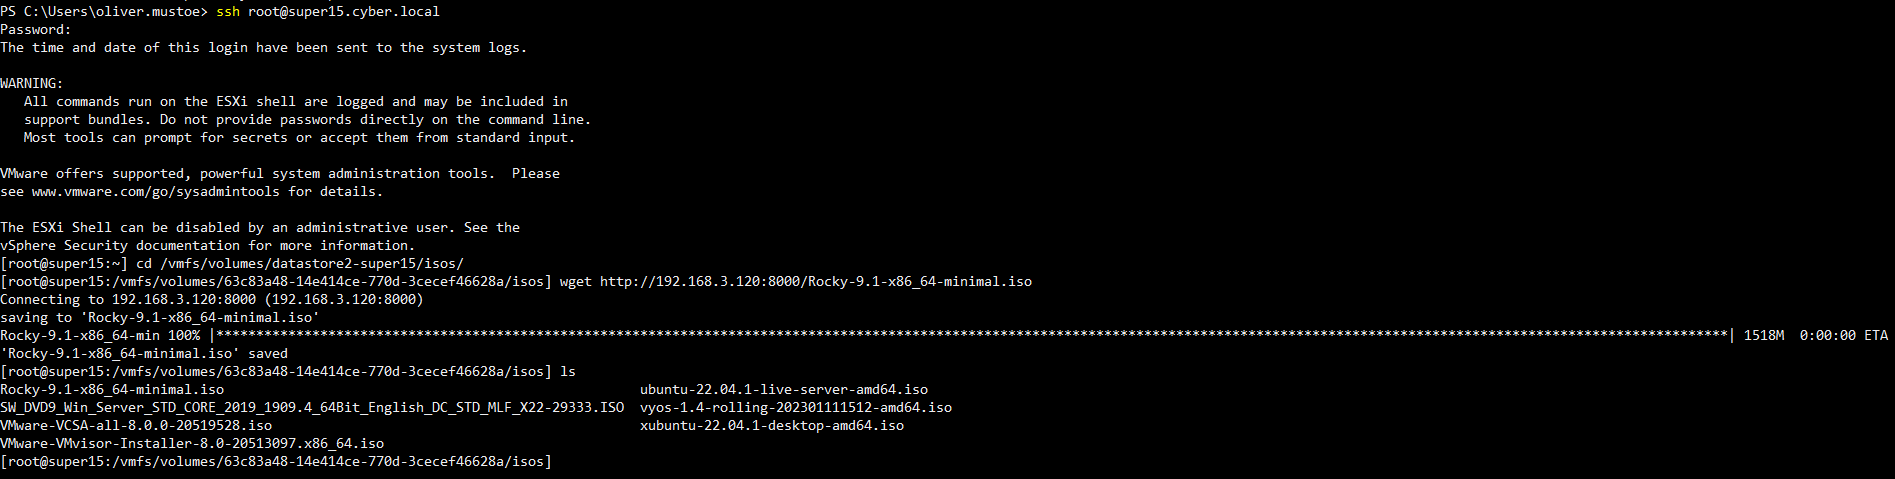
Used the same process to download the Rocky 9.1 VM as I did in Milestone 1:
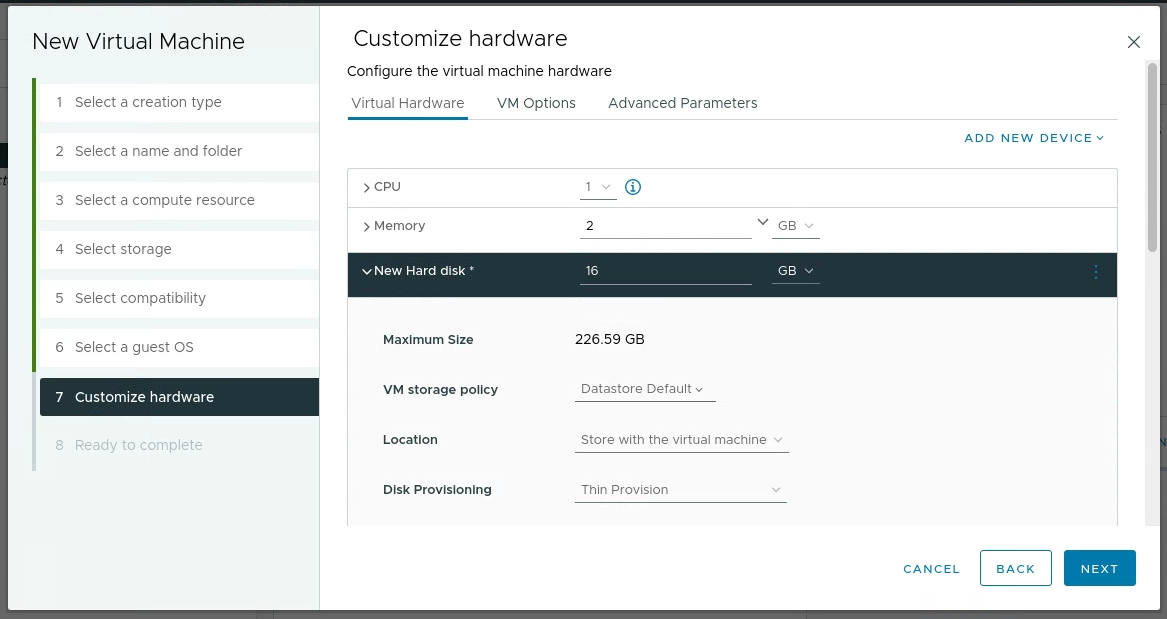
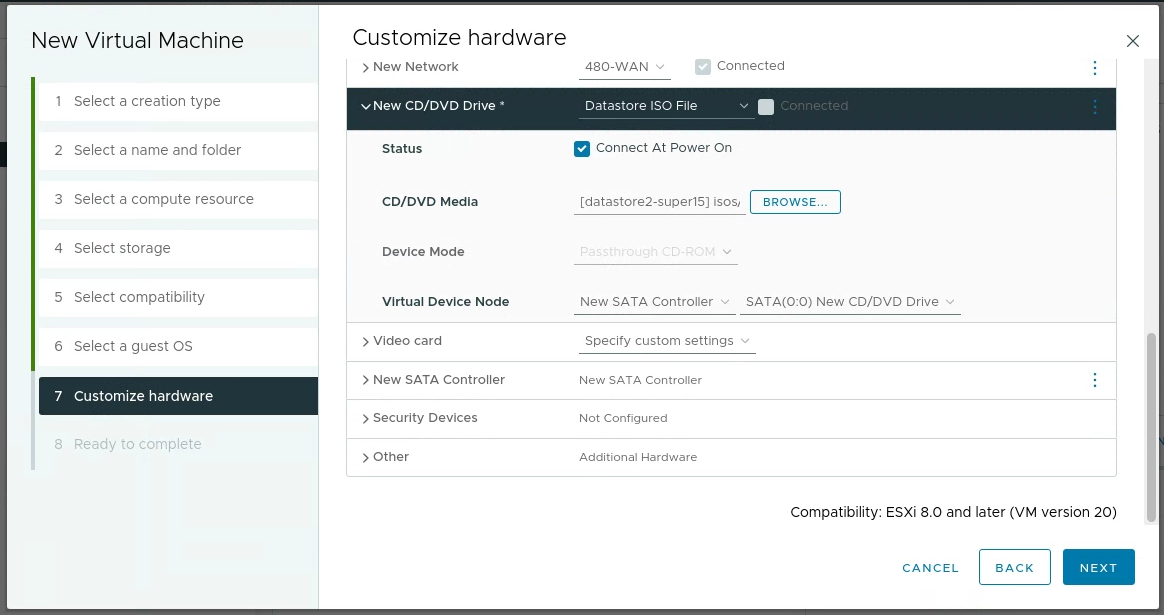
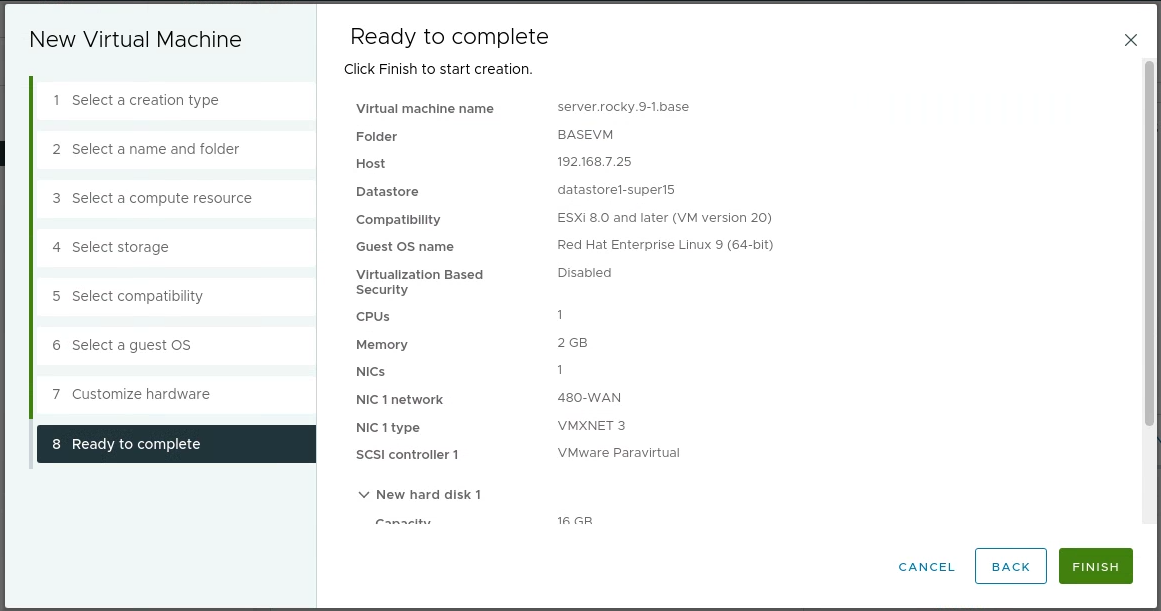
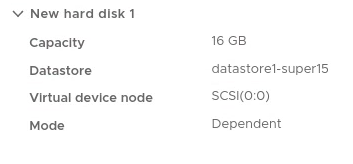
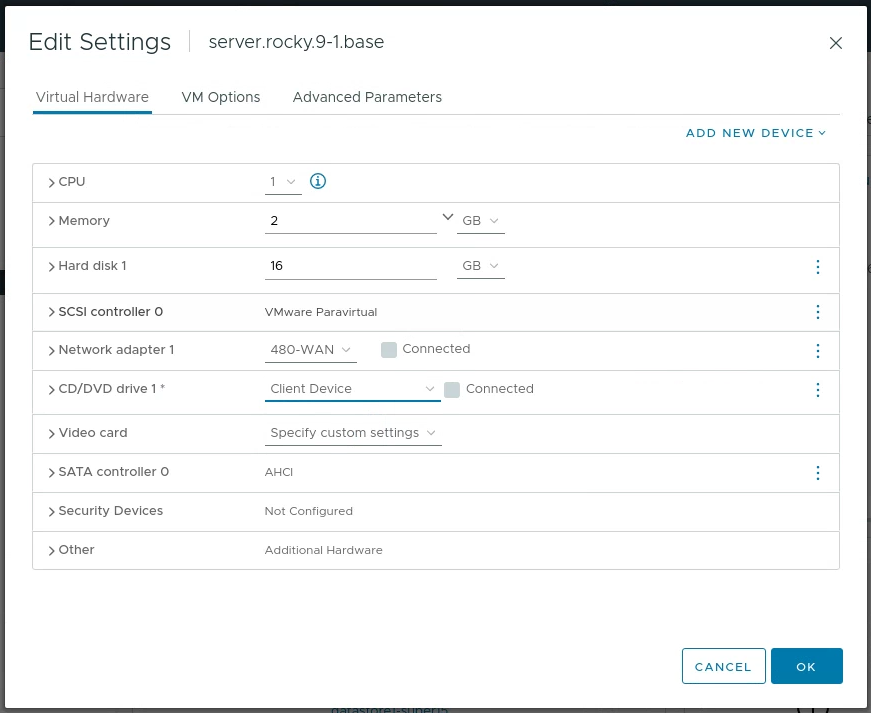
Then I created the following VM in the BASEVM folder with the following settings:

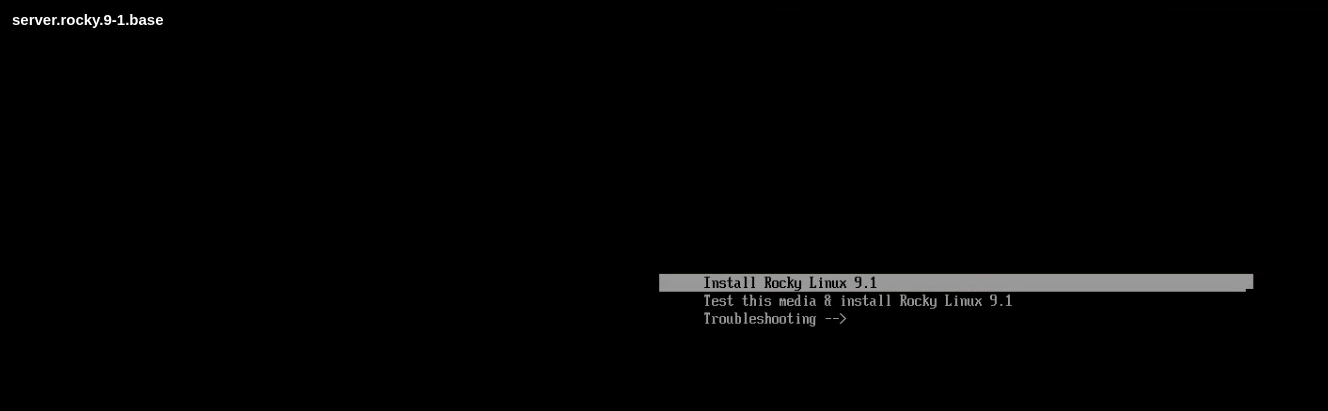
I then booted ‘server.rocky.9-1.base’, and began the installation with the selection in the terminal:
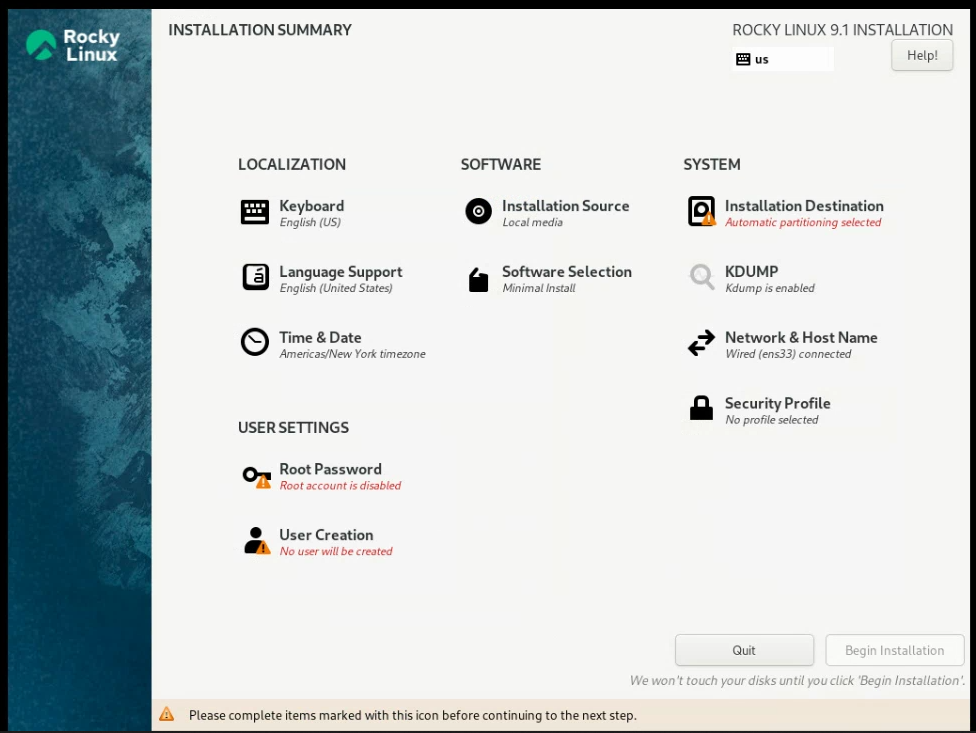
Then once it began, I would keep the language english. After selecting that I was met with this screen:
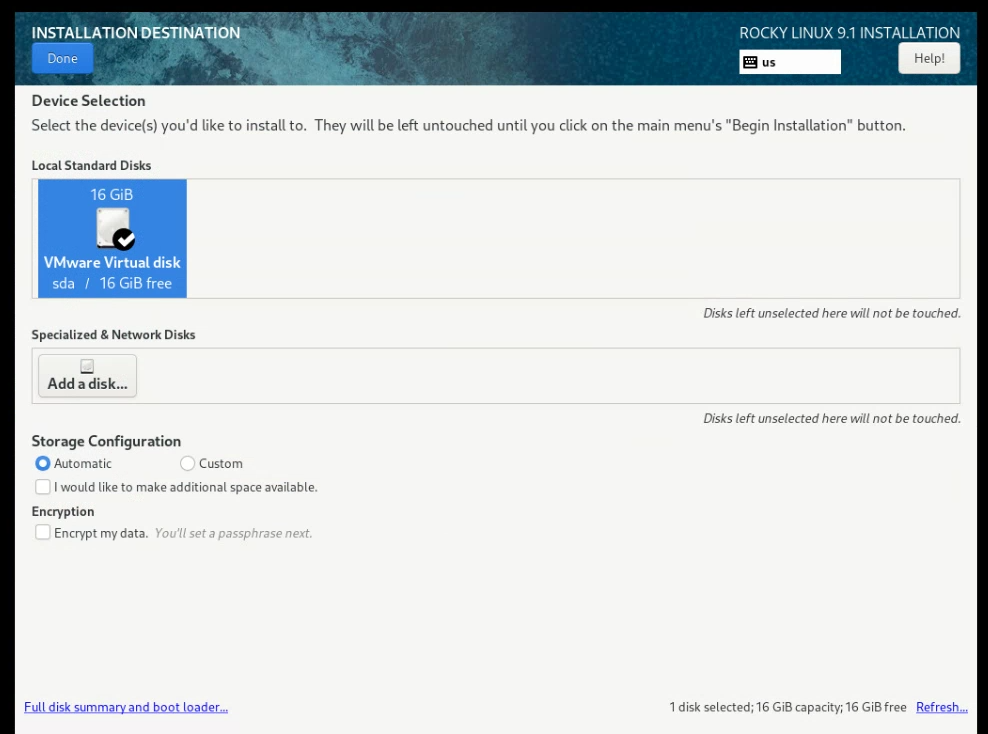
In ‘Installation Destination’ I would go in, select the VMware Virtual disk, and press Done:
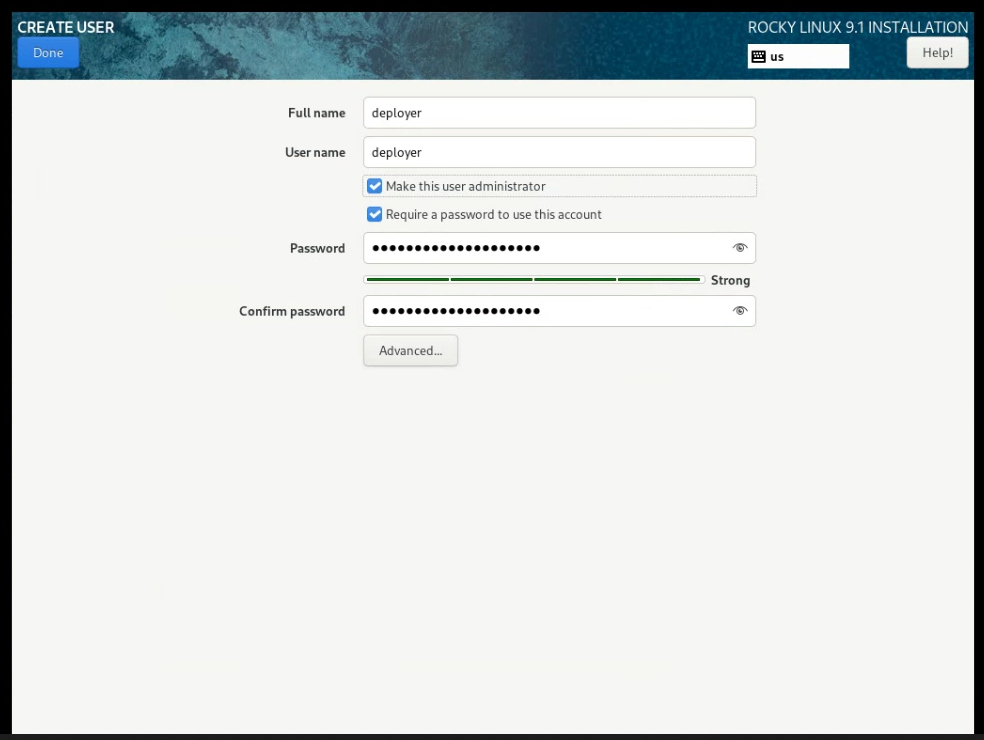
In ‘User Creation’, I would create a deployer user (MAKE USER ADMINISTRATOR):
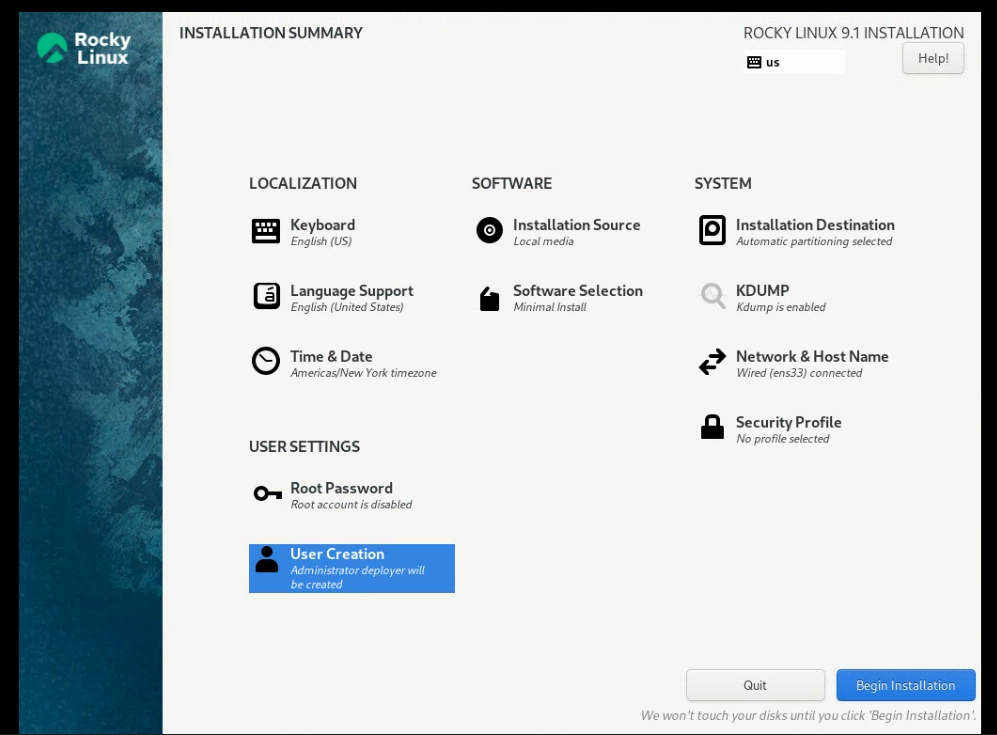
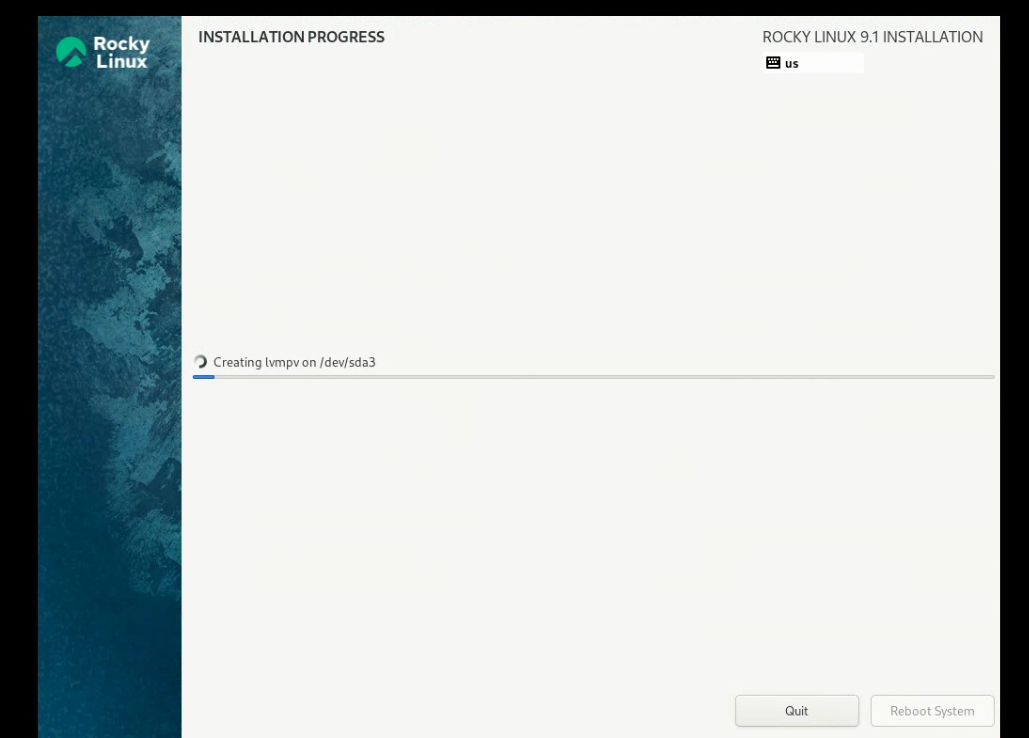
With these two settings finished, began the installation:
Completed installation:

Once the installation was finished, I shutdown the system (using vCenter Actions > Power > Power Off) and removed the datastore iso (Actions > Edit settings):
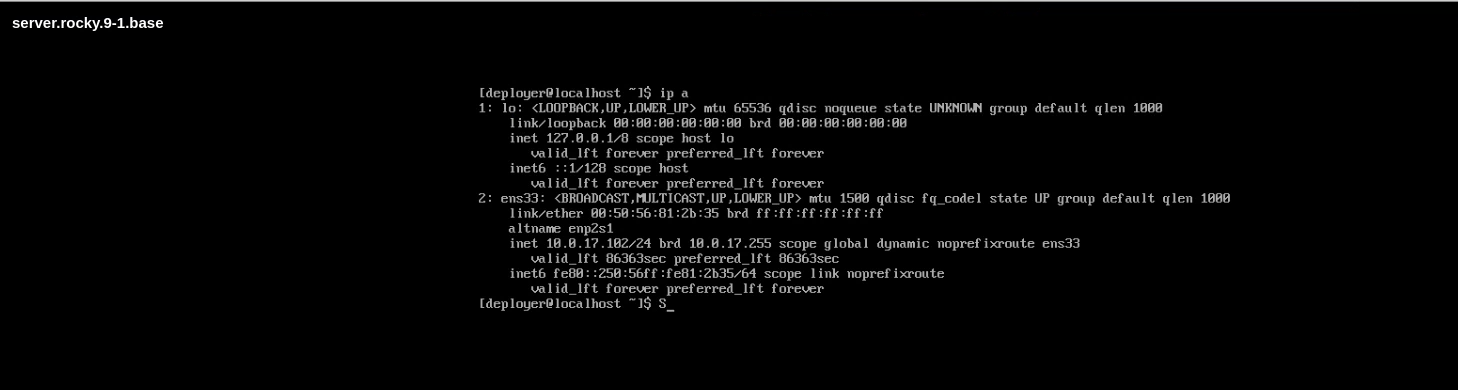
I then powered on the machine, logged in, and saw that I received a DHCP address from WAN:
I then ran the following commands to sysprep the VM (turns off VM):
curl -O https://raw.githubusercontent.com/gmcyber/RangeControl/main/src/scripts/base-vms/rhel-sealer.sh
sudo bash rhel-sealer.sh
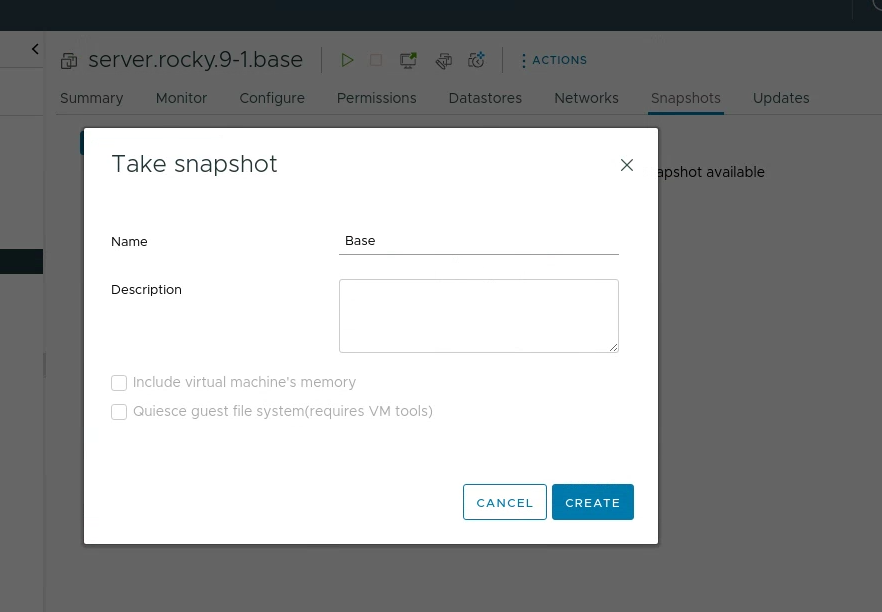
With the VM turned off, I created a snapshot called Base:
7.2 - Static Route and DHCP via Ansible
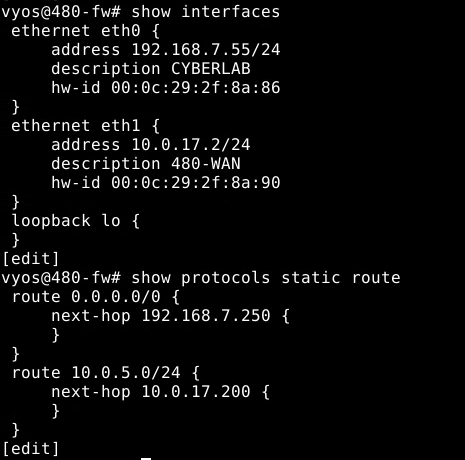
First I ran the following commands on my 480-fw to set the needed static route/correct some descriptions from previous labs:
configure
# Correct descriptions from prev labs
set interfaces ethernet eth0 description CYBERLAB
set interfaces ethernet eth1 description 480-WAN
# Set static route to blue-lan
set protocols static route 10.0.5.0/24 next-hop 10.0.17.200
commit
save
Result of above commands:
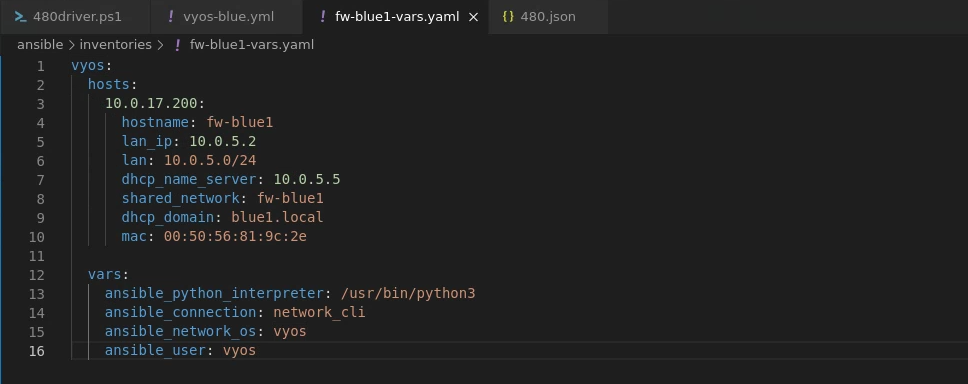
Then I created fw-blue1-vars.yaml Ansible inventory:
And this Ansible vyos-blue.yml playbook:
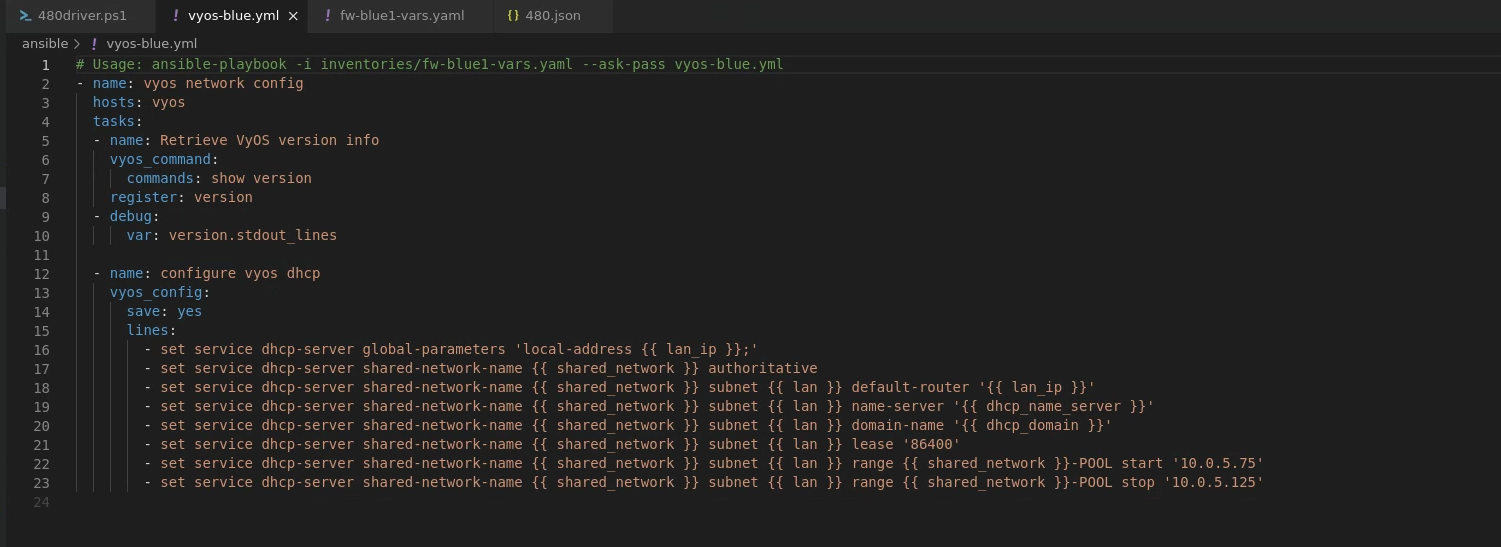
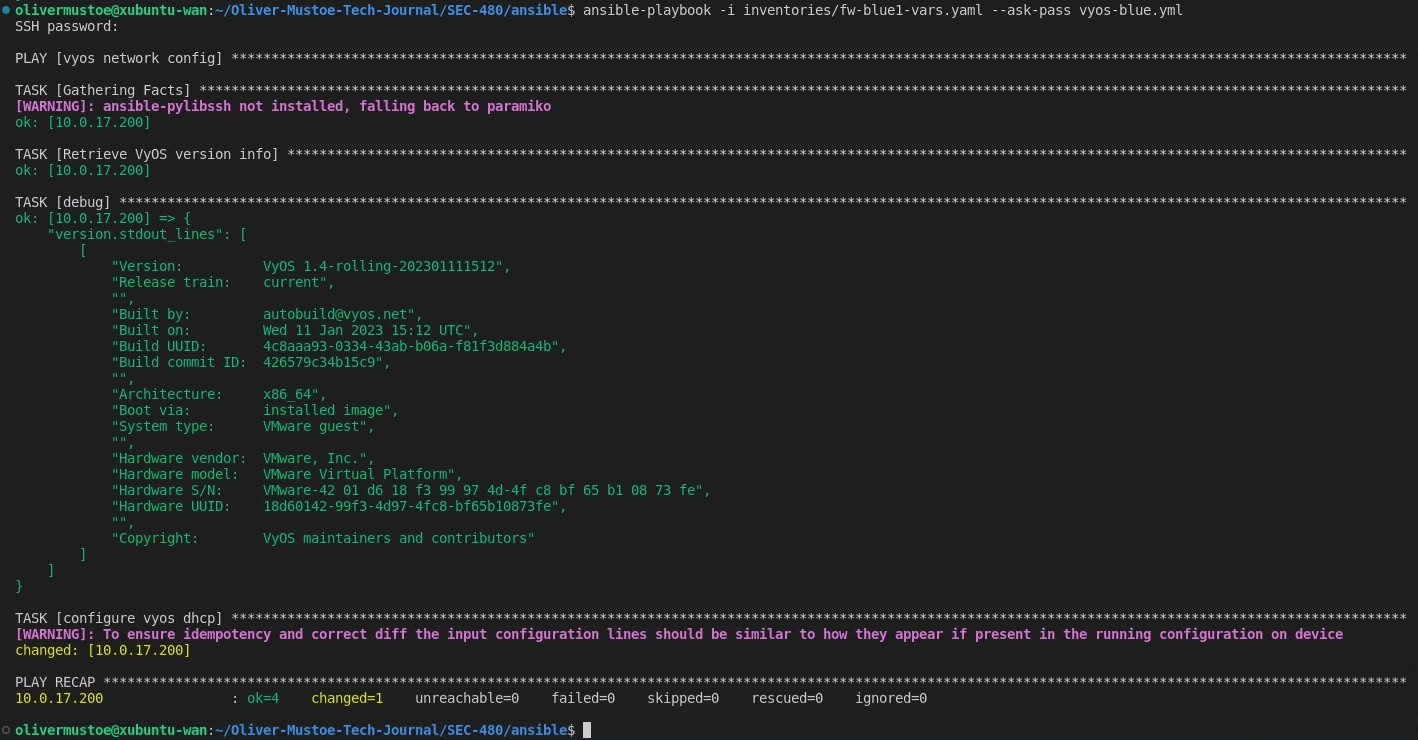
Run shown below with command:
ansible-playbook -i inventories/fw-blue1-vars.yaml --ask-pass vyos-blue.yml
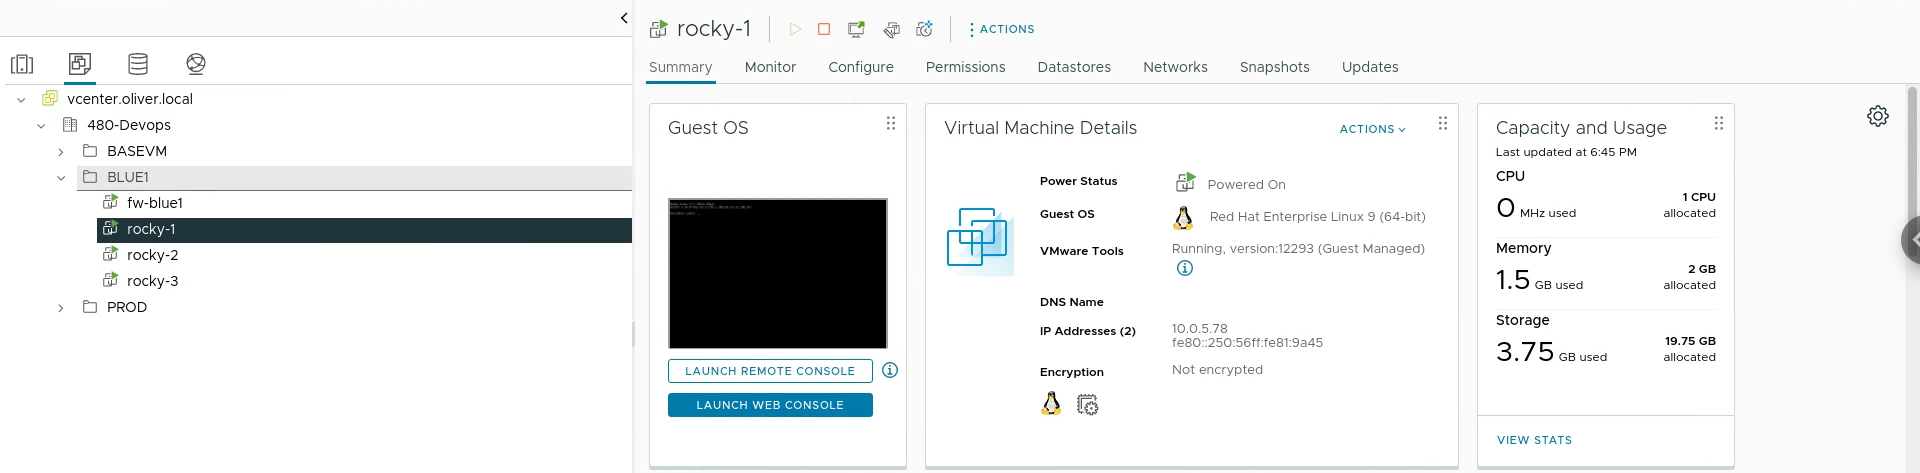
I then created rocky1-3 with the commands below (using the deploy-clone function to switch adapters and power on VMs):
Deploy-Clone -LinkedClone -VMName server.rocky.9-1.base -CloneVMName rocky-1 -defaultJSON ./480.json
Deploy-Clone -LinkedClone -VMName server.rocky.9-1.base -CloneVMName rocky-2 -defaultJSON ./480.json
Deploy-Clone -LinkedClone -VMName server.rocky.9-1.base -CloneVMName rocky-3 -defaultJSON ./480.json
Created VMs after being moved into a created folder “BLUE1” shown below (Right clicked 480-Devops > New Folder > New VM and Template Folder > named “BLUE1”):
I also updated my Get-VMIP function to accommodate multiple VMs (such as ‘rocky-*’)
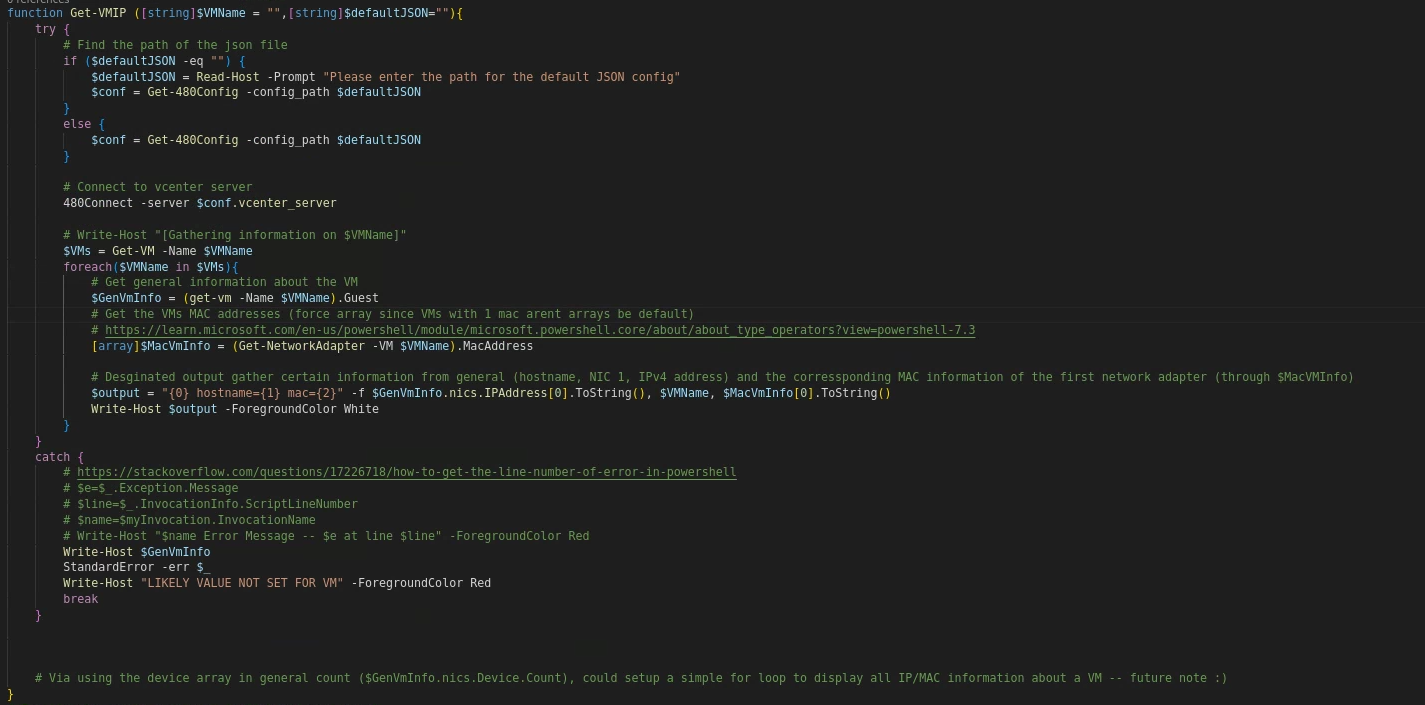
Output of
Get-VMIP -VMName rocky-* -defaultJSON ./480.json

Reflection for Milestone 7.1 and 7.2
Since 7.1 didn’t have much new information to reflect on, I decided to combine it with 7.2. I found milestone 7.1 easy as I could look back at old documentation about how to make VMs in vCenter and I have installed Rocky on VMware workstation before/worked with it in other classes. 7.2 had a few surprises in it, particularly the formatting of the inventory. I have always used a text file for my inventories before, never a yaml file. I definitely see the benefits of a yaml file (overall looks more organized) and I am interested in what other formats Ansible supports for inventories and what their pros and cons are. I also updated in 7.2 my Get-VMIP function to accommodate the use of *, which was actually a pretty easy implementation. I plan to implement this in other functions that could benefit from it.
7.3 - Rocky 1-3 Post Provisioning
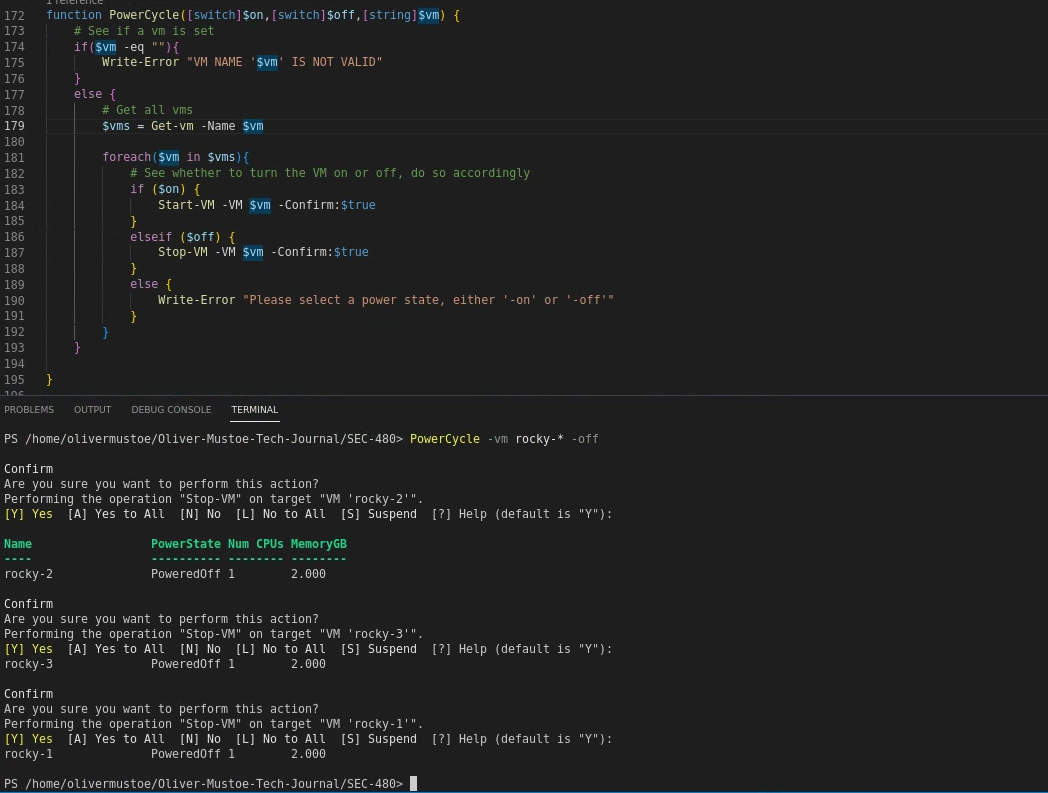
First I updated my Powercycle function to support using a *. Then I used that new functionality to turn off all of the rocky boxes:
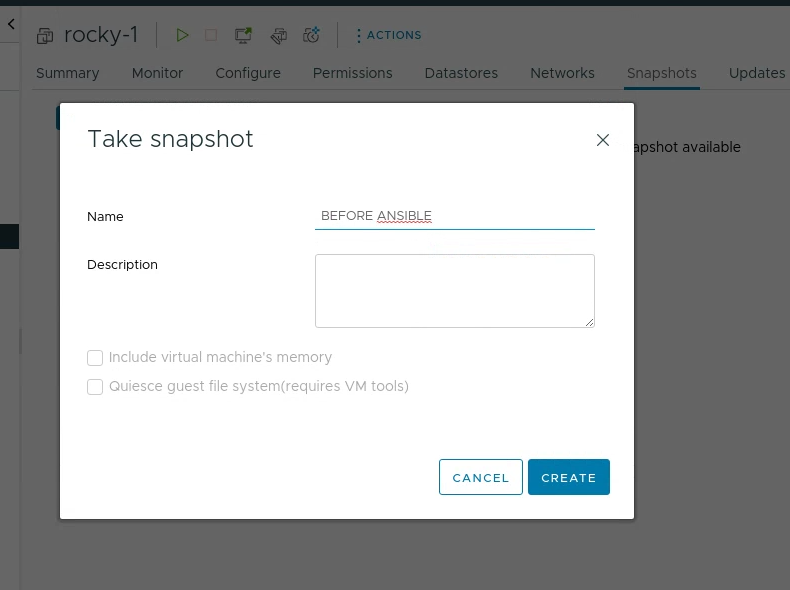
Then for each rocky machine I made a snapshot “BEFORE ANSIBLE”:
I then used my Powercycle function to turn them all on.
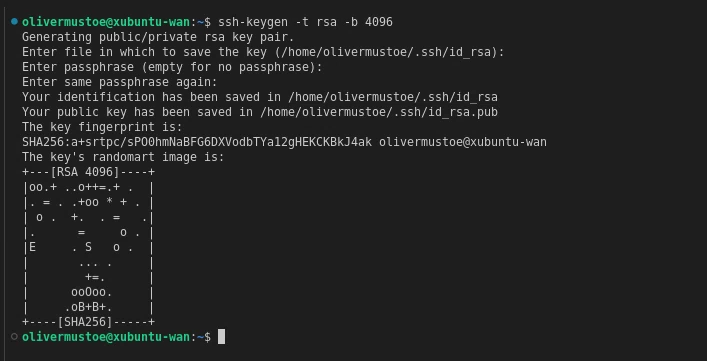
I then generated a passphraseless RSA key:
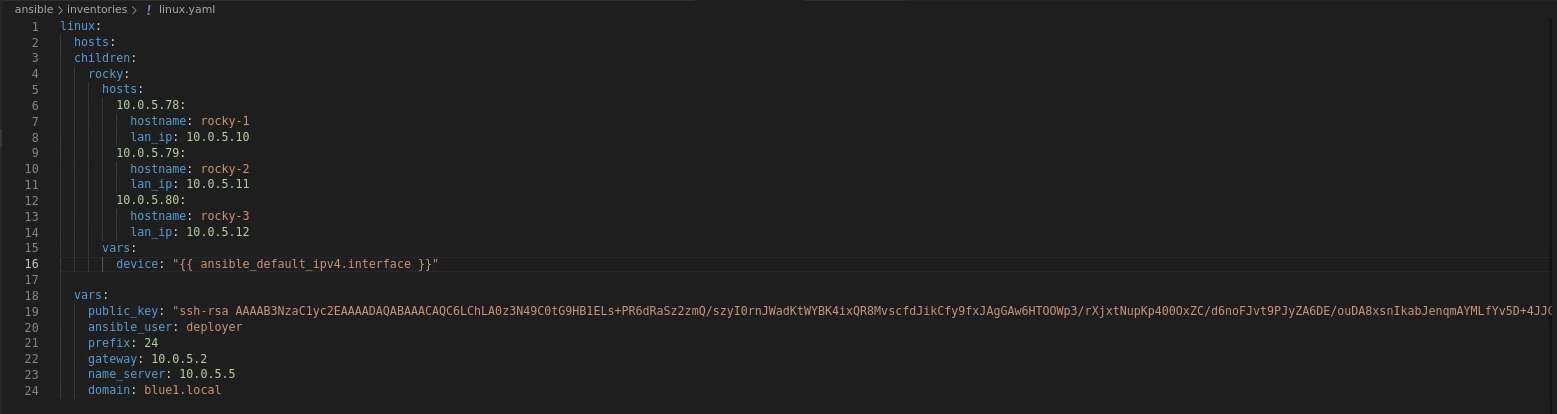
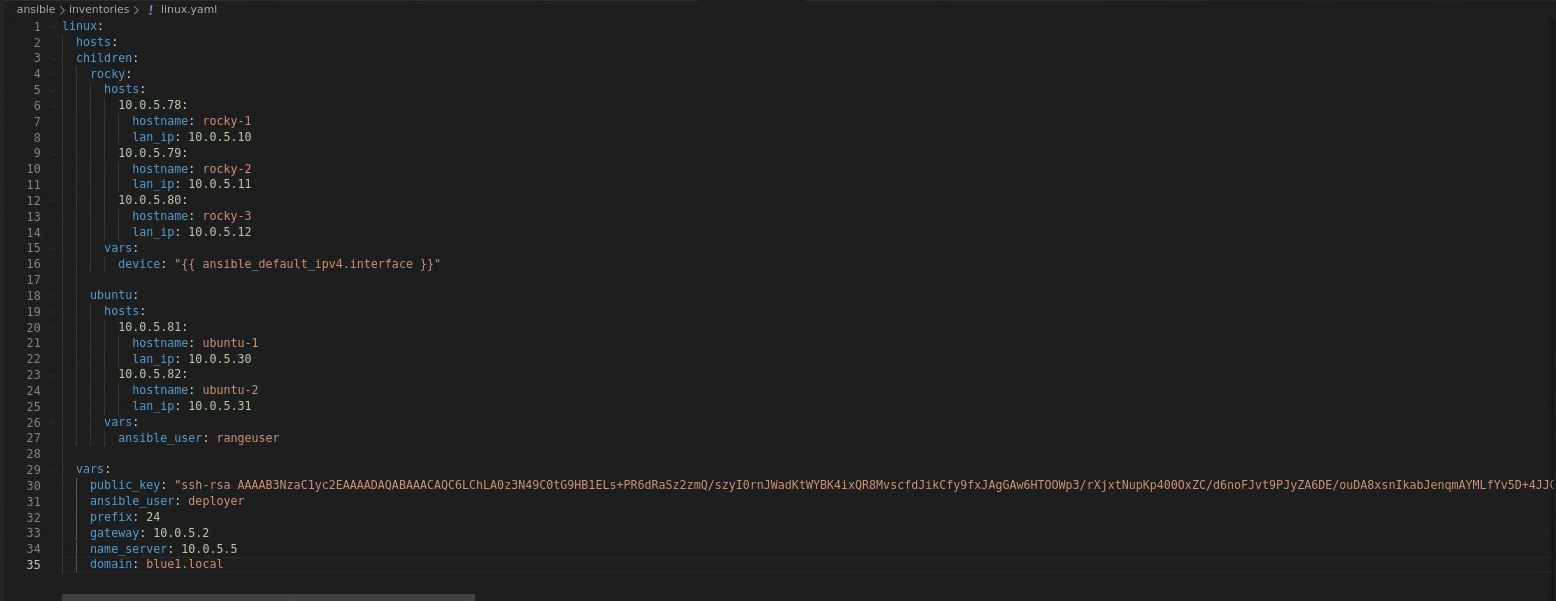
I then made the following linux.yaml playbook (using the RSA public key made above, small change made to instructors as “{{ ansible_default_ipv4.interface }}” will grab the interface dynamically so if the interface isn’t “ens192” the script won’t error out!):
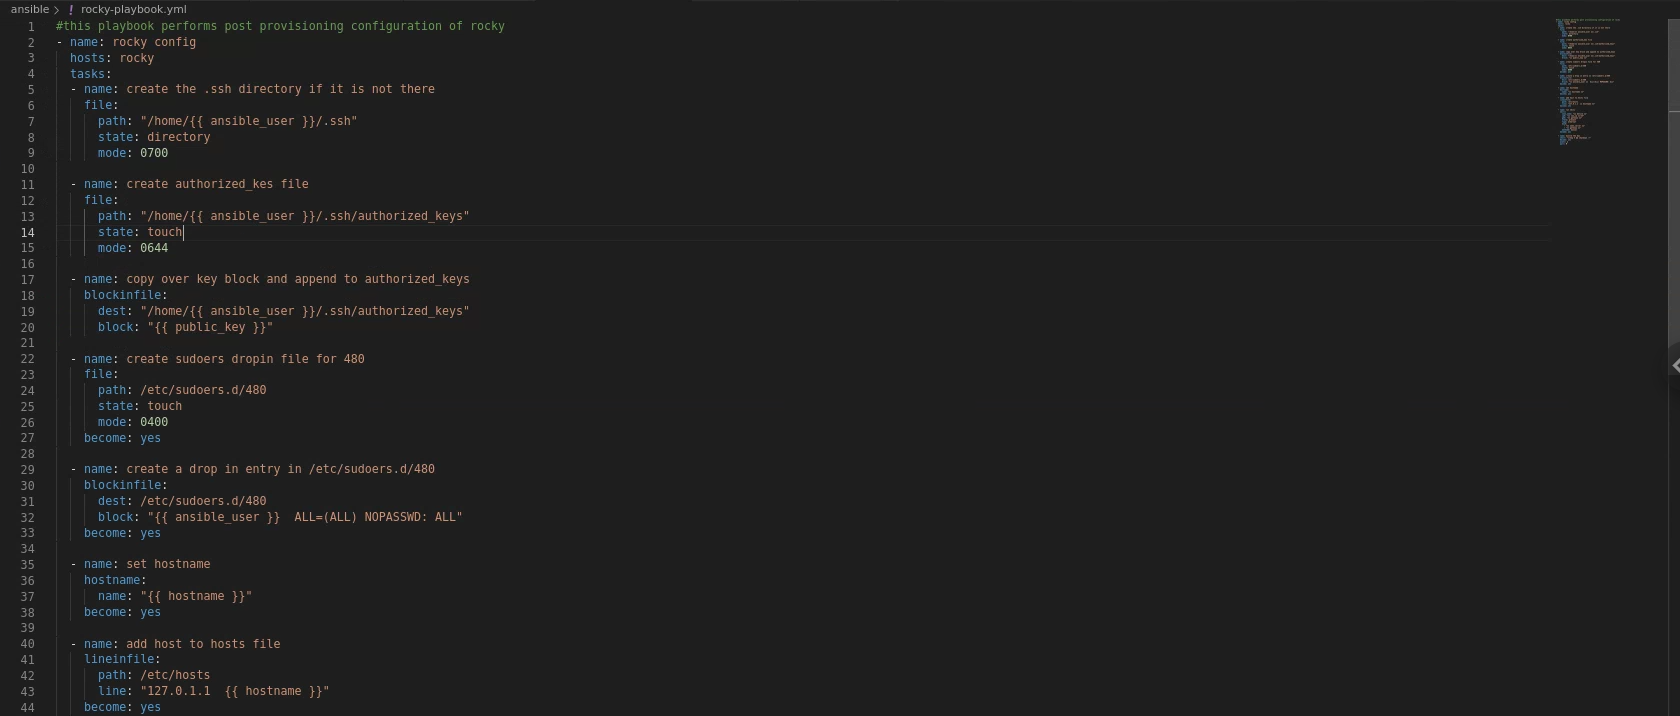
And I made the following playbook "rocky-playbook.yml" for rocky post provisioning:

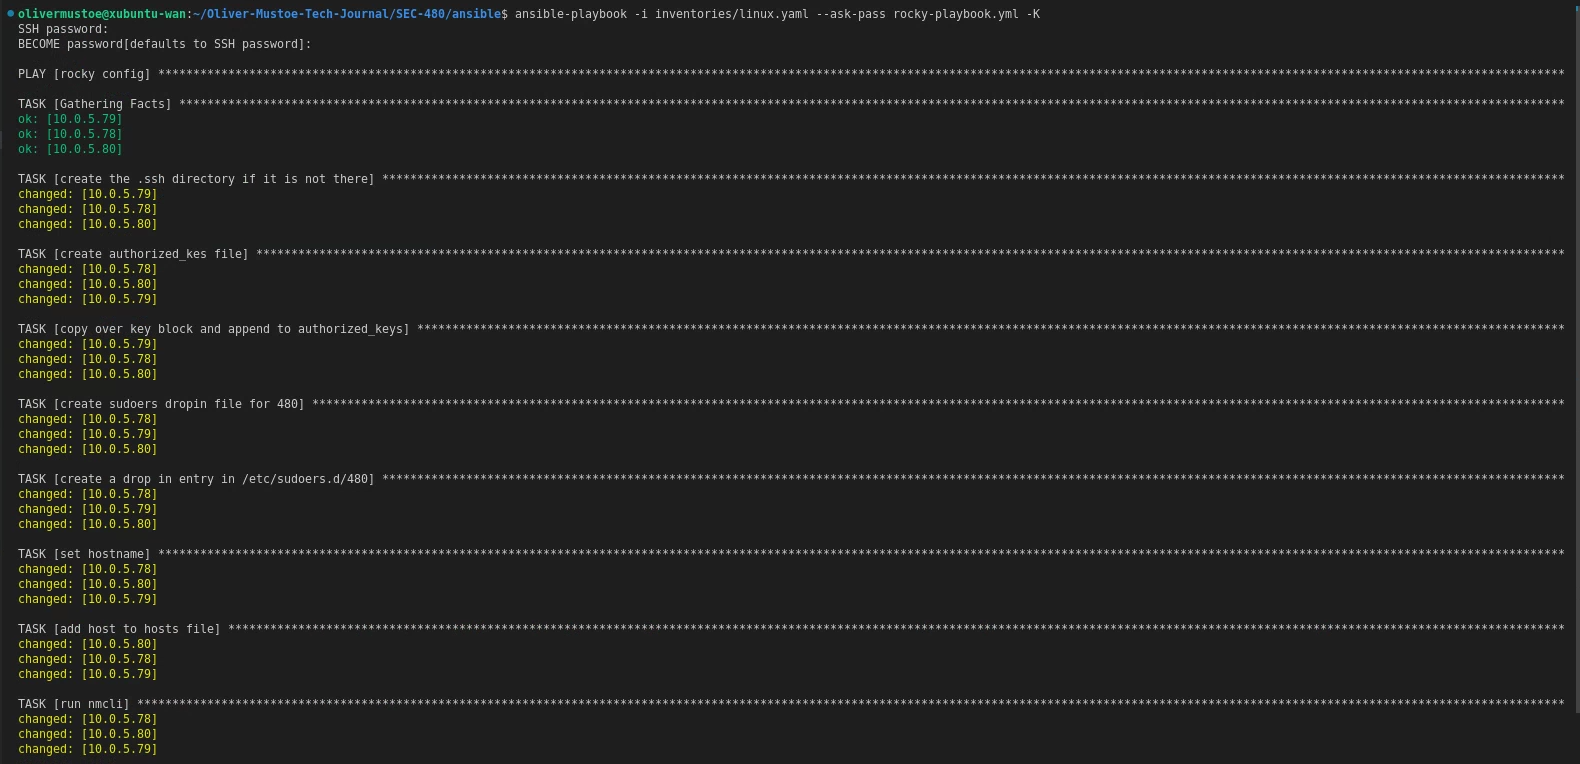
Below is a run of the rocky-playbook.yml (-K needed for sudo password):
ansible-playbook -i inventories/linux.yaml --ask-pass rocky-playbook.yml -K

New output of
Get-VMIP -VMName rocky-* -defaultJSON ./480.json

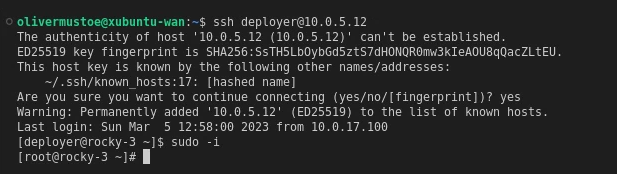
Showing that I can SSH into one of the new rocky boxes:
7.4 Post Provisioning Ubuntu 1-2 with Ansible
First I created 2 new ubuntu VMs from my base image (also switched the network adapter and turned them on):
Deploy-Clone -LinkedClone -VMName ubuntu.22.04.1.base -CloneVMName ubuntu-1 -defaultJSON ./480.json
Deploy-Clone -LinkedClone -VMName ubuntu.22.04.1.base -CloneVMName ubuntu-2 -defaultJSON ./480.json
Result after being setup and moved into the right folder:

Then I ran the following commands to get the IPs:
Get-VMIP -VMName ubuntu-* -defaultJSON ./480.json

With this set, I would repeat the same process of creating snapshots for the ubuntu boxes while they are powered off, afterwards turning them on with PowerCycle -vm ubuntu-* -on.
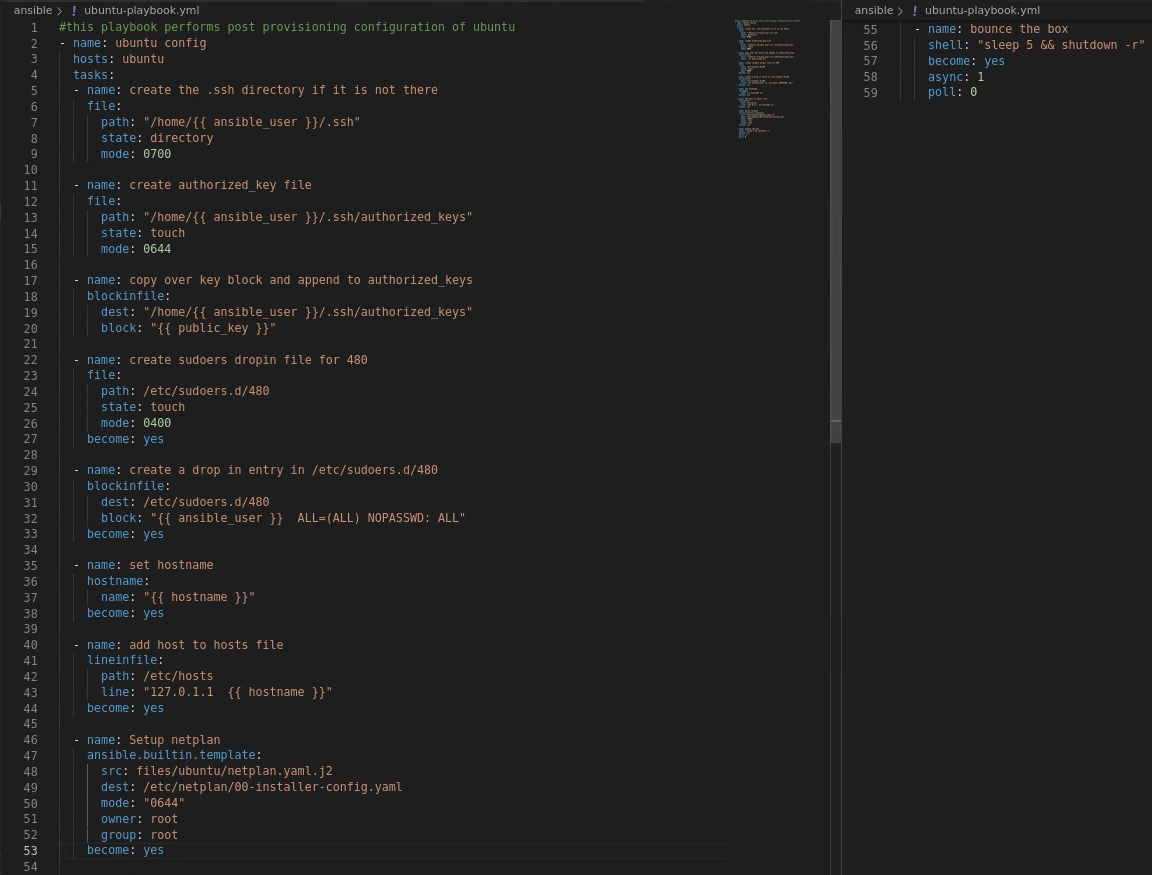
Then I updated my linux.yaml for ubuntu:
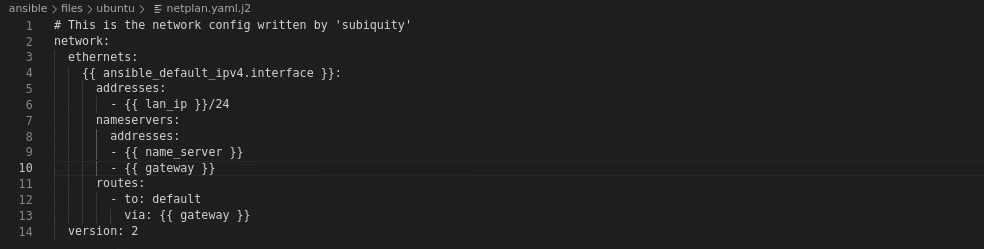
Templated a netplan.yaml:
Then created ubuntu-playbook.yml (on right side is last 4 lines of the file):
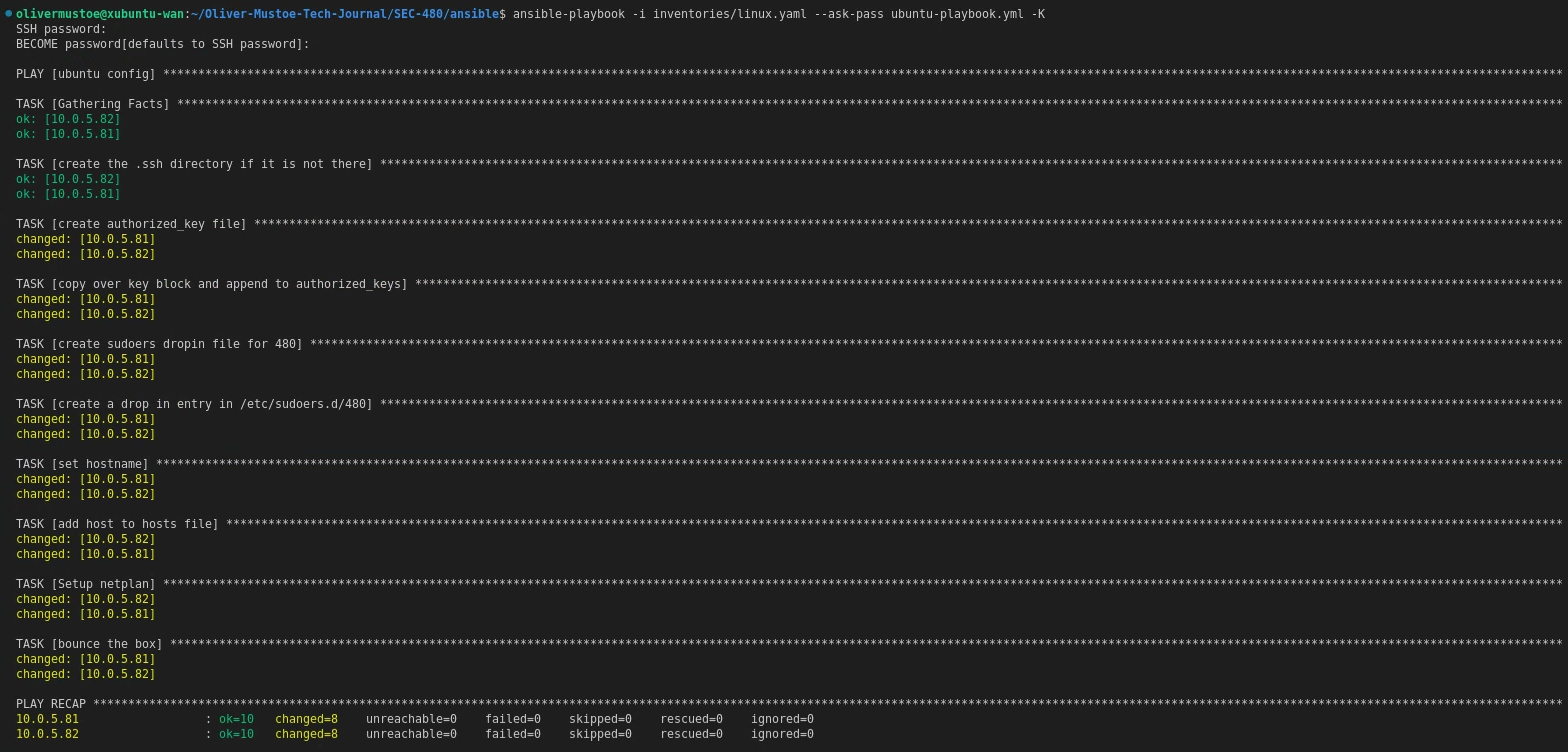
Below is a run of the playbook with command:
ansible-playbook -i inventories/linux.yaml --ask-pass ubuntu-playbook.yml -K
And the new result of:
Get-VMIP -VMName ubuntu-* -defaultJSON ./480.json

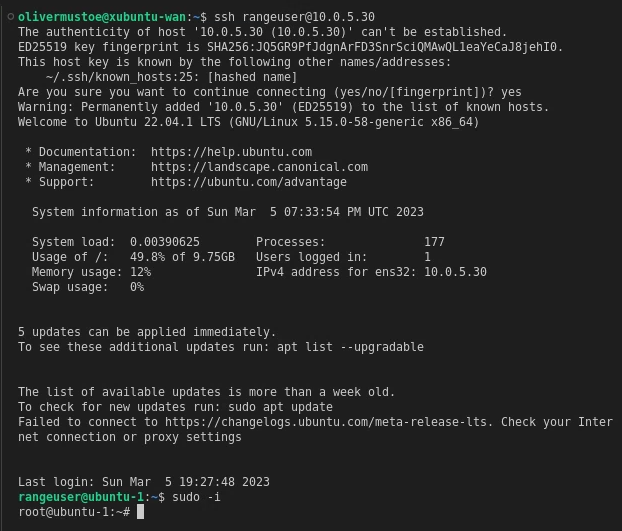
And a SSH session:
Reflection for Milestone 7.3 and 7.4
Since these two milestones were so closely aligned, I decided to combine their reflections. 7.3 was an interesting exploration of post provisioning. A lot of the steps, such as the drop in file, I have done before manually but never through Ansible. I did have to change the device variable as my Rocky devices were named differently. I decided to use an Ansible set variable for this as it will dynamically acquire the interface. For 7.4 I was able to pull from another class SEC-350, as I have been using Ansible to automate an upcoming assessment. I templated netplan for the assessment, so with minor variable naming changes I could easily import it to this class. I was originally going to apply the netplan in Ansible, but since we are using a DHCP address I instead used the shutdown command that is used in Rocky. Milestone 7 was overall a good Ansible learning experience, especially when it comes to the inventory, that I am excited to see how it is expanded upon in future milestones!
Sources for all:
How to Install Rocky Linux on VMware | phoenixNAP KB
Can't find something? Check in the Backup Milestone 7 journal