Milestone 2 AD - Oliver-Mustoe/Oliver-Mustoe-Tech-Journal GitHub Wiki
This page journals content related to NET/SEC/SYS-480 milestone 2.
Table of contents
VM Inventory
Google remote desktop
First thing I did was install a chrome remote desktop on xubuntu-wan. Seemingly during the base installation, google chrome was not installed. Because of this, I ran the following:
#chrome remote desktop
wget https://dl.google.com/linux/direct/google-chrome-stable_current_amd64.deb
sudo apt install --assume-yes ./google-chrome-stable_current_amd64.deb
wget https://dl.google.com/linux/direct/chrome-remote-desktop_current_amd64.deb
sudo apt install --assume-yes ./chrome-remote-desktop_current_amd64.deb
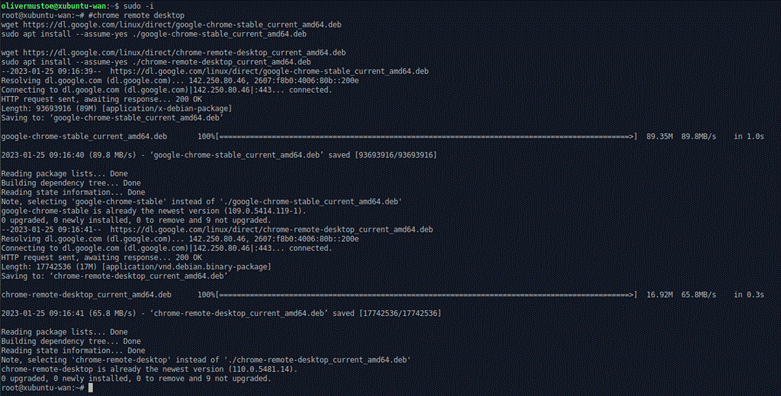
(Tried install as just user, did not work, worked with doing it as root. Above is after running once.)
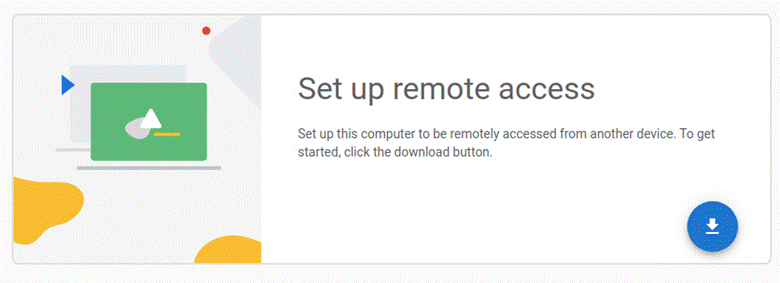
With google chrome desktop installed, I went to the website “https://remotedesktop.google.com/access”, logged in with a gmail account, and clicked the blue circle button:
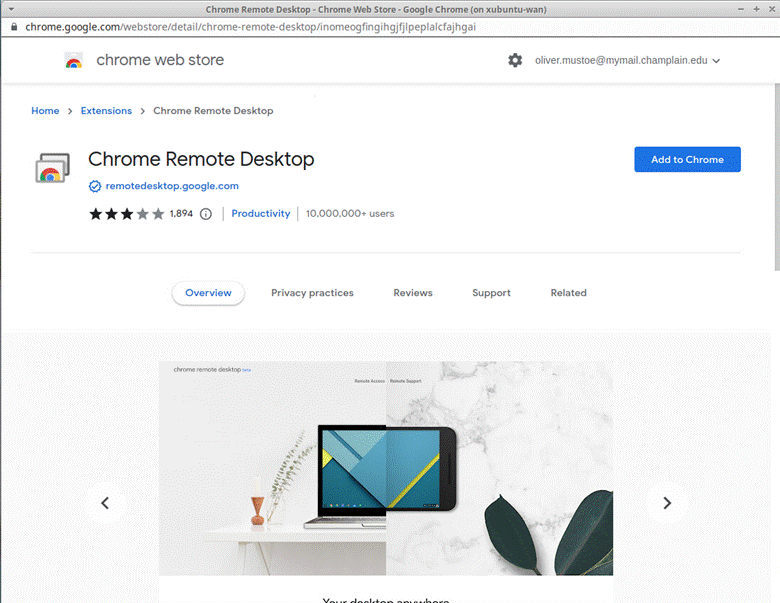
Where I then clicked “Add to Chrome” then add the extension:
I was then told setup a name and a pin, after this is set I gave it a name of hostname and the class (following shows this):

I then logged out of the host, and from another machine, used the address “https://remotedesktop.google.com/access” to access the machine (needed to use the pin set before.)
Sysprep
Inside google chrome, I would first navigate my ESXi host/devins jump box
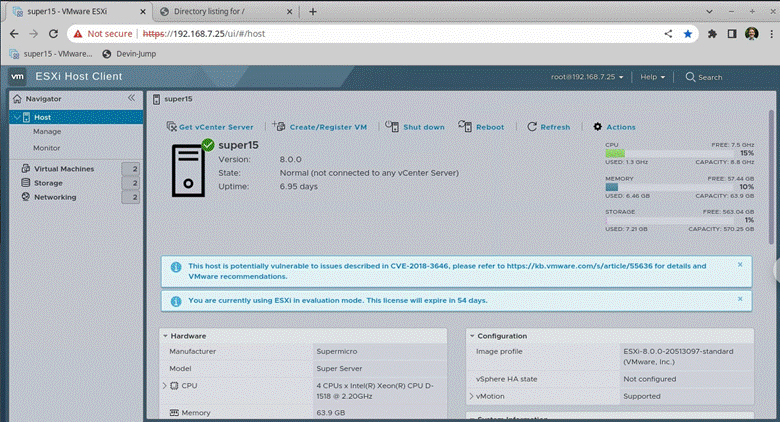

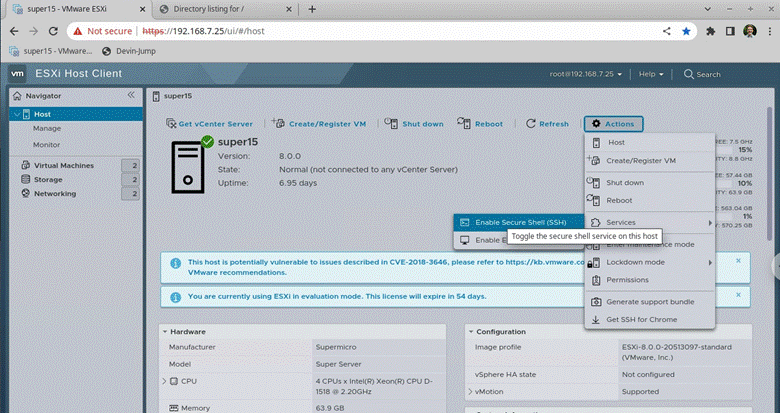
Then I enabled SSH from the ESXi home dashboard:
From there, I used the same process I used in Milestone 1 to download the VyOS/xubuntu VMs to download the isos for “Win_Server”, “VMware-VCSA”, and “VMware-VMvisor” to datastore2 (Commands below:)
ssh [email protected]
cd vmfs/volumes/datastore2-super15/isos/
wget http://192.168.3.120:8000/VMware-VCSA-all-8.0.0-20519528.iso
wget http://192.168.3.120:8000/VMware-VMvisor-Installer-8.0-20513097.x86_64.iso
wget http://192.168.3.120:8000/SW_DVD9_Win_Server_STD_CORE_2019_1909.4_64Bit_English_DC_STD_MLF_X22-29333.ISO
(Note: I installed the VMware isos before starting this milestone, but these are the commands to do so.)

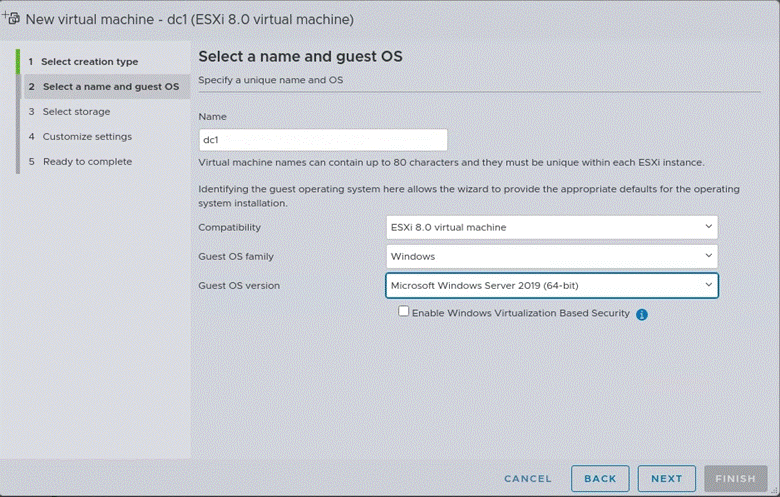
Then I created a new VM (Sidebar > Virtual Machines > Create/Register VM > Default creation type), then I named it and set the following compatibility settings:
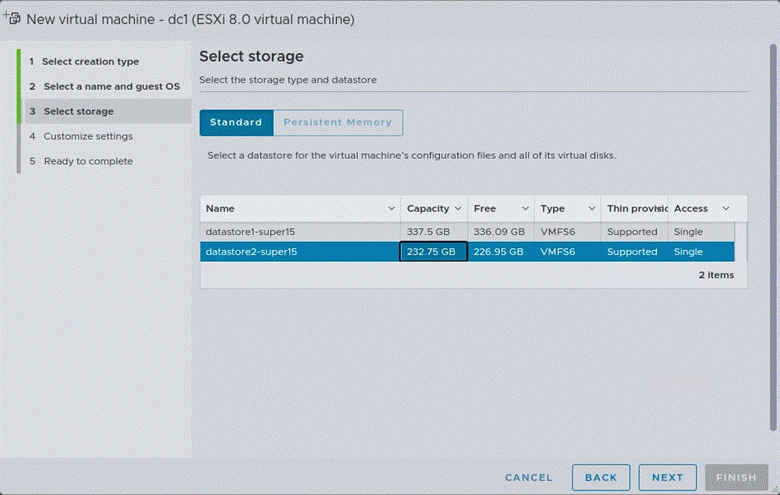
Stored on datastore 2:
Then I set the following VM settings:
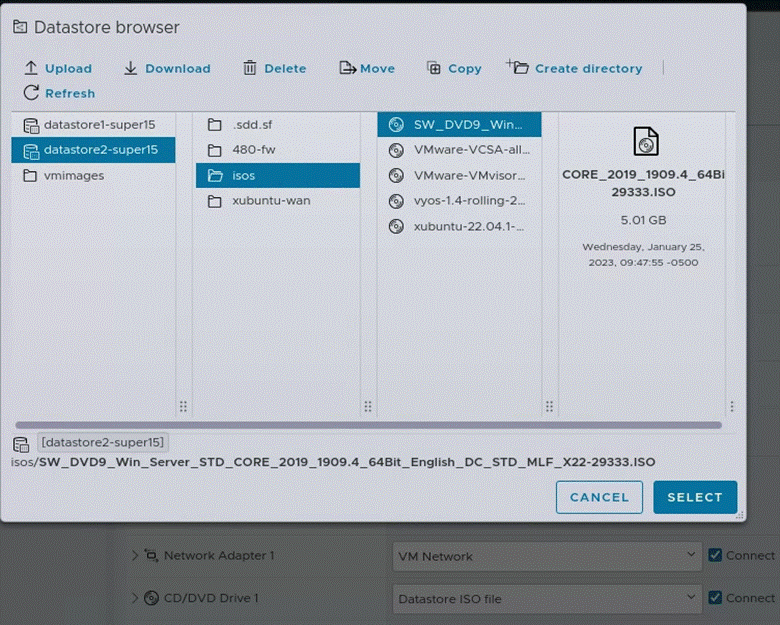
- CD/DVD setting set to the following:
- THIN PROVISIONING!!!
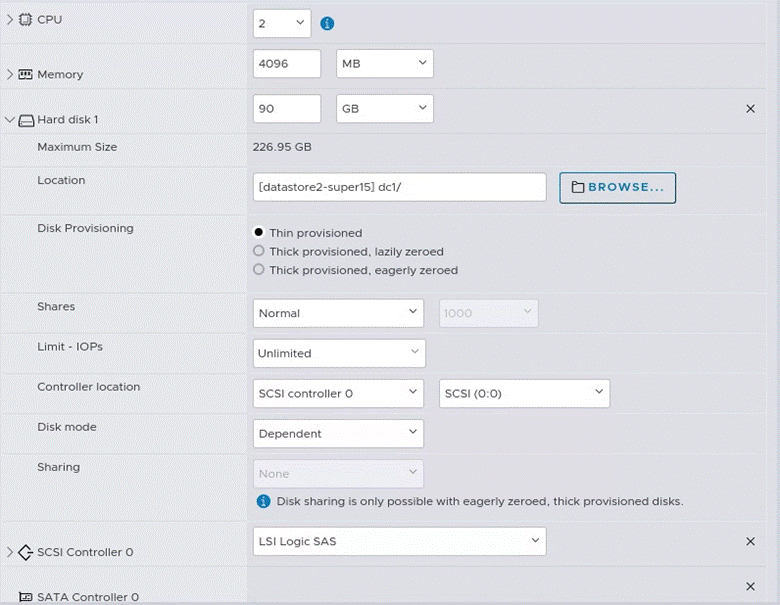
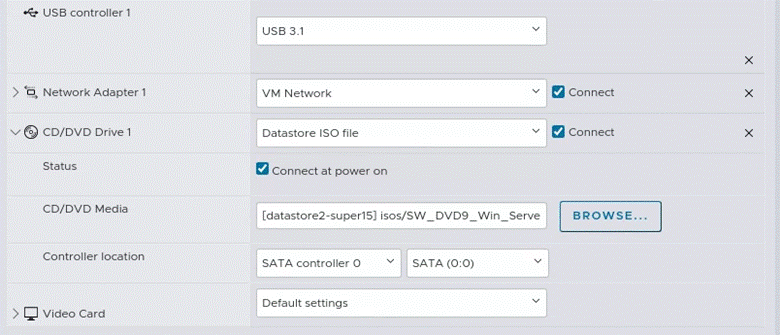
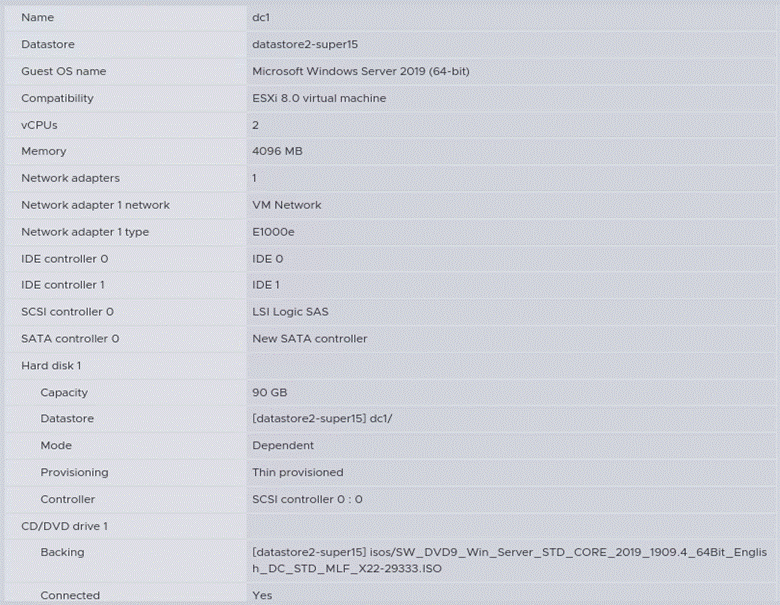
Overall:

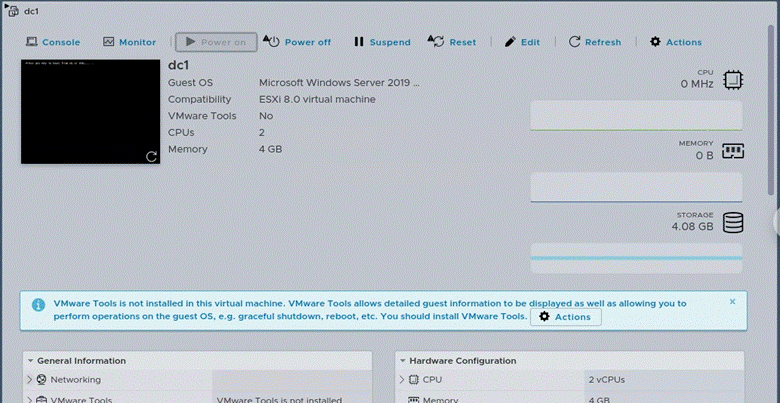
I then booted the newly created VM (Virtual Machines menu > double click VM > access on sidebar > Power On):
I then accessed the VM (Console > Open console in new tab) and was met with the following screen:
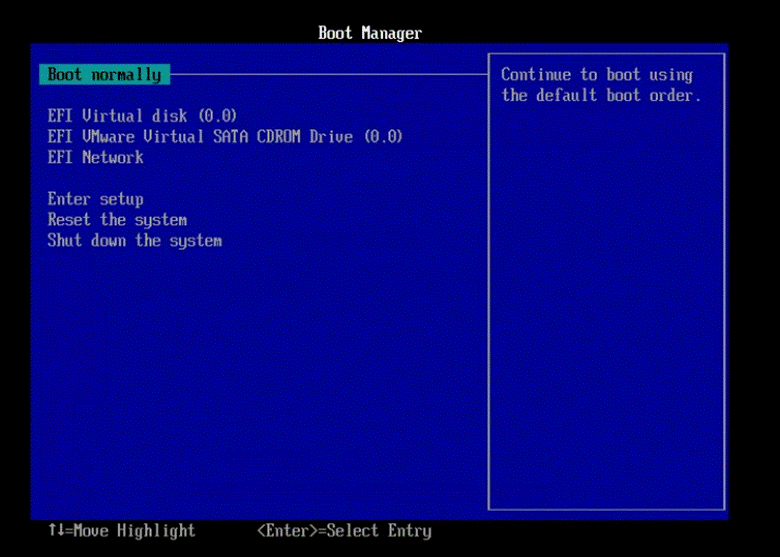
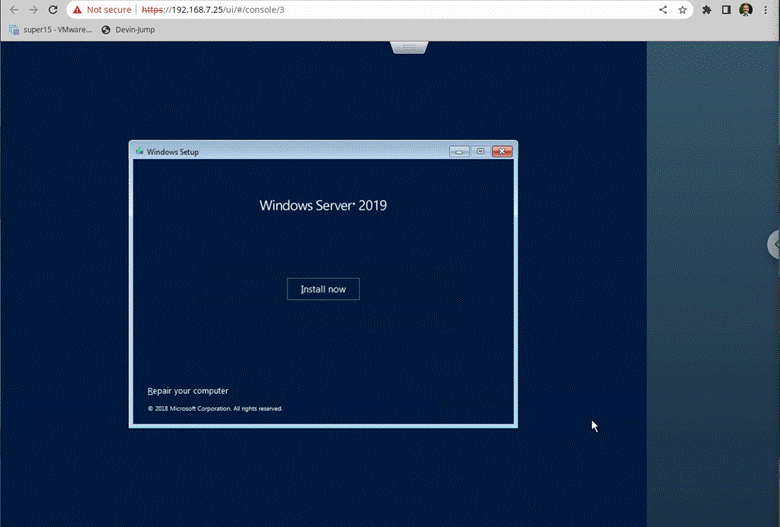
Where I clicked Enter, and on the next screen to prompt install pressed Enter again. I was met with a Windows screen asking for languages, picked “Next”. Then I pressed “Install now”:
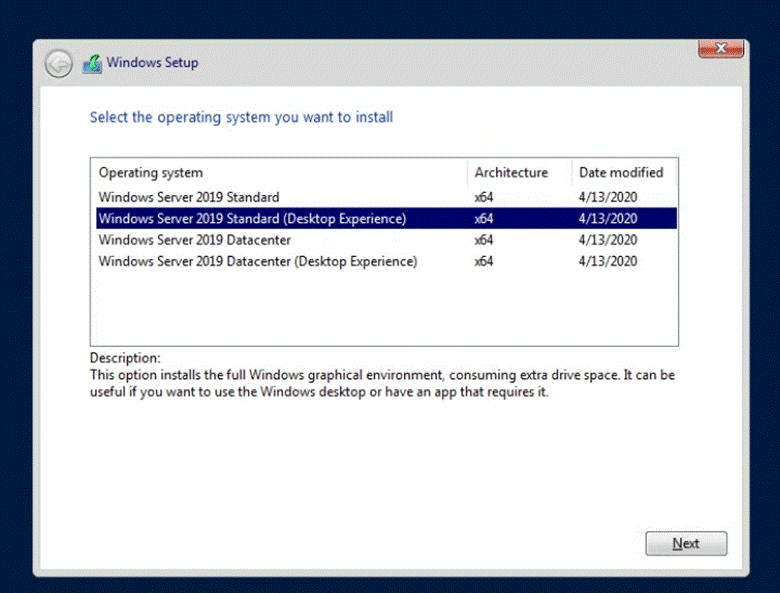
From here the setup would go along until I was met with the following screen – where I selected the second option from the top (highlighted in blue in the screenshot below):
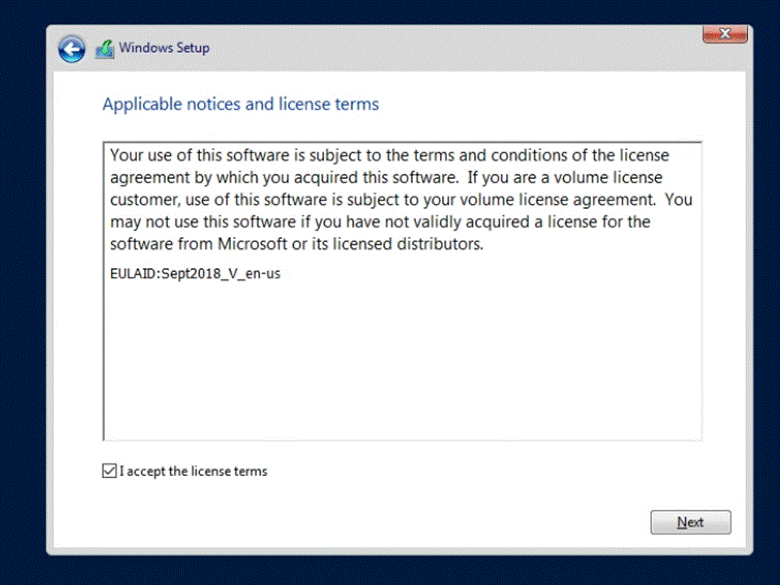
I would accept the license terms and select “Next”:
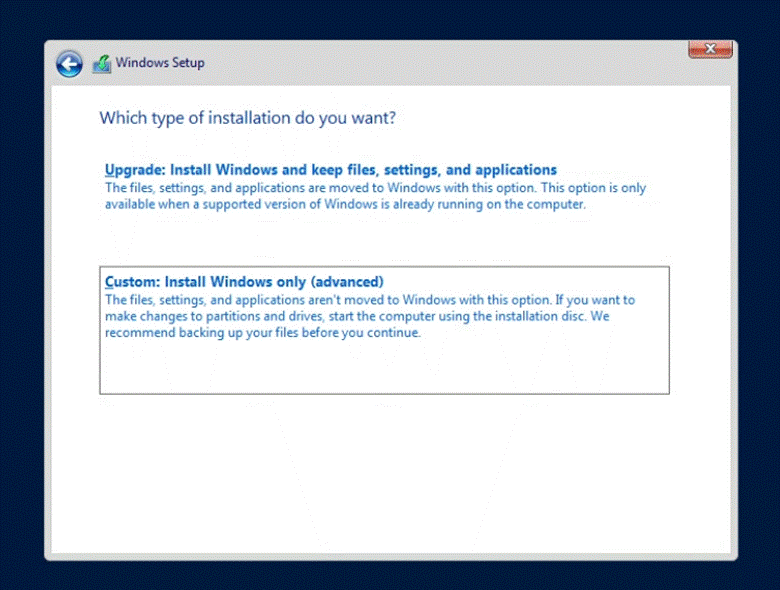
Selected to do a custom install:
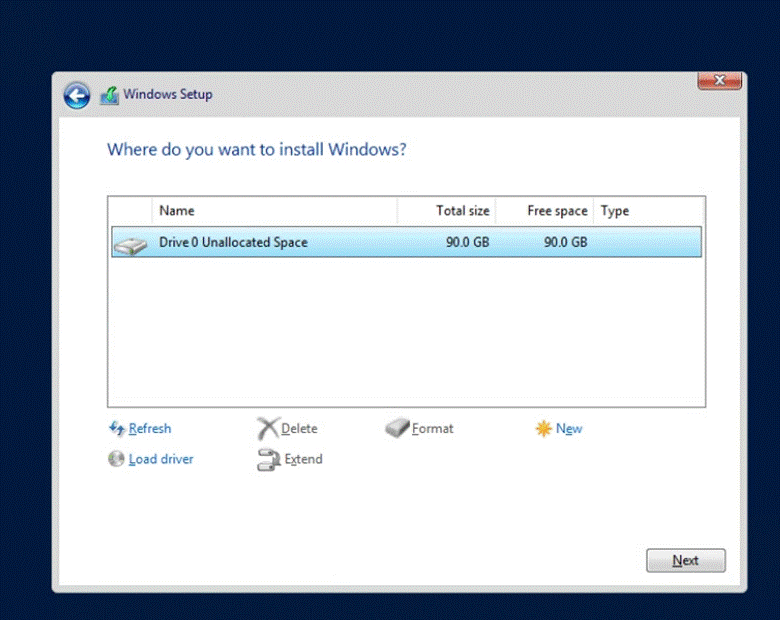
Used the unallocated space:
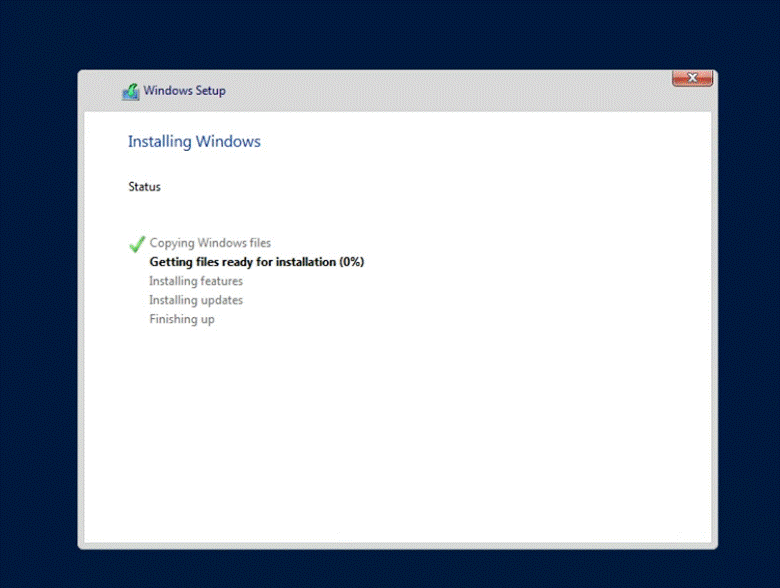
Windows will now install (takes awhile):
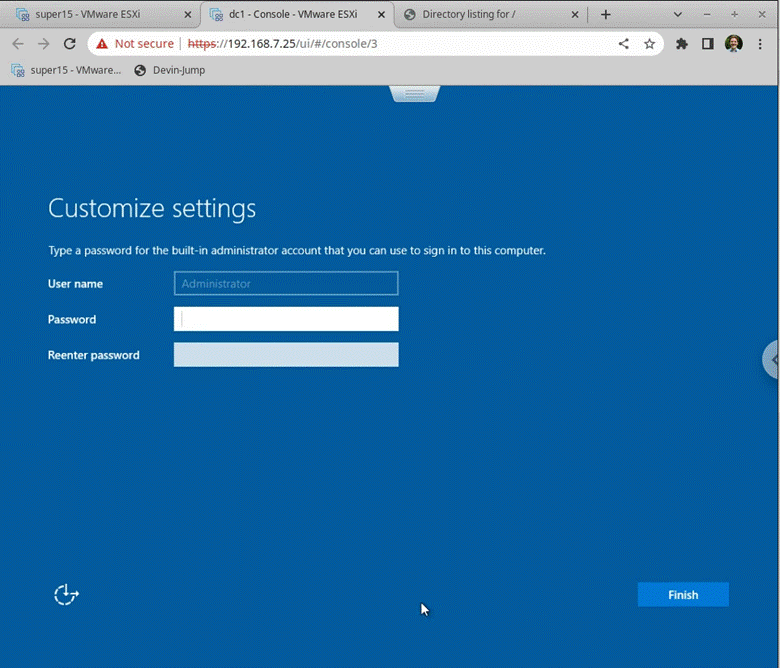
After installing/rebooting, I was met with the following customization settings where I held down CTRL+SHIFT+F3 to enter audit mode (because of my pc setup, I also needed to press FN):
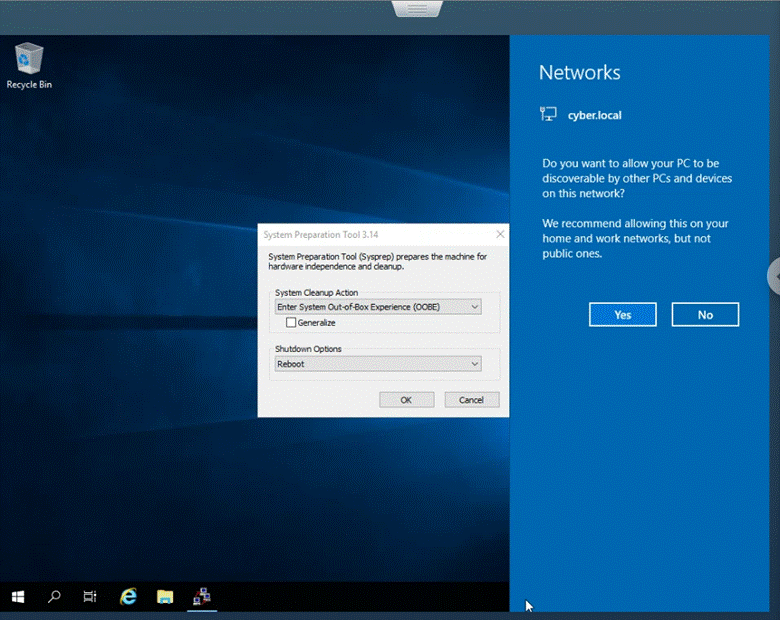
After letting audit mode setup, I was met with the following screen (I would select “Yes” to the network prompt):
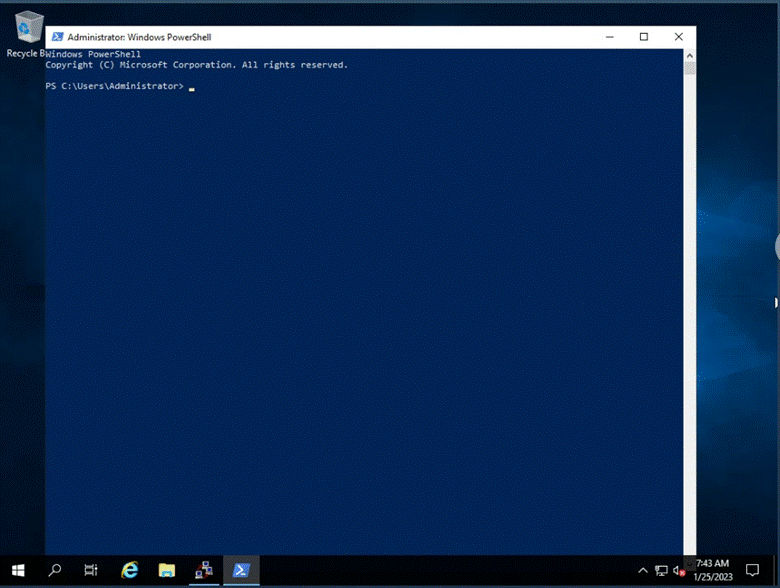
Then I used the searchbar to open powershell (opens as administrator by default):
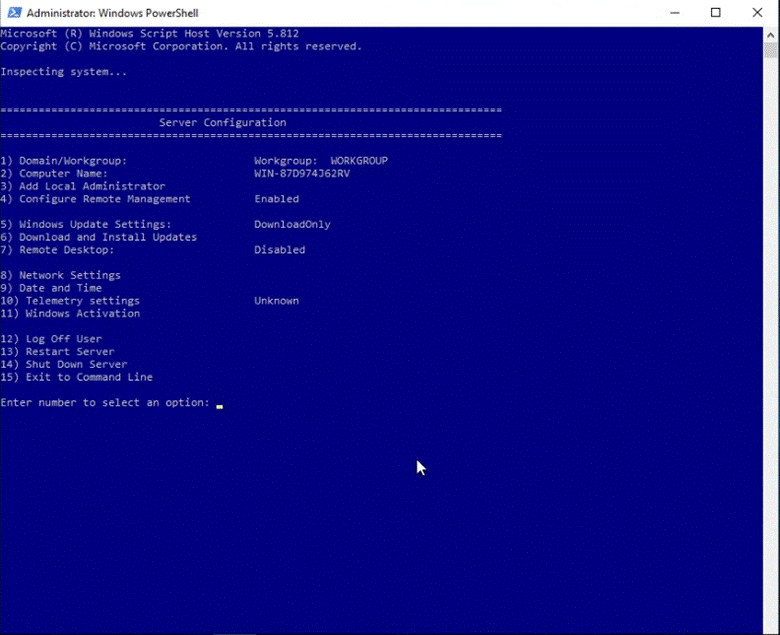
I then used the “sconfig” utility to set the following options:
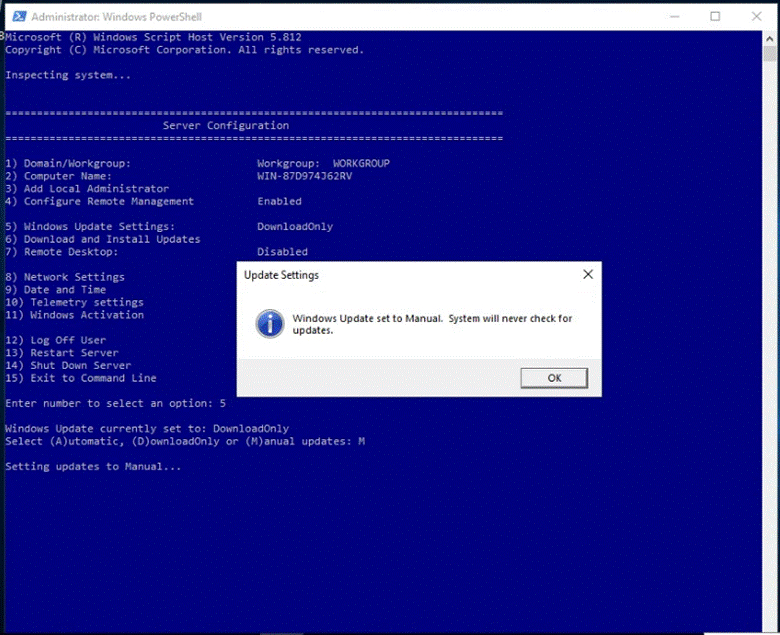
- 5 - Windows Update Settings – set to Manual (press OK)
- 9 – Date and Time – set to Eastern Time (press OK)
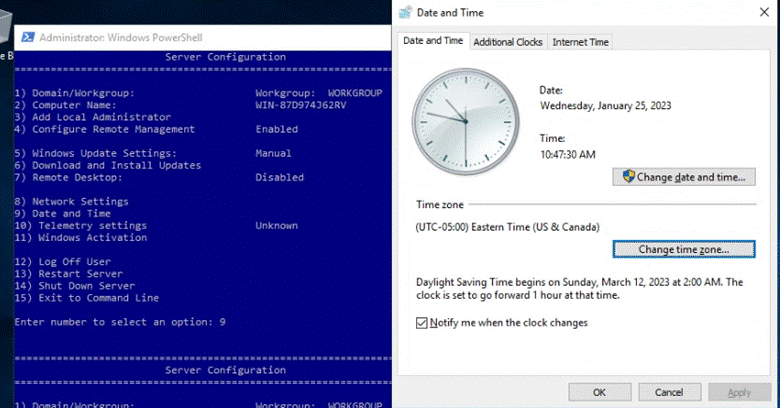
- 6 – Download and Install Updates – Search for all update/do all the updates (“A” at the cmd popup prompt/s), this process takes time and multiple restarts (Make sure to check periodically for restart prompts, Windows might say it's done…but not really be done). On restarts, will need to redo the sconfig > option 6 > A > A
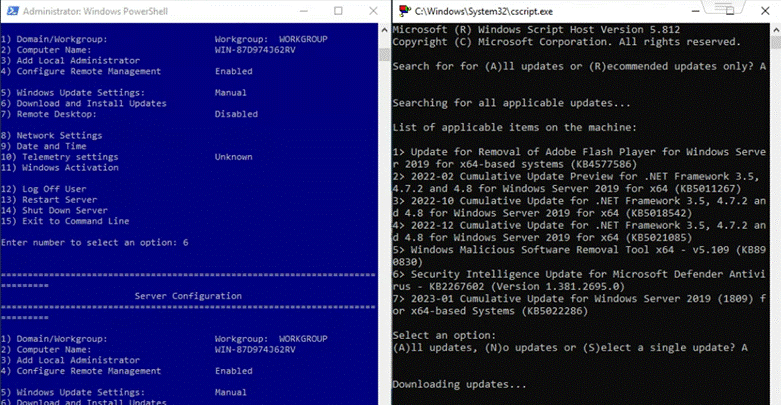
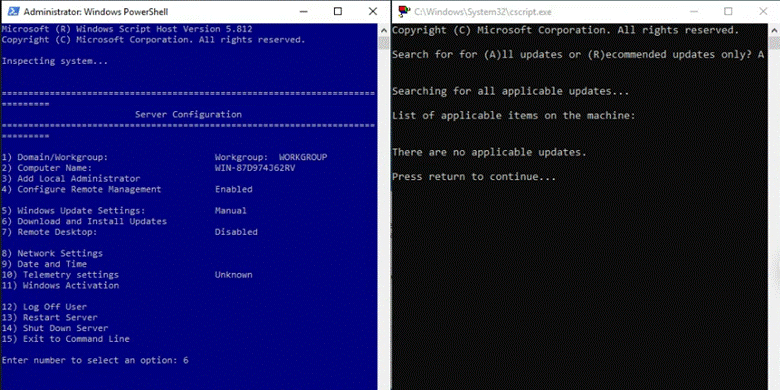
Following shows a completed updating output:
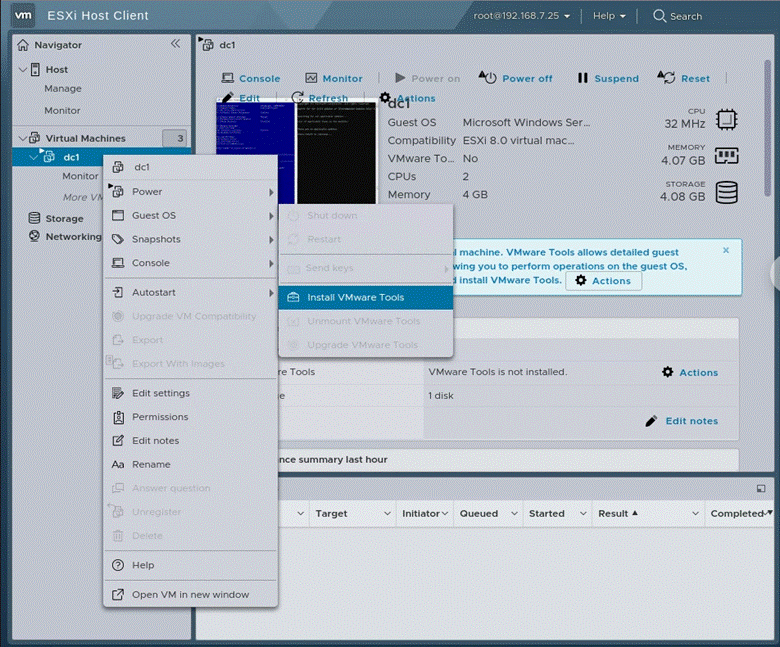
Then I installed VMware tools by going back to my ESXi host client > right clicking the VM “dc1” > Guest OS > Install VMware Tools:
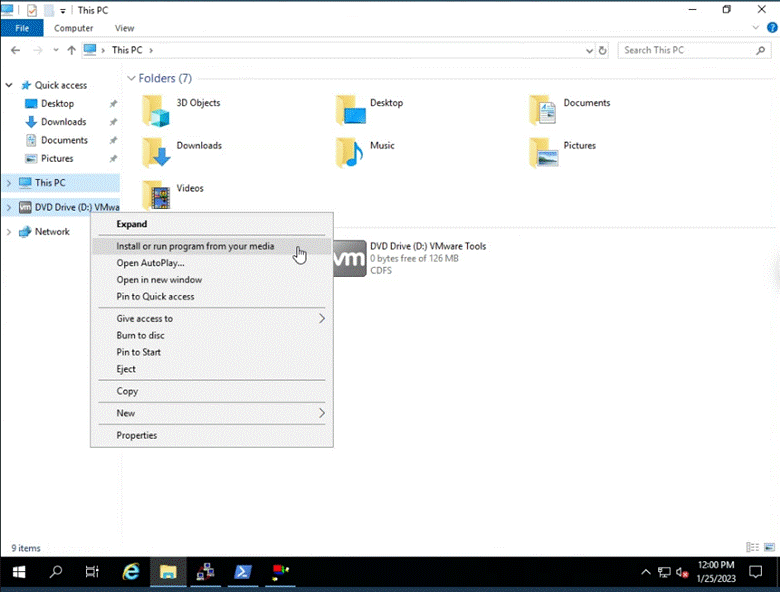
Back in the VM, I opened File Explorer > right clicked the new DVD drive for VMware > pressed “Install or run program from your media”:
In the installer I followed along with the default options (pressing “Next >” on first screen, then install)
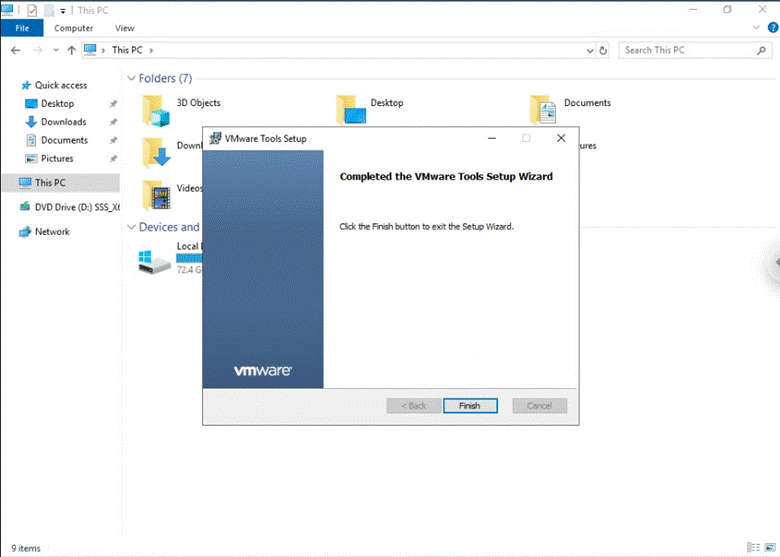
After pressing Finish, I would choose to NOT restart
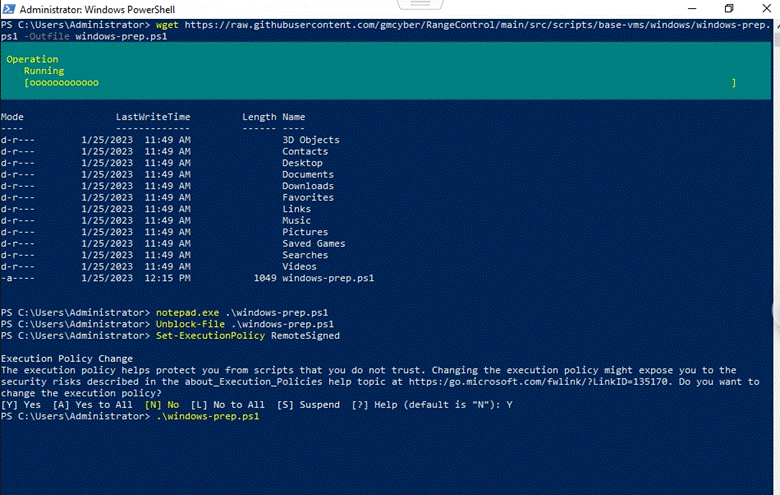
Then in powershell I downloaded this instructor provided script onto the Windows host:
wget https://raw.githubusercontent.com/gmcyber/RangeControl/main/src/scripts/base-vms/windows/windows-prep.ps1 -Outfile windows-prep.ps1
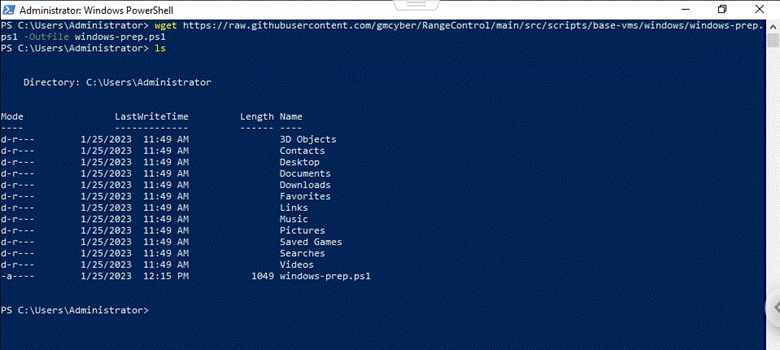
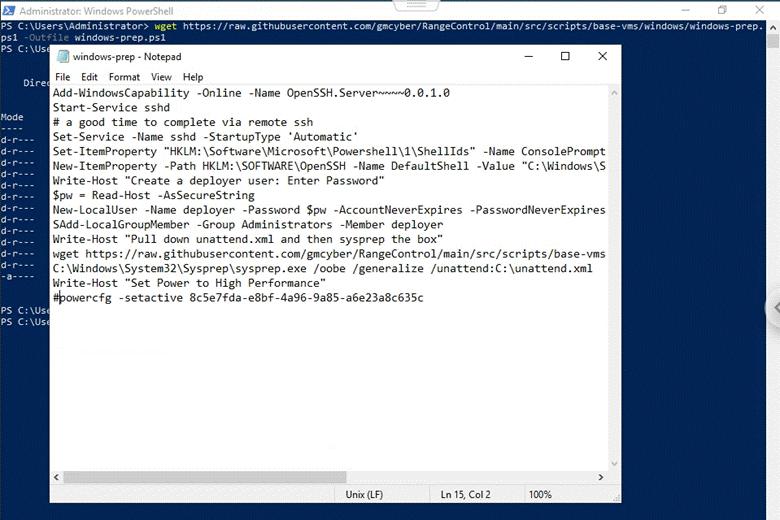
(NOTE: Following has a typo on the line for adding a local group member. Should start with the A in “Add-LocalGroupMember”)
In this file, using notepad, I made the following changes (essentially uncomment the lines revolving creating the deployer user/comment out the last line), and pressed CTRL+S to save it:
Then I unblocked the file and set the execution policy with the following commands:
Unblock-File .\windows-prep.ps1
Set-ExecutionPolicy RemoteSigned

Then I ran the file with `.\windows-prep.ps1’:
After running, I was met with the following (note above note), pressed OK:
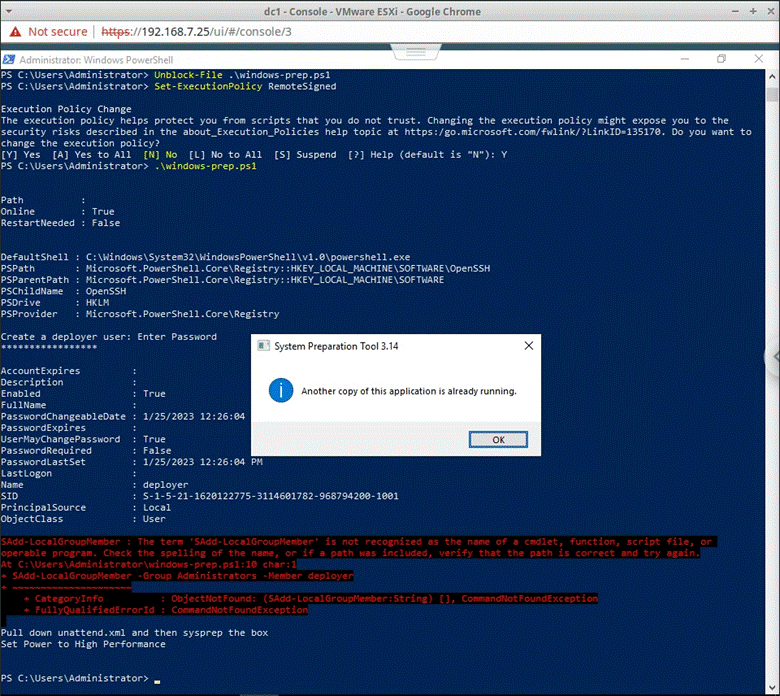
BECAUSE OF THE ABOVE TYPO I RAN THE FOLLOWING:
Add-LocalGroupMember -Group Administrators -Member deployer

Then I restarted the host
Once rebooted, I exited out of the System Preparation Tool, opened powershell, and ran the following commands:
C:\Windows\System32\Sysprep\sysprep.exe /oobe /generalize /unattend:C:\unattend.xml
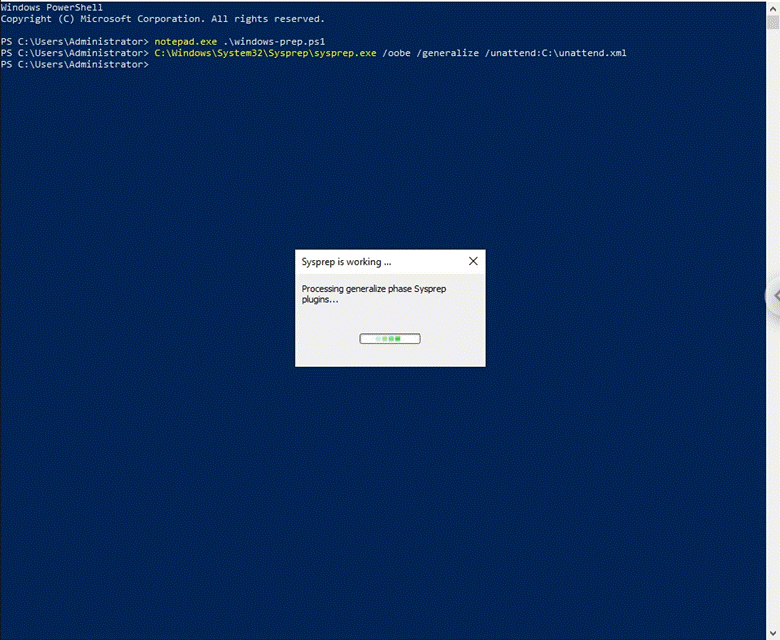
(This shuts down the machine)
Then from my ESXi Host Client, I right clicked the “dc1” VM on the sidebar > Edit settings and did the following:
- CD/CDC Drive 1 – Set to “Host device”
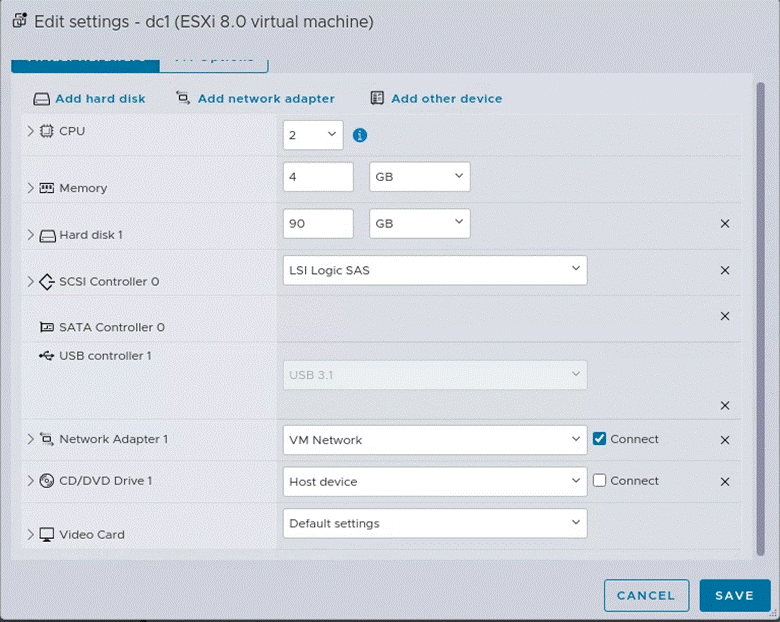
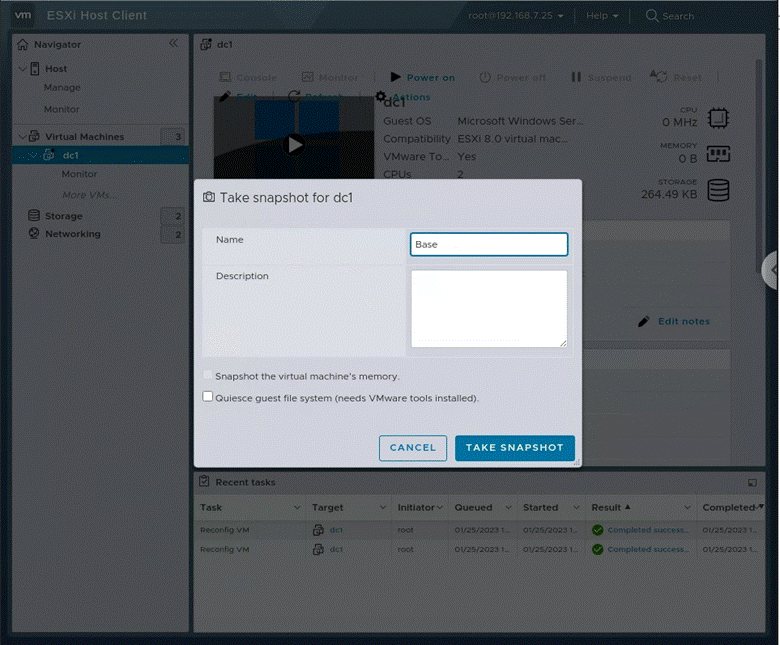
Then I created a base snapshot from the sidebar from my ESXi Host Client, I right clicked the “dc1” VM on the sidebar > Snapshots > Take snapshot:
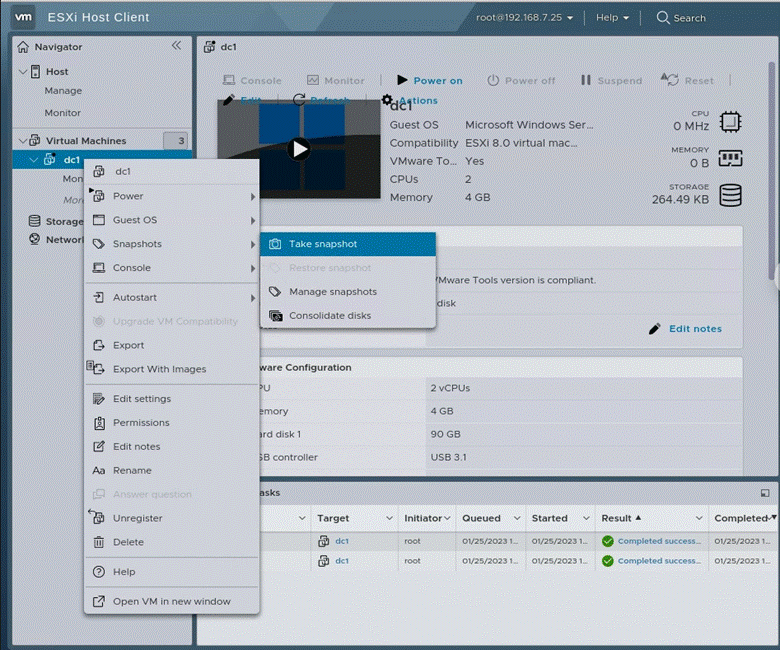
I would name the snapshot “Base” and take it:
Domain install
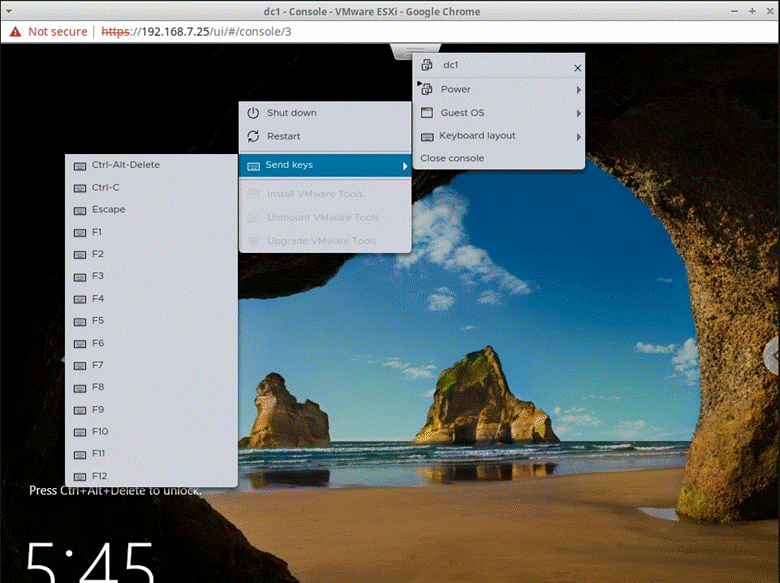
I powered on my dc1, sent a CTRL+ALT+DELETE (Dropdown > Send keys > whatever key you need):
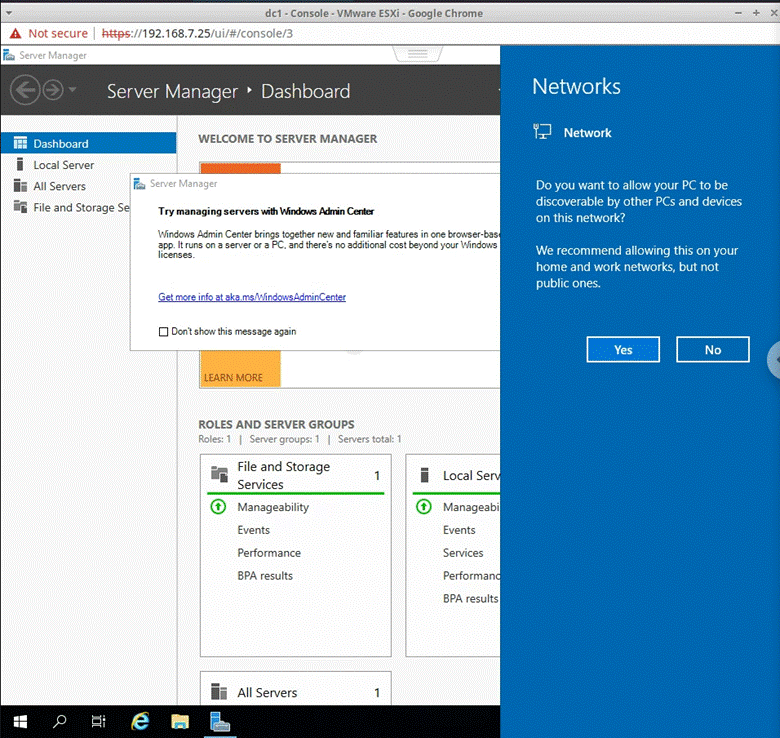
Then set my administrative password (after pressing sign in and ok at the next prompt, then creating a password) and was met with the following:
I would then go back to my ESXi dashboard and go to the sidebar > right click dc1 > edit settings > change the network adapter to “480-WAN”:
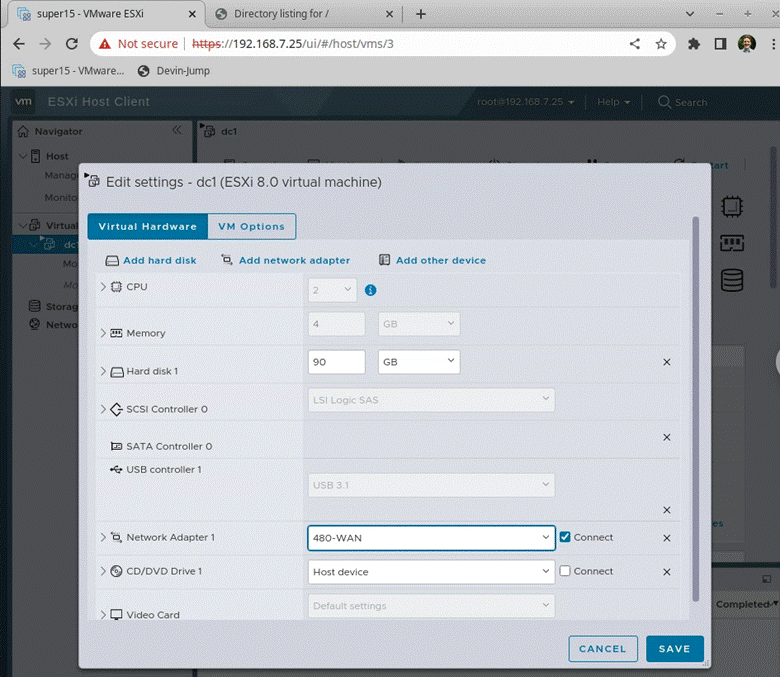
I would then go back to dc1 (automatically logged in as administrator), press ok for the network connection, then open powershell and go into sconfig where I would set the following (number represents number in sconfig and sub-menus):
-
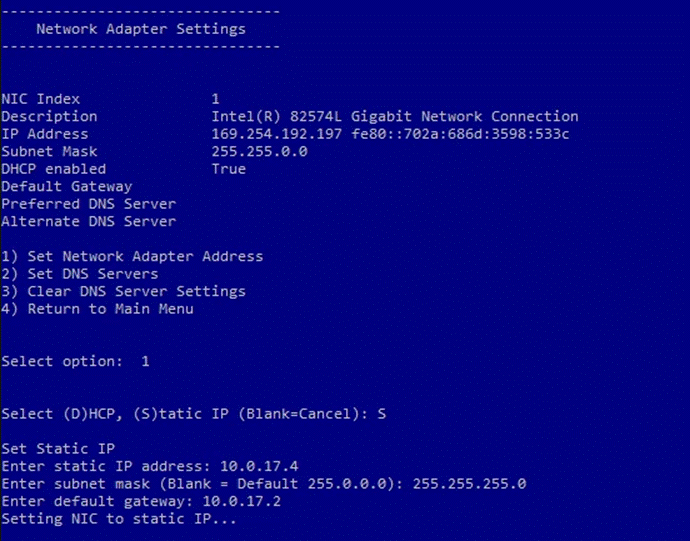
8 – change the network adapter settings to the following (only 1 network adapter, so edit that):
- 1 – “S” for static IP, 10.0.17.4 IP address, 255.255.255.0 subnet mask, 10.0.17.2 gateway (press ok on the network prompt)
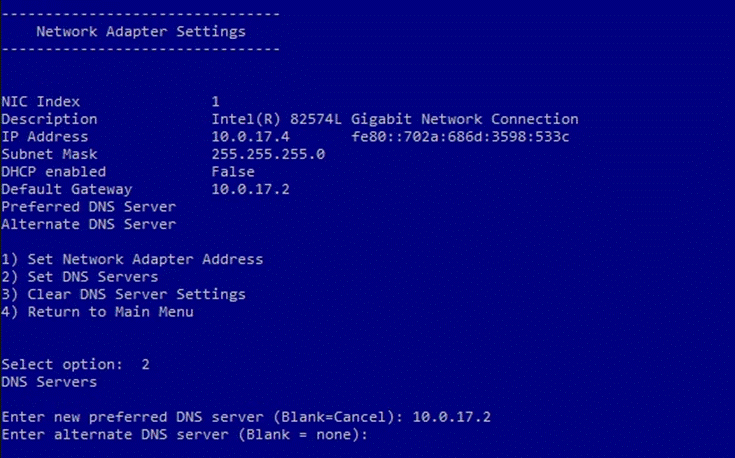
- 2 – set dns to 10.0.17.2, no alternative, yes to any pop ups
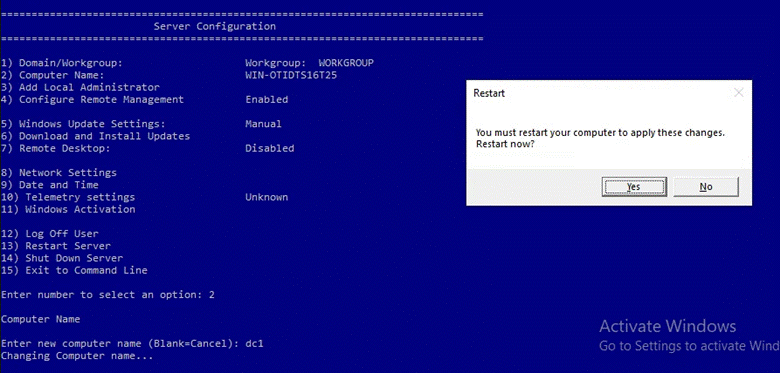
- 2 – Set computer name to “dc1”, restart
On reboot, I would attempt to login via SSH to dc1 from xubuntu, which was successful:

I then ran the following commands to install ADDS, DNS, and DHCP (for prompts, made safe mode password, answered with the default option for the rest.):
# Setup AD
Install-WindowsFeature -Name AD-Domain-Services -IncludeManagementTools
Install-ADDSForest -DomainName “oliver.local”
# Wait for reboot, SSH back in as deployer, then make accounts (might want to switch to new account after creation)
$password = Read-Host "Please enter a password for the oliver-adm.mustoe user" -AsSecureString
New-ADUser -Name oliver-adm.mustoe -AccountPassword $password -Passwordneverexpires $true -Enabled $true
Add-ADGroupMember -Identity "Domain Admins" -Members oliver-adm.mustoe
Add-ADGroupMember -Identity "Enterprise Admins" -Members oliver-adm.mustoe
# Setup DNS and make records (A/PTR)
Install-WindowsFeature DNS -IncludeManagementTools
Add-DnsServerPrimaryZone -NetworkID 10.0.17.0/24 -ZoneFile “17.0.10.in-addr.arpa.dns”
Add-DnsServerResourceRecordA -CreatePtr -Name "vcenter" -ZoneName "oliver.local" -AllowUpdateAny -IPv4Address "10.0.17.3"
Add-DnsServerResourceRecordA -CreatePtr -Name "480-fw" -ZoneName "oliver.local" -AllowUpdateAny -IPv4Address "10.0.17.2"
Add-DnsServerResourceRecordA -CreatePtr -Name "xubuntu-wan" -ZoneName "oliver.local" -AllowUpdateAny -IPv4Address "10.0.17.100"
Add-DnsServerResourceRecordPtr -Name "4" -ZoneName “17.0.10.in-addr.arpa” -AllowUpdateAny -AgeRecord -PtrDomainName "dc1.oliver.local."
# Setup DHCP
Install-WindowsFeature DHCP -IncludeManagementTools
netsh dhcp add securitygroups
Restart-Service dhcpserver
Add-DHCPServerv4Scope -Name “oliver-scope” -StartRange 10.0.17.101 -EndRange 10.0.17.150 -SubnetMask 255.255.255.0 -State Active
# In theory, lease-time flag could be added to the above command, but I did not set it first time. To ensure future running, just added below
Set-DHCPServerv4Scope -ScopeID 10.0.17.0 -Name “oliver-scope” -State Active -LeaseDuration 1.00:00:00
Set-DHCPServerv4OptionValue -ScopeID 10.0.17.0 -DnsDomain dc1.oliver.local -DnsServer 10.0.17.4 -Router 10.0.17.2
# Following must be run as the new adm user
Add-DhcpServerInDC -DnsName "dc1.oliver.local" -IpAddress 10.0.17.4
Restart-service dhcpserver
Then, on xubuntu, I changed my DNS settings (Connection dropdown in upper right > Edit Connections…> first option selected and select with gear wheel) via editing the first wired connection to the following:
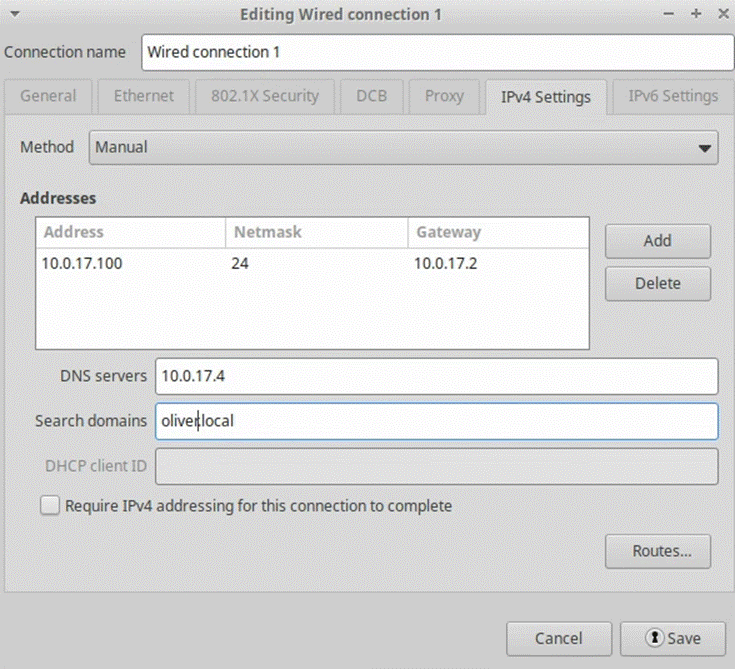
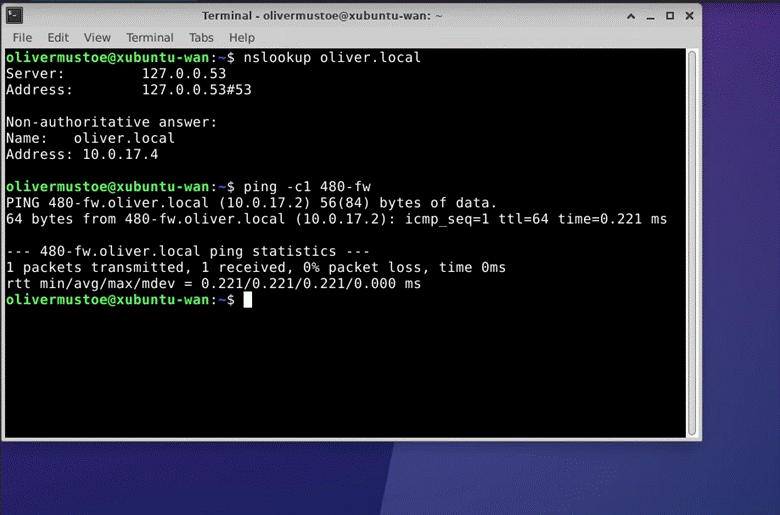
After saving, needed to from the dropdown disconnect and reconnect the adapter (this caused my google remote connection to stop, and I needed to power cycle the VM) but I was able to log back in and use the DNS functionality:
I also installed remmina with:
sudo apt install remmina
Then I, from my SSH connection, enabled remote desktop on the Windows host/let it through the firewall (did login via the gui once, but I am unsure if that had an effect or not.):
Set-ItemProperty -Path 'HKLM:\System\CurrentControlSet\Control\Terminal Server' -name "fDenyTSConnections" -value 0
Enable-NetFirewallRule -DisplayGroup "Remote Desktop"
From here, I could login to my windows host wth remmina!
Reflection
This milestone was a good introduction to the base imaging process of windows server, and a fun reintroduction into domains for windows. As I have experienced both sysadmins classes, I have a lot of experience with working mostly with Windows server gui. Working with AD in powershell purely was actually a really fun experience, and besides some typos (which lead to looking up and deleting DNS records), I actually found it easier than the gui. I also made sure to mark down the powershell commands I ran, so I can easily repeat the process/start using a utility like Ansible to automate the process. I also didn’t have Google remote desktop installed on my xubuntu box for some reason, even using the install commands manually didn’t work. So as I continue on with the course, I will keep a close eye on things to ensure that nothing gets messed up. If stuff does get messed up from my base image, my plan would be to make a full clone from base > re-run script and ensure proper settings are set > Snapshot2.exe > clone from that from then on. I am hopeful though that it was simply a Google quirk.
Sources:
Can't find something? Look in the backup Milestone 2 page