Deployment guide - OfficeDev/microsoft-teams-apps-sustain GitHub Wiki
To begin, you will need:
-
Tools for Deployment
- AzureRM module
Install-Module AzureRm -Scope CurrentUser
- AzureRM module
-
An azure subscription where you can create the following kinds of resources
- App Service
- App Service (2)
- App Service Plan (2)
- Azure SQL Server
- Azure SQL Database
- Azure Storage Account
- Azure Key Vault
- App Registration
-
A developer tenant with O365 subscription and Teams side-loading app enabled.
-
A SharePoint online site collection that is accessible to all users in the tenant
- Download the whole solution folder from GitHub
- Unzip the files to a folder
- Navigate to the below path to open “azuredeploy.parameters.json”. Please update the parameters in the file.
<<Path of extracted project folder>>\Deployment\Azure\azuredeploy.parameters.json

- Replace
<<value>>with appropriate value for all the required fields. Make sure you review the default values for optional fields. - Refer to the following:
- app_name – Name of the application in lowercase. Make sure to have app name in lowercase.
- environment_suffix – It can be optional, e.g., dev|int|prod.
- tenant_id – Tenant Id of the Azure subscription. Copy tenant id from Properties - Microsoft Azure
- subscription_id - Azure subscription to deploy the solution to (MUST be associated with the Azure AD of the Office 365 tenant that you wish to deploy this solution to.) e.g., 22f602c4-1b8f-46df-8b73-45d7bdfbf58e.It can be retrieved from azure subscription
Please follow the steps below to deploy the app template:
- Open the windows PowerShell - run as administrator and navigate to the azure deployment folder by typing the following command below:
cd “<<Path of extracted project folder>>\deployment\azure”
- Authenticate an account on Azure Portal on PowerShell window by typing the following command below:
Connect-AzureRmAccount
- Type and enter credential which is used to access the azure portal where the resources are to be deployed
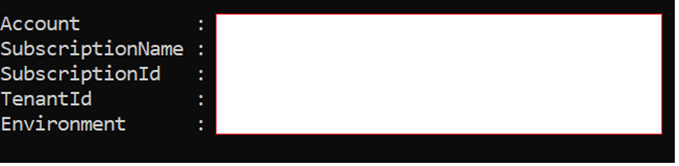
- On successful authentication you should see Account, SubscriptionName, SubscriptionId, TenantId and Environment on the Window PowerShell.
- Run the deployment by typing the following command below:
.\Deploy-AzureResourceGroup.ps1
- Type “R” to proceed further.
- Note: - If an error occurs that document is not digitally signed please execute below command then proceed with deployment
Set-ExecutionPolicy -Scope Process -ExecutionPolicy Bypass
- Script will ask for inputs like ResourceGroupLocation and ResourceGroupName (Name should be text only). Region options can be seen on this link Create a resource group - Microsoft Azure. Type region where the resource group should be located.
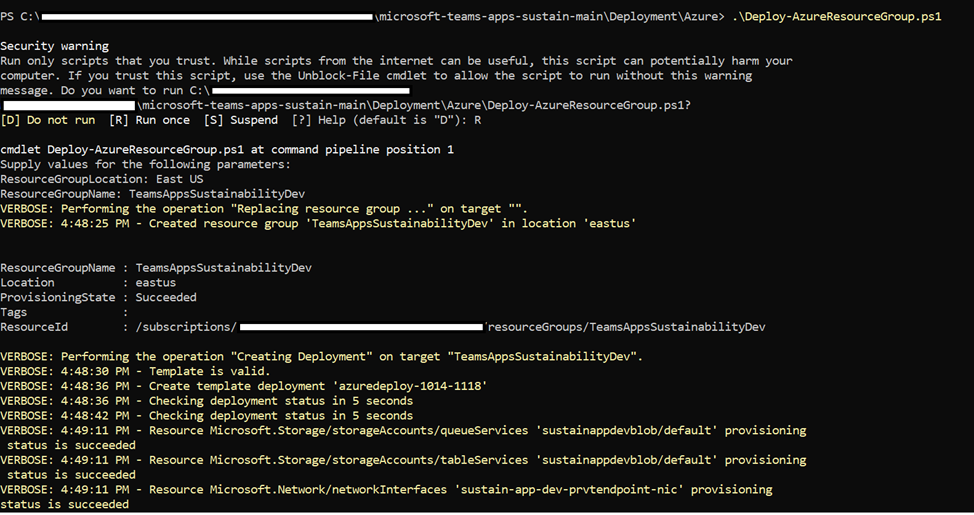
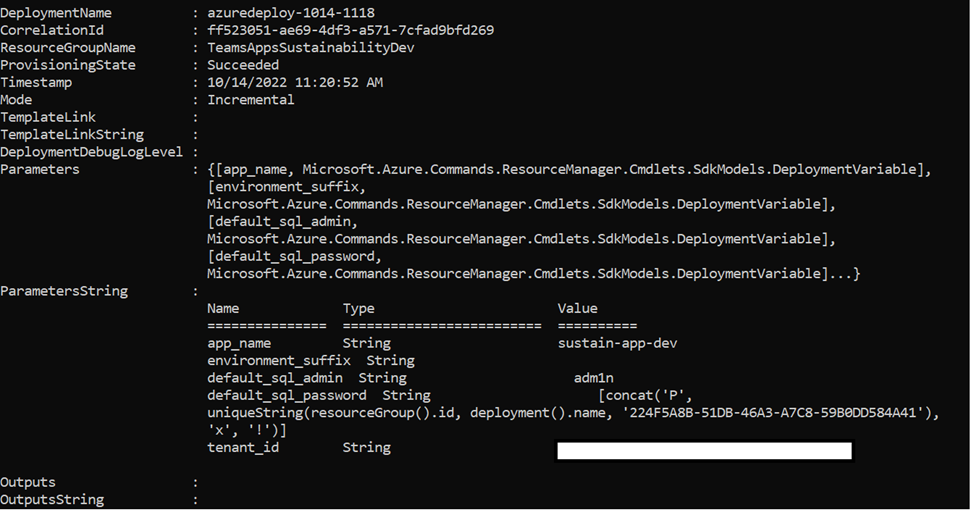
- Once all the resources are deployed the message below will be displayed in PowerShell console.
- A sign-in will prompt again for creation of app registration, after a successful sign-in, an app registration should be created.

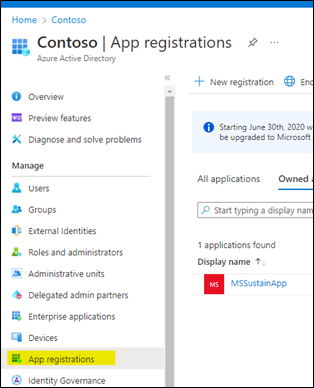
- Navigate to the App Registration that was recently created.
- Go to Azure Portal/Azure Active Directory/App Registrations
- Select
<<App Name>>-app-registration-
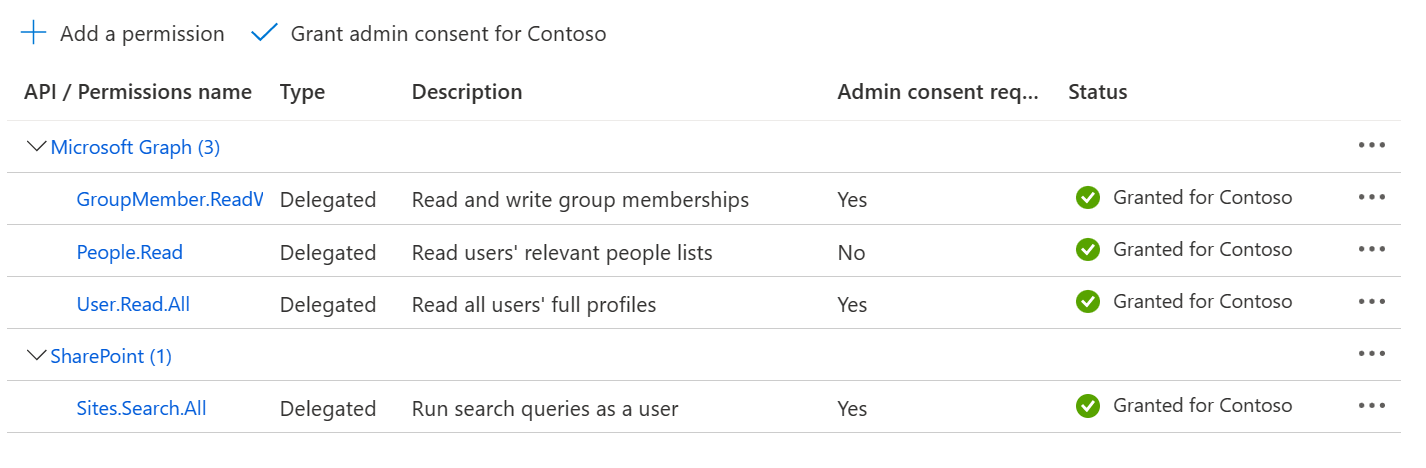
API Permissions
- Add the following API delegated Permissions:
- Microsoft.Graph
- GroupMember.ReadWrite.All
- People.Read
- User.Read.All
- SharePoint
- Sites.Search.All
- Microsoft.Graph
- Grant admin consent for all the added permissions.
- Granting GroupMember.ReadWrite.All in the app registration will allow the application to auto add users to the Yammer group.
- If need be this permission can be skipped and admin can add all required users to Yammer group manually.
- Application will add users to group only if it is a public group, if it is a private Yammer group, admin has to manually add users to ensure sufficient privileges for users.
- Add the following API delegated Permissions:
-
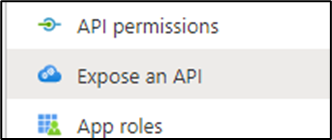
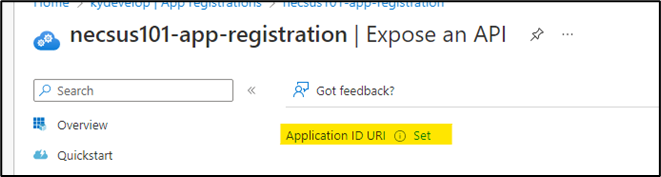
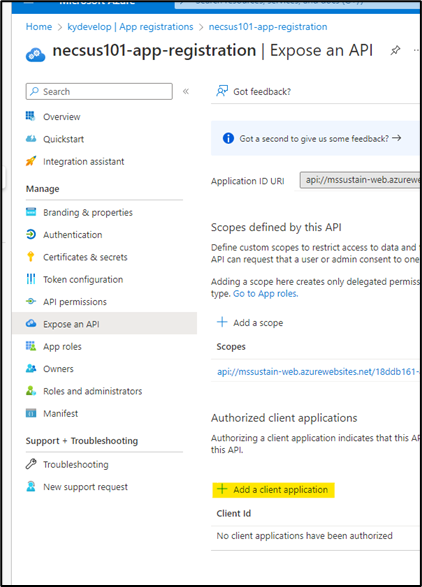
Expose an API
- Go to Expose an API from side nav
- Set the Wep App URI to
api://<<azure-appservice-web-domain>>/client-id- App registration client ID
- Web app URI
- Sample

- Click Save.
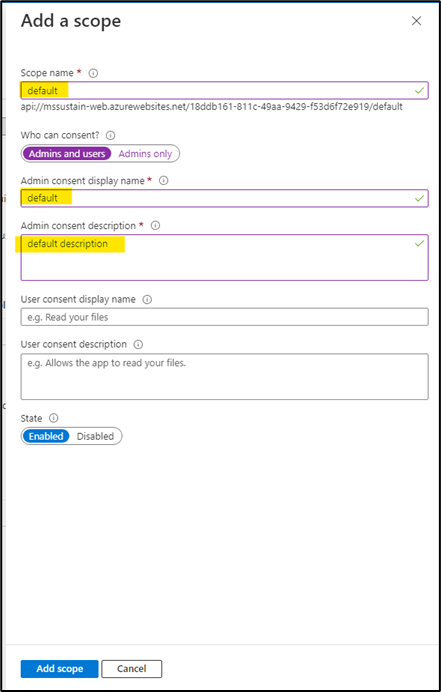
- Add a scope
- Click on “Add a scope” button.
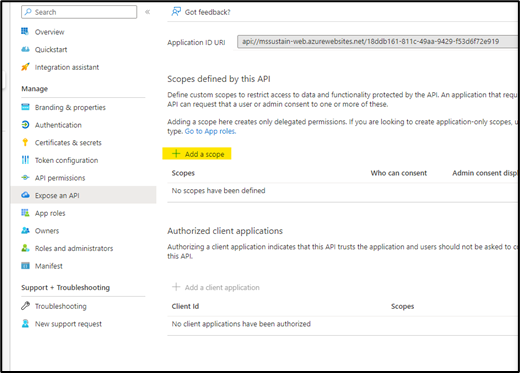
- Fill up the form with “default” values and click add scope.
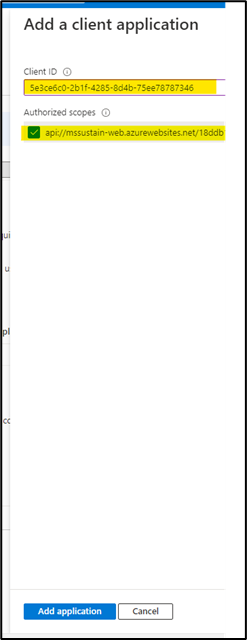
- Add a client Application
- Click on add a client application
- Fill-up the form with this GUID "5e3ce6c0-2b1f-4285-8d4b-75ee78787346".
- Select the recently created scope and then click add application.
- Properly configured app registration should look like this

-
- Add access policies to your Key Vault
- Go to Azure Key Vault from the resource group that was recently created.
- On the side navigation, click on “Access Policies”.
- Click on “Create” button.
- Click on Select All from the Secret Permissions segment.
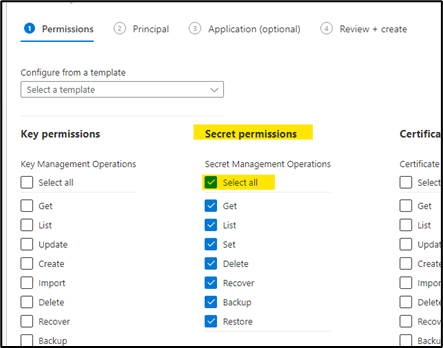
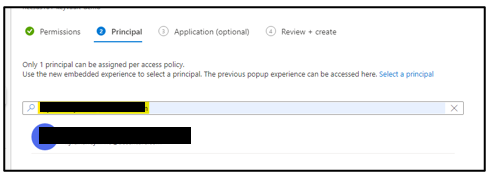
- Click next and then on principal, select your own email address.
- Click next, important: skip the Application (Optional) part, do not select any application, and then click next.

- Click on create.
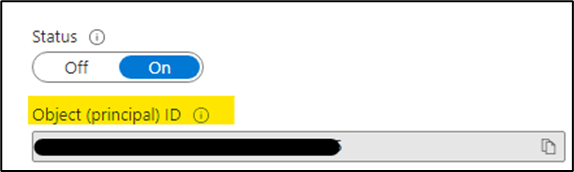
- To get the Principal ID, go to the Azure App Service of your API.
- On the side navigation, click on identity.

- Copy the Object (Principal) Id.
- Follow the steps mentioned in User Section to add API Principal.
- In step 5 of User Section we need to add Principal ID which we get in third steps.
Below are the steps to add secrets which will be required later -
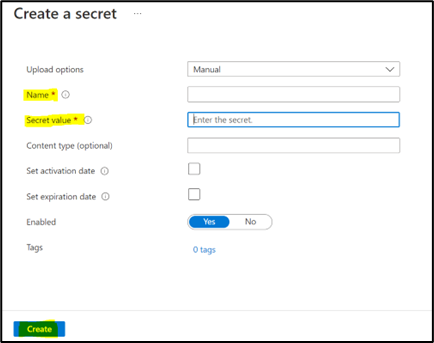
- Navigate to your Key Vault from the Resource Group that was recently created and select 'Secrets' then click on 'Generate/Import' as shown in below image –
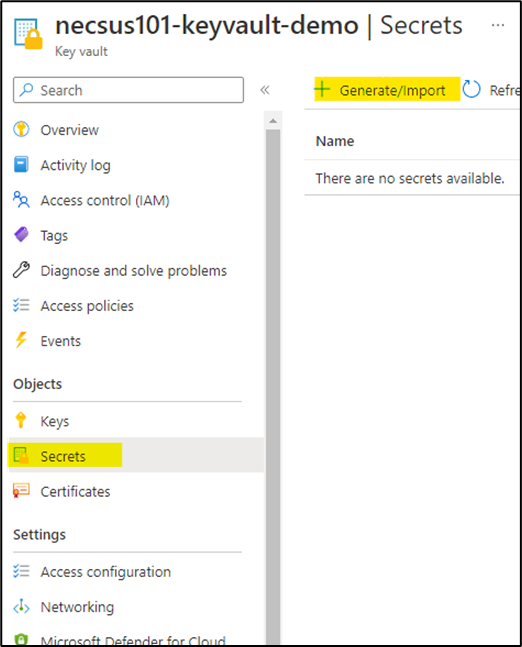
- After clicking on "Generate/Import", update "Name" and "Secret Value" and click on create to add a secret.
-
necsus-appreg-secret - This is the first secret which needs to be added. This is the app registration secret that needs to get generated.
- In the Azure portal, in App registrations, select your application.
- Select Certificates & secrets > Client secrets > New client secret.
- Add a description for your client secret.
- Select an expiration for the secret or specify a custom lifetime.
- A client’s secret lifetime is limited to two years (24 months) or less. You can't specify a custom lifetime longer than 24 months.
- Microsoft recommends that you set an expiration value of less than 12 months.
- Select Add.
- Record the secret's value for use in your client application code. This secret value is never displayed again after you leave this page.
- Follow the steps as mentioned in section and update Name "necsus-appreg-secret" and secret Value as value generated in above step.
-
necsus-blob-connectionstring - This is the second secret that needs to be added. This is the connection string of your blob storage/storage account.
- Go to resource group that was created.
- Navigate to blob storage/storage account.
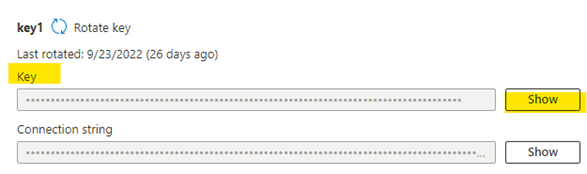
- On the side navigation, go to Access Keys.
- Click on Show button beside the Connection String on key1.

- To create new secret, follow steps mentioned in section, update Name as "necsus-blob-connectionstring" and Secret Value as generated in above steps i.e., connection string value of "Key1".
-
necsus-blob-key - This is the third secret that needs to be added. This is the access key of your blob storage/storage account.
- Go to a resource group that was created.
- Navigate to blob storage/storage account.
- On the side navigation, go to Access Keys.
- Click on Show button beside the Key on key1.
- To create a new secret, follow steps mentioned in section, update Name as "necsus-blob-key" and Secret Value as generated in above steps i.e., Key value of ‘Key 1’
-
necsus-sql-connection-string - This is the fourth secret that needs to be added.
- Go to the resource group that was created.
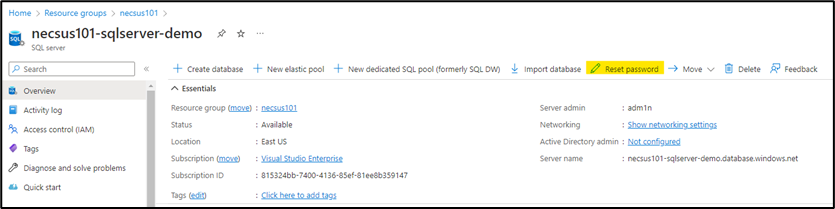
- Navigate to SQL Server resource.
- Click on the Reset Password button.
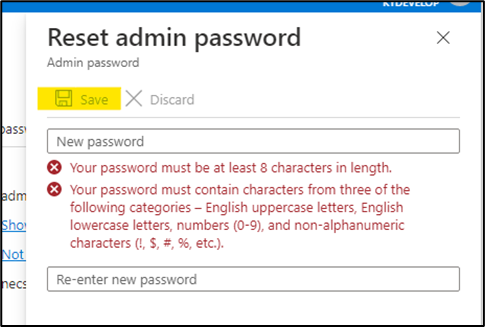
- Set a new password and click save.
- After resetting it, navigate to the resource group again and go to SQL Database resource.
- On the side nav, there should be a "Connection Strings" menu.
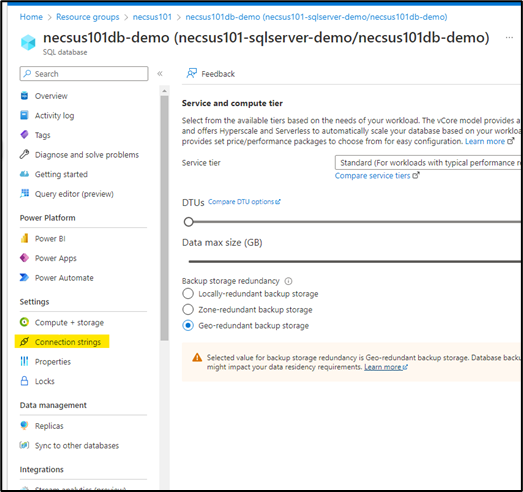
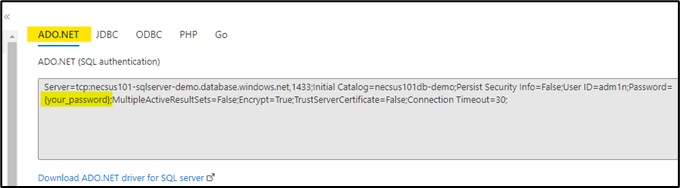
- Copy the ADO.NET SQL Connection String.
Note: make sure to replace the {your_password} string with the recently updated password.
- To create a new secret, follow the steps as mentioned in section, update Name as "necsus-sql-connection-string" and Secret Value as generated in above steps i.e., SQL connection string.
-
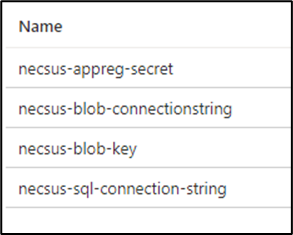
There should be a total of 4 secrets to the Key Vault.
- Navigate to the below path to open “config.json” and update 'REACT_APP_BASE_URL' parameter.
<<Path of extracted project folder>>\WebUI\build\config.json
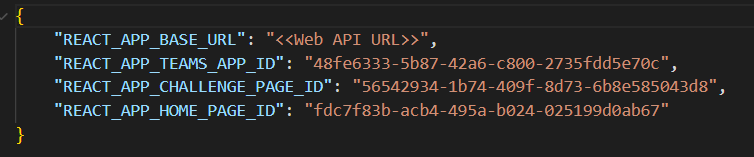
- Replace
<<Web API URL>>with appropriate value for 'REACT_APP_BASE_URL' fields. Refer the below for updating parameter -"REACT_APP_BASE_URL": https://{App service API url}
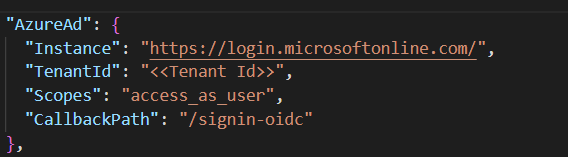
- Navigate to the below path to open "appsettings.json" and update 'TenantID' parameter.
<<Path of extracted project folder>>\WebAPI\appsettings.json
-
Replace
<<Tenant Id>>with appropriate value for 'Tenant Id' field. Refer the below for updating parameter -"Tenant Id": Tenant Id of the Azure subscription- Copy tenant id from Properties - Microsoft Azure
-
Navigate to the below path to open "appsettings.Production.json" and update all parameters -
"<<Path of extracted project folder>>\WebAPI\appsettings.production.json
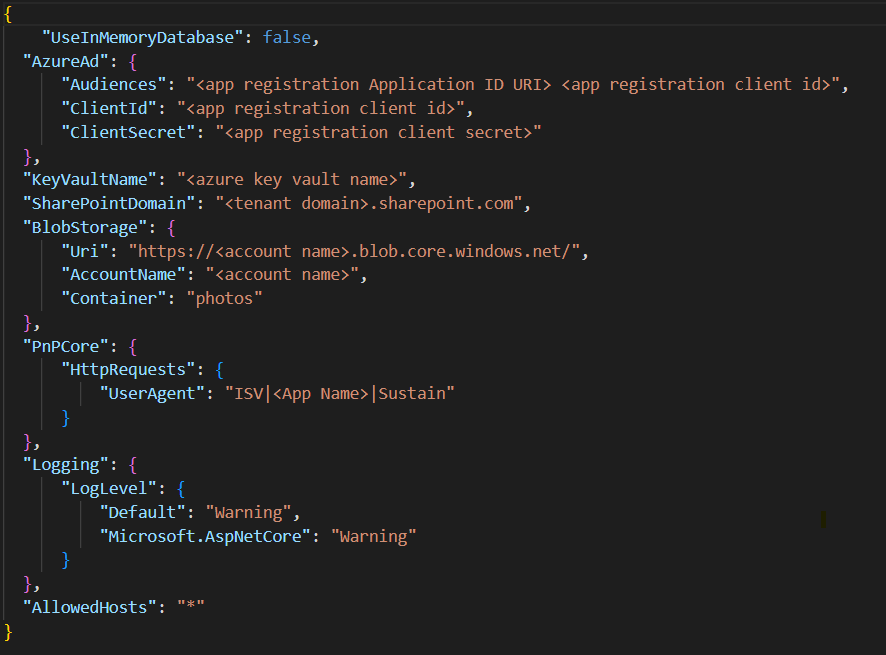
- Refer the below for updating parameter -
Audiences: "api://{App Registration Application ID URI} {App Registration Client ID}"
-
Note – There should be a space between App Registration Client ID and App Registration Client ID.ClientId: "{App Registration Client ID}"ClientSecret: "{App Registration Client secret value}"KeyVaultName: "{Azure Key valult name)"SharePointDomain: "{Tenant Domain}.sharepoint.com"Uri: "https://{Name of Blob Storage}.blob.core.windows.net/"AccountName: "{Name of Blob Storage}"UserAgent: "ISV|{App Name}|Sustainability"
Note – In “User Agent”, App Name can be anything, but it is recommended to update the same app name which we provided in “azuredeploy.parameters.json” in path "<<Path of extracted project folder>>\Deployment\Azure\azuredeploy.parameters.json”.
-
Open PowerShell (if PowerShell window is already open, make sure to close and open it) and navigate to Deployment folder by typing the command below
cd <<Path of extract project folder>>\Deployment\Azure
-
Run the deployment by typing the following command below -
.\Deploy-Application
-
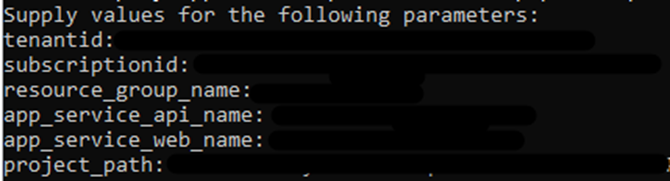
Supply the following parameters as mentioned below –
$tenantId = '<<GUID - Id of tenant>>'$subscriptionId = '<<GUID - Id of subscription>>'$resource_group_name = '<<Name of resource group eg. sustain-app-demo>>'$app_service_web_name = '<<Name of Azure App Service of Web eg. sustain-app-web>>'$app_service_api_name = '<<Name of Azure App Service for API eg. sustain-app-api>>'$project_path = '<<Local path of project eg. C:\Users\<UserName>\Desktop\SUSTAINABILITY SUPPORT\microsoft-teams-apps-sustain-main_updated\microsoft-teams-apps-sustain-main\>>'
-
You will be prompted to sign-in, type the credentials of the user account that connects to Azure Portal.
-
Press "Y" to confirm deployment to API.
-
Press "Y" to confirm deployment to Web.
-
Successful deployment should look like this:
`
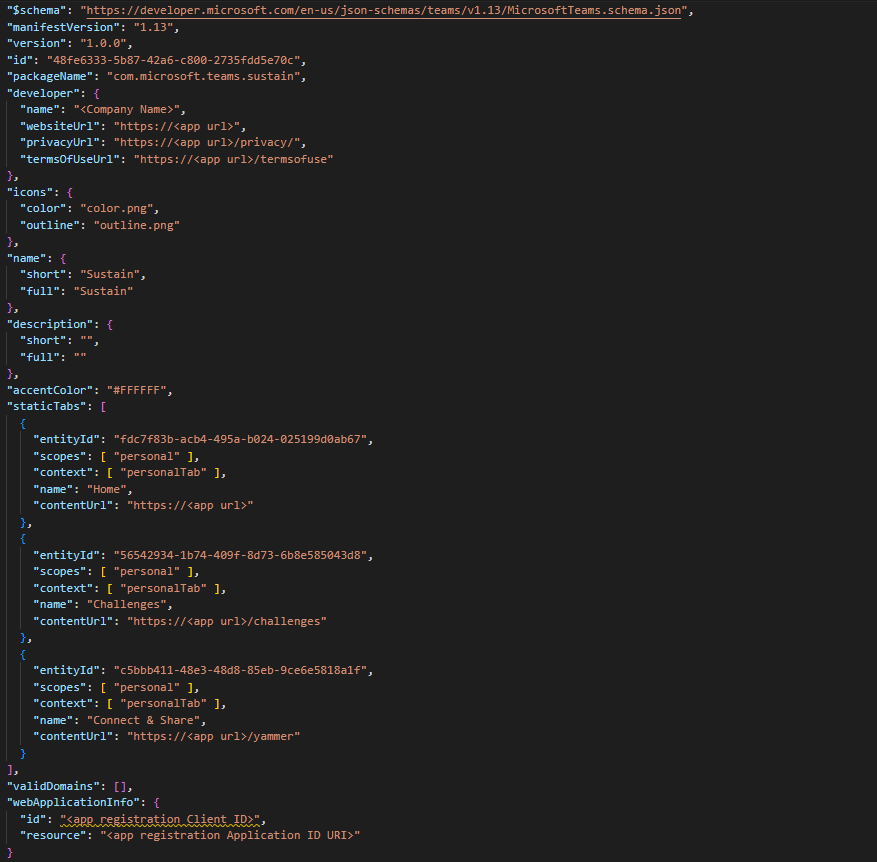
- Go to the below path to open "manifest.json" and update parameters mentioned in below point.
<<Path of extracted project folder>>/Deployment/Teams/prod
-
Refer the following to update the parameters -
name: {Company Name}websiteUrl: {Web App URL}privacyUrl: {Web App URL}/privacy/termsOfUseUrl: {Web App URL}/termsofusecontentUrl: {Web App URL}id: {App registration Client Id},resource: {app registration Application ID URI e.g., api://client-app-uri}
-
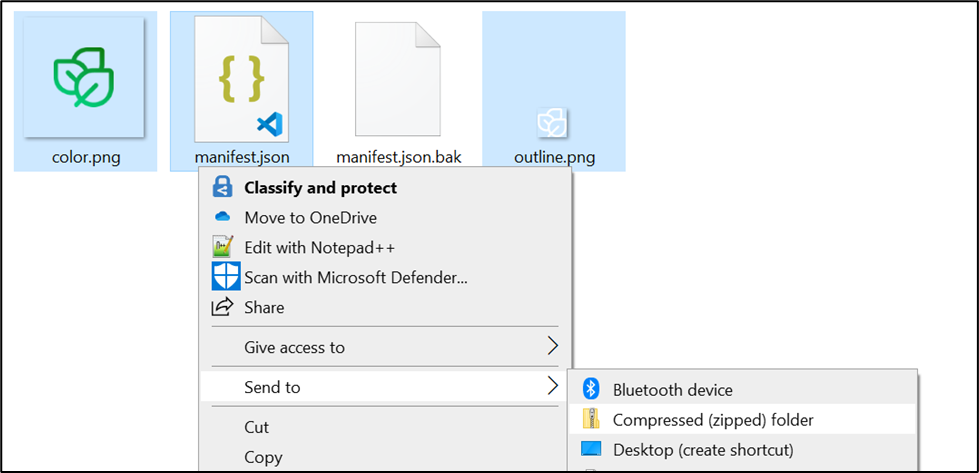
Select "color.png","manifest.json","outline.png" and send to "compressed folder" and rename the compressed folder to "Sustainability".
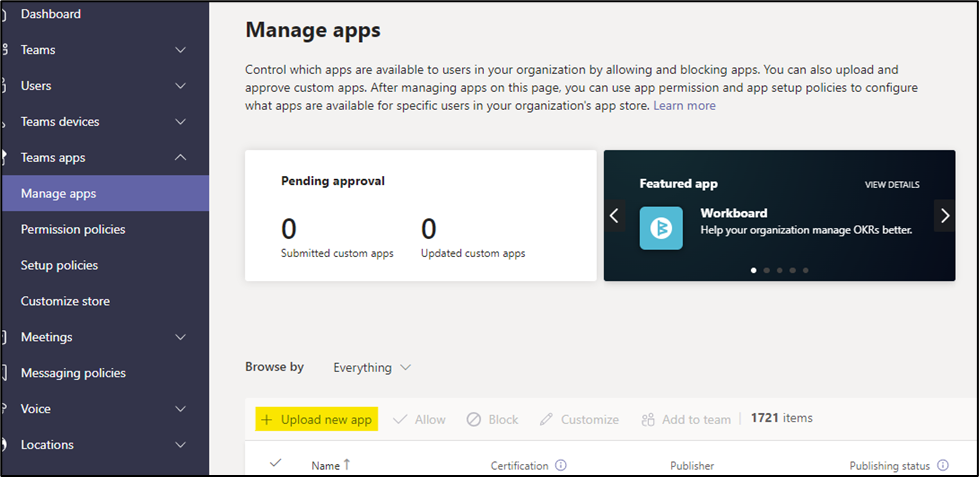
- Go to Microsoft Teams Admin Center
- Click on Manage Apps and then click on Upload new app button.
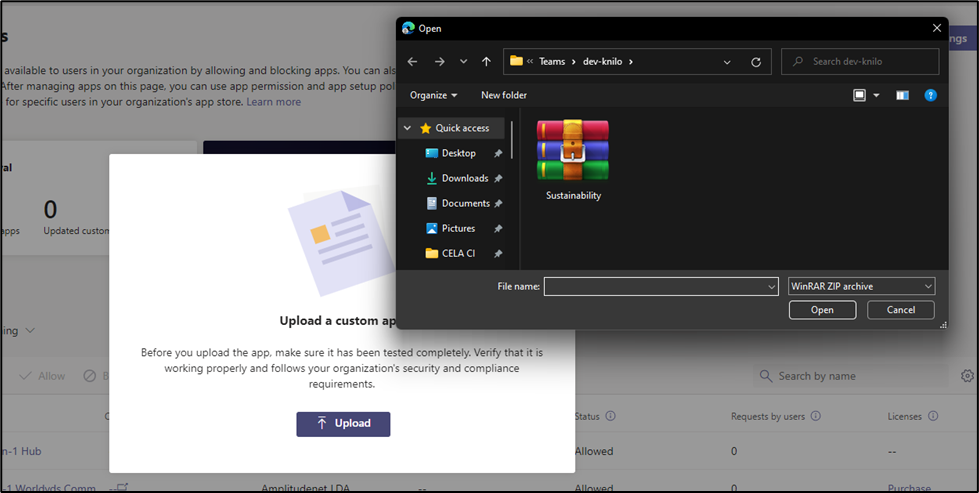
- Select the Manifest zip file and then upload the compressed folder “Sustainability.zip” created in above step.
- Navigate to the App Service of the API in Azure Portal
- Look for the CORS under API section
- In the CORS page:
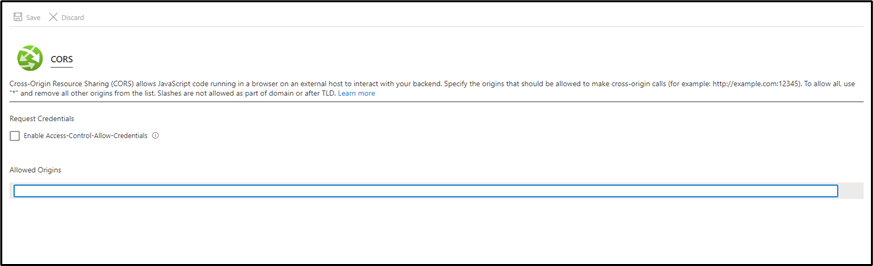
- Check the "Enable Access-Control-Allow-Credentials".
- Add the URL of the Web UI e.g., https://{Web App URL} in the Allowed Origins.
- Click Save.
Note - If different versions of the same app needs to be installed in the same tenant, please update the GUID in manifest file and update the same in Web Section.