Deployment guide - OfficeDev/microsoft-teams-apps-staffcheckins GitHub Wiki
Prerequisites
To begin, you will need:
-
Office 365
-
Sign up for Power Apps
-
Sign up Power Automate
-
A valid SharePoint Online license and permission to create lists and store data
-
A copy of Staff Check-ins app zip package
-
Bing Maps API key. Please follow the steps here to get your Bing Maps API keys.
Step 1: Create SharePoint site
-
Sign in to https://www.office.com/, and then select SharePoint on left navigation bar.
-
After navigating to SharePoint, select Create site.

- Select Team site.

- Enter name and description for your site.
- Set Privacy settings to Public so that everyone in the company can get the necessary information.

Step 2: Create SharePoint lists
-
Import the package zip file.
-
Click here to Signup/Login into Power Automate.
-
Click on Import at the top rail of the page and select CreateSharePointListsStaff Check-ins zip package.
-
For SharePoint Connection resource type under related resources click on "Select during import" and select connection which appears on the right rail.
-
IF there are no connections in the right rail click on Create new, it will redirect to a new page where you can add a new connection by searching for SharePoint and logging in.
-
Click on Refresh list, select name, and save.
-
Run the flow, click continue and SharePoint permissions and enter SharePoint site URL created in Step 1 under TeamSharePointUrl box and run flow.
-
You can verify SharePoint lists by clicking on Site contents present on the left rail of site.
Step 3: Import and setup flow
-
Import Staff Check-ins Schedules Adaptive Card flow.
-
Under related resources select Microsoft Teams connection and SharePoint connection by clicking on the wrench icon.
-
If Microsoft teams connection is not visible in the right rail, click on create new and add a Teams connection, same as the SharePoint connection mentioned in step 2.
-
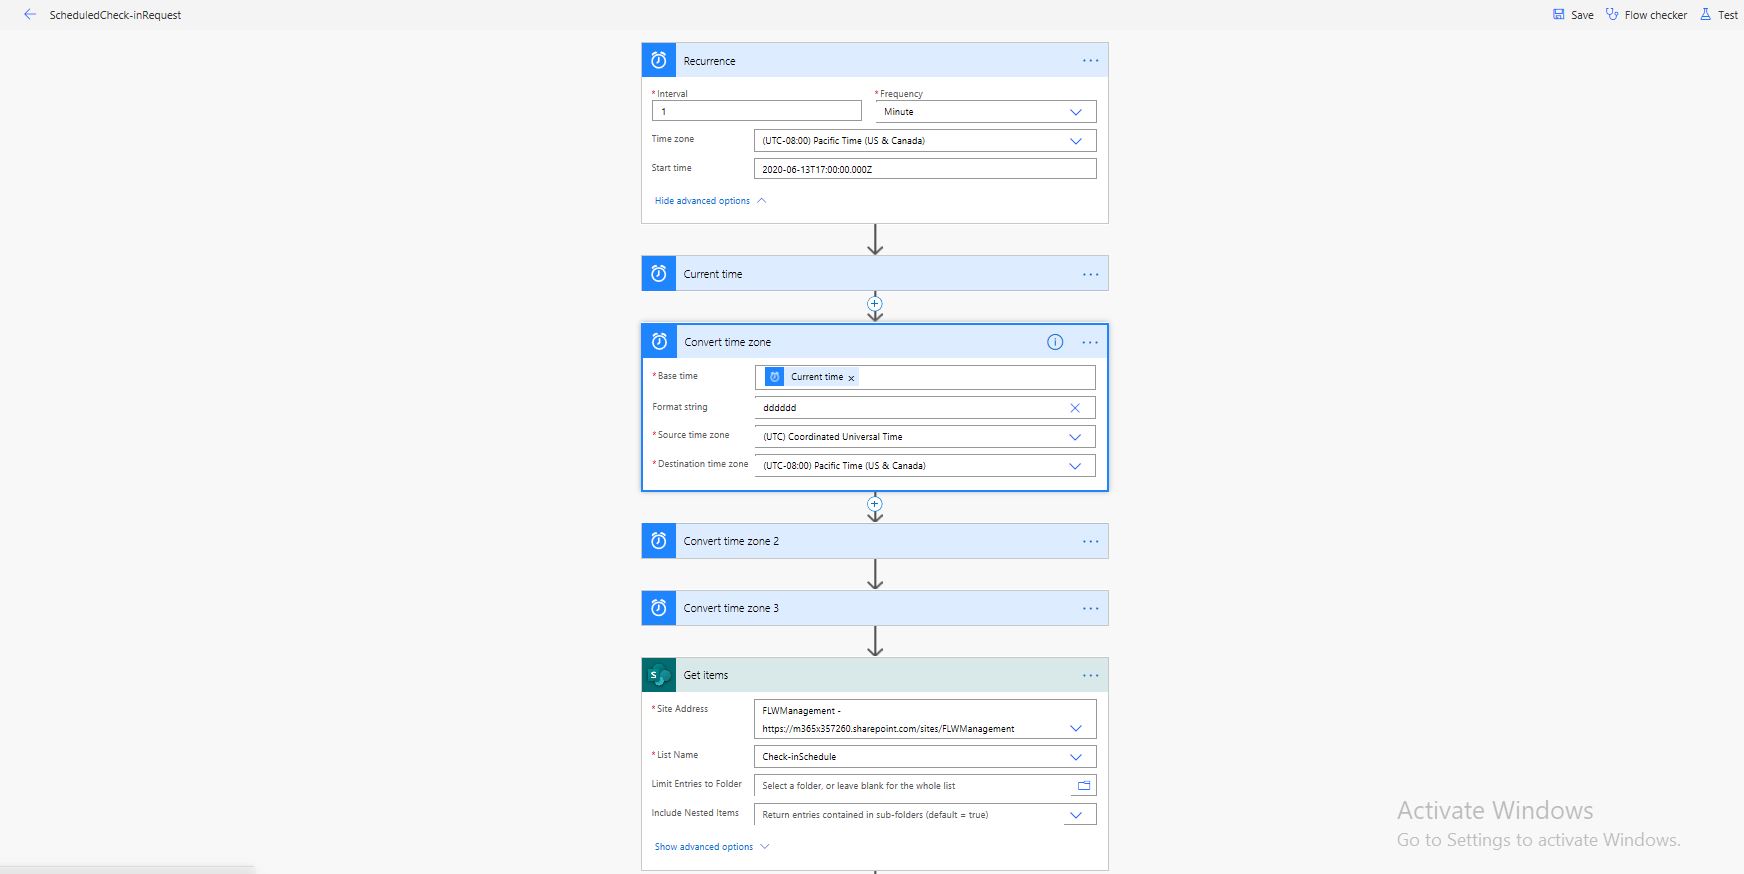
Once imported, click edit and under Recurrence step & Convert time-zone steps, select Destination time zone according to your local timezone.
Note: Power App automatically displays local time but Power Automate converts everything into UTC so we have to set it manually to show visitor arrival time in local timezone in adaptive card
-
In step "Get items", enter SharePoint site address and select 'Check-inSchedule' List and save.
-
Import Staff Check-ins Adhoc Schedules Adaptive Card flow.
-
Select SharePoint and Microsoft Teams connections by clicking on the wrench icon.
-
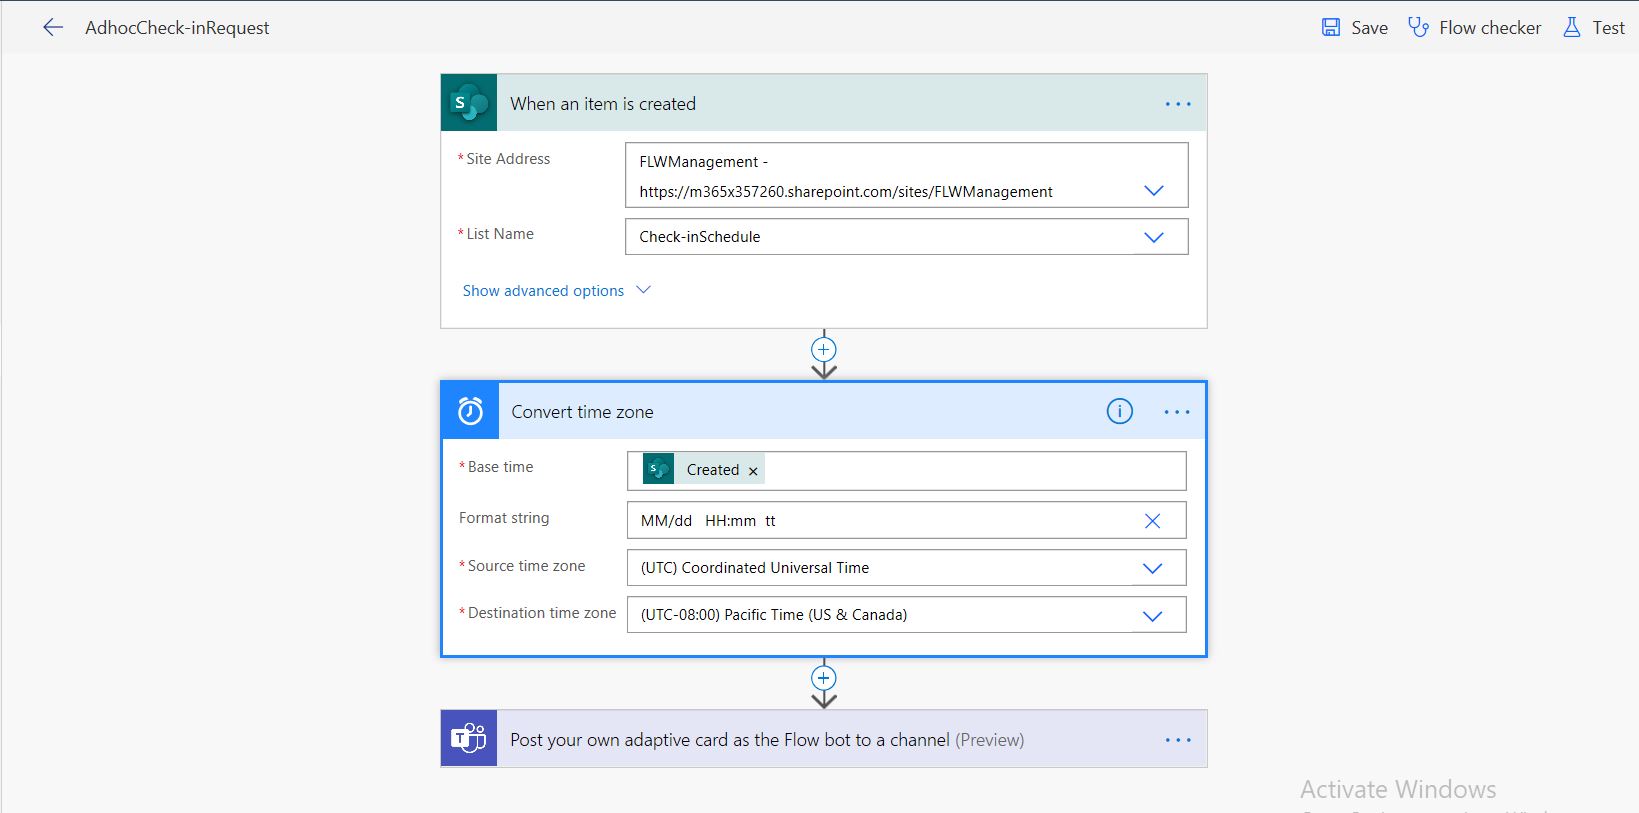
Once imported, click edit and enter SharePoint site created in step1 and select 'Check-inSchedule' in List name of step "When an item is created" and
-
Select your local time as destination timezone in Convert time zone step and save.
Step 4: Import Power Apps packages
Staff Check-ins has two Power App packages for two Persona's Managers/Admin and Staff.
Managers/Admin application
-
Click here https://powerapps.microsoft.com/en-us/Login/Signup into Power Apps.
-
Click on Apps on the left rail and click on the "Import canvas app" visible at top of the page.
-
Select 'Staff Check-ins Admins' zip package and under related resources select SharePoint and OneDrive connection by clicking on the wrench icon, same as step 2.
-
Click Import and the app will be ready to open.
-
Edit the Power App, under Data sources, remove the existing demo SharePoint lists Check-inSchedule List and UserCheck-ins List by clicking on "...".
-
Search and select SharePoint connection under Data sources and on the right side enter the SharePoint site address and click on connect, select Check-inSchedule List, and UserCheck-ins List.
-
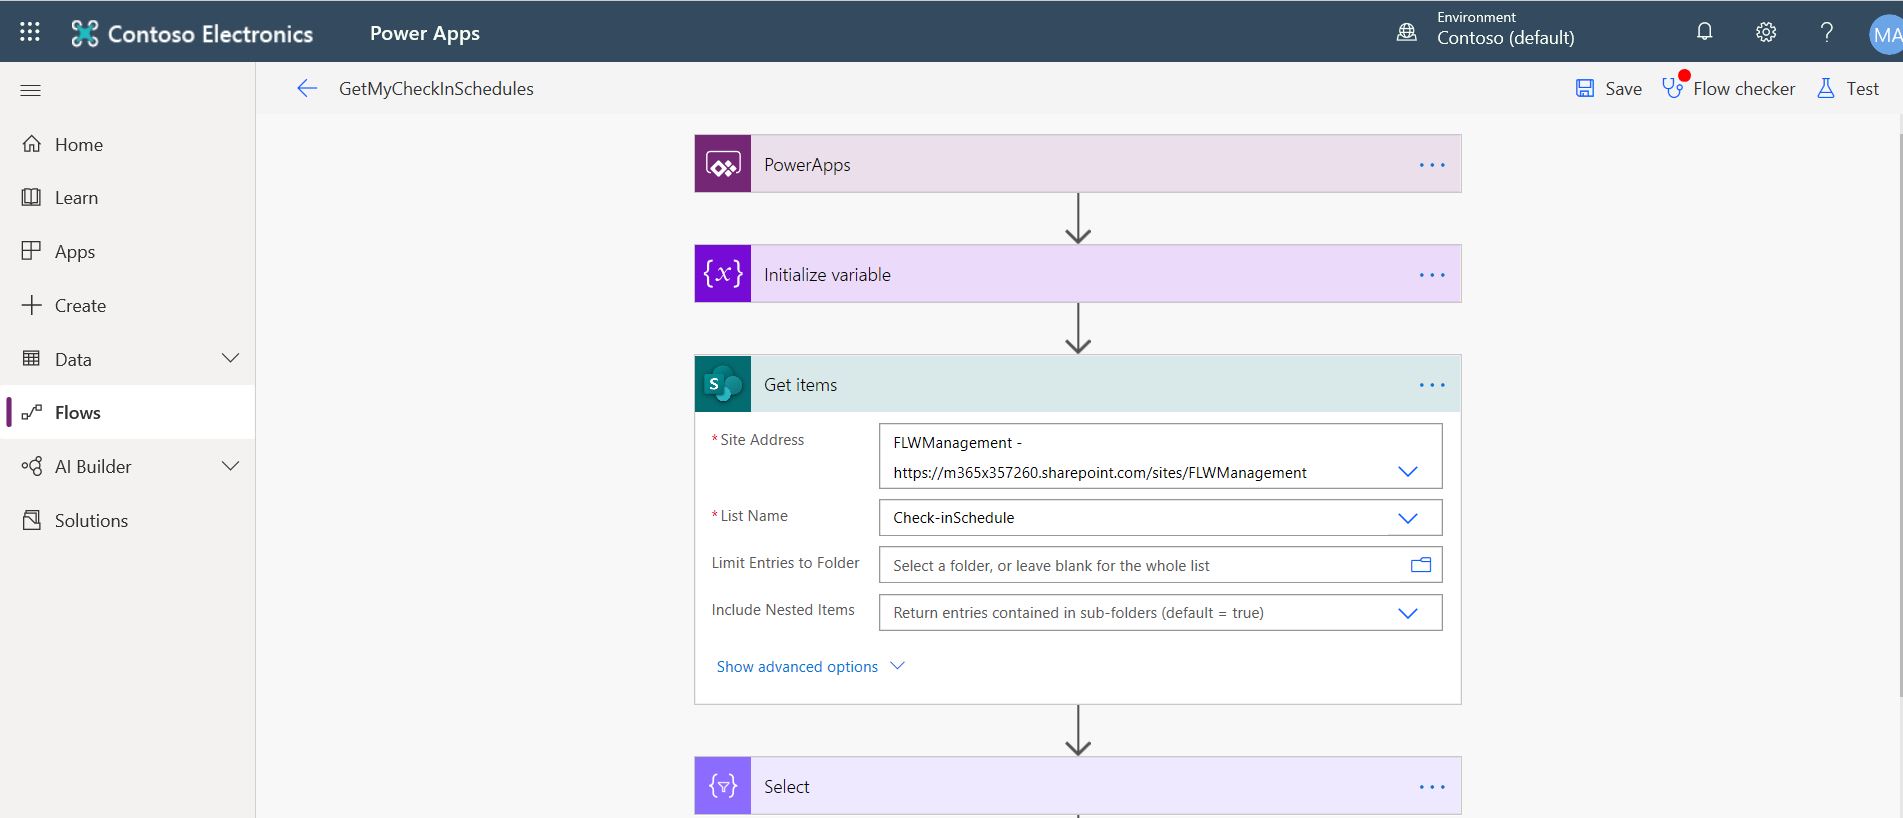
Click on Flows on the left rail and edit 'GetMyCheckInSchedules'.
-
Under "Get items" step paste or select the SharePoint site address from dropdown, select 'Check-inSchedule' List in List Name and save.
-
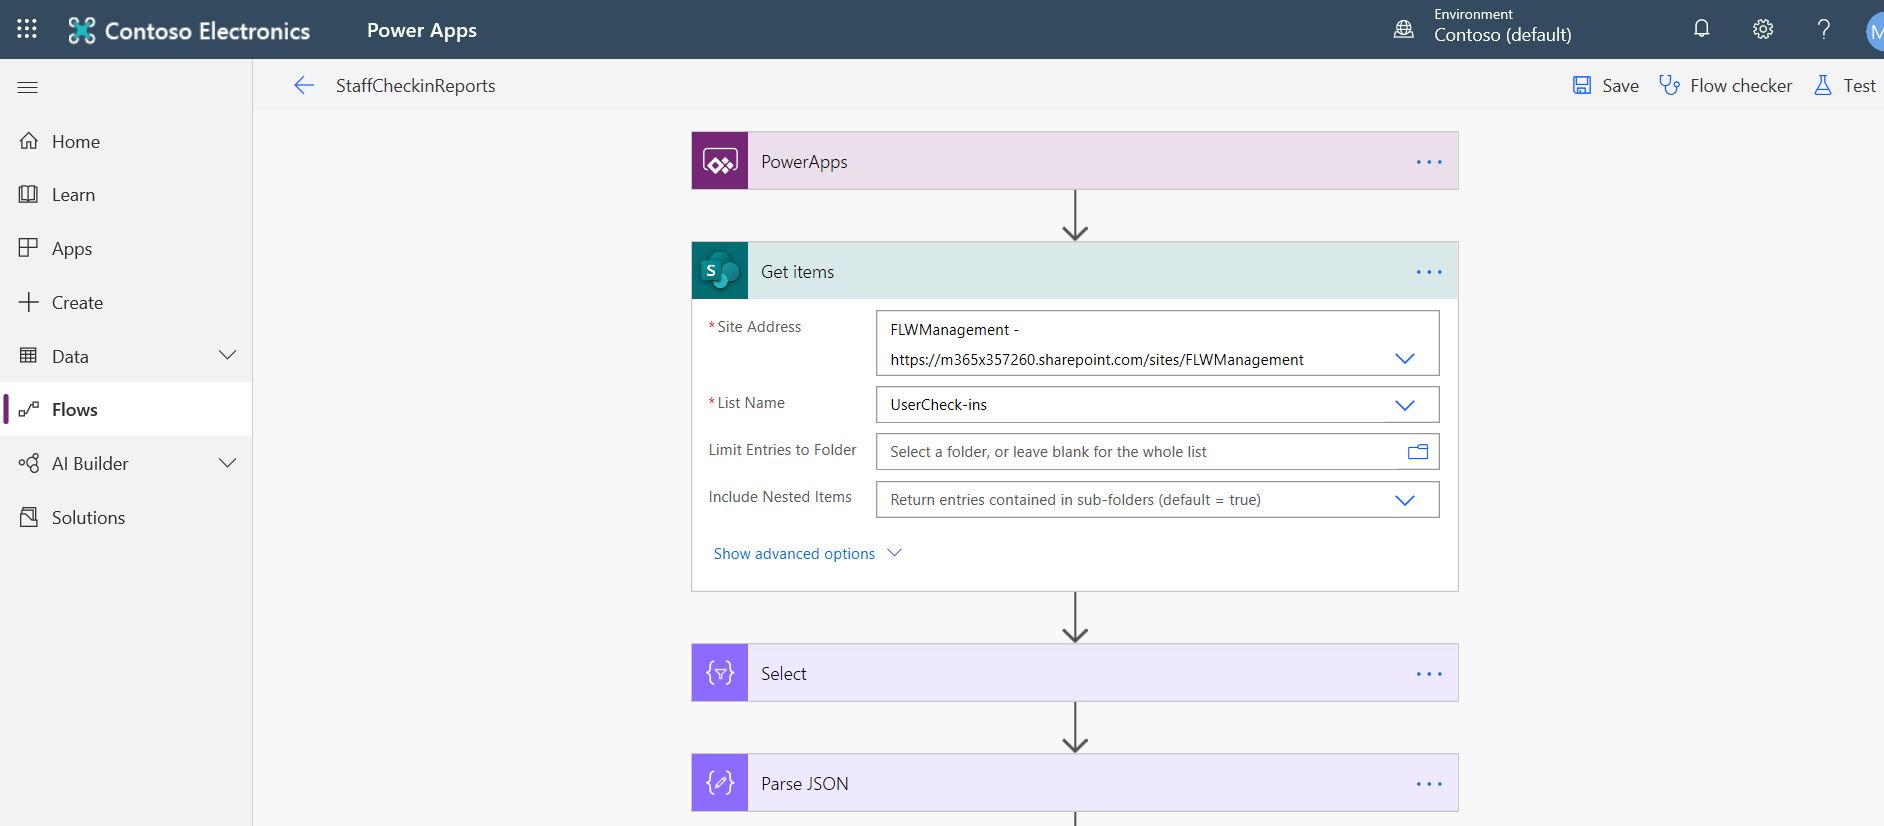
Click on Flows on the left rail and edit 'StaffCheckinReports'.
-
Under "Get items" step paste or select the SharePoint site address from dropdown, select 'UserCheck-ins' List in List Name and save.
-
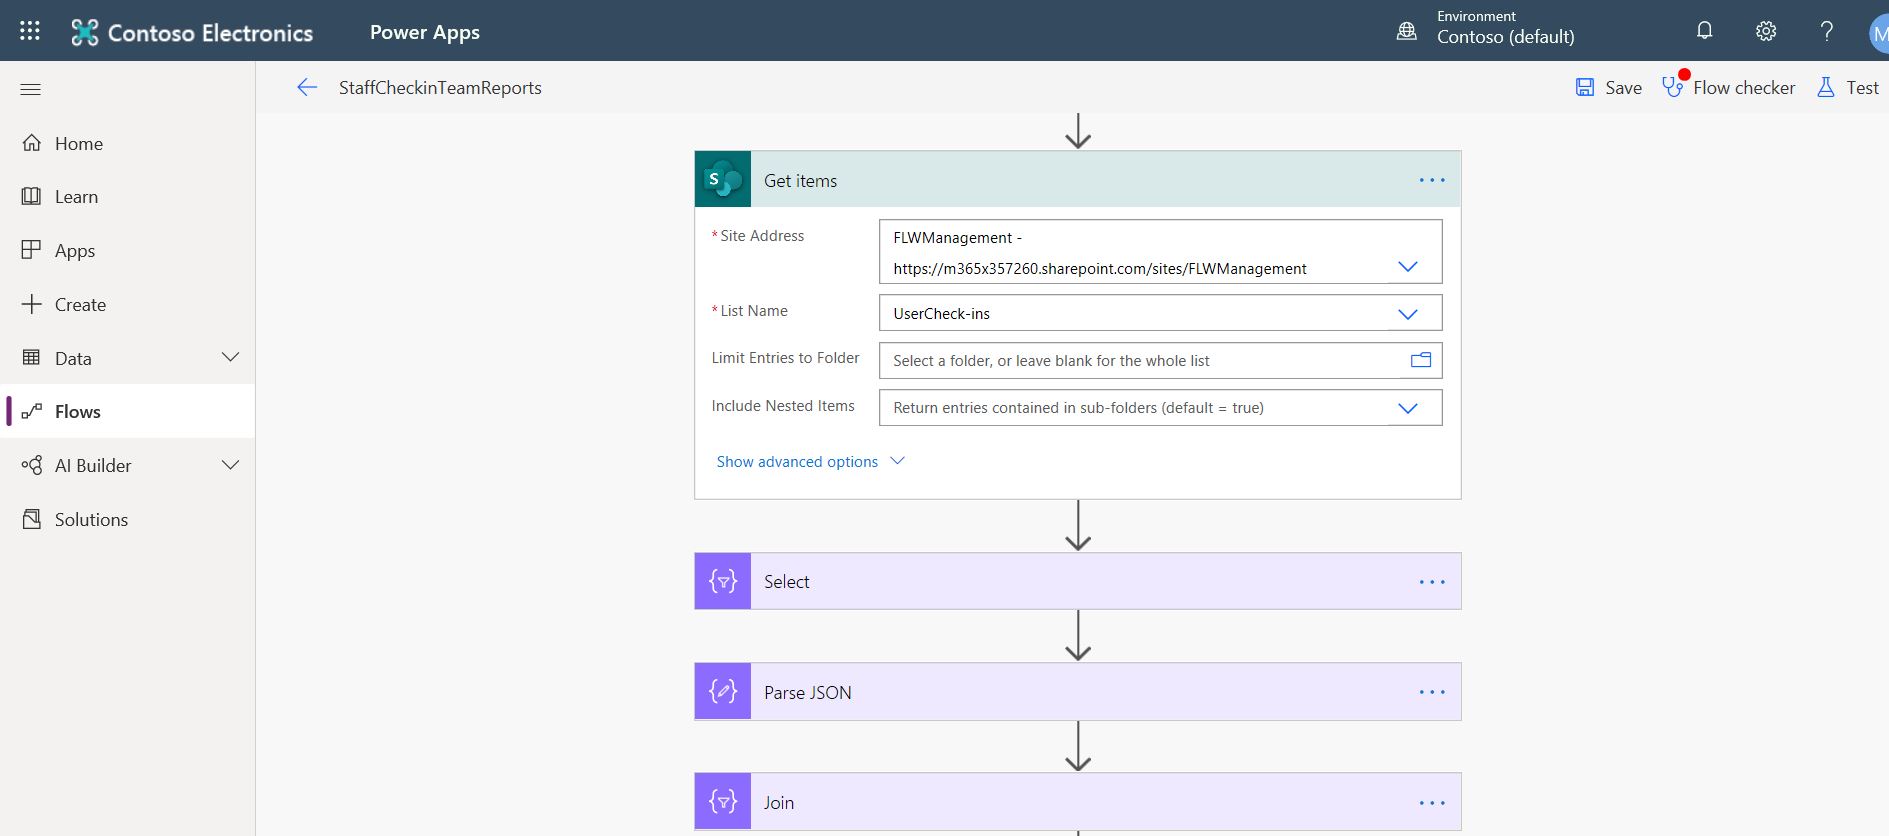
Click on Flows on the left rail and edit 'StaffCheckinTeamsReports'.
-
Under "Get items" step paste or select the SharePoint site address from dropdown, select 'UserCheck-ins' List in List Name and select your local time zone under destination time zone in Convert time zone step.
-
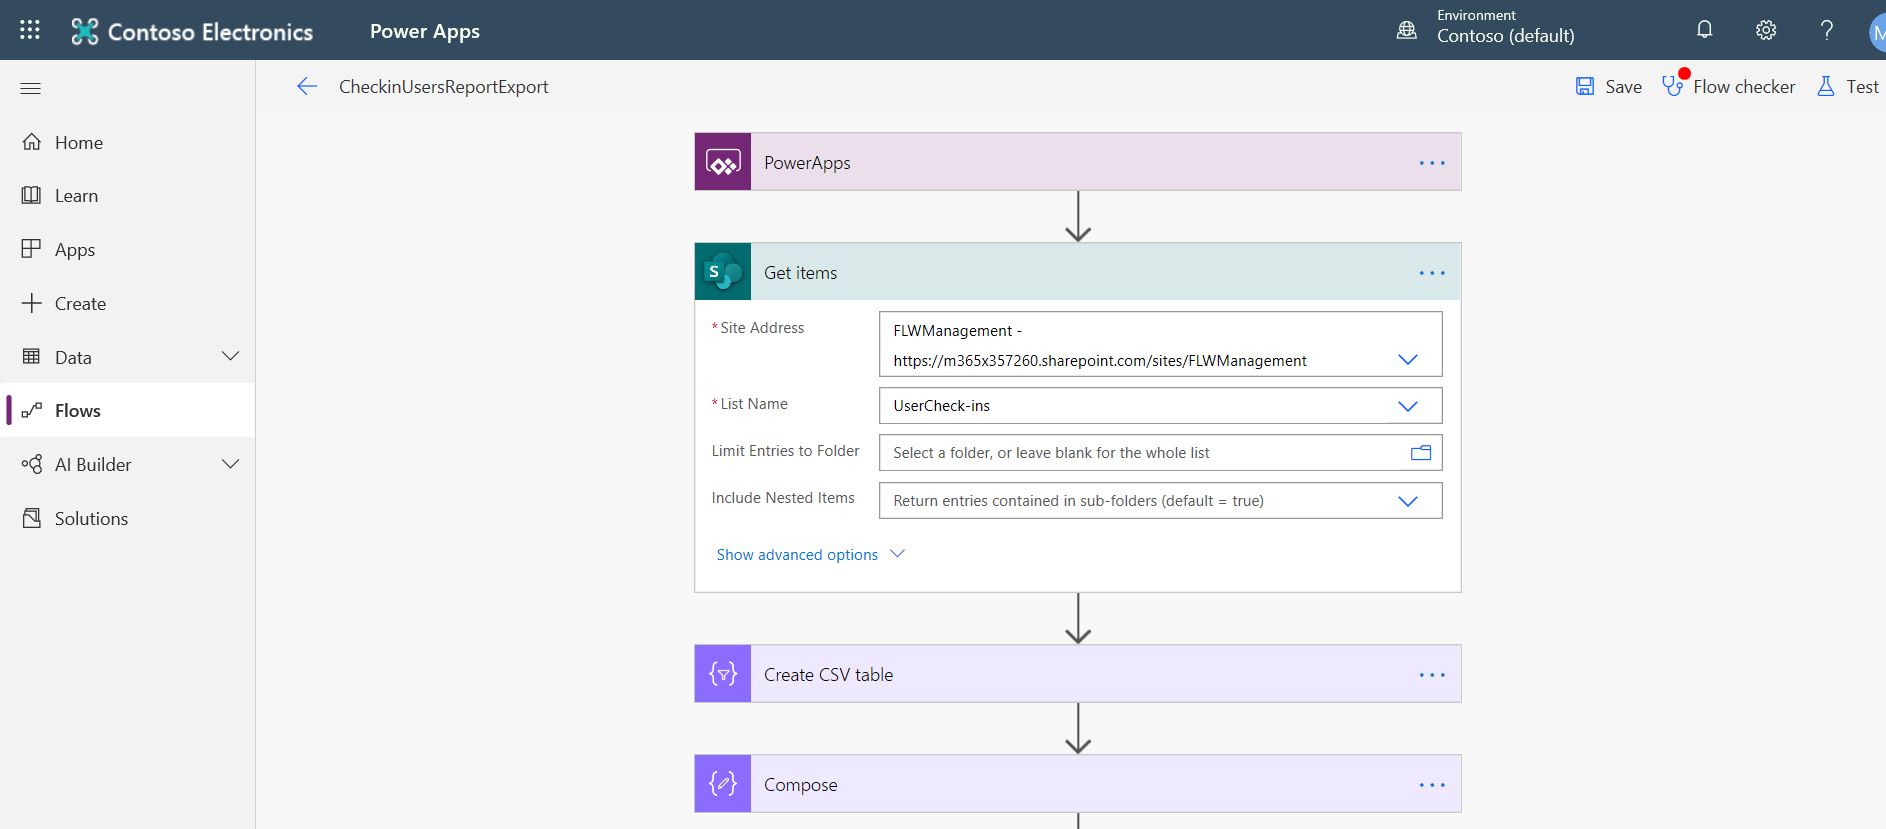
Click on Flows on the left rail and edit 'CheckinUsersReportExport'.
-
Under "Get items" step paste or select the SharePoint site address from dropdown, select 'UserCheck-ins' List in List Name and save.
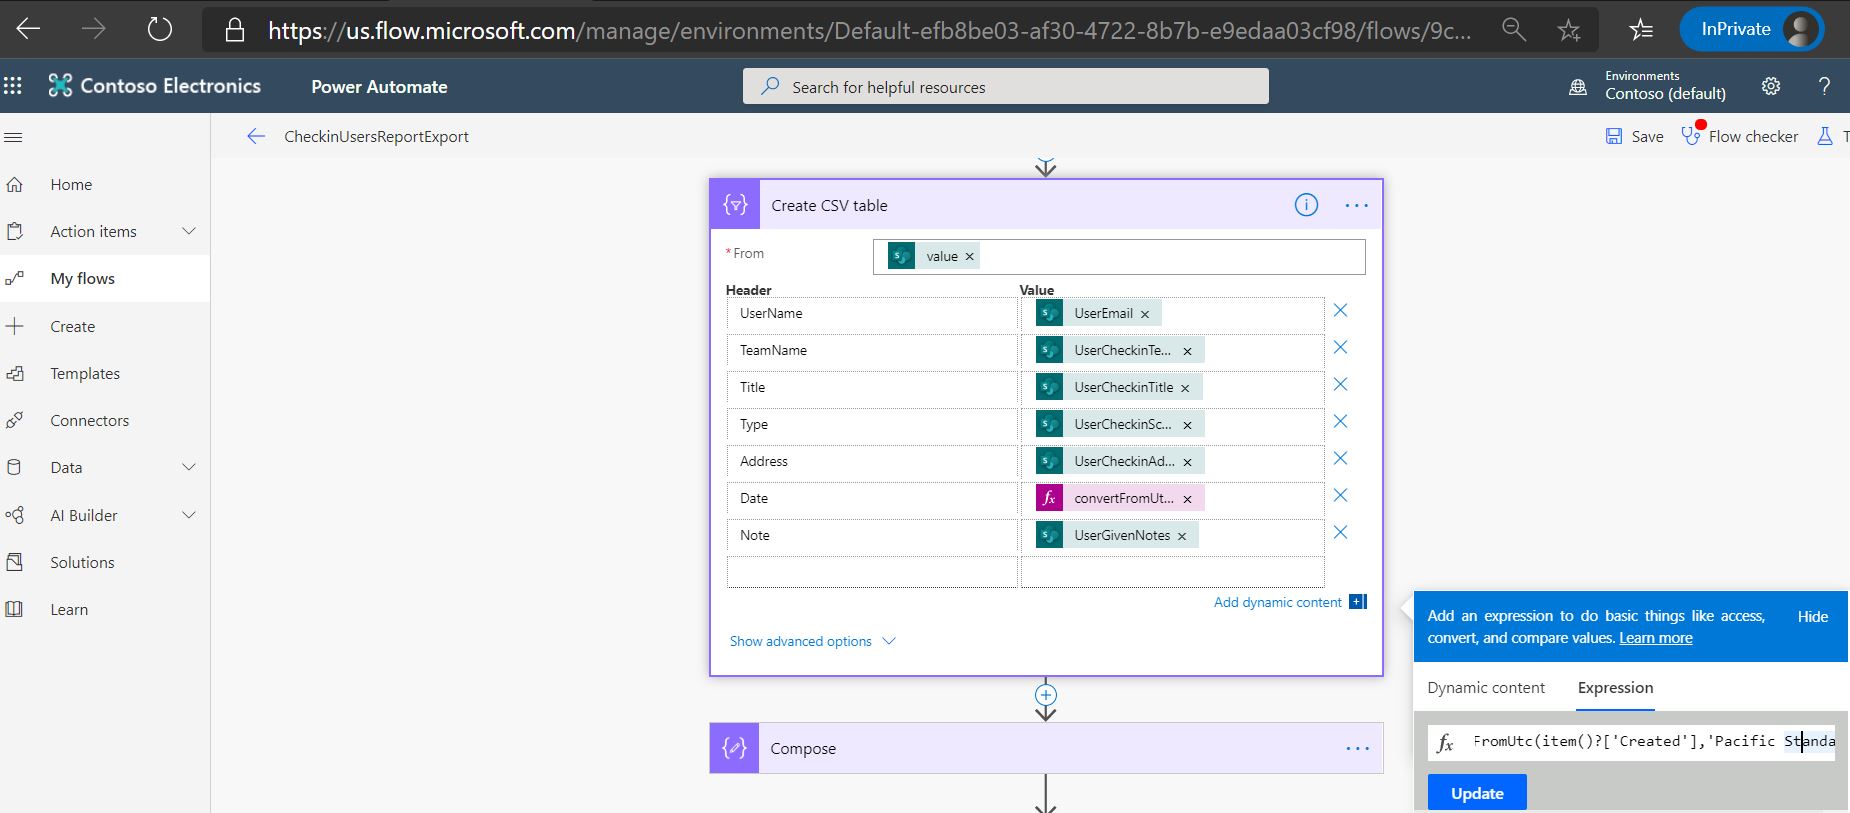
- The exported data will be in Pacific Standard Time (PST) by default. To customize it, click on step "Create CSV table" and click on expression beside Date and change the DateTime format by replacing "Pacific" from "@convertFromUtc(item()?['Created'],'Pacific Standard Time','MM/dd/yyyy hh:mm:ss tt')" and changing dd/MM or MM/dd format. click "Update" and Save the flow.
-
Click "Import canvas app", select the 'Staff Check-ins' zip package and select SharePoint and Microsoft Teams connection and import.
-
Edit the Power App, under Data sources, remove the existing SharePoint lists by clicking on "...".
-
Search and select SharePoint connection under Data sources and on the right side enter the SharePoint site address and click on connect, select 'Check-inSchedule' List, and 'UserCheck-ins' List.
Staff application
-
Visit https://www.bingmapsportal.com/ website, signup and under My accounts click on My Keys.
-
Create a new key by entering Application name, Key Type as basic and Application type as Mobile and click create (application URL is optional).
-
Under the respective application name, click on Show Key and copy the key as it will be used in the further steps.
-
Import Staff Check-ins Power App package and under related resources select connections by clicking on wrench icon, similar to step 2.
-
Upon searching for Bing Maps connection and click to add, a pop up will appear asking for an API key, provide the earlier saved API key.
-
Under Data Sources remove and update DataSources, similar to points 5 and 6 above.
-
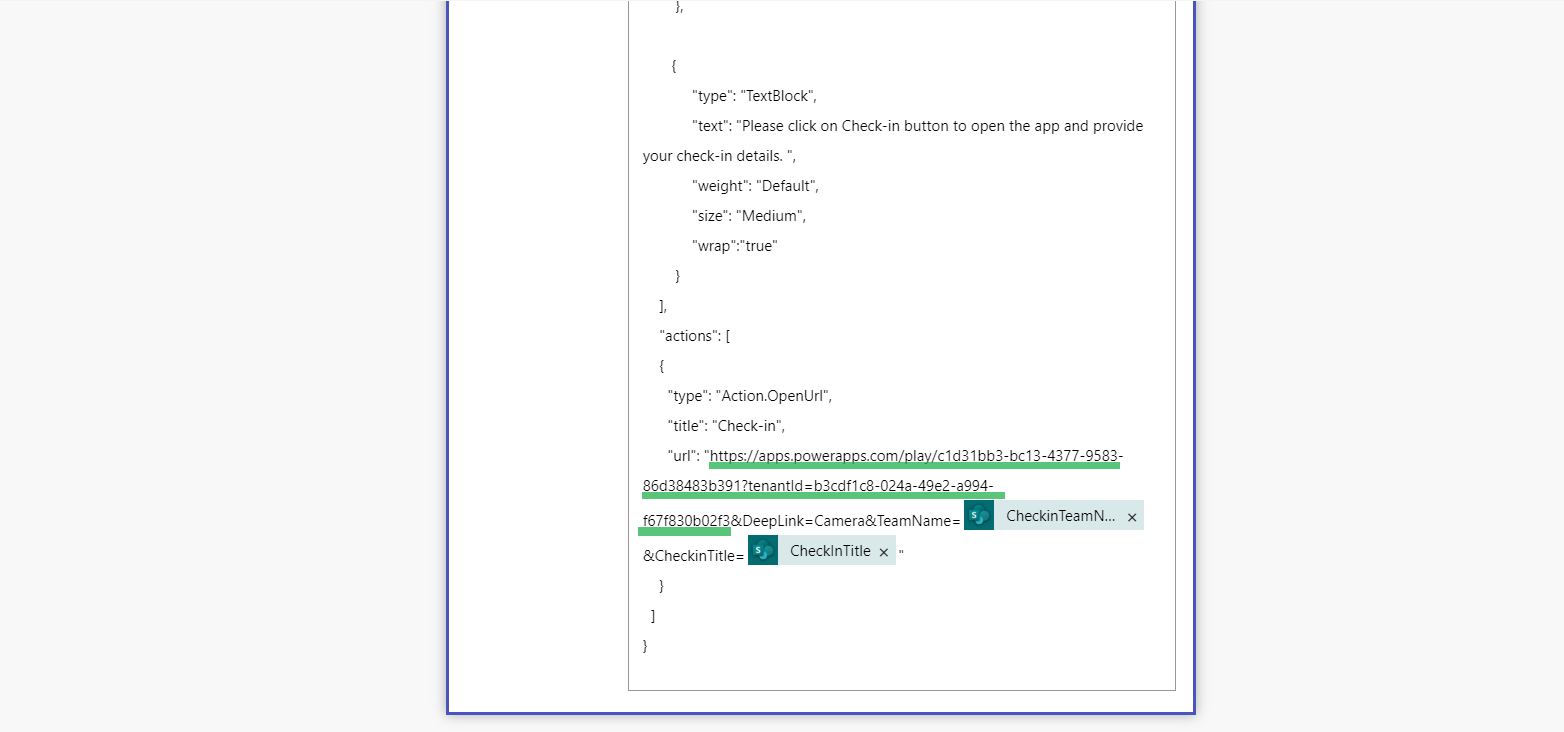
After publishing the 'Staff Check-ins' app, click on "..." > "Details" and copy the web link of the app.
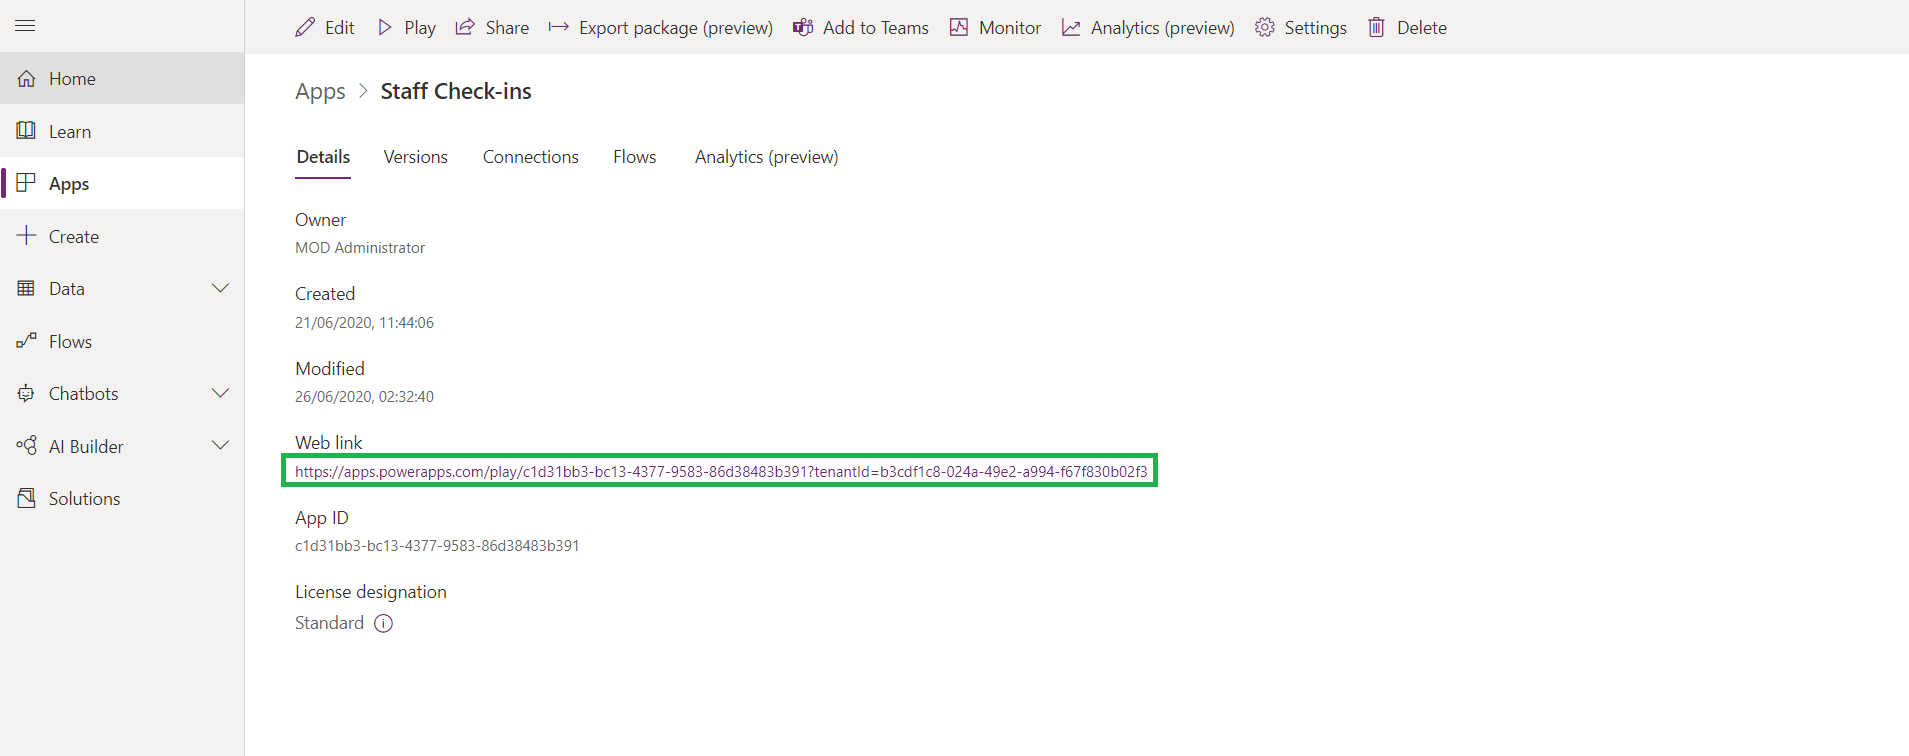
- Navigate to both the flows which you have imported before ( "Staff Check-ins Schedules Adaptive Card" & "Staff Check-ins Adhoc Schedules Adaptive Card") and in step"Post your own adaptive card as the flow bot in a channel" of both the flow paste the copied web link as shown below;
Note: Save and publish both the Power Apps once Data sources are added.
Step 5: Share Power Apps and SharePoint site
-
Admin needs to share the app with all intended users of the application.
-
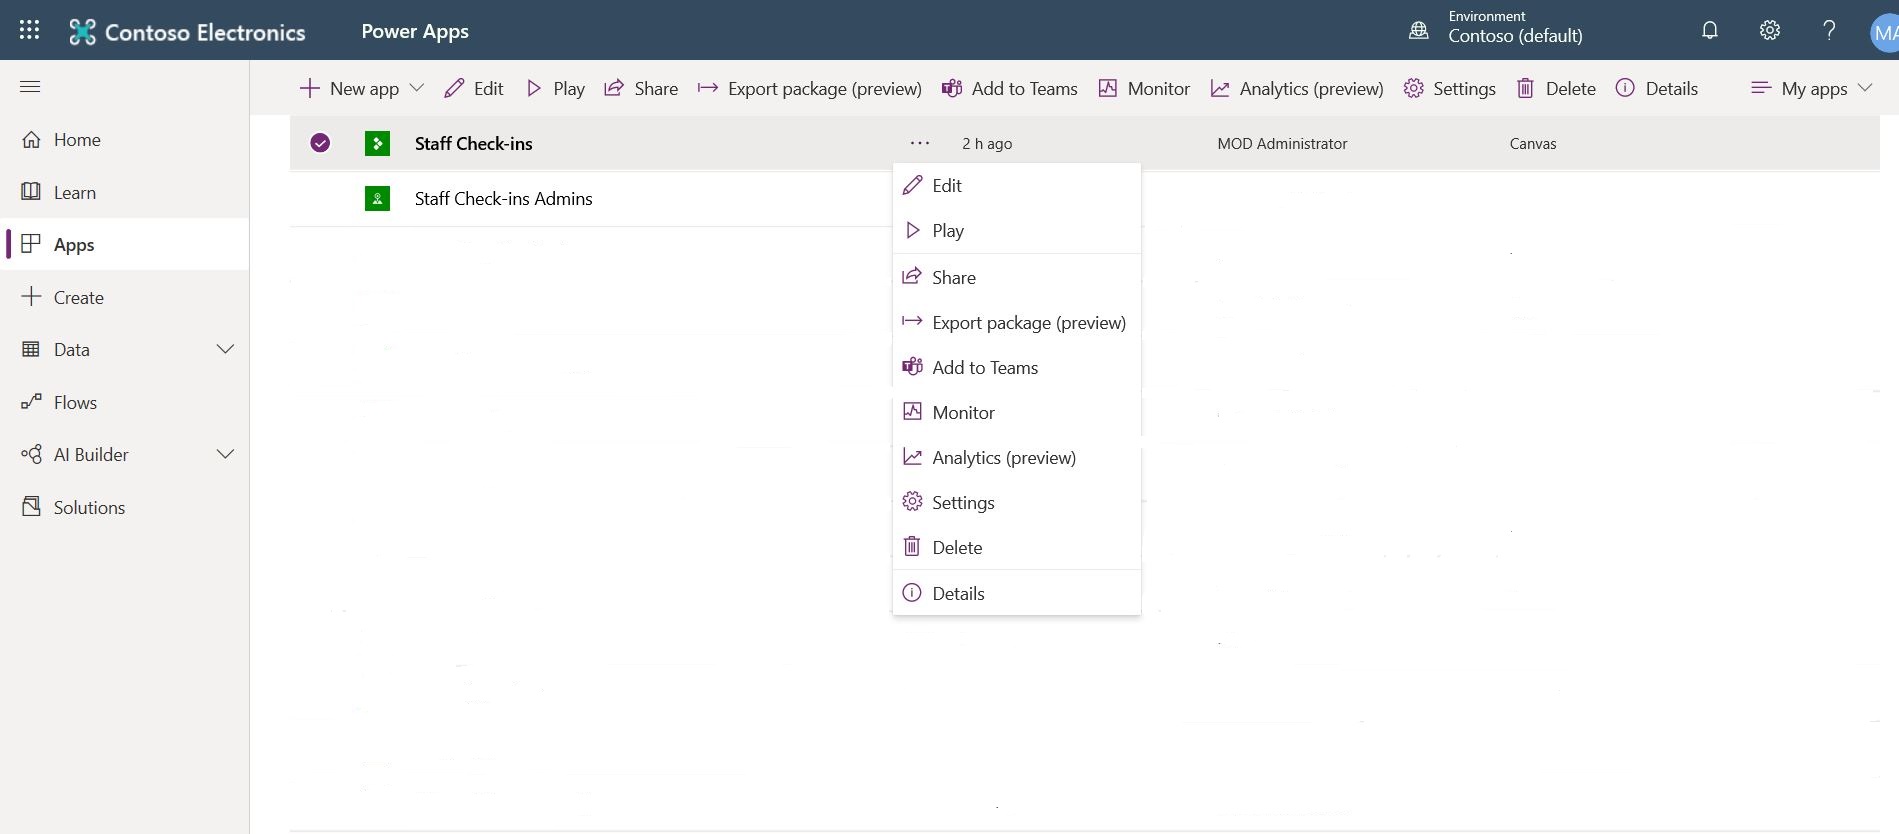
Go to Apps menu in the left menu bar and you will be able to see the app you have imported.
-
Click on 3 dots (Options) for your app and click on Share.
-
Enter the group name meant for users in the popup and click on Share. You can also add additional members if needed. This is required to allow members to access Staff Check-ins App.
Note: While Sharing the Staff Check-ins a warning may appear "Sharing the app implicitly shares at least one connection". Click on confirm.
-
Admin also needs to share the SharePoint site to all individuals who will be using the app. To grant access to the SharePoint site, please follow the steps below:
-
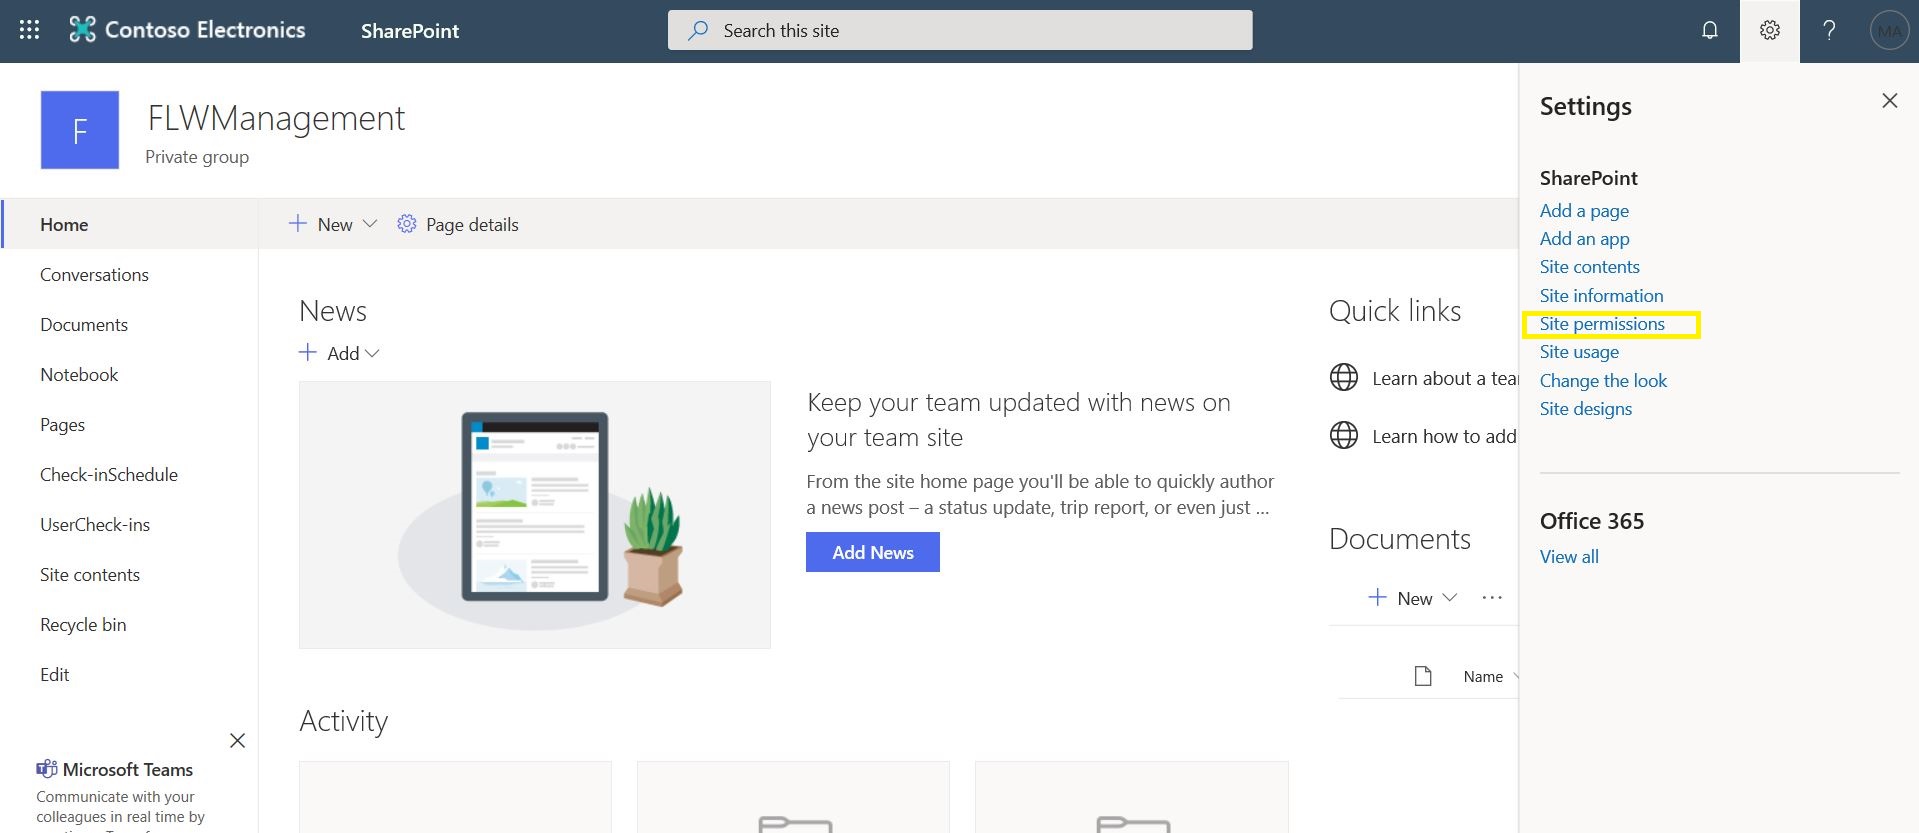
Go to SharePoint site that is created during step 2 and click on Settings icon at top right corner and click on the "Site permission":
-
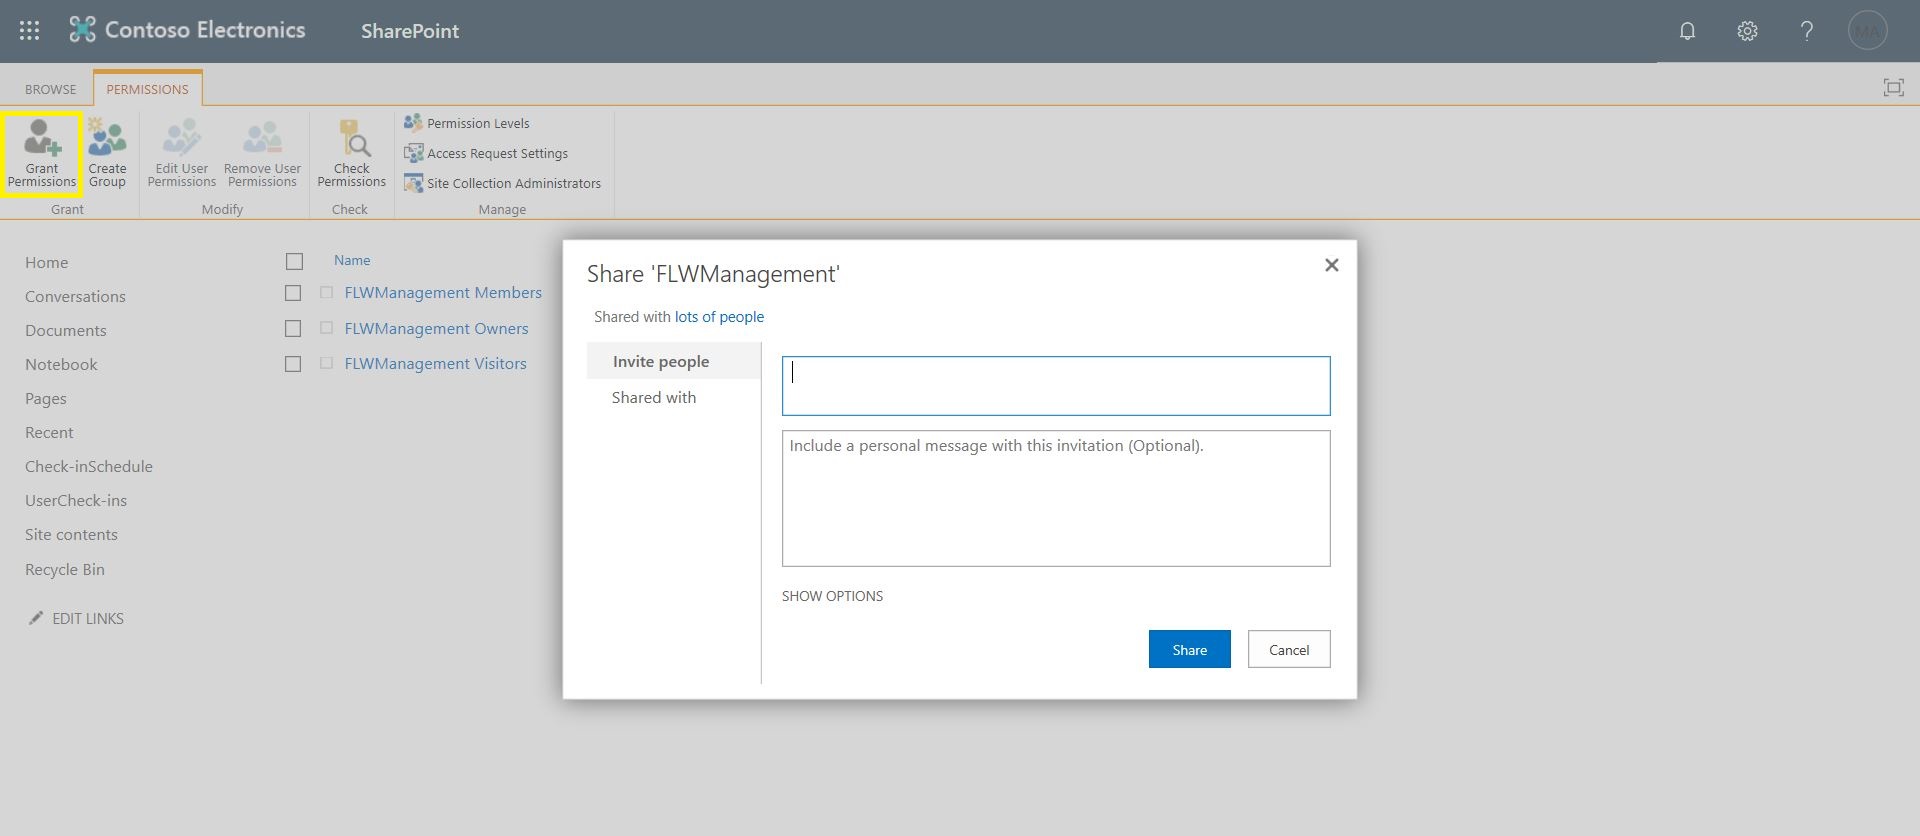
Click on "Advanced Permissions settings".
-
Click on the Grant Members option from the top menu bar and search the user name or type the email address of the user to whom you want to share the site.
Note: Once Admin shares the app and SharePoint site and User/Co-owner access it for the first time it will ask for Allow/Deny SharePoint data source permission. User/Co-owner should click on "Allow" to use the app.
Step 6: Export Teams Package
-
Go to Apps menu in the left menu bar and you will be able to see the app you have imported.
-
Click on 3 dots (Options) for your app and click on Add to Teams.

-
Click on Download App in the popup to download a zip package.
Step 7: Adding the app to teams
-
Go to Teams > Apps (in the left menu) > Upload a Custom App.
-
Select the downloaded zip package from the previous step.
-
Once uploaded the app will show up in the Built for Contoso( or your Organization name).
-
Click on the app and a popup will appear, clicking on add will add the application in your organization.

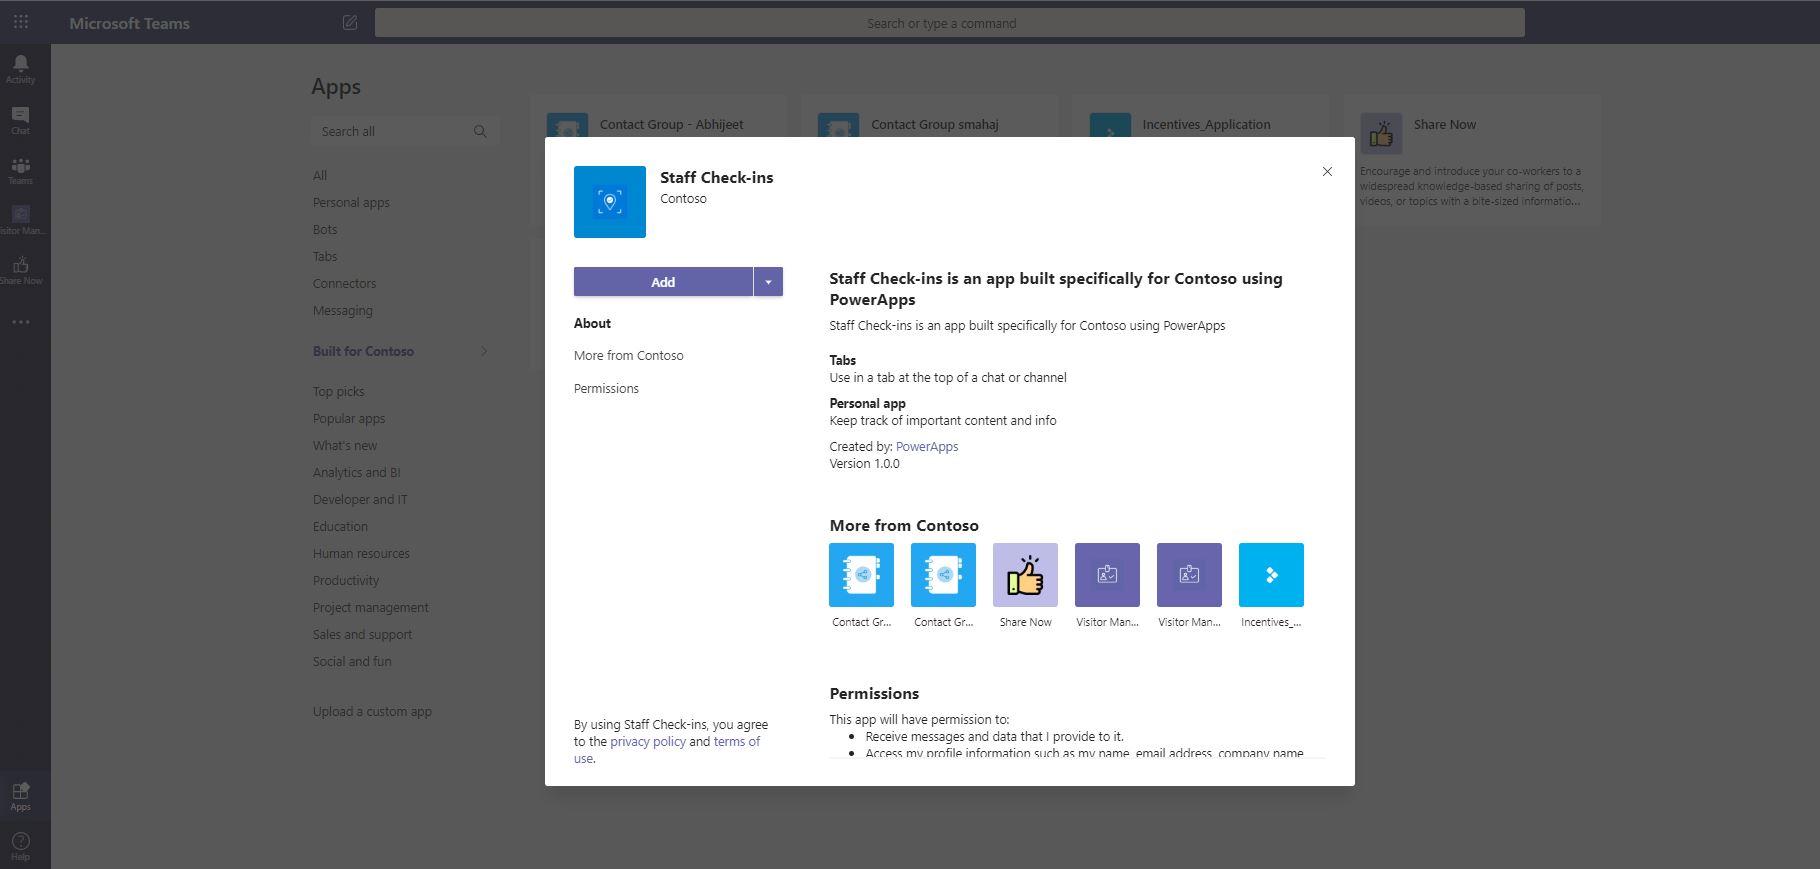
-
Repeat the same process for the second package as well.