Getting started - OfficeDev/microsoft-teams-apps-rapid-assist GitHub Wiki
The Rapid Assist applications provides simple interface for users to get quick/rapid support. This comprises of two Power Apps.
Rapid Assist - for field personnel to immediately connect & talk to experts via teams meeting for any high priority queries or escalations they come across. This end-user app can be pinned to the personal app bar in Microsoft Teams.
Rapid Assist - Experts - for corporate liaisons (SME) to configure categories & topics through settings, receive notifications to quickly get on a call to help answer queries. This app can be added as a tab in team of experts.
The key features of "Rapid Assist-Experts" app include:
- Settings- Manage categories & topics
-
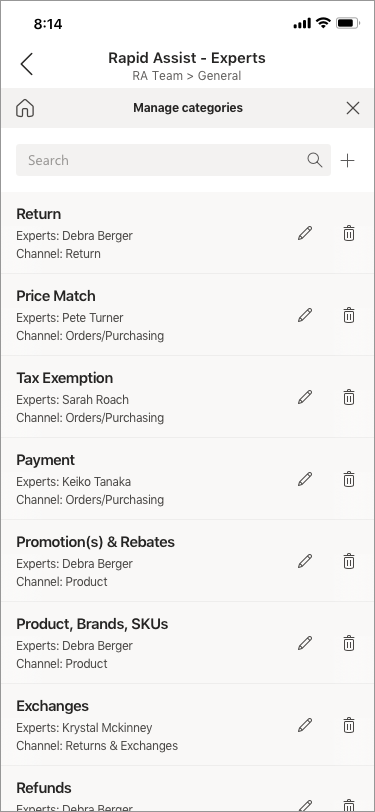
Manage Categories- It is important that experts configure categories so that the requests for support gets routed to the right channel in teams. Categories represent the different types of request which are supported.
- Navigate to Rapid Assist-Experts app.
- Click on "Settings". This brings up "Settings" screen.
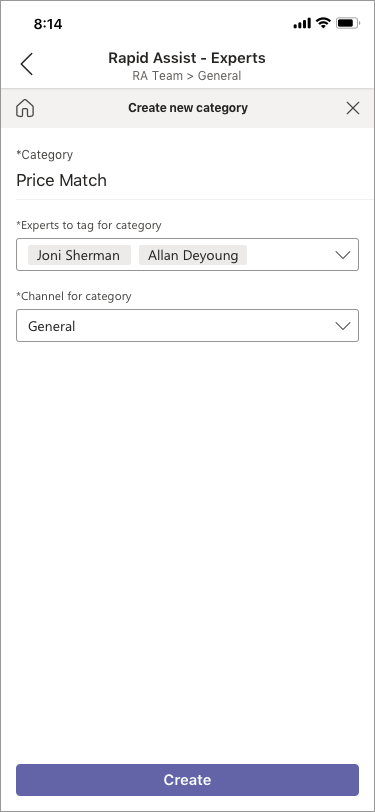
- Click on "Manage categories" and then "Add category" button to create new category.
- Enter category name
- Tag experts (used to @mention the experts when the notification is received in the channel for a support request)
- Select channel where to post the notifications. [Please note that in order to select channel, team should be configured under "Configure a team" option]
Note -
- Catgories can also be modified and deleted when required.
- End-users are required to select category in order to submit request and get connected with the expert. Please configure categories before end-users start using the app.
- Manage Topics- (Add, edit or delete topics) - Experts have the access to generate and share the resolution to a query by clicking on "Add topic" button. To edit/delete topic, click on 3 dots(...).

- Configure a team - Enables expert to select a team, from the dropdown, where all the request related notifications are sent. The experts will only be able to see the teams in the dropdown they are part of. This app supports single team of experts which can have different channels to manage escalations related to different categories. This setting is required in order to select channel while adding new category.
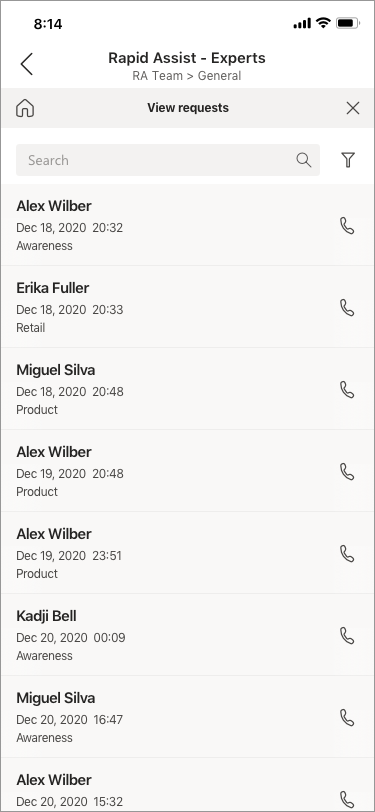
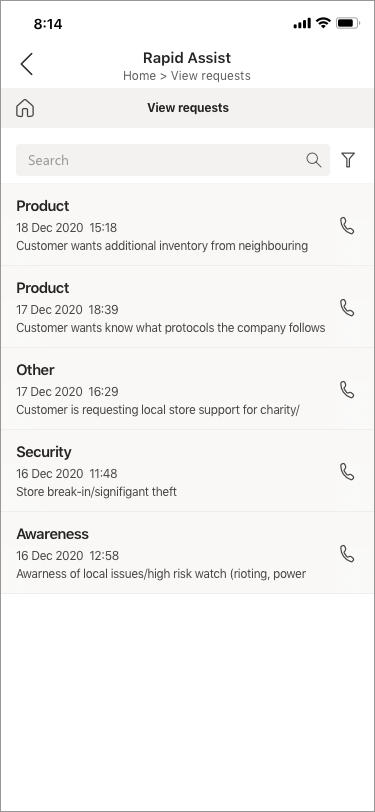
- View requests- Experts can view open requests and close them if the resolution is provided.
- The older requests are displayed on top so that they are closed on priority. Ideally every request should be closed quickly so that there no stale requests.
- Click on the request to see the details.
- Expert can follow up on request with end-user by clicking on call button.
- Use filter options to filter by category. One can also search requests either by 'requested by' or 'category'. The filter & search option comes handy when expert has to close the request by doing a filter first based on category they are supporting and then search on "requested by" user to narrow down the results further.
- Each request is represented into 3 rows - requested by, requested datetime & request category.
- Experts will get notified in the channel when a meeting request is submitted. They can get into the call through "Join meeting" button. Experts can also reply to the message in case of multiple experts working for the same category by providing an update that they are picking up the request before joining the meeting.
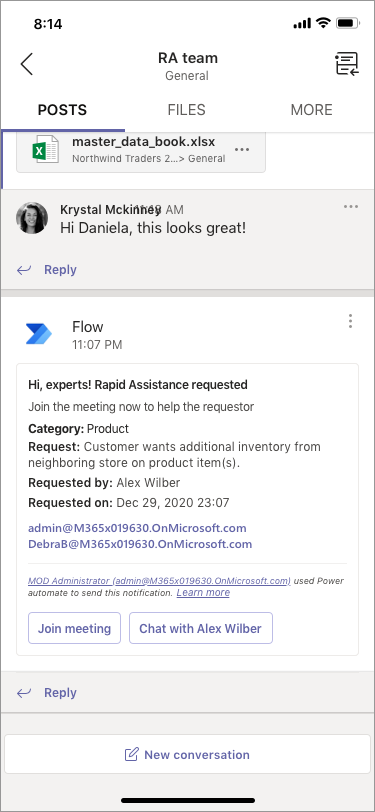
[Note] - Chat with requestor option should only be used in rare cases when all the experts are busy and need to communicate the same to requestor.
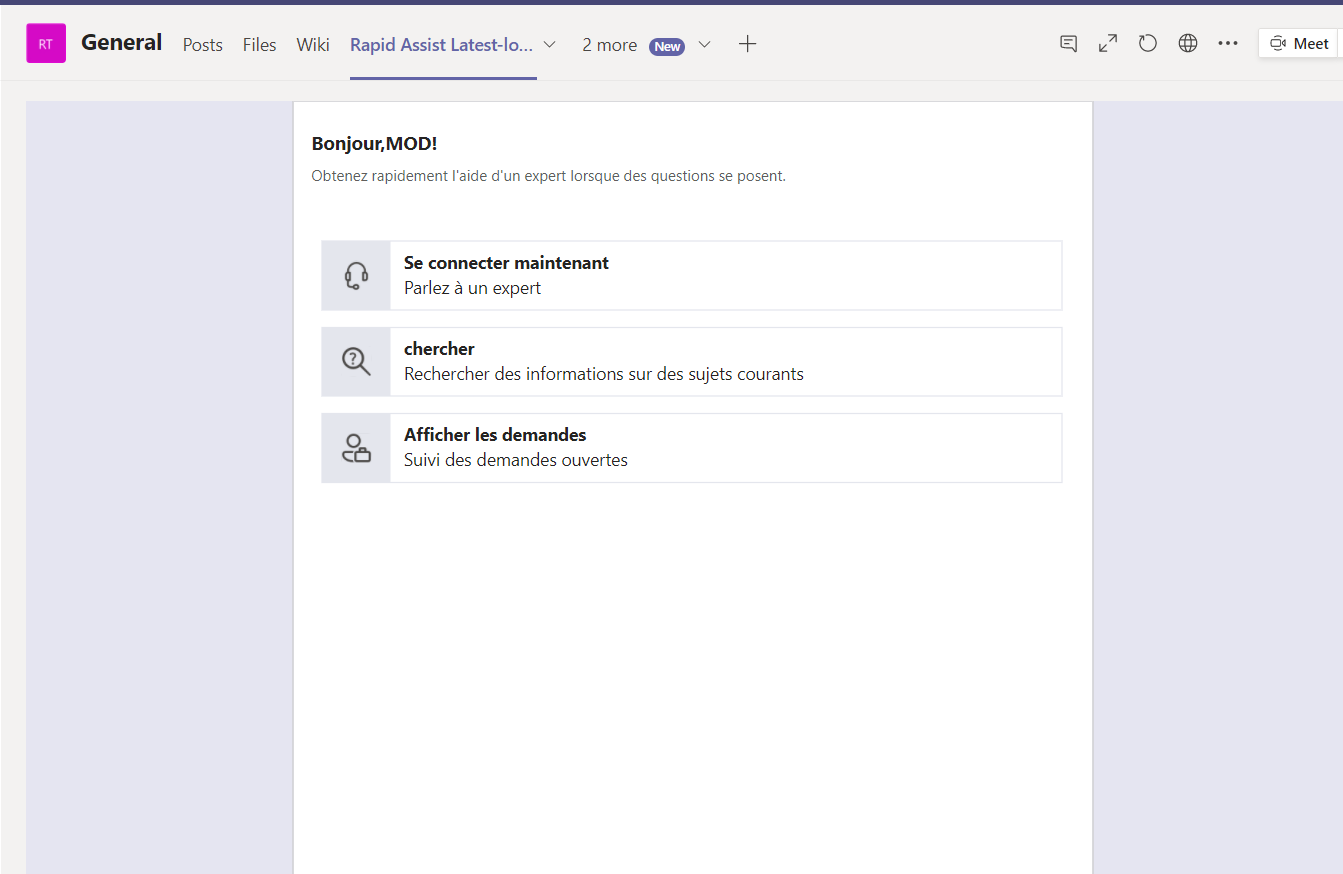
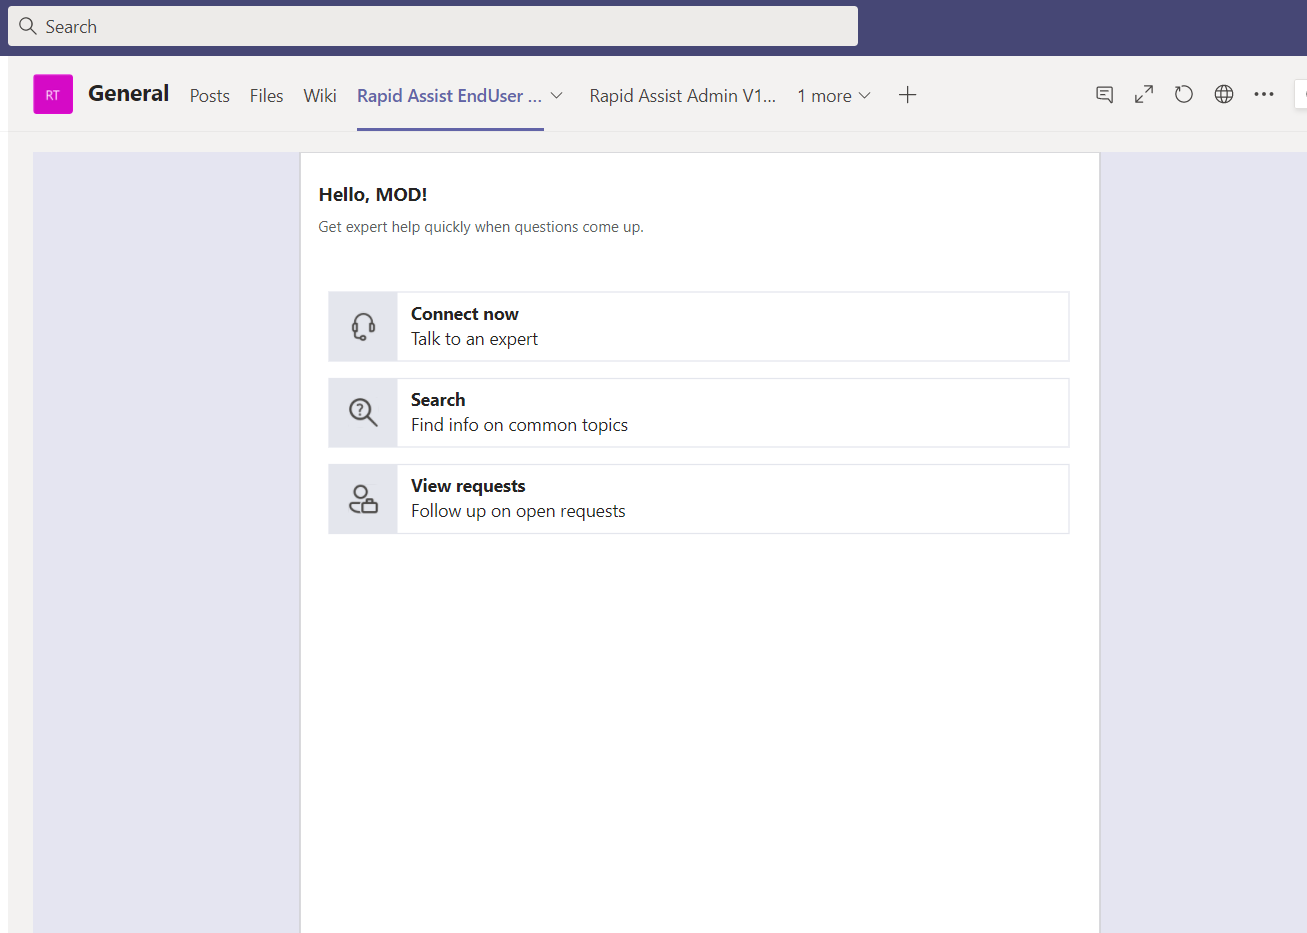
The key features of Rapid Assist app include:
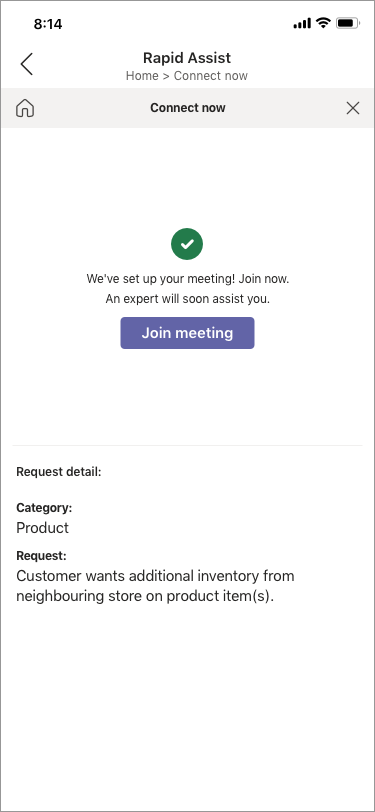
- Connect Now - For any support that the customer services representative may need while responding to customer, the 'Connect Now' feature of the app helps in calling the experts and getting back to the customer with a prompt answer. When store associates click this option within the app (pinned in Teams), it would trigger a meeting on the backend and pass basic and/or desired data over. The request gets routed to the right expert channel based on the query category.

-
Search- Using this feature customer service associates can find info on common topics. This provides quick reference guide, to be able to resolve the customer queries faster. The search results are displayed based on the search text found in either question or answer.
-
View requests- View & follow up with SME's on any open requests. User can search requests either by providing request description or category. Also, supports filter by single or multiple categories.
- Click on the request to see the details.
- Expert can follow up on request with end-user by clicking on call button.
- Each request is represented into 3 rows - Category, requested datetime & request description if any.
Steps to remove Topic feature from the app (Optional)
Please refer below steps if there is a need to remove "Search on common topics" feature from end user app and "Manage topics" from expert app.
A. Removing Topic from Expert app.
-
Navigate to Power Apps (https://make.powerapps.com/)
-
In the left menu section, click on apps to open all the apps.
-
Open Rapid Assist Expert app in edit mode.
-
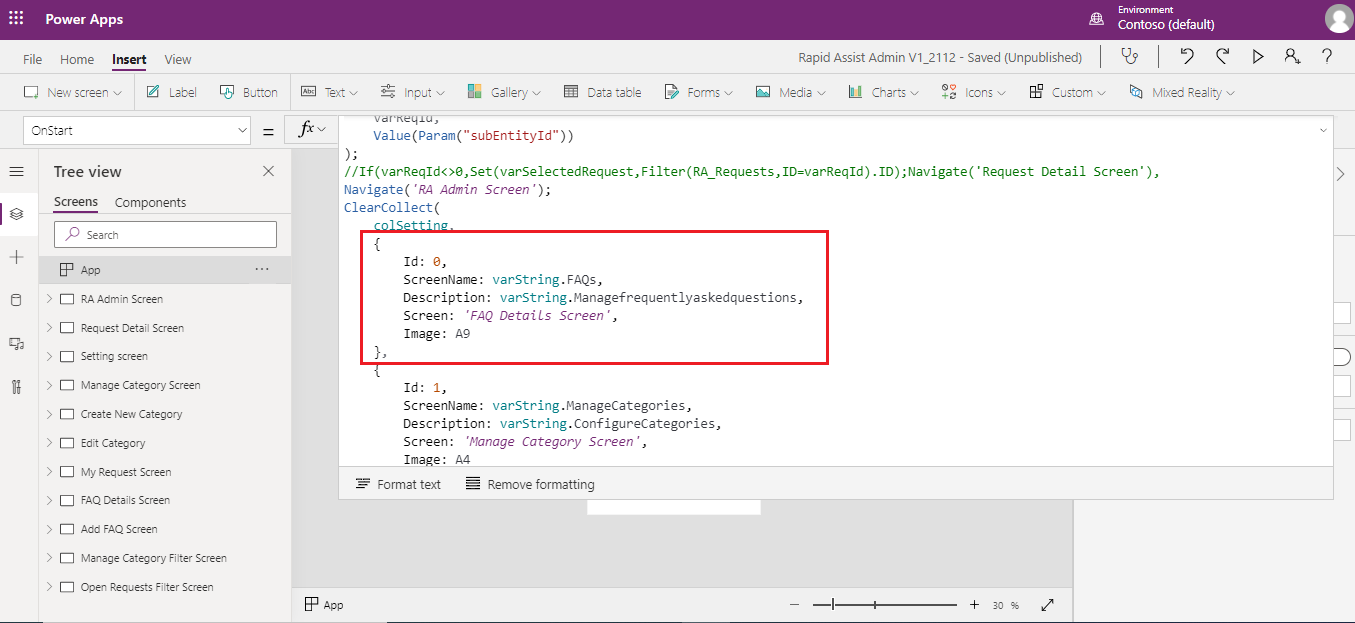
On the app Onstart method, Remove object with Id equals to 0 from colSetting collection formula.
- Save the app and publish it.
B. Removing Topic from End user app.
-
Navigate to Power Apps (https://make.powerapps.com/)
-
In the left menu section, click on apps to open all the apps.
-
Open Rapid Assist app in edit mode.
-
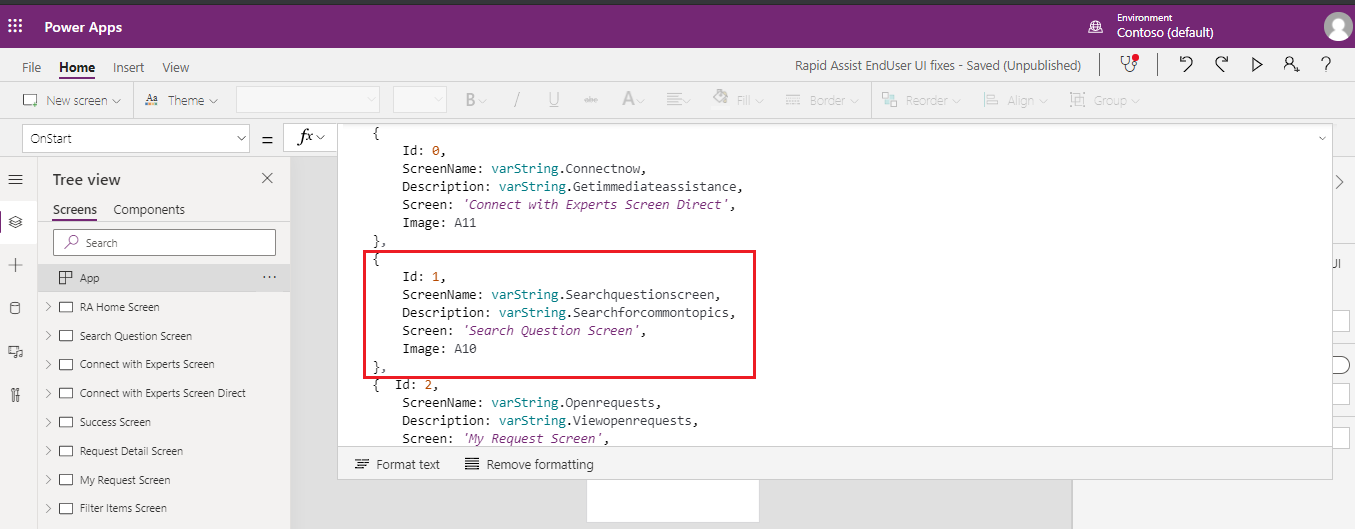
On the app Onstart method, Remove object with Id equals to 1 from colNav collection formula.
- Save the app and publish it.
Language translations
The application have been designed to be translated to a language of choice. All the language translations are managed using the colTranslations.xlsx file that can be downloaded from the GitHub repository.
Understanding translations
Here is some key information about the translation file
-
Download and extract the Rapid Assist App.zip.
-
Open the colTranslation.xlsx file.
-
The file contains a sheet which in turn constitutes of translation table.
-
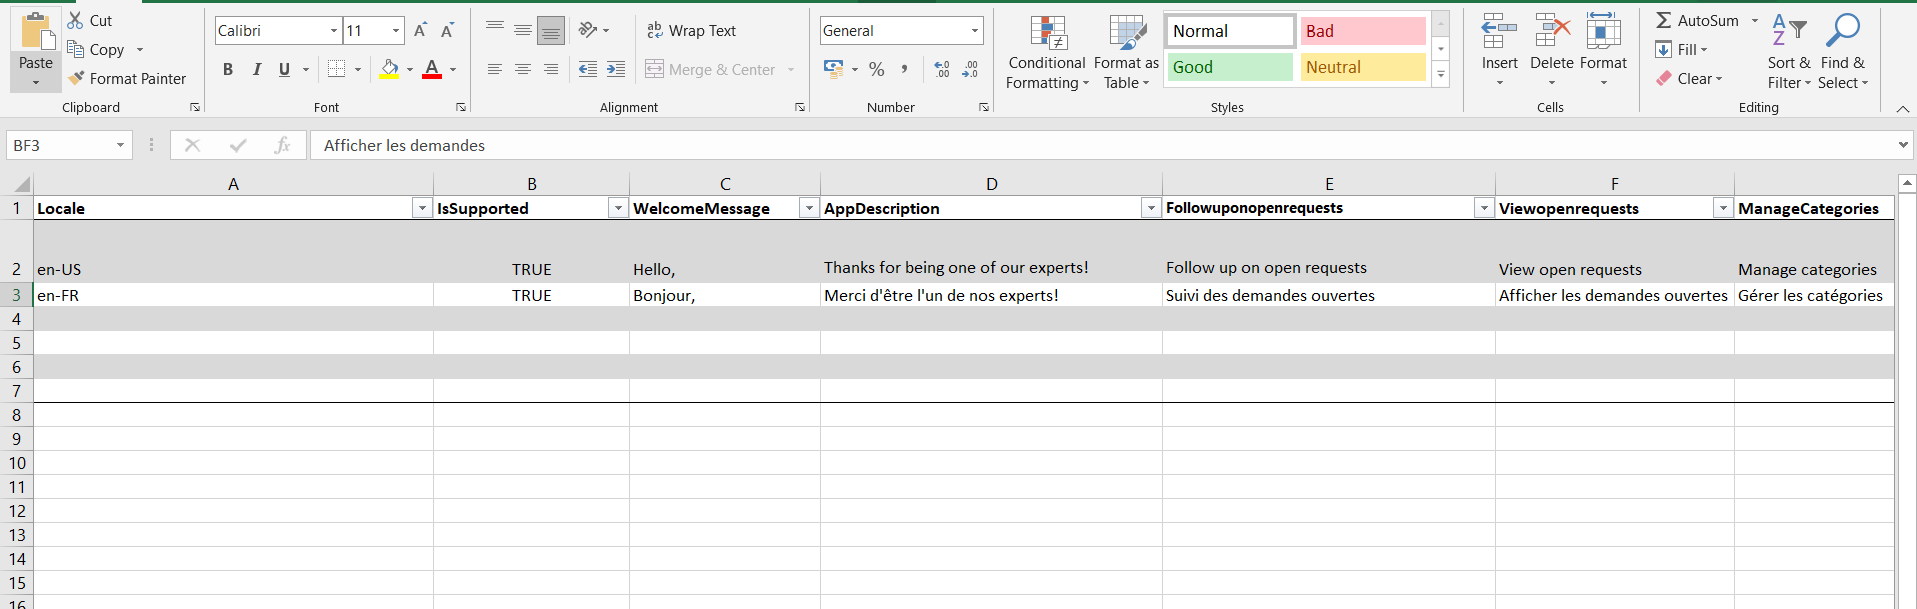
Each table is made up of 2 key columns i.e. Locale and IsSupported. PowerApps rely on these columns to decide which language to use.
-
Rest of the columns are labels that are translated.
PowerApp translation formulas
- All PowerApps manage translation on App start using the Language() function.

- The excel table data sources are then filtered using the language detected.
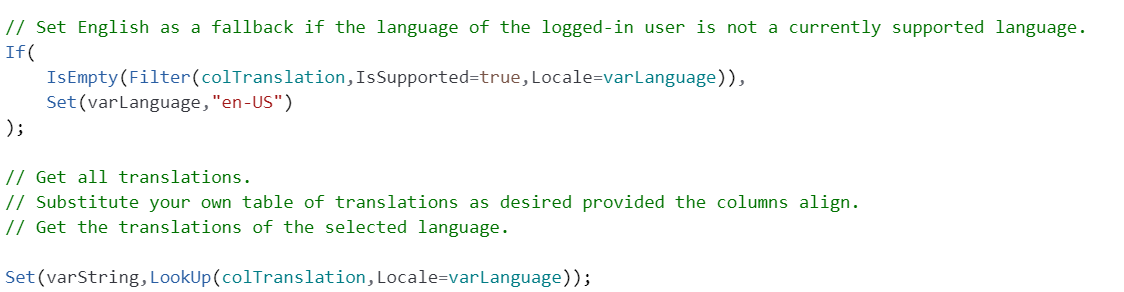
- Change the language code from en-US as per your desired language code.
Updating the translations
Some of the translations might not be accurate, as they have been generated using an automated process. In this case, you can choose to update them. To update:
-
Download and extract the Rapid Assist App.zip.
-
Open the Rapid Assist.xlsx file.
-
Open the PowerApp (Rapid Assist app) where the translation for the label needs to be updated.
-
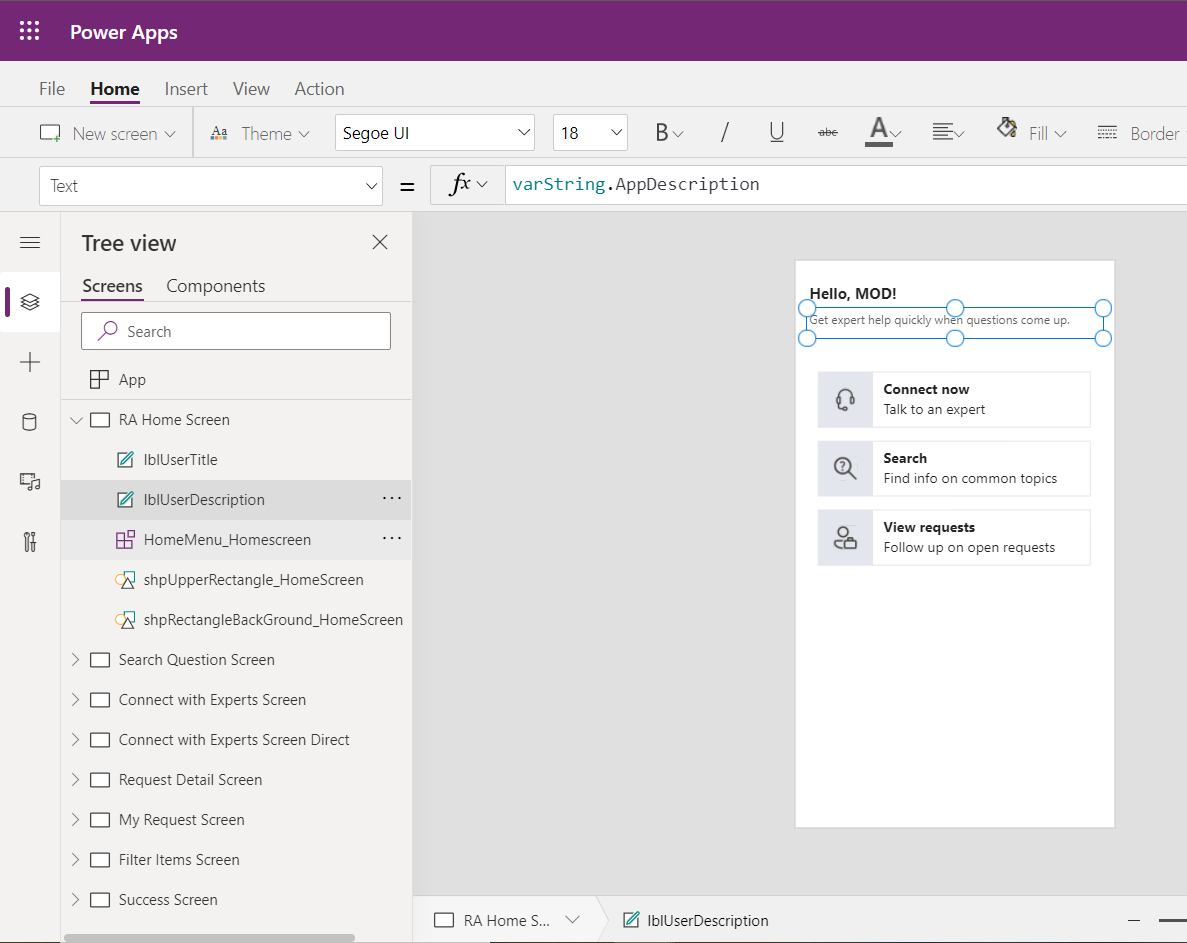
Select the component label for which needs to be updated.
-
In the image above lblUserDescription been selected.
-
The text property states column name to be updated within the excel file. In this case AppDescription.
-
Search for AppDescription within the colTranslation table in the excel file.
-
Update the column value for your locale row.
-
Save the file.
-
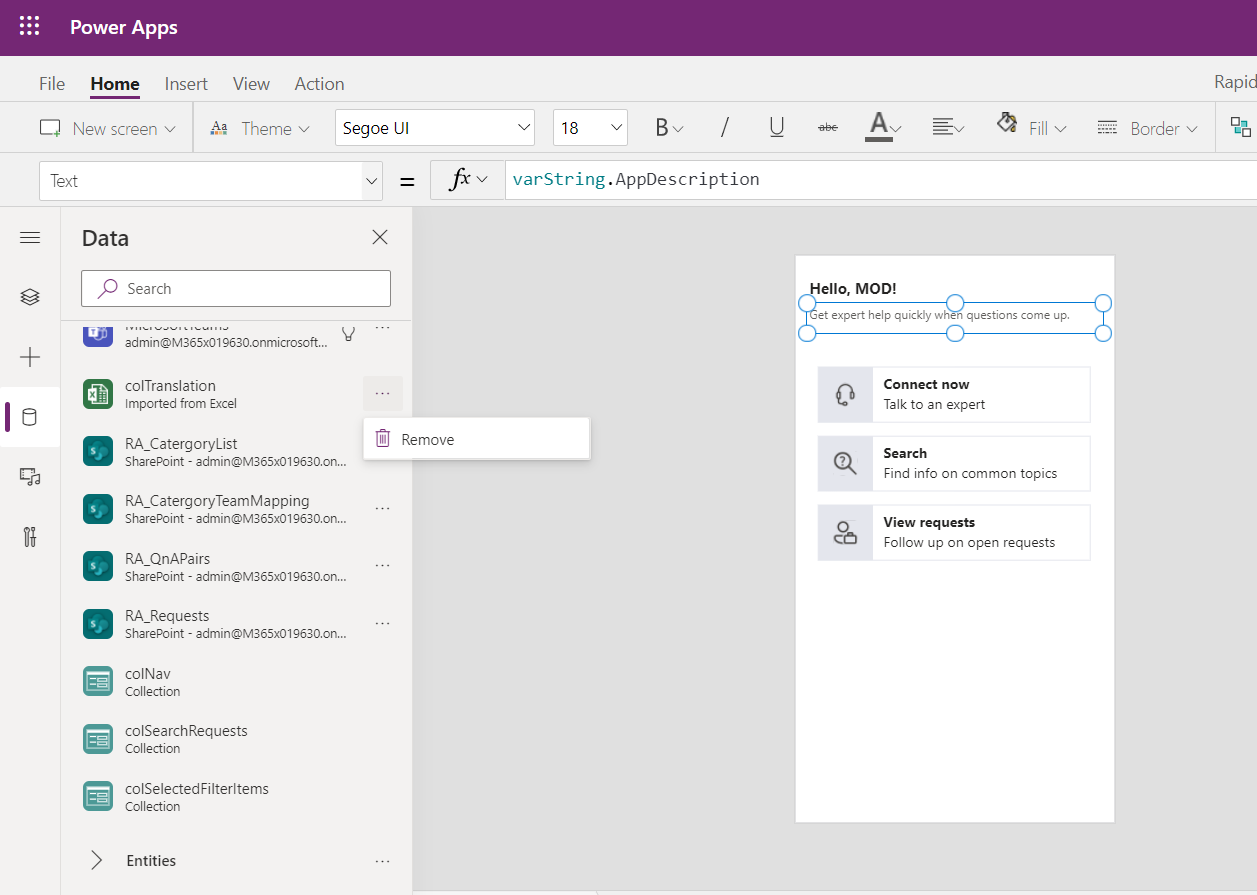
Switch to the data sources section of the Rapid Assist App.
-
Remove colTranslation excel data source.
-
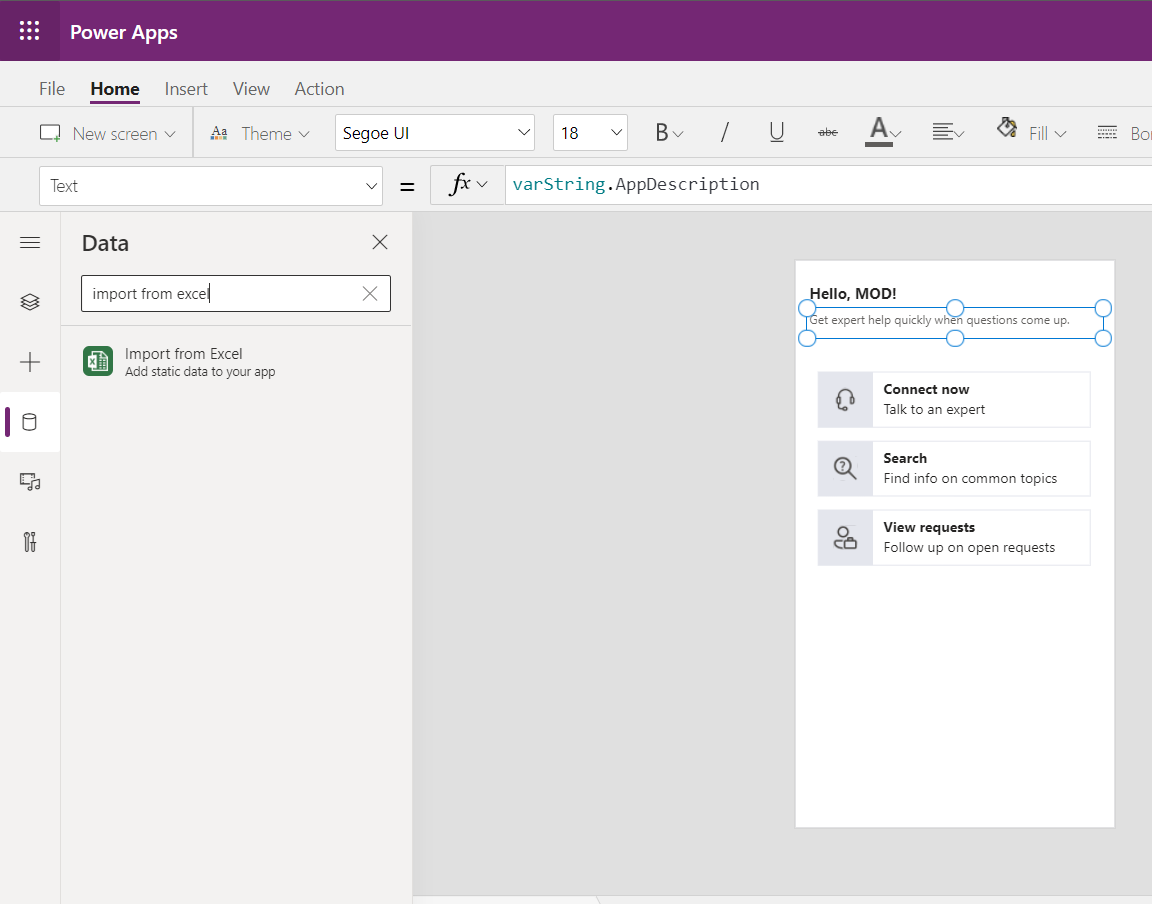
In the data source section search for excel and select Import from Excel.
-
Browse and select the excel file you modified.
-
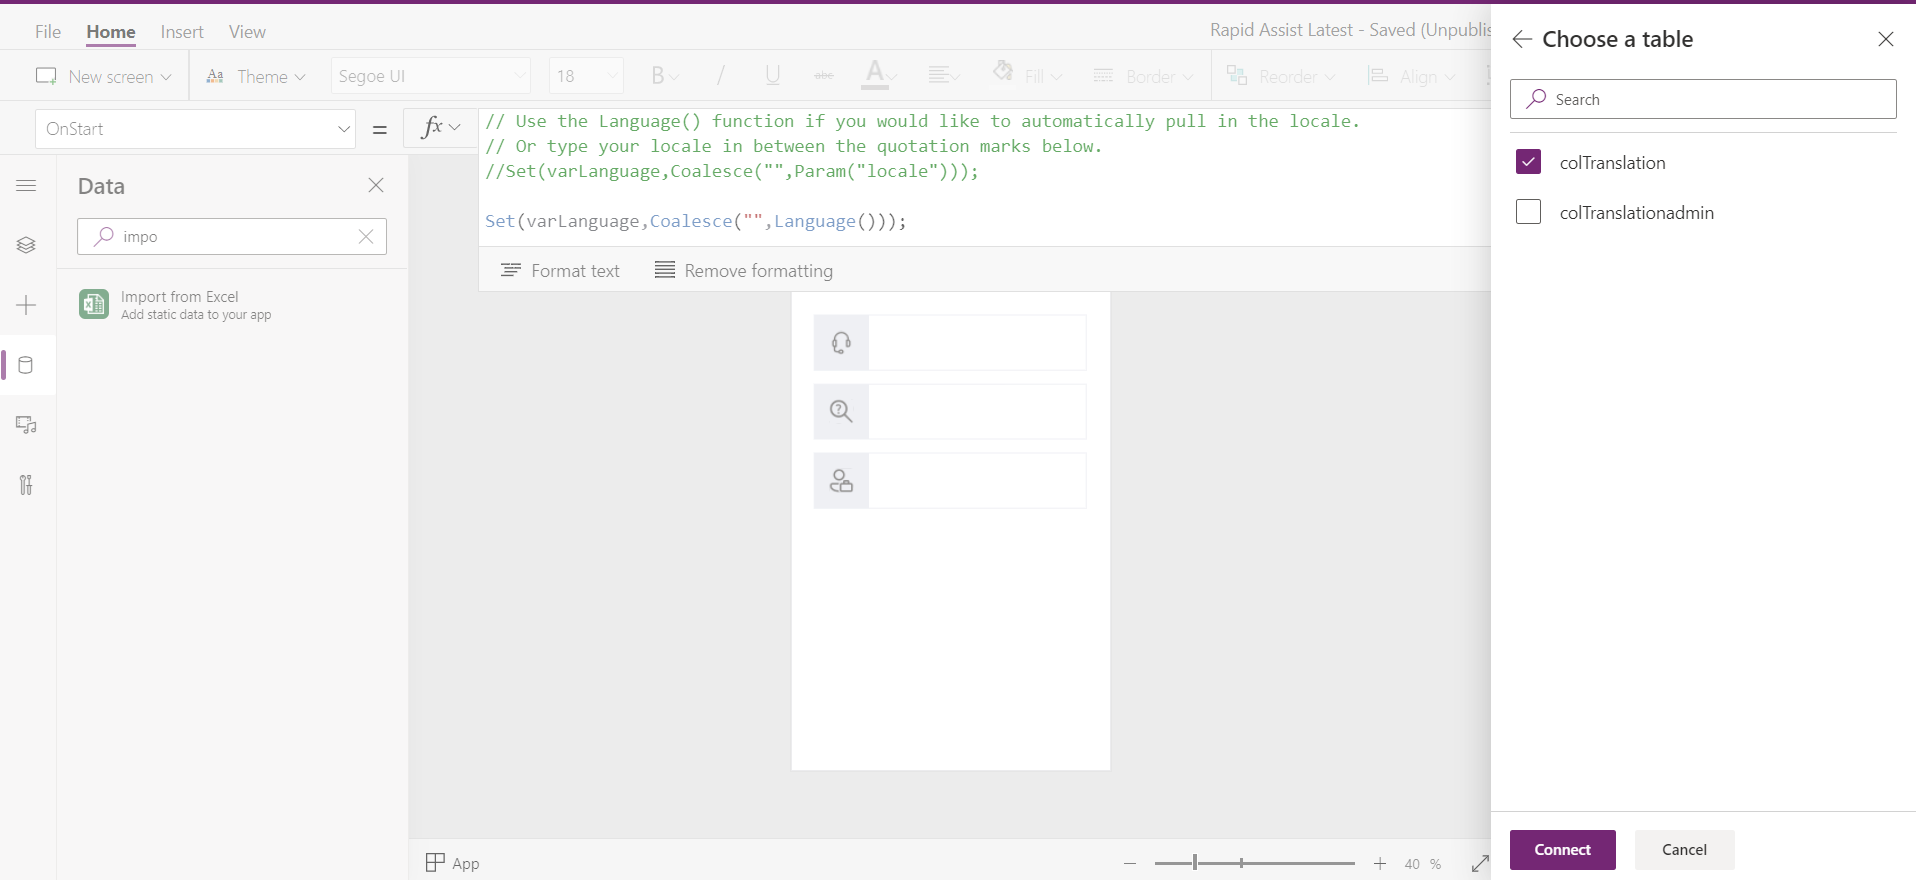
Once selected, you will be asked to select the table to import the data from.
-
Select colTranslation
-
Press Connect.
-
New Data source appears.
-
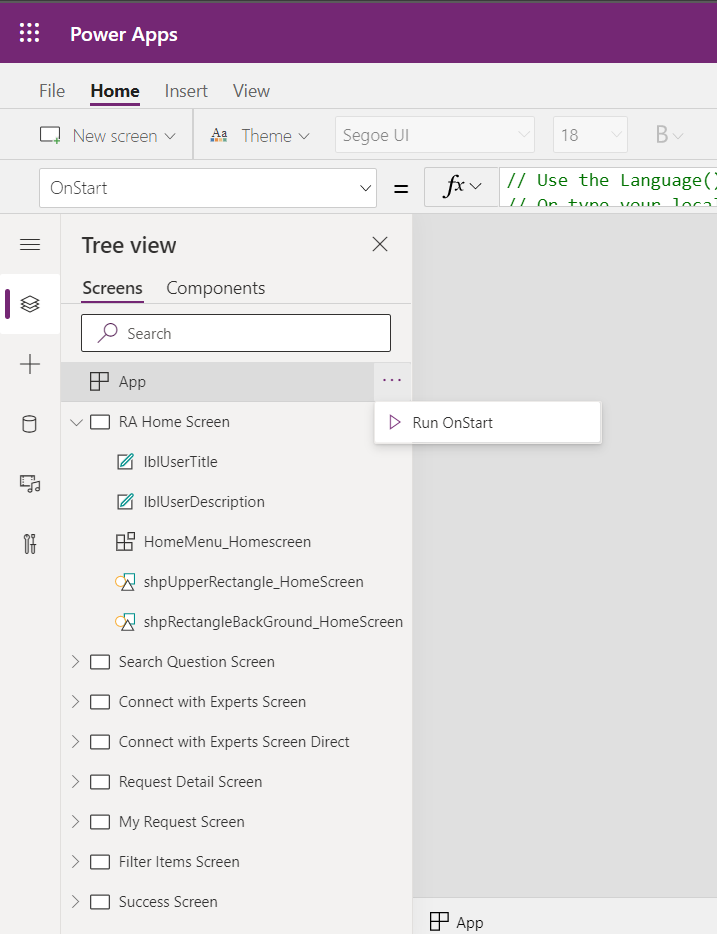
Switch to Tree View section.
-
Click Run on Start to run formulas on App Start and load the labels.
- Save and Publish
Note
-
Currently excel data source can read first 100 columns from the excel table.
-
If your translation table exceeds 100 columns, your Power App might not be able to read the column value.
Testing Translations
Once the translations have been configured, you can validate this by configuring browser language or changing app language within Microsoft Teams client application.
Changing Browser Language
-
Open Microsoft teams within Microsoft Edge.
-
Navigate to Rapid Assist App.
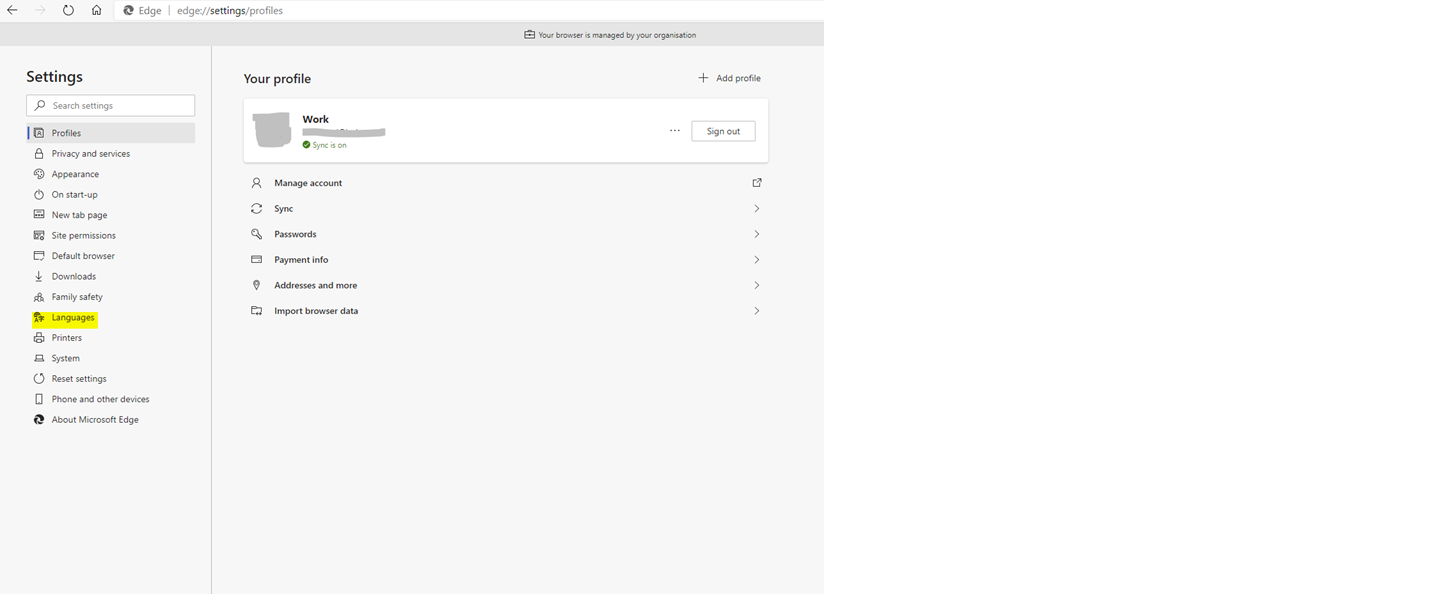
- Click on ellipsis(…) on the top right corner of the browser and click on Settings. elipi
- Click on Languages on the left-hand side menu.
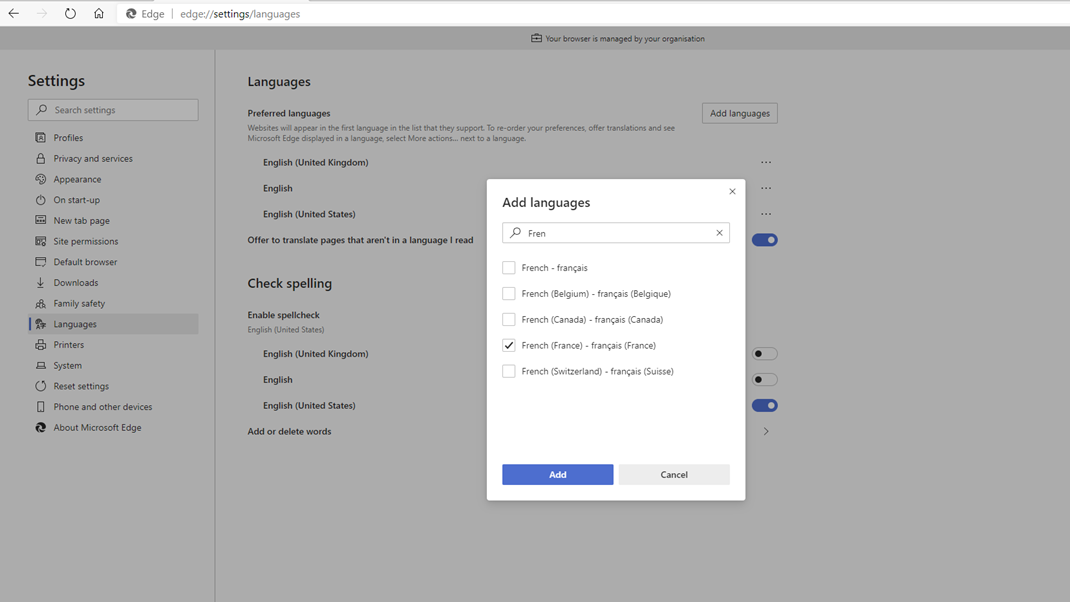
- Click Add Languages and Select Language of your choice and Click Add.
-
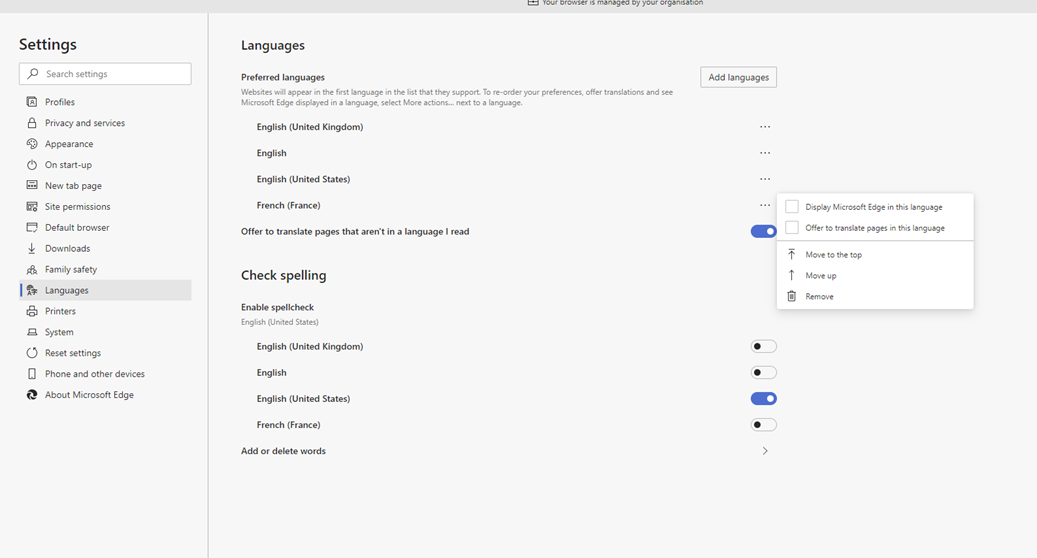
Once language has been added, click ellipsis(…) next to the Language.
-
Select Move on the top.
-
Once you see the language on top, click ellipsis(…) next to the Language and select the option to make this the default language in the browser
-
Restart the browser. It should now be translated to the selected language.
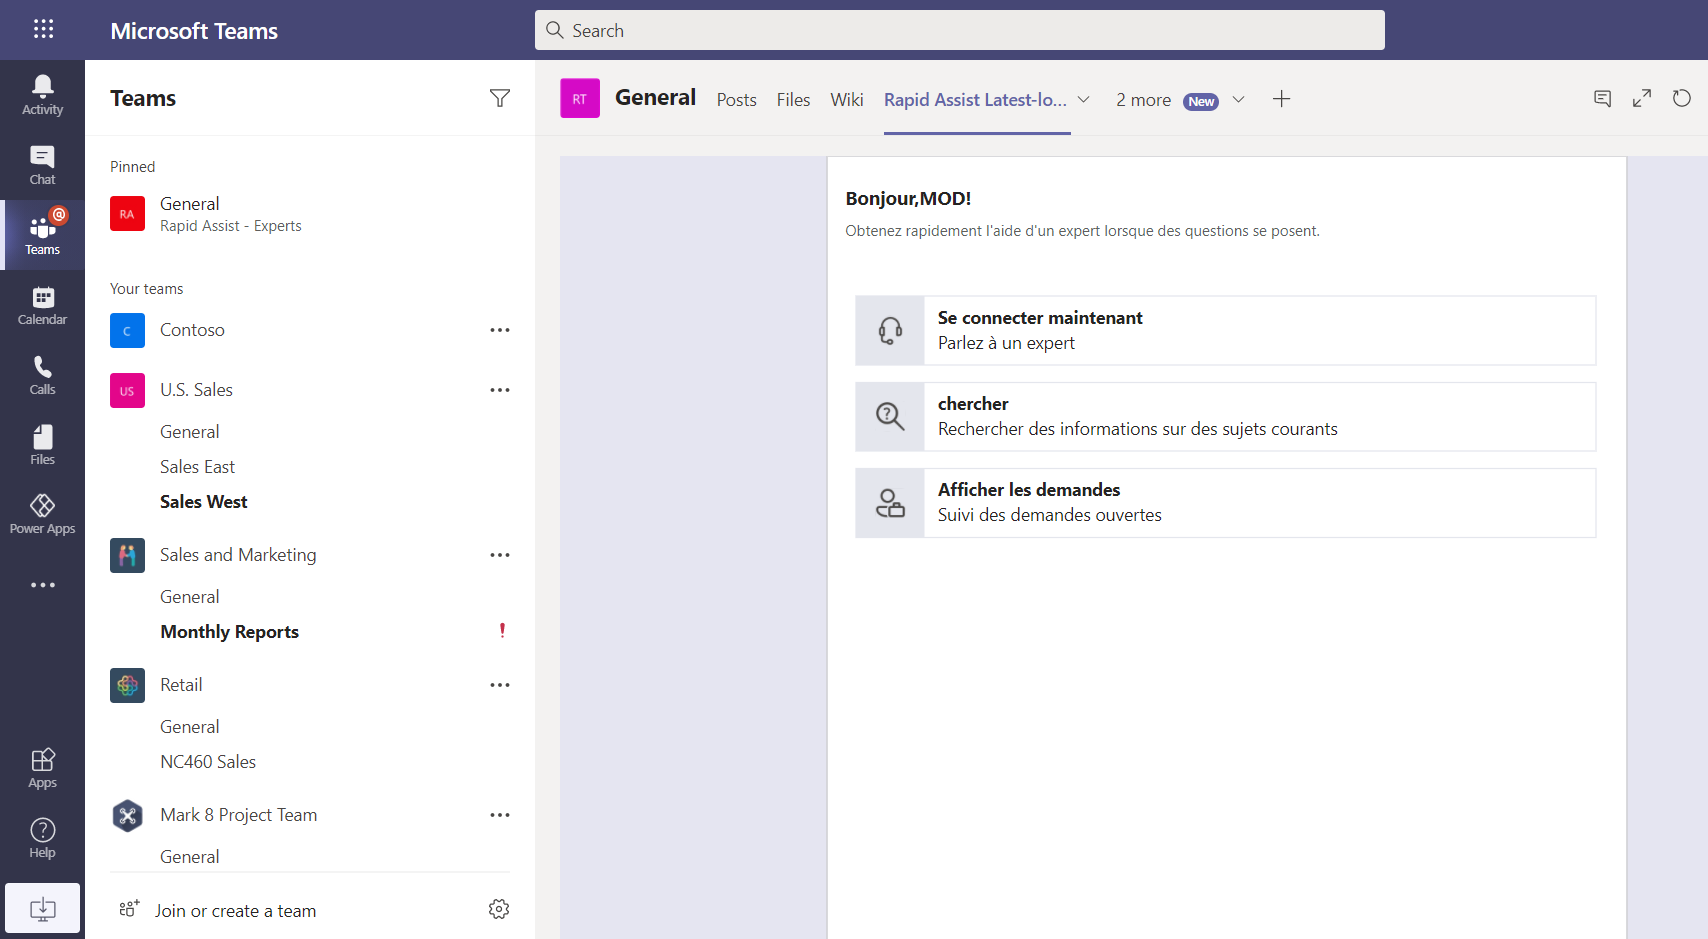
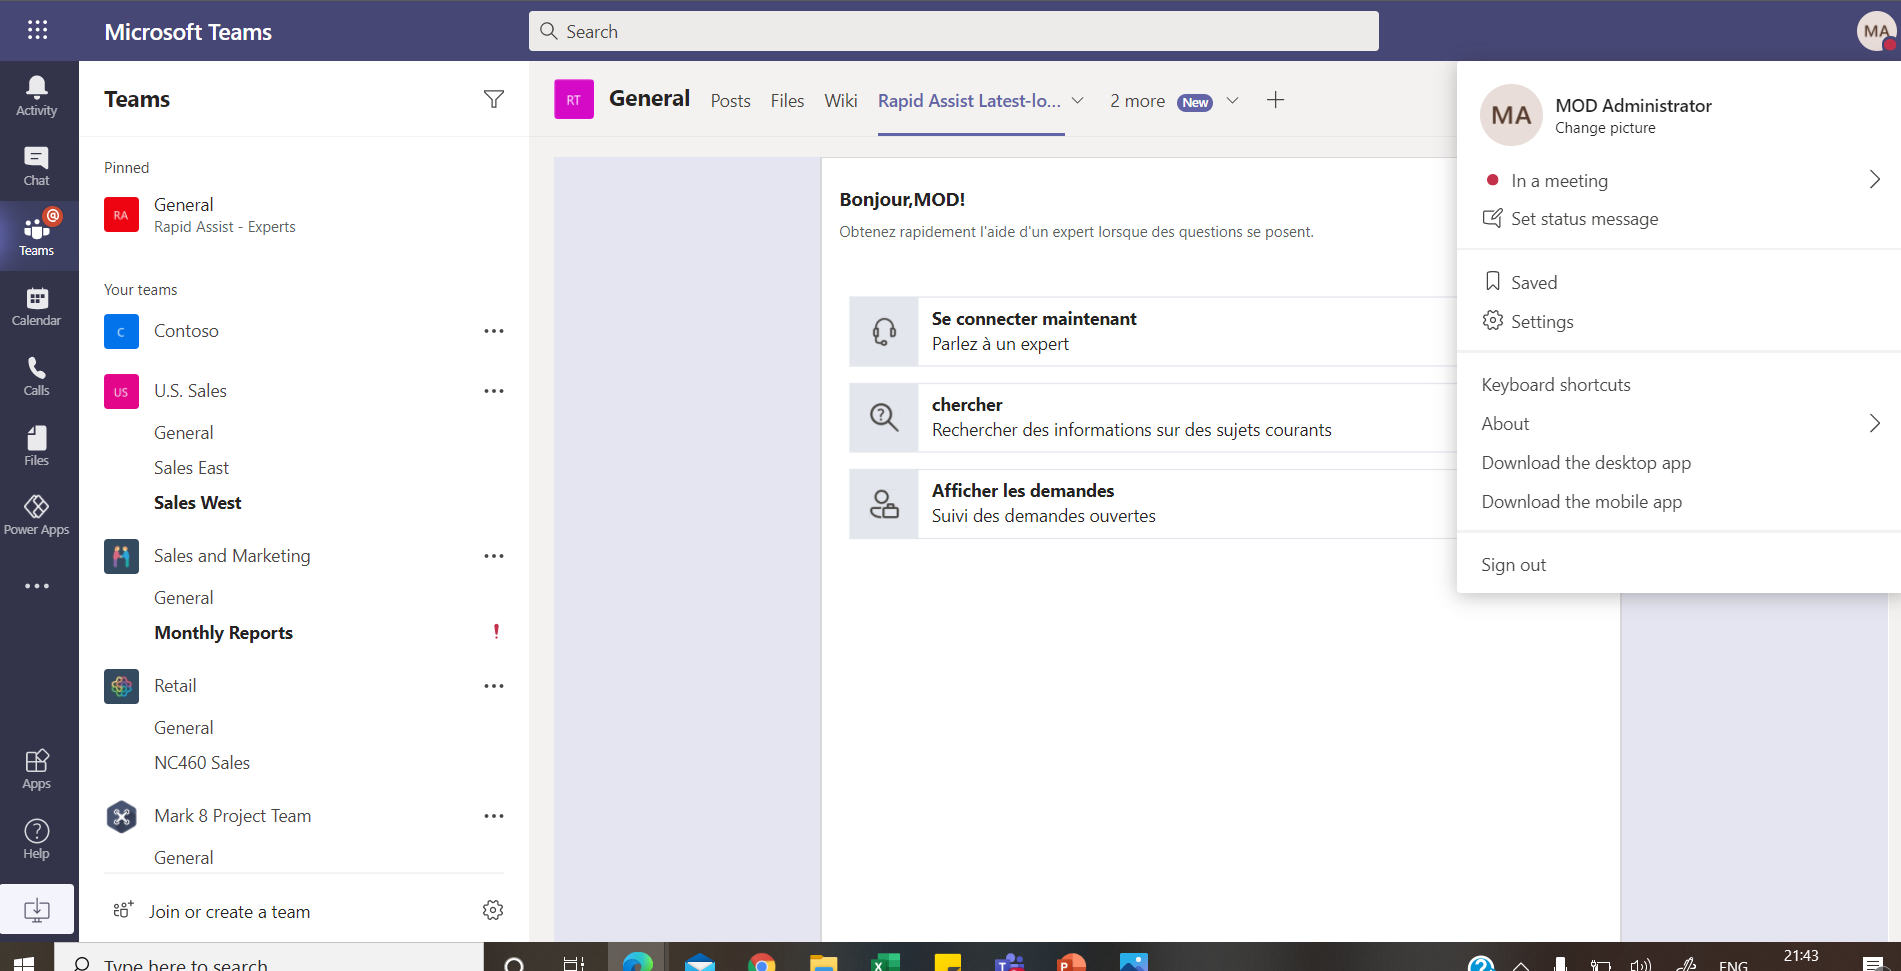
Change Microsoft teams App language
To test app translations within Microsoft Teams client app:
- Click on your photo on the top right of the Teams application and click settings.
-
Under General Settings, change the App language to language of your choice.
-
Click Save and Restart.

- The App will load in the language selected.