Deployment Guide - OfficeDev/microsoft-teams-apps-eprescription GitHub Wiki
Prerequisites
- Microsoft 365 license (minimum E3,E5)
- Premium Connectors (Populate A Microsoft Word Template, Convert Word Document to PDF)
- PowerApps license
- PowerAutomate license
- Microsoft Teams instance
- A valid and active SharePoint online license
- Required permissions to create SharePoint Lists and store data
- Bookings app is enabled for your Microsoft Teams instance
- A Copy of e-Prescription App (Github Link)
- Valid email account (Service Account)
Step 1. Enable the Bookings app for your Microsoft Teams instance
- Set up a booking calendar for a business
-
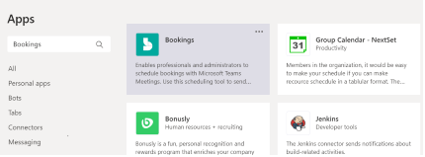
Go to the apps store button on the left-hand side of the Teams app
-
Search for Bookings, and add it
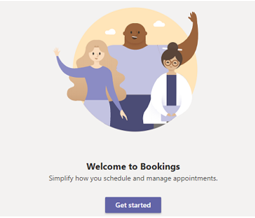
-
would be prompted to provide credentials when you select the CTA, Get started
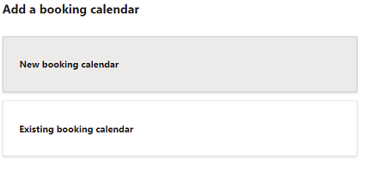
-
Choose either New booking calendar or Existing booking calendar
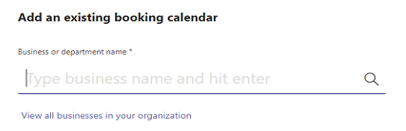
a. If you choose Existing business, search for your organization or department name, hit Enter and choose the exact match and note down the hospital mail id.
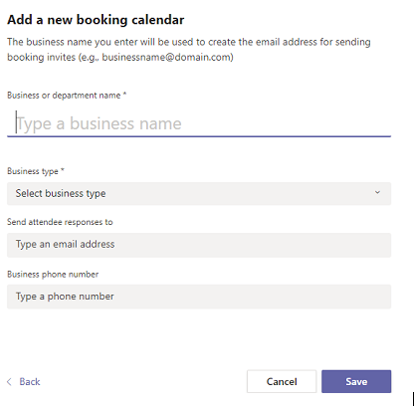
b. If you choose New business, fill out the form. Keep in mind that the information that you enter will appear in appointment emails that get sent to the patients
-
After filling the form, click on Save
-
Follow the prompts for the initial setup. Once done, you’ll land on the Schedule tab and a new mail id will be created. Note down that hospital mail id.
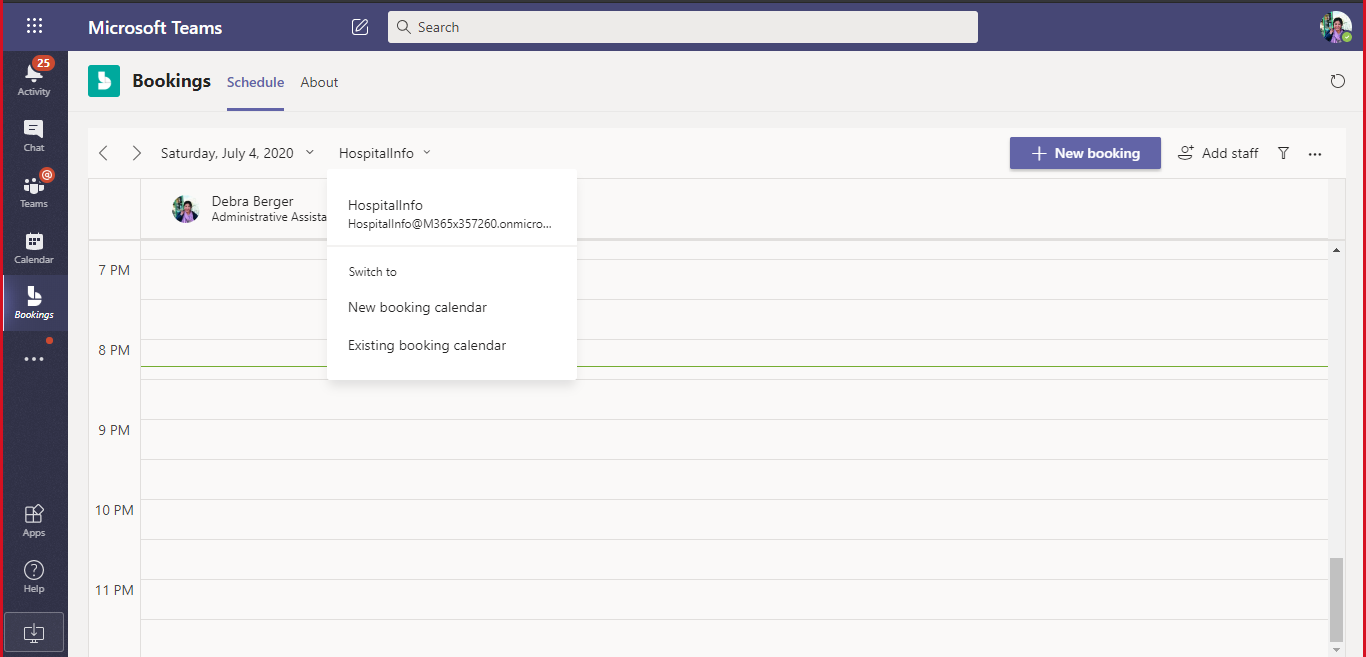
To switch between the booking calendars, or to set up a new one. Expand the dropdown inverted caret next to your business name
Step 2: Schedule a booking in the Teams Bookings app
-
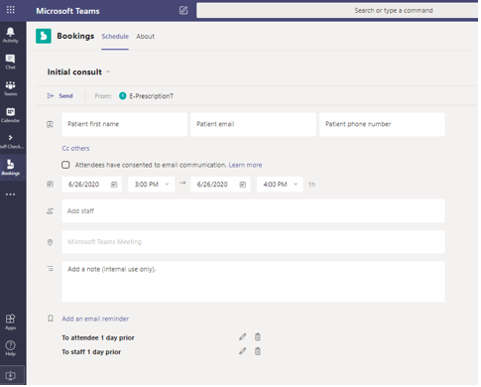
Go to your booking calendar and select New Booking at the top of the screen. You can also browse staff member schedules and click on any available name
-
Fill out the relevant information
-
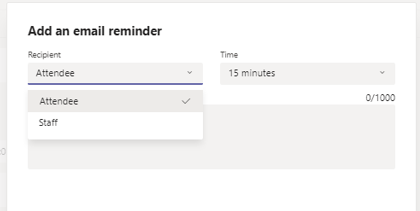
Add optional reminders. Different messages can be sent to staff and attendees
-
Click on Send in the upper left-hand side of the screen, and you’re all set!
-
The Exchange mailbox must be in Exchange Online. On-premises Exchange Server mailboxes are not supported.
-
Microsoft Bookings must be turned on for the organization.
-
To enable this setting, go to Microsoft 365 admin center > Settings > Settings, then select Bookings.
Step 3. Create an E-Prescriptions admin/security group in Microsoft Teams
Please ignore steps 1-7 below if you already have a team of admins and continue from step 8. Otherwise, please follow the steps below:
-
Open the Teams application on your desktop or on the web, navigate to https://teams.microsoft.com
-
Click on the Teams tab in the left-hand side menu
-
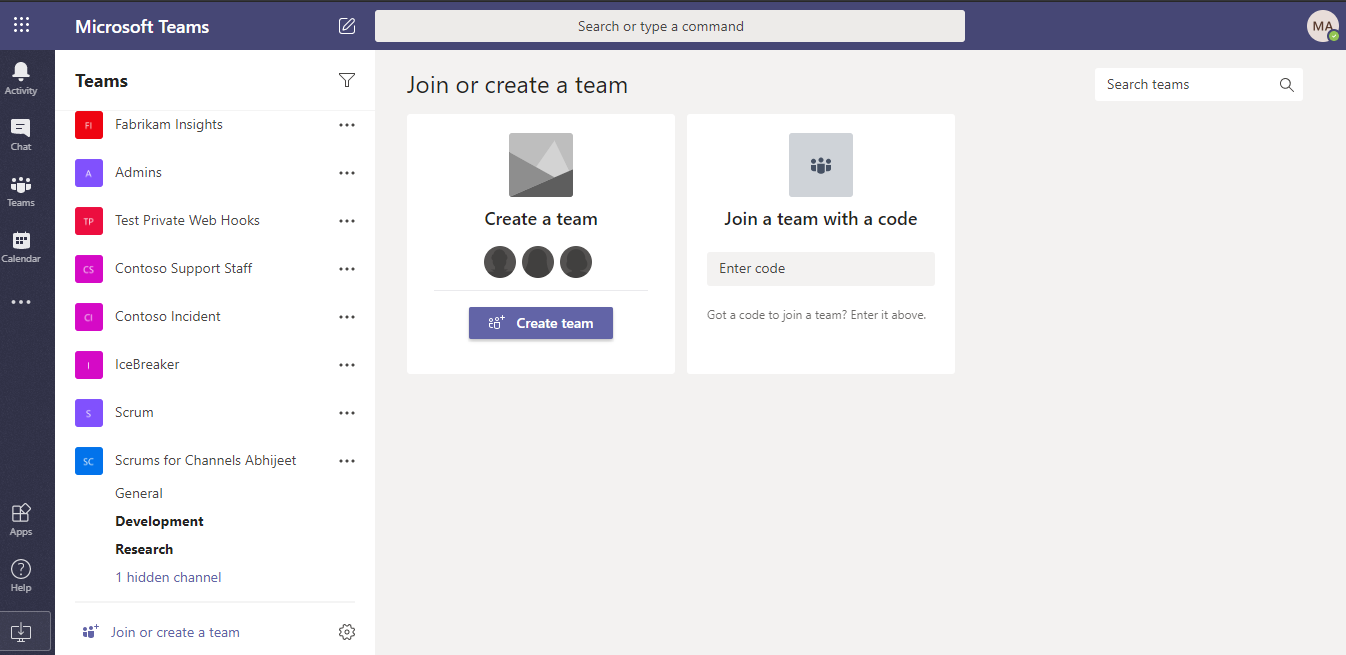
Click on Join or Create Team, then select Create team
-
Click on the option that reads Build your team from scratch, then select Private – doing so will create a private team in your Microsoft Teams instance
-
Provide your Team name and description as appropriate to your business, then click Next
-
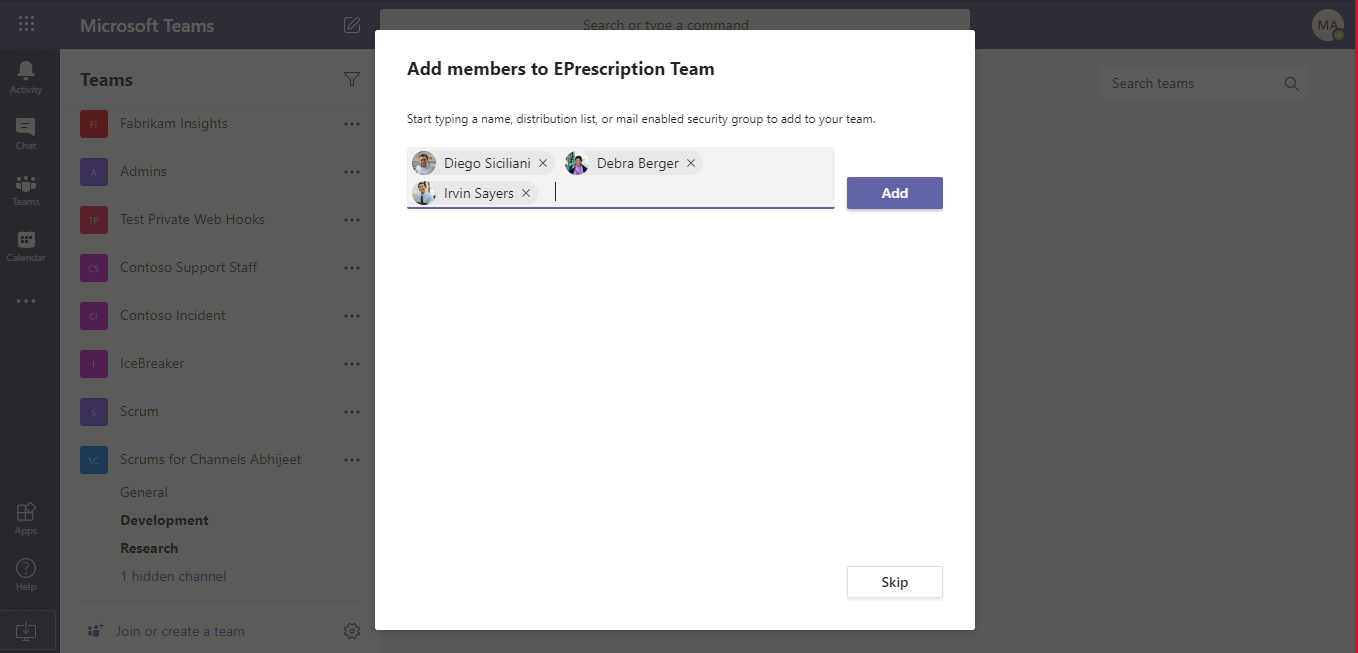
You will be presented with a screen to add members to the newly created team in the previous step. Add the required members
-
You should be taken to the General channel of the newly created team – if this happens, it is a confirmation that you successfully created a new team
-
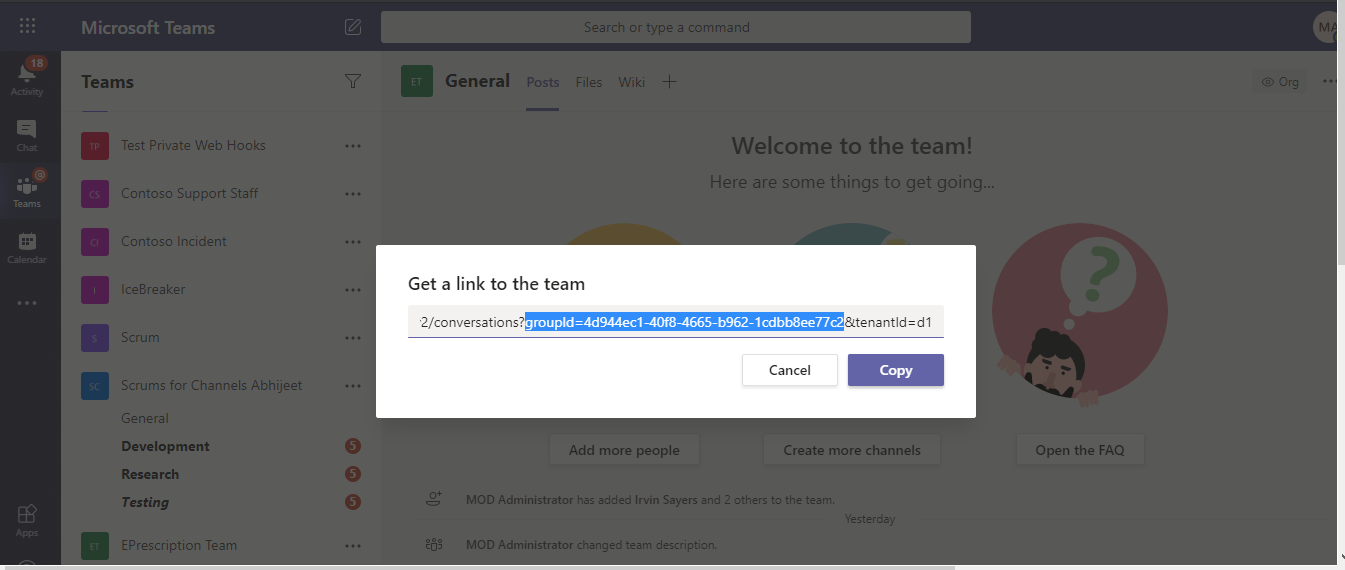
Next to the team name, click on the ellipses (“…”) and select “Get link to team”
-
Click on “Copy” to copy the link to clipboard
-
Get the groupID query string value as shown below:
-
Note 1- Note down the groupId as it will be used in further steps
Step 4: Create the SharePoint list
-
Create a Team site in SharePoint
For Creating Team Site In SharePoint :a. Login to SharePoint . Click on +Create Site Button at the top left corner of the page.
b. Select Team Site in Popup Window.
c. Enter Site Name(EPrescription) then select Next.
d. Now you will be navigated to the SharePoint site.
Note 2(E-Prescription Team Site URL )- Please note down the site URL from the address bar.Follow the above step to create another Team site with SiteName as (Archival EPresciption).
Note 3(Archival E-Prescription Team Site URL) – Note down site URL of Archival E-Prescription.
-
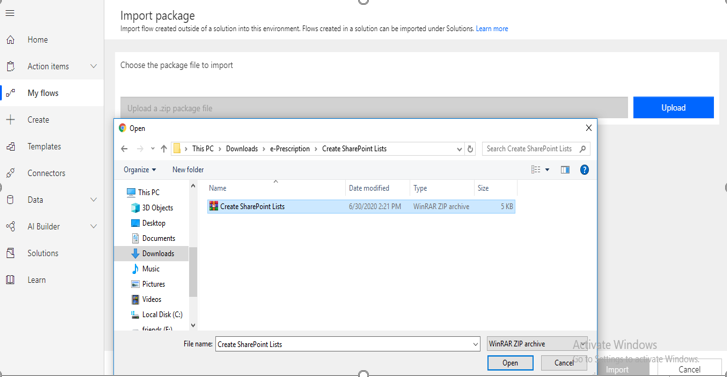
Sign in to Power Automate Click Here. Select My Flows in the left panel, click on Import, Upload Create SharePoint Lists.zip from the package provided. Once imported, click on “Edit”.
-
The import package page will open. In the related resources column, click on select during import.
a. If connections are already available click on any of them and Save it and select Import.
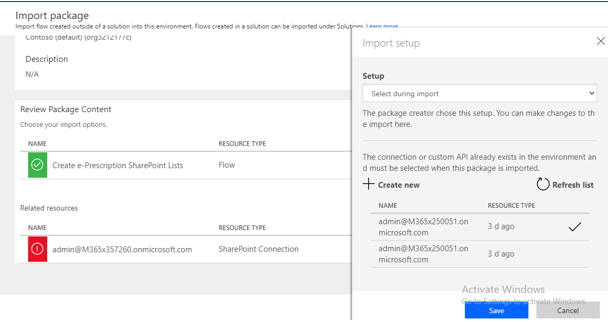
b. If connections are not available, click on +Create new button, A new window will open. Now click on Add connection at the top.
A list of connections will be opened. Now click on add icon in the SharePoint row. Then click on create and sign in.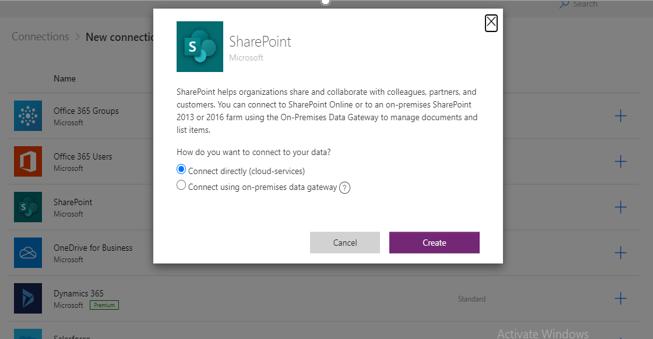
c. Now connection will be added and you can Navigate to previous flow tab and follow step 4.3.a
-
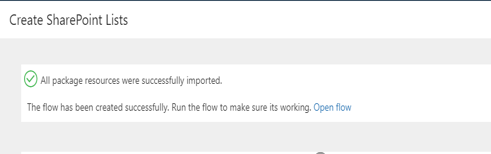
Once the flow is successfully imported. Click on Open flow.
-
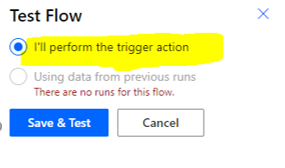
Click on Test Icon in the right top corner. And then select I’ll perform the trigger action. Click on Save&Test. You will then get a Popup to enter the TeamSharePoint URL, Enter the E-Prescription Team Site Url) (Note 2 ). Then click on Run Flow, Now click on done.
-
Once the flow is successful, You will get the below screen.
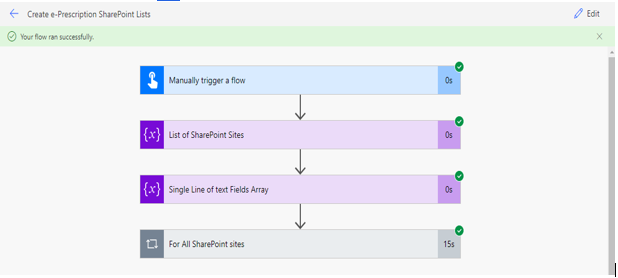
Click on Edit option, and follow point 5 with Archival E-Prescription Site URL (Note 3)
-
The below 3 lists will be created in E-Prescription and Archival E-Prescription Site:
a. Doctors
b. Patients
c. HospitalDetails
-
Navigate to E-Prescription Site using (Note 2). Click on the Site Contents on the left-hand side.

-
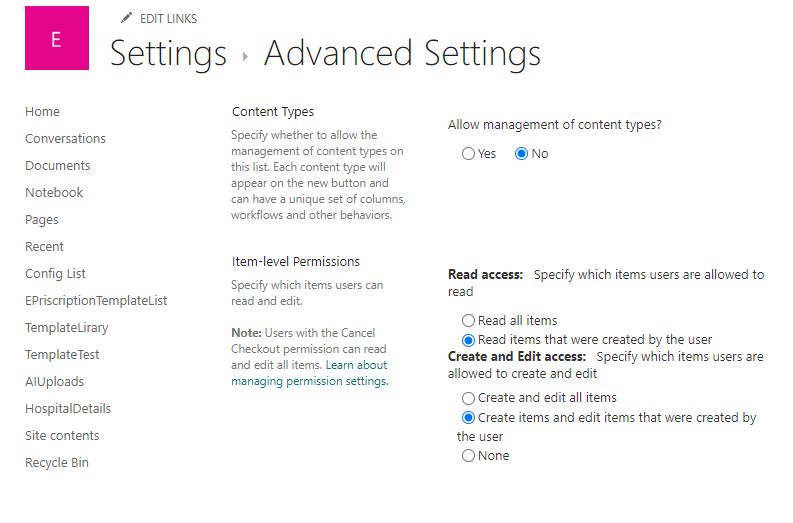
Navigate to the Patients list
a. Click on the settings icon at the top right-hand corner
b. Go to List settings
c. Click on “Advanced Settings”
d. Give below permissions at the Item-level
-
Navigate to the “Documents” folder. Upload the 'Doctor Prescription' file from the package. Also, create a new folder to save all the prescriptions(Note 4– Copy the path to the folder)
-
If age and gender needs to be included in Prescription
- Open the Templates folder in the package, Upload the "Doctor Prescription with Age and Gender" file.
If age and gender doesn't need to be included in Prescription
- Open the Templates folder in the package, Upload the "Doctor Prescription" file
-
Upload the hospital logo. Please note that the file extension must be either .PNG or .JPG (a sample is also provided in the package, you can also upload it)
-
Navigate to Doctors list, Click on RegistrationNumber column>column settings>Edit
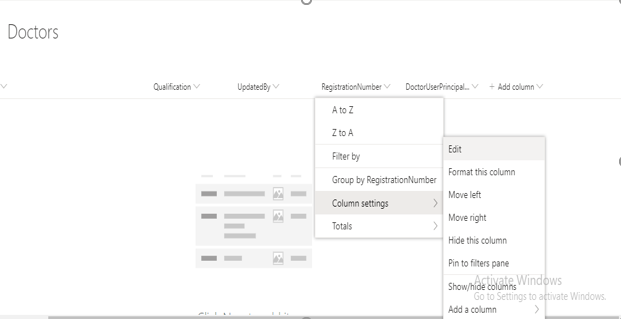
Edit column popup will open, click on more options, and enable Enforce Unique Values options and click on save.
Step 5: Import package in Power Apps for Admin and Doctor using the zip file
-
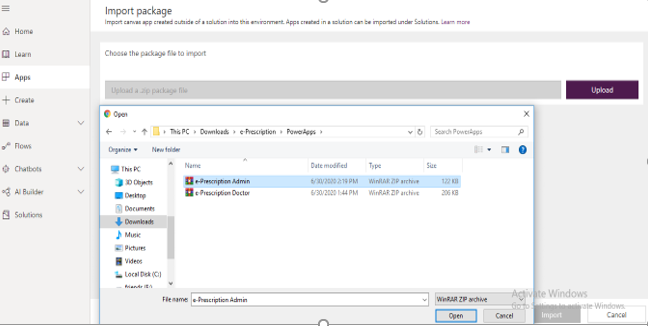
Navigate to the Power Apps platform (https://make.powerapps.com/)
-
Click on Apps in the left side pane and click on Import canvas app.
-
Import the e-PrescriptionAdmin.zip from package.
-
You will be automatically redirected to the details page
-
In the package details page, click on Select during import for SharePoint connection in import setup column
-
If you do not find any existing connections, click on Create new button in the popup. The page will open in a new browser tab
-
Click on Create a connection button
-
You will be able to see the list of available connections. Click on + for SharePoint connection
-
Check Connect directly (Cloud services) option in the popup and click on Create button
-
Login to confirm the connection setup correctly
-
Navigate back to the import package tab. Once the connection is created, you will be able to see the connection in the import setup dialog
-
If you are not able to see the SharePoint connection, click on Refresh List button in the dialog
-
Click on the connection name to select it and then click on Save
-
You will be able to see that SharePoint is connected to your tenant
-
Repeat the steps from step 5 for Word online connection and Office 365 Outlook connection for Doctor Package.
-
You will be able to see Office 365 Outlook connection and Word Online connection imported in your tenant
-
Click on the Import button at the bottom of the page
Step 6: Edit Data source
-
Click on Open app link when the zip package is successfully imported. You will be redirected to the PowerApps portal
-
Click on Open menu at the left side of the screen -> PowerApps -> ePrescriptionAdmin/ePrescriptionDoctor app which you have imported
-
The app will request your permission to use all the listed data connections
-
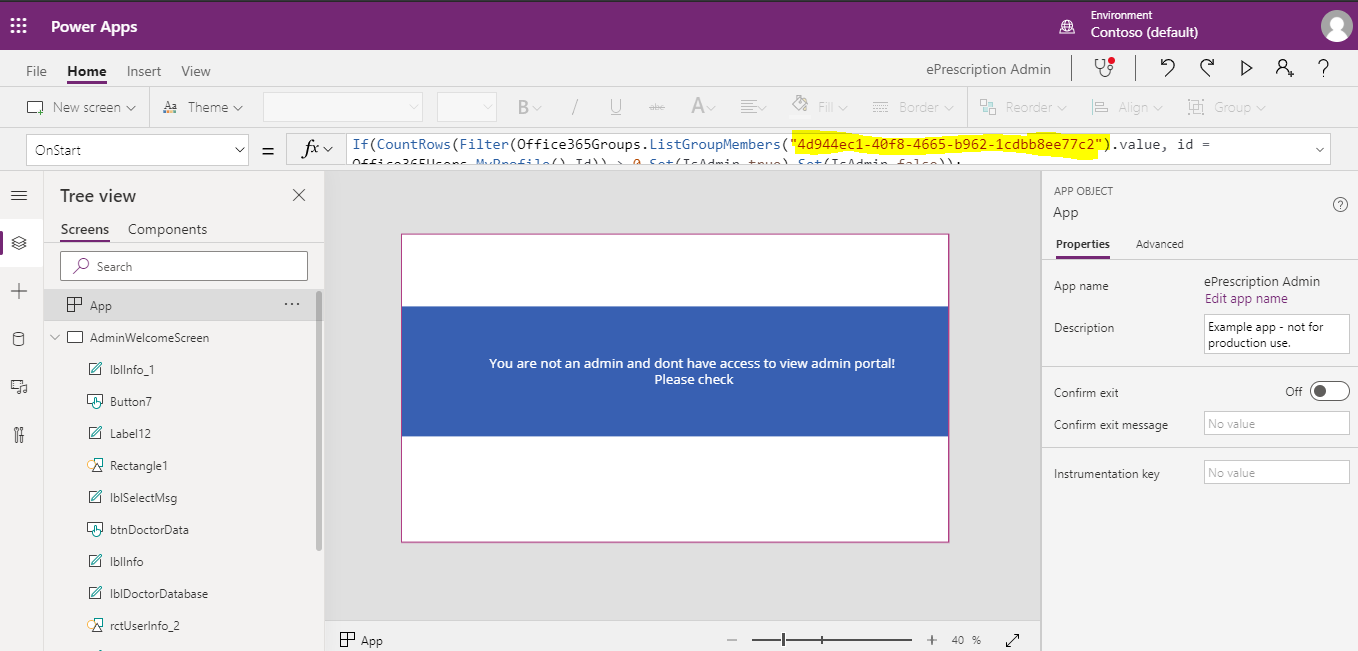
Once the app opens,Only for the ePrescriptionAdmin App - Click on 2nd icon in left-hand pane and select App. Then change the highlighted part Team group id (Note 1).
-
In the horizontal menu, click on View and select Data sources
-
Delete existing **Doctors, Patients and HospitalDetails SharePoint connections
-
Search for SharePoint and select it
-
Enter the newly created SharePoint URL in the pop-up window
-
Choose **Doctors, Patients and HospitalDetails lists and select connect
-
In the E-Prescription Doctor app, follow this step 5 only if you want to add gender and age for generating prescription.
By default, we are providing the package without gender and age,
If you want to add gender, age :
Please follow these steps
After opening the E-Prescription Doctor App
-
In the left panel, click on the second icon (tree view)
-
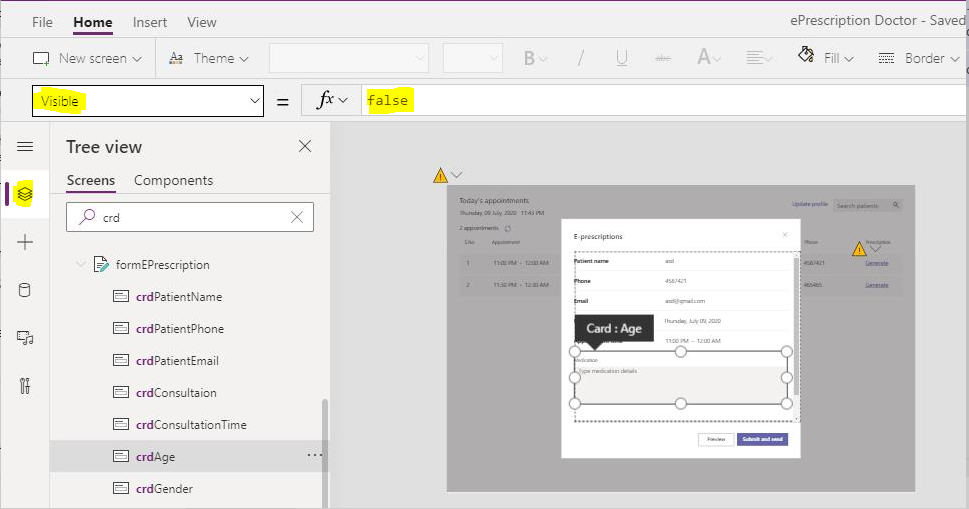
In the search bar, search for crdAge, Click on it. In the dropdown below New screen, Select the Visible. When you select "Visible", false will show in the right bar. Change it to true.
-
Follow above step for crdGender ,lblPreviewGender, lblPreviewAge
-
-
Publish the app by selecting Save on the File menu (on the left edge), and then select Publish
-
Follow step 4 and step 5 above, for importing the doctor package "e-Prescription Doctor.zip"
Step 7: Edit Flow Data Source
-
Open Power Automate (https://flow.microsoft.com/en-us/)
-
Click on MyFlows in the left panel. Select the flow GetBookingAppointment connected to Power Apps. Click on Edit icon.
Now paste the hospital mail id that you have generated using the Bookings app in step 2, save the flow.

-
Click On My Flows, click on import package, Select Generate E-Prescriptions.zip package from Flows folder.
In the first step, select note-2 site URL, select List as patients.
In get item step, select note-2 site URL, select List as HospitalDetails.
Note: Here the item id is 1 as only one record will be added to HospitalDetails List by default. If the record is deleted manually, please change the ID as per the record id.
a. Replace all the SharePoint URL field with e-Prescription site URL (note-2).
b. As the above step, change the Hospital Mail id in the Generate Prescription Flow also.
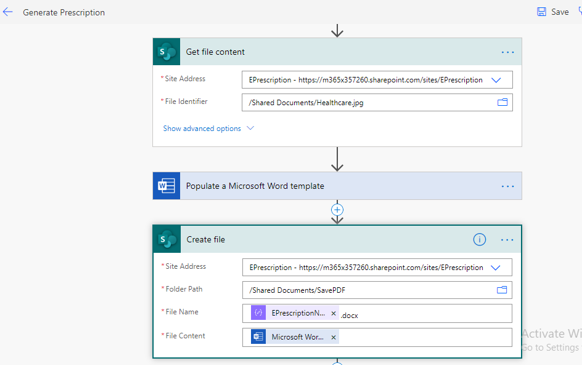
c. In Get FileContent - Change the site address to the new SharePoint site which has been created in Step 3(Note 2- ePrescription SharePoint site URL) and change the file identifier to uploaded logo file path.
d. For Create File Choose the E-prescription site Address, select the folder path that you have created in Step 3.10(the folder path where you want to save the PDF and Word document files for the E-Prescriptions)
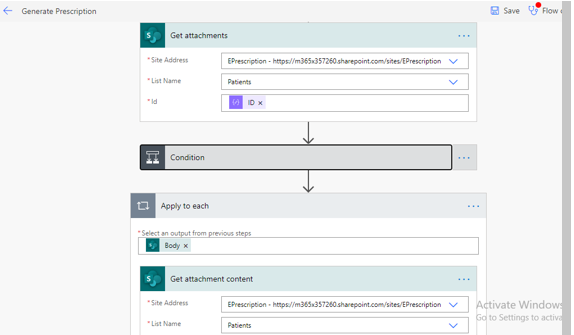
e. Select the E-Prescription site and Patients list to get attachment content in Apply to each field at the last step. Click on save.
- Now click on My Flows and
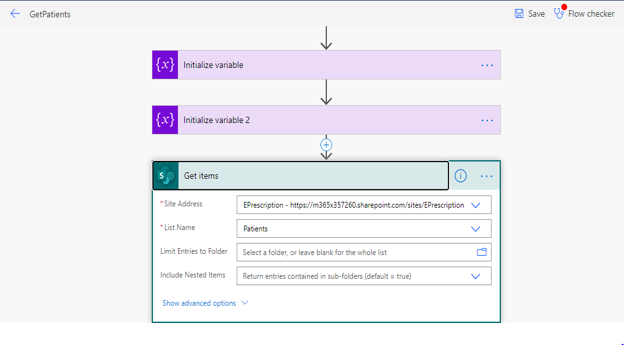
Select the flow named GetPatient, and click on Edit
a. Change the site address to the new SharePoint site which has been created in Step 4
b. Now select Patients as the list name which you have created in Step 4, click on Save.
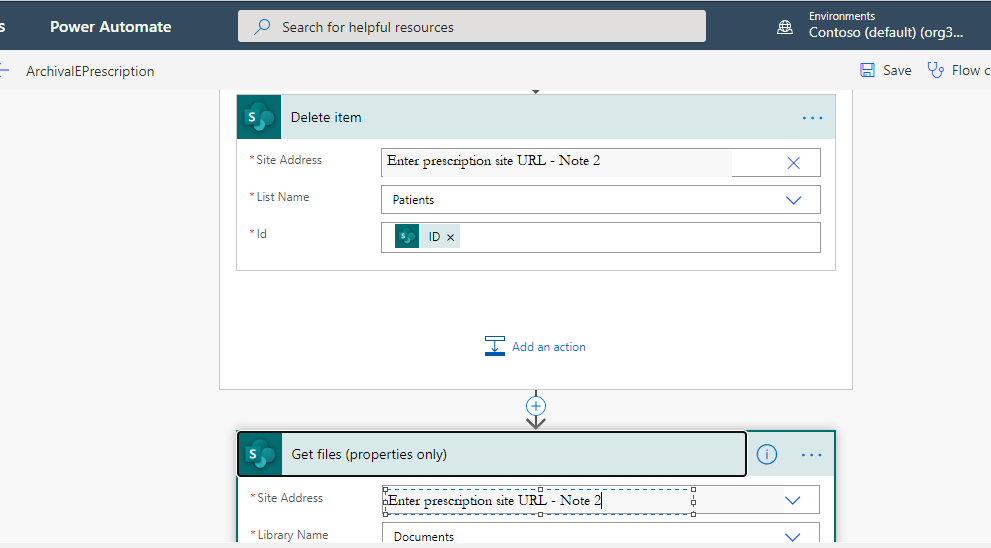
- Now click on MyFlows, open View Prescription Flow. Click on step 2 in the flow, change site URL to Note 2 URL, replace only SavePdf with the folder name that you have created to save all prescriptions. Save the flow.
- Go to My flows, Click On Import Now Open the package, Open Flow Folder, and select Archival EPrescription Flow.
-
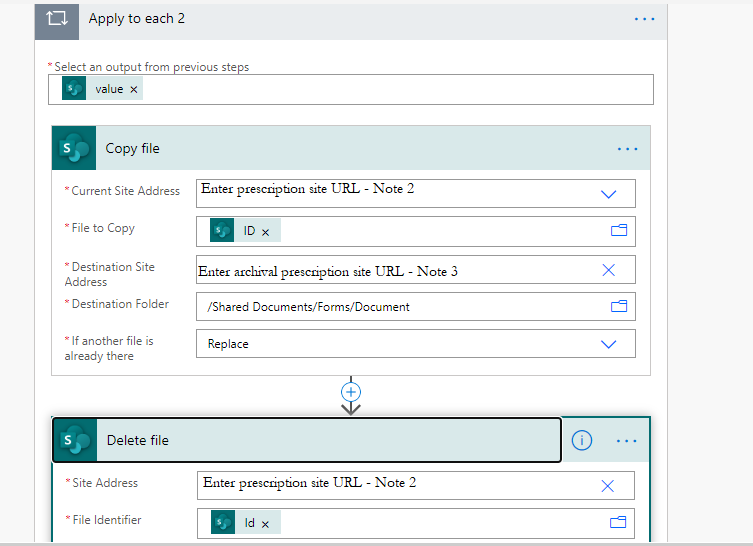
Archival flow is to save the data in another list to prevent data loss, where the data from the original SharePoint will be saved to another SharePoint site and the original data gets deleted.
-
Before editing the flow, open a new tab, open the Archival SharePoint site. In the left panel, click on Documents, Create a new Folder as Archival Prescriptions
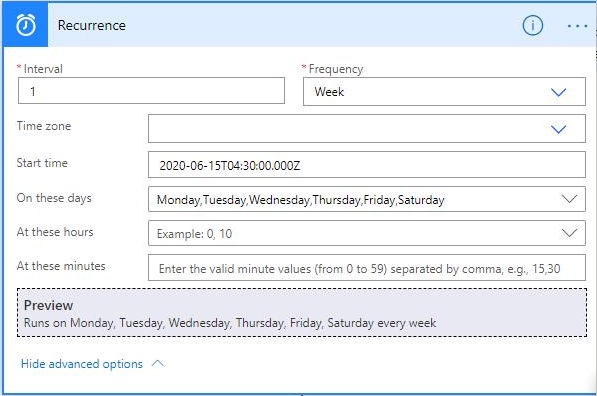
- Click on the Recurrence, Click on edit, select show advanced option.
- Based on the requirement you can change the timezone and time for which the data can be shifted.
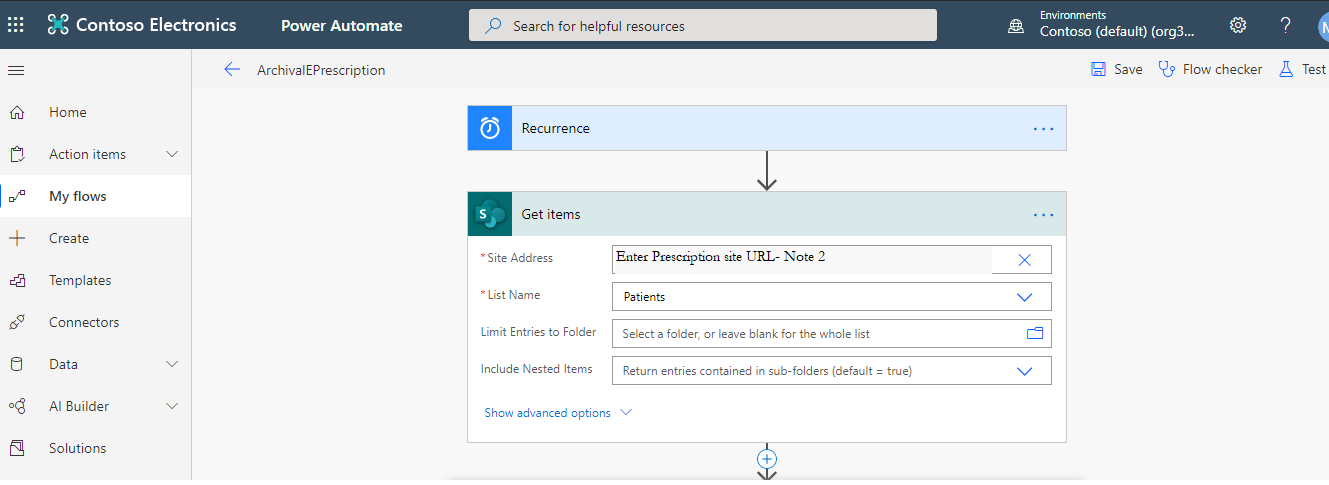
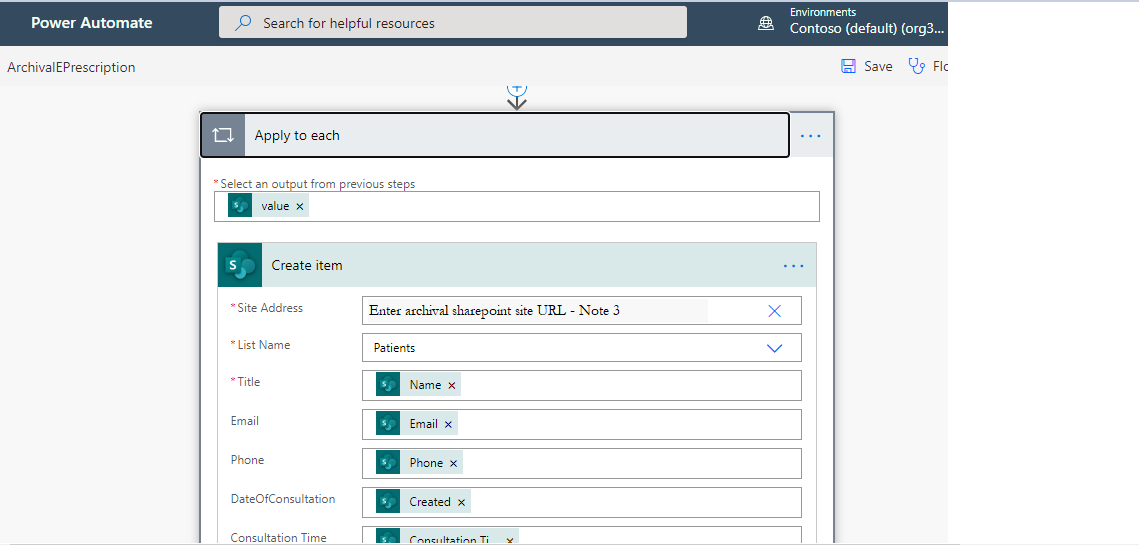
Change the destination Site name to Archival Site URL,
select Destination folder to Archival Prescriptions Folder path.
The path looks like this Shareddocuments/Archival EPrescriptions
Step 8: Set up permissions for the hospital email account
Set up below permissions for the doctors to send the e-prescriptions email using the hospital email account:
-
In the admin center, go to the Users page by clicking on the Active Users link (hyperlink to insert here)
-
Select the hospital user account to open their properties pane
-
Click on the Mail tab, select the Manage mailbox permissions
-
Next to Send as, click on Edit
-
Select Add permissions, the choose all the doctors who should be using the hospital account to be able to send as
-
Select Save
Step 9: Share Power App
The admin would need to share the app to all individuals who will be using the app (this includes the admins and doctors).
-
Open the PowerApps user interface (https://make.powerapps.com/)
-
Go to the Apps menu in the left-hand side menu bar and you will be able to see the list of apps which have been imported
-
Click on the ellipses (3 dots) for your app, and click on Share
-
Enter the users with whom you want to share the app, and click on Share
Step 10: Adding E-Prescriptions Power App to Microsoft Teams
-
Navigate to Power Apps (https://make.powerapps.com/)
-
Click on the ellipses (3 dots) for your app, and click on Add to Teams
-
A compressed file (zip) will be downloaded to your Downloads directory in your browser
-
Open the Microsoft Teams desktop app, or web app by navigating to the link here (https://teams.microsoft.com)
-
Go to the apps menu on the left-hand side
-
Click on the option that reads: Upload a custom app
-
Upload the downloaded zip file
-
You should see the app
Step 11: Publish The Booking page :
Now to share the bookings page with patients :
-
Go to the following link (https://outlook.office.com/bookings/services)
-
In the left-hand panel, select Appointment type
-
You will be able to see the appointment type, click on the row.
-
Go to Custom Fields Column, Select Modify
-
Click on the Required checkbox beside Phone Number, Click on Ok
-
If you want to change the Appointment type name or Description Change it and click on Save.
-
Once the details are saved, Now Click on the Booking Page in the left panel, click on Save and Publish
-
Once published, Booking page status will become published
-
Copy the link and share it with patients.