Deployment guide - OfficeDev/microsoft-teams-apps-classroom-dropin GitHub Wiki
Please go through the steps outlined below for a fresh deployment.
Prerequisites
To begin, you will need:
-
Administrative access to Azure Active Directory
-
Power Apps Premium (per App or per User) license assigned to your account (you will be unable to import the Power App without this)
-
Power Automate license assigned to your account
-
A valid SharePoint Online license assigned to your account, and permission to create lists and store data
-
A Microsoft Teams license assigned to your account
-
A copy of the Classroom Drop-in app zip package
Table below lists the zip packages under /Deployment folder required during application set up:
| Component | Filename | Description |
|---|---|---|
| Classroom Drop-in App | ClassroomDrop-in.zip | Power Apps zip file for Drop-in app |
| SharePoint List creation flow | CreateDropInSPLists.zip | Creates the lists necessary to hold the data in the app |
| Inserting data from excel to share point Flow | ImportingDatasFlow.zip | Flow for inserting data from Excel to SharePoint list |
Step 1: App registration in Azure AD
Registering the application in Azure AD is used to authenticate users and request access to user resources. Permissions are also added here so that Graph API calls functions as expected on behalf of user.
Group
-
Setup or identify a Security Group(s) of users who will have access to use the app
-
Setup or identify a Security Group(s) of users who will administer the app
App Registration
-
Navigate to the App Registrations page in Azure AD and create a new registration
-
Title your registration, and leave all the other options as default, and click Register.
-
Go to API Permissions, and click Add a permission
-
Select Microsoft Graph, and then Application permissions
-
Add the following permissions:
-
Sites.Manage.All
-
Sites.ReadWrite.All
-
TeamMember.ReadWrite.All
-
Team.ReadBasic.All
-
Directory.Read.All
-
User.Read.All
-
GroupMember.ReadWrite.All
-
Group.ReadWrite.All
-
Directory.ReadWrite.All
-
-
Click Grant admin consent
-
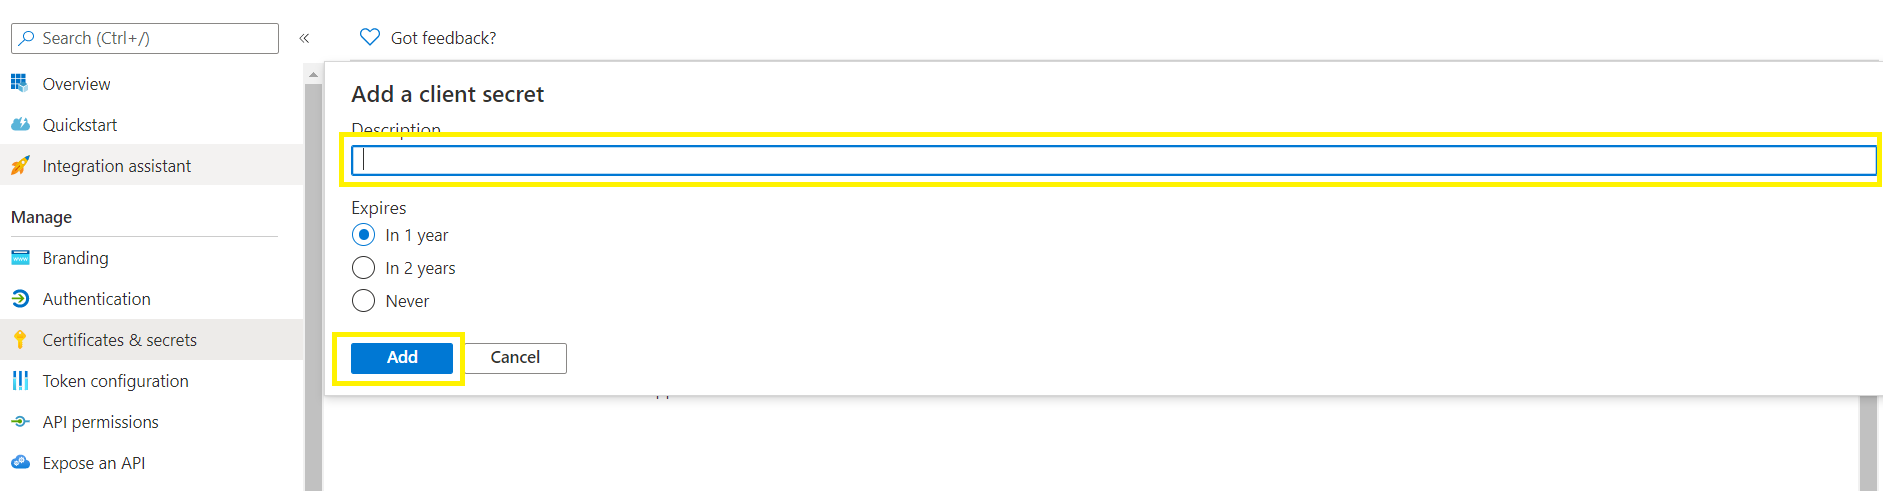
Click Certificates & secrets
-
Create a new client secret and note it’s value.
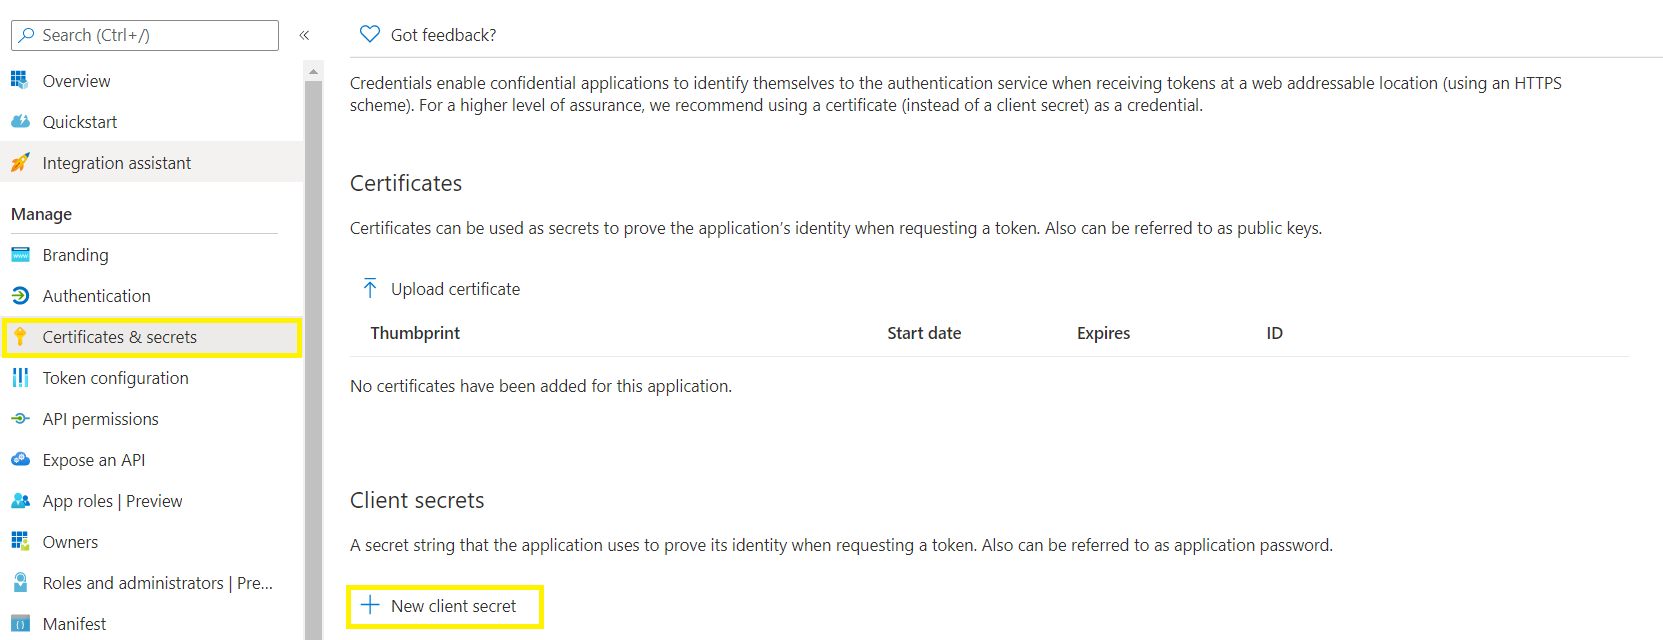
- Note the Directory and Application ID from the overview tab.
Note: The above permissions are required to call graph API in order to add/remove users to any team/group.
Step 2: Create SharePoint site
- Create a SPO Team Site (ideally not tied to an O365 Group, using the SPO Admin Center)
Note: Ensure you properly configure the Time Zone.
- Select Create site by navigating Sites > Active sites > Create
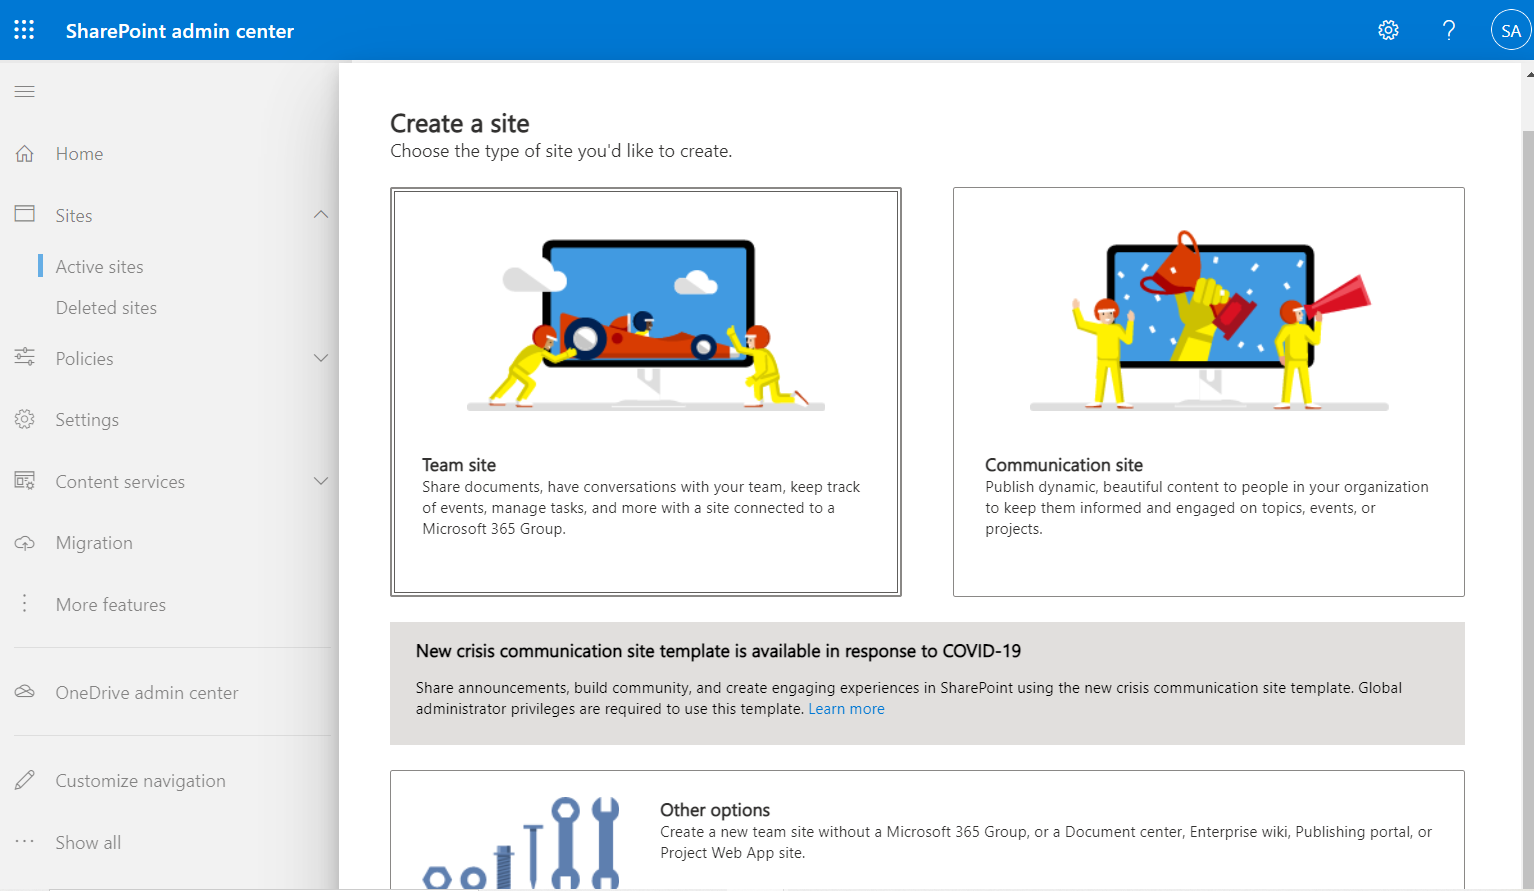
- Select Other options
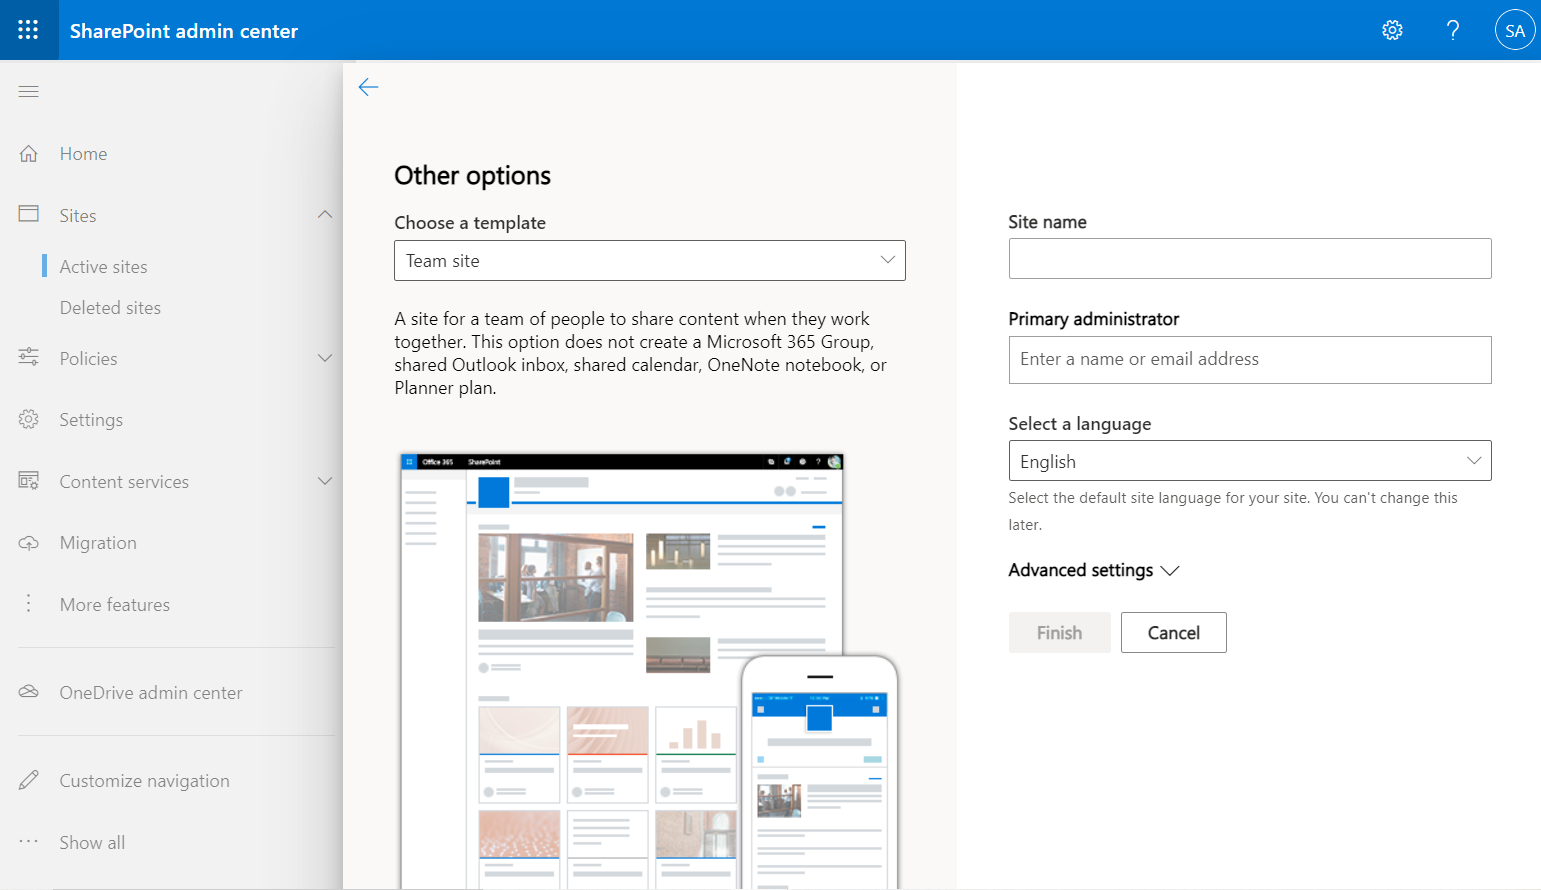
-
Enter name and description for your site.
-
Select Next.
-
Add additional owners for the site (optional).
-
Select Finish.
-
Note the URL of the new SharePoint site. This will be required for future steps.
-
Setup Site Permissions
a. Add security group(s) of users who will have access to the app to the built-in Visitors group (these users will only need read access to most of the site).
b. Add security group(s) of users who will have access to the app to the built-in Owners group.
c. Remove the built-in Members group (to avoid future confusion).
Step 3: Create SharePoint Lists
The app uses multiple lists to store its data. You can use the CreateDropInSPLists Power Automate, available from the downloaded package inside Flows folder, to automatically create these lists. The Power Automate creates the required lists and fields.
Import the SharePoint List deployment flow
-
Go to https://flow.microsoft.com.
-
Select My flows from the left navigation pane.
-
Select Import on the command bar.
-
Upload CreateDropInSPLists.zip package.
-
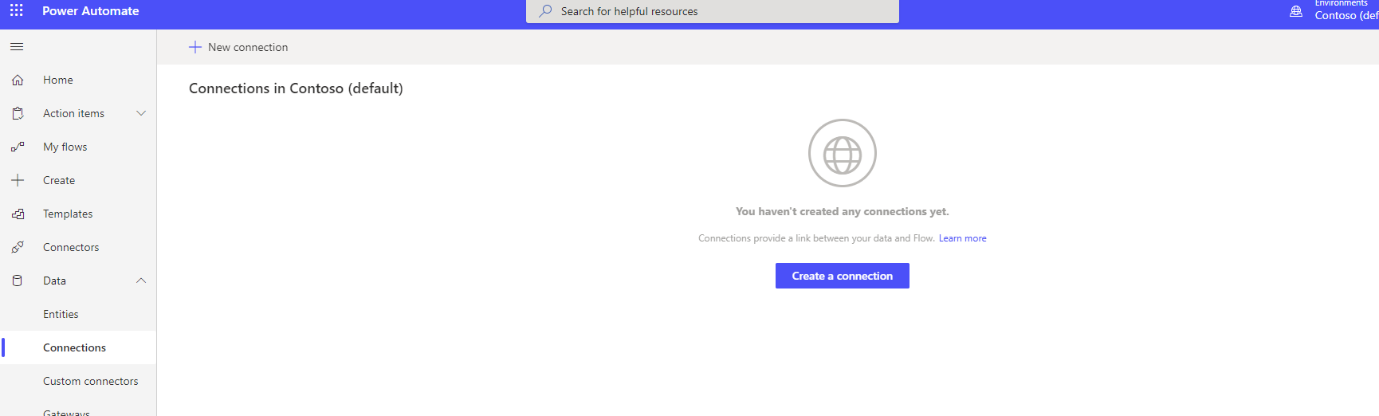
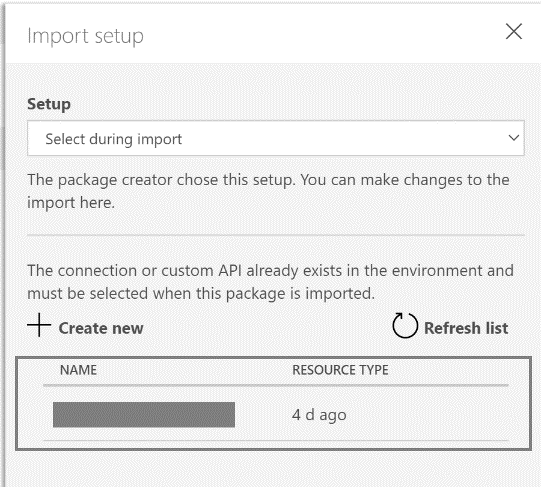
Under Related resources, add a SharePoint connection by selecting the Select during import link
-
If you don’t see a SharePoint connection listed, you will need to create a new SharePoint connection. Select + Create new in the Import setup pane.
Note: A new tab/window will open to allow creating new connection keeping the existing tab open. Please do not close the existing tab.
- Select New connection on the command bar.
-
Search for the SharePoint connector and click on +.
-
Choose "Connect directly (cloud-services)"to connect to SharePoint online.
-
Return to the tab where flow is imported and select the connection you just created.
-
Select Save, this will close the flyout menu.
-
Select Import.
Edit the SharePoint List deployment flow
-
After the import is done, go to My flows and refresh the list of flows.
-
Select the newly imported flow, CreateDropInSPLists.
-
Select Edit on the command bar.
-
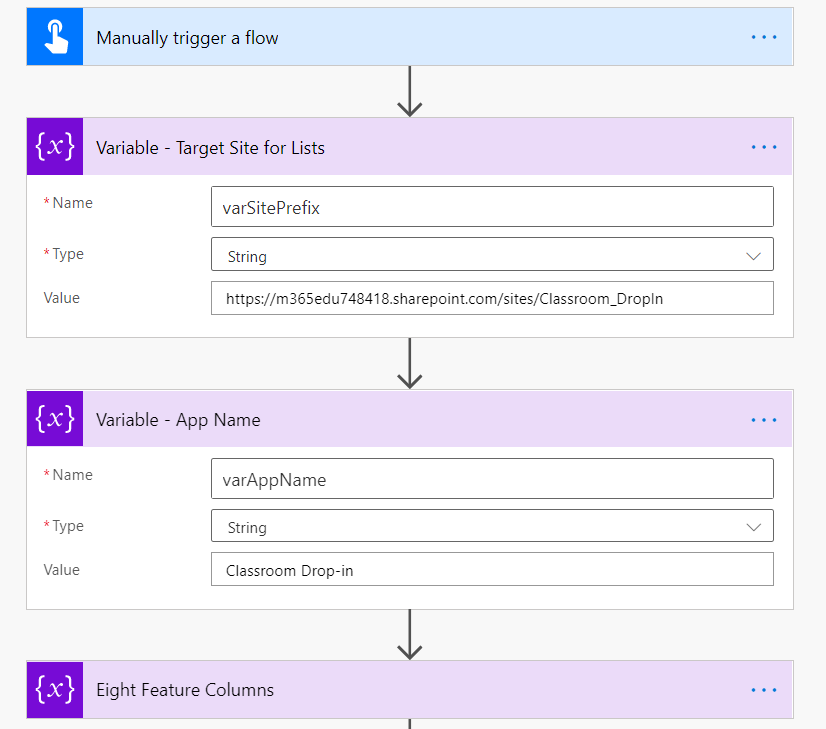
Open the 'Variable - Target Site for Lists' step card.
-
Under Value, change the URL with your SharePoint site that you created earlier.(e.g. https://contoso.sharepoint.com/sites/DropIn).
-
Open the 'Variable - App name' card.
-
For Value, enter the name of your app; by default, the name is Classroom Drop-in.
- Select Save.
Run the SharePoint List deployment flow
-
Click the back arrow to return to the detail screen for the CreateDropInSPLists flow.
-
Select Run on the command bar.
Note: Check whether the flow is turned on or not, if its disabled then first turn it on by clciking on ellipse, after that run the flow
- Select Continue, and then select Run flow
Note: You might receive an error stating that location services are required. If this occurs, allow location services to access Power Automate and refresh the page before trying again.
-
Run usually takes 30-40 seconds. Refresh the page until the run status changes from running to Succeeded.
-
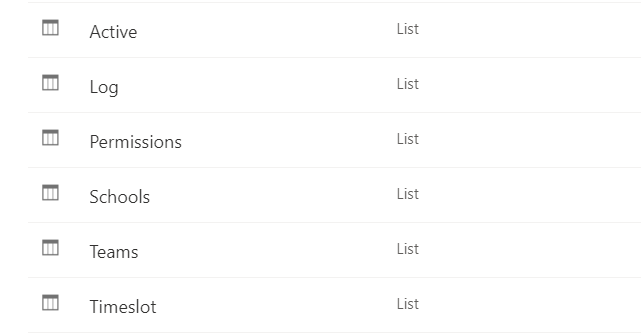
Navigate to your SharePoint site and verify below SharePoint lists created by clicking on the gear icon in the top right > Site Contents. Please check if there are 6 SharePoint lists created (as shown in below screenshot).
Configuring Column Settings
- Open 'Active' list and click on 'Expiration' column > Column settings > Edit and turn on the 'Include Time' toggle button.
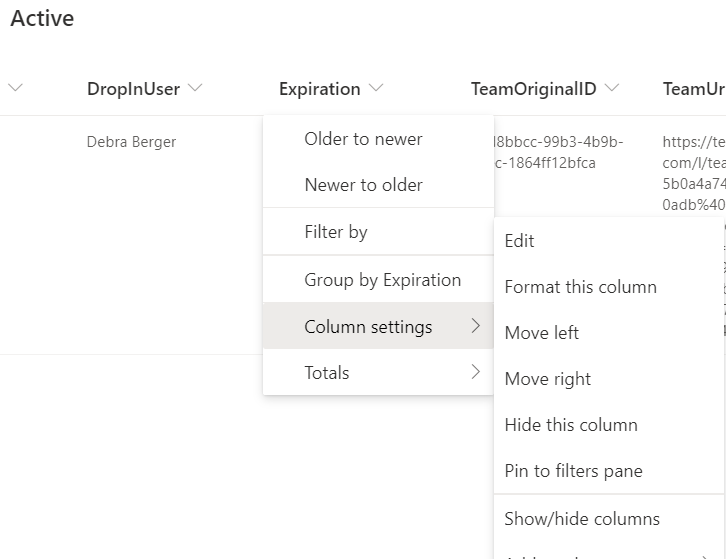
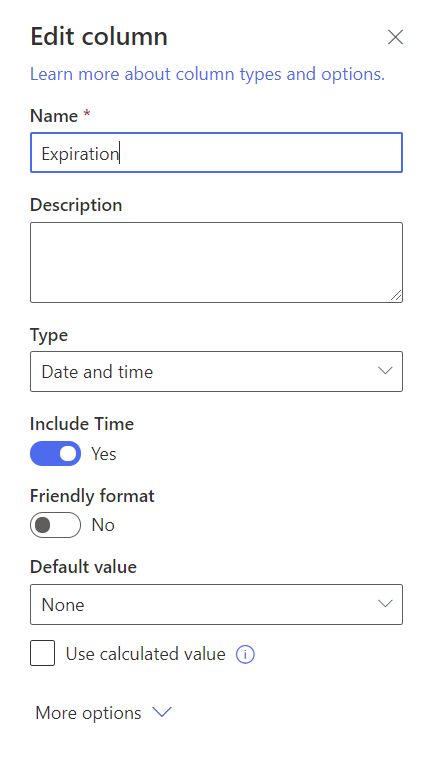
- Repeat the same step for 'StartTime' column also.
Permission settings :
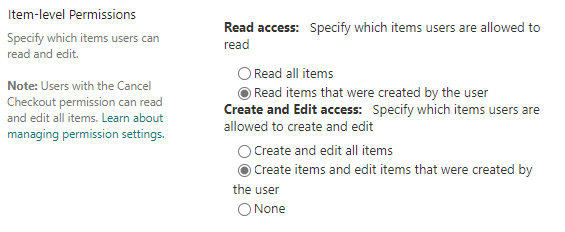
'Active' list permission settings
i. Select 'Active' list.
ii. Item-Level Permissions (in Advanced Settings):
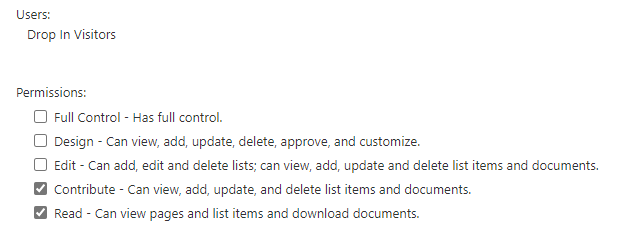
iii. List Permissions: Stop Inheriting Permissions, and edit the Visitors group permissions to include Contribute.
'Log' list permission settings
i. Select 'Log' list.
ii. List Permissions: Stop Inheriting Permissions, and remove the Visitors and Members groups from the list permissions (only Owners group should have permissions)
Note:
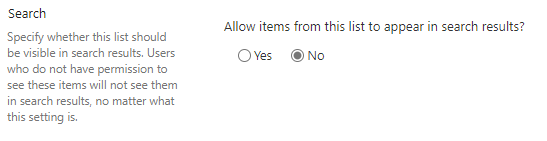
- Configure all lists to not appear in search results (Advanced Settings in List Settings):
- Add your logged-in user that is performing the setup to the 'Permissions' list, and set IsAdmin to True. More users can be added at a later time. In 'Permissions' list ,'Title' field is not used but requires information. It can be bogus text for all this solution cares.
Note: If the data in your data source exceeds 500 records,then for better performance you can do indexing in SharePoint lists by following Step-10.
Step 4: Import and Set up the Classroom Drop-in
Modifying the PowerApps ZIP Package
Select ClassroomDrop-in.zip file - it is available under /Deployment/Power Apps
Due to some bugs in the import process of a PowerApp with flows tied to it that call an SPO list, we will need to modify the ZIP package. DO NOT unzip, modify the files, and rezip. This will result in a corrupt PowerApps package. Follow the below steps exactly:
-
Navigate to your SharePoint site, and open up the List settings for the Active list
a. The URL should look like this: https://m365edu748418.sharepoint.com/sites/Classroom_DropIn/_layouts/15/listedit.aspx?List=%7Bc66072b5-953c-453e-8bd3-10d281910b3e%7D
b. Note the List GUID. (in this example that would be c66072b5-953c-453e-8bd3-10d281910b3e
-
Open (not extract) the ZIP file using Windows File Explorer.
-
Open \Microsoft.Flow\flows\c1839949-7c7a-4e71-b9e1-22a77c2babb5\definition.json in a text/code editor.
a. Find and replace all instances of “https://m365edu748418.sharepoint.com/sites/Classroom_DropIn” with the URL of your SharePoint site.
b. Find and replace all instances of “c66072b5-953c-453e-8bd3-10d281910b3e” with the GUID from step 1b above (the Active list).
c. Save the definition.json file locally on your computer.
-
Drag and drop the new definition.json file into the \Microsoft.Flow\flows\c1839949-7c7a-4e71-b9e1-22a77c2babb5 folder, and overwrite the existing one (using Windows File Explorer).
a. Again, DO NOT try to extract and rezip. You must use this drag and drop method to maintain the integrity of the AIP package.
Import the app
-
Sign in to Power Apps.
-
Select Apps from the left navigation pane.
-
Select 'Import canvas app' on the command bar.
-
Upload the ClassroomDrop-in.zip file.
-
Complete the import setup for SharePoint Connection and Office 365 Users Connection by selecting the appropriate connections by using the Select during import hyperlink. You might have to create a new connection for Office 365 users and SharePoint, if it doesn't already exist.
-
Select Import.
Update the SharePoint connections
-
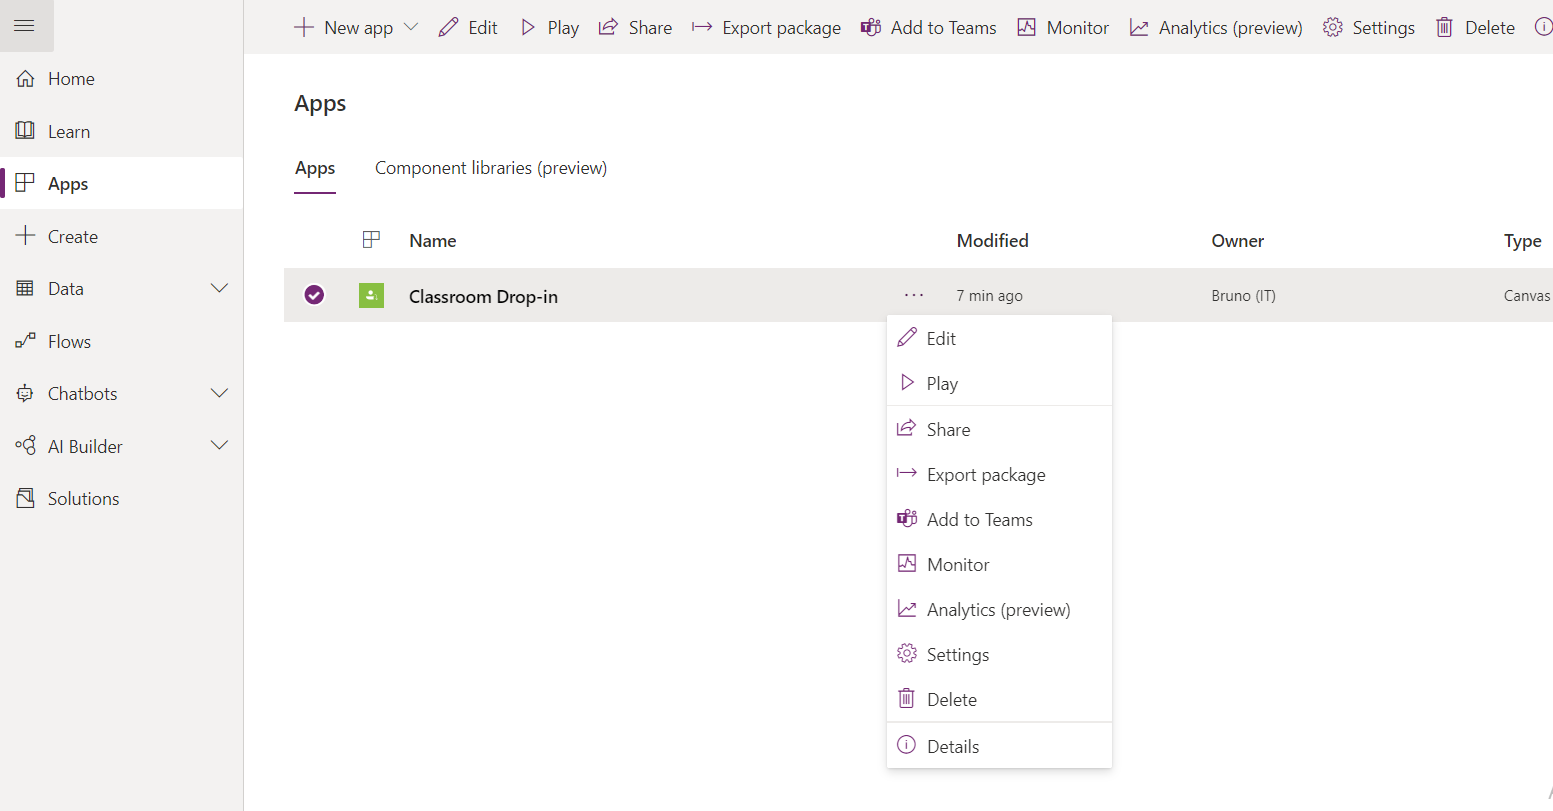
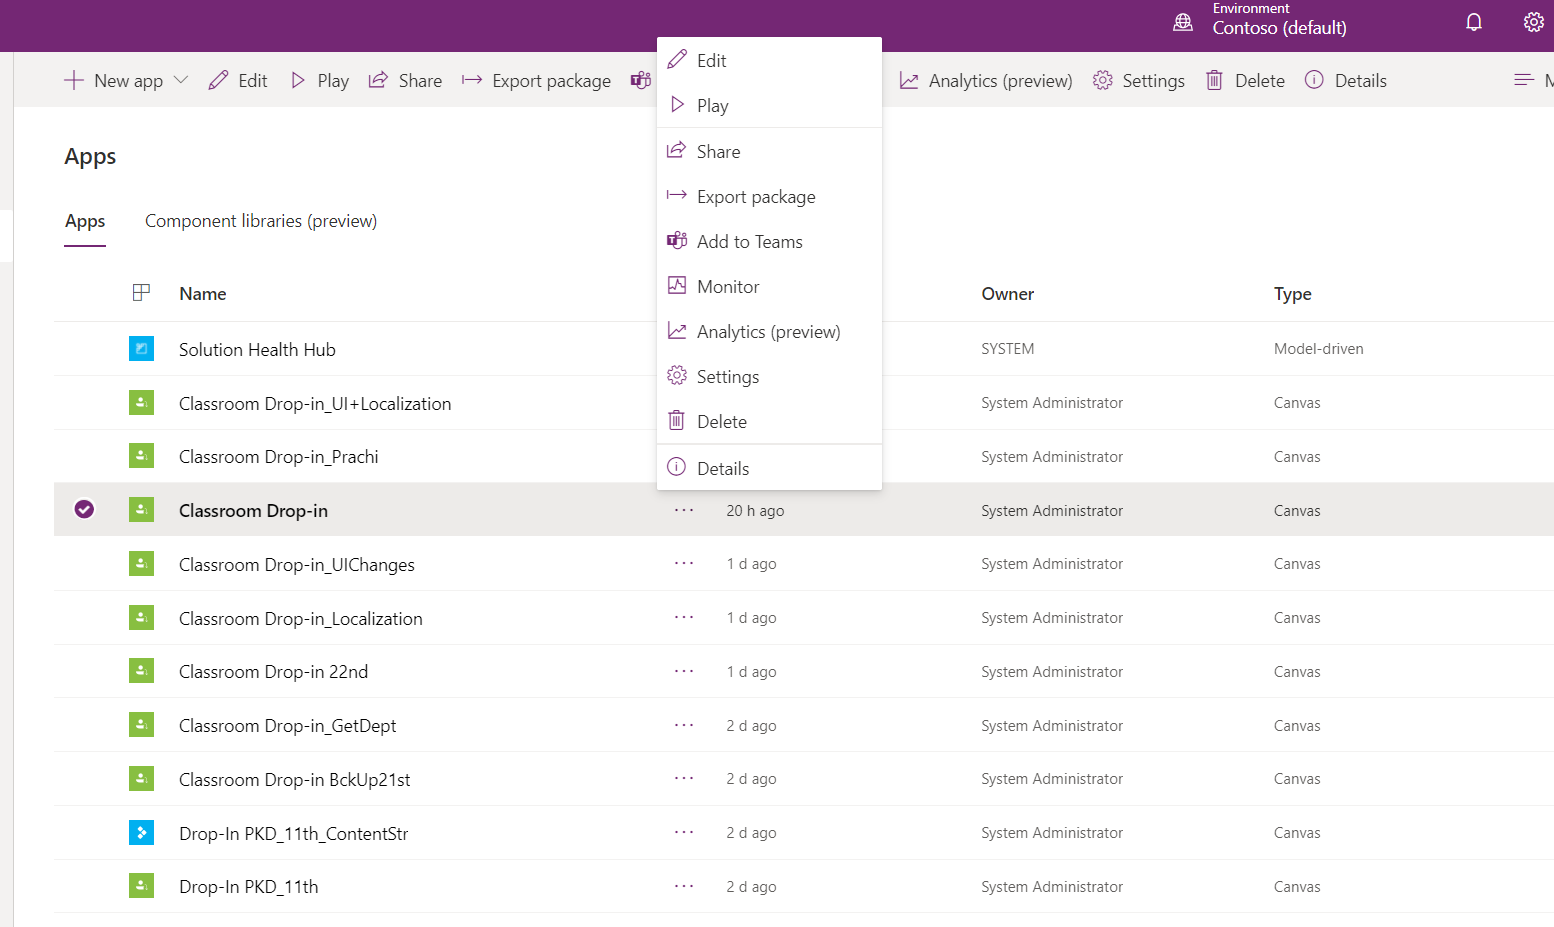
After successful import, go back to the Apps.
-
Select More commands (...) for the 'Classroom Drop-in' app.
-
Select Edit from the context menu.
-
Sign in or create any necessary connections, and then select Allow.
-
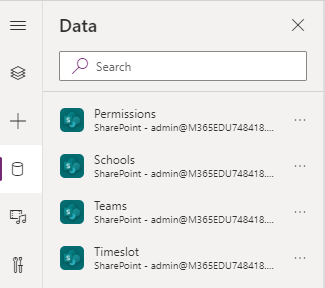
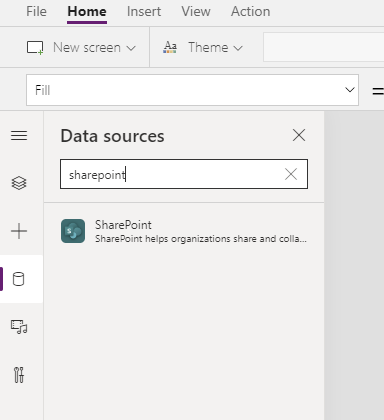
Go to the data sources in the left pane.
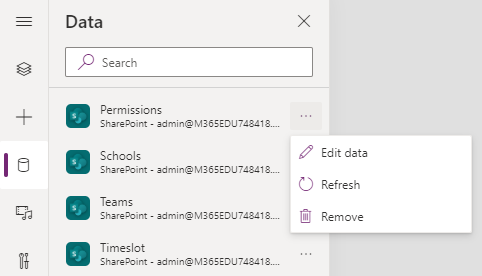
- Click the "..." to remove existing SharePoint Lists inside the app, because they don't point to your current SharePoint site.
-
Add the lists from your own SharePoint site. Start by searching for SharePoint in the search bar.
-
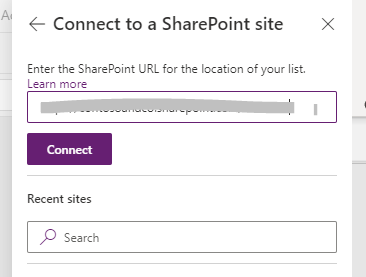
Select SharePoint, and then choose a connection.
- Copy and paste the URL to your SharePoint site in the text field, and then select Connect.You may also see it in the recent sites list.
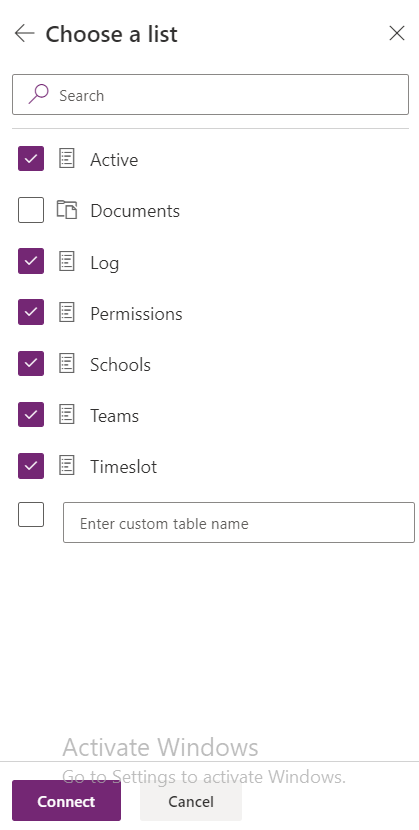
- Select all the SharePoint Lists and libraries and then select Connect.
-
From the File menu, select Save, and then select Publish.
-
Share the Power App with the appropriate security groups as defined in the Azure AD steps.
Step 5: Deploying Classroom Drop-in App to Microsoft Teams (as a personal app)
Deploying the Classroom Drop-in App to Microsoft Teams is an easy way to promote adoption, centralize discussions, and amplify information across the organization. Once you have downloaded the app following the written instructions above, the steps below walk through the process to deploy it to Microsoft Teams.
Download the Classroom Drop-in App from Power Apps Homepage
-
Navigate to https://make.powerapps.com
-
The Classroom Drop-in app should appear under "My Apps".
-
Click the "..." to the right of the app name, then select the "Add to Teams" option.
- Click Download app.
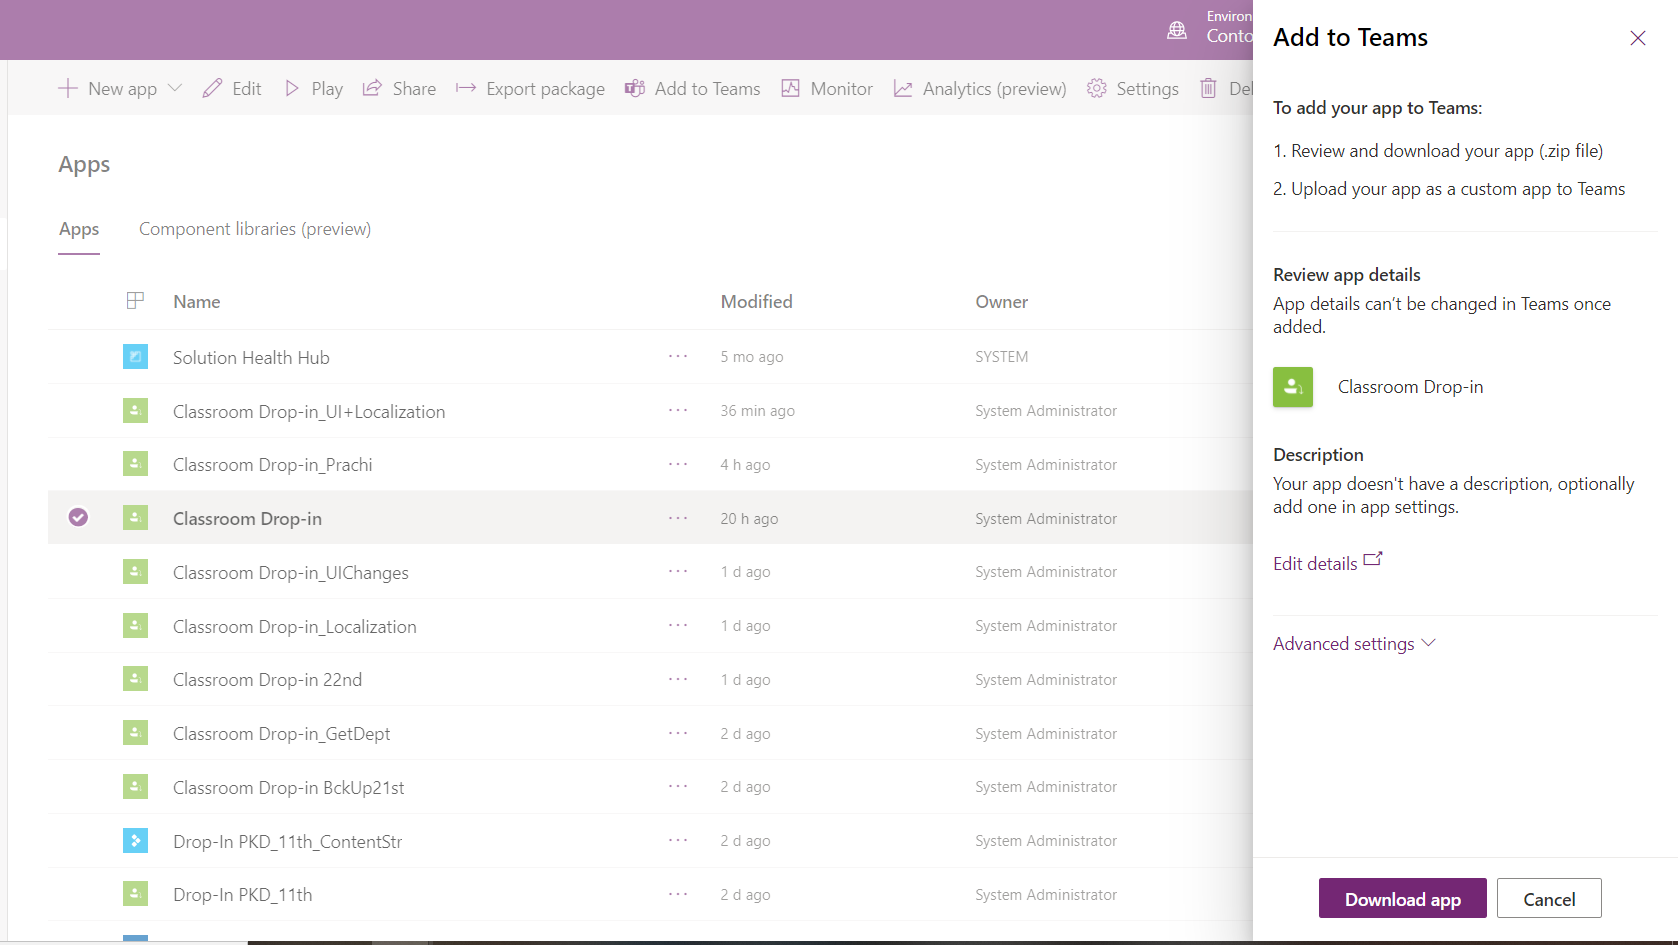
- This will download a zip file which can be uploaded to Microsoft Teams in the next step, so save the file to a location you can remember and easily access.
Add app to your Microsoft Teams app store
-
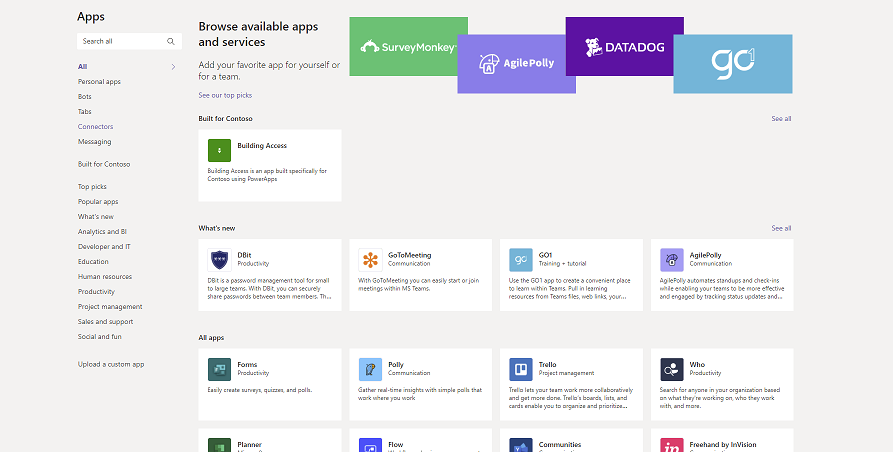
Once the app has been downloaded from your Power Apps homepage as a zip file, open Microsoft Teams and navigate to the app store.
-
Use the "Upload a custom app" function at the bottom-left. If you don't see Upload a custom app option it may mean that this option is disabled for your organization. Contact you team's administrator and follow instructions in the "Notes" section below.
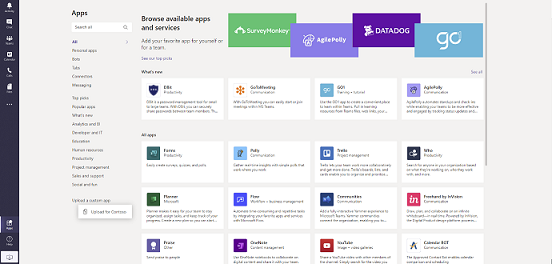
-
Click Upload for [Organization Name].
-
Upload the zip file you downloaded from Power Apps in the prior step.
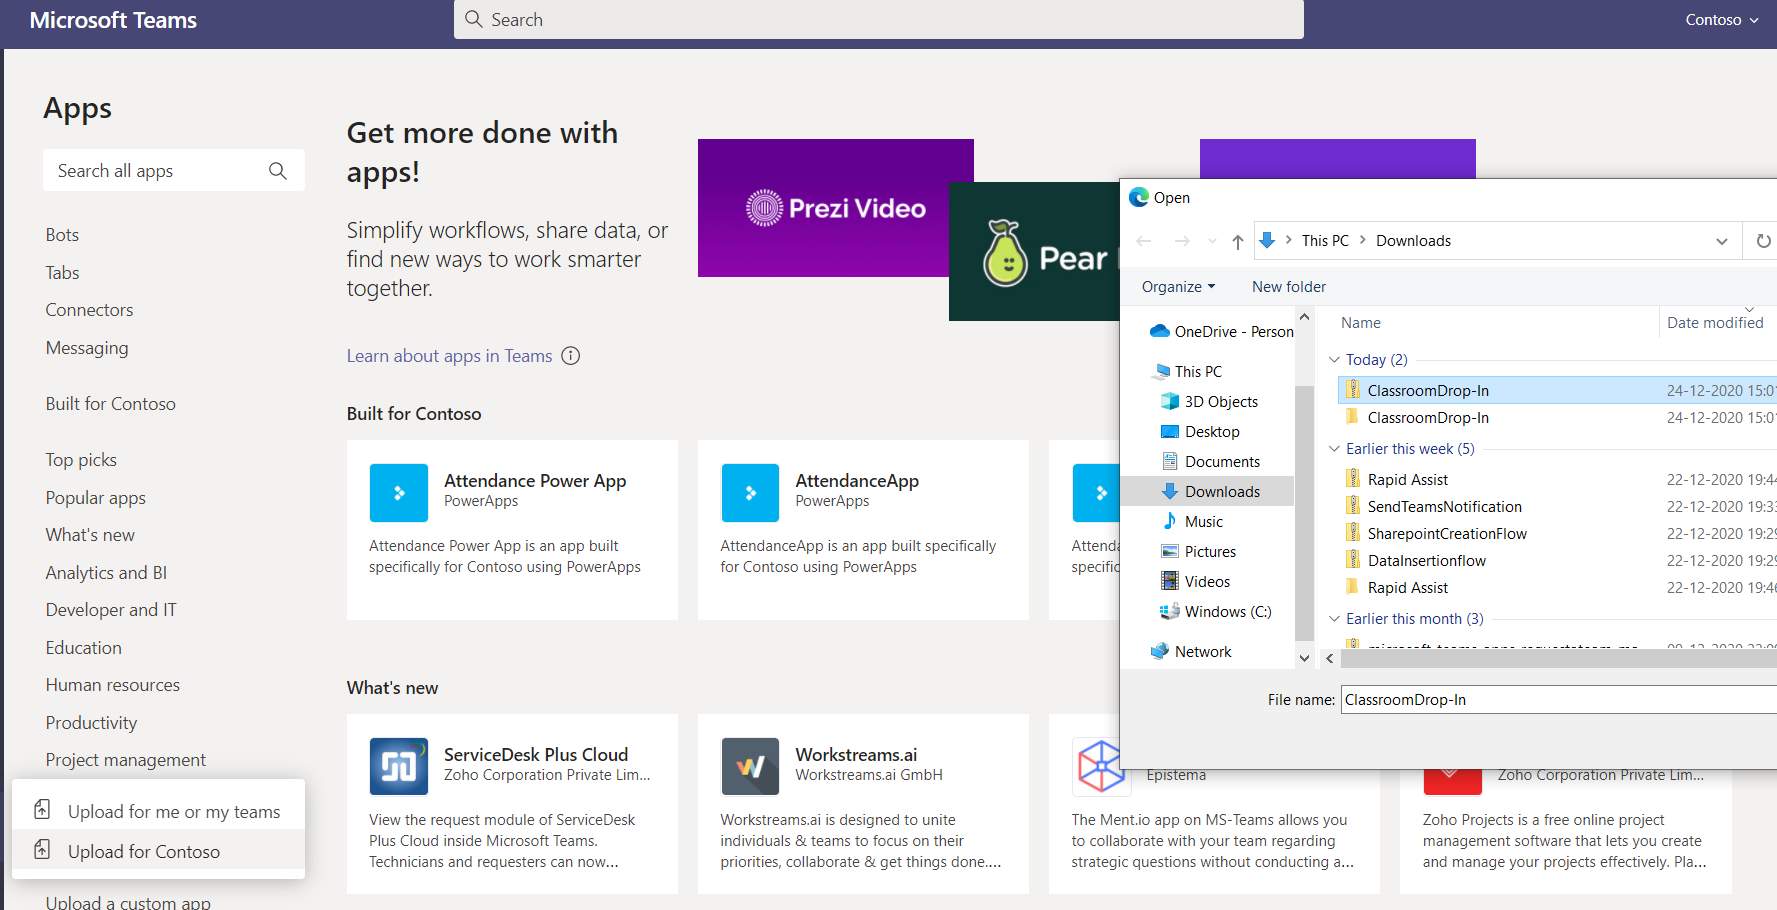
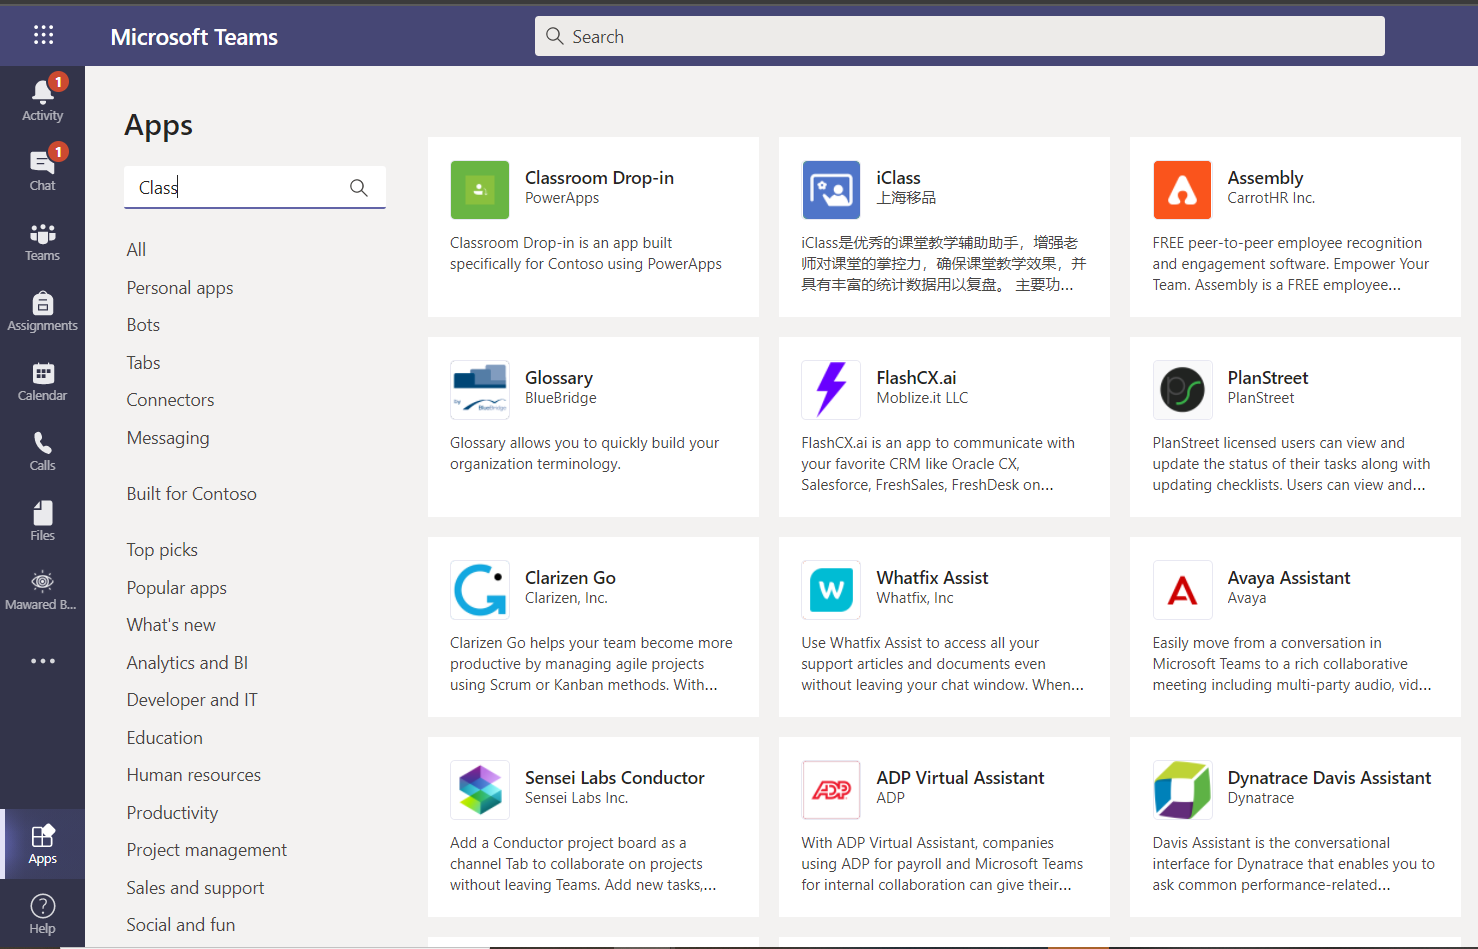
- Once uploaded, the app appears in the app store.
Pin the app to your personal Microsoft Teams app bar (any Microsoft Teams user)
Even if your Teams Admin has not taken steps to add this app to the Microsoft Teams app bar for your tenant, any user can add this app their personal app bar.
-
Click the app from the app store.
-
Click on 'Open' .
-
Once the app icon appears on your app bar, right click the icon and select "pin". The app icon will remain on your app bar to provide you easy access, even after you navigate away from the app.
-
Once deployed, open the app in Teams using a web browser and note the URL in the address bar. This is the App URL used when configuring Flows later in this guide.
Step 6: Set up Flows
-
Go to https://flow.microsoft.com.
-
Select My flows from the left navigation pane.
-
Select 'Drop In Flow'.
-
Select Edit on the command bar.
-
Select the trigger "Set Client Secret" step card.
-
Change the value with Client Secret previously done during App Registration.

-
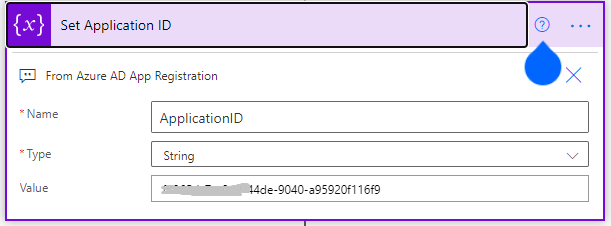
Select the trigger "Set Application ID" step card.
-
Change the value with Client ID previously done during App Registration.
-
Select the trigger "Set Directory ID" step card.
-
Change the value with tanent ID previously done during App Registration.

-
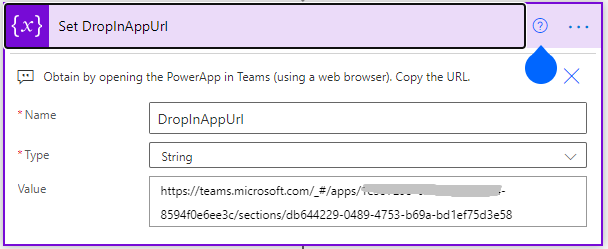
Select the trigger "Set DropInAppUrl" step card.
-
Change the value with URL (Obtain by opening the PowerApp in Teams (using a web browser)).
-
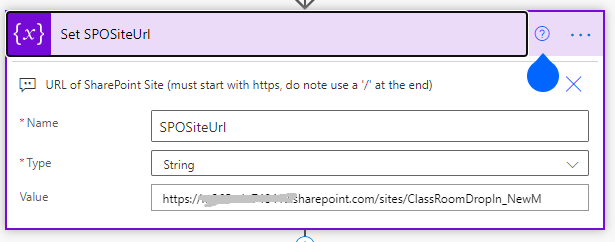
Select the trigger "Set SPOSiteUrl" step card.
-
Change the value with SharePoint Site which you have created for this App.
-
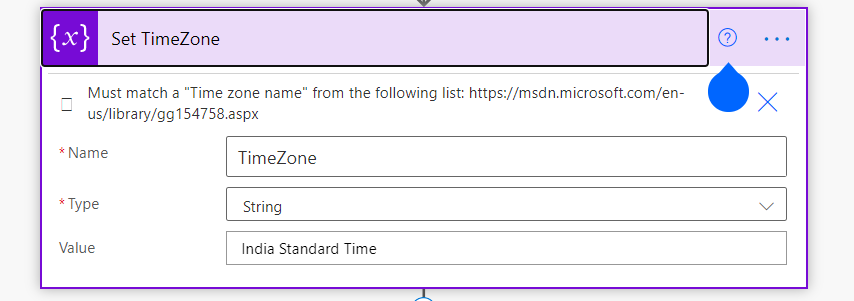
Select the trigger "Set TimeZone" step card. (Not present in 'Drop-in Cancel' Flow)
-
Change the value with proper time zone.
- Select Save.
Repeat the same steps for 'Drop-in Extend Flow' & 'Drop-in Cancel Flow'
Step 7: Populating data in SharePoint lists
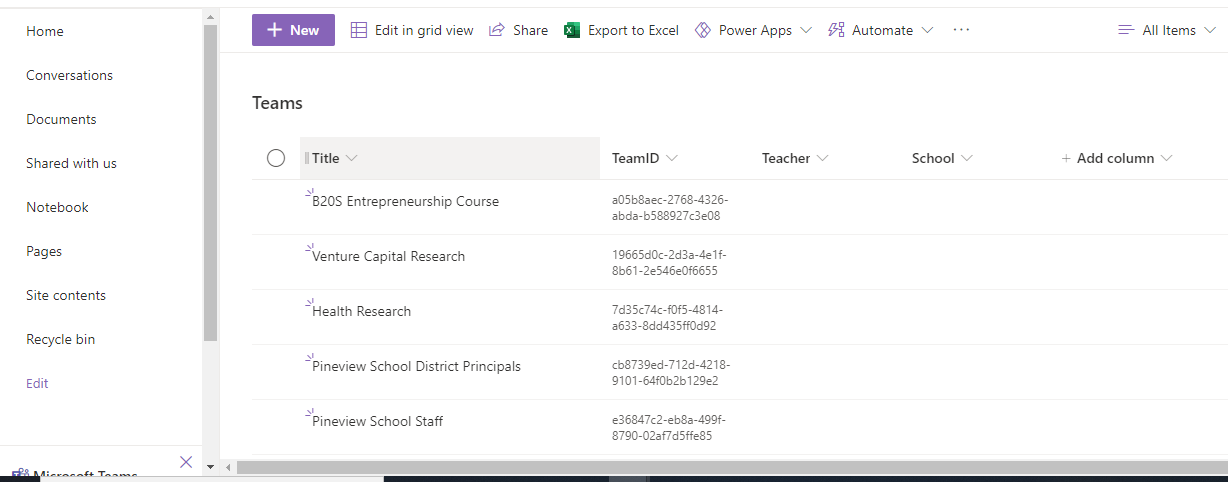
Populate data in the 'Schools', 'Teams', 'Permissions' & 'Timeslot' list manually or you can follow Step-8 & Step-9 to add data in 'Schools,'Timeslot' & 'Teams' list respectively, if the data are huge in number.
Note: For manually adding data (to get TeamName and TeamId) in 'Teams' list follow below steps:
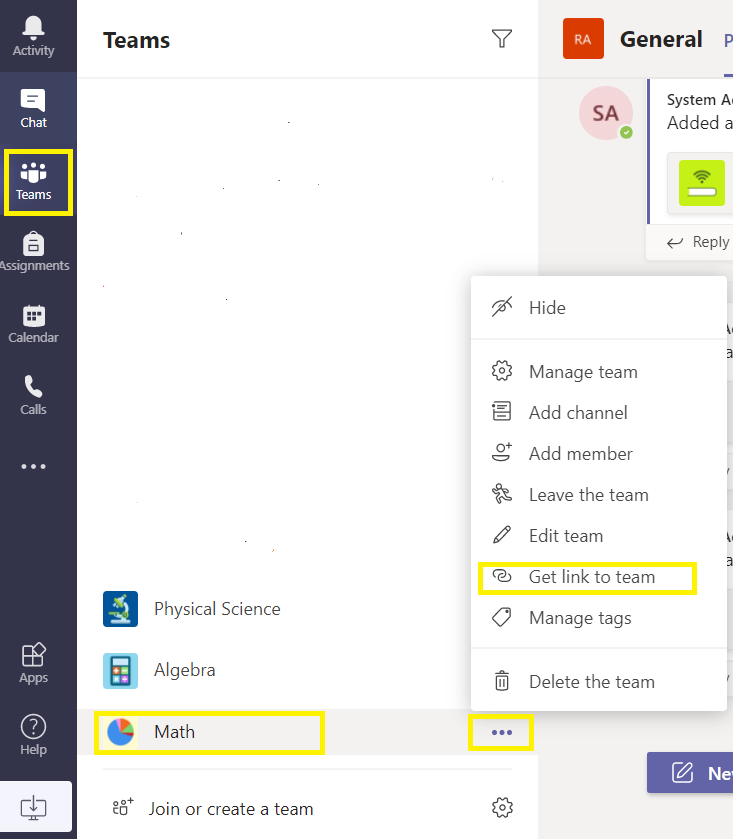
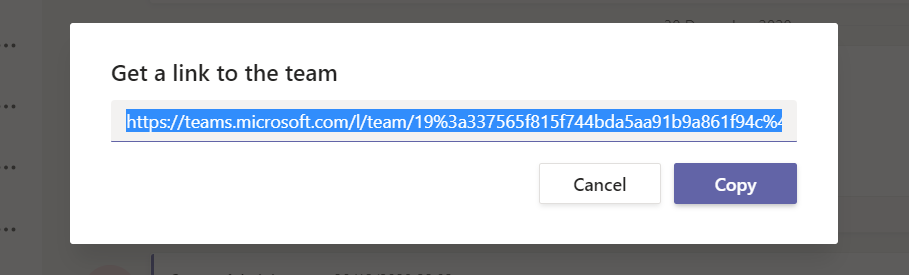

The portion of text marked in blue is the TeamId.
After adding TeamName & TeamId, map each team to their respective school('School' Column) and teacher('Teacher' column) manually_
Step 8 (Optional): Adding data to 'Schools' & 'Timeslot' list
Create Excel with required data and save it in OneDrive.(For reference, a sample excel is attached in deployment folder Drop-inListDatas.xlsx)
By running below flow , you will be able to add data in 'Schools' & 'Timeslot' lists.
Import and set up the 'ImportingDatas Flow' Power Automate
Modifying the Flow ZIP Package
Select ImportingDatasFlow.zip file - it is available under /Deployment/Flows
-
Navigate to your SharePoint site, and open up the List settings for the Schools list
a. The URL should look like this: https://m365edu748418.sharepoint.com/sites/TestDrp/_layouts/15/listedit.aspx?List=%7B8af07276-8e0b-4b02-9809-20b2f7afb5a3%7D
b. Note the List GUID (in this example that would be 8af07276-8e0b-4b02-9809-20b2f7afb5a3 )
-
Navigate to your SharePoint site, and open up the List settings for the Timeslot list
a. The URL should look like this: https://m365edu748418.sharepoint.com/sites/TestDrp/_layouts/15/listedit.aspx?List=%7B8deff760-4871-486c-a5fd-571cdc53eba3%7D
b. Note the List GUID, which is the text in between %7B and %7D at the end (in this example that would be 8deff760-4871-486c-a5fd-571cdc53eba3 )
-
Open (not extract) the ZIP file
-
Open \Microsoft.Flow\flows\202bc30c-4b52-4a30-83c3-f26cf792b32b\definition.json in a text/code editor.
a. Find and replace all instances of “https://m365edu748418.sharepoint.com/sites/TestDrp” with the URL of your SharePoint site.
b. Find and replace all instances of “8af07276-8e0b-4b02-9809-20b2f7afb5a3” with the GUID from step 1b above.
c. Find and replace all instances of “8deff760-4871-486c-a5fd-571cdc53eba3” with the GUID from step 2b above.
d. Save the definition.json file locally on your computer.
-
Drag and drop the new definition.json file into the \Microsoft.Flow\flows\202bc30c-4b52-4a30-83c3-f26cf792b32b folder, and overwrite the existing one.
a. Again, DO NOT try to extract and rezip. You must use this drag and drop method to maintain the integrity of the AIP package.
Import the 'ImportingDatas Flow' Power Automate
-
Go to https://flow.microsoft.com.
-
Select My flows from the left navigation pane.
-
Select Import on the command bar.
-
Upload the ImportingDatasFlow.zip package - this is available under /Deployment/Flows.
-
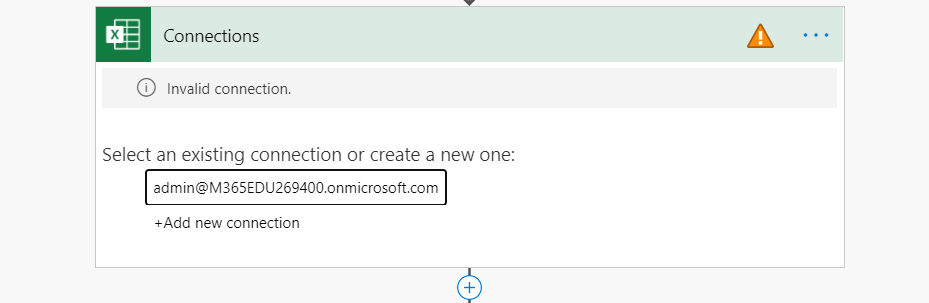
Add a SharePoint connection for the new flow by selecting the Select during import link and completing the form.
-
If you need to create a new SharePoint connection, select Create new in the Import setup pane and follow the instructions as before.
Edit the 'ImportingDatas Flow' Power Automate
-
After the import is done, go to My flows and refresh the list of flows.
-
Select the newly imported flow, ImportingDatas Flow
-
Select Edit on the command bar.
-
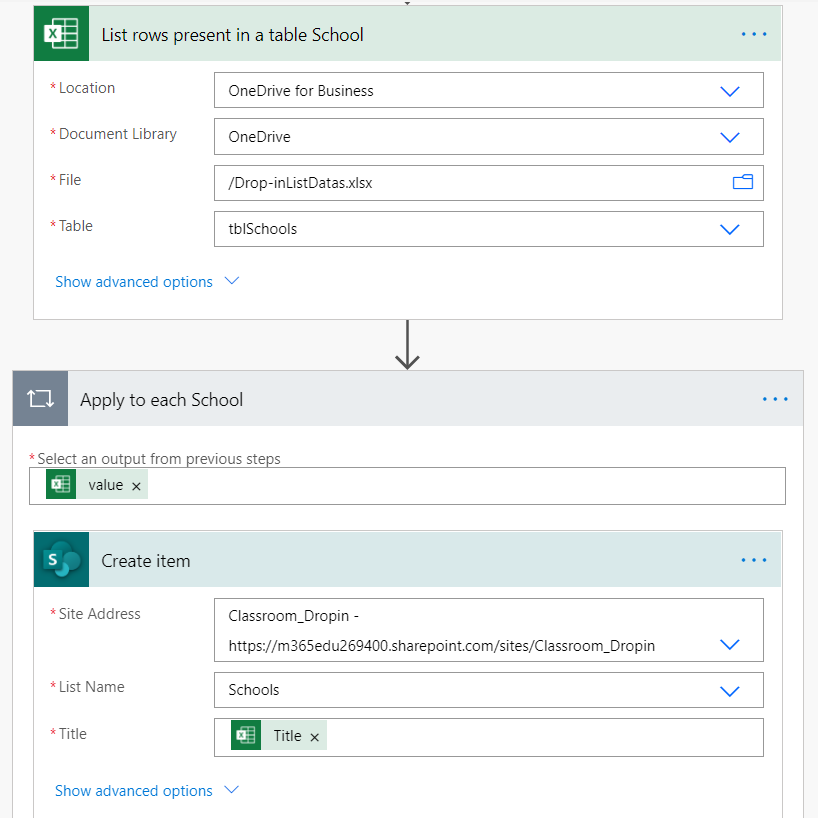
Select the trigger "List rows present in a table School" step card.
-
Change the File with your data Excel
-
Change the table with your data Excel table(tblSchools) name
-
Select the trigger "List rows present in a table Timeslot" step card.
-
Change the File with your data Excel
-
Change the table with your data Excel table(tblTimeslots) name
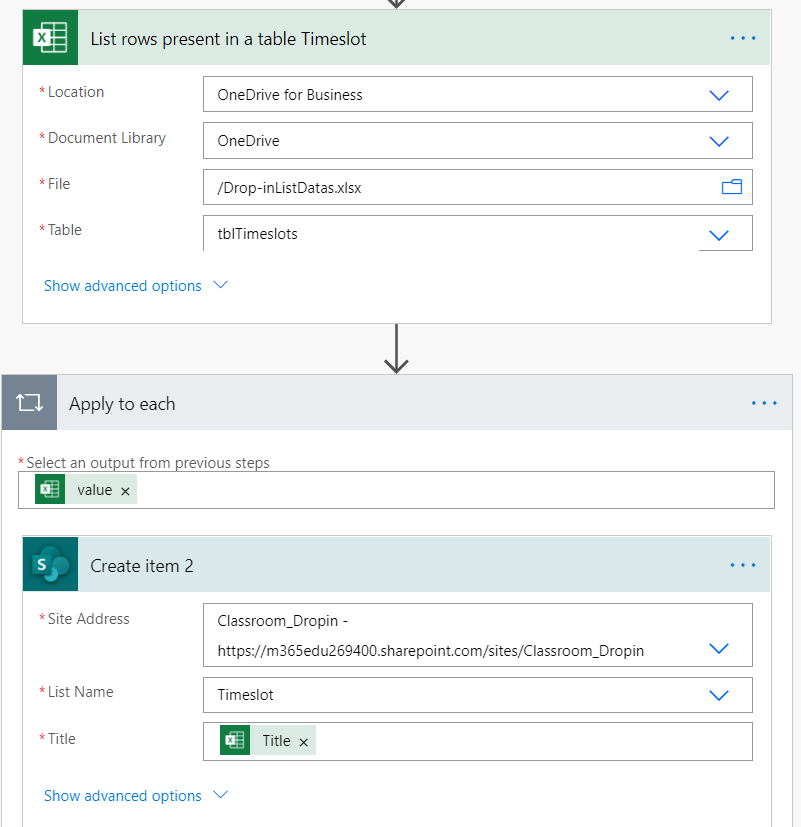
- Select Save.
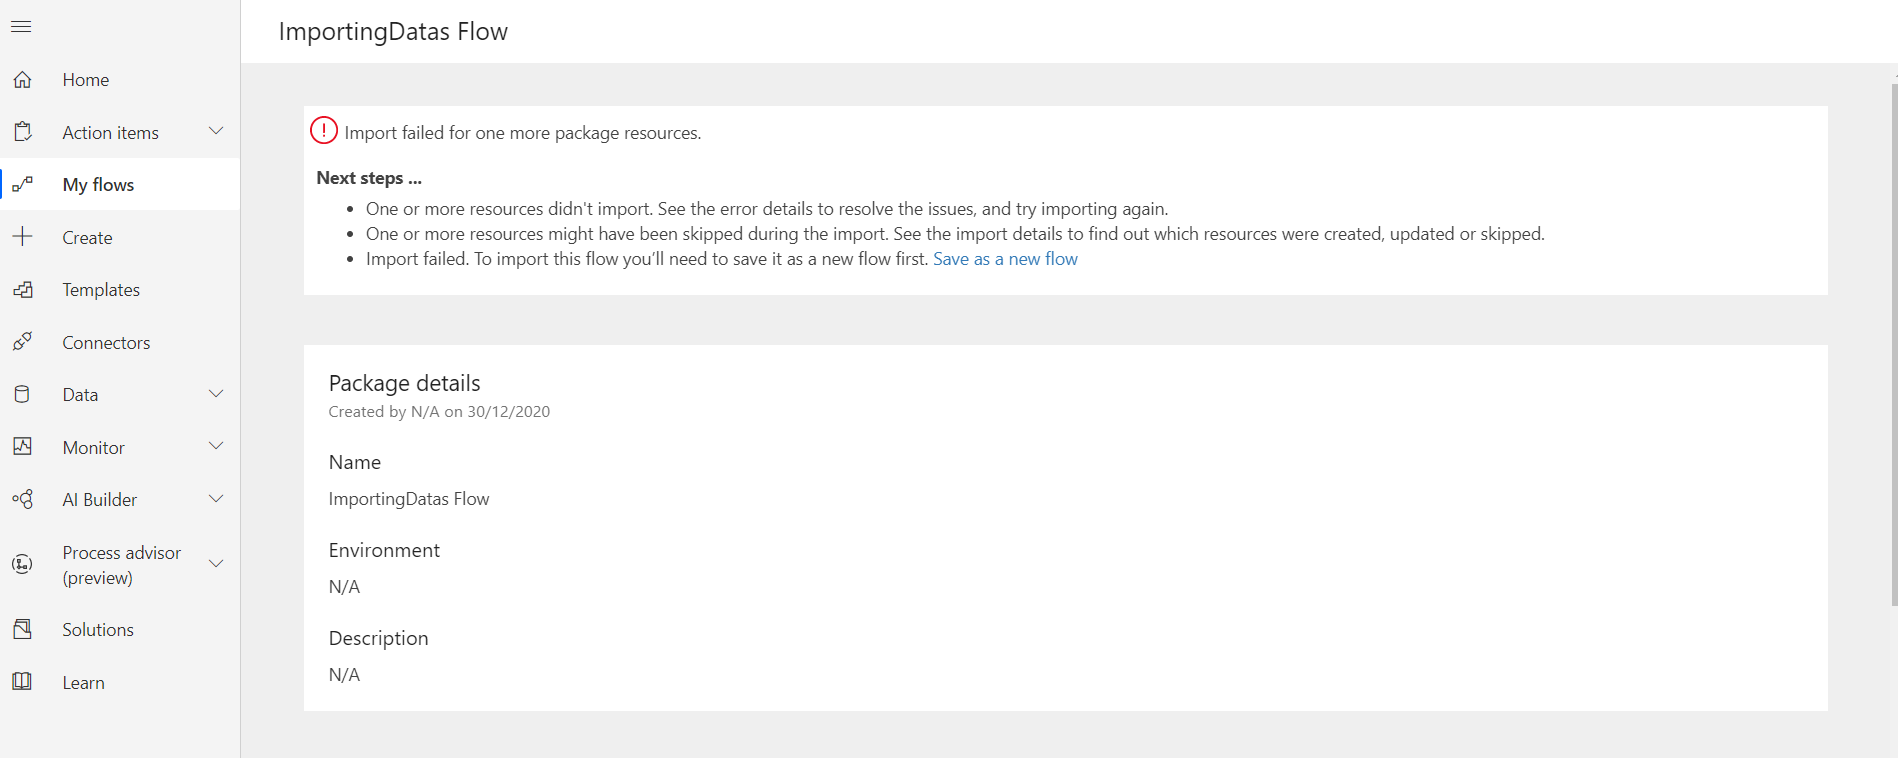
Note: If importing fails for some reason, then click on 'Save as a new flow' and fix the connections
Step 9 (Optional): Adding data to 'Teams' list
For adding data(TeamName and TeamId) to 'Teams' list by PowerShell Script, follow below steps:
- Open PowerShell Command Prompt as Administrator & run the below script.
Note: _ This script will create the TeamsData.csv file with TeamName and TeamID in c:\temp Path.It Prompts for login, login with valid credentials._
Install-Module -Name MicrosoftTeams -Repository PSGallery

Connect-MicrosoftTeams

$AllTeamsInOrg = (Get-Team).GroupID

$TeamList = @()

Write-Output "This may take a little bit of time... Please sit back & relax!"

Write-Host ""

Foreach ($Team in $AllTeamsInOrg)
{
$TeamGUID = $Team.ToString()
$TeamName = (Get-Team | ?{$_.GroupID -eq $Team}).DisplayName
$TeamList = $TeamList + [PSCustomObject]@{TeamName = $TeamName; TeamObjectID = $TeamGUID}
}

#######

$TestPath = test-path -path 'c:\temp'

if ($TestPath -ne $true) {New-Item -ItemType directory -Path 'c:\temp' | Out-Null

write-Host  'Creating directory to write file to c:\temp. Your file is uploaded as TeamsData.csv'}

else {Write-Host "Your file has been uploaded to c:\temp as 'TeamsData.csv'"}

$TeamList | export-csv c:\temp\TeamsData.csv -NoTypeInformation
- After successful run of above script please run the below script as well to add data obtained in TeamsData.csv file to 'Teams' SharePoint list(If you want, you can filter out the data present in the file and keep only required data). It also prompts for login, login with valid credentials.
Note: _ Please replace SiteUrl with yours Site URL._
Install-Module SharepointPNPPowershellOnline

$SiteUrl = "https://m365edu748418.sharepoint.com/sites/TestDrp"

$ListName = "Teams"

$CSVPath = "c:\temp\TeamsData.csv"

$CSVData = Import-CsV -Path $CSVPath

Connect-PnPOnline $SiteUrl -UseWebLogin

ForEach ($Row in $CSVData)
{
Write-Host "Adding Contact $($Row.FirstName)"
Add-PnPListItem -List $ListName -Values @{"Title" = $($Row.TeamName);
"TeamID" = $($Row.TeamObjectID);
};
}
- After sucessful run of above script, data will get inserted into 'Teams' List.
Note: This script adds data to Title(TeamName/Class) and TeamID column in 'Teams' list. After running the flow please map each team to their respective school('School' Column) and teacher('Teacher' column) manually
Step 10 (Optional): Indexing SharePoint lists
Adding an index to a list column increases performance when using filters. You can add indexes on up to 20 columns on a list. While you can add up to 20 indexes per list, it's recommended you add indexes to only to the most commonly used columns and on those columns which you are using to filter data both in views as well as using the column headers. Indexes add overhead to the data so use them only where they make sense to be used.
Please follow below instructions for Indexing.
-
Navigate to your SharePoint Site. (url looks like https://m365edu748418.sharepoint.com/sites/Classroom_DropIn)
-
Click on Site Contents on the left bar.
-
Hover over the 'Active' list and click the three dots (“Show Actions”), then select “Settings”.

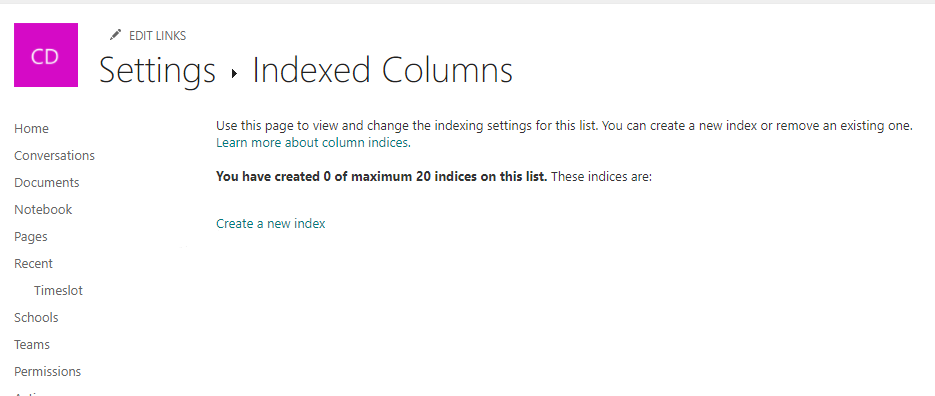
- Scroll down and select "Indexed Columns".
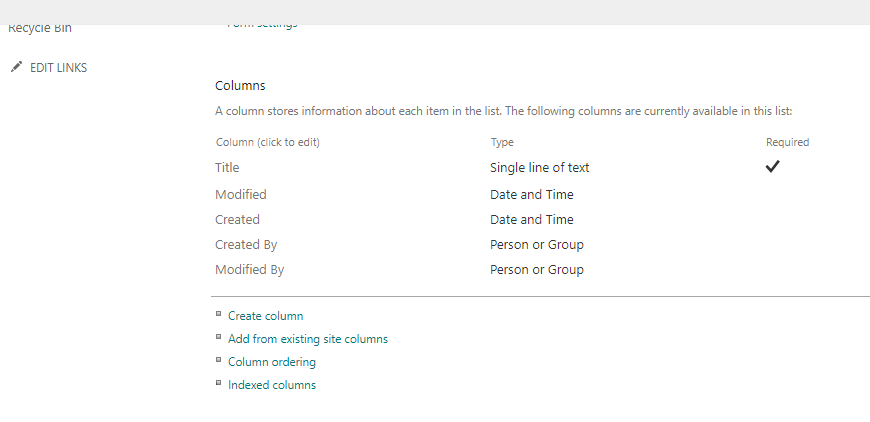
- Click “Create a new index”
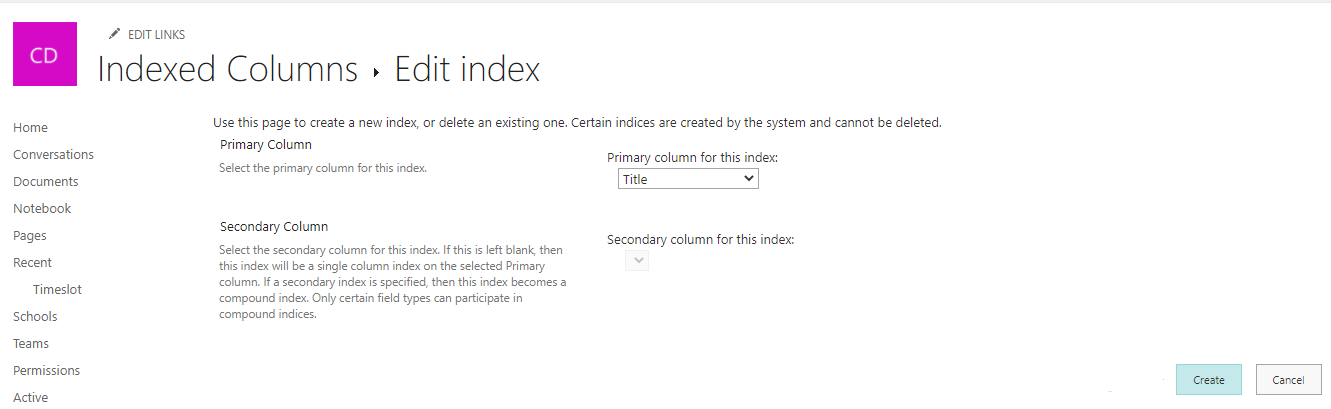
- For “Primary Column”, select your “Title” column, and click Create.
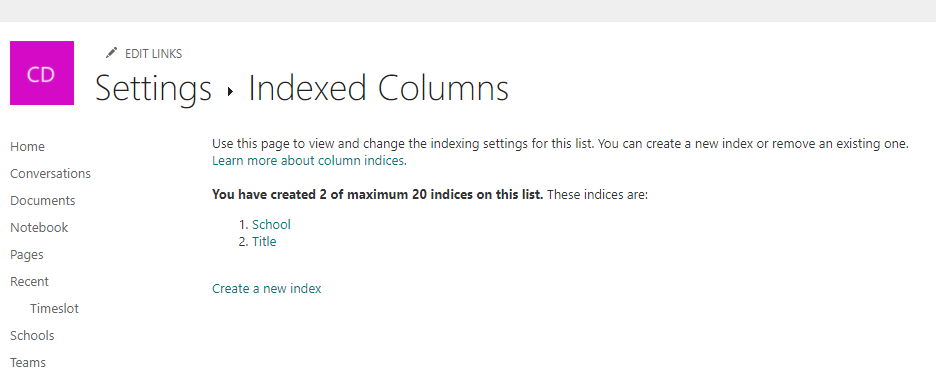
Repeat steps 3-6 for remaining lists:
- Log
- Permissions
- Schools
- Teams
- Timeslot