Deployment guide - OfficeDev/microsoft-teams-apps-buildingaccess GitHub Wiki
If you already have a working instance of the v1 app in your tenant, please follow the steps to migrate from the older version to the current version. If not, please go through the steps outlined below for a fresh deployment.
Prerequisites
To begin, you will need:
- Power Apps Studio
- Power Automate
- A valid SharePoint Online license and permission to create lists and store data
- A copy of the Building Access app zip package
Package contents
Table below lists the zip packages under /Deployment folder required during application set up:
| Component | Filename | Description |
|---|---|---|
| SharePoint List creation flow | DeploySPLists.zip | Creates the lists necessary to hold the data in the app. |
| Building Access end-user app and create request flow | BuildingAccess.zip | Allows users to request space in a building and managers to approve requests. |
| Building Admin application | BuildingAdmin.zip | Allows facility management teams to configure building details, occupancy thresholds and other app settings |
| Building Security application | BuildingSecurity.zip | Allows security offices and lobby managers to validate access for users and check in |
| Approver notification flow | BARNotifyApprover.zip | Sends an adaptive card to the approving manager in Microsoft Teams |
| Calendar Reservation flow | BARCalendarReservation.zip | Creates Calendar reservation for requested dates in Outlook Calendar |
| Microsoft Power BI Dashboard | Building Access Insights.pbix | Dashboard provides insights around building occupancy, trending metrics and contact tracing |
| Label & messages translations | colTranslations.xlsx | Excel file containing machine translations for 44 languages for all the labels and messages used in the app. |
Step 1: Create SharePoint site
-
Sign in to https://www.office.com/, and then select SharePoint on left navigation bar.
-
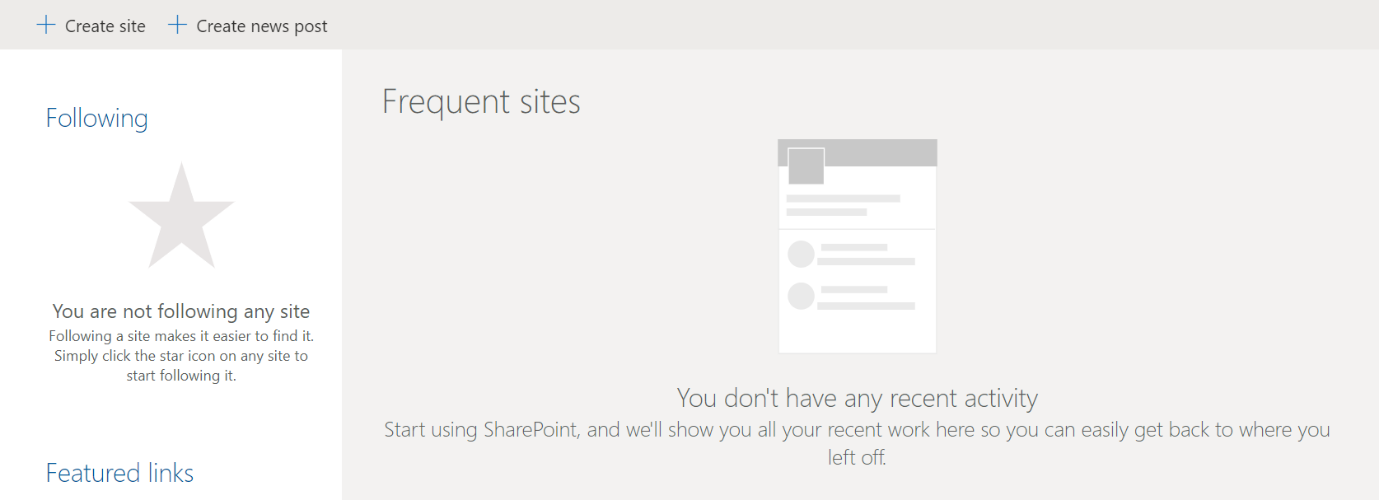
After navigating to SharePoint, select Create site.
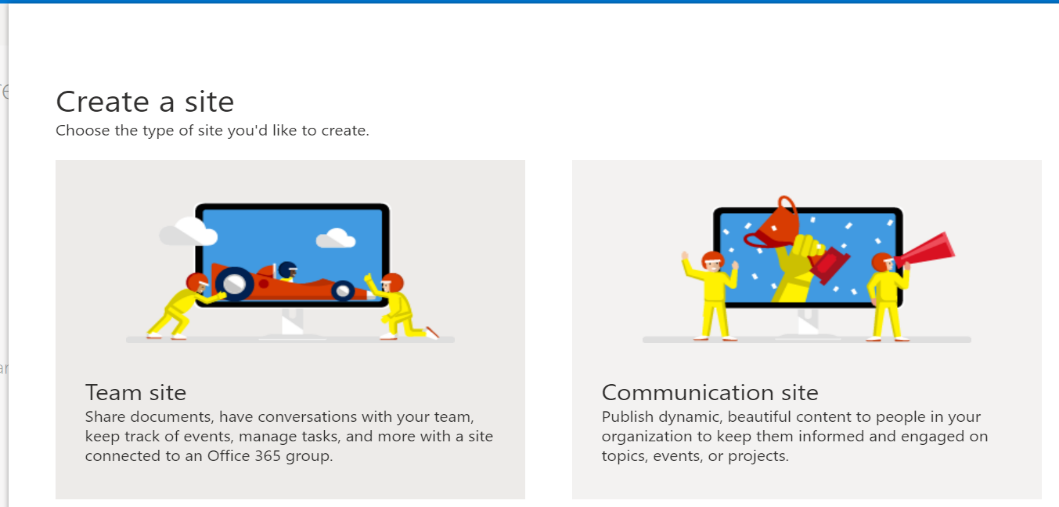
- Select Team site.
- Enter name and description for your site.
- Set Privacy settings to Public so that everyone in the company can get the necessary information.
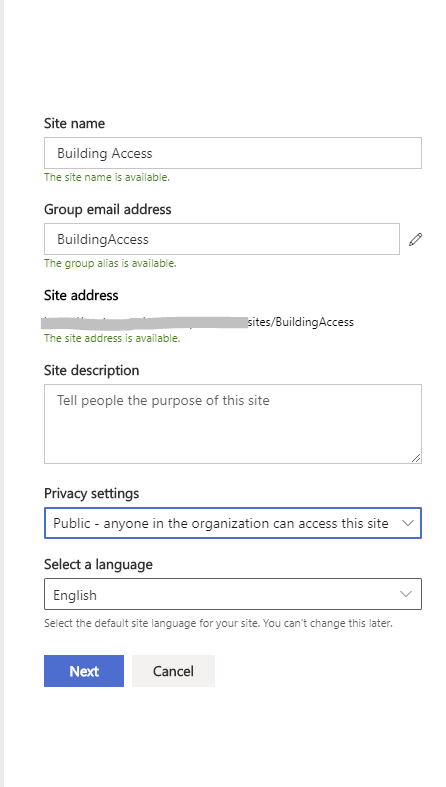
- Select Next.
- Add additional owners for the site (optional).
- Select Finish.
Step 2: Create SharePoint Lists
The app uses multiple lists to store its data. You can use the DeploySPLists Power Automate, available from the downloaded package inside Flows folder, to automatically create these lists. The Power Automate creates the required lists and fields.
Import the SharePoint List deployment flow
- Go to https://flow.microsoft.com.
- Select My flows from the left navigation pane.
- Select Import on the command bar.
- Upload DeploySPLists.zip package.
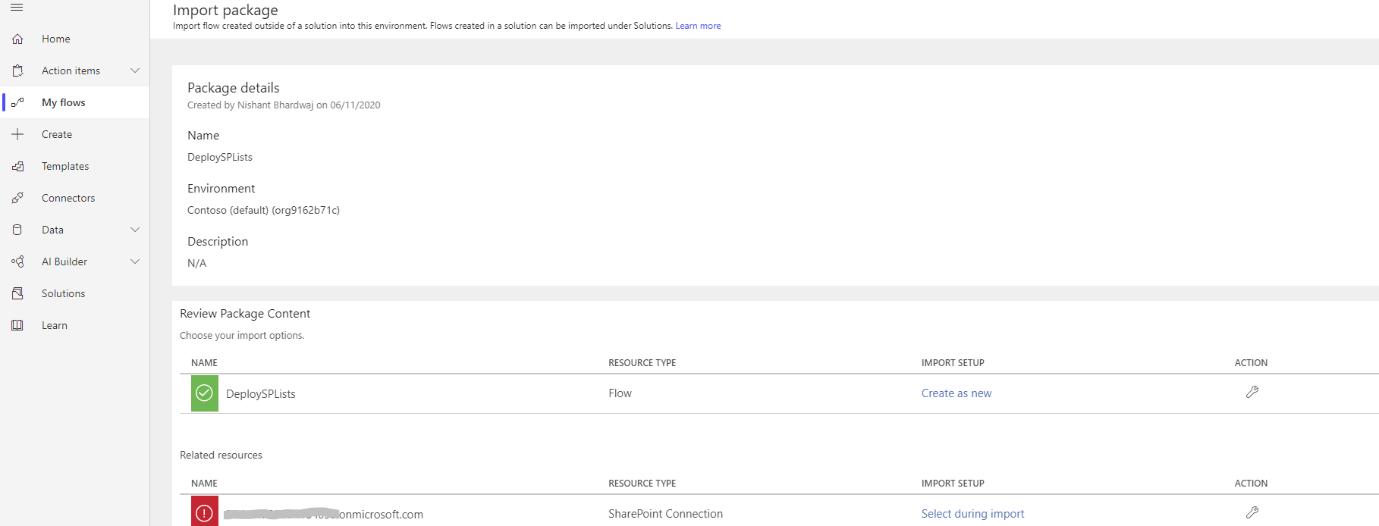
- Under Related resources, add a SharePoint connection by selecting the Select during import link
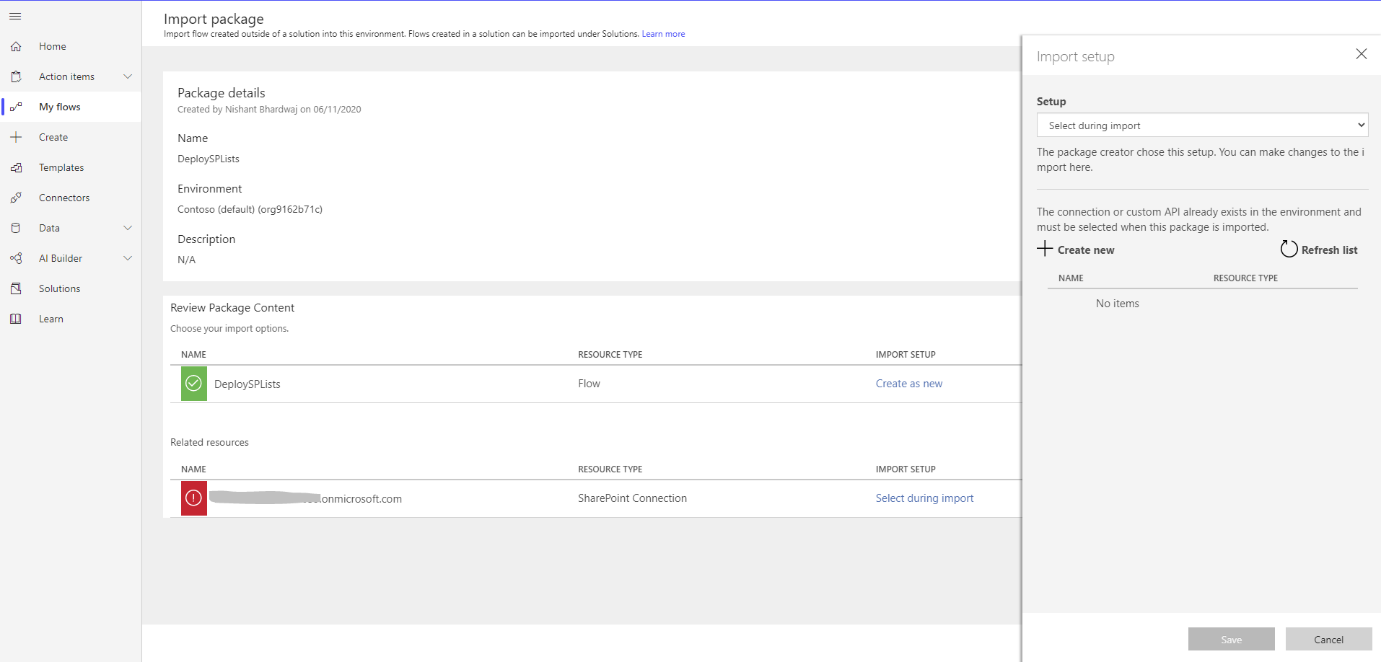
- If you need to create a new SharePoint connection, select + Create new in the Import setup pane.
note: a new tab/window will open to allow creating new connection keeping the existing tab open. Please do not close the existing tab.
- Select New connection on the command bar.

- Search for the SharePoint connector and click on +.
- Choose "Connect directly (cloud-services)"to connect to SharePoint online.
- Return to the tab where flow is imported and select the connection you just created.
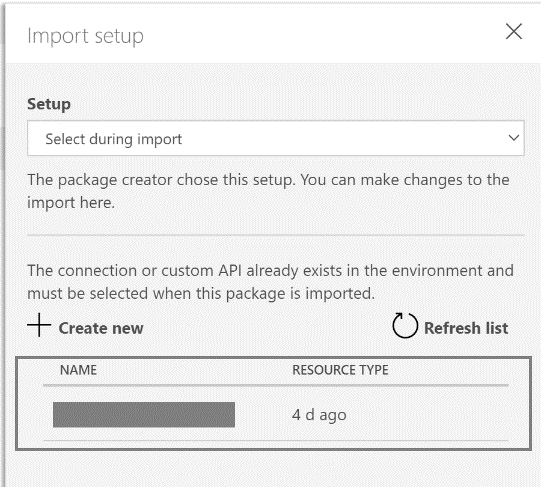
- Select Save, this will close the flyout menu.
- Select Import.
Edit the SharePoint List deployment flow
-
After the import is done, go to My flows and refresh the list of flows.
-
Select the newly imported flow, DeploySPLists.
-
Select Edit on the command bar.
-
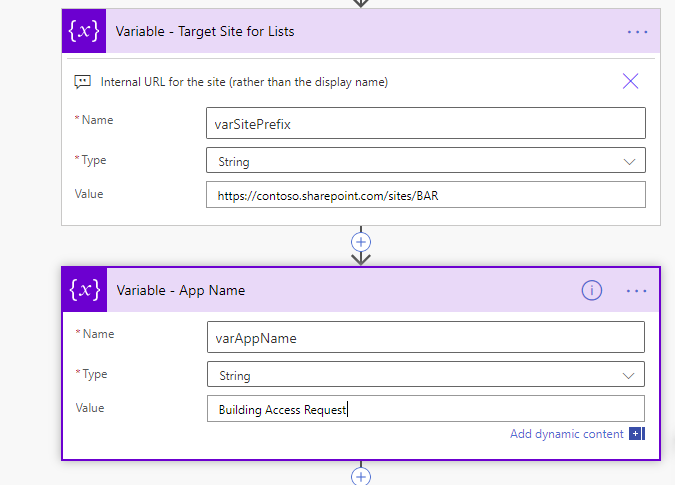
Open the 'Variable - Target Site for Lists' step card.
-
Under Value, change the URL with your SharePoint site (e.g. https://contoso.sharepoint.com/sites/BAR).
-
Open the 'Variable - App name' card.
-
For Value, enter the name of your app; by default, the name is Building Access.
-
Select Save.
Run the SharePoint List deployment flow
- Click the back arrow to return to the detail screen for the DeploySPLists flow.
- Select Run on the command bar.
- Select Continue, and then select Run flow
Note: You might receive an error stating that location services are required. If this occurs, allow location services to access Power Automate and refresh the page before trying again.
-
Run usually takes 30-40 seconds. Refresh the page until the run status changes from running to Succeeded.
-
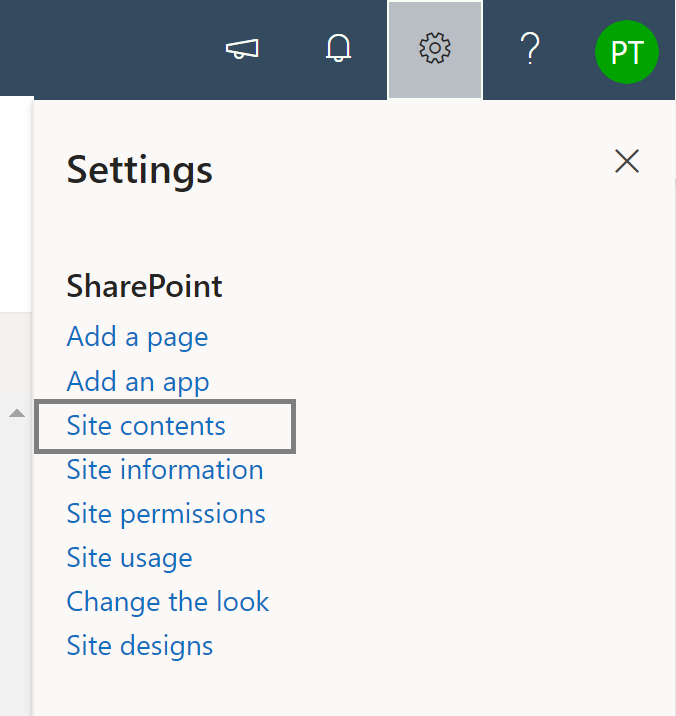
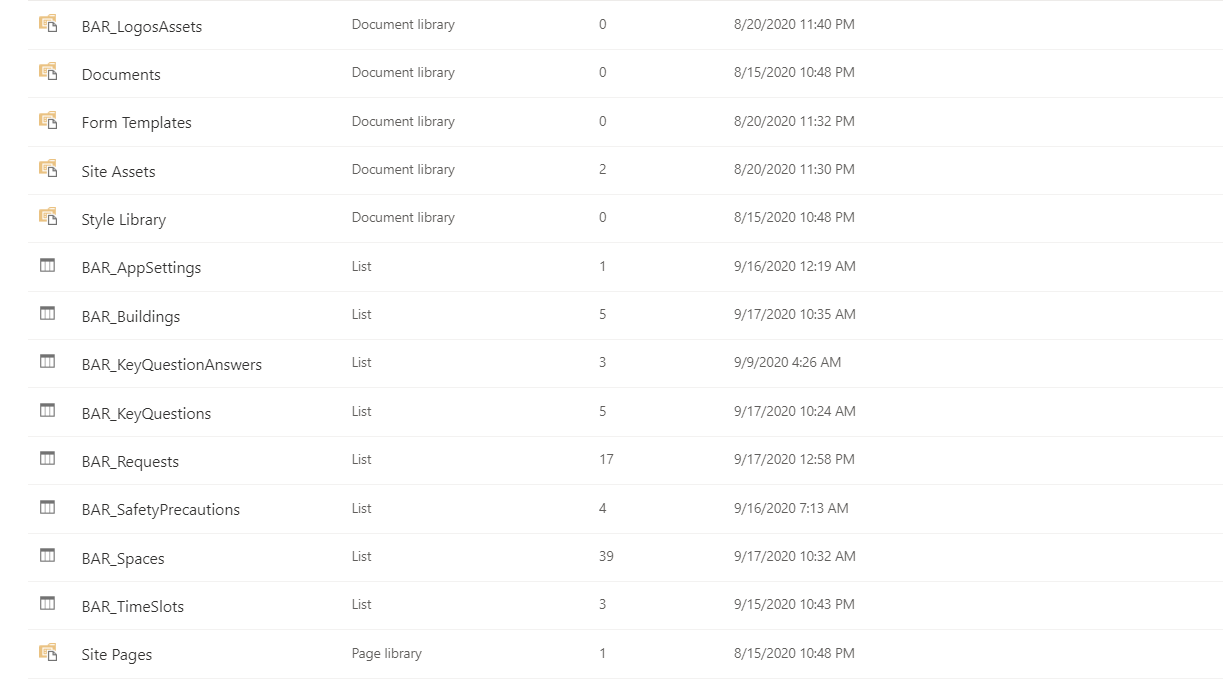
Navigate to your SharePoint site and verify below SharePoint lists created by clicking on the gear icon in the top right > Site Contents. Please check if there are 8 SharePoint Lists created (as shown in below screenshot).
SharePoint Security
SharePoint Lists should be configured using principal of least privilege. This is to ensure that the users are only given privileges that they require for seamlessly using the Apps in an intended way.
Application supports following personas and it is important that each roles should be provided with appropriate access level -
- Admins are users who use the Building admin app and are responsible for configuring key settings and reference data for the Building Access App.
- Users use the Building Access App. Users make reservation requests. Users are also managers who are responsible for approving the reservation requests.
- Security are users who use the Building Security App responsible for building security and ensuring that users follow protocols by managing their entry to the building.
Refer to the permission matrix below to ensure users have right level of access to the SharePoint Lists.
| LISTS | USERS | ADMIN | SECURITY |
|---|---|---|---|
| BAR_AppSettings | Read | Read, Edit | Read |
| BAR_TimeSlots | Read | Read, Edit | Read |
| BAR_Buildings | Read | Read, Edit | Read |
| BAR_KeyQuestionAnswers | Read, Edit | Read, Edit | Read, Edit |
| BAR_KeyQuestions | Read | Read, Edit | Read |
| BAR_Requests | Read, Edit | Read, Edit | Read, Edit |
| BAR_SafetyPrecautions | Read | Read, Edit | Read |
| BAR_Spaces | Read | Read, Edit | Read |
Note
-
Currently SharePoint site has been configured as Public. This means all users in your organization are members of the site.
-
Admins should be configured as owners of the site.
-
As the site is public, security users are already part of the members group of the site.
Steps below show how to set up permissions for the BAR_AppSettings list. Same steps can be followed for other lists to provide access as per the permission matrix above.
-
Navigate to the SharePoint site.
-
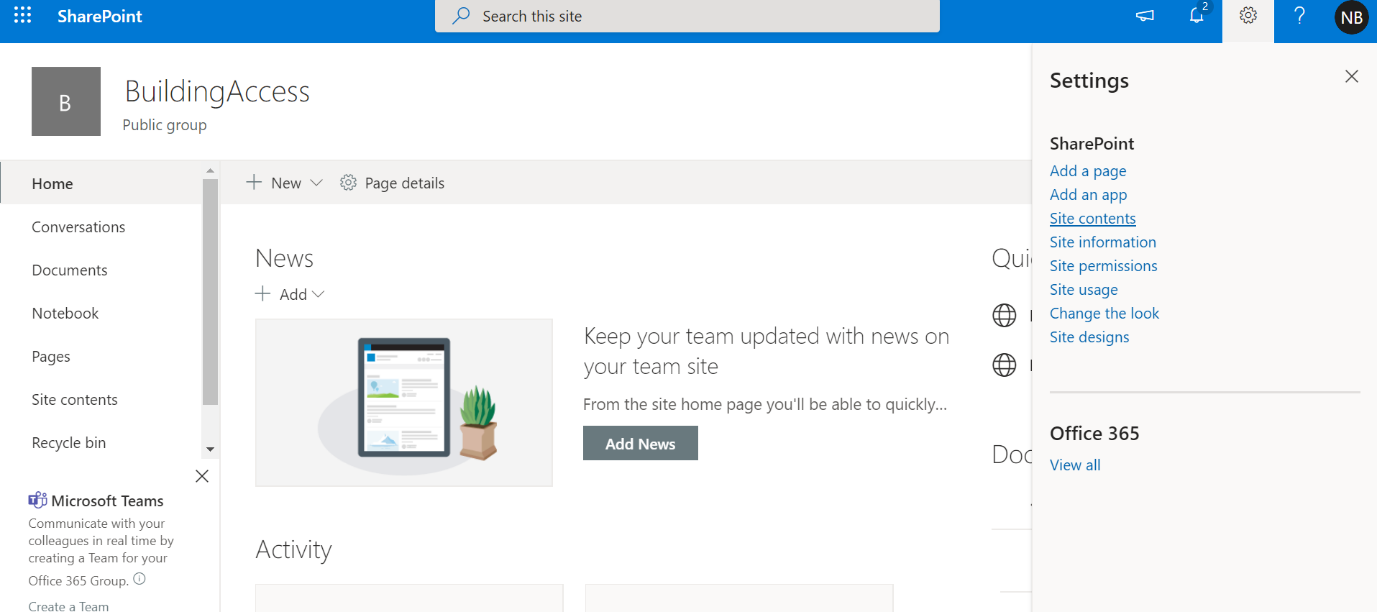
Click on the gear icon on top right and then click Site Contents.
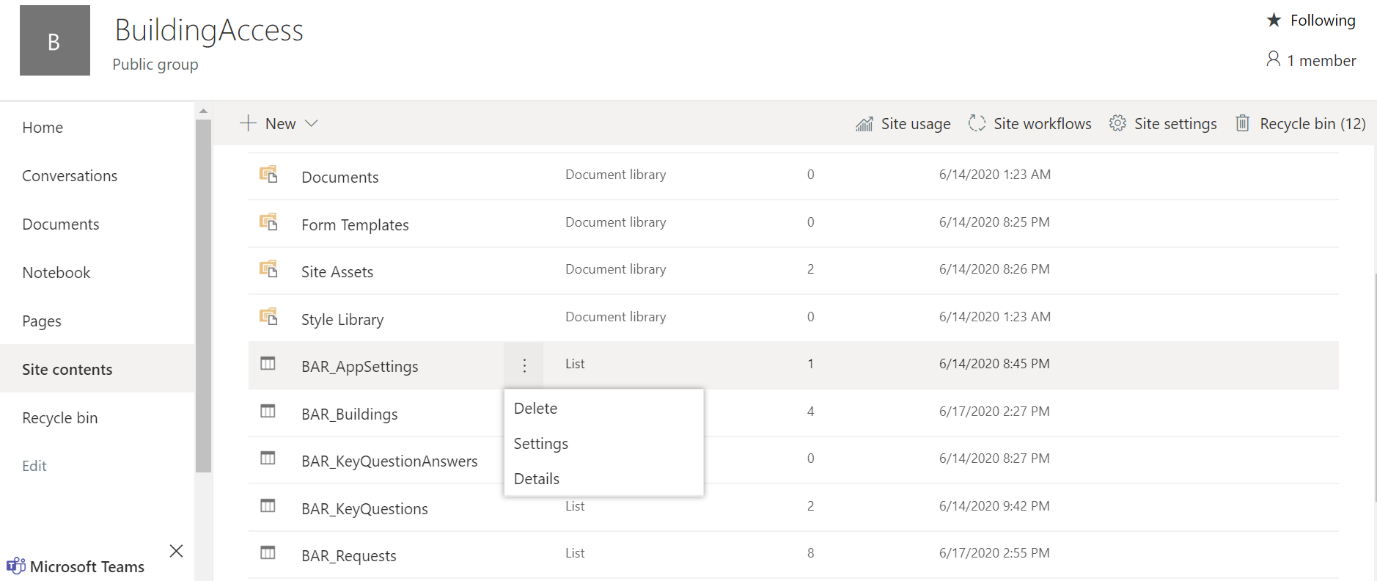
- Click Show Actions icon and then select Settings
- In the Permissions and Management section, click Permissions for this List
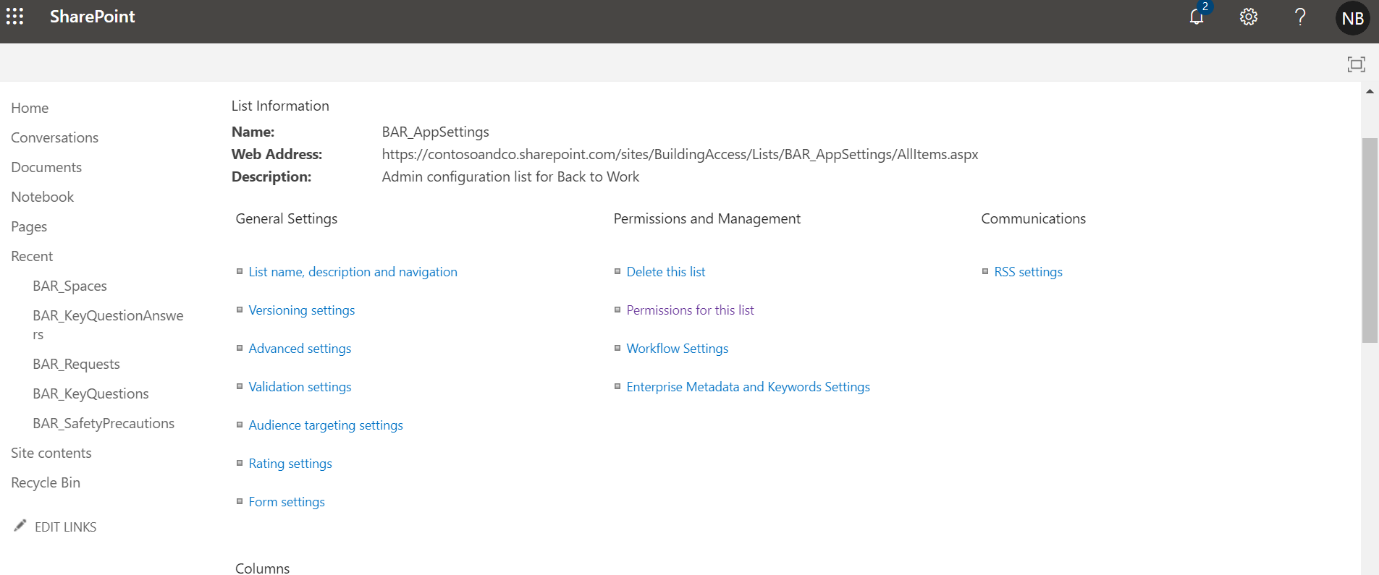
- On the top left corner Click Stop Inheriting Permissions.
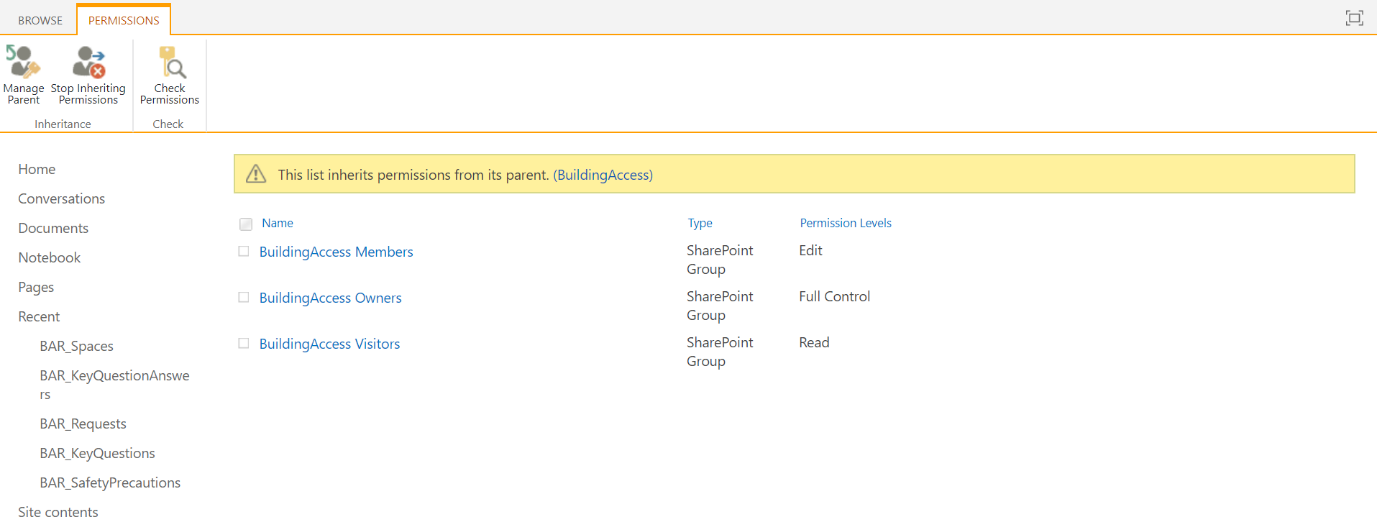
-
This creates unique permissions for the list.
-
Select the members group.
-
Select Edit User Permissions
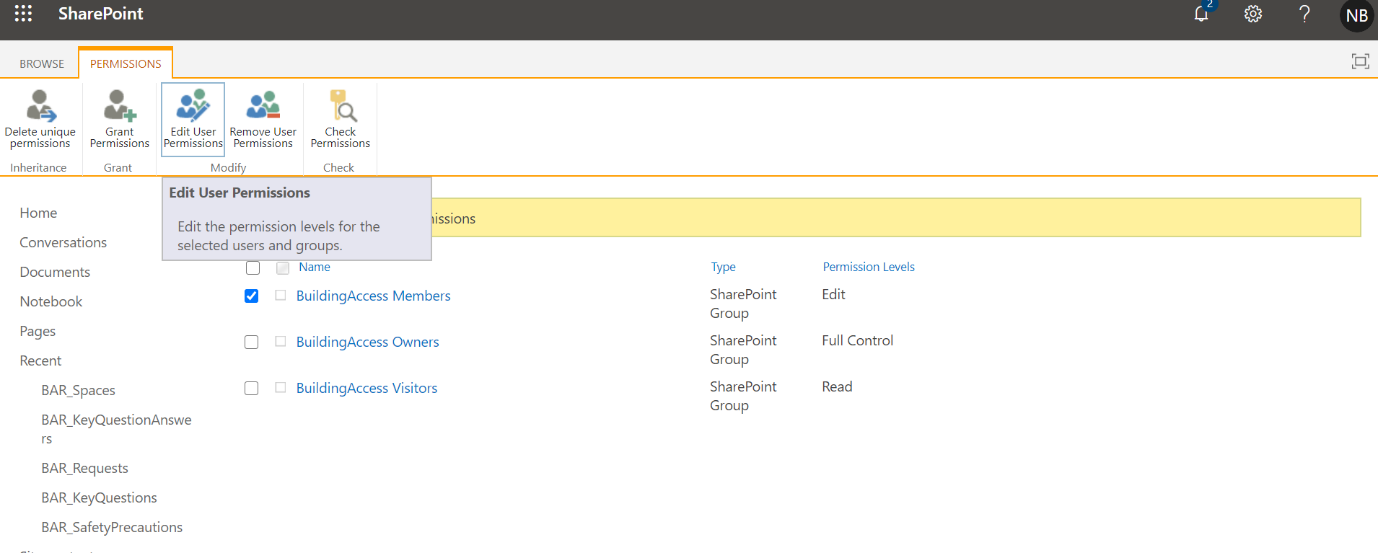
- Uncheck Edit and check Read.
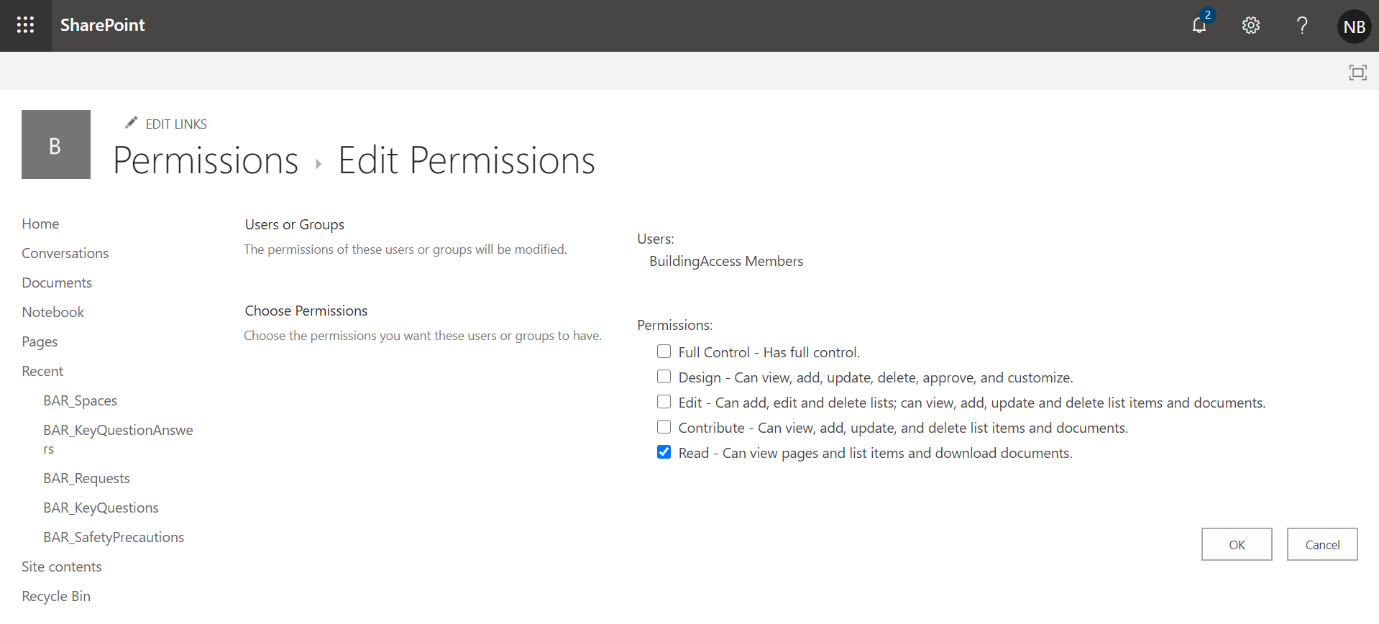
- Click Ok.
tip
-
The SharePoint site can be configured as a private site.
-
If site is configured as private, it is important that list permission matrix is followed.
Step 3: Import and Set up the Building Access app
After all SharePoint Lists have been created, you can import the app and connect it to your new data sources.
Import the app
-
Sign in to Power Apps.
-
Select Apps from the left navigation pane.
-
Select 'Import canvas app' on the command bar.
-
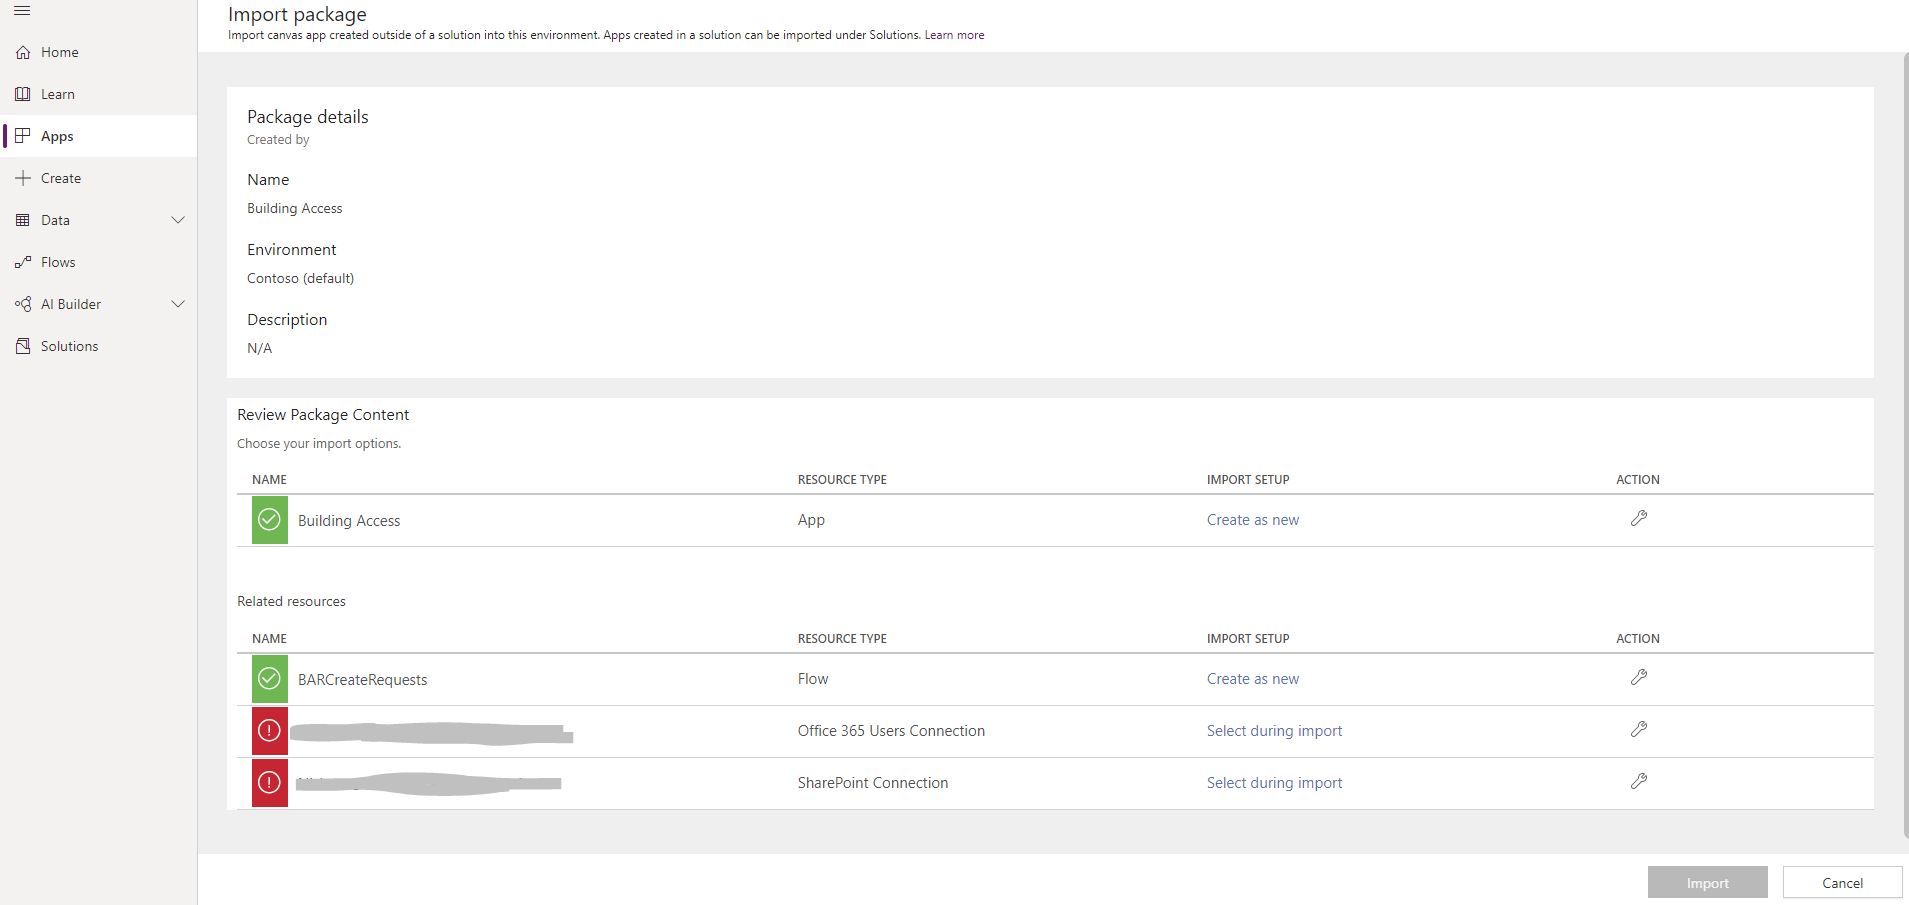
Upload the BuildingAccess.zip file - it is available under /Deployment/Power Apps
-
Complete the import setup for SharePoint Connection and Office 365 Users Connection by selecting the appropriate connections by using the Select during import hyperlink. You might have to create a new connection for Office 365 users and SharePoint, if it doesn't already exist.
-
Select Import.
Update the SharePoint connections
- After successful import, go back to the Apps.
- Select More commands (...) for the 'Building Access' app.
- Select Edit from the context menu.
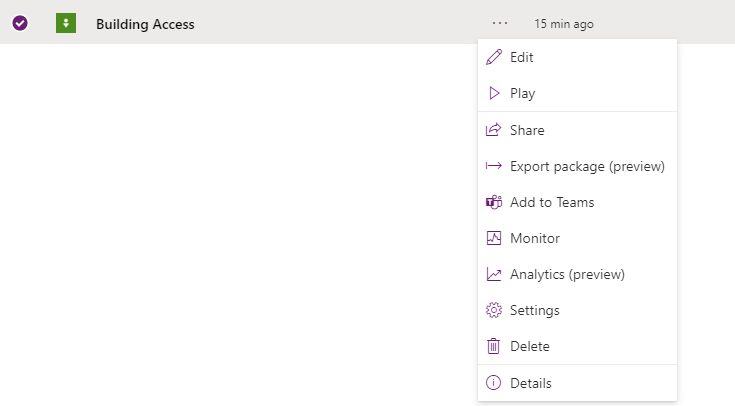
- Sign in or create any necessary connections, and then select Allow.
- Go to the data sources in the left pane.
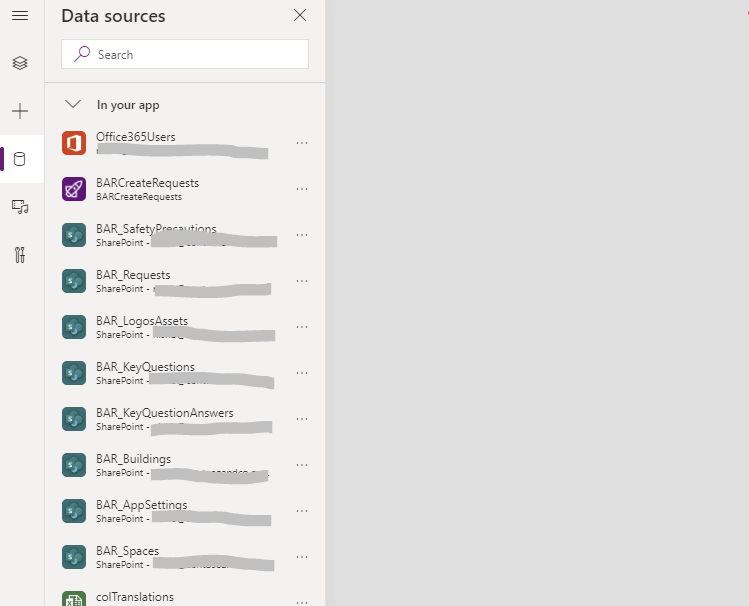
- Click the "..." to remove existing SharePoint Lists inside the app, because they don't point to your current SharePoint site.
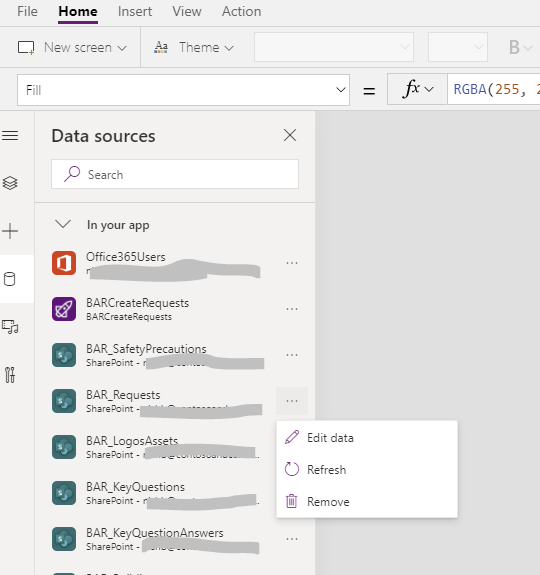
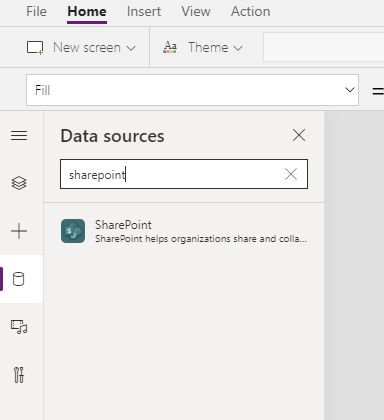
- Add the lists from your own SharePoint site. Start by searching for SharePoint in the search bar.
- Select SharePoint, and then choose a connection.
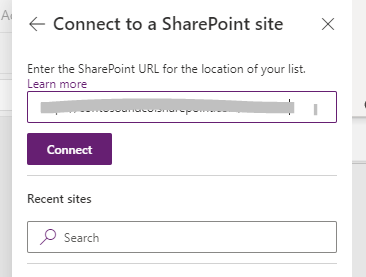
- Copy and paste the URL to your SharePoint site in the text field, and then select Connect.
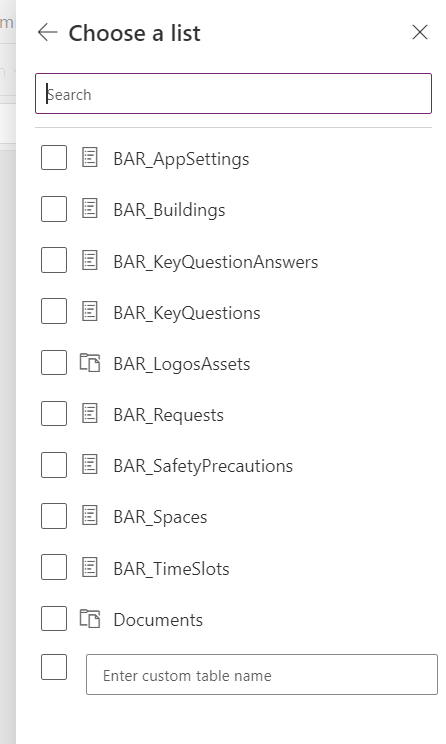
- Select all the SharePoint Lists and libraries that start with "BAR", and then select Connect.
- From the File menu, select Save, and then select Publish.
Update the BARCreateRequests Power Automate
This flow is called from within the Building Access app. This creates the building reservation request in the SharePoint List. The flow passes the context information back to the Building Access app.
- Go to https://flow.microsoft.com.
- Select My Flows from the left navigation pane.
- Select More commands(...) for BARCreateRequests, and then select Edit.
- Open the INIVarSiteURL step card.

-
For Value, enter the URL of your SharePoint site.
-
In case if you see a warning icon, then open the action and set up a connection by clicking "Add new connection". If you do not see any warning, then move to next step.

- Select Save.
Step 4: Import and set up the BARNotifyApprover Power Automate
Import the BARNotifyApprover Power Automate
- Go to https://flow.microsoft.com.
- Select My flows from the left navigation pane.
- Select Import on the command bar.
- Upload the BARNotifyApprover.zip package - this is available under /Deployment/Flows.
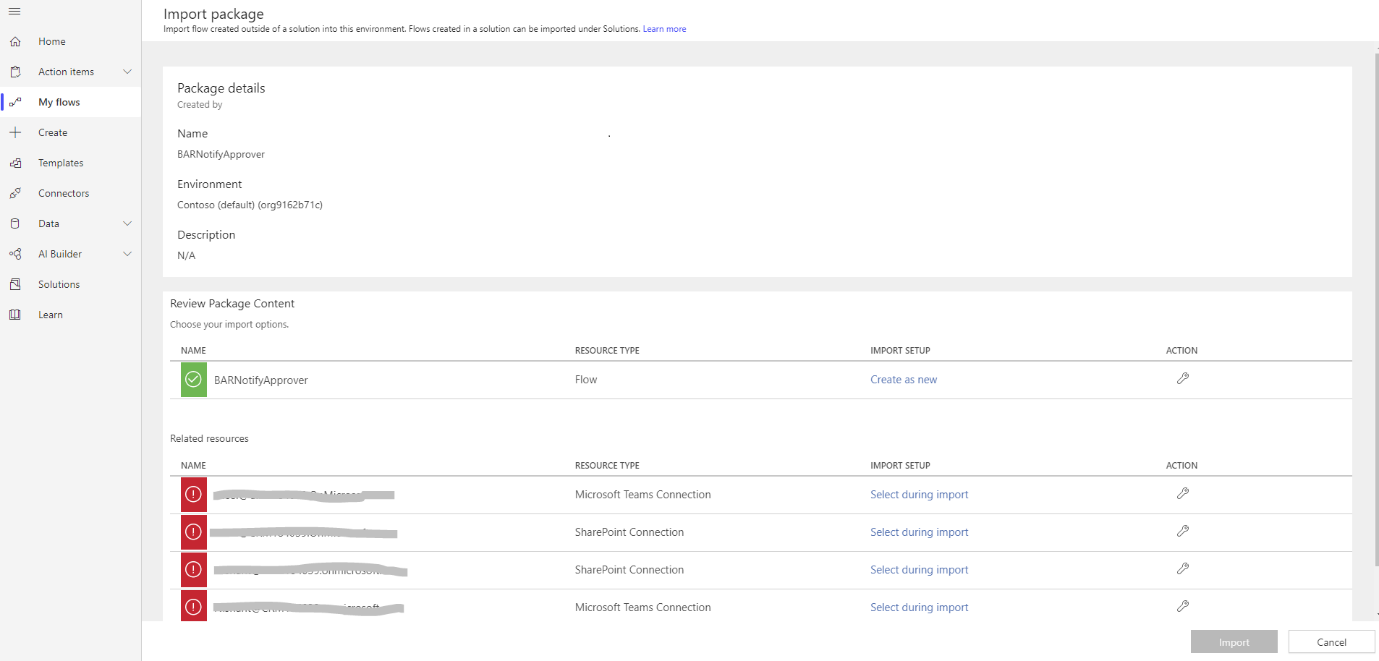
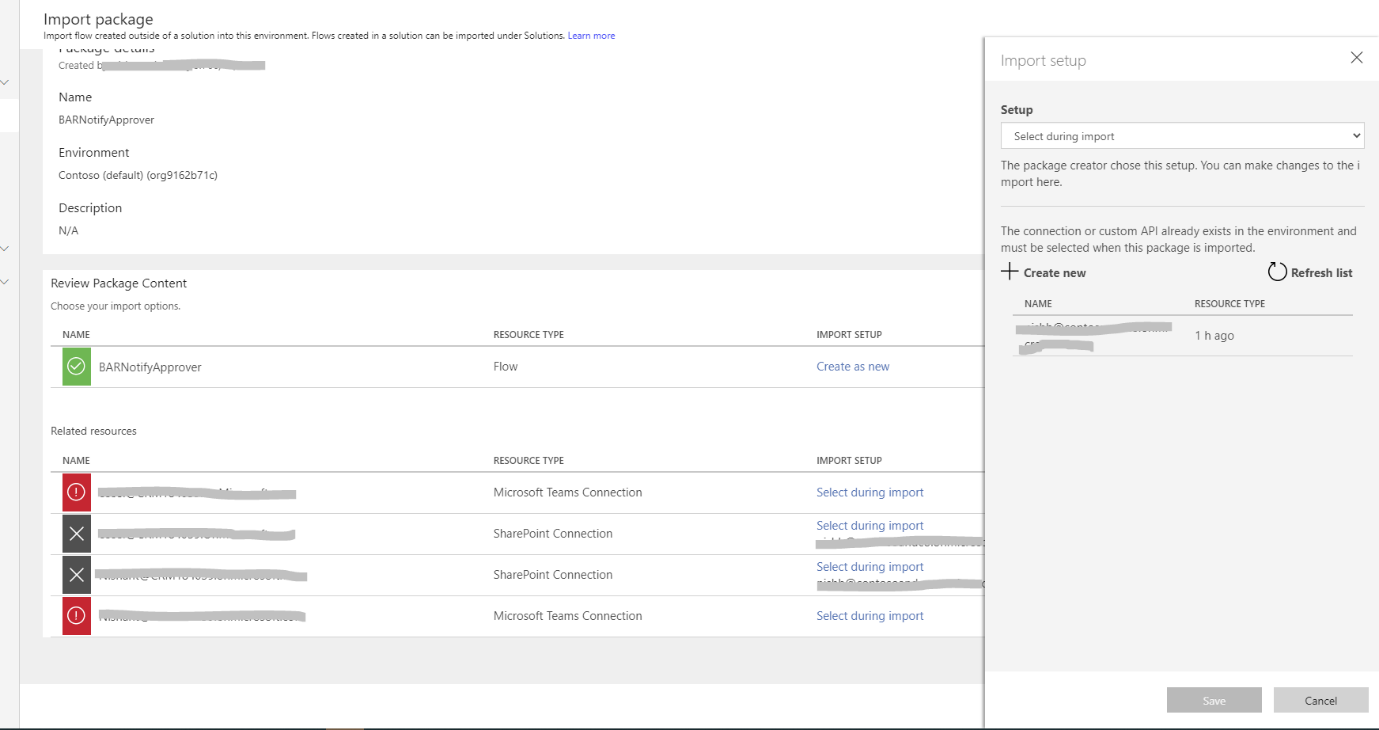
- Add a SharePoint connection for the new flow by selecting the Select during import link and completing the form.
-
If you need to create a new SharePoint connection, select Create new in the Import setup pane and follow the instructions as before.
-
Add a Microsoft Teams Connection by selecting the Select during import link and completing the form.
-
If you need to create a new Microsoft Teams connection, select Create new in the Import setup pane.
-
Select New connection on the command bar.
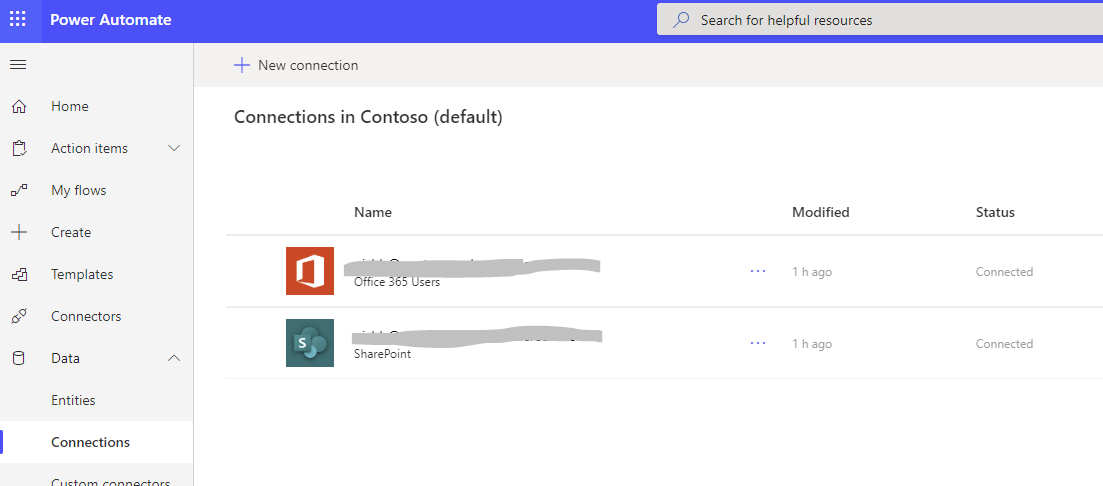
- Search for the name of the connection, for example Microsoft Teams.

- Select the connection you created.
- Select Save.
Edit the BARNotifyApprover Power Automate
-
After the import is done, go to My flows and refresh the list of flows.
-
Select the newly imported flow, BARNotifyApprover
-
Select Edit on the command bar.
-
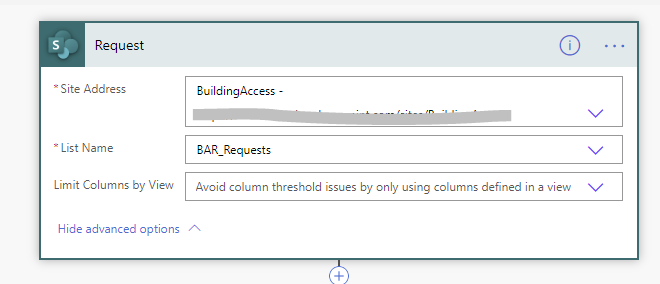
Select the trigger "Request" step card.
-
Change the Site Address to the URL of your SharePoint site.
-
Update the List name to BAR_Requests (tip: once you remove the list name, the existing SharePoint lists will be automatically populated, please select from the list).
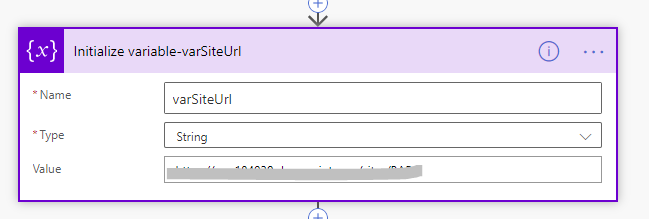
- Open the 'Initialize Variable -varSiteUrl' step card.
-
For Value, enter the URL of your SharePoint site.
-
Select Save.
Step 5: Import and set up the BARCalendarReservation Power Automate
Import the BARCalendarReservation flow
- Go to https://flow.microsoft.com.
- Select My flows from the left navigation pane.
- Select Import on the command bar.
- Upload the BARCalendarReservation.zip package - this is available under /Deployment/Flows.
- Add a SharePoint connection and Office 365 Outlook Connection for the new flow by selecting the Select during import link and completing the form.
- If you need to create a new SharePoint connection, select Create new in the Import setup pane and follow the instructions as before.
- Add a Office 365 Outlook Connection by selecting the Select during import link and completing the form.
- If you need to create a new Office 365 Outlook Connection, select Create new in the Import setup pane.
- Select New connection on the command bar.
- Search for the name of the connection, for example Outlook.
- Select the connection you created.
- Select Save.
Note
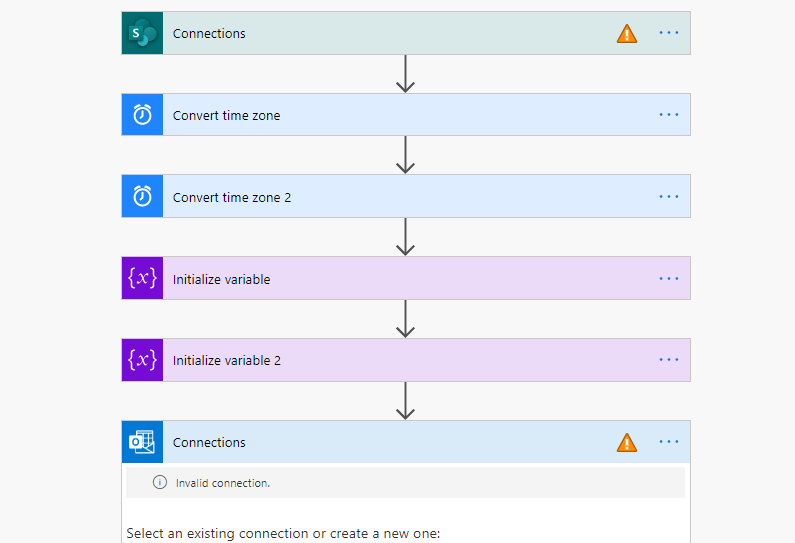
- If you are getting below error while importing, Then click on "Save as a new flow" as below

- For any actions that have an orange triangle, open the action and set up a connection by clicking "Add new connection".
Edit the BARCalendarReservation flow
- After the import is done, go to My flows and refresh the list of flows.
- Select the newly imported flow, BARCalendarReservation
- Select Edit on the command bar.
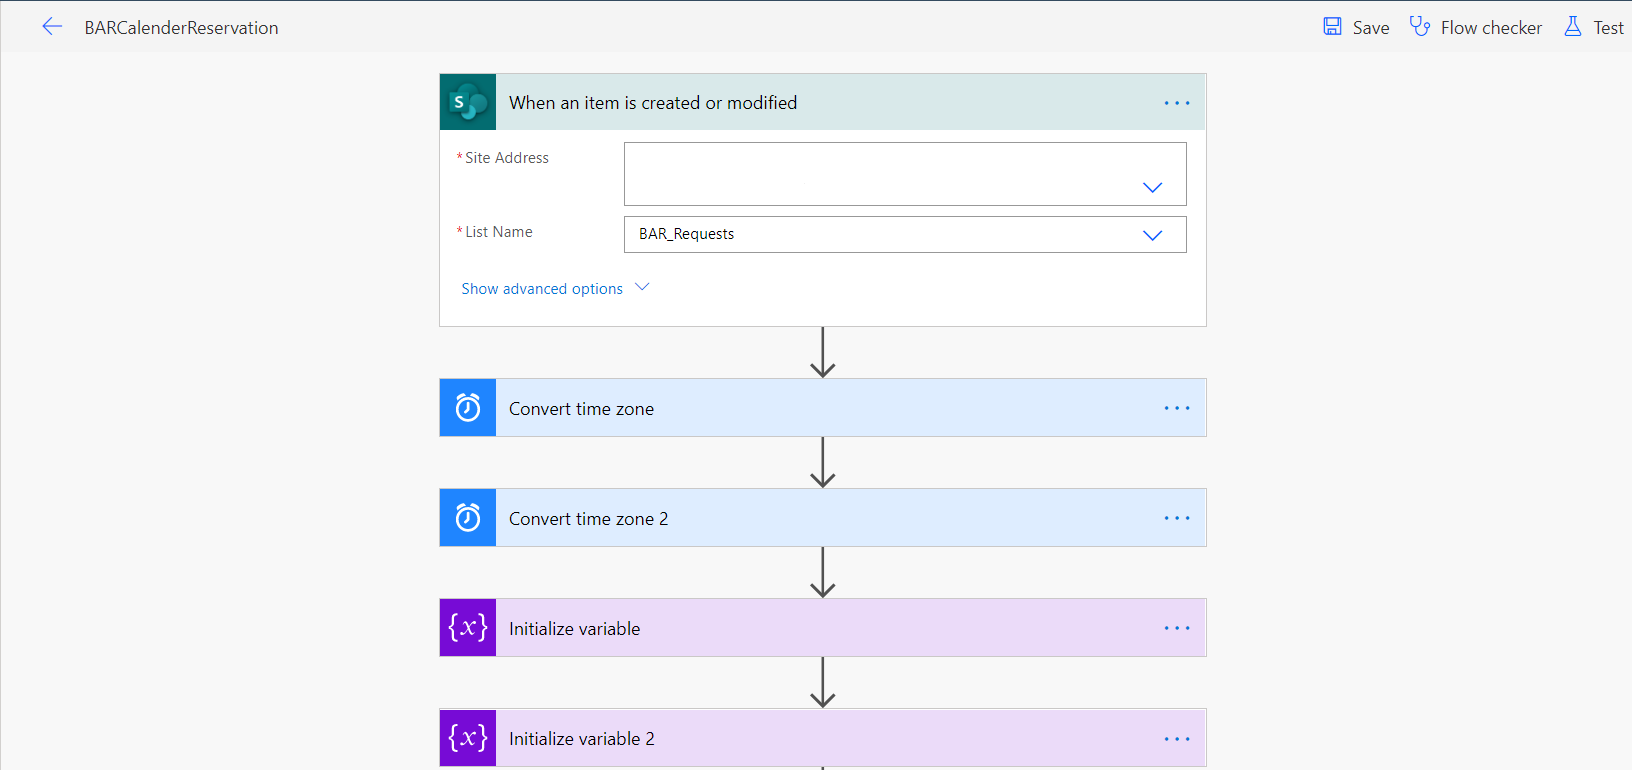
- Select the trigger "When an item is created or modified" card.
- Change the Site Address to the URL of your SharePoint site.
- Update the List name to BAR_Requests (please select it from the dropdown values)
-
Under 'Create event (V4)' step card,
- Please check if the Calendar id is blank. In case the flow generated a random string, please remove and select 'Enter custom value' from the dropdown. Once selected, select 'Outputs' under Compose section. Please make sure that the Calendar id should show Outputs as the selected value.
- Update the Time zone field with your local time zone. The time zone selected here is the time that is used to show when a request was submitted in notification cards.
-
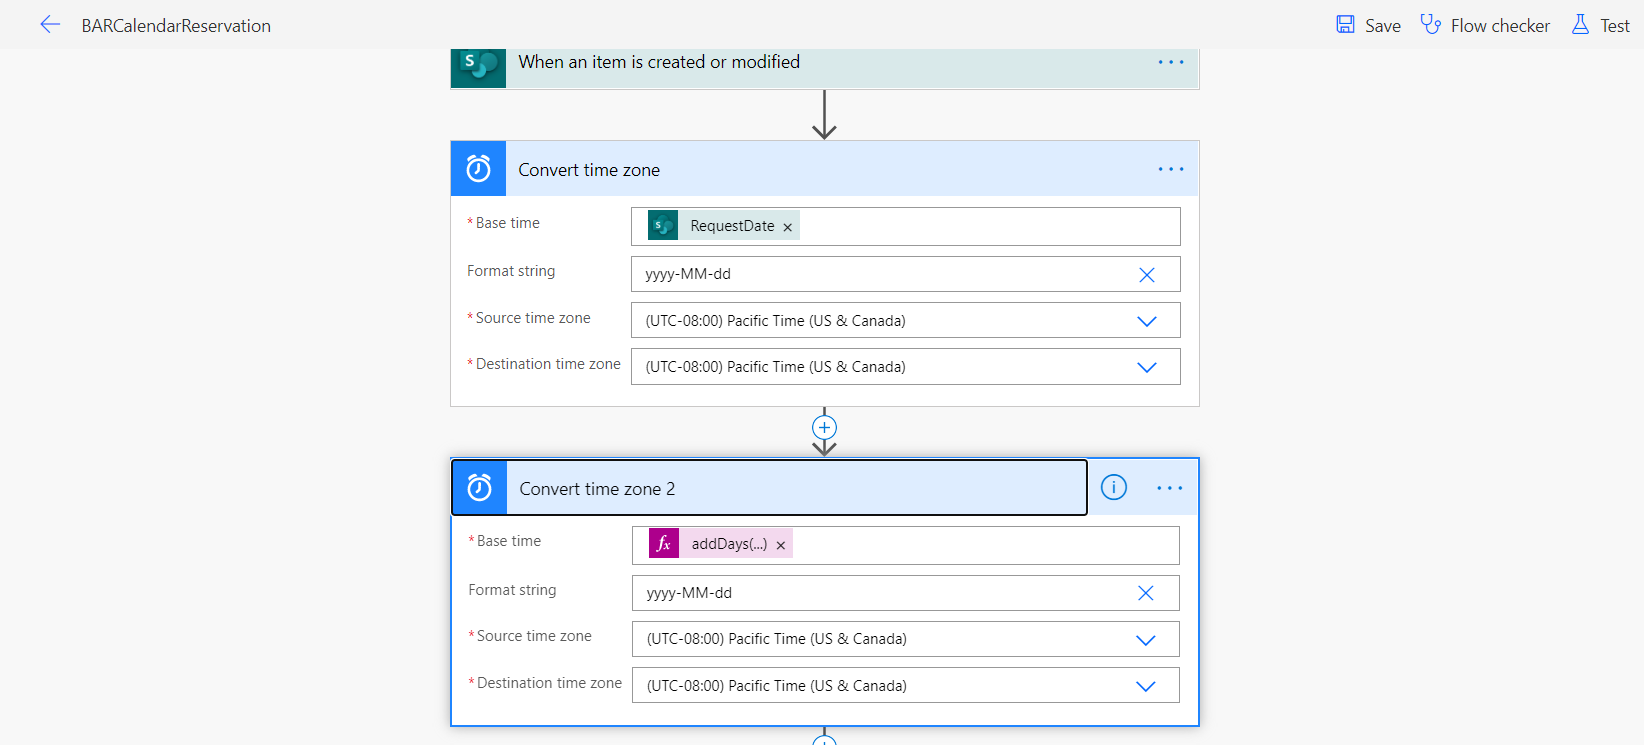
Under 'Convert time zone' step card, update the Source time zone and Destination time zone with your local time zone.
-
Under 'Convert time zone 2' step card, update the Source time zone and Destination time zone with your local time zone.
- Select Save.
Step 6: Import and Set-up the Building Admin app
Import the app
To manage the app you imported, repeat the same steps for the admin app.
-
Sign in to Power Apps.
-
Select Apps from the left navigation pane.
-
Select Import on the command bar.
-
Upload the BuildingAdmin.zip package - this is available under /Deployment/Flows.
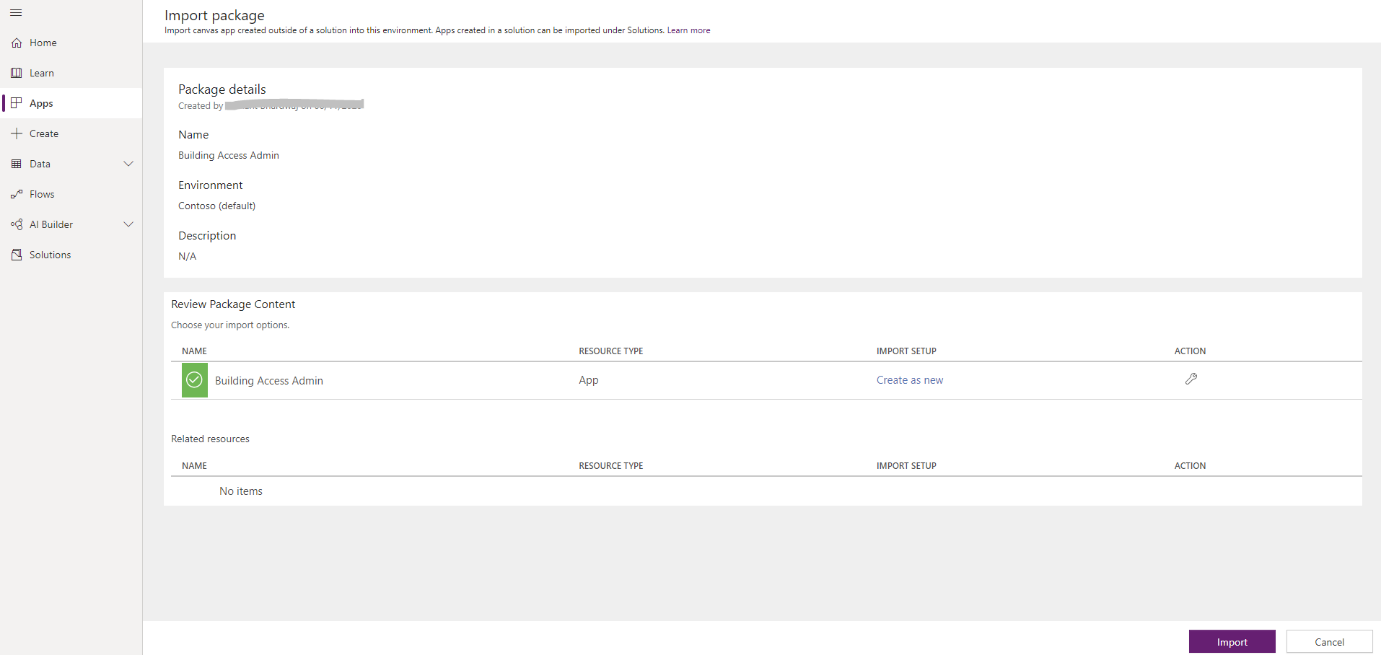
- Select Import.
Update the SharePoint connections
- Go back to the Apps list.
- Select More Commands (...) for Building Access admin app.
- Select Edit from the context menu.
- Sign in or create any necessary connections, and then select Allow.
- Go to the data sources in the left pane.

- Remove existing SharePoint Lists inside the app, because they don't point to your current SharePoint site.

- Add the lists from your own SharePoint site. Start by searching for SharePoint in the search bar.
- Select SharePoint, and then choose a connection.

- Copy and paste the URL to your SharePoint site in the text field, and then select Connect.

- Select all the SharePoint Lists and libraries, and then select Connect.

- From the File menu, select Save, and then select Publish.
Step 7: Import and Set-up the Building Security app
Import the app
To manage the app you imported, repeat the same steps for the admin app.
- Sign in to Power Apps.
- Select Apps from the left navigation pane.
- Select Import on the command bar.
- Upload the BuildingSecurity.zip package.
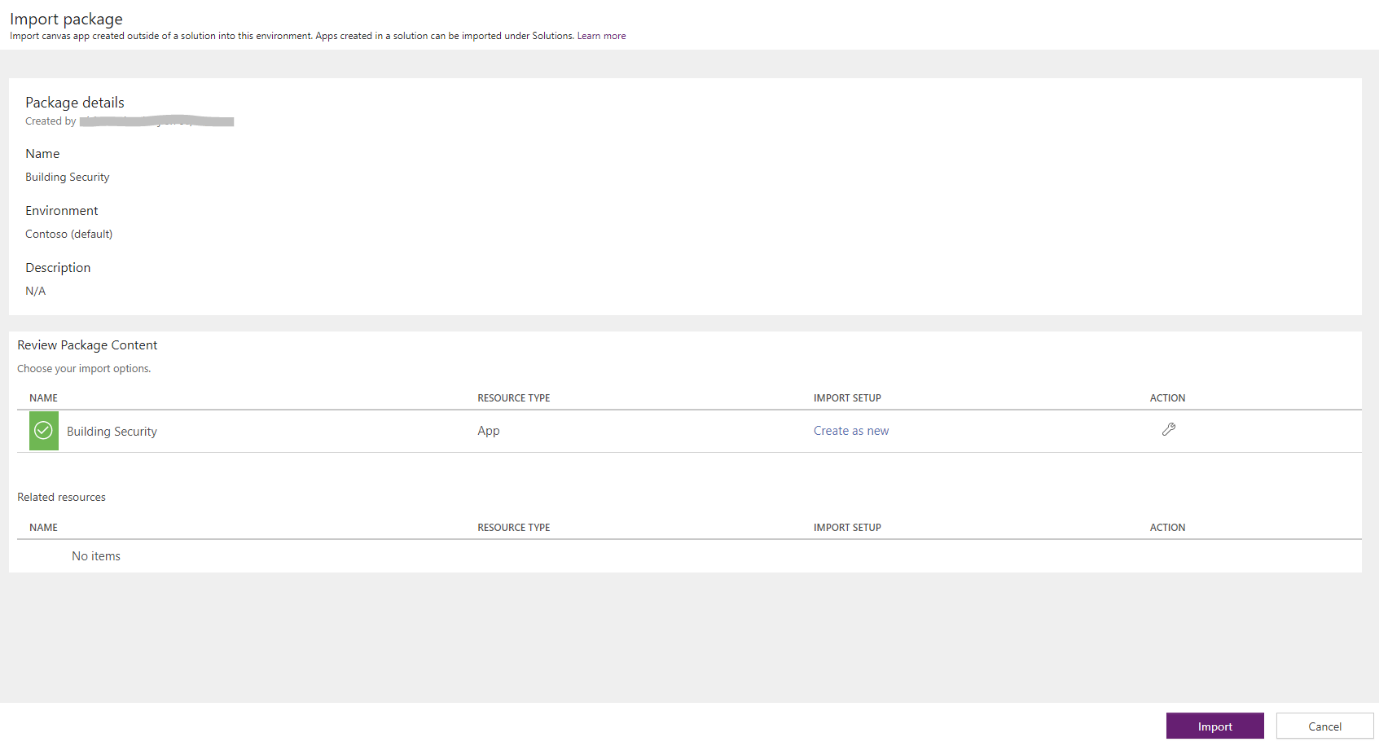
- Select Import.
Update the SharePoint connections
- Go back to the Apps list.
- Select More Commands (...) for Building Access Security app.
- Select Edit from the context menu.
- Sign in or create any necessary connections, and then select Allow.
- Go to the data sources in the left pane.

- Remove existing SharePoint Lists inside the app, because they don't point to your current SharePoint site.

- Add the lists from your own SharePoint site. Start by searching for SharePoint in the search bar.
- Select SharePoint, and then choose a connection.

- Copy and paste the URL to your SharePoint site in the text field, and then select Connect.

- Select all the SharePoint Lists and libraries, and then select Connect.

- Select Save, and then select Publish.
Step 8: Set up an Admin Team
It is important that you set up an admin team to centrally manage admin tasks like, configuring key settings and reference data, approving building access requests.
Building access requests are approved or rejected by requestor's manager as defined in the Active directory. There might be instances where an organization's active directory doesn't hold this information for user. In this case, Admin team will be responsible for approving or rejecting building access requests.
Set up an Admin team following instructions in this article. It is recommended that you create a channel to manage building access requests. To create a channel with your newly created admin team, follow instruction in this article.
Note
-
Ensure that right users are added to the admin team.
-
Generally, users using the Building Admin App and owners of the SharePoint site should be part of this team.
Create initial content for the app
At this point, you've successfully imported both the Building Access App, Building Admin app and Building Security App. You can now start creating the initial content. To start, open the Building Admin app.
You can use the admin app to customise all the key information required in the Building Access app and to configure key settings for the app and accompanying flows.
Set up key parameters under Settings
To initialize your app, you need to provide all the required fields by navigating to Settings.
Complete all the fields as shown in the following table, and then select Save.
| Field name | Logical name in SharePoint | Purpose | Example |
|---|---|---|---|
| Maximum days in advance requests can be made | BookingAdvance | This setting defines number of days from today in future the request to access the building can be made. | 14 |
| Error message for requests | BookingAdvanceErrorMessage | This setting defines the error message that will be shown to users when they select a date that is beyond the maximum days in advance till when a booking request can be made | You can only book for 14 days in advance. |
| Building admin team | AdminTeamsID | This is the team ID where the approval adaptive card is sent if the requestor does not have a manager assigned in Active Directory | 9cd94000-09ce-472d-976f-0a080f3a071c |
| Building admin channel | AdminTeamChannelID | This is the channel within the Building admin team where the approval adaptive card is sent if the requestor does not have a manager assigned in Active Directory | 19:[email protected] |
| Eligibility failure message | KeyQuestionsFailMessage | This is the message that appears if a requestor has answered “Yes” to any of the Key Eligibility Questions | Sorry at this time you do not qualify. |
| Inline buttons on approvals | EnableInlineApprovals | This setting enables managers to approve individual requests from the Building Access app | Yes/No |
| Safety Precautions Feature | SafetyPrecautions | This setting enables/disables safety precaution feature on the Building Access App | Yes/No |
| Eligibility confirmed prior to making access request | KeyQuestions | This setting makes it mandatory for requestors to answer Key eligibility questions before requesting access to a building | Yes/No |
| Allow users to select alternate approver | SelectAlternateApprover | This setting allows the users the ability to select a different approver for requests. In this case the requests will be routed to the selected person for approval | Yes/No |
[NOTE: Retrieve Team's ID]
- Open Microsoft Teams.
- Click on (...) next to your admin team name.
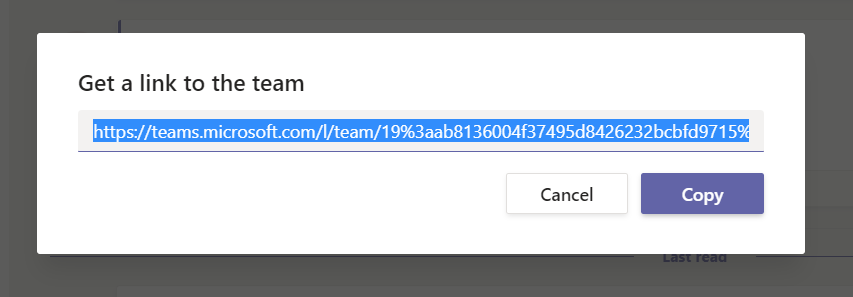
- Click Get link to the team.
- Copy the team's link and paste in a text editor like notepad.
- The link is in the format

- The value of the groupid parameter is the id of your team.
[NOTE: Retrieve Team's Channel ID]
- Navigate to the admin team's channel.
- Click (...) next to the channel name.
- Click get link to the channel.
- Copy the channel link in a text editor like notepad.

- Extract the id between channel/ and /general. This is your channel id.

Step 9: Sharing Power Apps
You need to share your Power Apps with relevant users in order to make the apps available to use. For guidance on sharing a canvas app, refer to this article.
It is important that you share the apps with right users. As an example,
-
Building Access app can be shared with all users in your organisation who are required to request access to a building.
-
Building Admin can be shared with Facilities Admin users, who are responsible for managing key information like Buildings.
-
Building Security can be shared with security personnel, who are responsible for managing entry to a building.
Step 10: Deploying Building Access App to Microsoft Teams
Deploying the Building Access App to Microsoft Teams is an easy way to promote adoption, centralize discussions, and amplify information across the organization. Microsoft Teams Admins, as well as end-users, can add this app to Microsoft Teams, albeit with slightly different steps. Once you have downloaded the app following the written or video instructions above, the steps below walk through the process to deploy it to Microsoft Teams.
Download the Building Access App from Power Apps Homepage
-
Navigate to https://make.powerapps.com
-
The Building Access app should appear under "My Apps".
-
Click the "..." to the right of the app name, then select the "Add to Teams" option.
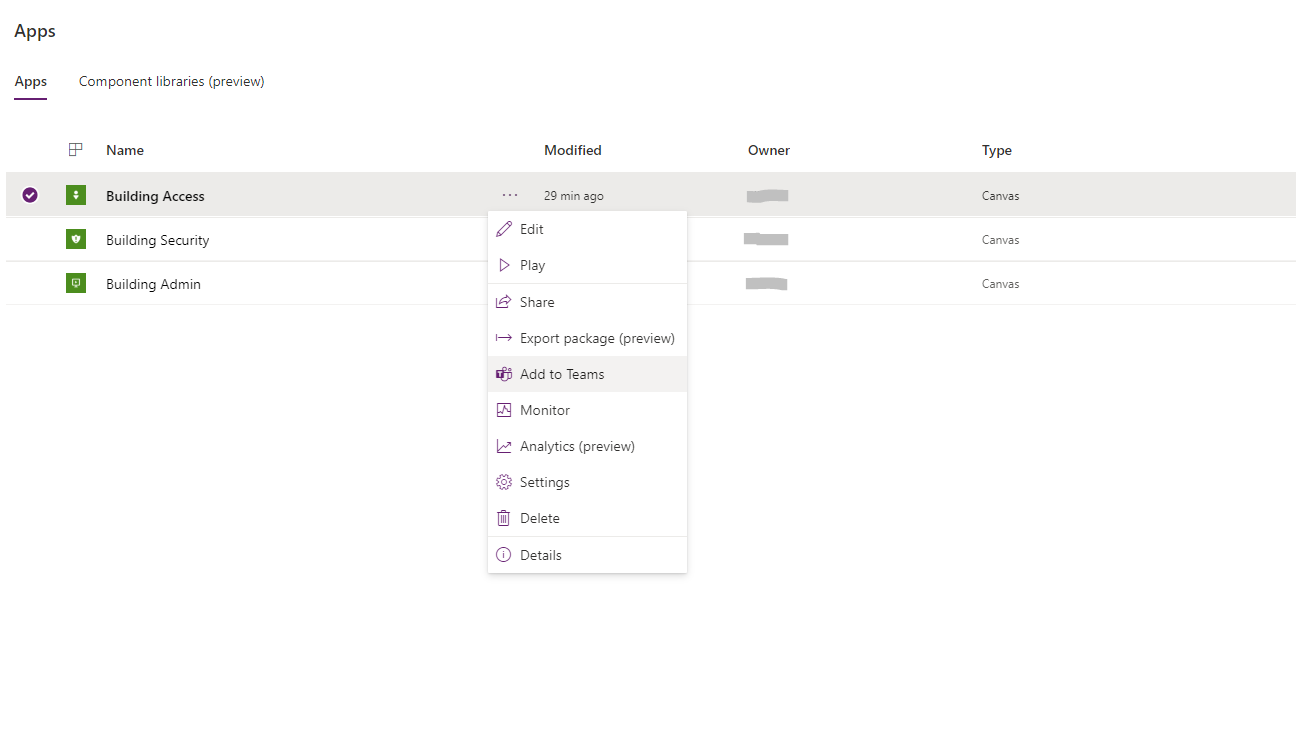
- Click Download app.
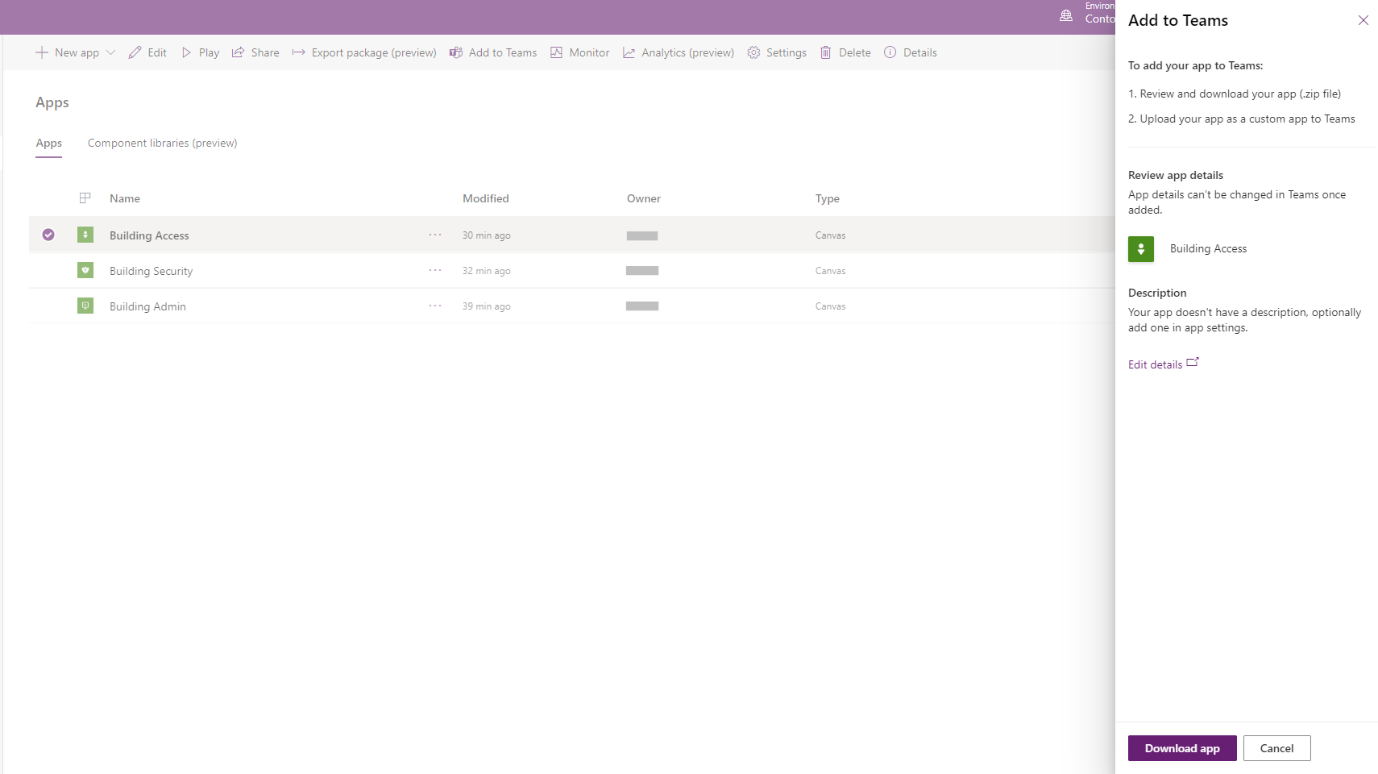
- This will download a zip file which can be uploaded to Microsoft Teams in the next step, so save the file to a location you can remember and easily access.
Add app to your Microsoft Teams app store
-
Once the app has been downloaded from your Power Apps homepage as a zip file, open Microsoft Teams and navigate to the app store.
-
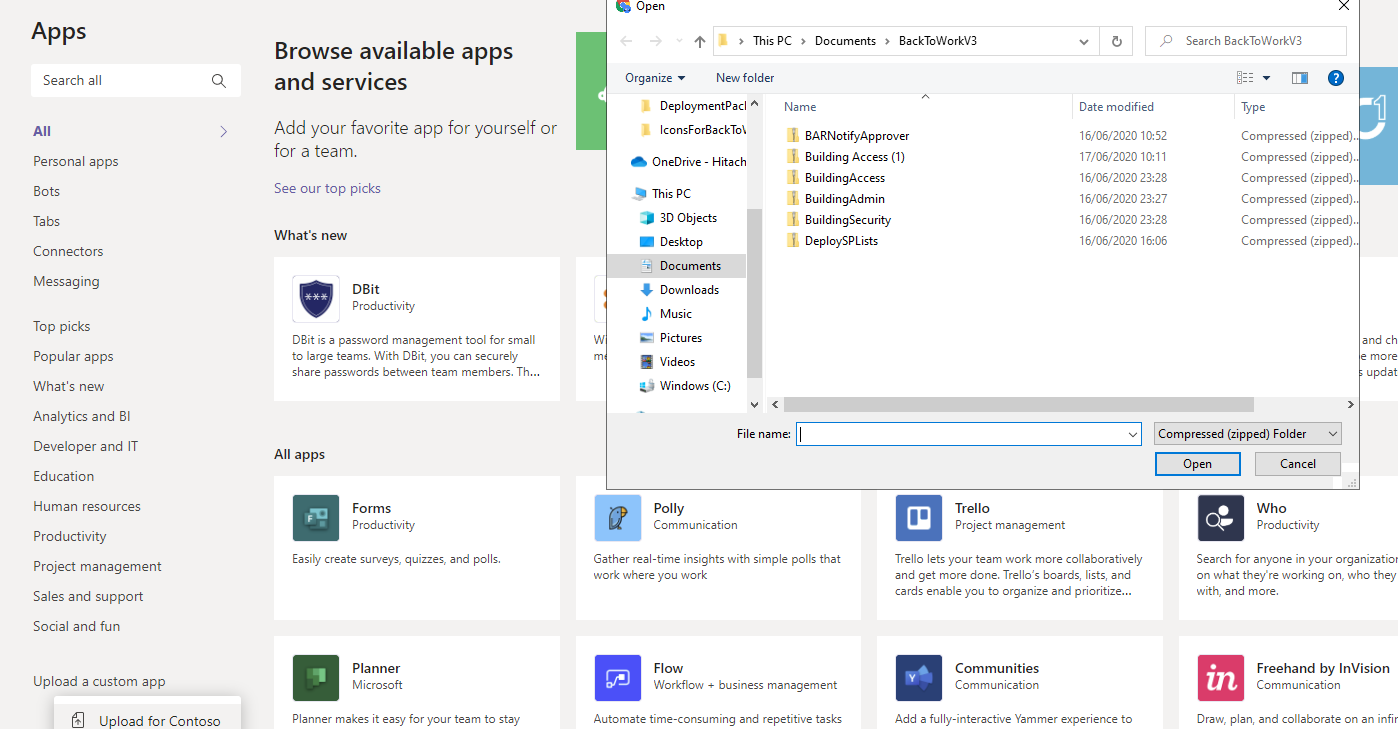
Use the "Upload a custom app" function at the bottom-left. If you don't see Upload a custom app option it may mean that this option is disabled for your organisation. Contact you team's administrator and follow instructions in the "Notes" section below.
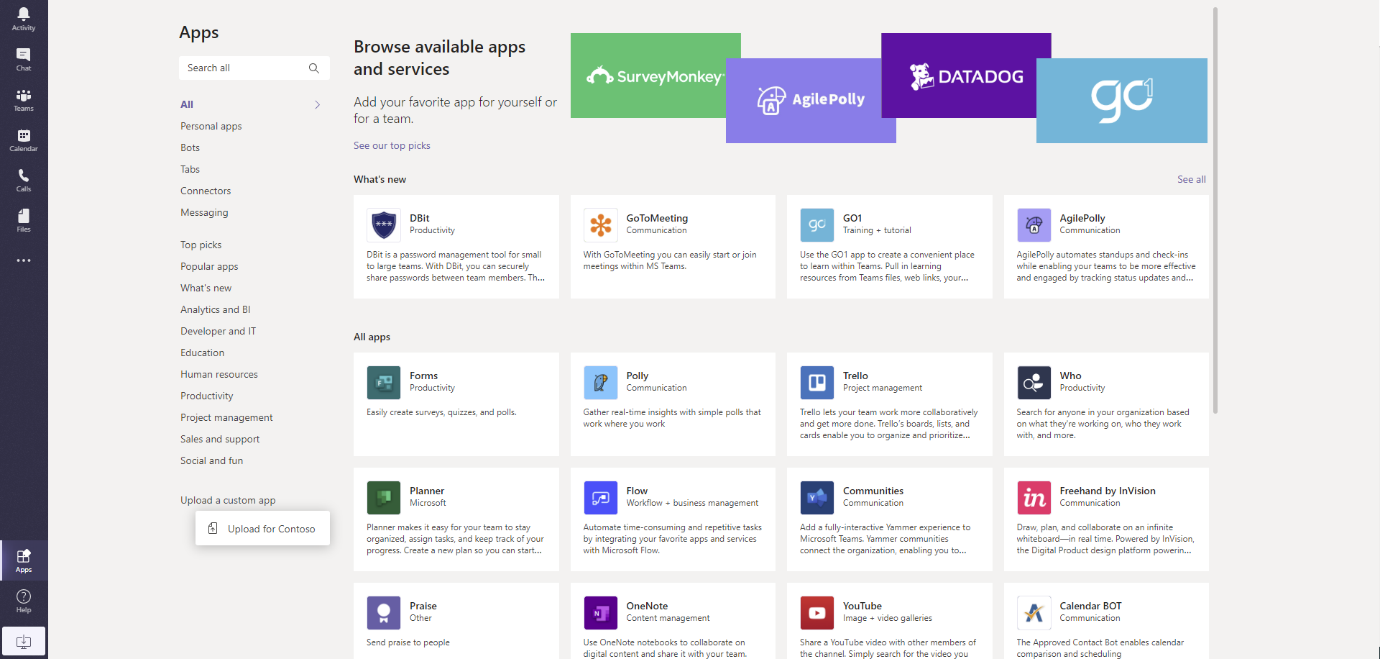
- Click Upload for [Organisation Name].
- Upload the zip file you downloaded from Power Apps in the prior step.
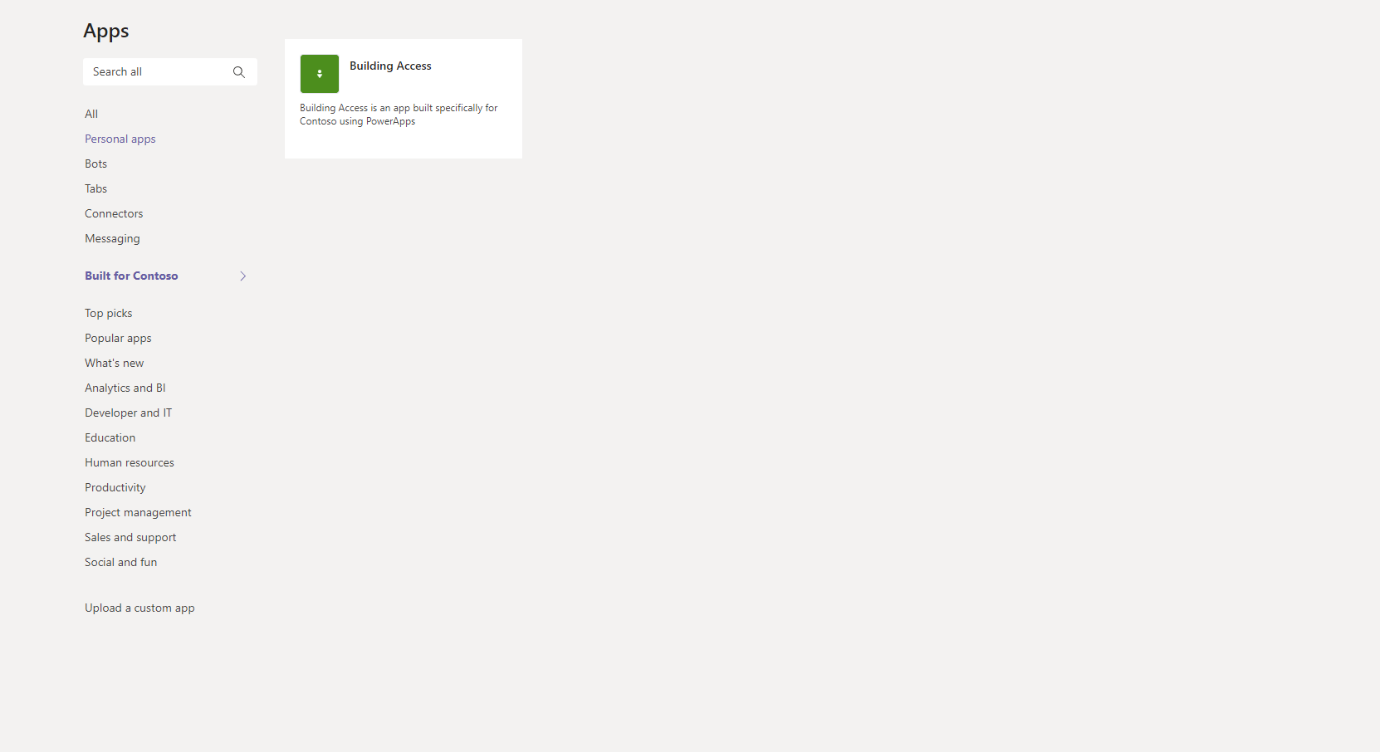
- Once uploaded, the app appears in the app store.
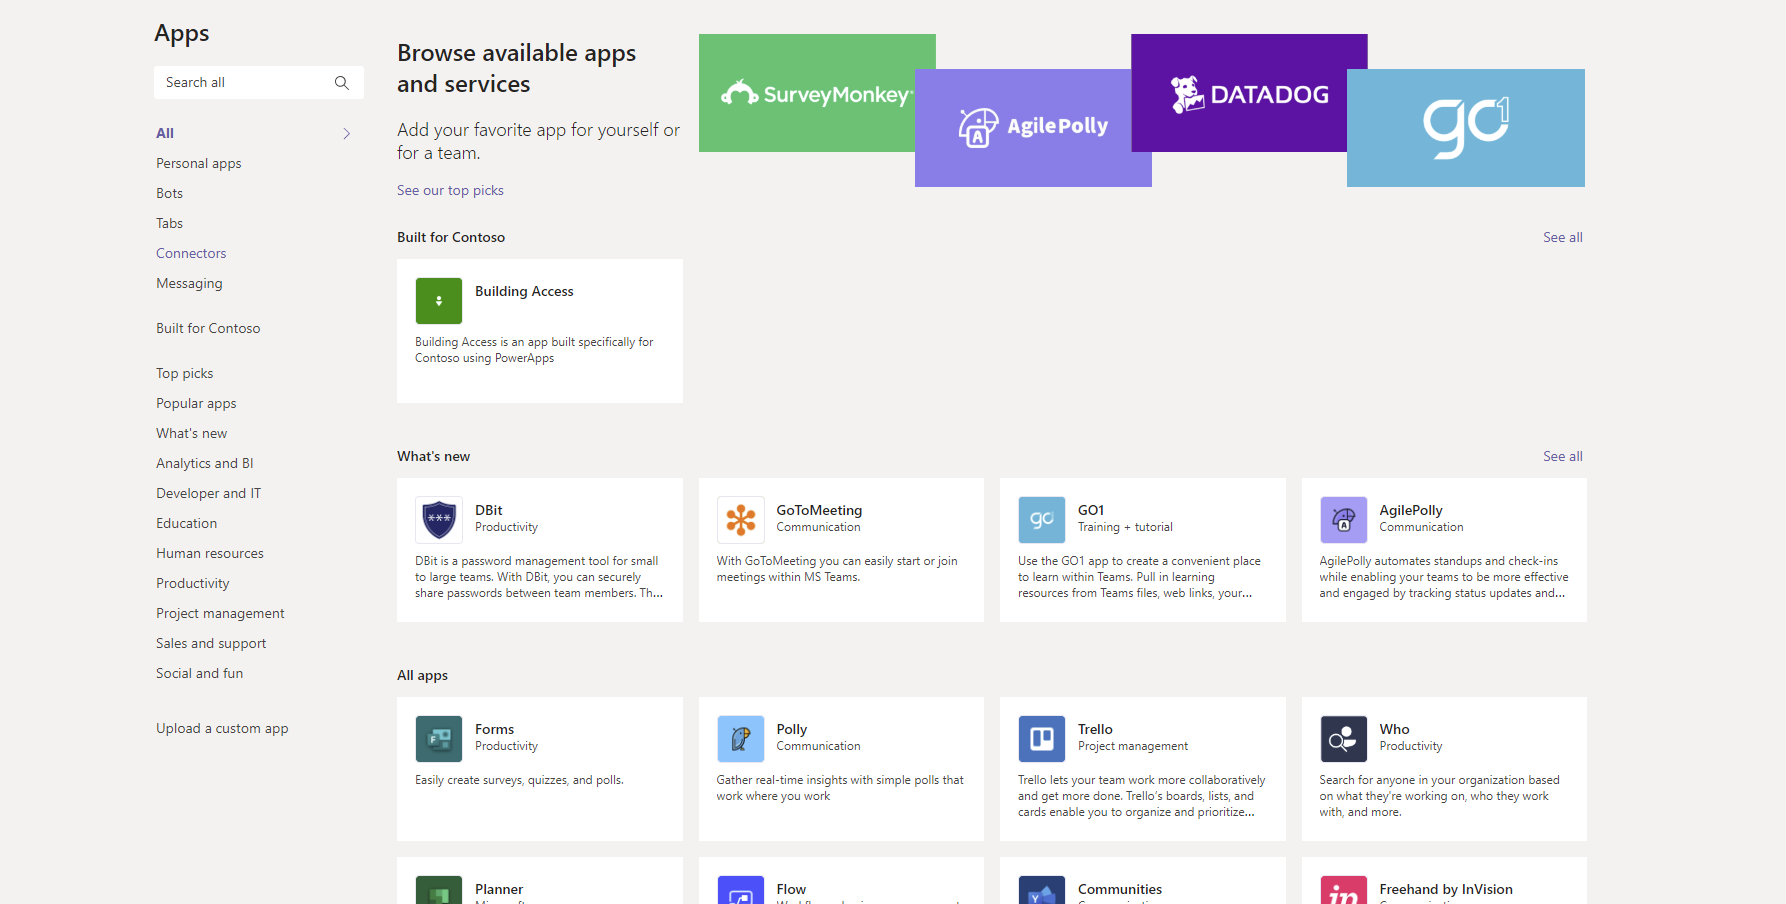
Pin the app to your personal Microsoft Teams app bar (any Microsoft Teams user)
Even if your Teams Admin has not taken steps to add this app to the Microsoft Teams app bar for your tenant, any user can add this app their personal app bar.
- Click the app from the app store.
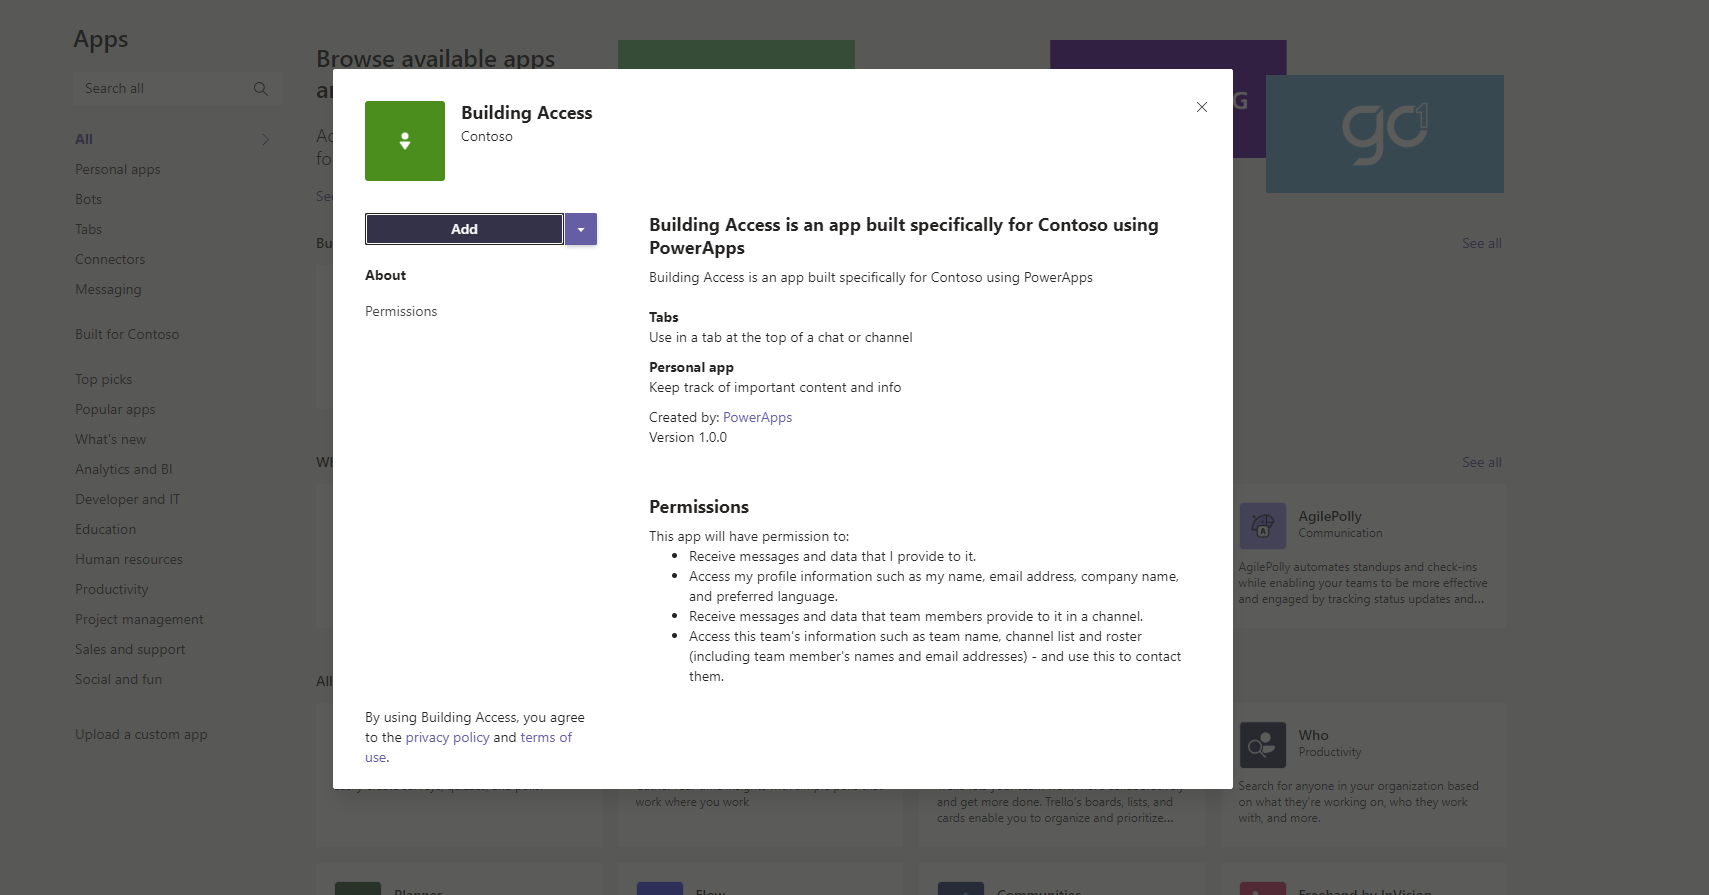
- Click Add to add app to your app bar.
- Once the app icon appears on your app bar, right click the icon and select "pin". The app icon will remain on your app bar to provide you easy access, even after you navigate away from the app.
Configuring Power BI Report
Once you have configured all the apps, users will start requesting access to the buildings. Managers or admins will approve them and security personnel will be able to check in and check out users. PowerBI report provides an excellent way to report on the data captured and extract some key information. Follow the steps below to configure the Power BI report.
-
Download Building Access Insights.pbix from the GitHub repository.
-
Open the pbix file using Power BI desktop.
-
Click on Tranform data under Home menu.
-
In the transform data dialog, under parameters change the values for SharePoint URL parameter to the URL of you SharePoint site.
-
Under parameters change the values for BAR_Requests SP Key to GUID of the BAR_Requests list. Note:
-
To extract GUID of the list, navigate to SharePoint list.
-
Navigate to List Settings under settings icon.
-
Make note of the List GUID from the URL
-
Under parameters change the values for BAR_Buildings SP Key to GUID of the BAR_Buildings list.
-
Under parameters change the values for BAR_Spaces SP Key to GUID of the BAR_Spaces list.
-
Click on Data Source Settings.
-
In the Data Source settings dialog, click Edit permissions.
-
In the Edit Permissions Dialog, Click Edit and leave everything else as default.
-
Select Microsoft account and select Sign in as different user.
-
Sign in using credentials for a user account that has at least read access to all lists in the SharePoint site.
-
Once you are signed in, a message appears "You are currently signed in", Click Save.
-
Click Ok on Edit permissions dialog.
-
Click Close in the Data Source settings dialog.
-
Verify by clicking on the Queries, which should now show data.
-
Click Close & Apply.
-
The Power BI report should update with new data.
Migration Steps
- Refer the Change log and manually create new columns for SharePoint lists (BAR_Requests, BAR_AppSettings, BAR_Buildings) as outlined in the document. Also create a new SP List called BAR_TimeSlots
- Please turn off BARNotifyApprover Power Automate flow which you imported as a part of the existing app
- Follow the Deployment guide from Step 3 to Step 10 (Ignore Step 8 using your already configured Admin team)
