OpenAPI spec to Teams App - OfficeDev/TeamsFx GitHub Wiki
The
api2teamsand its generated project template is currently under active development. Report any issues to us here
api2teams is a command line tool to generate a complete conversational style command and response Teams application based on your Open API specification file and represent the API response in the form of Adaptive Cards.
api2teams is the best way to start integrating your APIs with Teams conversational experience.
Before running this CLI and deploying your generated Teams App to Azure or your local development machine, please ensure that you have the following prerequisites in place:
- Node.js, supported versions: 14, 16, 18
- An Microsoft 365 account for development
- Teams Toolkit Visual Studio Code Extension version 5.0.0 and higher or TeamsFx CLI
- [Option] If you want to deploy this APP to Azure, you also need an Azure subscription. If you don't have an Azure subscription, create a free account before you begin
- Install
api2teamswith npm:npm install @microsoft/api2teams@latest -g - Prepare the Open API specification. If you don't currently have one, start with a sample we provided by saving a copy of the sample-open-api-spec.yml to your local disk.
- Convert the Open API spec to a Teams app, assuming you are using the
sample-open-api-spec.yml:api2teams sample-open-api-spec.yml
The CLI name is api2teams. Usage is as below:
Usage: api2teams [options] <yaml>

Convert open api spec file to Teams APP project, only for GET operation

Arguments:
  yaml                   yaml file path to convert

Options:
  -o, --output [string]  output folder for teams app (default: "./generated-teams-app")
  -f, --force            force overwrite the output folder
  -v, --version          output the current version
  -h, --help             display help for command
You can input below command to generate Teams App to default or specific folder:
api2teams sample-open-api-spec.yml # generate teams app to default folder ./generated-teams-app
api2teams sample-open-api-spec.yml -o ./my-app # generate teams app to ./my-app folder
api2teams sample-open-api-spec.yml -o ./my-app -f # generate teams app to ./my-app folder, and force overwrite output folder
api2teams -h # show help message
api2teams -v # show version information-
Open the generated project in Visual Studio Code and make sure you have the latest Teams Toolkit (version 5.0.0 or higher) installed.
-
Follow the instruction provided in the
README.mdfor the generated project to get started. After installing the Teams app generated from the provided OpenAPI spec, you will receive a welcome message.
-
You can then run a
GET /pets/1command in Teams to receive an Adaptive Card response from the bot.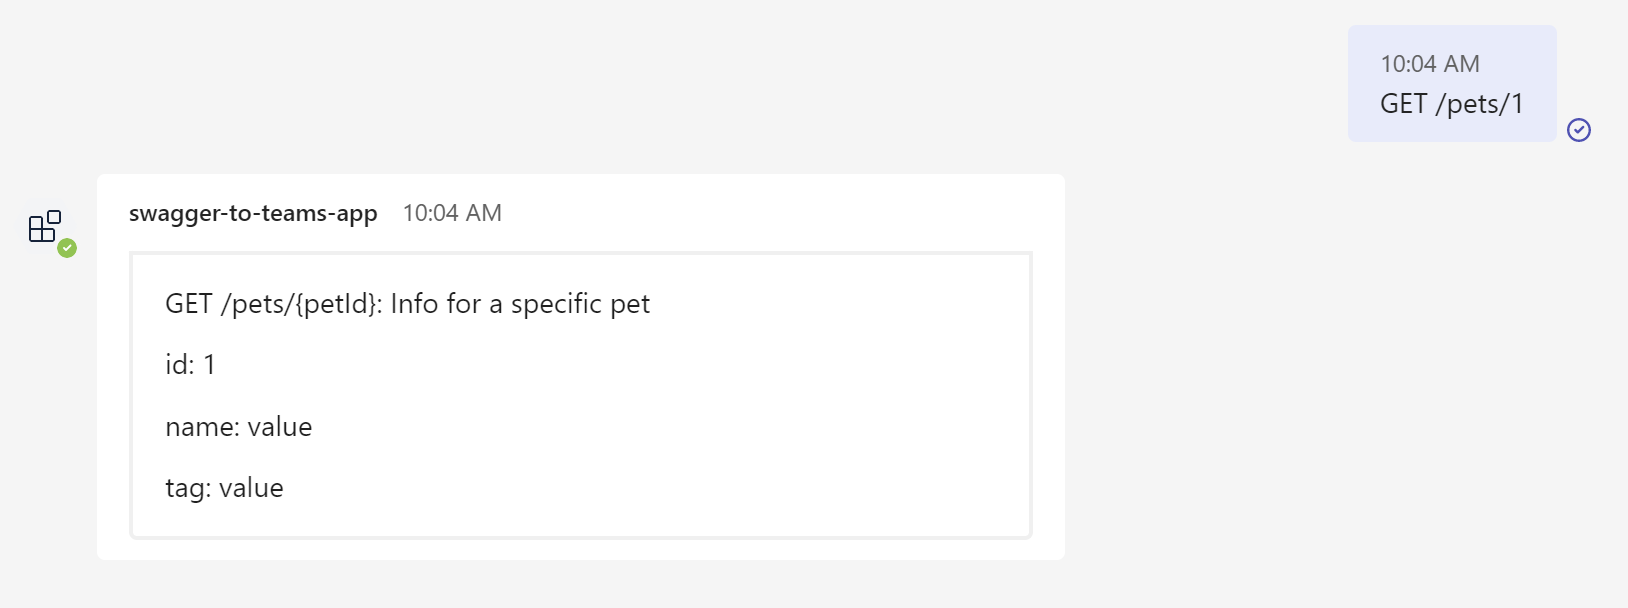
The app template is generated based on a command bot project that's compatible with Teams Toolkit project structures.
| Folder / File | Contents |
|---|---|
teamsapp.yml |
Main project file describes your application configuration and defines the set of actions to run in each lifecycle stages |
teamsapp.local.yml |
This overrides teamsapp.yml with actions that enable local execution and debugging |
env/ |
Name / value pairs are stored in environment files and used by teamsapp.yml to customize the provisioning and deployment rules |
.vscode/ |
VSCode files for debugging |
appPackage/ |
Templates for the Teams application manifest |
infra/ |
Templates for provisioning Azure resources |
src/ |
The source code for the application |
The files in following folder can be customized and demonstrate an example implementation to ge you started.
| Folder / File | Contents |
|---|---|
src/adaptiveCards |
This folder contains adaptive card generated by api2teams based on the Open API Specification. Each API will generate two adaptive cards, one is *RequestCard.json, and another is *ResponseCard.json. Request card is for user to input parameters and click button to send request, and response card is used to render api response data. Using this pattern is more clear than use component name (although it may produce duplicated cards), because component name can be used by multiple apis, and it is not easy for user to know which adaptive card is for specific api |
src/apis |
This folder contains two .ts file, one is for mock api calls (mockApiProvider.ts) and another is for real api calls (realApiProvider.ts). For real api calls, you need to update these files to call backend service. |
src/cardActions |
This folder contains card action handlers, when user click action button in the request adaptive card, it would use these handlers to get response and render response adaptive card. |
src/commands |
This folder contains bot command handlers, when user send messages, it will match the api, and send back request adaptive card. There is a special command handler which named helpCommandHandler which is used to show help messages. |
src/index.ts |
Index file using restify as web service framework to host bot server, and register command handlers and action handlers for bot to handle use messages and button clicking event. |
src/teamsBot.ts |
This file contains bot welcome message code, and it will be called by index.ts. |
Below is a simple command and response flow chart:

In case the command requires additional input, the following flow will be triggered:

Congratulations, you've just had your API integrated with Teams! Now you can further extend this template that fits with your business requirements:
- Customize the trigger pattern
- Customize the Adaptive Card with dynamic content
- Change the way to initialize the bot
- Connect to an existing API
- Access Microsoft Graph
- Add notifications to the project
- Only OpenAPI version 3.0.0 or higher is supported.
- Authorization properties inside OpenAPI spec is not supported
- Only GET operations are supported.
- The webhooks property is not supported and will be ignored during conversion.
- The oneOf, anyOf, and not keywords are not supported, not because there is no better way to represent them in adaptive cards. Only the allOf keyword is supported.
- For request cards, there is no proper element to represent array types in adaptive cards, so users need to input array values manually.
- Adaptive cards do not support file uploads, so if an API contains file uploads, it cannot be converted to adaptive card.
- Due to Teams limitations, command intellisense can only contain a maximum of 10 items.