Lab 13: Azure Self Hosted Agent - OT-TRAINING/azure-devops-zero-to-hero GitHub Wiki
Configuring Your First Self Hosted Agent
Step 1:
Click to Project Settings at bottom left corner
Step 2:
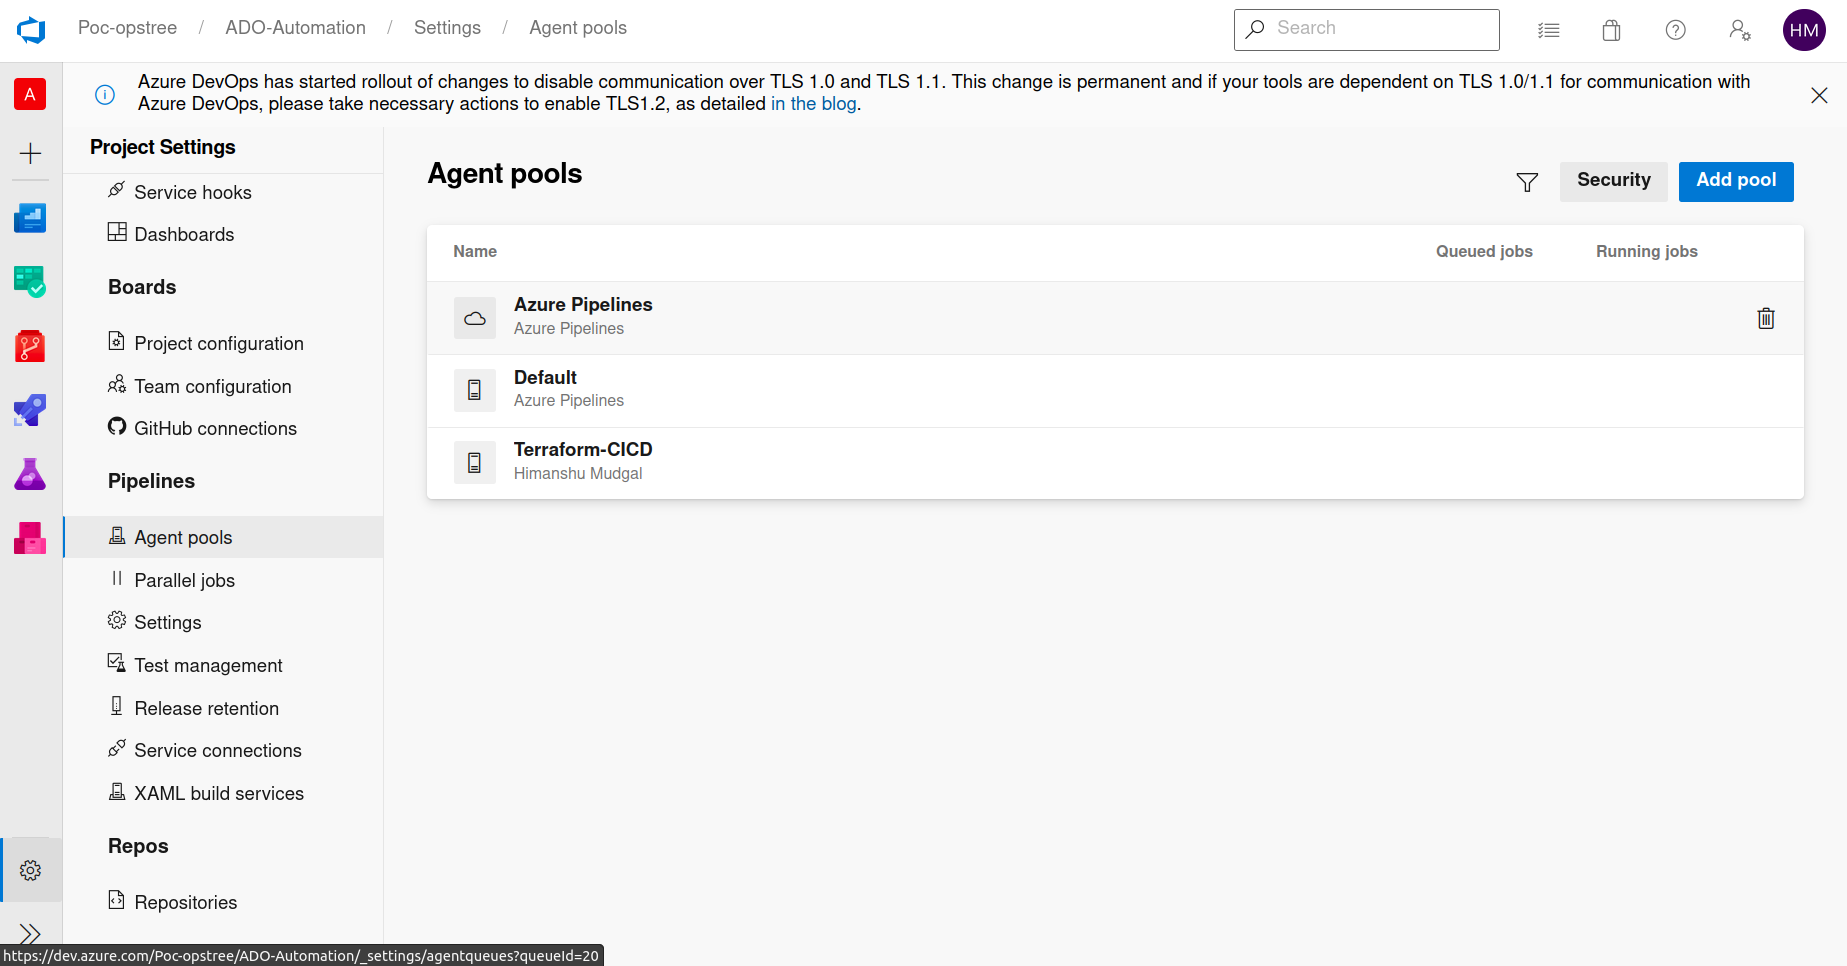
Go to Agent Pools under Pipelines header
Step 3:
Click Add Pool and choose Self Hosted Agent
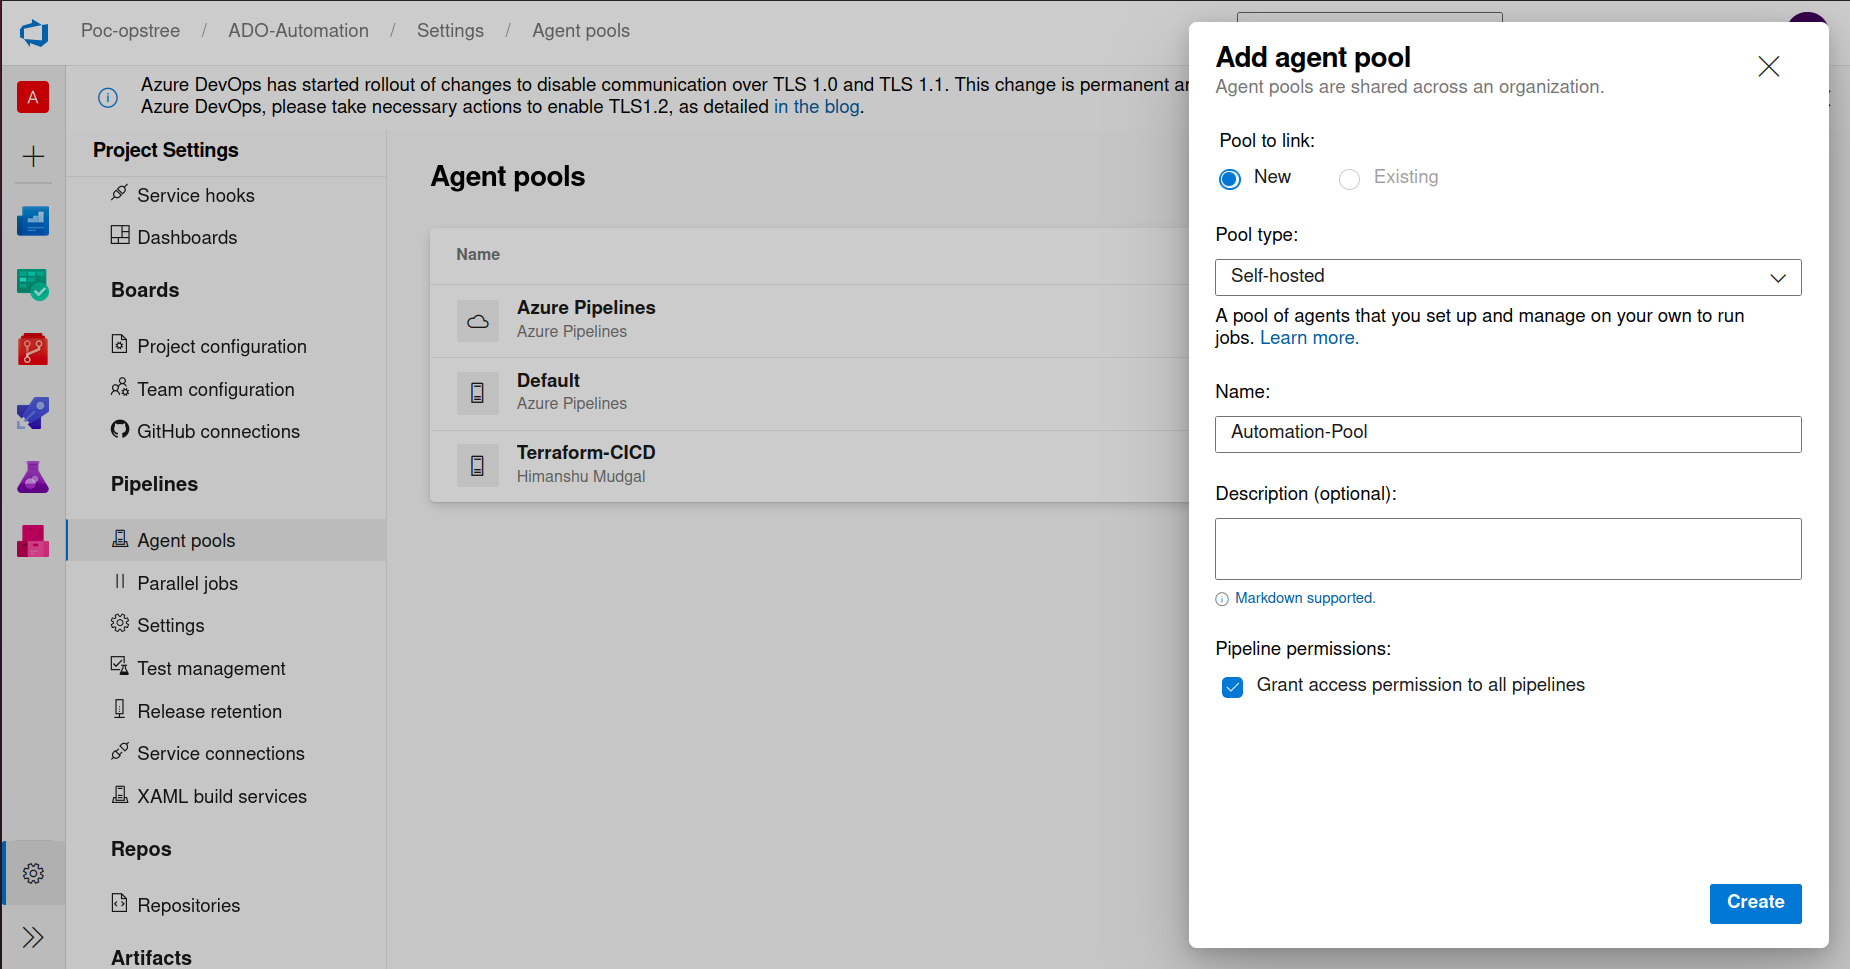
Step 4:
Now move inside your newly created pool & click at New Agent
Choose Your os-flavor and move forward accordingly.
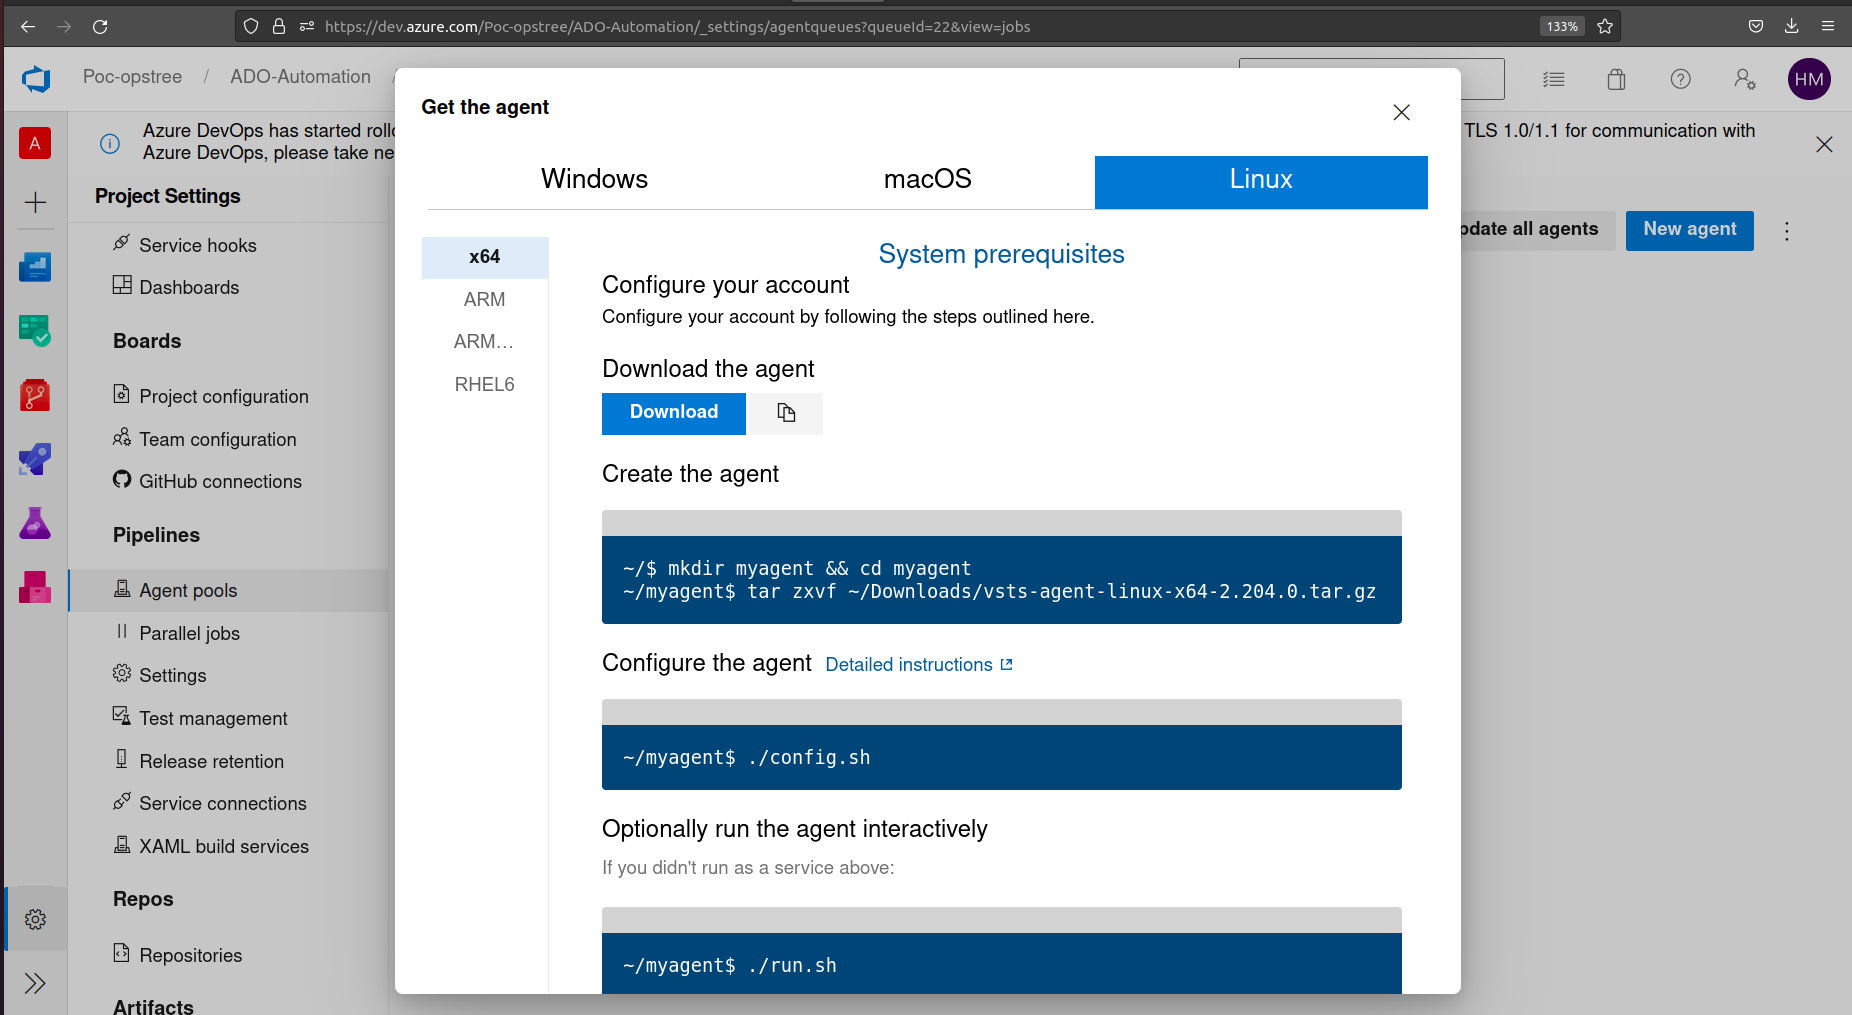
You can also use following commands to configure your linux agent for ADO
cd myagent
wget https://vstsagentpackage.azureedge.net/agent/2.204.0/vsts-agent-linux-x64-2.204.0.tar.gz
tar zxvf vsts-agent-linux-x64-2.204.0.tar.gz
Step 4: Configure your first linux Agent
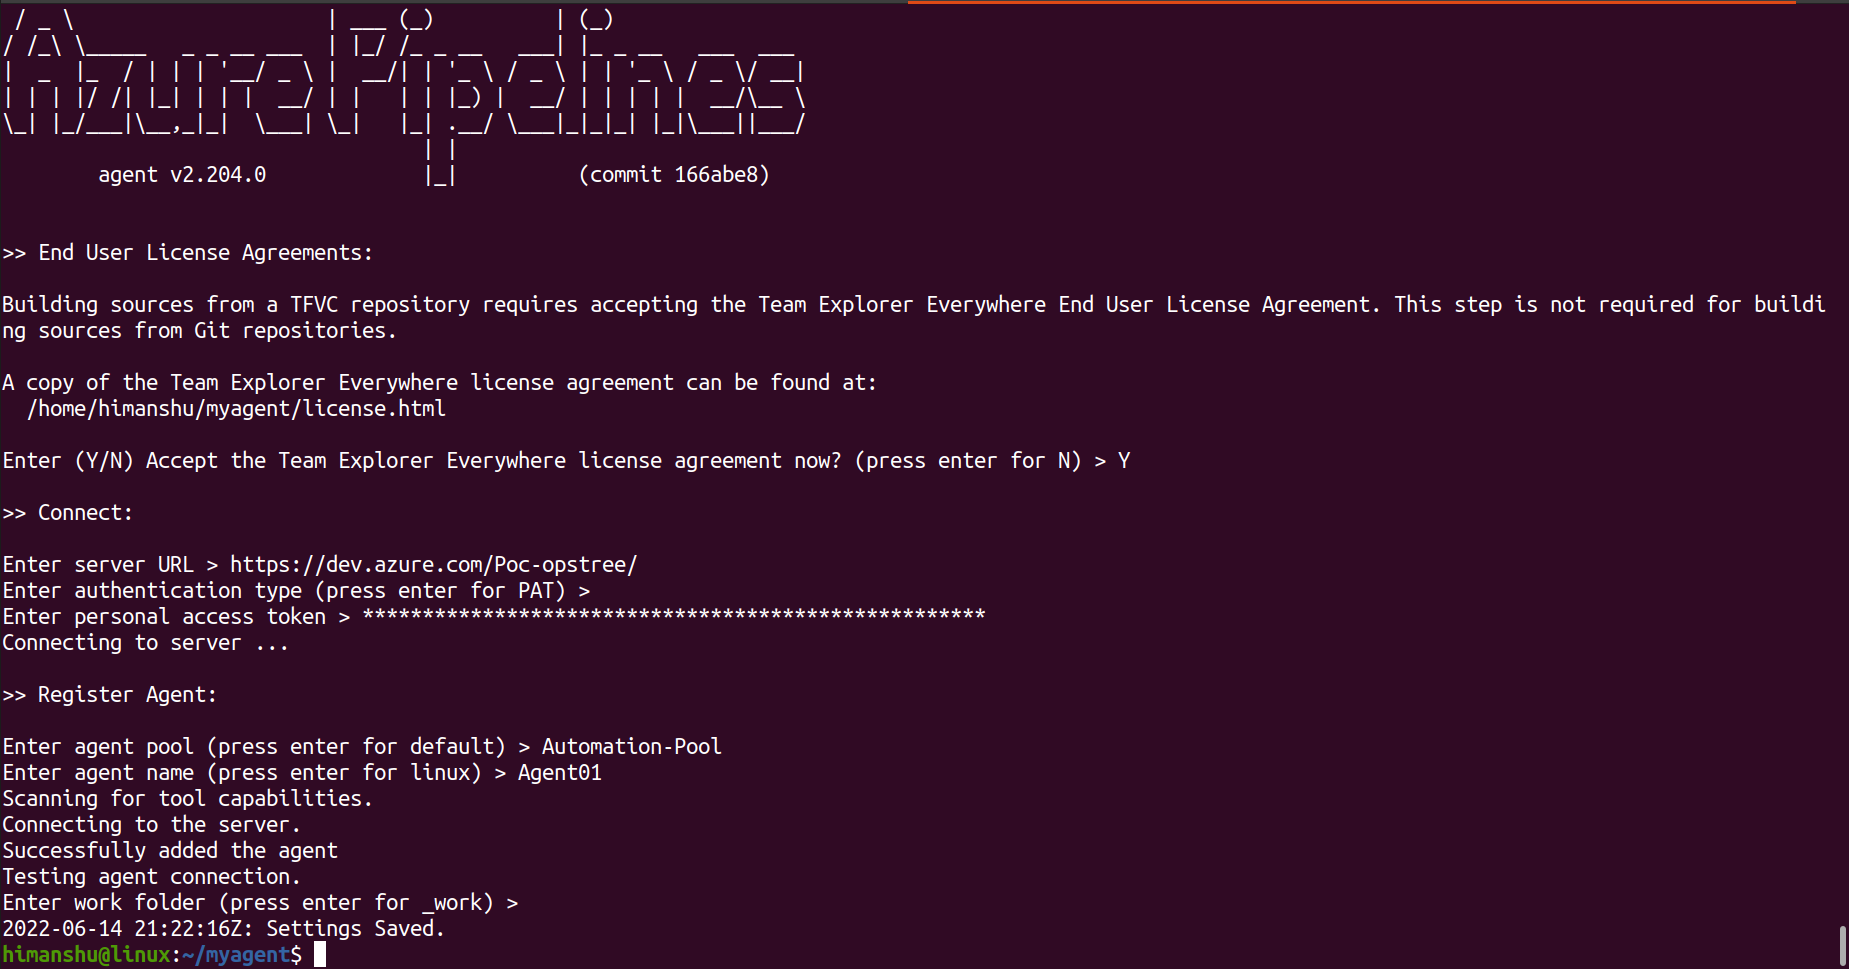
Run ./config.sh in your terminal
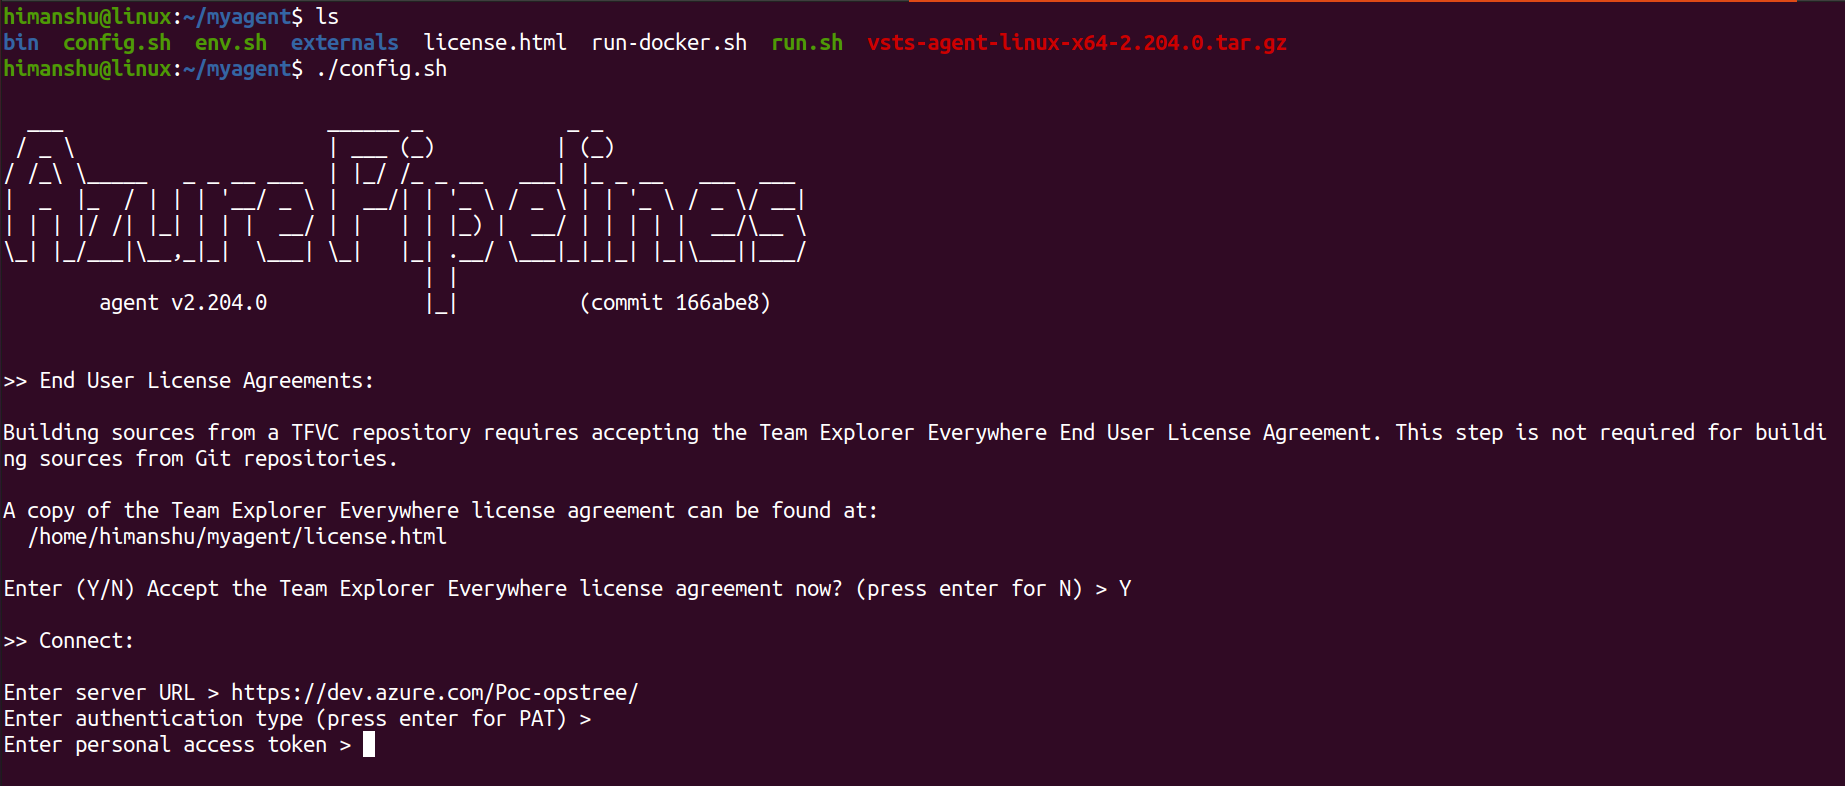
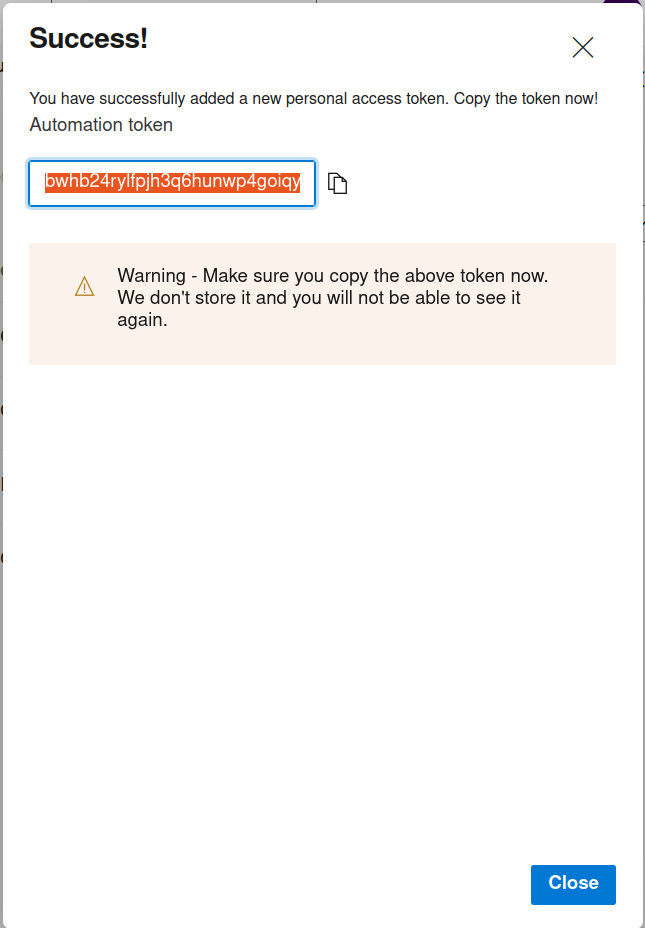
Now you need to generate a Personal Access Token (PAT)
For that you need to go at Personal Access Tokens section under User Settings located at top right corner of your screen.
Name it accordingly and grant permissions as per your requirements
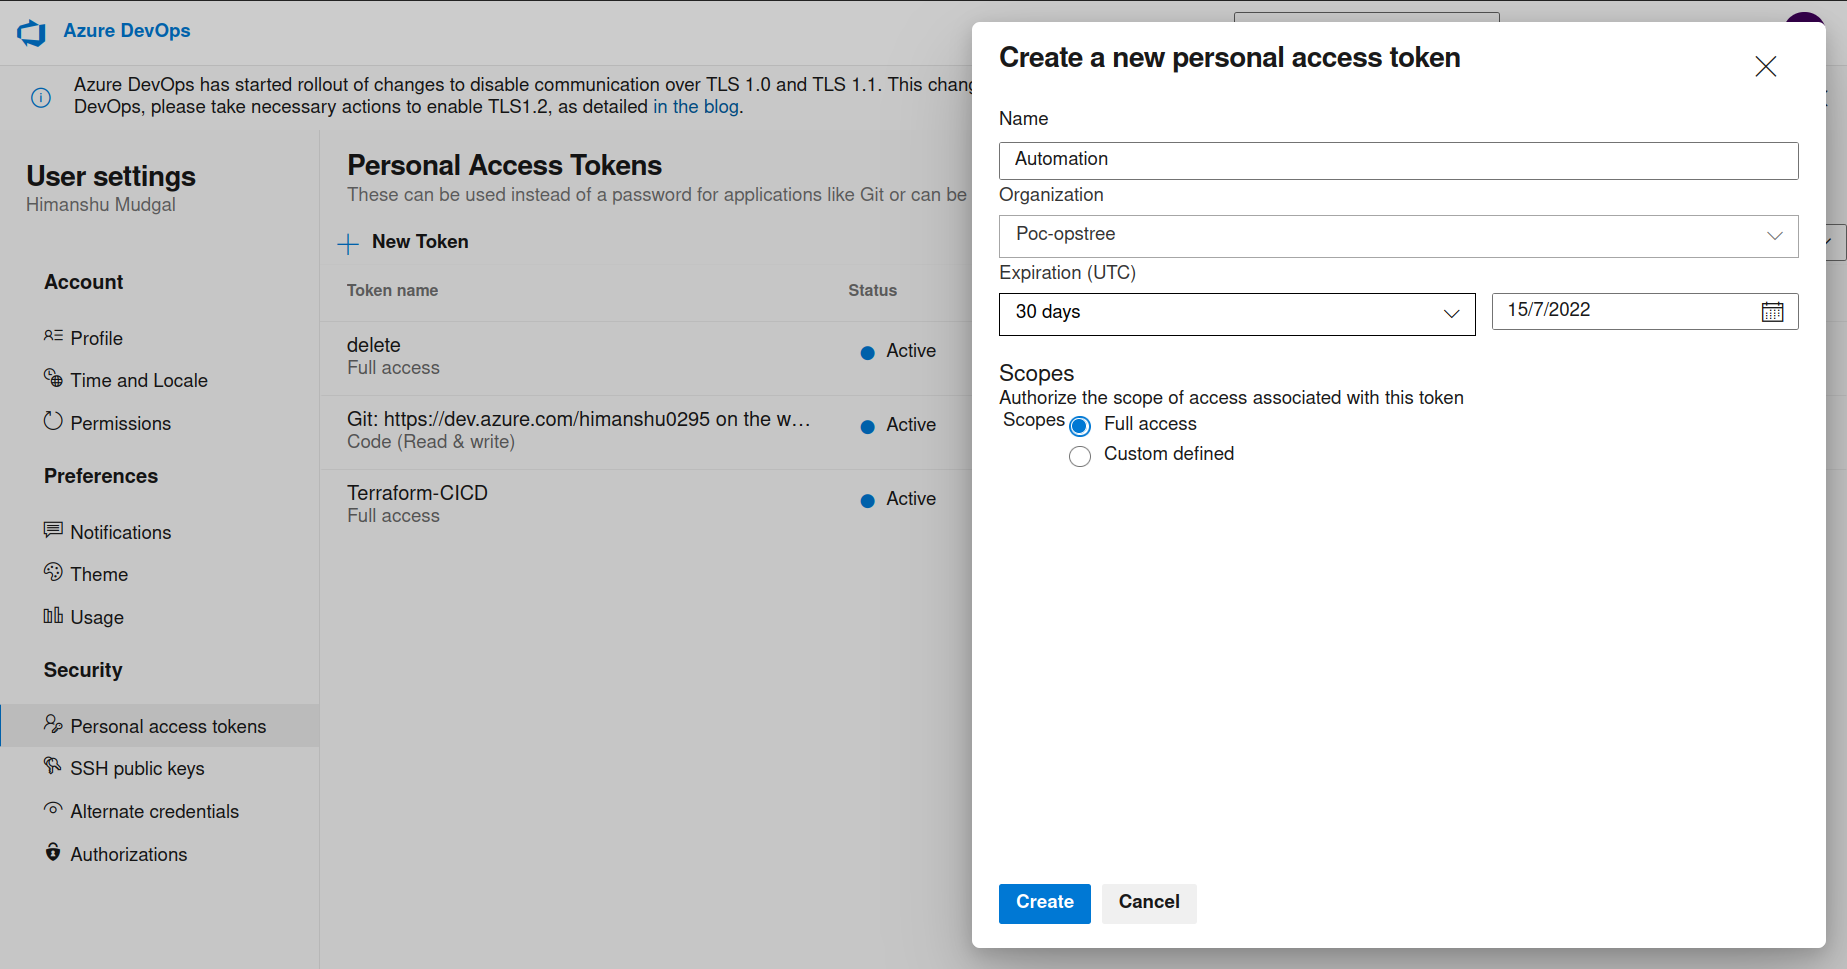
Warning - Make sure you copy the token. Azure don't store it and you will not be able to see it again.
PAT can only be regenerated
Step 5:
Now paste that PAT in your terminal
Enter agent pool (press enter for default)
Enter agent name (press enter for linux)
Enter work folder (press enter for _work)
And you're done with your ADO Self Hosted Agent Configuration
Step 6:
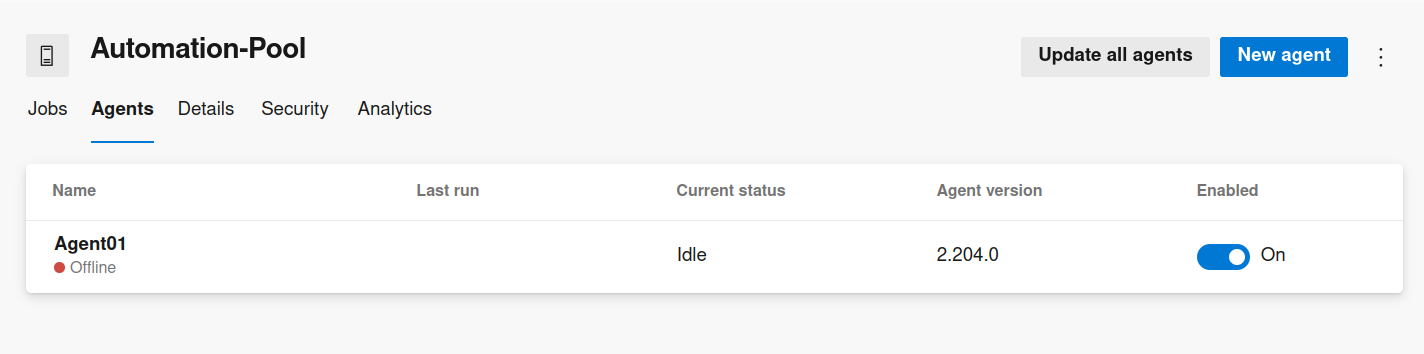
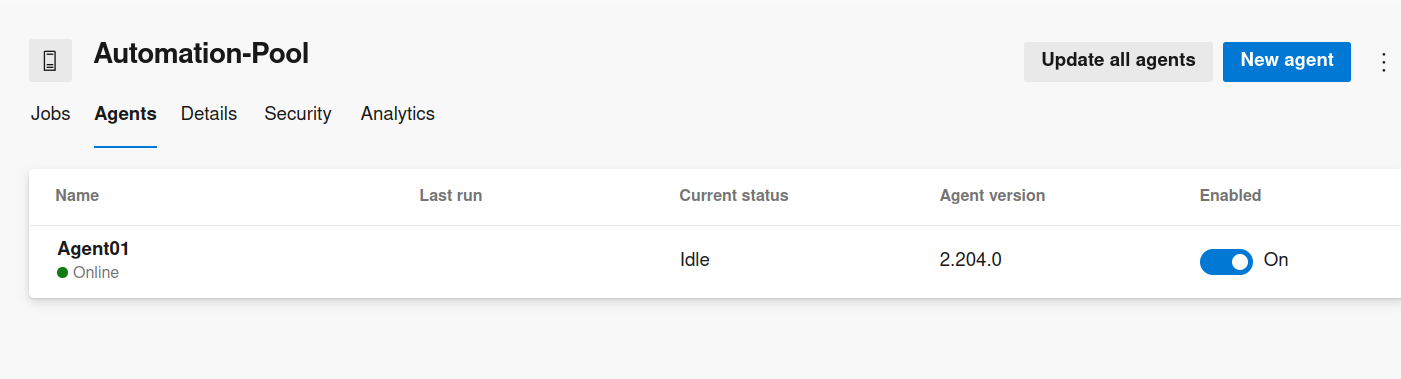
Now Run ./run.sh to bring your agent from Offline to Online