Apps Developer Guide - ONE-store/inapp-sdk-eng GitHub Wiki
Outline
상‘Product’ means the applications, VOD and shopping coupons distributed on ONE store. As for application products, ONE store developer center provides two types of support for the applications as follows:
- App: an app product that can be downloaded from ONE store
- In-App: an in-app product that is embedded in an app and can be additionally purchased within the app.
How to Start
You are required to go through a total of 5 steps of App Title/ App Info/ Price/ New APK/ and In-App to register an app.
How to Register App Title
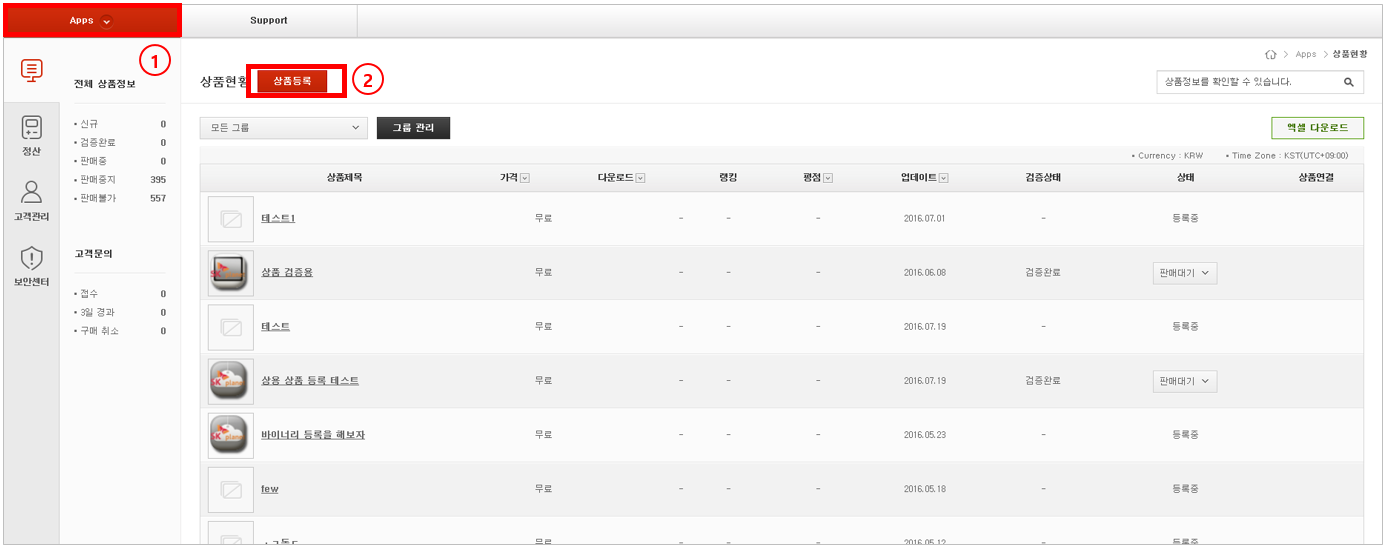
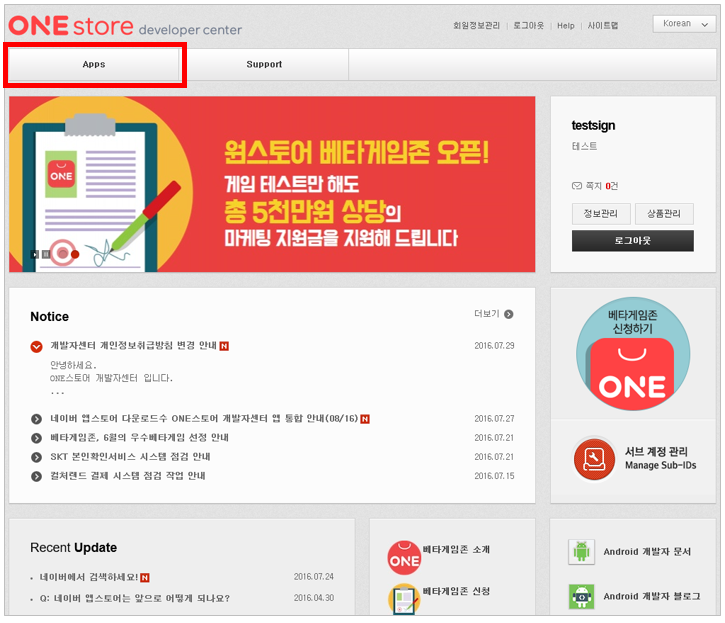
- Select [Apps] button (① in the image below) and move to [My Applications].
- If you select [Register App] button (② in the image) in the [My Applications] field, [Register App Title] window pops up to allow entering an app title
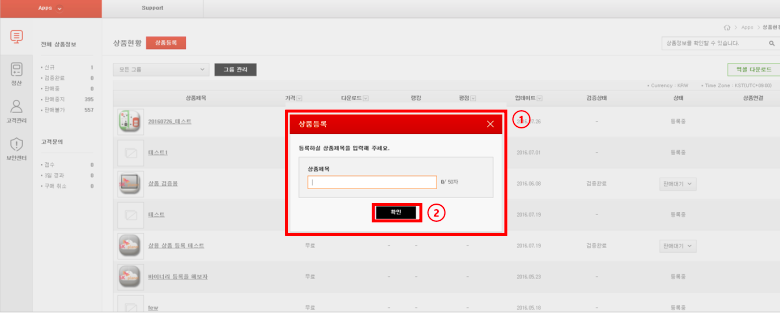
- If you enter an app title in the [Register App Title] popup window (① in the image) and click [Submit] button (② in the image), the corresponding app is registered in the list of apps.
How to Register App Info
You can enter app information, including Title/Description, App Image, Category, SEO Information, Collected Information & Intellectual Property Right, and Customer Support Contact Information, in the [App Info] field.
For more detail on image, icon resolution, etc., please refer to Apps Reference.
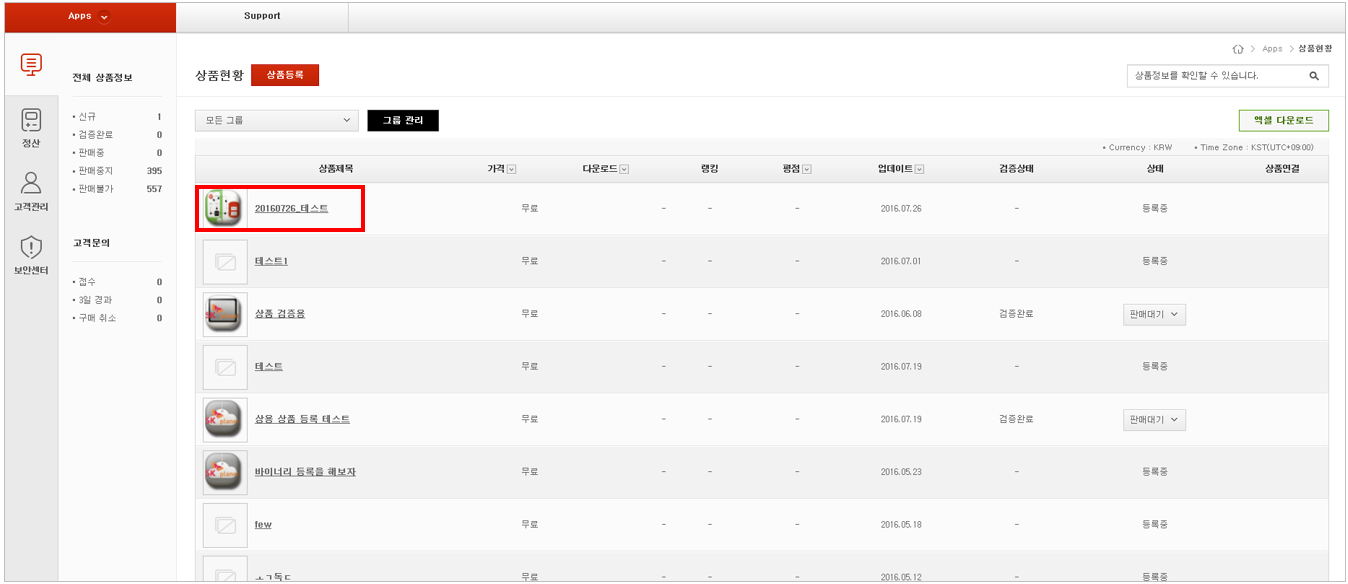
- If you click the app title (① in the image) that you just registered in the [My Application] field, you can move to the [App Info] field of the corresponding app.
- You can enter and edit App Title, Publisher’s Description, Publisher's Description Image, and Youtube URL in the [Title/Description] field of the[ App Info] screen
Even if you register the Publisher's Description Image, it will not be reflected immediately. The image will be used at the time of making a background image for Youtube video and a promotion banner image in [App Details] screen.

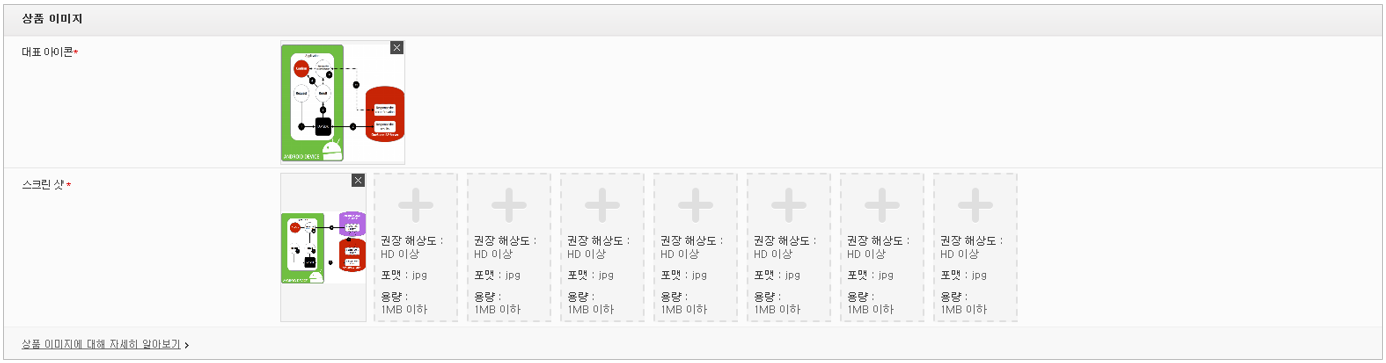
- You can enter and edit Icon and Screenshots in the [App Image] field of the [App Info] screen
- You can set App Type & Content Ratings in the [Category] field of the [App Info] screen.
For more detail on content ratings, please refer to Apps Reference.

- Set exposure conditions for app search in the [SEO Information] field of the [App Info] screen.

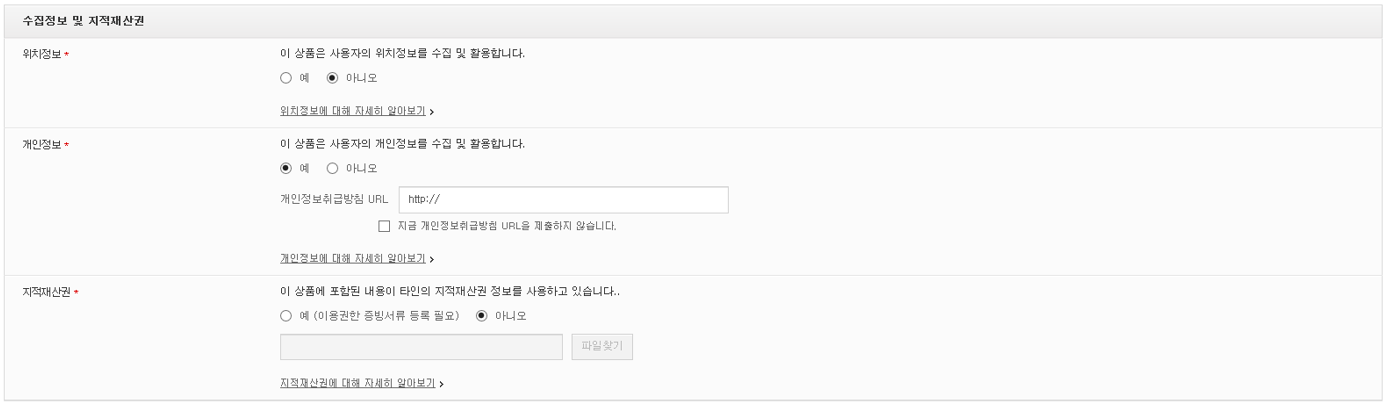
- You can set if personal information and local information will be used by an app in the [Collected Information & Intellectual Property Right] field of the [App Info] screen.
- You can enter information about the publisher who has published their apps in the [Customer Support Contact Information] field of the [App Info] screen.

How to Register Price & Distribution
As for a paid app, you can set the price of the corresponding app and the app distribution information on the mobile operators’ stores and Naver store. For more detail, please refer to Apps Reference.
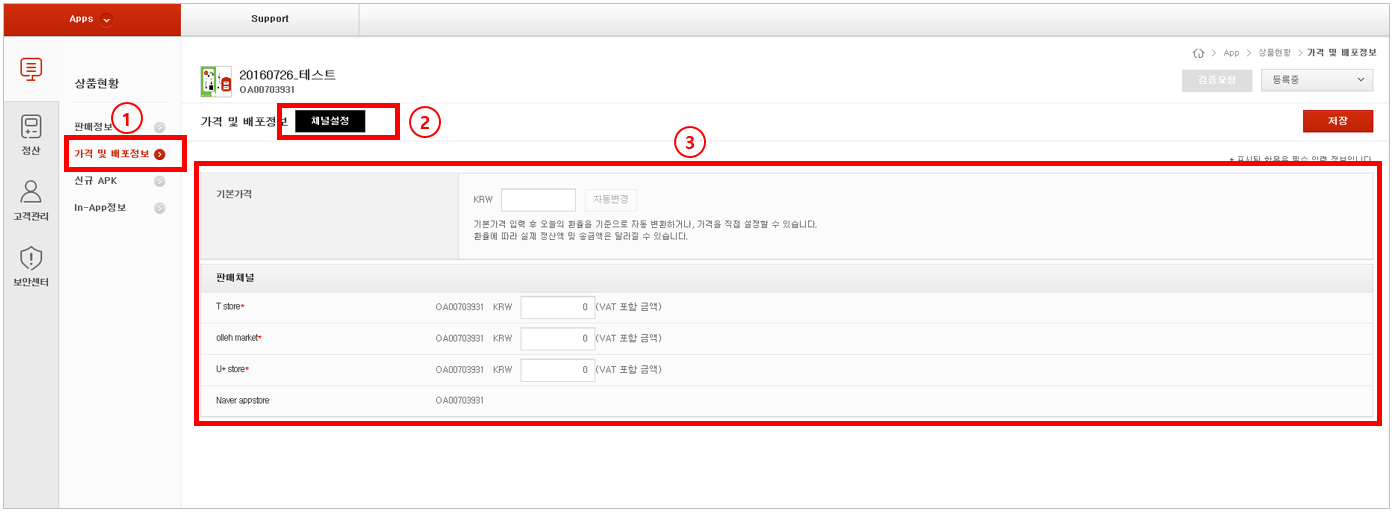
- you can set price by selecting [Price & Distribution] ] (① in the image) in {My Applications}.
- You can set channels by clicking [Set Channel] button (② in the image).
- You can set price per channel in the pricing field (③ in the image).
Note
- The app price is VAT inclusive.
- If the default price is “KRW 0”, the corresponding app is sold for free.
- Paid apps or apps with in-app purchase can be reviewed/ published after getting approval about settlement information.
- For more detail about how to register settlement information, please refer to Manage Your Information > Bank Information for Payment
- As for paid apps, you can enter up to KRW 100K (except multimedia products)
New APK
- Upload an APK file of an app and select supported devices at this stage. If you edit the binary file, you must get it reviewed again.
- Please be careful if you delete some of the supported devices for the published apps. Once the devices are deleted, the customers who use those devices cannot redownload the apps, and you are required to refund for the corresponding apps.
ARM (Application Digital Rights Management)
- Select if you will apply ARM (Application DRM) or not.
- For more detail, please refer to ARM Developer Guide.
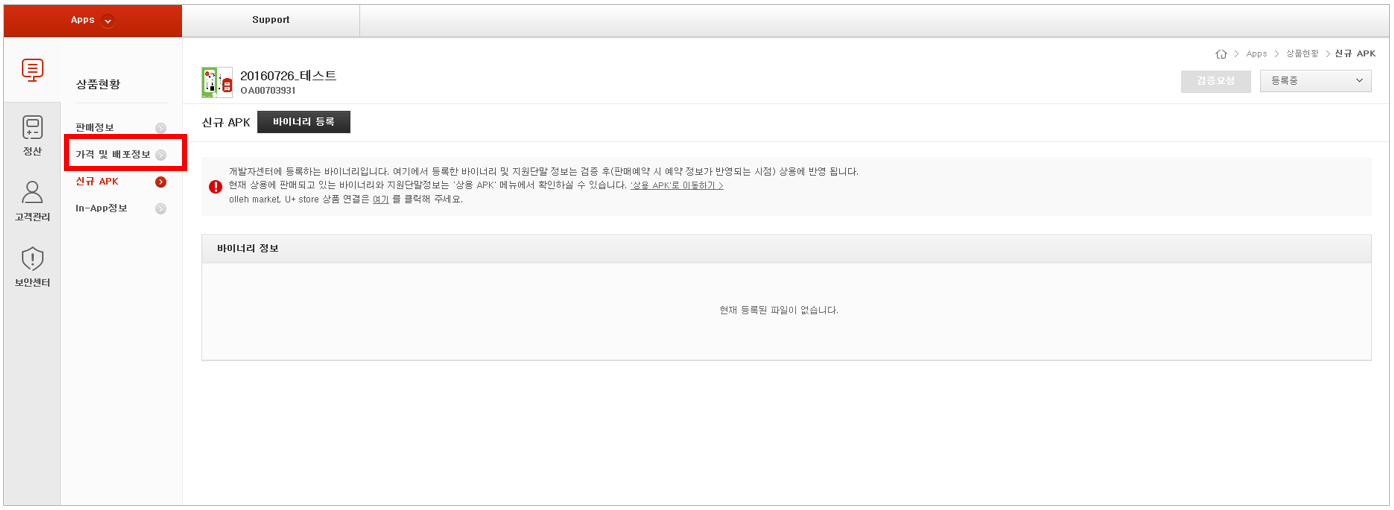
Upload New Binary
You can upload new binary in this screen. The binary and supported device information that you upload in this screen will be published on ONE store after being reviewed (at the time when the app publishing schedule is reflected). You are allowed to upload only the APK file as a binary file with size up to 350MB.
At the time when the binary is uploaded, inspections are made to check virus, duplicate package name, signing key and version code. If any error occurs, an error message will pop up and the uploading will fail. For more detail, including specifications, please refer to Apps Reference.
If Binary Is Uploaded for the First Time
Upload APK file via the upload binary popup window
If Binary Is Already Uploaded
- Select either [Upload New Binary] or [Update Existing Binary] in the upload binary popup window.
- Upload new binary: if you add another binary without replacing the existing one, please follow the same process as you did to upload binary for the first time.
If Existing Binary Is Updated: if the uploaded binary is replaced with other binaries
- Click [Update] button placed next to the binary that you want to update on the binary list.
- Upload the file by clicking [Upload File].
Select Supported Device
- Select the devices from the list of supported devices based on resolution in
AndroidManifest.xml/OS version - You can change whether the device is supported or not in the model list. The list can be sorted by device manufacturers, mobile operators, and resolutions.
- Once the uploading of binary files is completed, you will be automatically allowed to publish an app on all the devices supported by ONE store. If you want to publish the app only on certain devices, you can do that by editing provisioning information and the supported devices.
- Changing the supported devices or deleting the file before getting approval will not affect the status of published apps, because the binary file in the New APK menu will be reflected after being reviewed and approved.
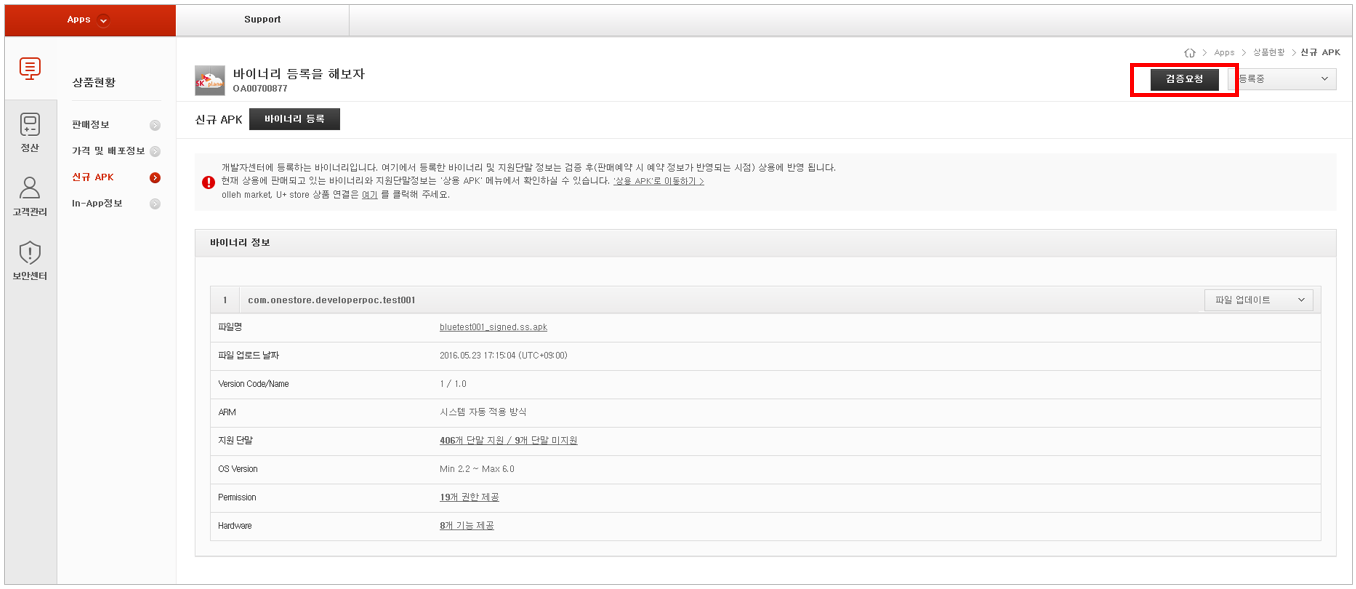
Request App Review
The list of supported devices is required to be reviewed based on the uploaded binary files and provisioning settings.
Manage Update History
- You can manage the update history of the published apps.
- Updates are shown on [Recent Changes] of the app details page on ONE store. If an app is uploaded or deleted, the changes will be reflected in the update history after the review procedure is completed. However, the updates will not be reflected if the app has already been published, so please register the updates before initiating the review procedure.
Manage App Review History
- You can check the review details when you request an app review.
- ONE store review team refers to the review details during the review, and provides support to make an efficient app review procedure.
Published APK
- You can check the published binary and supported device information in this menu.
- Uploading and editing binary is not available (the corresponding feature is provided in New APK menu).
- Downloading binary and changing the supported devices are available.
Changes in the supported devices are immediately reflected without going through the review procedure.
In-App
- The in-app price is VAT inclusive.
- For more detail, including in-app type, please refer to Apps Reference.
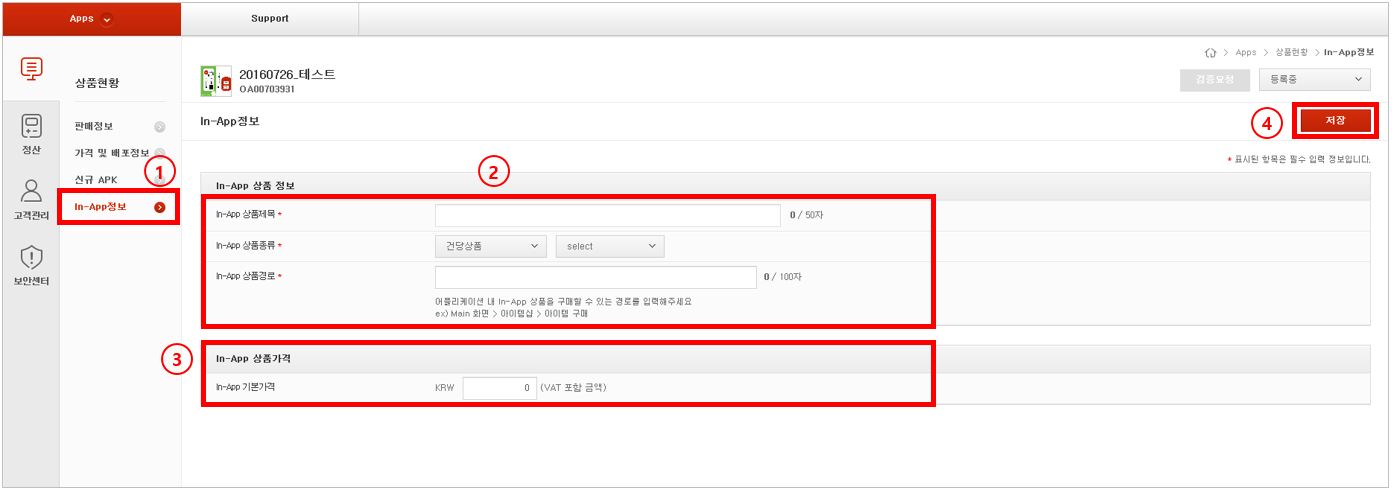
- Click [In-App] button (① in the image) of [My Applications] screen and move to [In-App].
- Enter [In-App Title/In-App Type/In-App Path] in the [In-App] Information field (② in the image).
- Enter [In-App Default Price] in the [In-App Price] field (③ in the image) (available to enter up to KRW300K).
- If all fields are filled up, upload in-app by clicking [Save] button (④ in the image) located on the upper right.
Perform Self Test
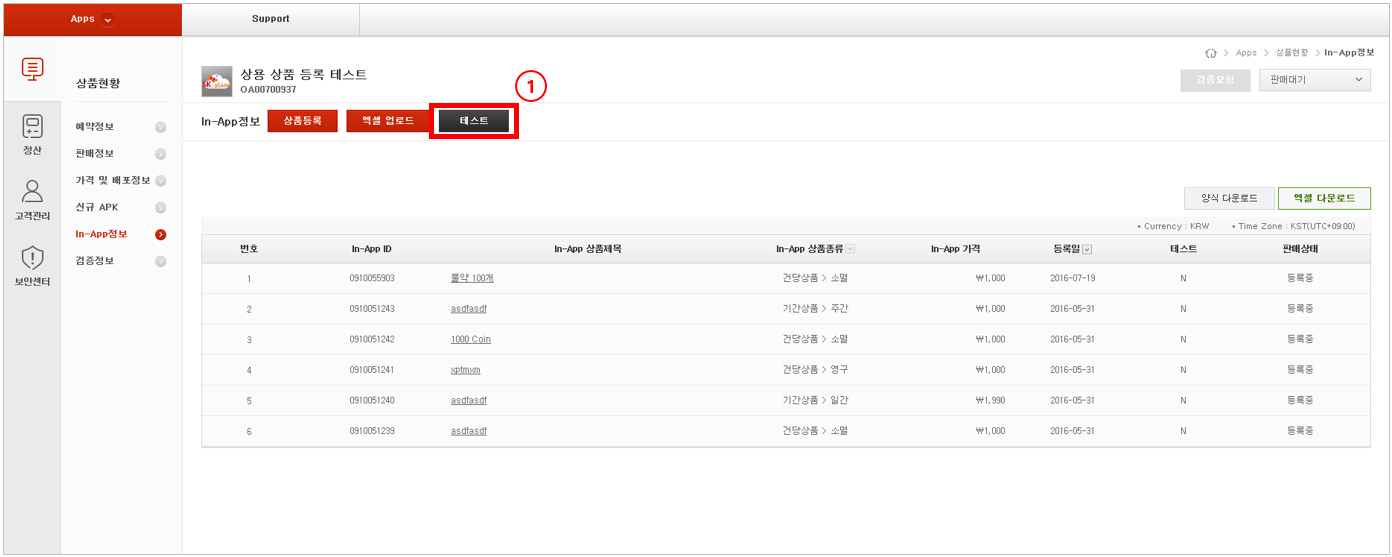
You can perform the test on the uploaded in-apps and check billing logs through the in-app test. You can request review only for the in-apps that have already been tested.
- Click [Test] button (① in the image) of the [In-App] screen.
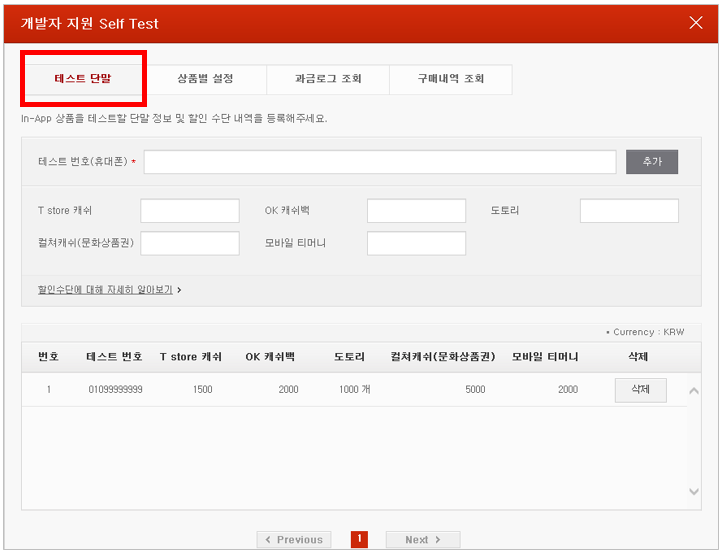
- If the [In-App Test] window pops up, register the device to be tested in the [Test Device] tab
If you enter MDN (Mobile Device Number), you are reqired to enter the number only without (-).
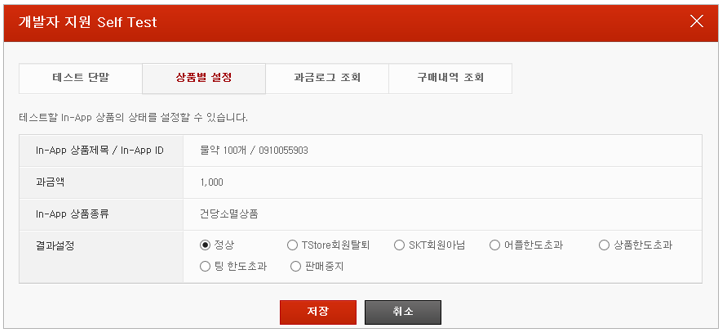
- If you click [Setting per App] tab (① in the image), the list of in-apps is displayed. If you select the title (② in the image) of an in-app to be tested from the list of in-apps, you can move to the settings screen of the corresponding in-app.
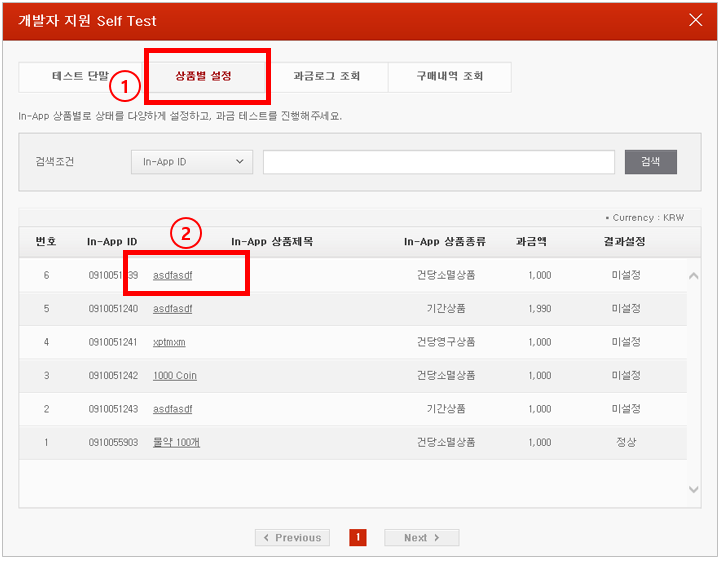
- You can set up various conditions for the corresponding in-app in the settings screen and perform billing test.
- You can change the status and conditions of the customer and identify availability. It is recommended to perform test with various settings as many as possible.
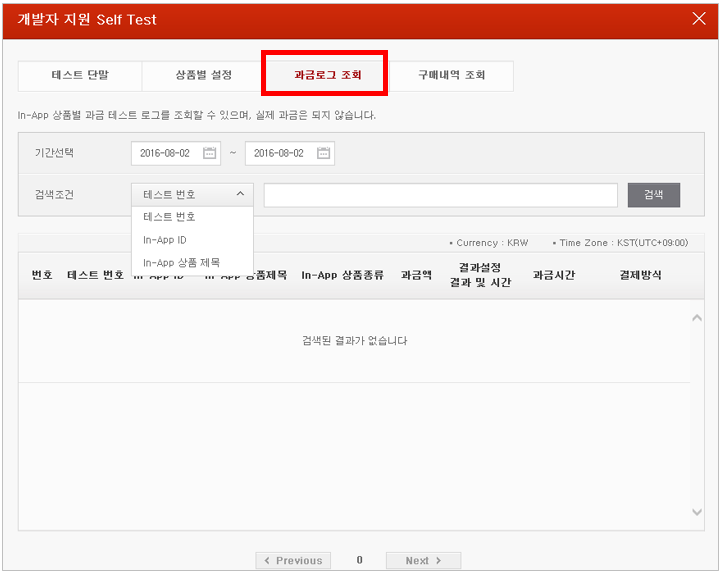
- Check billing logs.
- You can identify the billing test result logs of all the in-apps with PID while checking the billing logs.
- You can check if billing is applied or not (success or failure) in the [Billing Logs] screen.
- You can view more detailed results by clicking [In-App ID].
- You can check more detailed billing test results by selecting the period and the search condition.
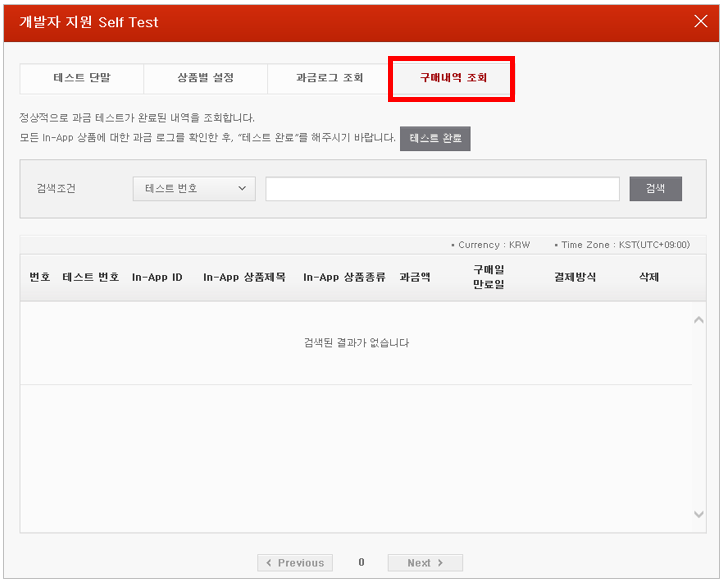
- Check purchase history.
- You can check the PID purchased date and expiration date in the [Purchase History] screen.
- If you cannot find the purchase history of the tested in-app in [Purchase History], you are required to set conditions in [Setting per App] and perform test.
- You can test again after deleting the purchase history of the in-app. Once the test is completed for all in-apps, click [Complete Test] button located on the upper right.
- You can initialize the purchase history and the test records by deleting them.
- If a window pops up to say that there are in-apps that have not been tested, please identify if all the in-apps with PID are tested, and click [Complete Test] button again after completing the test for all the uploaded in-apps.
Manage Apps
You can identify the status of the uploaded apps in the [My Applications] screen by selecting [Apps] button located on the top menu of homepage.
Modify Title/Description
You can frequently modify the uploaded [App Info]. However, if you edit new APK, you are required to request review.
| Item | Definition | Remarks |
|---|---|---|
| App Info | Modifiable | App Info is modifiable and the modifications are reflected in real time. However, you can edit the [App Info] after app review is completed. |
| Supported Devices | Modifiable | You can add and delete the supported devices. However, if app review is requested or publishing is scheduled, you can modify the supported device information after the app is distributed. |
Items that are required to be reviewed after being modified: App Type/ Content Ratings/ Location Information/ Personal Information / Intellectual Property Rights
| Item | Definition | Remarks |
|---|---|---|
| App Type | App review is requested if the app type is changed from GAME to others types. | |
| Content Ratings | App review is requested if the content ratings for apps in GAME category are changed from 18+ to sub-ratings (For All, 12+, 15+). | |
| Location Information | App review is requested if setting values are changed and modified. | |
| Personal Information | App review is requested if setting values are changed. | |
| Intellectual Property Rights | App review is requested if setting values are changed and attached files are modified. | |
| Other Binary Information | If development information, including APK, is modified, the modifications are reflected after app review is approved. |
How to Change Supported Device
- Supported Devices : select [Device]
- Change the status of device as [Supported] or [Excluded] in the list of supported devices
- Once ‘
saved’the changes made in the list of supported devices can be immediately applied.
Update Apps
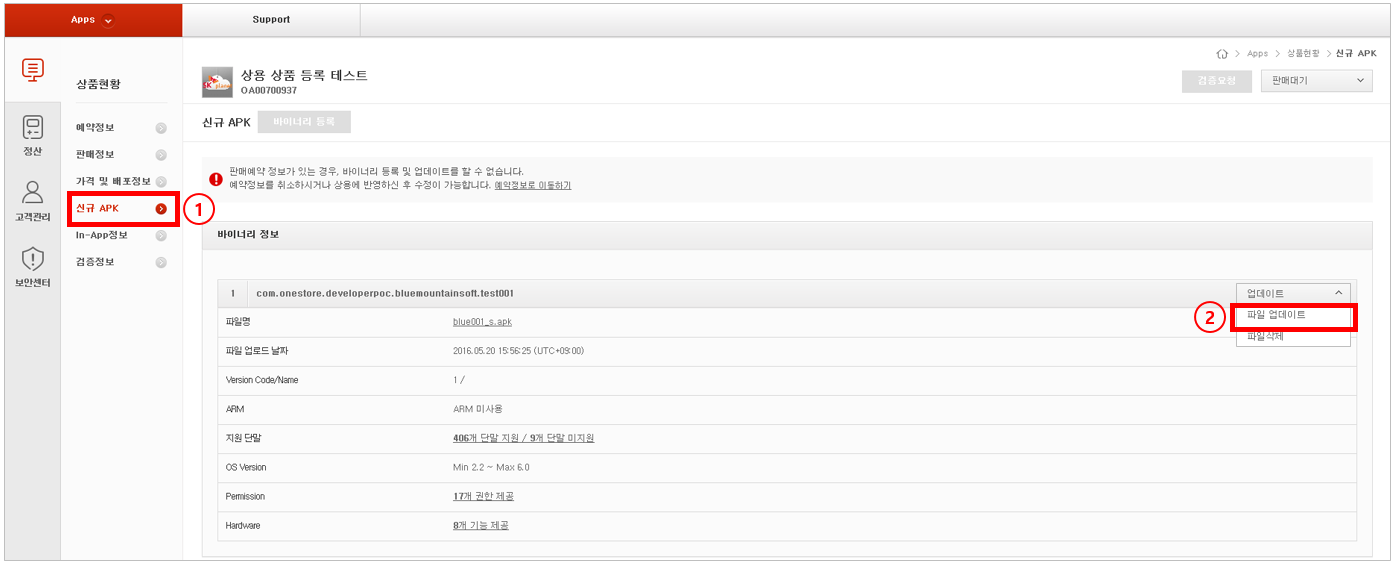
You can perform update in [New APK] menu. If you need to update binary files, please follow the instructions below.
How to Update
- Select New APK menu (① in the image), and choose [Update Binary] (② in the image) in the uploaded binary.
- Select the binary file(① in the image) that you want to update, and click [Confirm] button(② in the image)
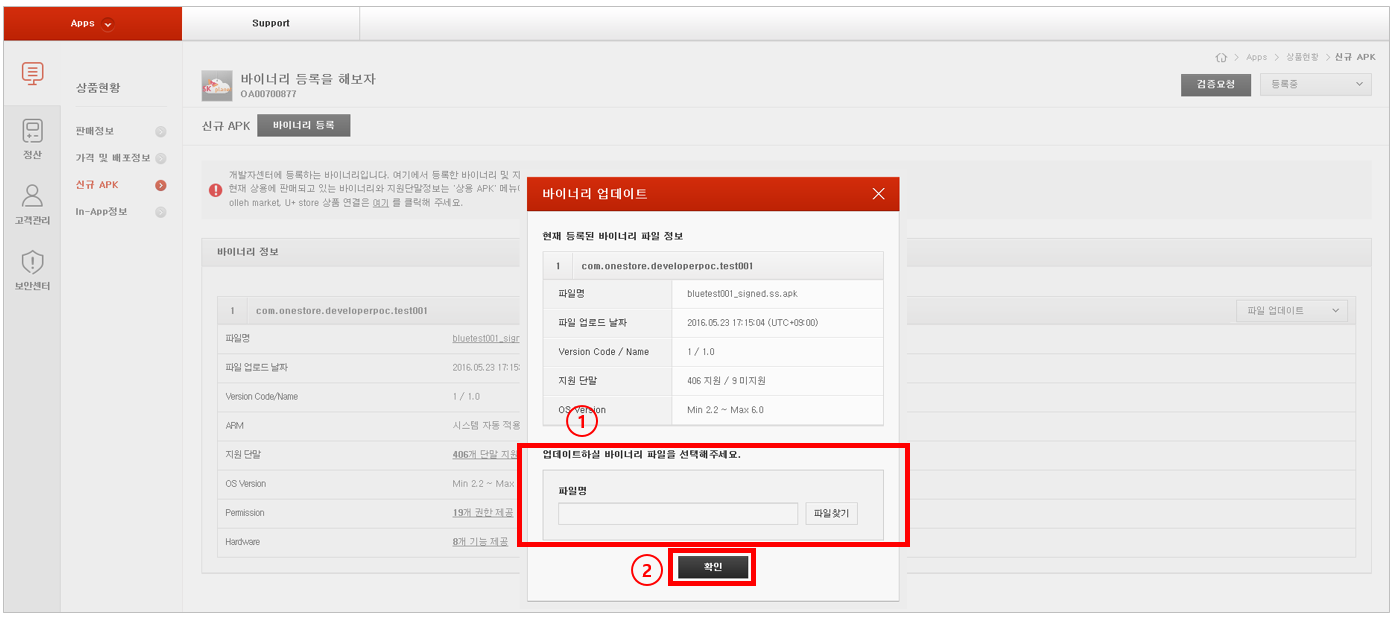
- Complete the final update by clicking [Request for Review] button after registering the update.