Getting Started with Private Workspaces - Nastel/gocypher-cybench-java GitHub Wiki
Getting Started with Private Workspaces
By default all benchmark submissions are stored in a public workspace, where all benchmarks are visible to everyone. Private workspaces contain benchmarks which are only visible to workspace owner and permissioned team members. Each private workspace maintains access tokens. Each token can have Bench and/or View permissions.
Bench-- allows users to submit benchmarks into a private workspace (write access)View-- allows other users to view benchmarks stored in a private workspace (read access)
Creating your first Workspace
First, you will need your private workspace and a bench token (token with Bench access). To get one follow the steps below!
Bench tokens are API tokens with write permission to your workspace (keep them secret and only share with team members who will submit benchmarks to your workspace).
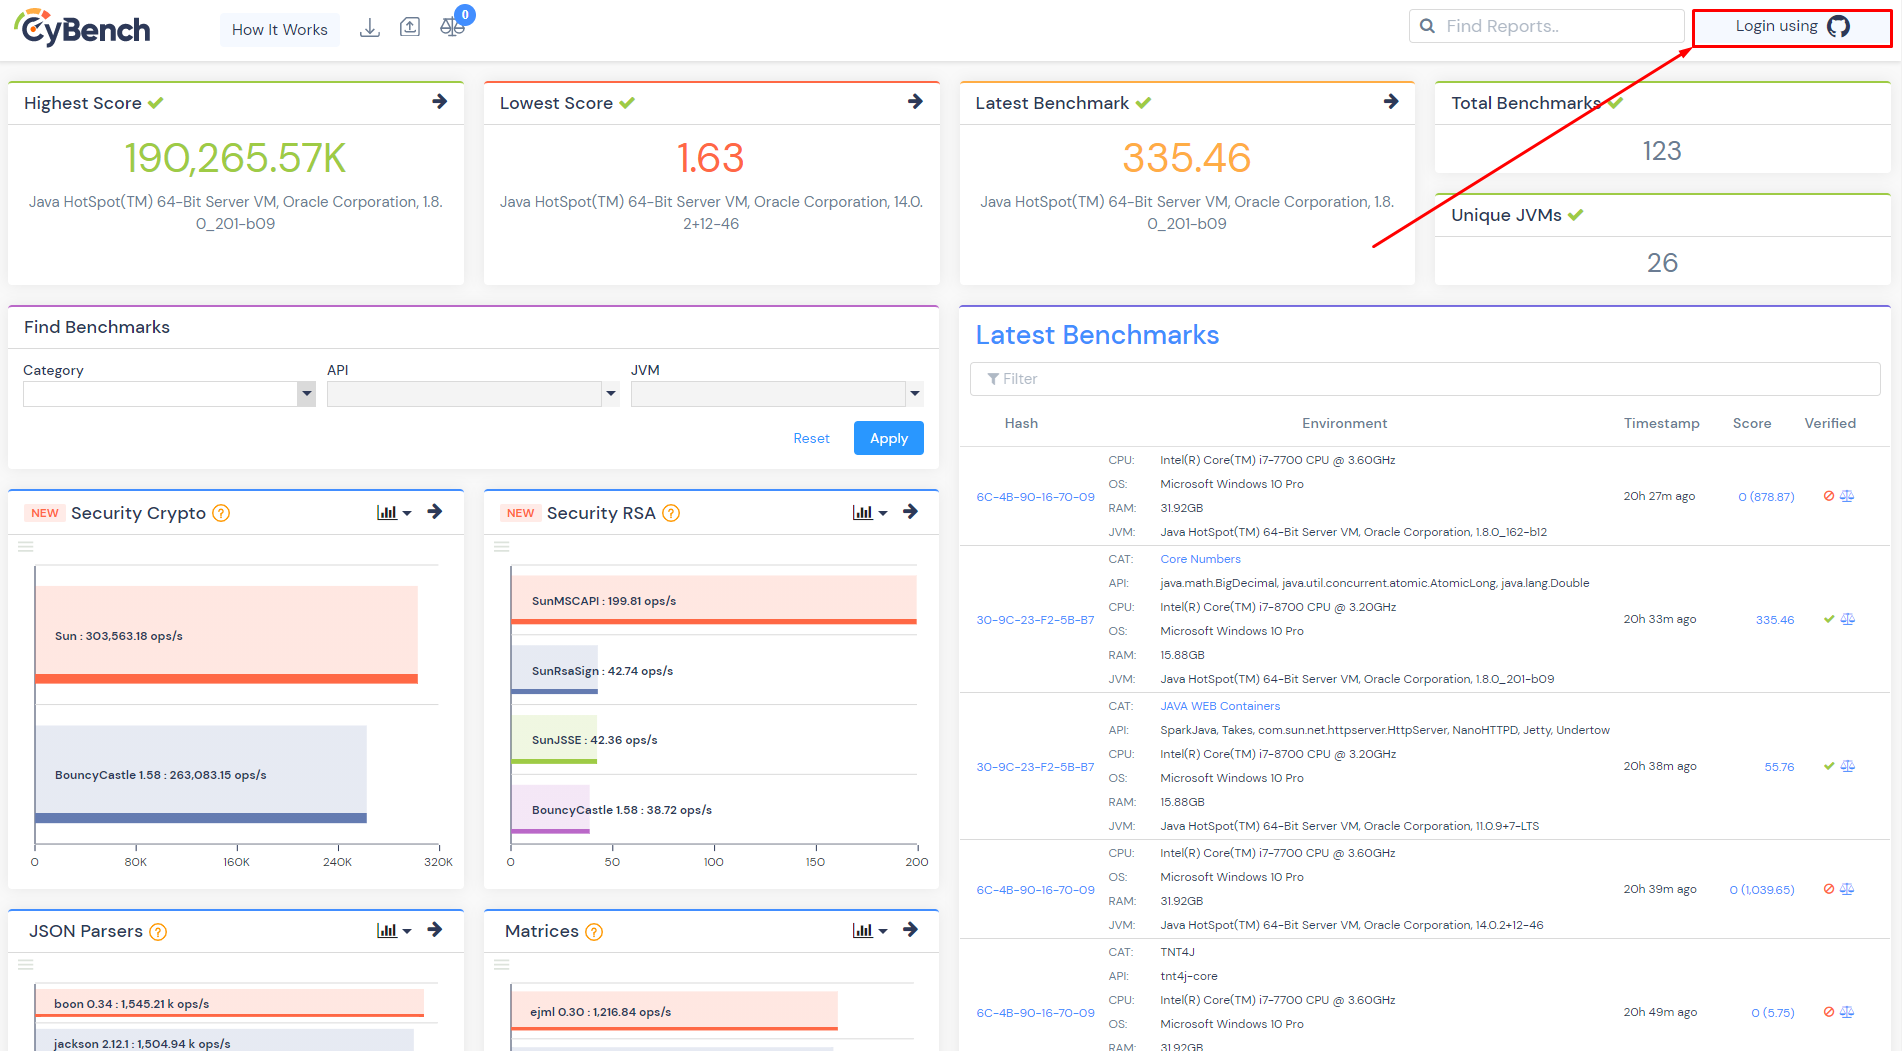
- Go to the CyBench Explorer
- Click login using GitHub, which will ask you to provide login credentials
- Go to the user page

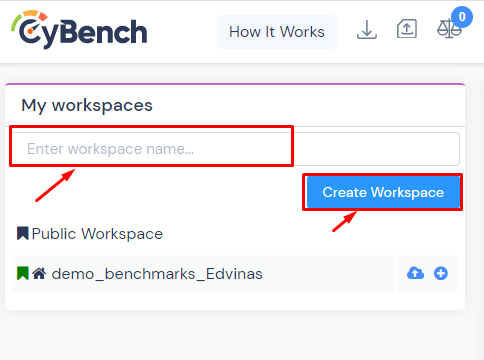
- Create a workspace with your chosen unique name.
- Find the token that has Bench rights and copy it.

Integration Options
Now that you already have a workspace created, and tokens generated you can use them to send reports to your private workspace that will be only visible to you or others that you give access to.
The next step would be to make or take some benchmarks and try it out with with one of the available options:
- CyBench launcher - No installation, No programming, just download and run!
- IntelliJ plugin - Code benchmark plugin into IntelliJ
- Eclipse plugins - Code benchmark plugin into Eclipse
- Maven - Code benchmark plugin into Maven
- Gradle - Code benchmark plugin into Gradle
Using Bench token with IntelliJ
If you have not yet used the plugin you can follow the Getting started with IntelliJ guide to get to know it better before continuing.
Now that that's settled we can try to send a benchmark to our private repository.
- It's quite easy all you need to do is copy the bench token from the CyBench Explorer
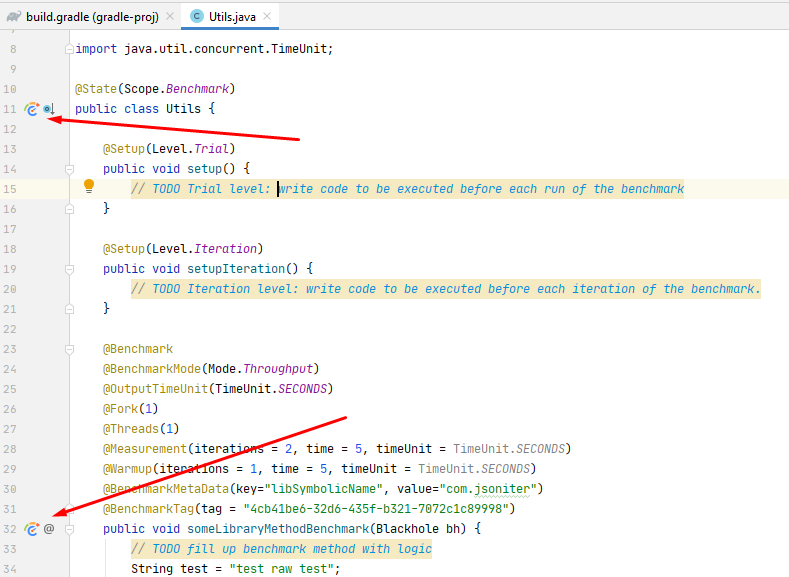
- Then open your benchmark inside IntelliJ and click the CyBench icon inside the benchmark class.
- Select the create option.

- And input your token into Bench Access Token field. Select check-box "Send Report to CyBench", check if Working directory is correct and then click the Apply button.

- Run the newly created configuration.
Using Bench token with Eclipse
If you have not yet used the plugin you can follow the Getting started with Eclipse guide to get to know it better before continuing.
Now let's try to configure the run so that it sends the benchmark to a private repository.
Note: Both eclipse plugin versions have the same UI and the same functionality so do not worry if you do not have the latest Eclipse version.
- First thing you need to do is copy the bench token from your workspace in CyBench Explorer
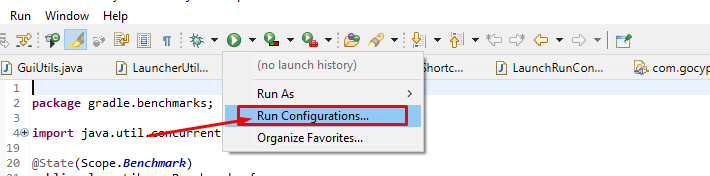
- Open your benchmark inside an Eclipse application and go to run configuration.
- Double click the CyBench icon inside the list of configuration selection.

- Input your token into the Bench Access Token field. Check that the "Run Project" selected is correct, that the "Send Report to CyBench" is checked.

- Click the Apply - > Run.
Using bench token with Maven
If you have not yet used the plugin you can follow the Getting started with Maven guide to get to know it better before continuing.
Now let's try to configure the run so that it sends the benchmark to a private repository.
- All you need to do is to open any maven project that has benchmarks ( for example the one that is given in the example above ).
- Update the pom.xml file by adding a new property to the CyBench plugin configuration.
		<configuration>
			<shouldSendReportToCyBench>true</shouldSendReportToCyBench>
			<benchAccessToken>aaaa-cccc-bench-token-sample</benchAccessToken>
		</configuration>
- Run maven clean verify that will trigger the CyBench plugin to run the benchmarks, and if shouldSendReportToCyBench property is set to true it will run the benchmarks and send the report to your private workspace.
Using Bench token with Gradle
If you have not yet used the plugin you can follow the Getting started with Gradle guide to get to know it better before continuing.
Now let's try to configure the run so that it sends the benchmark to a private repository.
- All you need to do is to open any Gradle project that has benchmarks ( for example the one that is given in the example above ).
- Update the build.gradle file by adding a new property to the CyBench plugin configuration.
	cybenchJMH {
		shouldSendReportToCyBench = true
		benchAccessToken='aaaa-cccc-bench-token-sample'
	}
- Run gradle build that will trigger the CyBench plugin to run the benchmarks, and if shouldSendReportToCyBench property is set to true it will run the benchmarks and send the report to your private workspace.
Using bench token with CyBench Launcher
- Download any of the prepared benchmarks .zip packages with integrated CyBench launcher from the CyBench launcher release page .
- Extract the package into the directory of your choice.
- Open the conf directory and cybench-launcher.properties file.
- Put your bench token into benchAccessToken property
benchAccessToken=aaaa-cccc-bench-token-sample - Navigate back from the configuration directory and run cybench.bat it will run the benchmarks and send the report to your private workspace.
Benchmark Results
- After preforming one of the above steps the benchmarks from the selected project will be executed and the report will be sent to your private workspace.
- In order to see the results you have to go back to CyBench Explorer page and select the workspace that you created.
