1. Pertinent information - N-Division-2020-2021-even/Repo-17 GitHub Wiki
INTERACTIVE TOYS
Concept 1. Plants vs zombies

This is a project that was created in CSCI 7000: Things That Think at the University of Colorado Boulder. The BRAAIIINNNSS of the zombie is the Arduino. It runs off of a 9 volt battery. The zombie is made from 'moss green' polyester felt, and is sewn using a simple pattern for a rag doll found online (www.sewing.circleofcrafters.com) To make the brains, they started with a Styrofoam egg and shaped it by flattening the base and creating a seam in the middle to separate the left and right hemisphere. They glued the RFID button to the Styrofoam and then covered the Styrofoam with textured grey felt and attached it using hot glue. The pea shooter was created using polyester felt. The RFID button is inserted in the 'mouth' of the pea shooter. The leaf was cut out by hand, and then the veins of the leaf were sewn in. The stem and the leaves were made in the same fashion, except that the stem has a wire sewn down the center of it to keep the head up. To make the zombie talk, they used a Chinese iPod shuffle knock off and hacked it using the same method as outlined in this instruct able, however, the pin outs are a little different on their mp3 player as that of the player in the Instruct able. They removed the board from the case and hard wired the audio outputs directly to their amplifier board. They also hard wired the switches that control the volume, play/pause, next track, and previous track. They disconnected the battery, and connected the the power inputs to the Arduino outputs. They used the Audio Hijack Pro software to record sounds directly from the PVZ game. Audacity was used to shorten the tracks, and were then loaded onto the microSD card. They planned on using a pulse sensor from MAKE so that the zombie can read your pulse and display it in his LED eyes, however, upon testing, they found that the pulse sensor is designed to run at 115200 baud and the RFID reader only works at 9600 baud. The zombie's eyes are made using large (about 1/2" diameter) googly eyes, and modified using the "googly eye mod," which involves removing the black pupil, trimming it down, and replacing it in the eye, sealing it with hot glue. Behind the googly eyes are two RGB LEDs (one for each eye) The red and blue channels are wired in parallel, so that only one Arduino pin is required for each color. The green channel for each LED is controlled independently, so that we can make the eyes different colors for example, we can turn on the red channel and one green channel to get one yellow eye and one green eye. In this was the toy was designed.
The full working of a toy can be seen in this video :
https://content.instructables.com/ORIG/FVL/7ING/H1JUE9PN/FVL7INGH1JUE9PN.jpg?auto=webp&frame=1&width=1024&height=1024&fit=bounds&md=e6092f462eca6822b388f87d5dd845f3
Concept 2.Lilypad Arduino light-up critter

The LilyPad Arduino Main Board is based on the ATmega168V(the lower power version of the ATmega168) or the Atmega328V. The LilyPad Arduino was designed and developed by Leah Buechley and SparkFun Electronics. The LilyPad Arduino can be powered via the USB connections or with an external power supply. If an external power supply is used, it should provide between 2.7 and 5.5 volts. This can come either from an AC-to-DC adapter battery. Again don't power the LilyPad Arduino with more than 5.5 volts, or plug the power in backwards. The LilyPad Arduino can be programmed with the Arduino 'Arduino software'. This project can be created using fabric scraps and a LilyPad Arduino. First, draw out the shape for your bunny on a piece of paper (two pieces of 8.5*11 to get it big enough). Draw the oral for the face, two circles for the cheeks, a heart, and a panel for the back pocket if desired. You will need two pieces to sew the main body of your toy. fold your chosen piece of fabric in half so that the good side is facing in. Pin your pattern in place, then cut those for the cheeks, heart and pocket. Cut those out as well, and set them aside. Trace the same pattern, then cut out the oral. Next take a square of fabric larger than the hole. Pin the edges of the main fabric under, then sew the pieces together. Now sew on the cheeks and heart. You can attach these by hand, or with a sewing machine. To add the back pocket, tuck under the edges of the pocket piece and sew it to back of the fabric body. Next, add the buttons. turn your fabric so that outside is facing in, then pin together. sew around the edges of the toy, leaving a 2.5 inch hole for stuffing. Then, turn your toy right-side again. Upload the code to Arduino check that it's working, then break your board apart. Do the connections
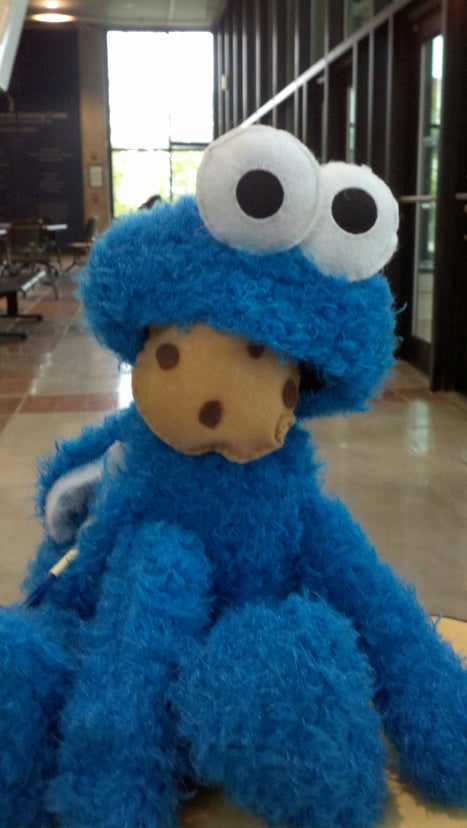
Concept 3.Interactive Cookie Monster Plush Toy
Make an adorable, lovable, cuddle-able Cookie Monster toy who loves cookies! His eyes light up blue when you give him a cookie, but red if you give him a carrot. Shaker motors vibrate in his stomach if Cookie Monster hasn't had something to eat for a while.
This project was created for Things That Think 2012, a class at the University of Colorado
Step 1: Cut Out Pattern
Using the adobe pattern files cut out all of the parts for Cookie Monster. Make sure you use furry blue fabric for the body, head, hands and legs. Use white felt for the eyes and black felt for the inside of the mouth.
Step 2: Feet/Legs
Sew the top and the bottom of the foot together using a sewing machine. The leg looks better if you sew them inside out and then flip them fuzzy-side-out. This hides the seem on the inside of the toy. Next, fold the leg into a cylinder and sew the edges together. Now sew the bottom of the leg into the hole in the foot and stuff it. Do not sew the top of the legs, this is where they attach to the body. Repeat these steps for the other leg
Step 3: Arms Sew
The two halves of the arms together inside out, and then flip them fuzzy-side-out to hide the seam. Do not sew the end of the arm that connects to the body. Stuff the arm. Repeat these steps for the other arm.
Step 4: Body
Marking off a 1 inch section along his side for Velcro goes (giving you access to his innards), sew the rest of the body together making sure not to sew over the section you marked off. Again, you want to sew it so together with the fuzzy sides touching and then flip it inside out to hide the seam. Now that the body is fuzzy side out, you can sew or glue the Velcro in place. Then sew the legs and arms onto the body and stuff.
Step 5: Head
To create the mouth, cut out black felt in the shape and size of the mouth opening. Next, cut out black felt rectangles, one that fits across the top of the mouth, and one that goes along the bottom curve. Mark off a section on the bottom of his head under his mouth, which will not be sewn so that wires can be fed through the bottom of his head. Sew his head together leaving the marked section for his neck un-sewn.
Step 6: Cookie and Carrot
Cookie: cut out two circles (roughly 3.5 inches in diameter) from tan felt. Cut out several small, irregular circles from dark brown felt for the chocolate chips. Glue the chocolate chips onto the cookie. Sew the two cookie halves together, leaving a half-inch long section for Velcro. This opening is so the RFID chip can be taken in and out. Stuff the cookie and Velcro it shut.
Carrot: cut out a triangle with a round bottom from orange felt, and three small green rectangle which will become the stem. Sew the straight edges of the orange triangle together, leaving about an inch un-sewn, attach the Velcro access to the un-sewn area. Sew the green rectangle to create small cylinders. Stuff the carrot with polyester filling. To Finish the carrot place the stem around the open top of the carrot. Sew around the top of the carrot using a cross stitch. When you have sewn around the top of the carrot one full time pull the thread tight. This should close the top of the carrot, pulling the stems together as well.
Step 7: Eyes
Laser cut out two 2.5 inch diameter circles out of white felt. Laser cut a 0.8 inch hole in the middle of the white felt circles. Cut out a section of black mesh and sew it over the back of the 0.8 inch hole. Sew the two white felt pieces together, leaving an opening at the bottom. Use a hole-punch to make a hole in the back of the eye. This is where the LED wires will be fed though. Repeat these steps for the other eye.
Step 8: LED/RFID/Shake Motor Wiring to the Arduino
Wire up the RFID components according to the instructions on the following photo

website: http://hcgilje.wordpress.com/resources/rfid_id12_tagreader/
*** Important links
1.https://www.instructables.com/
2.https://www.instructables.com/Interactive-Cookie-Monster-Plush-Toy/
Concept 4. Interactive Mike Mozowski Toy


Inspired by a Mike toy laying on my coworker's table, they made this interactive Mike with super light clay and Grove - Starter Kit Plus.
It's an interactive toy standing by the road, staring whoever takes his cap off. Once his cap is taken off, his eye will start to spin to find the naughty one.
Step 1: Sketch


They drew the sketch of their idea as pic 1.
They wanted his eye to rotate when someone takes his cap off. To implement it, they found electronic modules as pic 2.
They are:
- Seeeduino (an Arduino compatible microcontroller)
- Base Shield (an extension board for Grove modules to connect to Seeeduino)
- Half ping pong ball (I got it by cutting through a ping pong ball, but you can also find some other doom thing to replace it)
- Grove - Servo (create the rotation of the eye)
- Grove - Light Sensor (detect if the cap still lays on Mike's head)
Step 2: Building the Structure
)
They made a plate to fix the eye ball first.
And then implemented the servo and build up the rough structure of this project.
Step 3: Shaping


In this step, they hid the Grove parts in Mike and built up the shape.
The 1st pic is what they got after this step. Upload the code to the Seeeduino and done.
Now if you move its cap, it will rotate its eye.
Important links: https://www.instructables.com/Interactive-Mike-Mozowski-Toy/