Signalbox config - MrTroble/Open-Signals GitHub Wiki
Configure signalbox
Linking List
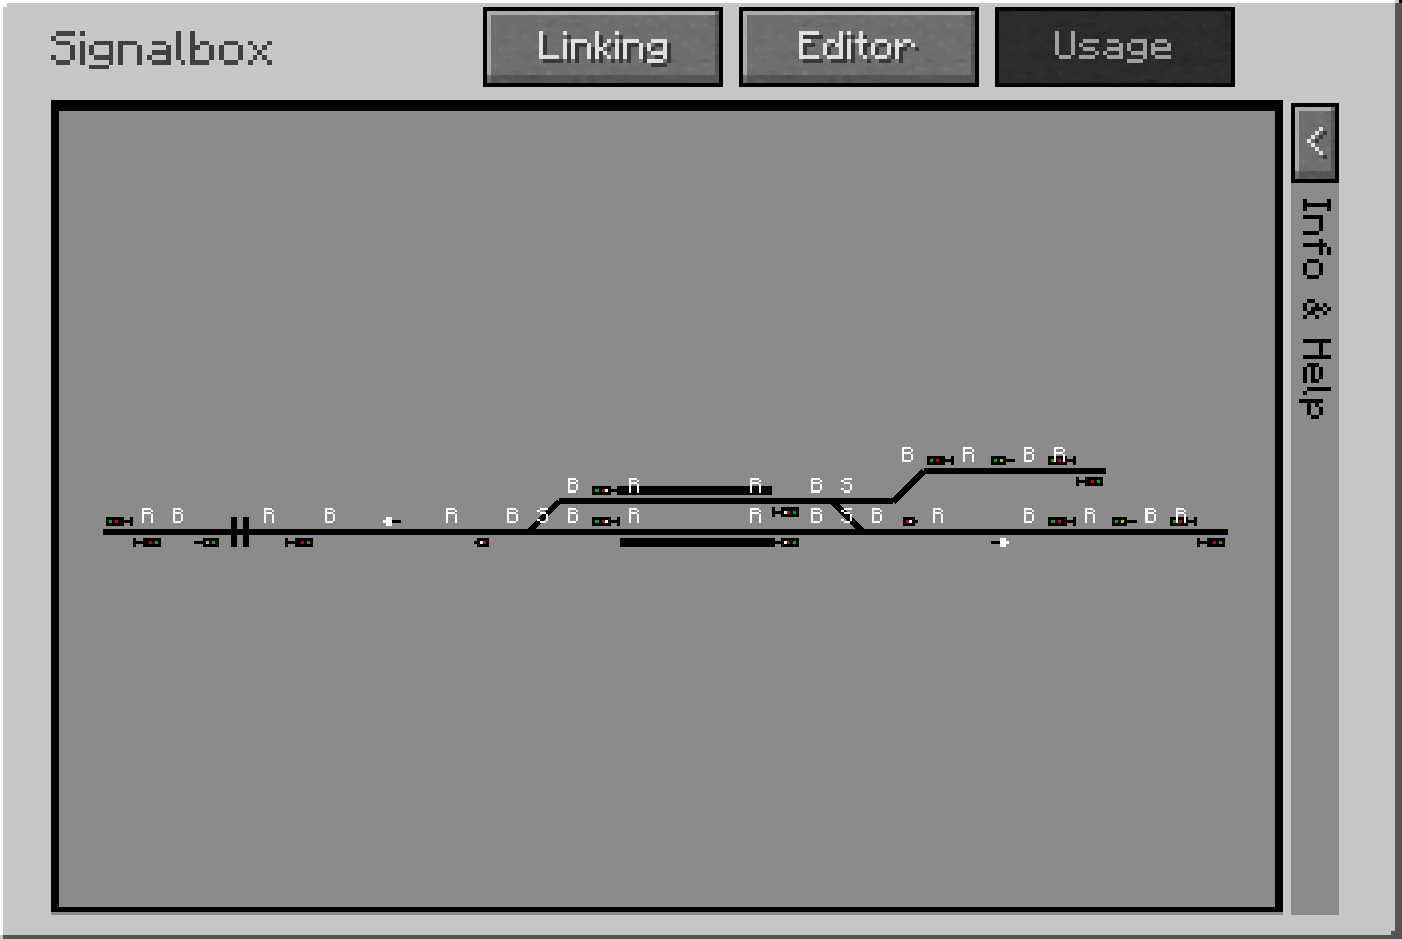
Once you have drawn the signalbox layout, you can go back to Operation mode.
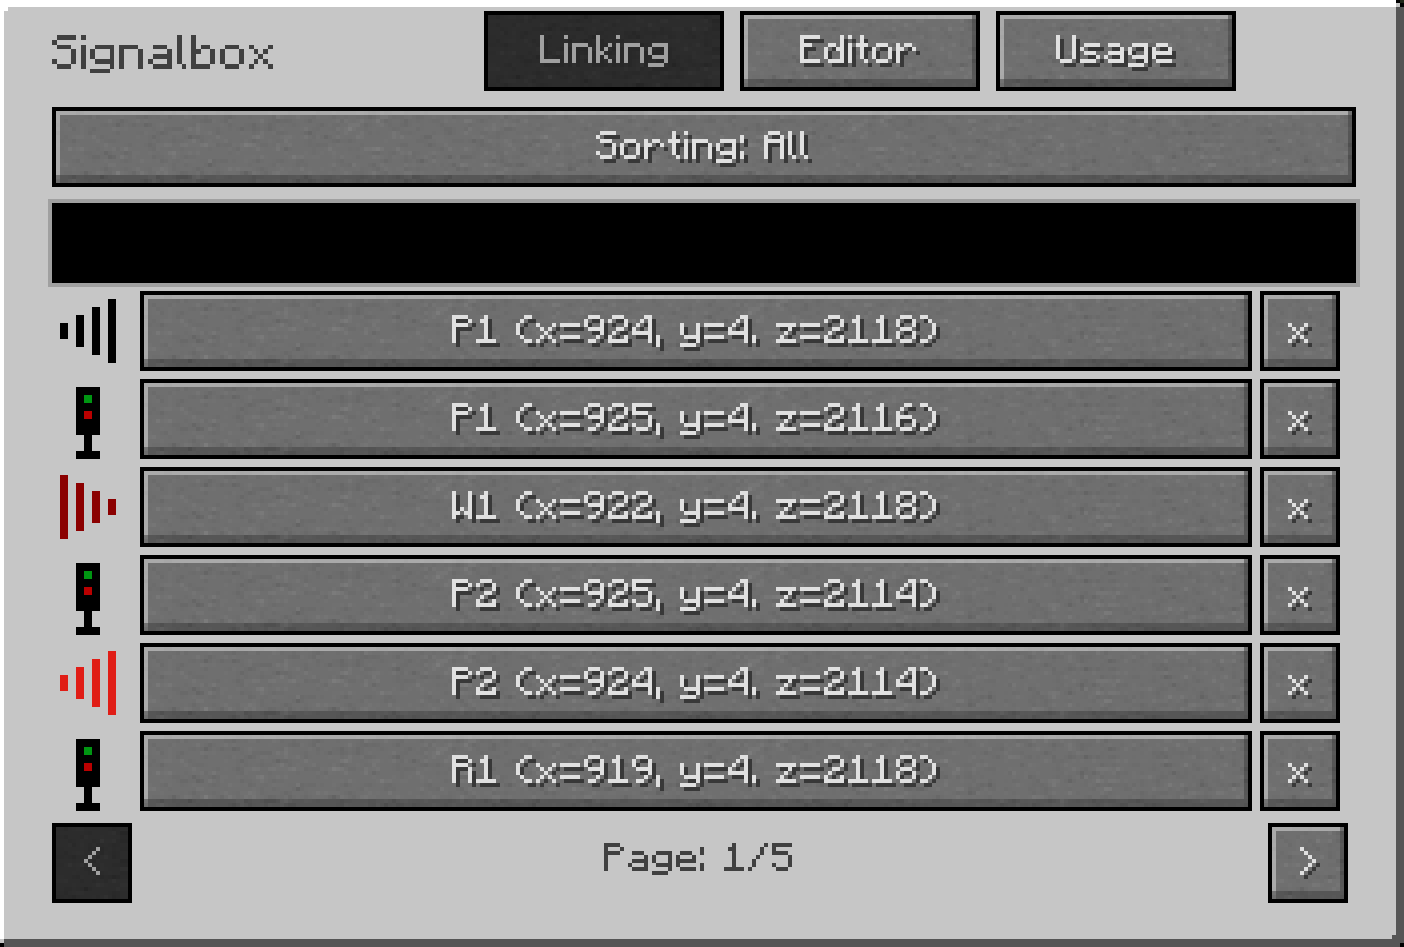
First you have to link the signals, redstone IO and other signalboxes in the world with the signalbox using the Linking Tool or Multi Linking Tool. You can find all linked blocks in the tab 'Linking'.
Connecting
Next step, after all blocks are already linked, you have to connect them with the corresponding elements in the signalbox layout. To tell the signalbox where which signal is located. In addition, further settings like
- slow-speed
- redstone output (switches etc)
- redstone input (blocking & resetting)
- subsidiary signals (Zs signals)
- etc.
can then be adjusted.
The settings are all stored in so-called nodes. Each tile has such a node and has different settings depending on the elements in the tile.
In general, all settings must always be defined on a path between two signals so that they apply to it. A path always contains all the tiles between the start and destination signals, but not the start and destination signals themselves.
Tip 1: It is recommended to give the signals and redstone IO their own names to be able to distinguish them better in the signalbox.
Tip 2: You can also link single elements first and connect them before you link others. You can also make additions and changes at any time.
Connect signals
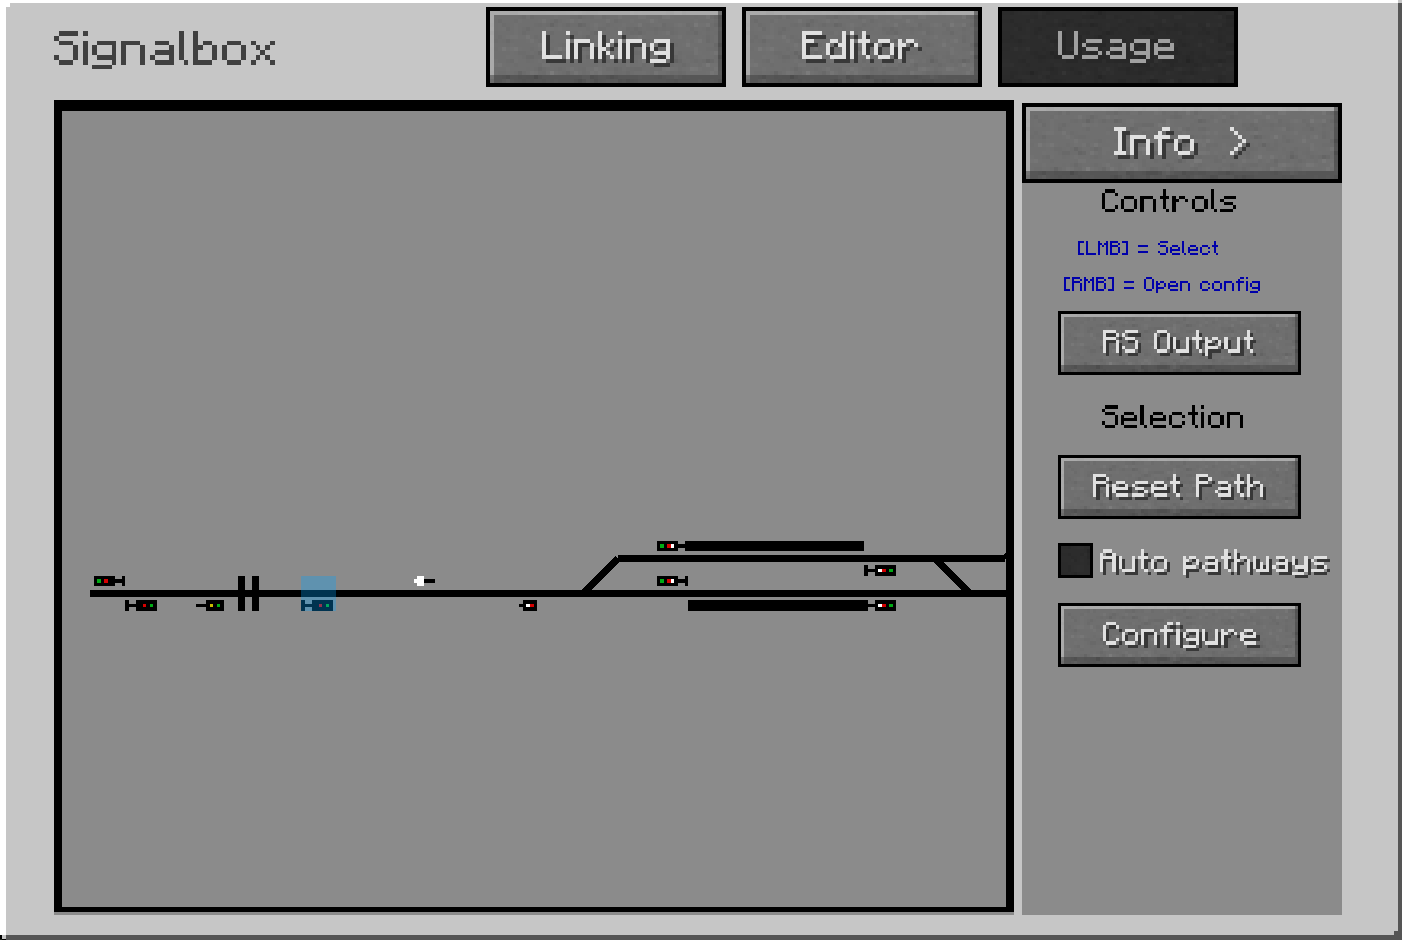
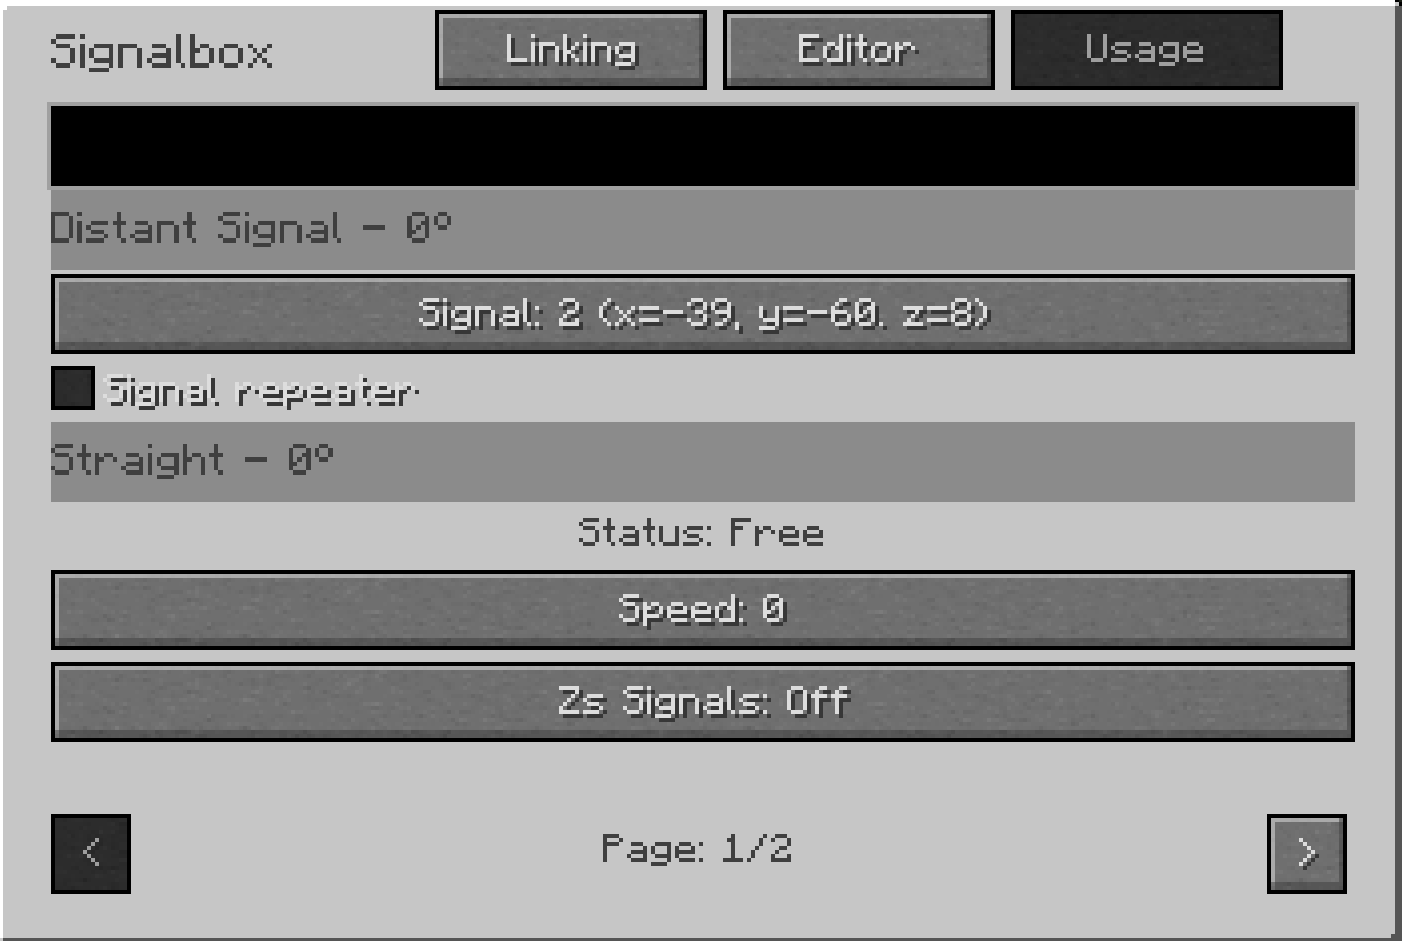
To associate a signal, right-click on the respective signal. Then the sidebar opens on the right. There you select Configure. A new window opens.
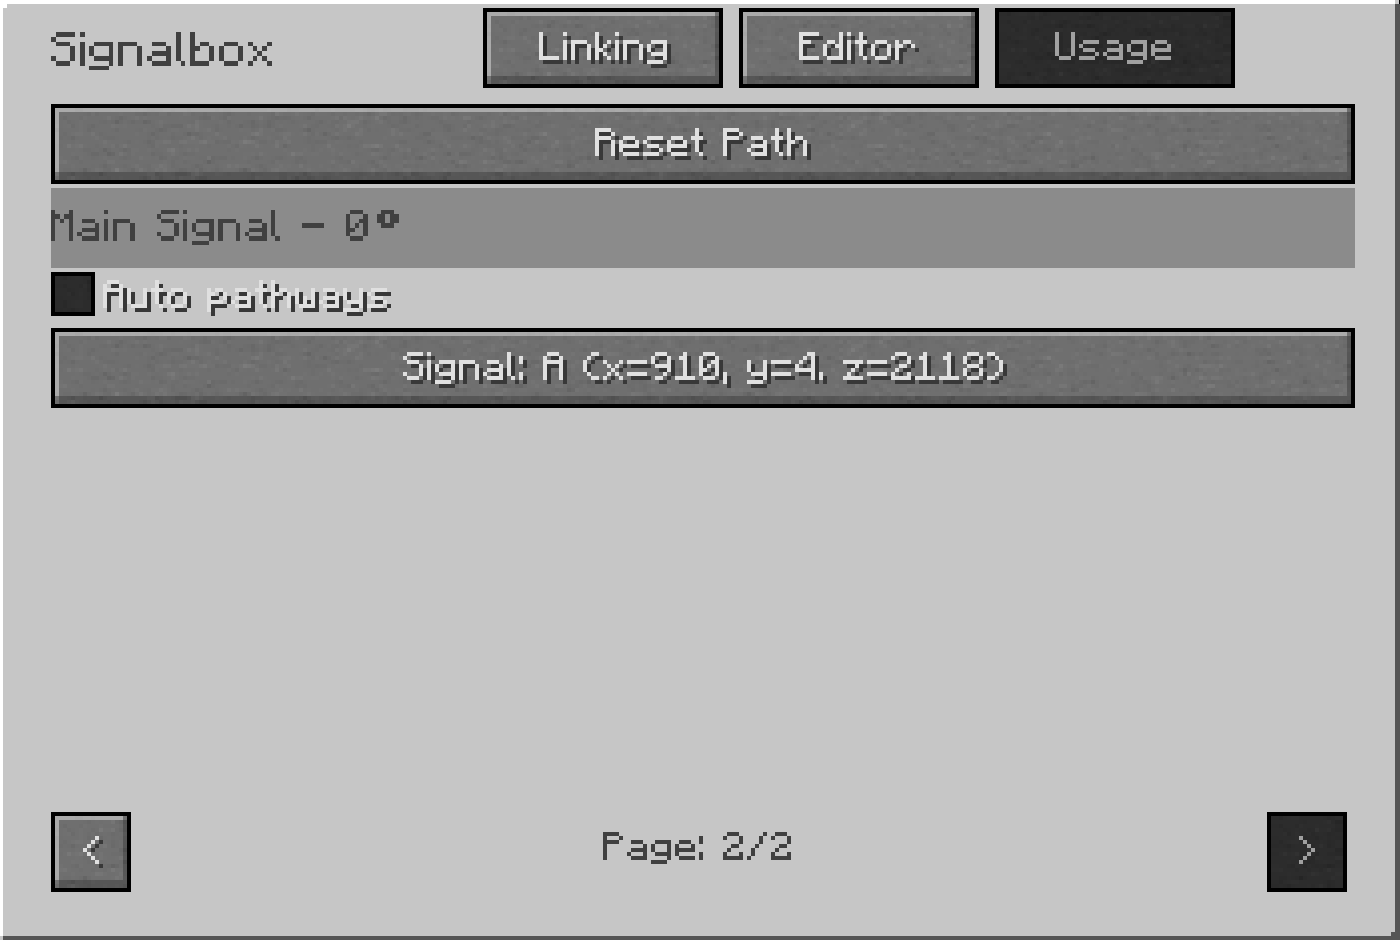
Then go to the signal in the GUI and select the correct signal in the dropdown menu. (There is also a search function there). This is done for all signals.
It is also possible to leave some signals unlinked, especially when it comes to exiting or entering a signalbox area, as so-called auxiliary or dummy signals.
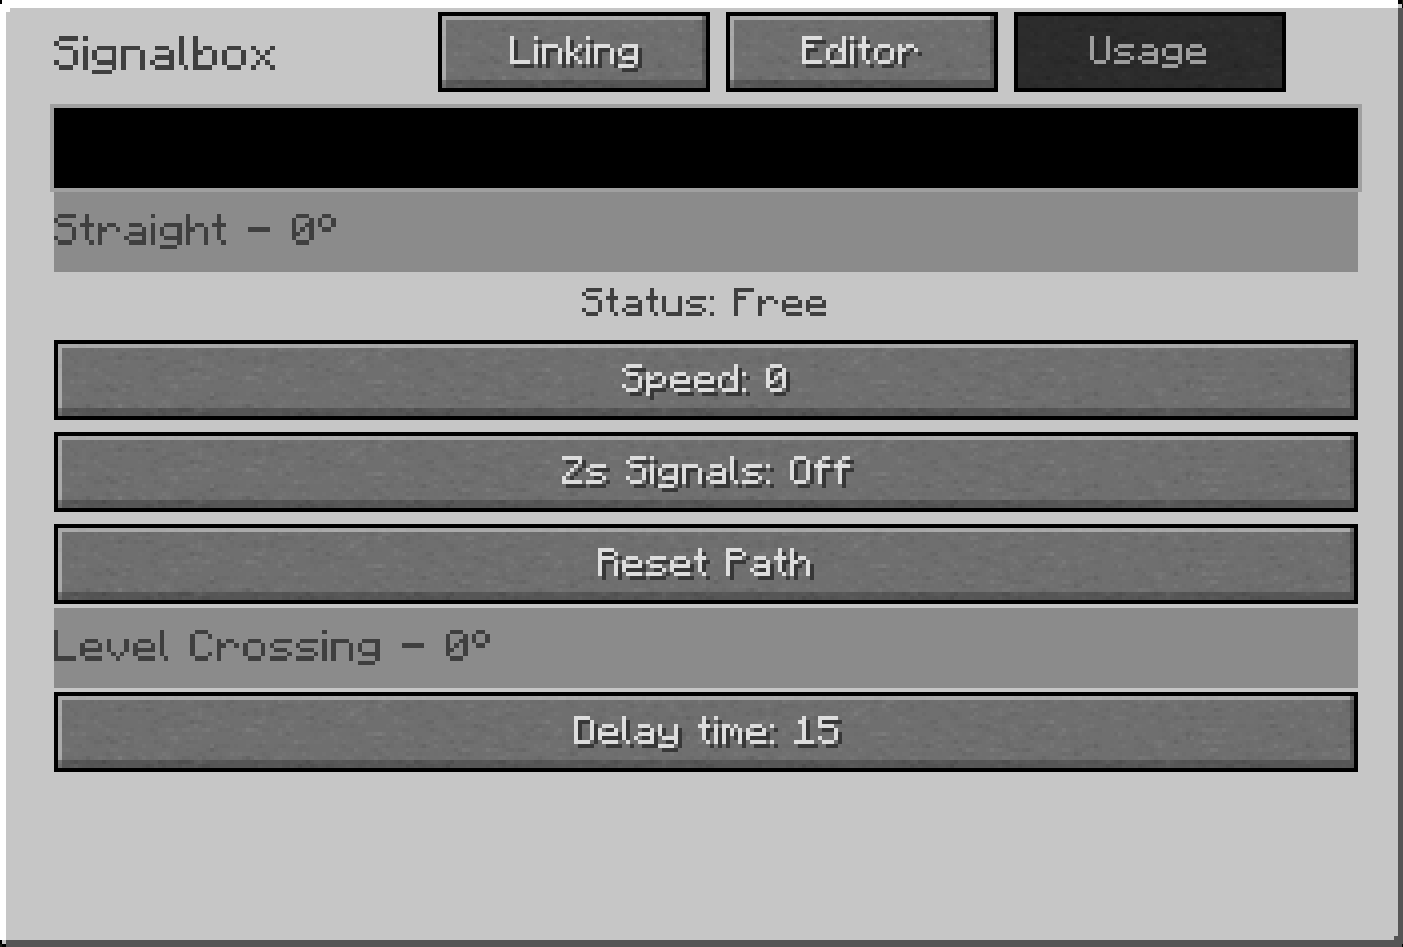
Speed
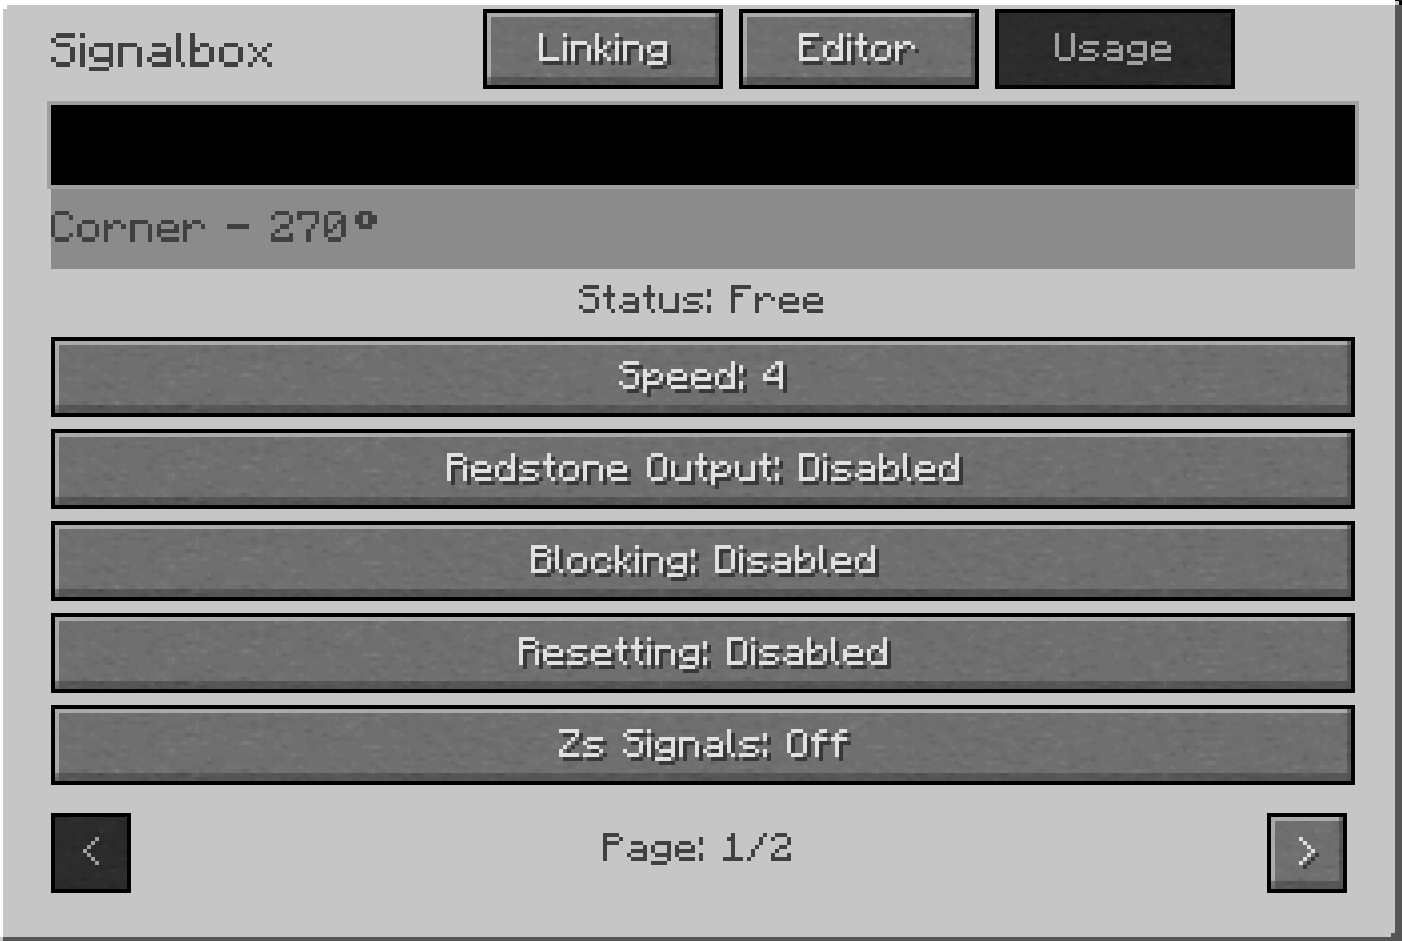
If you want to indicate a speed (slow speed), you have to right-click on a path element between two signals and select 'Configure' in the sidebar. The route element directly on the signal is not in the pathway and therefore does not work!
There you can set the 'Speed' value that should be displayed by the signals.
If several speed elements are located in a route, the lowest digit is always assumed.
Subsidiary signals (Zs signals)
The subsidiary (additional) signals function in a similar way to speed and can contain 'additional information' that is to be shown at the signals. We will not discuss them in more detail at this point.
Redstone Outputs (switches)
If you want to realize switches [S] in the track, you can control them with a redstone output. These give out a redstone signal as soon as they are activated, that means when a route is over the respective element. The redstone output can also control other things, there are no limits to your creativity.
Redstone Inputs (Blocking & Resetting)
Redstone inputs are used for blocking and resetting routes. A route can have several states.
- Either it is not set, then it and the contained elements are not active and the signals show stop.
- The route is set, but not occupied by a train (free). Then it and the contained elements are active and the signals show drive.
- The route is set and occupied with a train (blocked). Then it and the contained elements are active, but the start signal shows stop.
To block a route [B], ideally there must be a blocking point on the first tile after the start signal. For this you have to set the corresponding redstone input as blocking. This will then block the entire route up to the destination signal.
It is also possible to keep a route or a partial route blocked by permanently triggering a redstone input, e.g. when a train or wagon stops on a sensor. Then the part is not automatically resetted by a resetting point. This can be helpful when trains or train parts are parked.
A route can also be resetted [R]. To do this, a resetting point must be located one tile before the destination signal in order to reset all elements that are still active. The train has then left the section and is free for the next train and a new route can be set.
It is also possible to reset a route in several parts (partial route resetting). In this case, a route is resetted up to the respective resetting point, which can be located in the middle of the route.


Signal Repeater
By activating the signal repeater, it is possible to set the existing signal so that a corresponding auxiliary light is switched on if one is present.
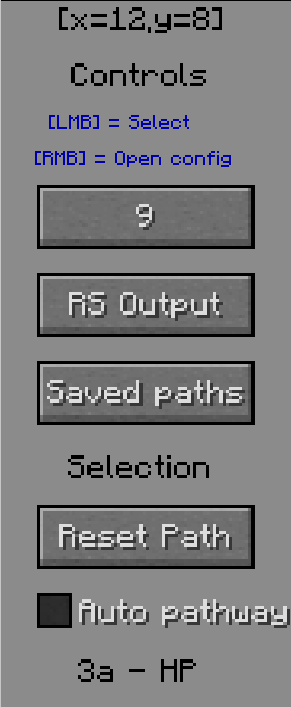
Auto Pathways
If the Auto Pathway has been activated in the settings for the respective route/signal, it is automatically reset after occupation and dissolution.
Signalling Block System (Inter-Signalbox-Pathways)
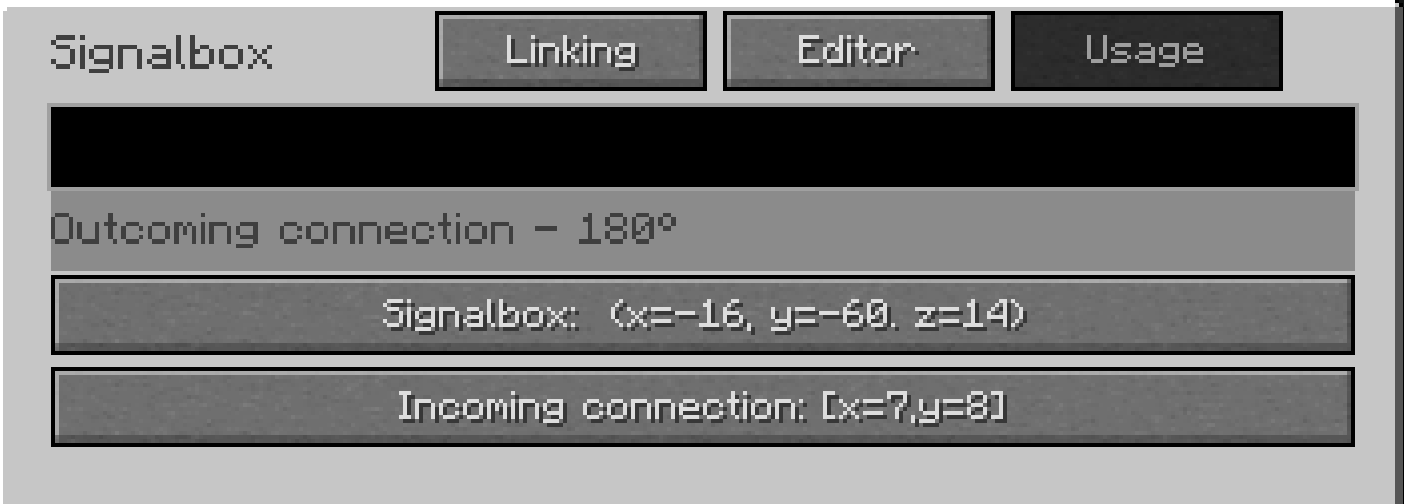
Inter-Signalbox-Pathways are for pathways between signal boxes. There can exist several connections between signal boxes and several signal boxes can be linked together. This requires an outcoming connection in one signal box (yellow arrow for outgoing) and an incoming connection in another signal box (yellow arrow for incoming). Attention: The two arrows have different functions, but look the same!
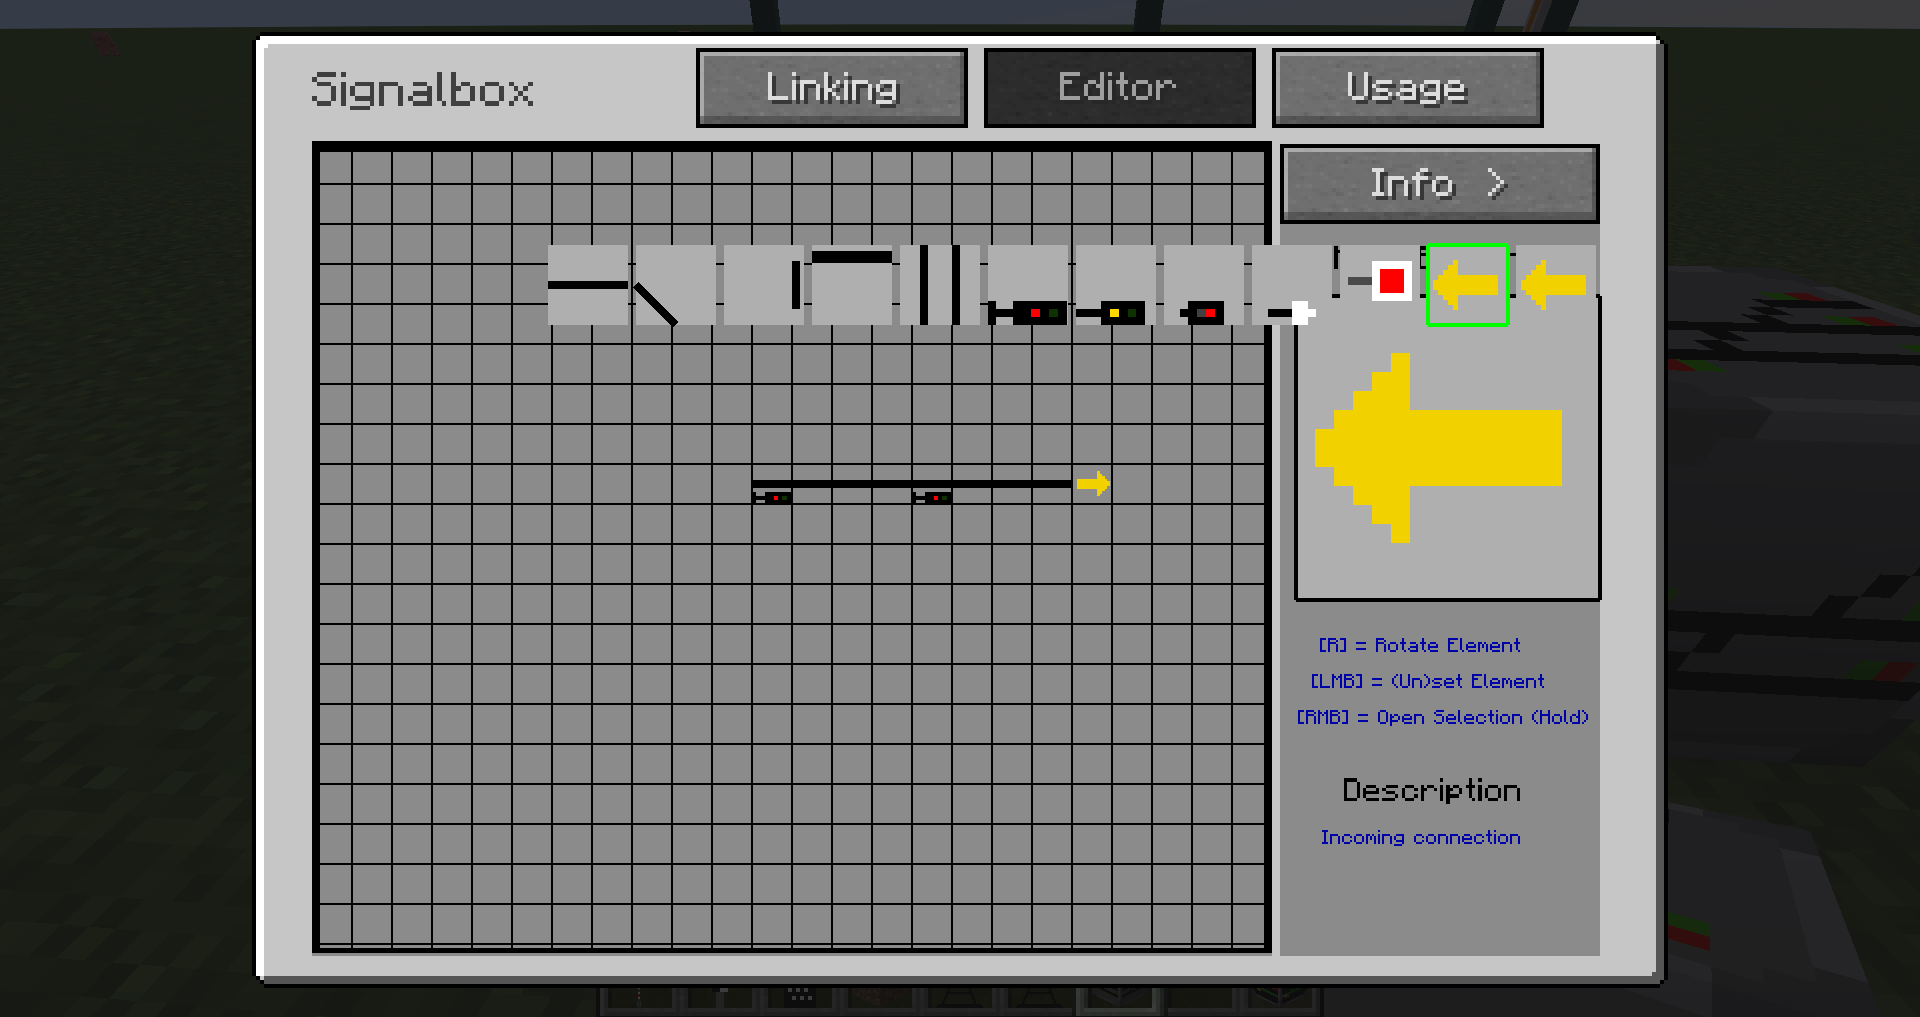
The following section describes how to set this.
- The signal boxes must then be linked with each other using the Linking Tool. To do this, use SHIFT+click to save the target signal box to the tool and then link it normally to the start signal box.
- In the destination signal box, a target signal must be selected for the incoming connection for the pathway to where it goes. To do this, the position x,y of the signal is selected in the signal box. The position of the signal can be obtained by clicking on a signal in the signal box on the right and the position is displayed at the top of the Info&Help bar.

- In the start signal box, the correct destination signal box must be selected for the outgoing connection. Then you have to go out and open the configuration again and then select the appropriate input connection (position) of the destination signal box.
Pathway Requester
See Pathway Requester for more informations.
Railroad Crossing
A timer can be set for level crossings, which delays the signals from moving. Values between 0 and 60 seconds can be set. If there are several level crossings with different times in a route, the longest time is assumed.
Pathway Costs
With additional pathwaycosts you can manipulate paths to manual control a prefer path. Lower costs will favor a path and higher costs will prevent a path.
Define presignals (distant signals)
On a main signal you can select distant signals for this, which show the equivalent signal aspect. Distant signal will also show the equivalent signal aspect if there is a path over it.
Overlap (pass-through safety way)
With "overlap" you select a tile until the overlap should go.
With "Overlap reset" you can select a redstone input block which triggers the reset of the overlap after the "overlap reset-time" in seconds.
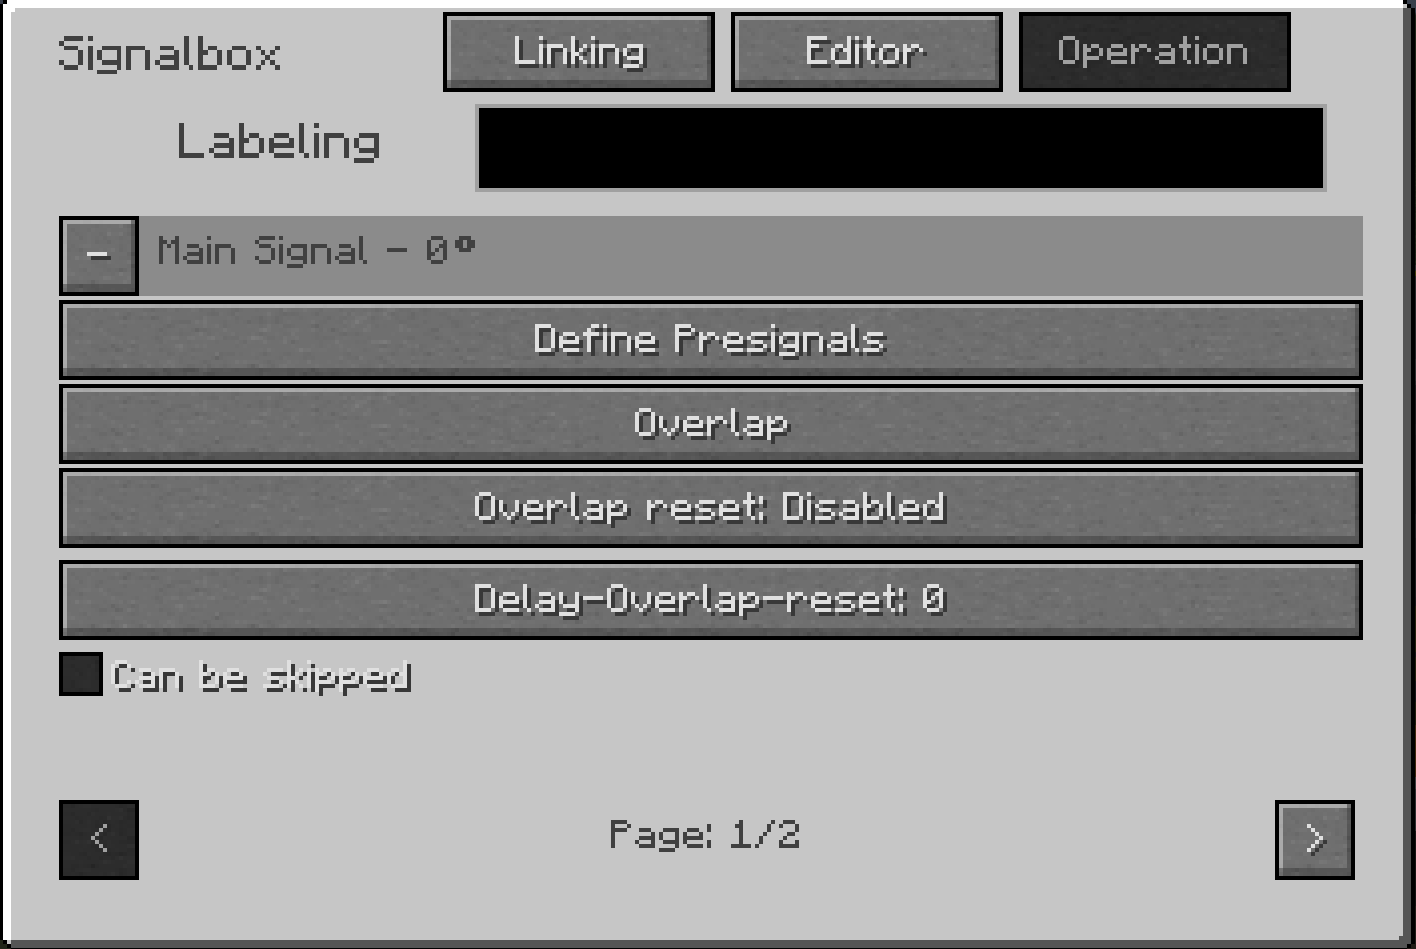
The overlap is the yellow path behind the destination signal, for safety purposes.