MRI_Convert_Nikon_Andor_To_Hyperstack - MontpellierRessourcesImagerie/imagej_macros_and_scripts GitHub Wiki
Because of the big size of the images the microscope cuts images along the time dimension into multiple files each with a number of frames. This tool will for each position and wavelength convert the image. It will do a z-projection, concatenate all time-chunks and save the resulting image. The user has to provide the number of slices in the z-dimension. The pixel size and time interval can automatically be set when provided by the user.
The source code in git-hub can be found here.
You can download an example data-set here:
![]()
Getting started
To install the tool drag the files MRI_Convert_Nikon_TI_Andor_To_Hyperstac.ijm and MRI_Convert_Nikon_TI_Andor_To_Hyperstac.py to the Fiji launcher window, save them under macros/toolsets in the Fiji installation and restart Fiji.
Select the "MRI_Convert_Nikon_TI_Andor_To_Hyperstac" toolset from the >> button of the ImageJ launcher.

Options
Right-click on the button to open the options dialog:
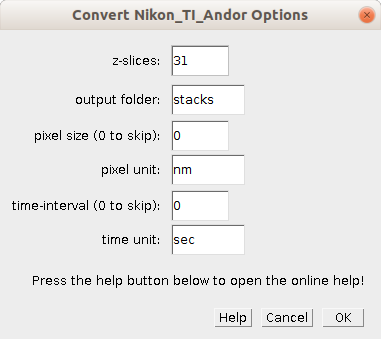
- z-slices - The number of z-slices of the stacks. The number of time-points will be calculated.
- output-folder - The result images will be written into a subfolder of the input-folder with the name provided by this option.
- pixel size - If different from zero, the pixel size will be set in the result images.
- pixel unit - If the pixel size was different from zero, the unit of the pixel size will be set in the result images.
- time-interval - If different from zero, the time-interval will be set in the result images.
- time unit - If the time-interval was different from zero, the unit of the time-interval will be set in the result images.
Usage
Right click cn-button to change the options or to come back to this help page. Click on the cn-button to run the script. A file-dialog will open. Select the folder containing the input images. While processing the progress is shown in the log-window. When finished you can find the result images in the output folder.