workshop beginner - MobiFlight/MobiFlight-Connector GitHub Wiki
[!CAUTION] This guide is obsolete. See the updated guide for information on building the beginner workshop project.
Workshop - Beginner
The workshop is aimed at everyone who would like to try out building their first device with MobiFlight for enhancing their flight simulation experience.
Overview

You will build a device that uses
- Illumintated push buttons
- Toggle switches, and
- Encoder
You will learn how to configure these devices and how to assign functions inside the simulator so that you can interact with it.
Required parts
- 1x Arduino
- 1x MobiFlight Prototyping board
- 1x USB cable
- 1x body incl 3x lids, Single encoder knob, washers & nuts
- 2x LED Push button (orange, red)
- 1x Single encoder with PCB
- 2x ON-ON switch
- 1x MobiFlight Switch PCB
- XH-JST-Wires: 2x 2-pin, 3x 3pin, 1x 4pin
- 12 screws (5mm M3)
3d print files (STLs)
- Base / Core - workshop-beginner-base.stl
- Dual push button lid - workshop-dual-pushbutton.stl
- Dual toggle switch lid - workshop-dual-toggle-switch.stl
- Encoder lid - workshop-encoder.stl
- Honeycomb/Saitek adapter - honeycomb-adapter-short.stl
For downloading, hover mouse over filename >
right-click>Save file as
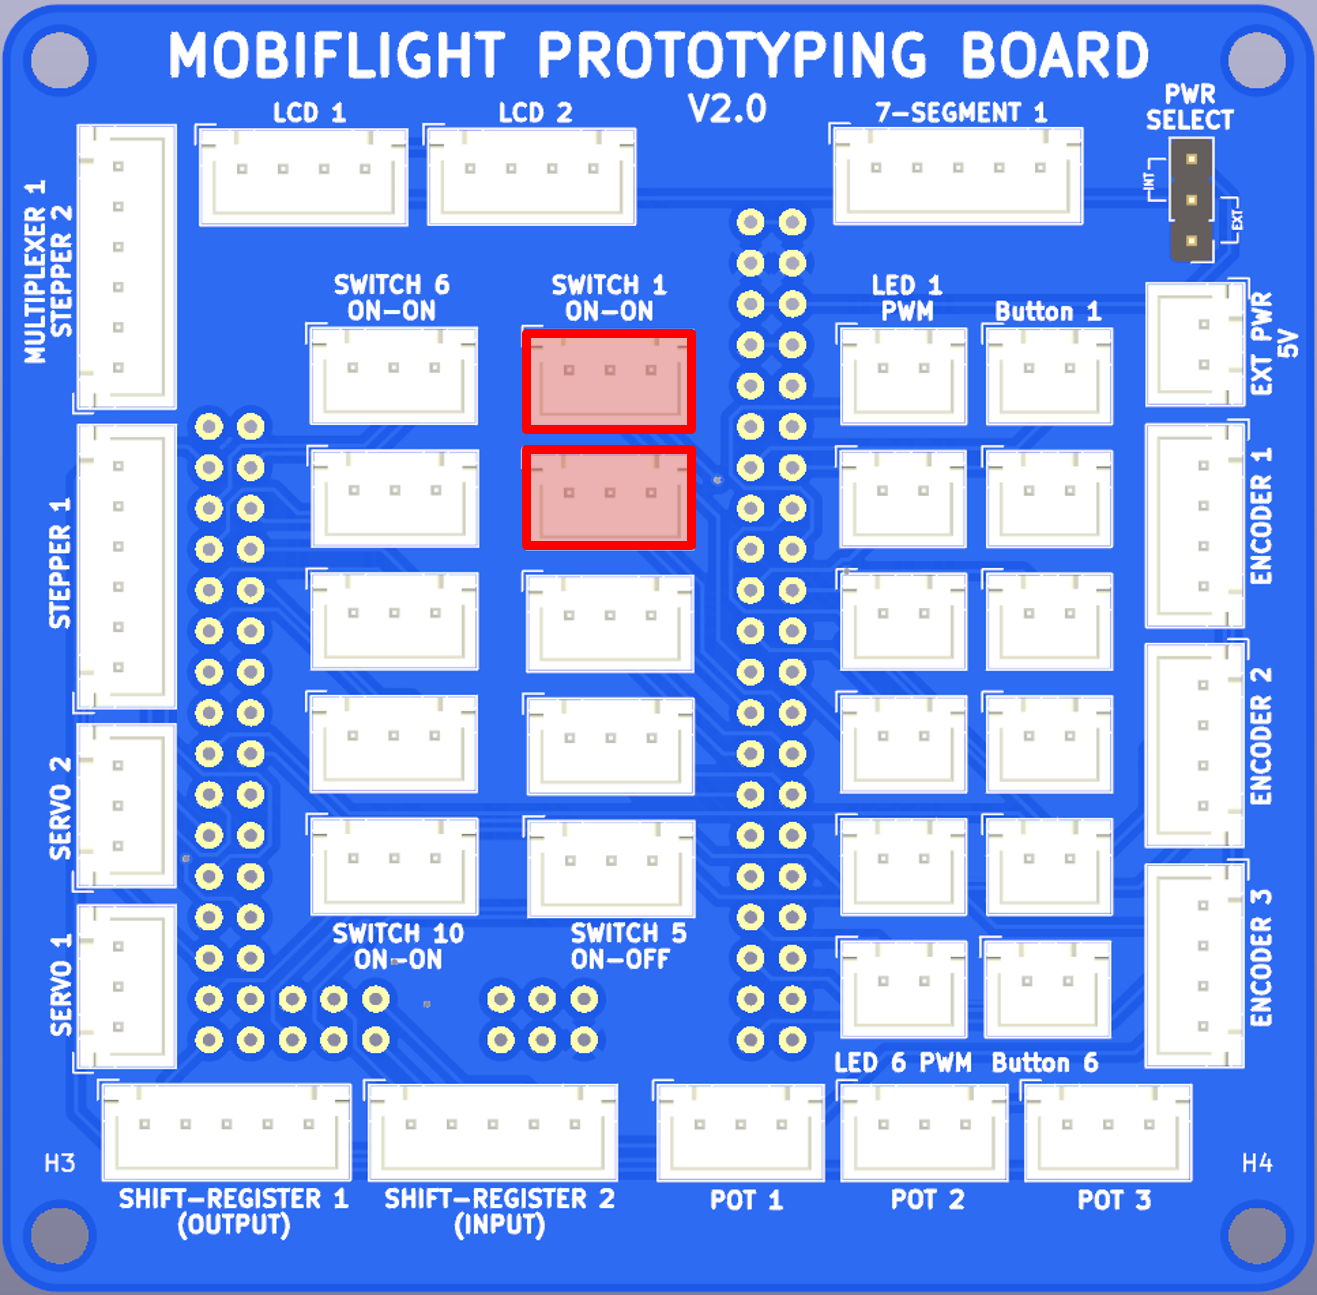
Exploring the prototyping board

The prototyping board is a great way to learn about MobiFlight and connecting different device types easily and without soldering.
In the workshop we are going to use the highlighted connectors:
LED 1 PWM- For the LED of the first push buttonButton 1- For the button pins of the first push buttonLED 2 PWM- For the LED of the second push buttonButton 2- For the button pins of the second push buttonSwitch 1 (ON-ON)- For the first connector on the toggle switch PCBSwitch 2 (ON-ON)- For the second connector on the toggle switch PCBEncoder 1- for the connector on the encoder PCB
Assemble Arduino and Prototyping board
- Insert Arduino board on the back of the PCB
- Connect the cable
- Connect the cable to your computer
Note: for those who have not brought their computer, they can use one of our laptops, or we can flash it after the session
Start MobiFlight Connector
- Download MobiFlight Connector from the website
- Install MobiFlight by following the instructions of the installer
- Start Mobiflight, see what’s happening
- attempt to auto upload firmware
- Arduino Mega Pro mini is ambigious
- Manually upload firmware
- right click on module and select
Upload firmware>Arduino Mega 2560
- right click on module and select
- Save the prepared config
- Open the config, right click on module >
Open - Explore the devices
Assemble LED Buttons
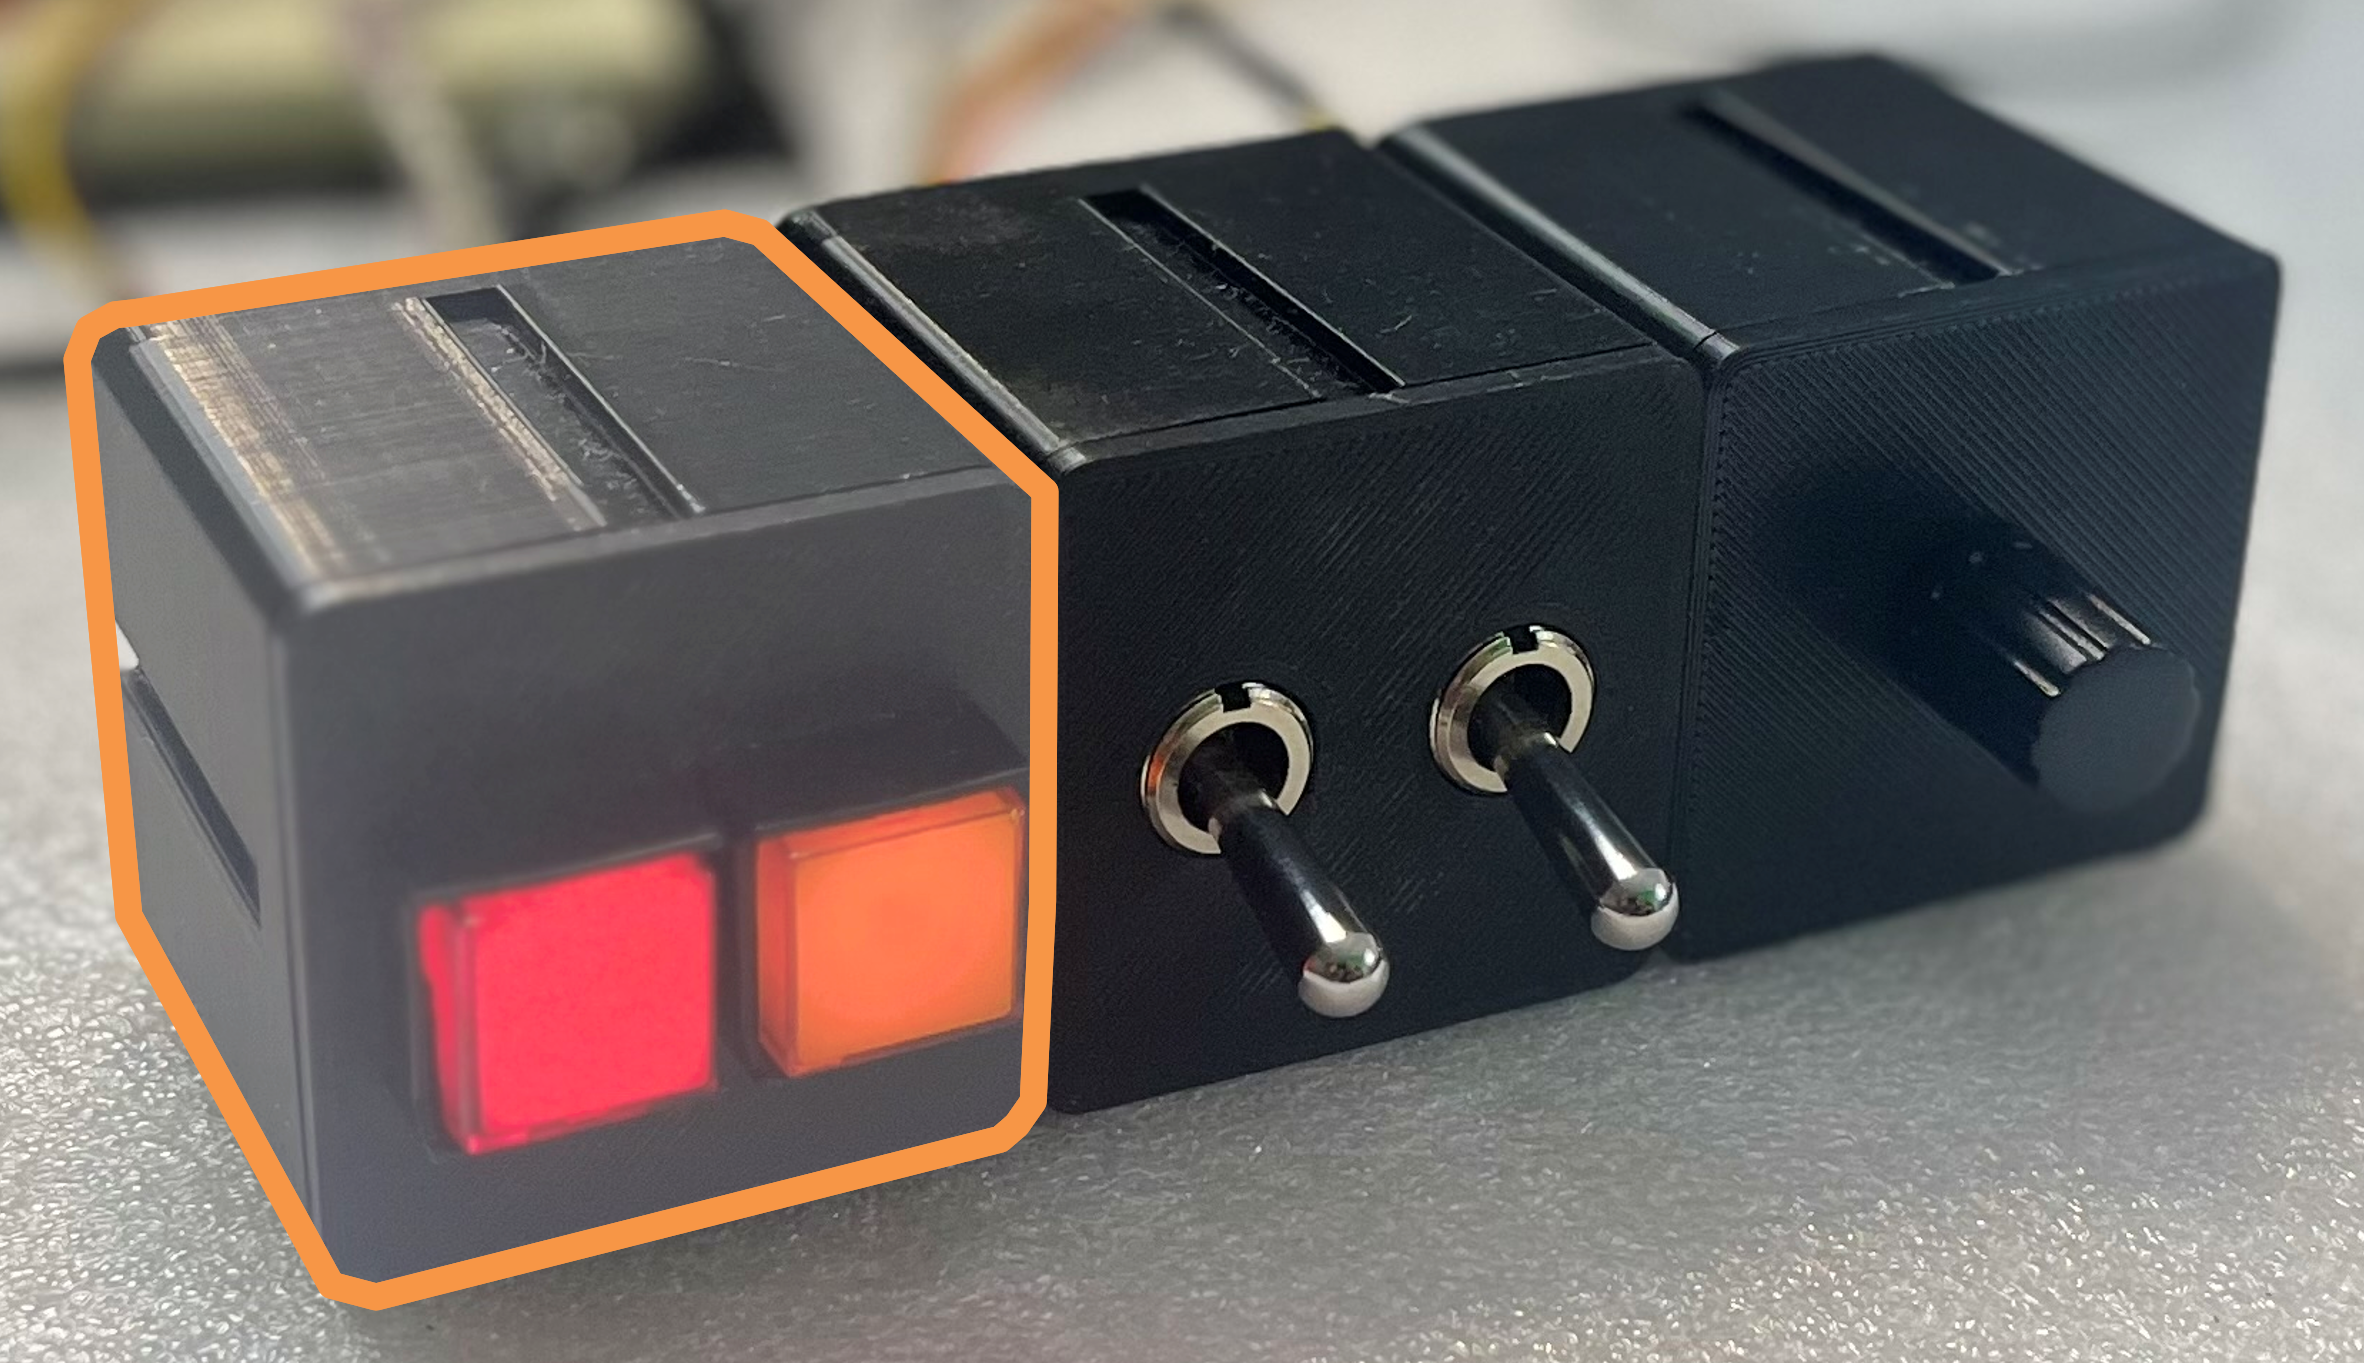
- Unscrew the fastener from the back of the button
- Put the LED Buttons into the lid
- Put the fastener back on
- Pass the cable through the hole on the back
- Close the lid
Connect LED Buttons

- Use 4x 2-pin cable
- Use
LED 1 PWMfor light (red) - Use Button1 for button one (red)
- Use
LED 2 PWMfor light (orange) - Use Button2 for button two (orange)
Assemble Toggle Switches
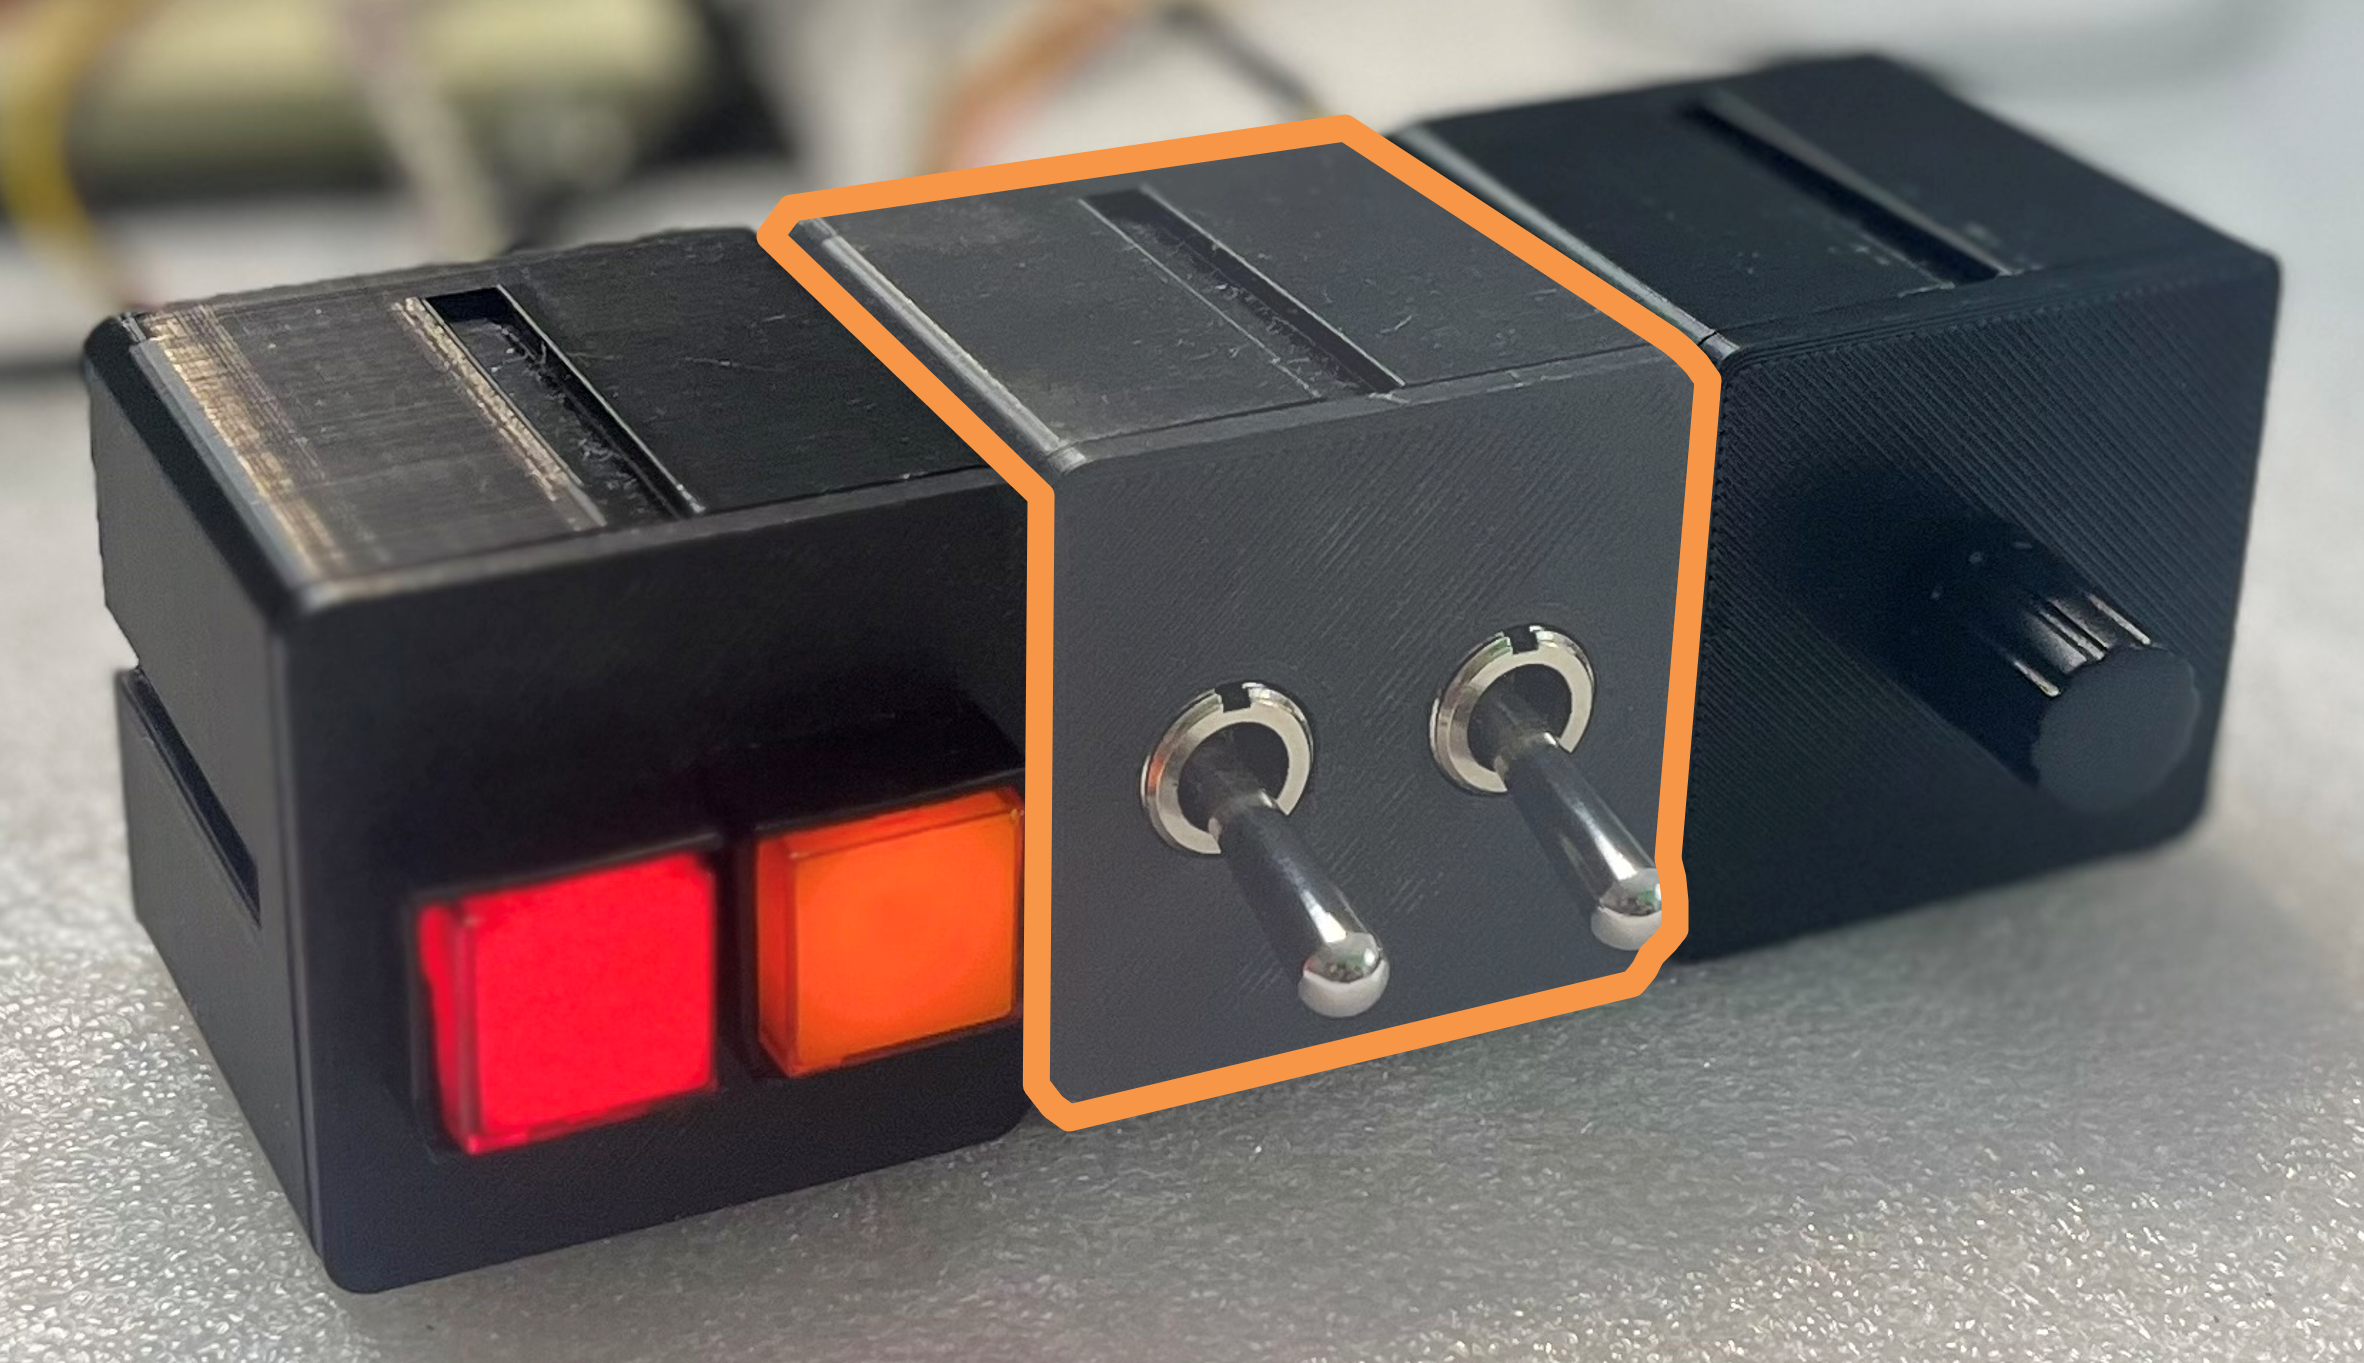
- Put one nut on each Switch, screw it on until half way on the thread
- Put both switches onto the PCB
- Fasten screws to attach PCB to the back of the lid
Connect Toggle Switches
- Use 2x 3-pin cable
- Connect switch PCB
Connector 1toSwitch 1 ON-ON - Connect switch PCB
Connector 2toSwitch 2 ON-ON
Assemble Encoder

- Put the Encoder PCB on the back of the lid
- Fasten it with the screws
- Put the lid into the core part
Connect Encoder

- Use 1x 4-pin cable
- Connect Encoder PCB
Inner ShafttoEncoder 1
Configuration
We are going to use the parking brake for
- Red LED - turns on when parking brake is set - (output configuration)
- Red Push button - toggles the parking brake - (input configuration)
- Left switch (switch 1) - Set the parking brake (lower position), release the parking brake (upper position) - (input configuration)
- Encoder - control the heading bug - (input configuration)
LED Button (red) - Output configuration
- Create output config for LED
parking brake- Test the LED
- Assign it to parking brake
LED Button (red) - Input configuration
- Create input config for Button
parking brake toggle- use
Scan for input> push the button - select tab
On Press - select action
Microsoft Flight Simulator 2020 - search for
parking - filter
aircraftforGeneric - select
Parking brake toggle
- use
- Test the config
Left switch (switch 1) - Input configuration
- Create input config for Switch
parking brake ON- use
Scan for input> flip the switch down - select
On Press - select action
Microsoft Flight Simulator 2020 - search for
parking - filter
aircraftforGeneric - select
Parking brake ON
- use
- Create input config for Switch
parking brake OFF- use
Scan for input> flip the switch up - select
On Press - select action
Microsoft Flight Simulator 2020 - search for
parking - filter
aircraftforGeneric - select
Parking brake OFF
- use
- Test the config by flipping the switch up and down
Encoder - Input configuration
- Create input config for Encoder
heading bug- use
Scan for input> twist the encoder - select tab
On Left - select action
Microsoft Flight Simulator 2020 - search for
bug - filter
aircraftforGeneric - filter
systemforFlight Instrumentation - select
Heading Bug DEC - click on
Copy - select tab
On Right - click on
Paste - select
Heading Bug INC
- use
- Test the config
What to do next?
- Take your device home
- Play around with assigning functions
- Watch the Getting started video
- Join our MobiFlight Discord Server
- Check out our MobiFlight Community Shop
- Build your own things!