Getting started with Microchip MPLAB® Harmony 3 on the SAMA5D2 - Microchip-MPLAB-Harmony/Microchip-MPLAB-Harmony.github.io GitHub Wiki
Getting started with MPLAB® Harmony 3 on the SAMA5D2
The SAMA5D2's ROM boot loader looks for a second stage boot loader in external NVM, relocates it to internal SRAM, and executes it. Harmony uses the AT91Bootstrap as its second stage boot loader. The AT91Bootstrap initializes clocks, PIO, and DDR prior to relocating the application image from NVM to DDR and starting it.
As of the 3.2 release of Harmony only loading the AT91bootstrap and Harmony application from an external SD card has been tested. To boot your Harmony application for the SD card, first format the card with the FAT file system. Next, download the AT91Bootstrap binary from here and place the boot.bin on the SD card.
The next step is to download the Harmony 3 framework. This process can be automated using the MPLAB® Harmony Framework Management Tool. First clone the MHC repository found here and launch the harmony-downloader.jar
java -jar harmony-downloader.jar.
The downloader will clone the Harmony 3 repositories that you select.
NOTE: From here on when the document references launching MHC it refers to the mhc.jar file downloaded by the downloader along with the rest of the Harmony Framework.
####Launching an Existing Project
Demo applications can be found in the apps directory in each Harmony repository downloaded. To load the demo application in MHC run:
java -jar mhc.jar =fw"(path to where you downloaded harmony)" -mode=gui -c="(path to harmony.prj file associated with the demo application you'd like to run. e.g. ../csp/apps/uart/uart_echo_interrupt/firmware/src/config/sam_a5d2_xult/harmony.prj)"
This will launch the existing project in MHC. For documentation on the demo applications shipped with Harmony refer to the github.io pages for the repository containing the app you'd like to run. (e.g. https://microchip-mplab-harmony.github.io/csp) Once the project is loaded the code can be regenerated by selecting
Generate->Generate Code
from the menu.
The IAR project has already been created for any demo applications and can be opened by opening (demo application's firmware directory)/sam_a5d2_xult.IAR/(project name).eww. Once IAR is launched simply build the application and load the harmony.bin image as described below.
####Creating a New Project
Once you've cloned the Harmony 3 framework launch MHC by running:
java -jar mhc.jar -fw="(path to where you downloaded harmony)" -mode=gui.
With the MHC running create a new Harmony project under
File->New Configuration.
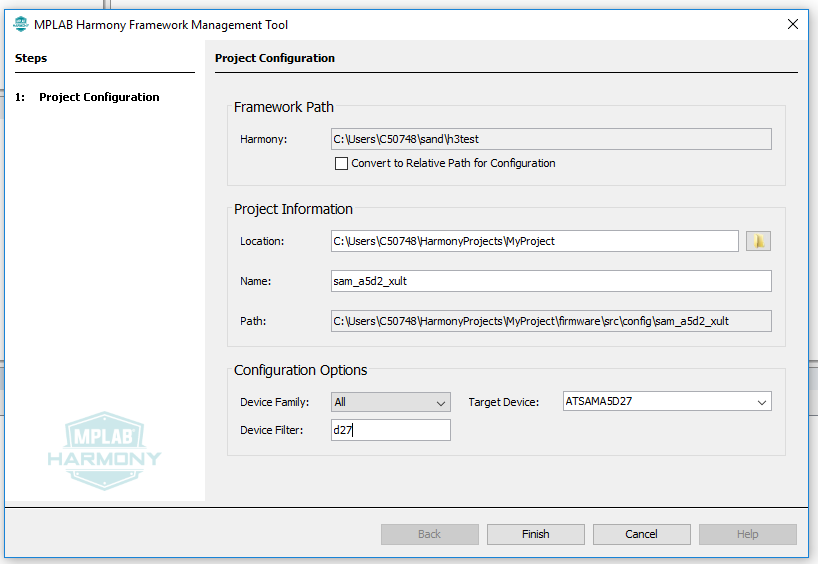
NOTES:
- As of the 3.2 release using relative paths in MHC causes issues when generating code. Please uncheck the box marked "Convert to Relative Path for Configuration"
- The diff tool should be configured immediately after tool install, before
code generation is attempted, otherwise User changes may be lost.
- Select File > Preferences from the menu.
- Enter the pathname to the executable file for your preferred "diff" tool
and click Close. (Pass command line arguments as {0} {1} and so on.)

Add the desired plibs, drivers, and system services your application requires and configure them accordingly, then generate the code.
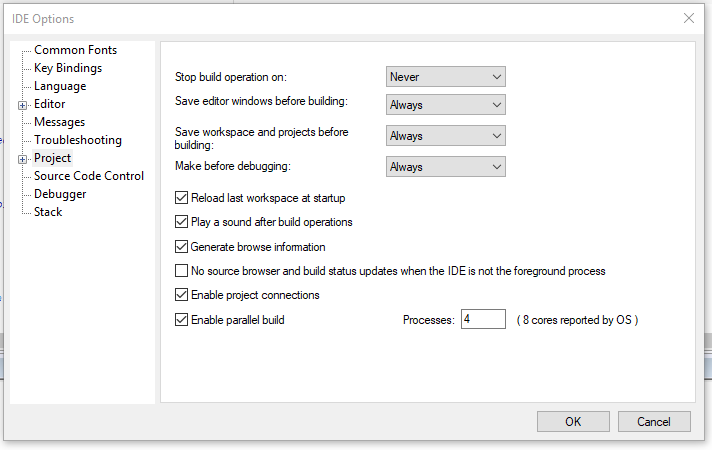
To compile your project launch IAR Embedded Workbench for ARM. (Harmony has been tested with version 8.30.1 of IAR EW.) Make sure you have IAR configured to use project connections by going to
Tools->Options->Project->Enable project connections.
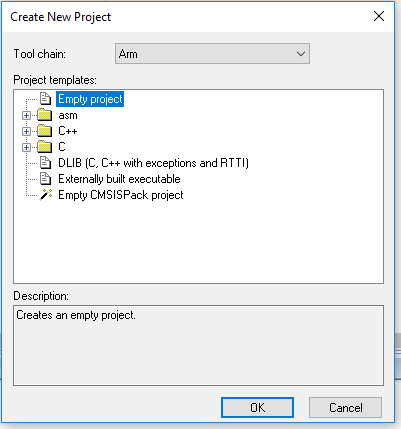
Create a new empty project in a new direcotry under the firmware directory created by MHC (e.g. HarmonyProjects/myApp/firmware/sam_a5d2_xult.IAR/myApp_sam_a5d2_xult.ewp).
Under the Project menu bar select
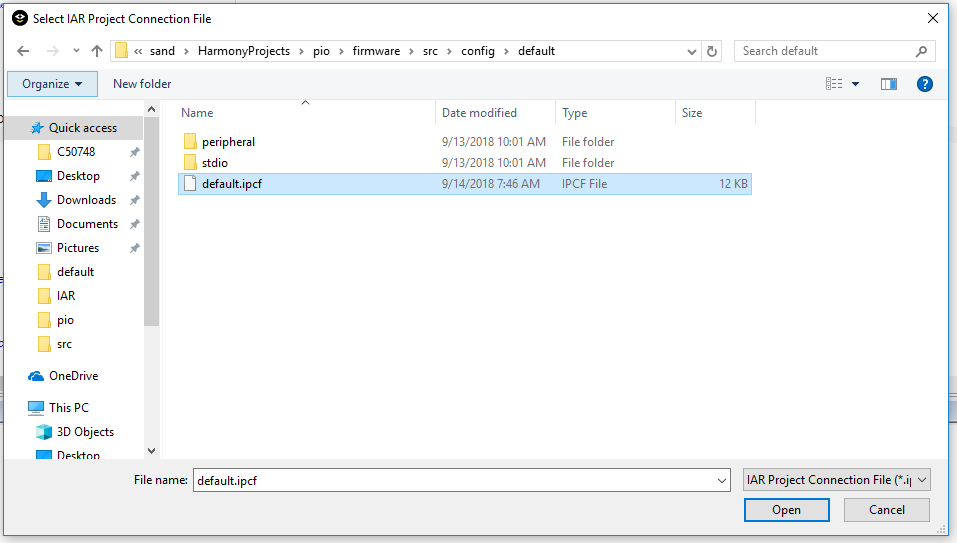
Add Project Connection
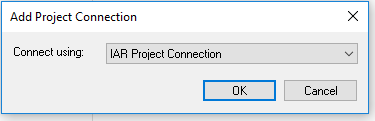
Browse to the ipcf file MHC generated.
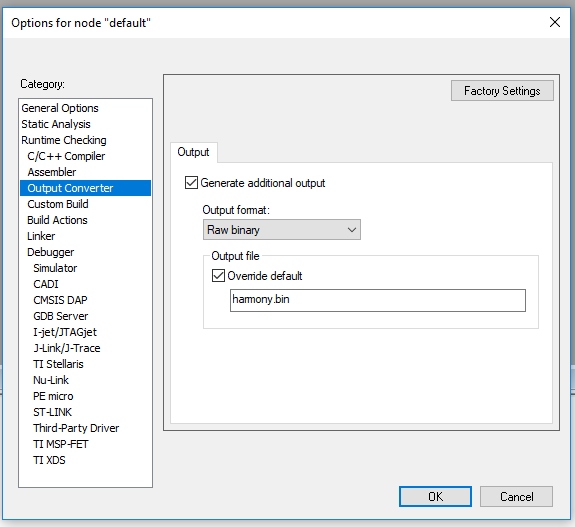
Since the AT91Bootstrap is looking to load a raw binary, we need to have IAR convert the ELF it builds into a raw binary. Right click on the project name and select options. Under Output Converter select the
Generate additional output
box, select Raw binary as the Output format, select the
Override default
box and type
harmony.bin
in the text field.
Now build your application. Once the application is built copy the harmony.bin file that was generated to the SD card. Insert the SD card into the board, apply power, and your Harmony application should boot and run.
Debugging your application:
IAR supports source-level debugging of your application. First connect the SAM-ICE JTAG debugger to the JTAG header on the development board. Go to
Options->Debugger
and select
J-Link/J-Trace
as the Driver. If the application has booted from the SD card, simply load your project in IAR and select
Project->Attach to Running Target
This will allow you to halt the running program, set breakpoints, view and change memory and registers, etc.