Configuration Files - MiSTer-devel/Wiki_MiSTer GitHub Wiki
MiSTer.ini
The MiSTer.ini configuration file contains settings for the MiSTer.
A default copy of the file itself can be found here: MiSTer.ini
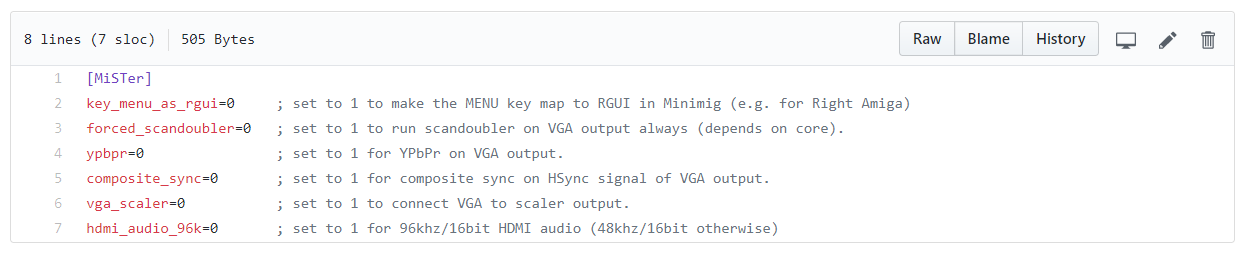
Download and copy the MiSTer.ini file to the root of your SD-Card. Open it with your favorite editor (e.g. Notepad++) and change the parameters accordingly to the following description.
List of INI Settings
- bootcore
- bootcore_timeout
- composite_sync
- controller_info
- custom_aspect_ratio
- direct_video
- forced_scandoubler
- hdmi_limited
- hdmi_audio_96k
- jammasd_vid, jammasd_pid
- key_menu_as_rgui
- osd_rotate
- recents
- vfilter_default
- vga_scaler
- vscale_mode
- vsync_adjust
- ypbpr
Addtional Information
bootcore
If specified, selects core to run at startup (instead of menu)
bootcore=lastcore Automatically loads the last used core
bootcore=lastexactcore Automatically loads the last used core, matching time stamp e.g. core_yyymmdd.rbf
bootcore=[corename] Loads [corename]_*.rbf at startup (first file found on SD card)
bootcore=[corename_yyyymmdd.rbf] Loads [corename_yyyymmdd].rbf at startup (exact file name)
You can still select Reboot in the system menu to get back to the main menu core.
bootcore_timeout
Number of seconds to wait before auto core boot. You can comment out this line by putting ; at the beginning to boot directly into the core with no timeout.
bootcore=10 Value can be 10 to 30 seconds
composite_sync
Use composite sync as horizontal sync signal on VGA output.
composite_sync=1 activate composite sync
composite_sync=0 deactivate composite sync
direct_video
Feature for using the HDMI port with DACs to produce analog video. See this page for more information.
direct_video=1 to activate it (disables compatibility with HDMI TVs and monitors).
direct_video=0 to deactivate it.
custom_aspect_ratio
You can set up to two additional custom aspect ratios (ie. 8:7, 10:7, 64:49, 204:137), which will appear in the Audio & Video menu of any core.
It is recommended to set these on a core-by-core basis in your config file, as you may want different options depending on what core you're playing.
Note: This is the aspect ratio of the active/visible image, NOT pixel aspect ratio.
custom_aspect_ratio_1=8:7
custom_aspect_ratio_2=64:49
controller_info
Seconds to display controller settings when starting a new core.
Cores support automated mapping from central joystick mapping if no core-specific joystick mapping was defined. When this is active, MiSTer shows a tiny popup displaying the button assignment. This setting controls the time that pop-up is displayed (and can switch it off)
controller_info=0 Do not display mapping info pop-up
controller_info=1, controller_info=10 Seconds to display controller mapping pop up
forced_scandoubler
Run scandoubler on VGA output always (depends on core).
Most modern monitors won't support the 15 KHz horizontal sync output signal through the VGA connector. This option doubles the frequency of horizontal sync signal and brings it in a compatible range for modern monitors. Note that this is not a global option and is only valid for the MiSTer Menu. Each core drives the VGA output itself and requires its own setting. Check the core menu of the corresponding core via HDMI to set the scandoubler option if available / necessary.
forced_scandoubler=1 activate scandoubler
forced_scandoubler=0 deactivate scandoubler
hdmi_audio_96k
HDMI audio output options
hdmi_audio_96k=1 96khz/16bit HDMI audio
hdmi_audio_96k=0 48khz/16bit HDMI audio
hdmi_limited
Change between Full Range RGB and Limited Range RGB
hdmi_limited=0 Full Range RGB (0-255)
hdmi_limited=1 Limited Range RGB (16-235)
hdmi_limited=2 Limited Range common DAC variant (16-255)
jammasd_vid, jammasd_pid
USB vendor ID and product ID for JammaSD adapter, required for keypress-to-joystick translation.
Allows a JammaSD joystick to be read as a standard joystick rather than being read as a keyboard.
jammasd_vid Vendor ID
jammasd_pid Product ID
key_menu_as_rgui
Makes the MENU key map to RGUI in Minimig (e.g. for Right Amiga)
key_menu_as_rgui=1 set the MENU key map to RGUI
key_menu_as_rgui=0 dont set the MENU key map to RGUI
osd_rotate
Display OSD menu rotated.
osd_rotate=0 no rotation
osd_rotate=1 rotate right (+90°)
osd_rotate=2 rotate left (-90°)
recents
Set to 1 to enable showing recently played games. Once enabled, you can highlight or select the "Load file" option in a core menu and press the select button on your controller to show a list of recently loaded files. In the core selection menu, pressing select will show the recently loaded cores. Files and cores that have been moved or renamed since they were last loaded will appear faded out in the recents list.
(Note: using this mode increases writes to SD card, which may increase wear over the long term.)
recents=0 Default behavior - don't show recent files
recents=1 Show recent files
vfilter_default
This sets a default filter for all cores if a video filter was not selected in the core settings.
vfilter_default=default.txt Use /media/fat/Filters/default.txt as default filter
vga_scaler
This option makes the VGA (DB15) connector output of the scaler. In other words, it makes the VGA have the same resolution as HDMI (1080p or 720p, or as per your overall video settings).
vga_scaler=1 VGA DB15 connector will have the full scaler output
vga_scaler=0 VGA DB15 will have an independent video output, separate from main scaler (e.g. 240p or 480p)
video_info
Seconds to display video information on startup. Defaults to zero.
video_info=0 Do not display video info
video_info=1, video_info=10 Specify number of seconds to show video info
vscale_mode
Options for integer scaling.
vscale_mode=0 scale to fit the screen height. Cores that allow for 5x vertical crop mode usually require this vscale mode in order to enable the feature. Ideal for fullscreen 1080p.
vscale_mode=1 use integer scale only.
vscale_mode=2 use 0.5 steps of scale.
vscale_mode=3 use 0.25 steps of scale.
vsync_adjust
Sets the vsync buffer mode for HDMI output. This setting does not affect direct video or analog output from the IO board.
Some HDMI displays can accept somewhat non-standard signals, allowing for lower display latency with MiSTer. It is recommended that you start with a setting of 0, and then try modes 1 and 2 to see if they work with your display or capture device. Different cores will have different results.
vsync_adjust=0 Default. Buffered 60hz HDMI video output, compatible with most HDMI devices.
vsync_adjust=1 Adjust output HDMI Vsync to match original Vsync. Lower latency than mode 0, but less compatible.
vsync_adjust=2 Low-latency mode, using the system's native pixel clock. This mode has the lowest latency, but it's the least-compatible.
ypbpr
Use YPbPr signal on VGA output.
ypbpr=1 activate YPbPr
ypbpr=0 deactivate YPbPr
Adding Core-specific Settings
It is possible to specify different settings for different cores; for example, you may prefer to use integer scaling just for the Game Boy Advance core so that you don't need any video filters for smooth scrolling. Simply add a section at the end of the INI file with the core name in brackets and paste your different settings below there, like so:
[GBA]
vscale_mode=1
Or, suppose you wanted to add an option to select 8:7 aspect ratio for the SNES core:
[SNES]
custom_aspect_ratio_1=8:7
The Menu core can have its own settings too. Create a section named [Menu] to specify settings for it.
Switching INI Files On the Fly
MiSTer currently supports up to 3 additional INI files that can be toggled in the OSD menu, either by going to Misc. Options (press left while in the menu) or by holding the menu back button on your controller and pressing a direction. This is useful if you need to switch between video configurations often. To get started, make copies of your INI file and rename them:
mister_alt_1.ini activated by back + left
mister_alt_2.ini activated by back + up
mister_alt_3.ini activated by back + down
Additionally, you can switch back to your default mister.ini by pressing back + right or by selecting Main.
Your alt INI file will stay loaded across reboots and core changes until you turn the power off; mister.ini will always load by default when powering on. Note that if you switch INI files while a core is running, the core will reset.