Deploying AWS Infrastructure using the Console - Masterchief-solo/AWS-Projects GitHub Wiki
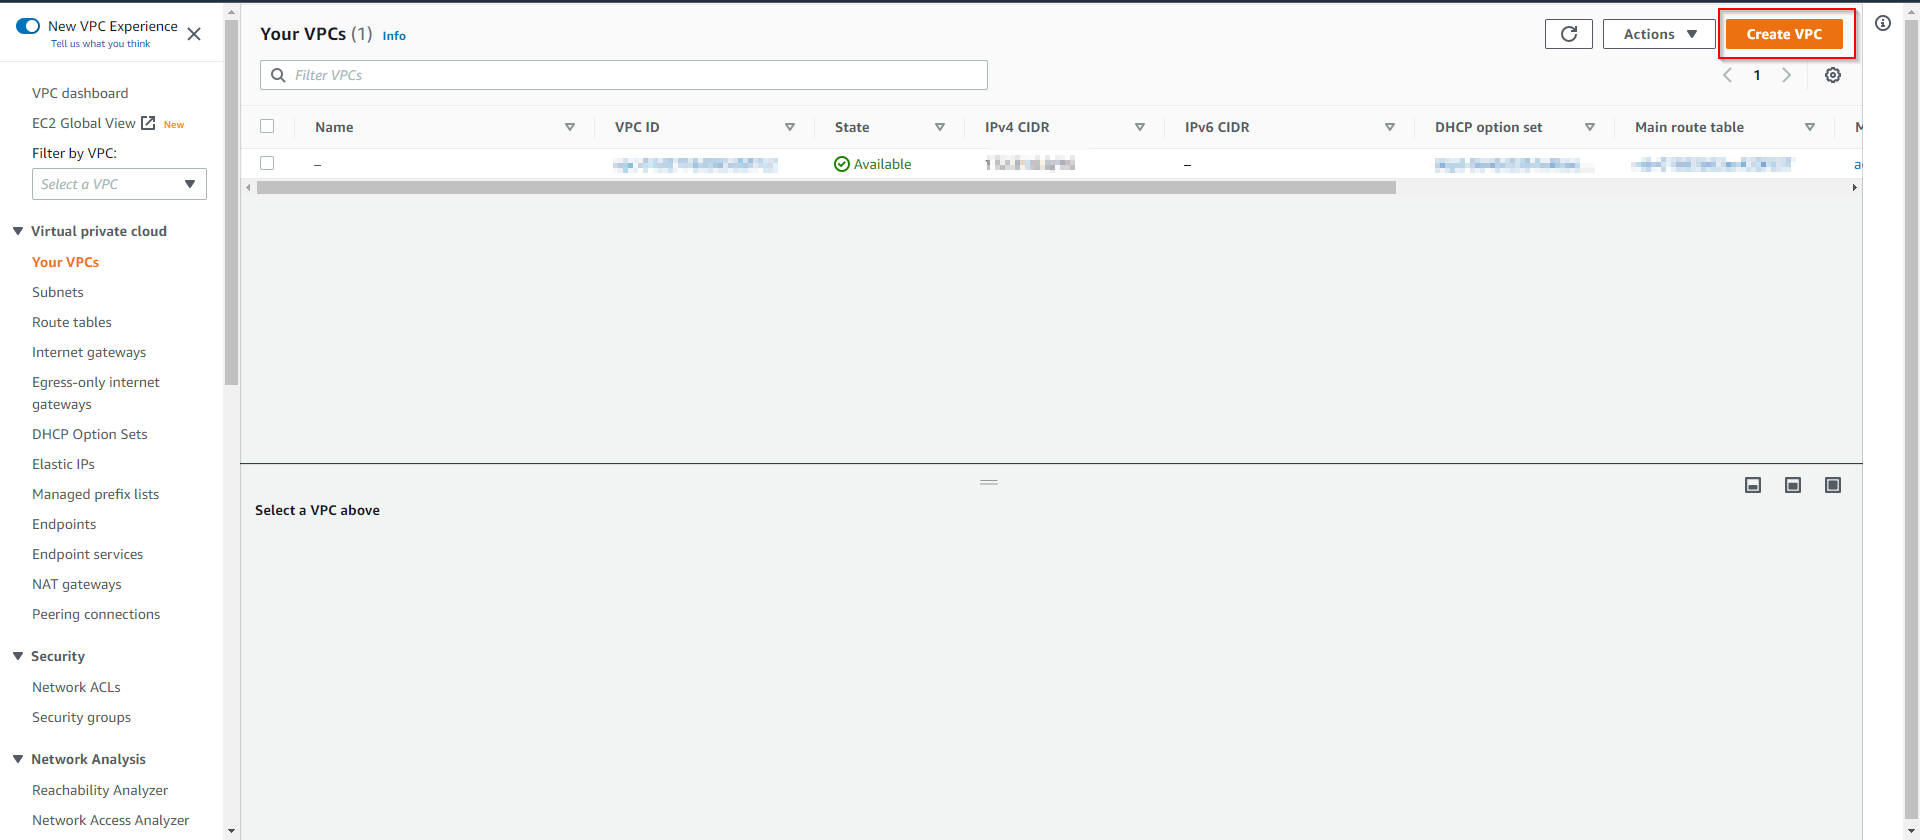
- Select Services > VPC > VPC Dashboard
- In the VPC console, select Create VPC
- Give your VPC a name [eg. terra-vpc]
- Set the IPv4 CIDR block to your preferred range [eg. 10.0.0.0/16
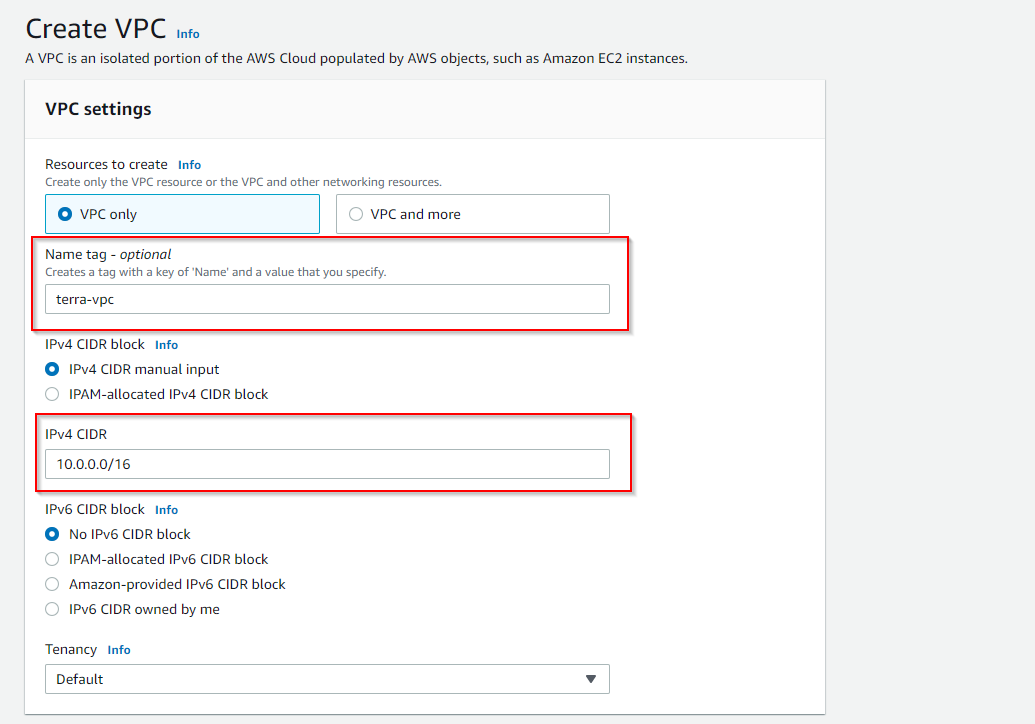
- Click create VPC
- In the VPC console, select Subnets from the navigation panel. Select Create Subnet.
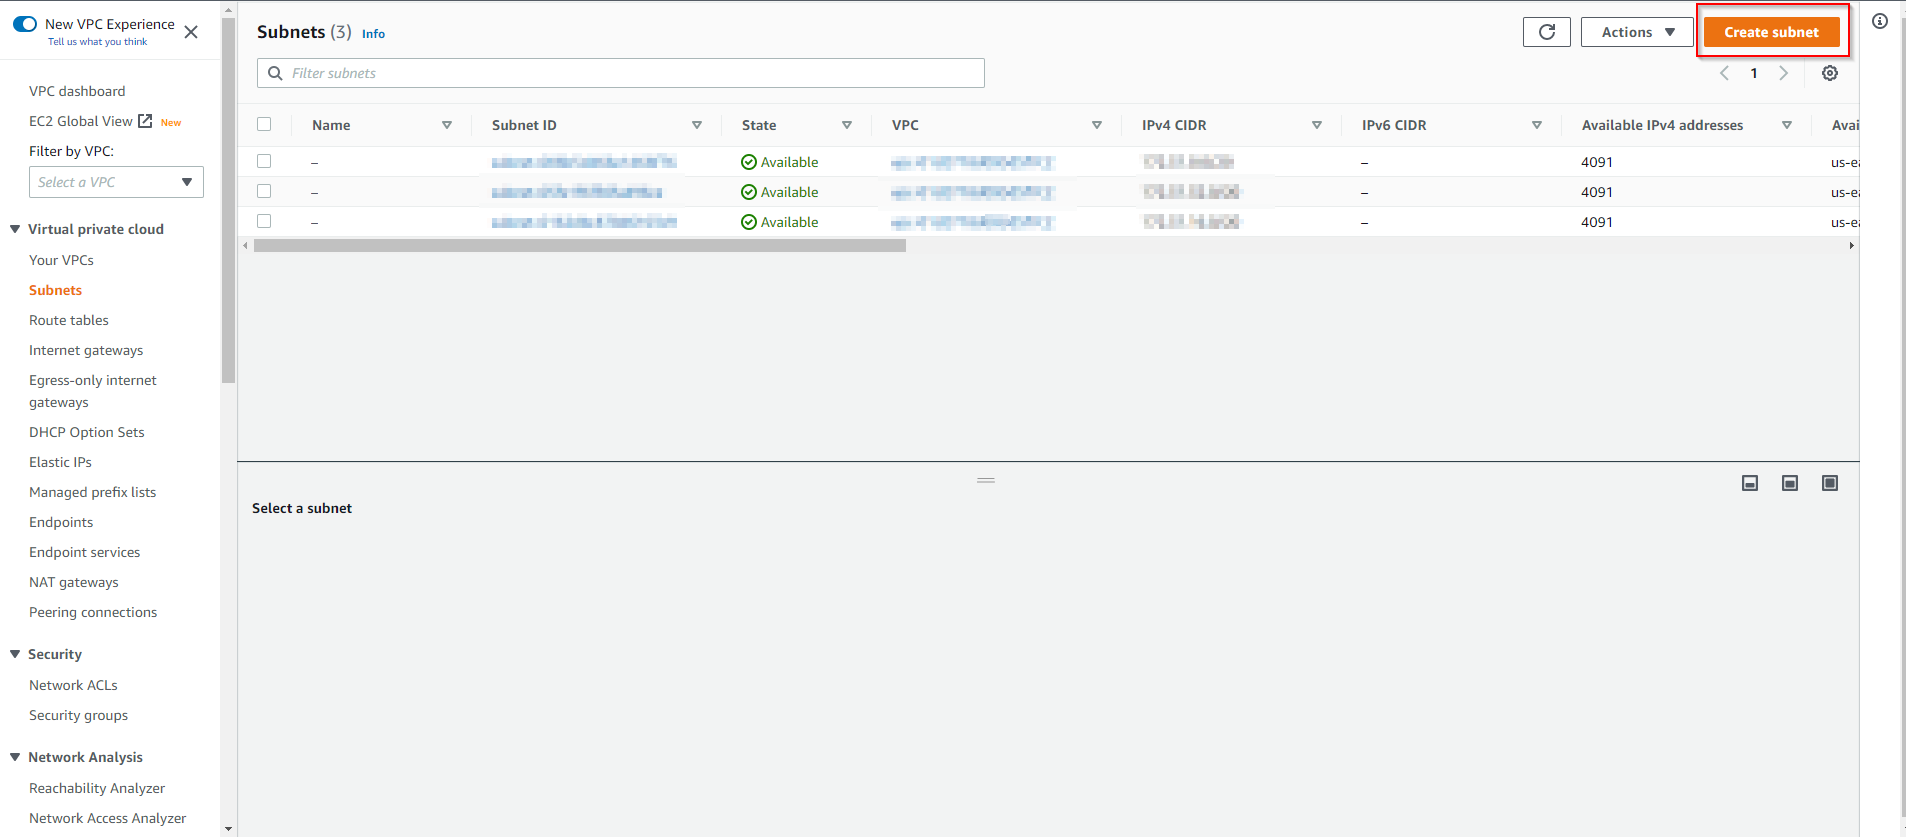
- Choose your recently created VPC from the dropdown menu.
- Give your subnet a name [eg. private-subnet]
- Select your Availability zone [eg. us-east-2a]
- Add your IPv4 CIDR block range
- Select Create subnet

- Repeat this process for all public and private subnets required for your infrastructure.
- Select Internet gateways from the Navigation menu
- Select Create internet gateway

- Give your internet gateway a name [eg. my-igw-1]
- Select Create Internet Gateway
- Attach the IGW to your VPC by selecting Actions > Attach to VPC > Select your VPC from the dropdown
Note: this is for outbound connectivity
- In the Navigation menu, select NAT gateways
- Select Create NAT Gateway

- Give your NAT gateway a name [eg. my-nat-igw]
- Assign a public subnet to your NAT gateway
- Choose your connectivity type [eg. public or private]
- Allocate elastic IP addresses
- Select Create NAT gateway
- Select Route tables in the navigation menu
- There is already a default route table that is created with the VPC. In this instance, we want to create a new route table.
- Select Create route table
- Give your route table a name
- Click Create route table
- Next, you need to associate your subnets with these route tables

- Edit Subnet Associations > Select all subnets you want to associate with this route table > Save associations
- Add routes by selecting the route table > routes > edit routes
- For public, select the internet gateway. All resources in the public subnet will go out to the internet gateway.
- public = IGW
- private = NAT

- Navigate to the EC2 Dashboard
- In the left-hand column, scroll to Network and Security > Click Key pairs
- Click Create a Key Pair
- Give your key pair a descriptive name
- Choose the Key pair type:
- RSA
- ED25519
- Select your private key format
- .pem (For use with OpenSSH)
- .ppk (For use with PuTTY
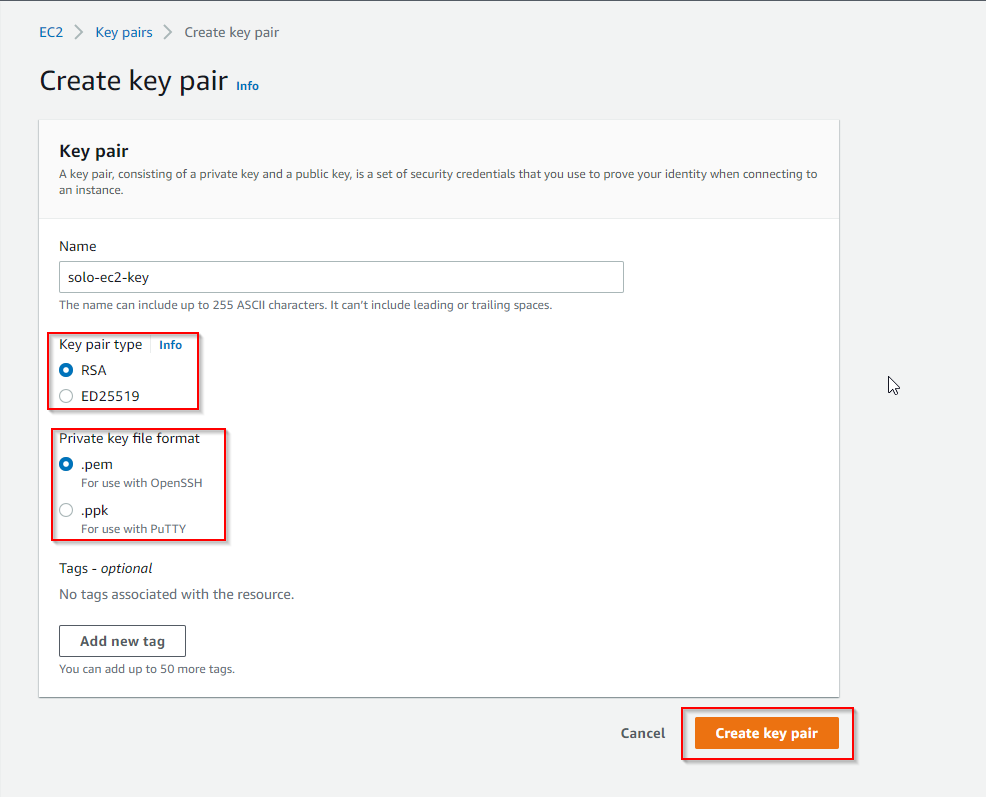
- Click Create key pair
- Choose VPC Dashboard, choose Security Groups, and then choose Create security group.
- On the Create security group page, set these values:
- Security group name:
- Description:
- VPC: Choose the VPC that you created earlier, for example: vpc-identifier (tutorial-vpc)
- In the Inbound rules section, choose Add rule.
- Set the following values for your new inbound rule to allow SSH access to your Amazon EC2 instance. If you do this, you can connect to your Amazon EC2 instance to install the web server and other utilities. You also connect to your EC2 instance to upload content for your web server:
- Type: SSH
- Source: Your public ip
- Add another rule
- Type: HTTP
- Source: 0.0.0.0/0 (anywhere)
To keep your DB instance private, create a second security group for private access. To connect to private DB instancesin your VPC, you add inbound rules to your VPC security group that allow traffic from your web server only.
- Choose VPC Dashboard, choose Security Groups, and then choose Create security group.
- On the Create security group page, set these values:
- Security Group Name:
- Description:
- VPC: Choose the VPC that you created earlier, for example: vpc-identifier
- Add inbound rules to the security group.
- In the Inbound rules section, choose Add rule.
- Set the following values for your new inbound rule to allow MySQL traffic on port 3306 from your Amazon EC2 instance. If you do this, you can connect from your web server to your DB instance. By doing so, you can store and retrieve data from your web application to your database.
- Type: MySQL/Aurora
- Source: The identifier of the tutorial-securitygroup security group that you created previously in this tutorial
- Choose Create security group to create the security group.
A DB subnet group is a collection of subnets that you create in a VPC and that you then designate for your DB instances. A DB subnet group makes it possible for you to specify a particular VPC when creating DB instances.
- Identify the private subnets for your database in the VPC.
- Choose VPC Dashboard, and then choose Subnets.
- Note the subnet IDs of the subnets named tutorial-subnet-private1-us-west-2a and tutorial-subnet-private2-us-west-2b. You need the subnet IDs when you create your DB subnet group.
- Open the Amazon RDS console
- In the navigation pane, choose Subnet groups.
- Choose Create DB subnet group.
- On the Create DB subnet group page, set these values in Subnet group details:
- Name: tutorial-db-subnet-group
- Description: Tutorial DB Subnet Group
- VPC: tutorial-vpc (vpc-identifier)
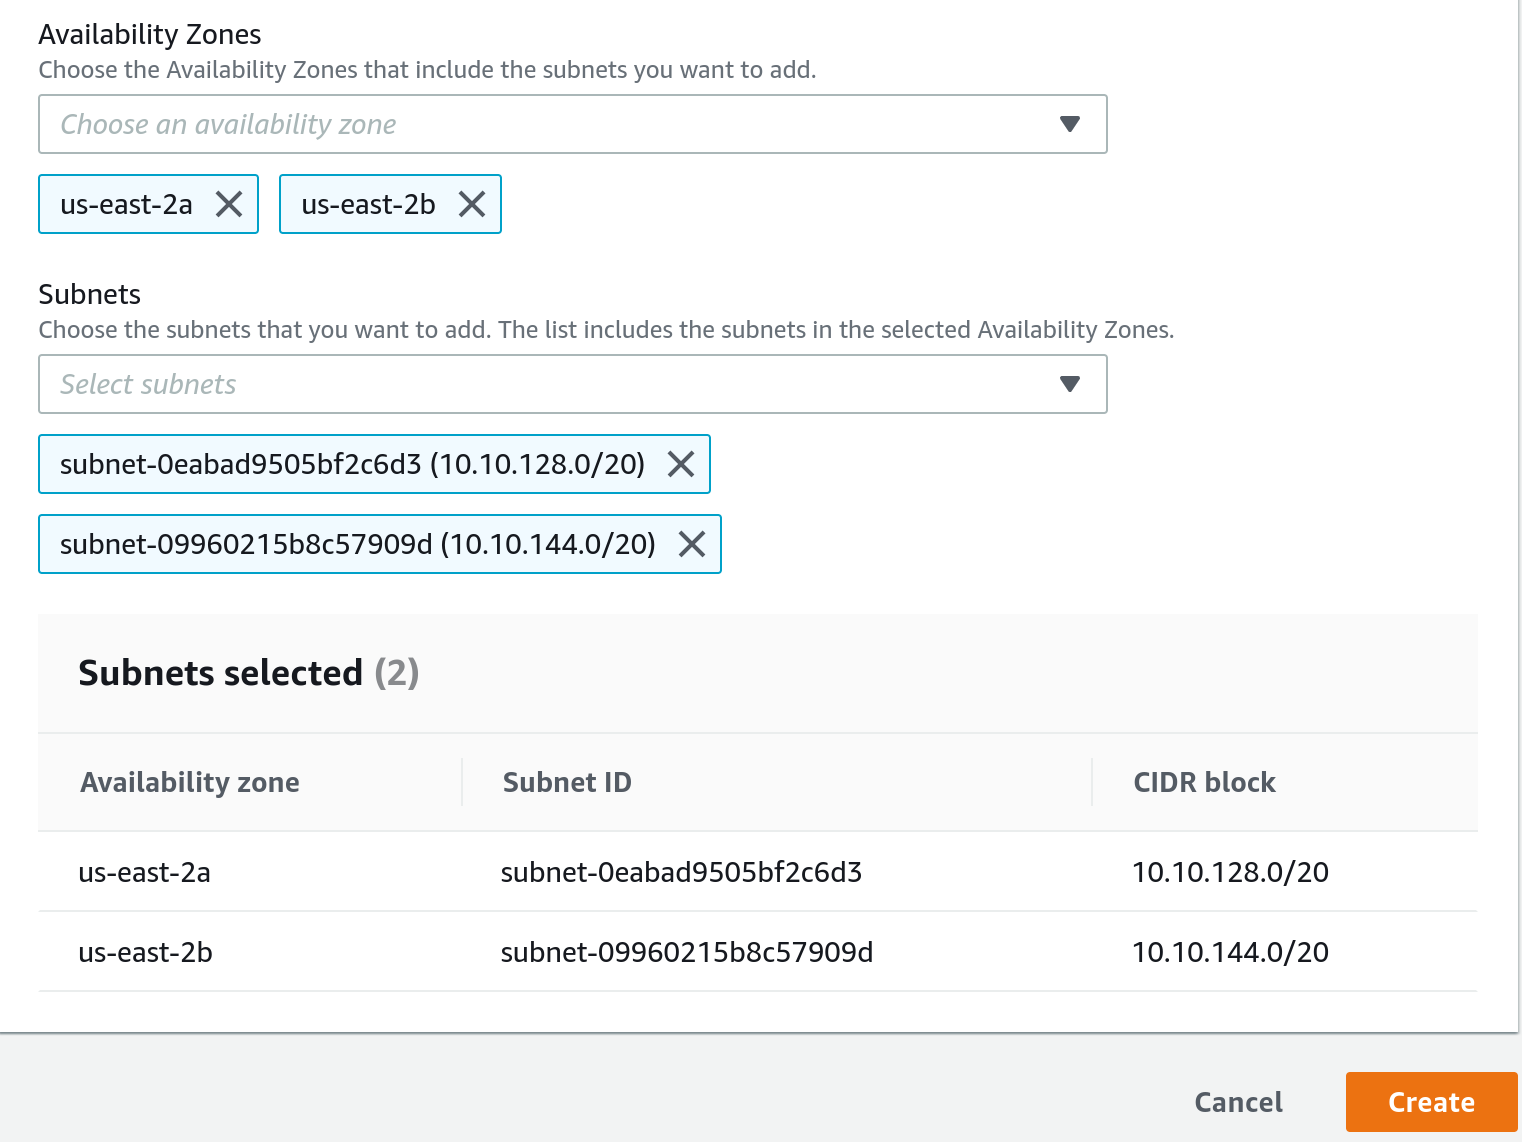
- In the Add subnets section, choose the Availability Zones and Subnets.
Create an Amazon EC2 instance in the public subnet of your VPC.
- In the upper-right corner of the AWS Management Console, choose the AWS Region where you want to create the EC2 instance.
- Choose EC2 Dashboard, and then choose Launch instance, as shown following.
- Make sure you have opted into the new launch experience.
- Under Name and tags, for Name, enter tutorial-ec2-instance-web-server.
- Under Application and OS Images (Amazon Machine Image), choose Amazon Linux, and then choose the Amazon Linux 2 AMI. Keep the defaults for the other choices.
- Under Instance type, choose t2.micro.
- Under Key pair (login), choose a Key pair name to use an existing key pair. To create a new key pair for the Amazon EC2 instance, choose Create new key pair and then use the Create key pair window to create it.
For more information about creating a new key pair, see Create a key pair in the Amazon EC2 User Guide for Linux Instances. 8. Under Network settings, set these values and keep the other values as their defaults:
- For Allow SSH traffic from, choose the source of SSH connections to the EC2 instance. *You can choose My IP if the displayed IP address is correct for SSH connections.
Otherwise, you can determine the IP address to use to connect to EC2 instances in your VPC using Secure Shell (SSH). To determine your public IP address, in a different browser window or tab, you can use the service at https://checkip.amazonaws.com/. An example of an IP address is 203.0.113.25/32.
- Turn on Allow HTTPs traffic from the internet.
- Turn on Allow HTTP traffic from the internet.
- Leave the default values for the remaining sections.
- Review a summary of your instance configuration in the Summary panel, and when you're ready, choose Launch instance.
- On the Launch Status page, shown following, note the identifier for your new EC2 instance, for example: i-03a6ad47e97ba9dc5.
- Choose View all instances to find your instance.
- Wait until Instance state for your instance is Running before continuing.
To create a MySQL DB instance
- In the upper-right corner of the AWS Management Console, check the AWS Region. It should be the same as the one where you created your EC2 instance.
- In the navigation pane, choose Databases.
- Choose Create database.
- On the Create database page, shown following, make sure that the Standard create option is chosen, and then choose MySQL.
- In the Templates section, choose Free tier.
- In the Availability and durability section, keep the defaults.
- In the Settings section, set these values:
- DB instance identifier – Type tutorial-db-instance.
- Master username – Type tutorial_user.
- Auto generate a password – Leave the option turned off.
- Master password – Type a password.
- Confirm password – Retype the password.
- In the Instance configuration section, set these values:
- Burstable classes (includes t classes)
- db.t3.micro
- In the Storage section, keep the defaults.
- In the Connectivity section, set these values and keep the other values as their defaults:
- For Compute resource, choose Connect to an EC2 compute resource.
- For EC2 instance, choose the EC2 instance you created previously, such as tutorial-ec2-instance-web-server.
- In the Database authentication section, make sure Password authentication is selected.
- Open the Additional configuration section, and enter sample for Initial database name. Keep the default settings for the other options.
- To create your MySQL DB instance, choose Create database.
- Your new DB instance appears in the Databases list with the status Creating.
- Wait for the Status of your new DB instance to show as Available. Then choose the DB instance name to show its details.
- In the Connectivity & security section, view the Endpoint and Port of the DB instance.