Roadkill Cable chain replacement - MakerBogans/docs GitHub Wiki
Background
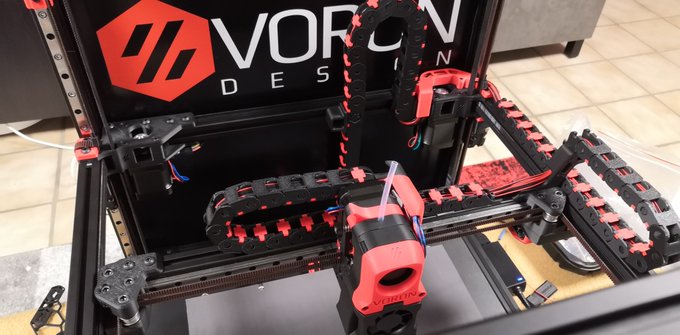
Currently most printers are wired via a cable chain or umbilical cord (grouping all the cables in one big one) is used. While the previous methods are still fine, They introduce extra weight, and complexity if a cable breaks. For a cable chain, replacing a broken wire can be a pain.
For an umbilical, the pain can be in the reduced amount of Z height you have available, due to the rigidity of the cord.
What is it?
Roadkill is a replacement to the existing methods where a ribbon cable is used, with a breakout board on both ends to allow you to wire up your printer. There are less total parts involved, with a lighter total weight. If a wire does burn out, replacing it will be quick and easy.
In progress test videos:
Here is a quote from Eddie, who sums it up better than me: Roadkill is a toolhead board to use with ribbon/fpc cables for cable runs in 3d printers. These can be drop in replacement wiring into your chains, or can potentially hold it's shape and flex like a chain. The idea is to see if this can become a proper alternative to chain runs (avoiding the bulkiness of chains) and umbilicals (which eat-up a lot of height). They can also be easily separated into 4-5 conductor width sizes to easily drop into your chains as well. And, if toolboards were made with ribbon cables, the use of IDC connectors which are lower profile than microfit connectors is an added bonus.
We are going with cicoil flexible ribbon wire that comes in at 28awg gauge. There are other alternatives such as Molex TempFlex and 3M ptfe ribbon wires. With 28awg, each conductor can safely carry up to ~1.4A. This means they are suitable for wiring anything to the toolhead and gantry except for the hotend heater. For that, bundling 2x 28awg conductor per hotend heater conductor brings the effective gauge to 25awg, which can handle ~2.7A. This will work with 24V systems and up to 60W heaters (remember heaters don't run 100% full blast all the time).
Currently, mounts and methods to run the ribbon cable is still in development; however these should be trivial. `
What do I need?
You will need
- Circoil has been retired for this better wiring, "Molex Temp-Flex". https://au.mouser.com/ProductDetail/Molex/100057-0101?qs=sGAEpiMZZMv0NwlthflBi6Lz9M0p4j4GmdajX8DGu70%3D . It is slightly stiffer, which means it needs no more reinforcement. We want the 26AWG Varient, linked. That's priced in Feet, we recommend you get 3 Units or one around a Metre's worth. You will need at least 550mm, more for bigger builds so it's better to get too much and cut it down.
- Sleeving for it. You will want 15mm (or 16mm if 15 is out of stock) in 1 Meter. https://www.aliexpress.com/item/1005001886110701.html
Where do i get it?
This is still a making in progress. The parts above, and the PCB board.
How do I make it?
We have a PCB board design:  that we are trying out.

#roadkill on the discord has far more information than this one, we have been making some small batches for those interested.
You will need to find or make a mount for the PCB on the toolhead to hold it in place. This is in progress! Most development is being tested with a Frankensherpa or Mantis one, but it will be an easy one to make.
How do I use it?
- Get the temp-flex molex aka long string of wires in a flat wire.
- Put the sheath on
- Solder on connectors to the PCB board
- Do wiring from your PCB to your printer motherboard as needed
- Do wiring with the nice short cable lengths from the toolhead.
