UI Editor: Customize the machine UI - Low-Drag-MC/Multiblocked GitHub Wiki
Before you read this tuto, make sure you know how to use the UI Editor provided by LDLib WIKI.
Next follow the tutorial to create a new machine and make its UI!!
Contents
- Step 1: Create a machine
- Step 2: Create a MBD UI Project
- Step 3: Bind slots to containers(traits)
- Step 4: Use custom UI for machine
- Demo and Download
Step 1: Create a machine
Let's make a furnace.
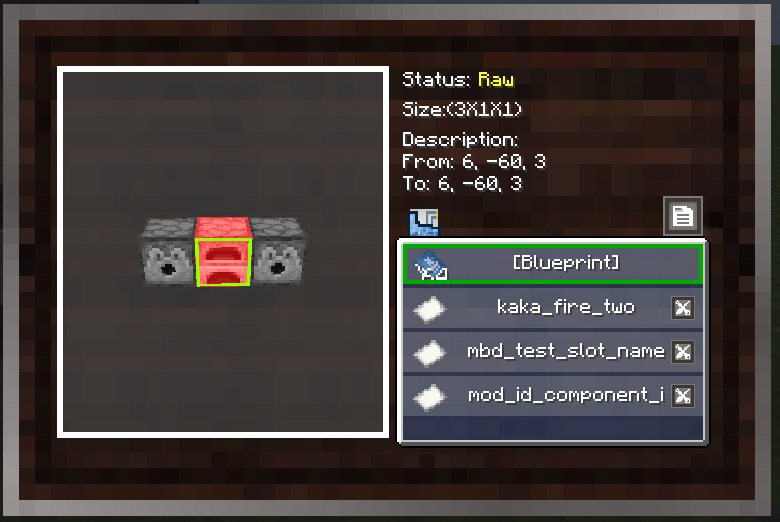
- Input from the dispenser on the left.
- Output TOthe dispenser on the right.
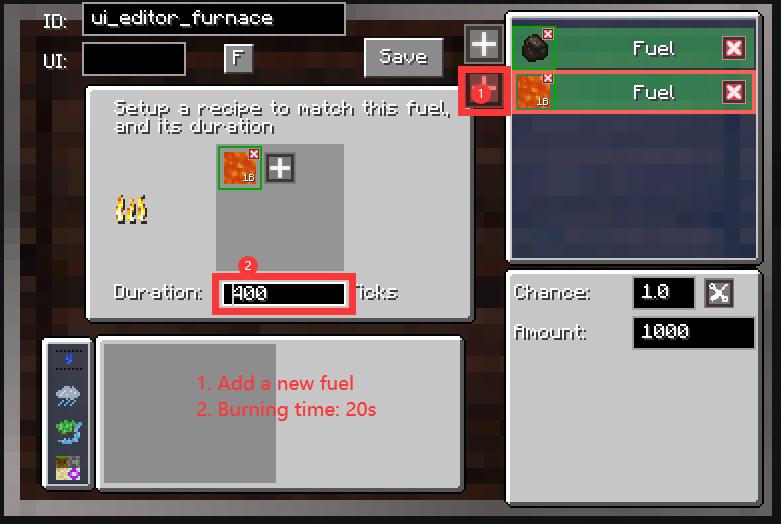
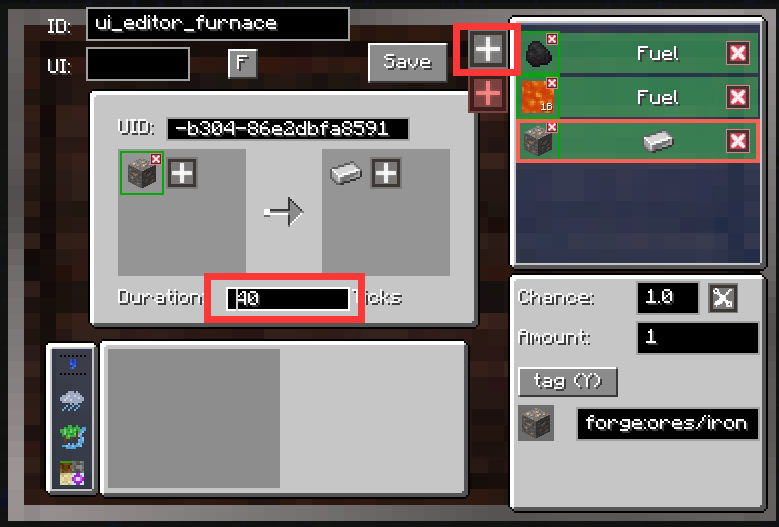
- The controller on the middle accepts coals or lava as fuels.
Expected Custom UI:
- Display dispensers' slots in the UI.
- Add a item slot and a fluid slot in the UI, which can be interacted for fuels.
- Add a remaining fuel bar.
- add a recipe progress bar.
Machine Settings are as follows:
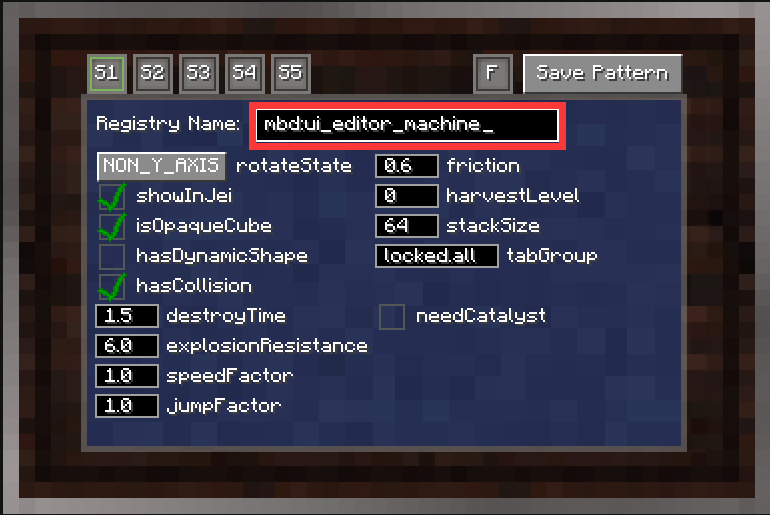
NOTE You don't need to set UI styles for traits, just add them. However, you still need to configure IO for item and fluid traits you add.
IMPORTANT To bind slots to the UI, you have to add them slot name.

Then, adjust its pattern. Make the left one to input only and set its slotname with input. Similarly, set the right one to output only and set its slotname with output.
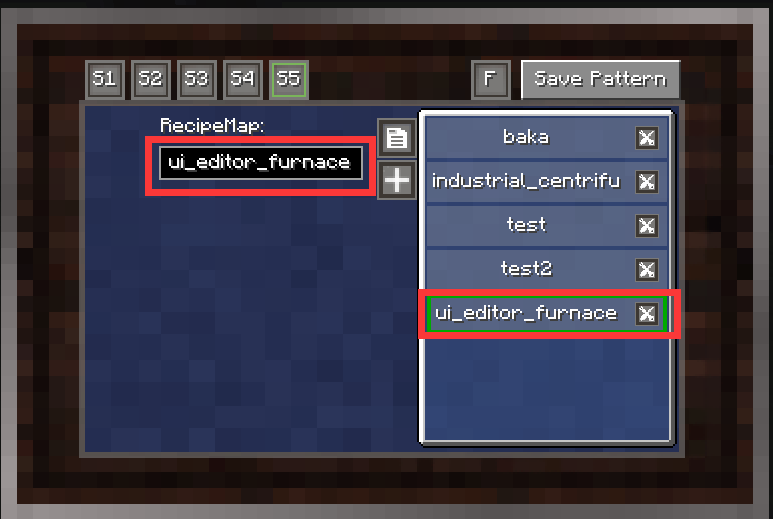
Create a new Recipe Map. rename it ui_editor_furnace. Add fuels and a recipe.
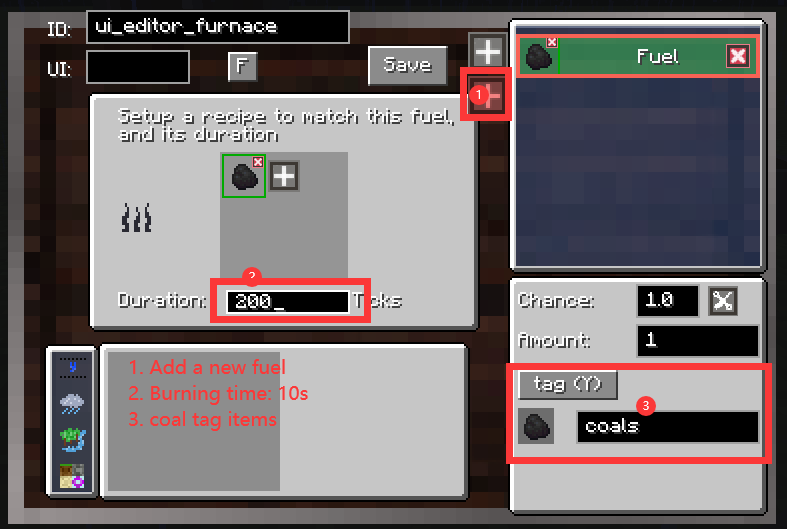
Don't forget to select the recipemap.
Step 2: Create a MBD UI Project
Open the UI Editor. (you have to open it via blueprint table for a properly workspace).
Create a new project and build your ui.

Add the player inventory.
- You can use the built-in Player Inventory which is provided by
Custom Tab. It's slots have already been bound to the player inverntory.
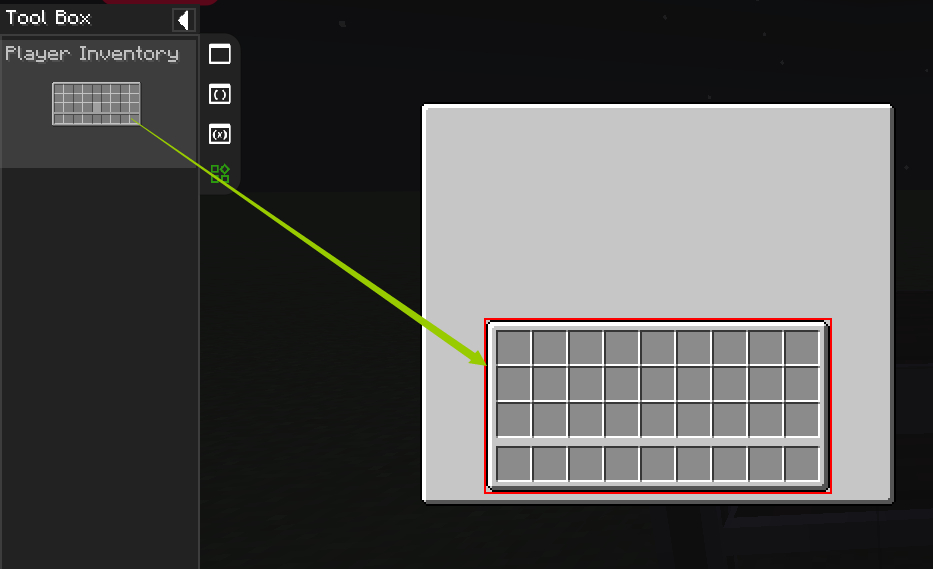
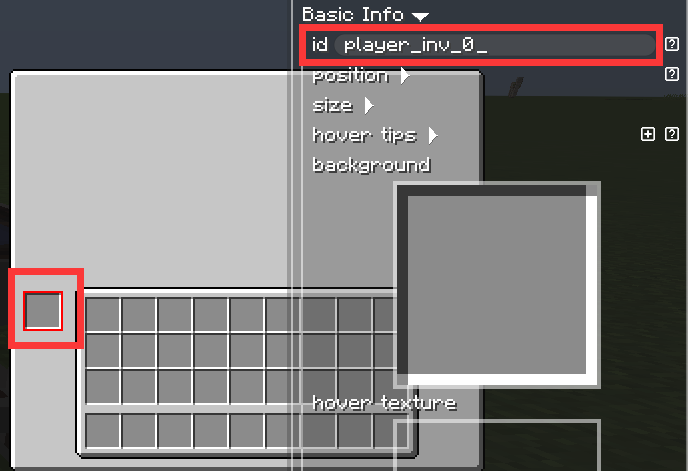
- Besides, you add a new slot, and set it
idlikeplayer_inv_{index},indexhere refers to the index of the player inventory. So, lets try to add another slot to display the contents of the first slot in inventory.

Add fuel slots
Then we add fuel slots (coal slot and lava slot).
- Item Slot
- Fluid Slot
We decorate the fluid tank a little bit.
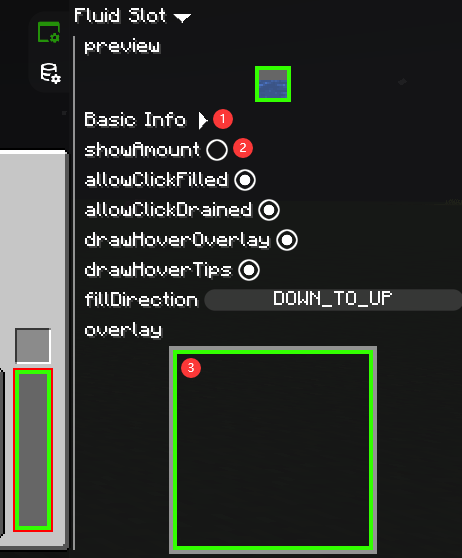
- Set a gray color texture as its background
- Disable amount rendering
- Add a green color frame texture as a overlay.
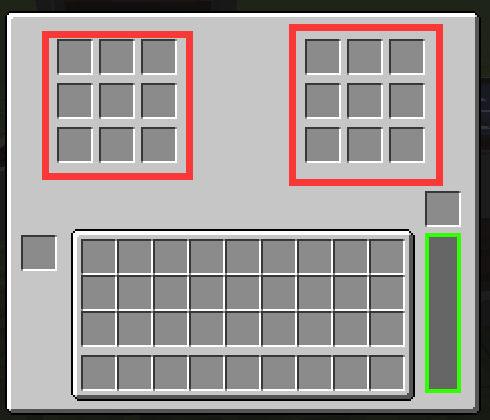
Add input / output slots
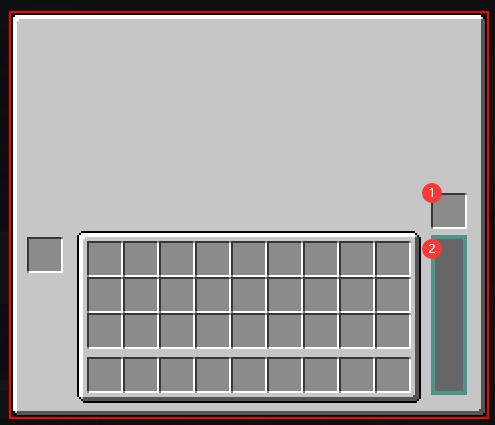
Then we add input / output slots which are from dispensers. Because a dispenser has 9 slots, we add 18 slots for the input and the output.
 TIPS: You can use copy/paste/align, group to help you setup layout quickly
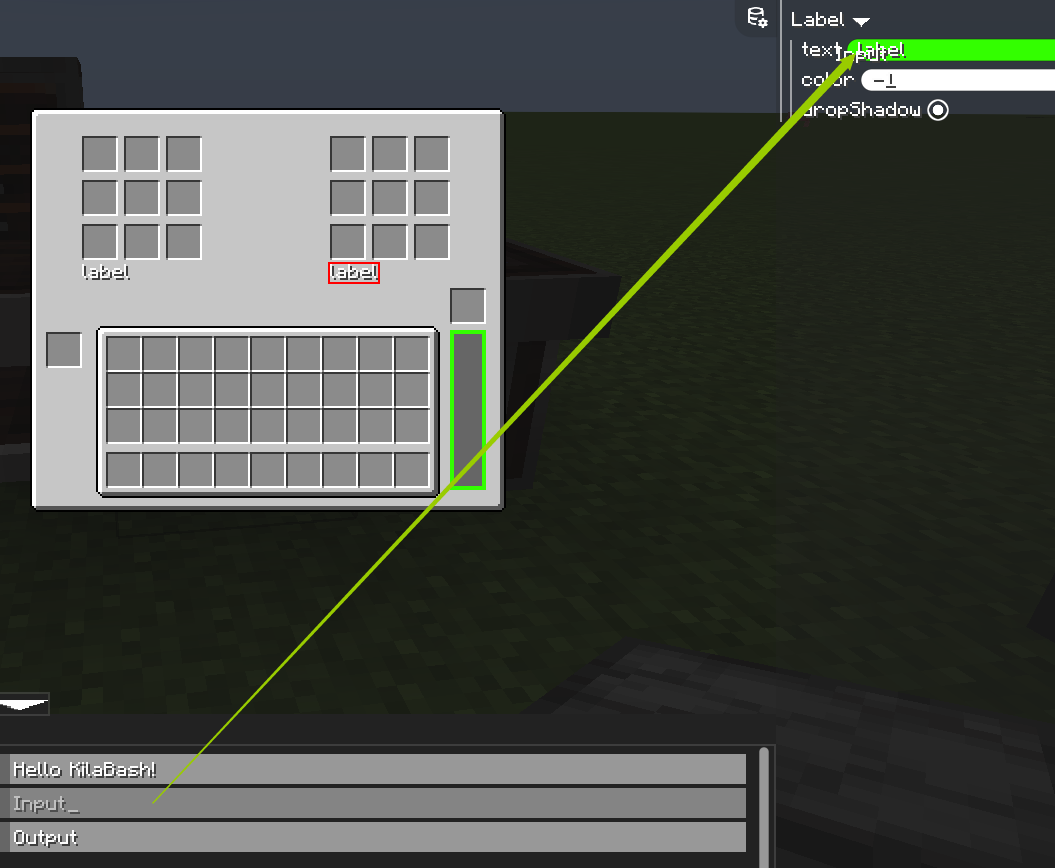
After adding slots, we also can add label to introduce them.
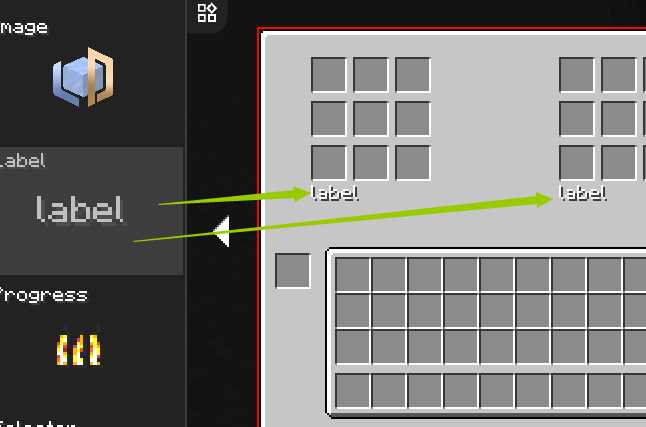
Then we add localizied lang entries.

Dragging them to labels' content.
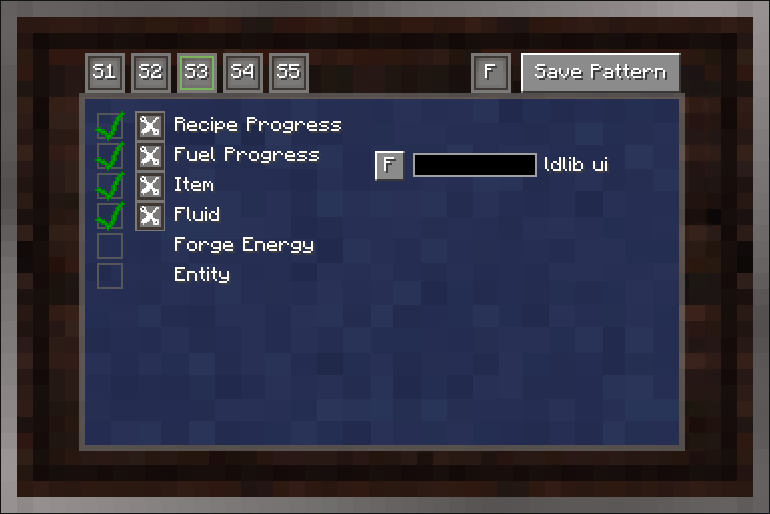
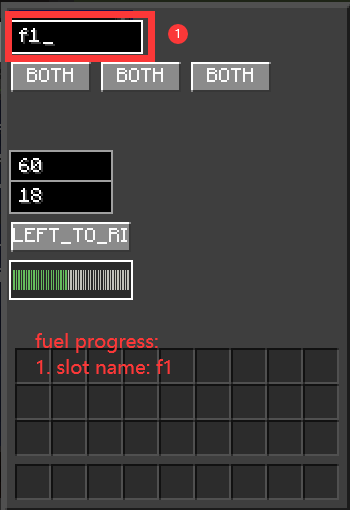
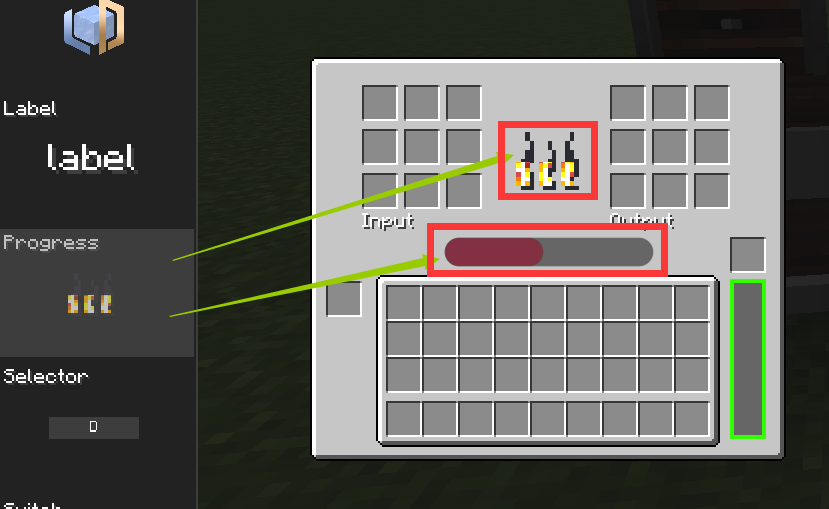
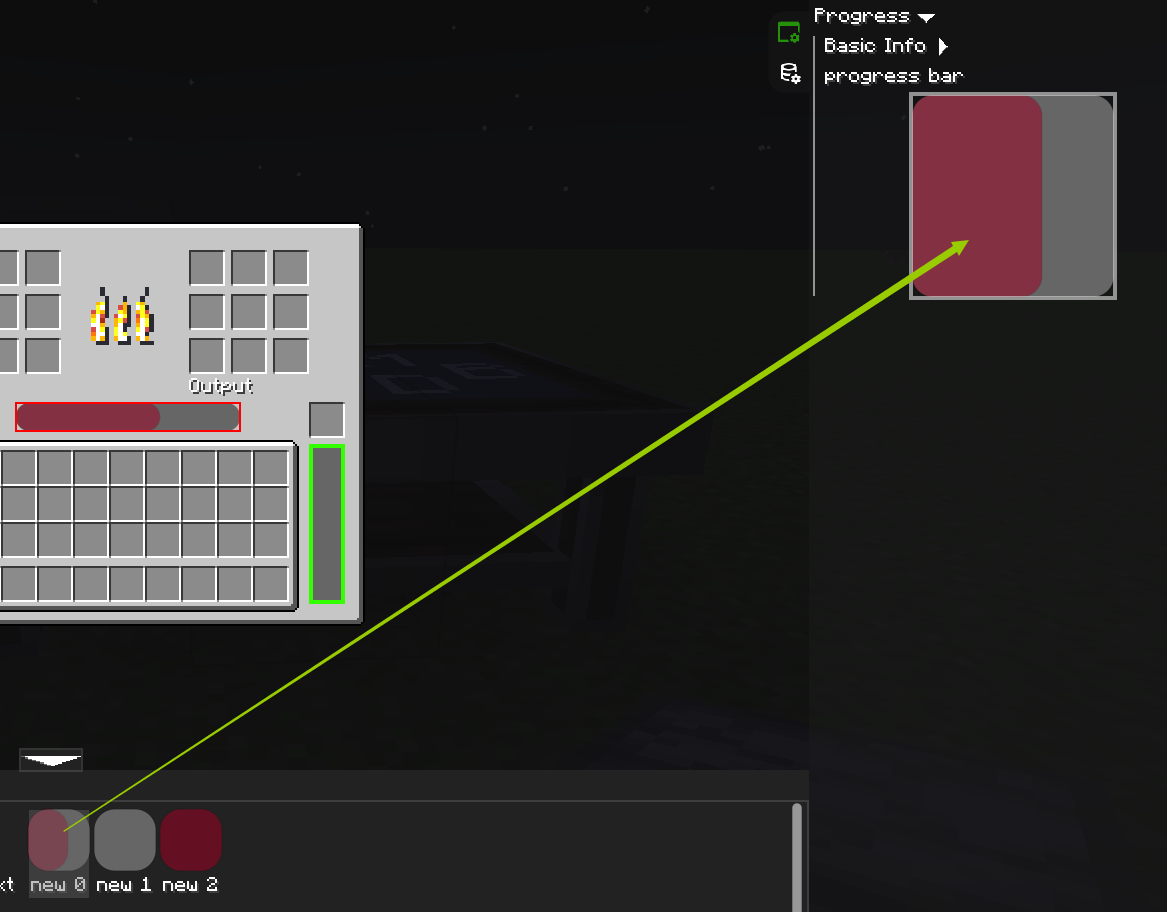
Add a Recipe Progress Bar and a Fuel Progress Bar
Let's add two Progress Widget for them.
-- We tried to make a modern progress bar :)
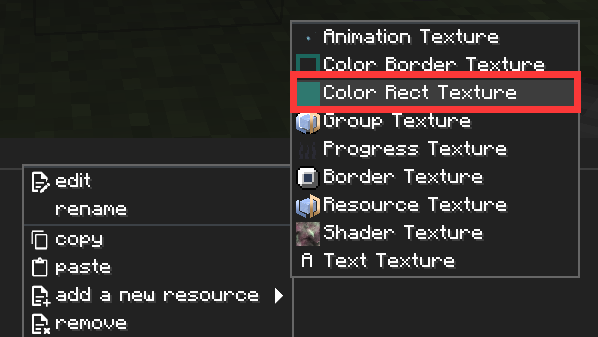
Firstly, lets create a new color rect texture.
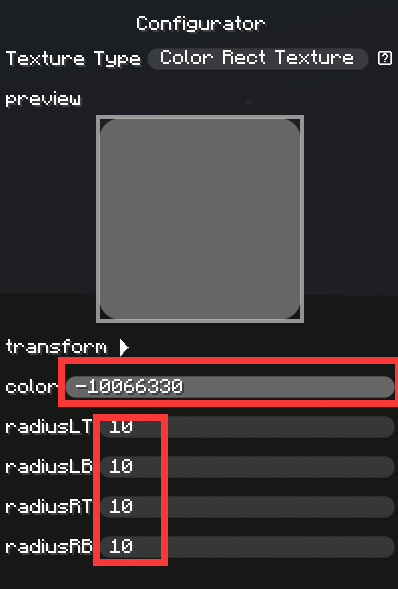
- Make it gray color.
- Make its corners with 10 radius.
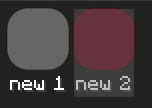
Secondly, copy and paste a new one, and make it red color.
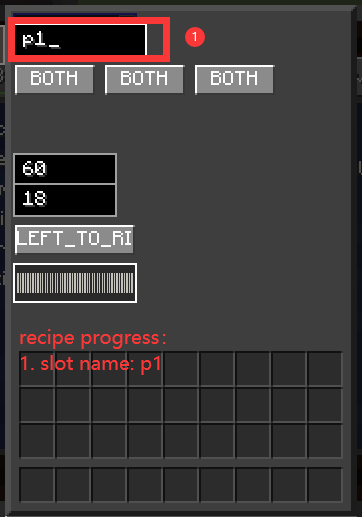
Then, create a Progress Texutre
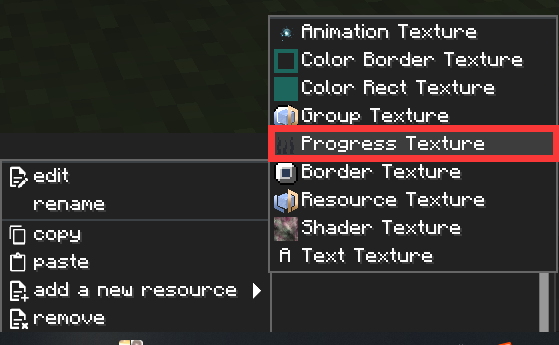
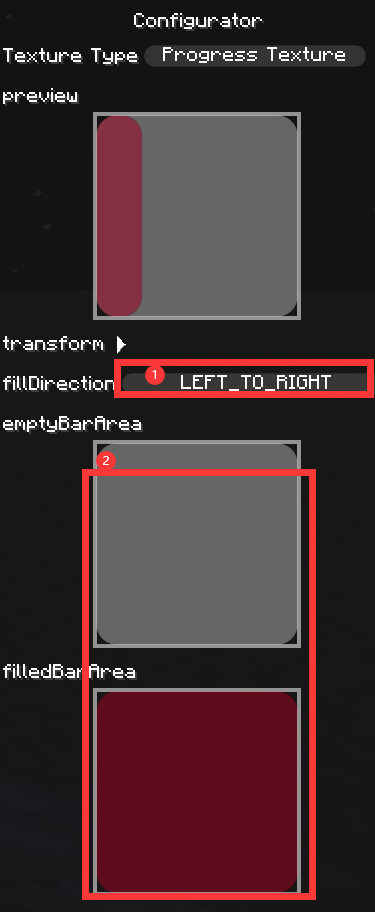
- Set its direction (
LEFT_TO_RIGHT). - Set progress textures to what we created abvoe.
Finally, use it as the progress texture.
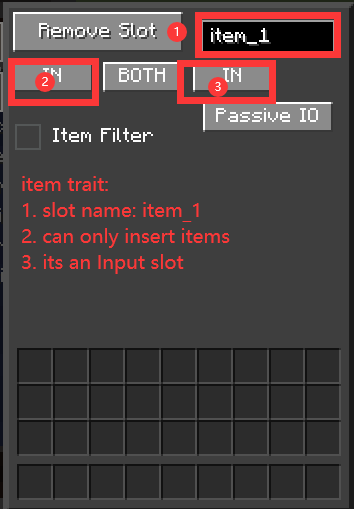
Step 3: Bind slots to containers(traits)
Bind traits
Binding machine traits to slots is not that hard, just by setting slots' id to the traits' corresponding slotName
For example, we have added a item trait and a fluid trait with name item_1 and fluid_1. So we can just set our item slot and fluid slot to have the same id.
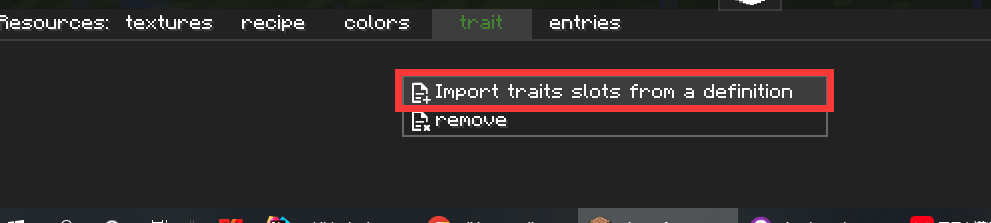
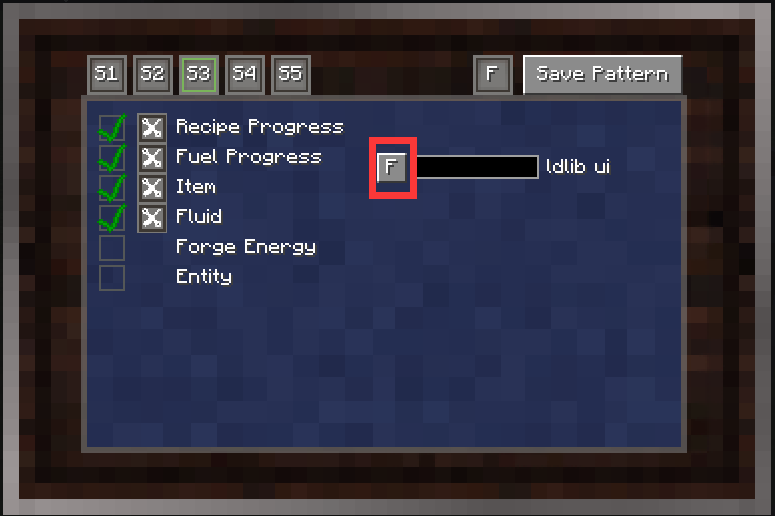
Here's an easier way to know which traits have slotnames. You can add traits definition files like this.

- Left column refers to slotName found in traits.
- Right column refers to how many widgets are using it as their
id.
You can set them directly to the widget by dragging.
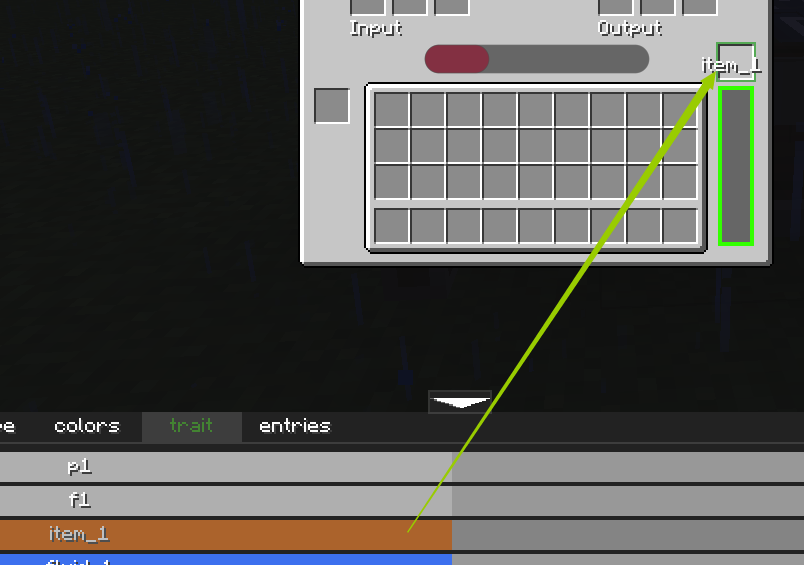
Then, lets set p1, f1 for two progress widgets and set item_1 and fluid_1 for slots.
Bind containers
Thanks to the new magic, if you are using UI Ediotr, you can proxy and bind containers which is belong to the block in the structure.
Which means, you can monitor containers of other blocks in the controller gui. So far, mbd just allow you proxy and display containers of item, fluid and forge energy.
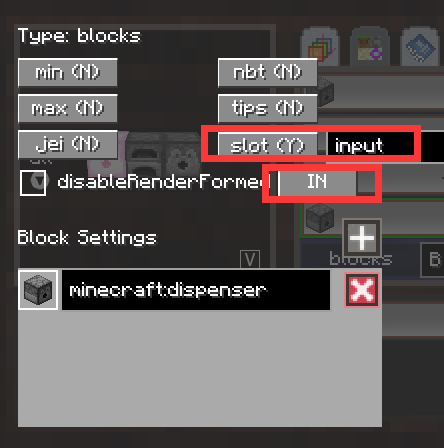
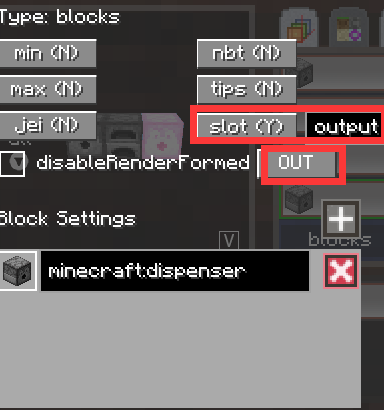
Remember we set the slotName (input and output) for dispenser earlier, and now we're using it.
- For
itemandfluid, the binding id is{slotName}_{index}, index refer to the index of its inner container. - For
forge energy, the binding id is{slotName}. so, we just name all input slots with id (e.g.input_0,input_1, ...), and all output slots with id (e.g.output_0,output_1, ...). Unfortunately, you have to set them manually so far.

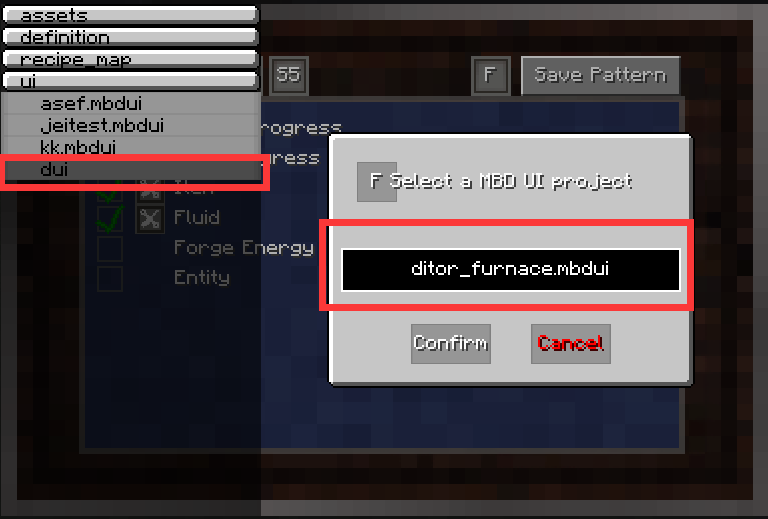
Step 4: Use custom UI for machine
Thank goodness you've done most of the setup. Finally, don't forget to save your project.

I just saved it under the ui folder and nameed it as ui_eidtor_furnace
Last step, set your machine to use the project you saved.
save everythings, open your controller.
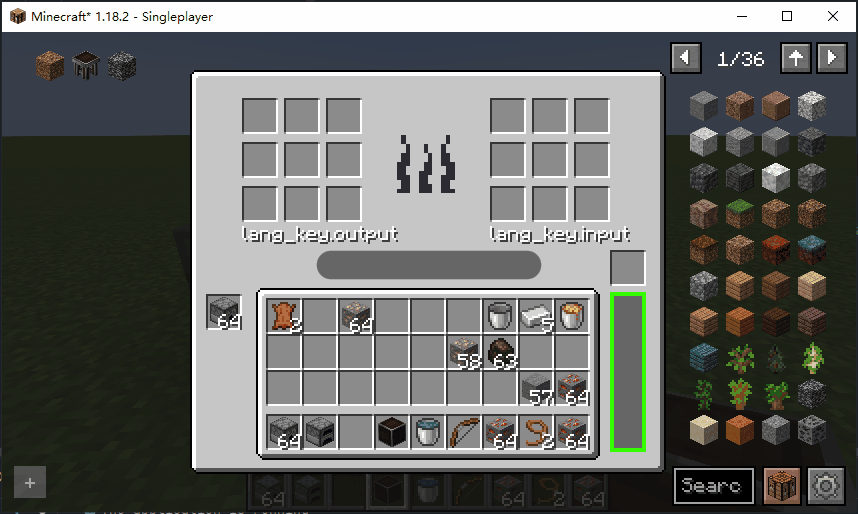
Demo and Download
Look at our machine. Isn't it awesome? You can also download all my files as an example.
Download: ui_editor.zip