Tutorials - LiquidGalaxyLAB/BIM-Liquid-Galaxy-Visualizer GitHub Wiki
Exporting 3D View as .fbx from revit file
A revit file could contains the structural plant, the 3D view and the schedules (metadatas) of a building.
Before export the 3D view we need to download and install the Revit.
After install the Revit open the .rvt file with it. To be able to create schedules on the future, the file should be of a model eg .rvt and not family eg .rfa
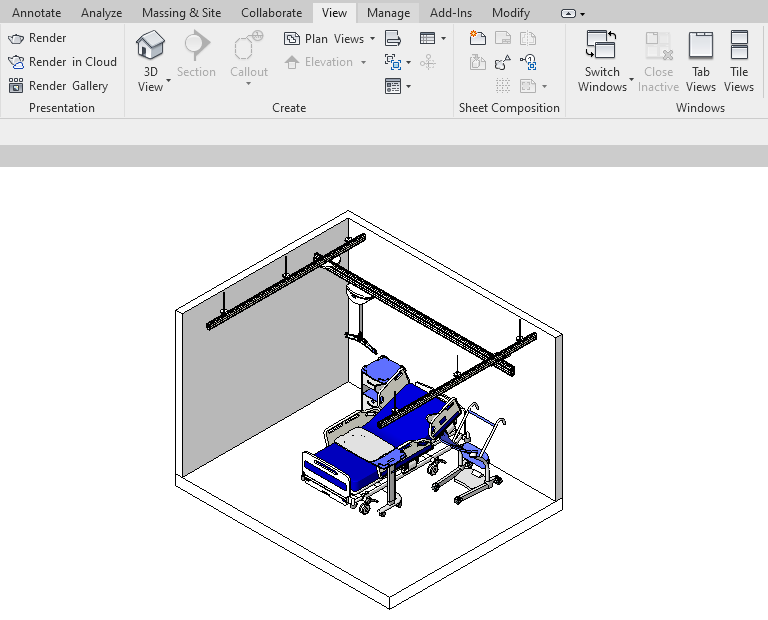
To preview the 3D view tap into View -> 3D View
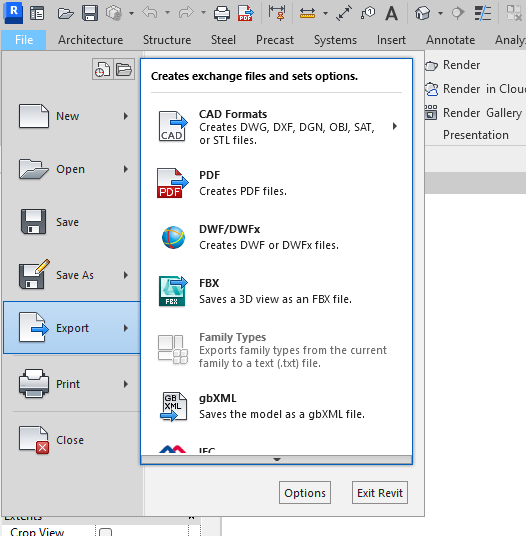
Finally, to export the view go into File -> Export and then choose FBX. Save you file into your preferred directory and that's all
Generating Unity AssetBundles
First we need to download the Unity. Use the Unity Hub tool to install the most recent version of Unity
After installing Unity, clone this repository using the following command in a command line terminal
git clone https://github.com/LiquidGalaxyLAB/BIM-Liquid-Galaxy-Visualizer
Open the BIMVisualizerUnity directory with the Unity HUB
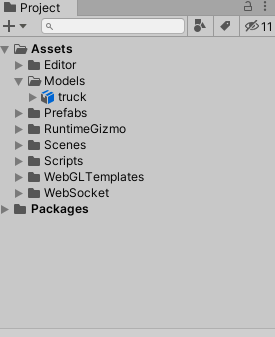
Inside the projects tab create a Models directory and put the file to be converted inside it
Convert the model by going into Assets -> Build AssetBundles
The model AssetBundle is the one with no extension, available at the AssetBundles directory
Getting texture on FBX model with 3ds Max
Sometimes the model loads without texture on Unity, this is due an incompatibility between Revit textures and Unity textures. To fix this problem (in most of the cases) we can use the 3ds Max software that is an 3d modelling software.
First we need to download and install the 3ds Max
After installing the 3ds Max, import your fbx model going into File -> Import
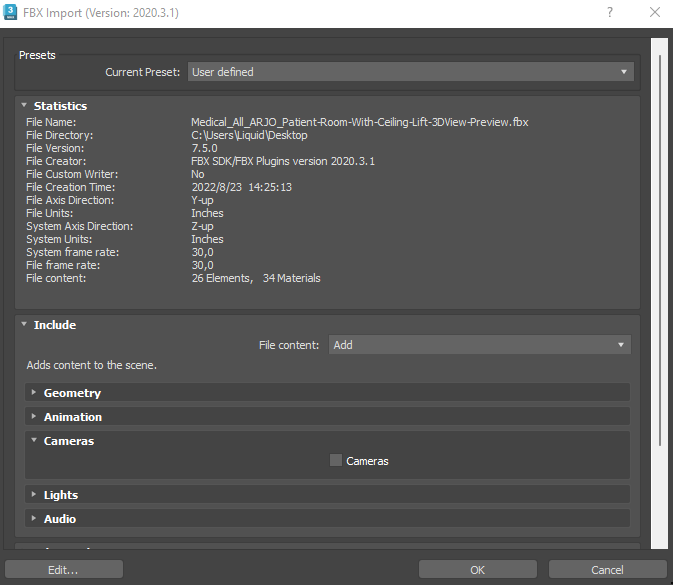
When importing a model an window is showed, we can just press ok, then after it will be showed the model perspectives
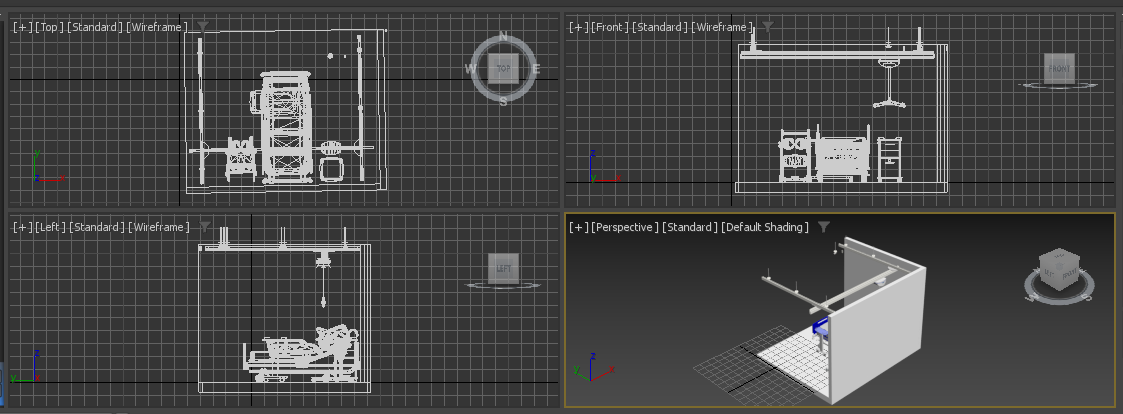
To expand some view just tap on the plus icon and then on expand
To convert the textures, go into Rendering -> Render, above Render button choose production, select one of the render presets and then click on Render
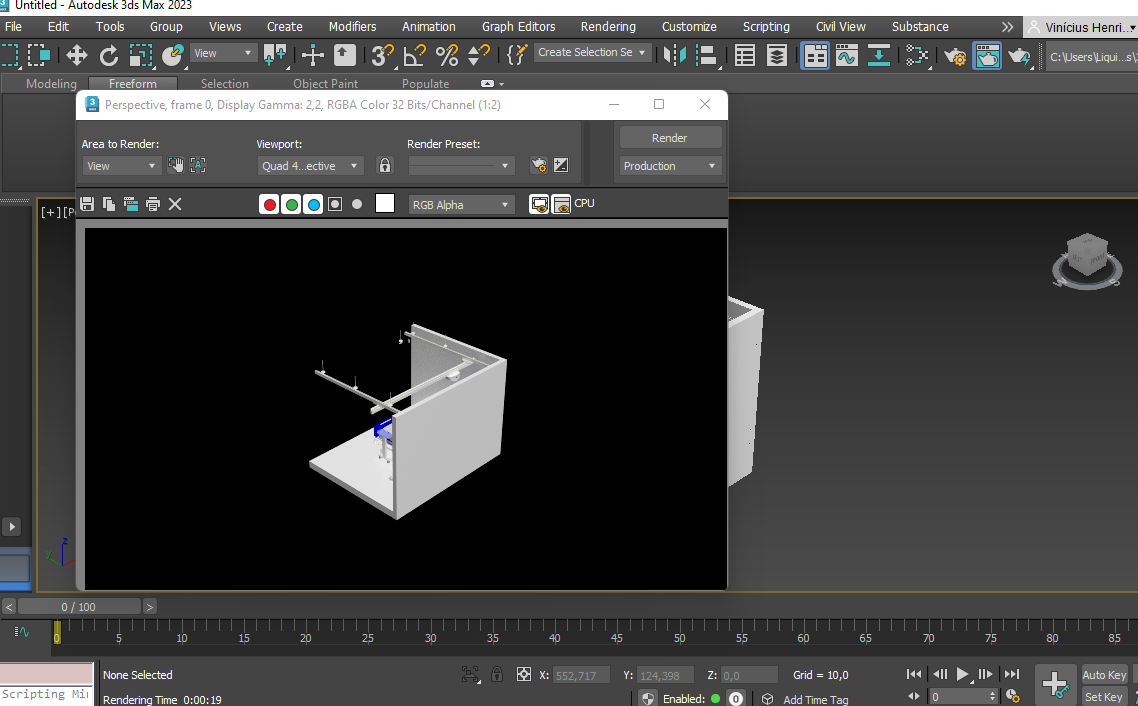
After render the model, export it going into File -> Export
Now (in most of the cases) the model should load with textures on Unity
Export a revit schedule
Revit allow us to view each property of the elements inside a project in tabular format and we can export these data in .csv format
To create a schedule we can go into View -> Schedules -> Schedule/Quantities
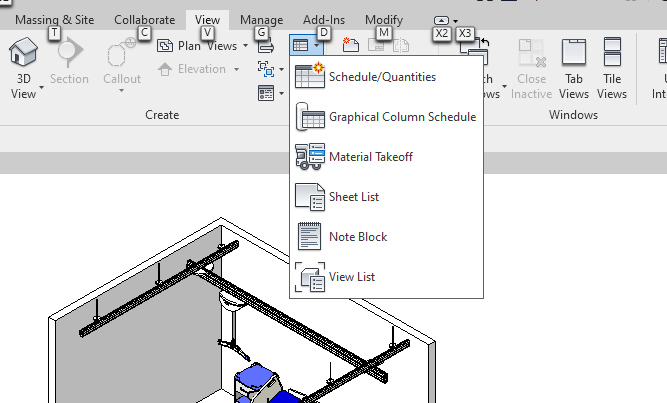
Then it's necessary to select a category
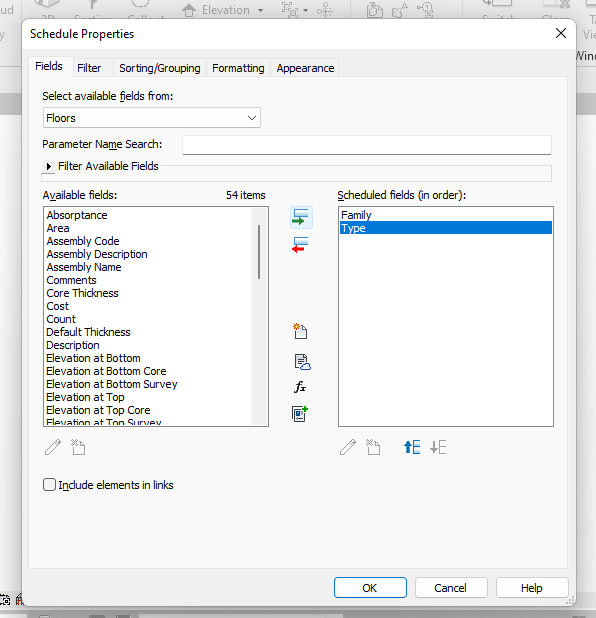
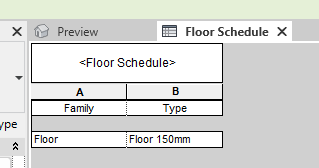
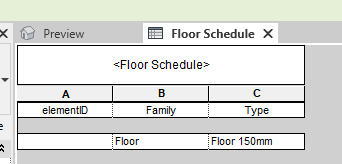
After select a category we can choose the fields that will be showed into the table. This project has compatibility with the following fields: elementID, family, type, length, baseLevel, baseOffset, topLevel and topOffset. The only mandatory field is the elementID
Now with the schedule created we can export it in .csv format, but we have a problem. In this state we cannot link each row of the schedule with the element inside the Unity scene
When a revit .fbx model is imported into the Unity it can be seen that the name of each element has an [ID]

A way of link the .csv data with the Unity element is by using this ID, so, before export the data we need to add the id into the schedule. For default, the element id isn't available into the fields list when we're creating a schedule but it's possible to add it
Into the Project Parameters, located into the Manage window it's possible to add new fields to the project
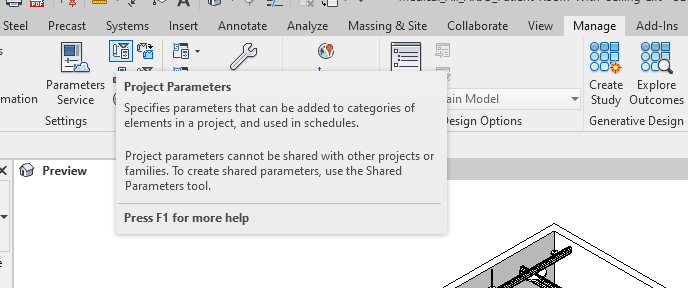
On Parameter Properties we set the elementID as the field name, number for the type and then we check all categories. After create the field they will be available on the fields list when creating a schedule

Now we have the elementID field, but is empty inside the schedule. To fill the elementID we can use the Dynamo DB that is already available inside the Revit
At Manage->Dynamo open the Dynamo DB and then start a new project. Create the following structure into the Dynamo DB by searching each component into the library search. Into the category we need to select the category in which will be added the id
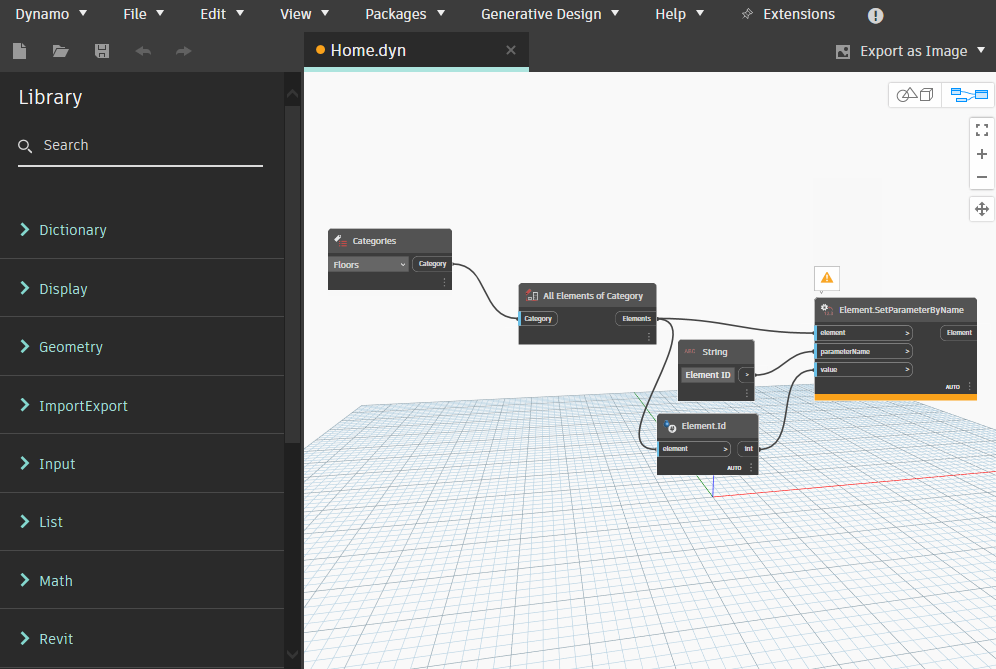
After create the structure save the file. Now the schedule should contain the elementID value for each row
Now that is all ready, we can export the data by going into File -> Export -> Reports -> Schedule.

Unmark the Export title and Export Group headers, footers and blank lines options and confirm

Now the file is almost ready. Before upload it in the app, open the file in a text editor and format the header to be in Camel Case format, this means, remove the space and the first capital letter, so in this way, the app can identify the columns name