Installing CUDA 11 [English] - LCAD-UFES/carmen_lcad GitHub Wiki
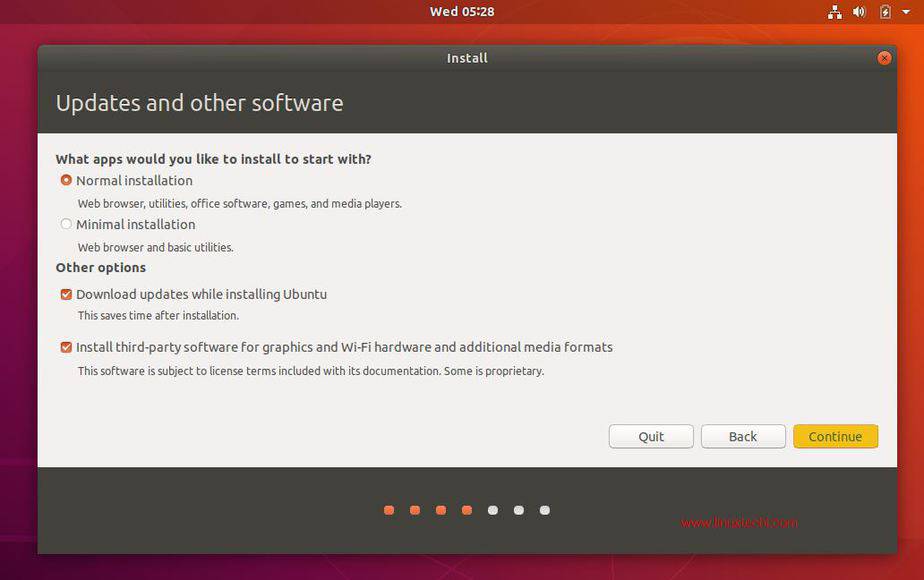
If you are installing Ubuntu 20.04, at the beginning of the installation, check the option "Install third-party software...".

If the above step was not done, run the following command:
sudo apt-get install nvidia-driver-470
Access the following link: CUDA 11.0 download runfile
Download the Base Installer and, with the terminal open in the Downloads folder, type the following command:
sudo sh cuda_11.0.2_450.51.05_linux.run
Press the spacebar to scroll through the terms and agreements and answer the following questions as shown below:
Existing package manager installation of the driver found. It is strongly recommended that you remove this before continuing.
 Abort
 Continue X

Do you accept the above EULA? (accept/decline/quit): accept (Enter)

Uncheck the driver option, scroll down to Install, and press enter:

CUDA Installer                                                               │
│ - [ ] Driver                                                                 │
│      [ ] 450.51.05                                                           │
│ + [X] CUDA Toolkit 11.0                                                      │
│   [X] CUDA Samples 11.0                                                      │
│   [X] CUDA Demo Suite 11.0                                                   │
│   [X] CUDA Documentation 11.0                                                │
│   Options                                                                    │
│   Install
Back on the CUDA 11.0 download page, download and install the existing patches one by one, similarly to the base installation:
- Command
sudo sh <filename> - Scroll through the terms by pressing the spacebar
- Type accept at the end
To test if the installation was successful, compile and run two provided examples:
cd ~/NVIDIA_CUDA-11.0_Samples/1_Utilities/deviceQuery
make
./deviceQuery
cd ~/NVIDIA_CUDA-11.0_Samples/5_Simulations/particles
make
./particles
If particles do not compile and it shows missing libraries like libGLU, install the recommended libraries and try compiling again:
sudo apt-get install g++ freeglut3-dev build-essential libx11-dev libxmu-dev libxi-dev libglu1-mesa libglu1-mesa-dev
If after compiling particles it gives an error, run this command to test (done on Ubuntu 20):
Obtained from: https://forums.developer.nvidia.com/t/running-sample-gives-code-999-cudaerrorunknown-how-can-this-be-solved/128947
__NV_PRIME_RENDER_OFFLOAD=1 __GLX_VENDOR_LIBRARY_NAME=nvidia ./particles
If the error persists, execute:
sudo gedit /etc/environment
And add the following path to the $PATH variable (be careful not to erase other paths, just add the following at the end):
/usr/local/cuda-11.0/bin
Go to NVIDIA CuDNN, and click on Download CuDNN. On the next page, create an account or log in if you already have one.
On the CuDNN Download page, check the box I Agree To the Terms of the cuDNN Software License Agreement and at the bottom of the page click on Download cuDNN v8.2.1 (June 7th, 2021), for CUDA 11.x and download the following files:
- cuDNN Runtime Library for Ubuntu20.04 x86_64 (Deb)
- cuDNN Developer Library for Ubuntu20.04 x86_64 (Deb)
- cuDNN Code Samples and User Guide for Ubuntu20.04 x86_64 (Deb)
Open the terminal in the Downloads folder and install the three packages:
cd ~/Downloads
sudo dpkg -i libcudnn8_8.2.1.32-1+cuda11.3_amd64.deb
sudo dpkg -i libcudnn8-dev_8.2.1.32-1+cuda11.3_amd64.deb
sudo dpkg -i libcudnn8-samples_8.2.1.32-1+cuda11.3_amd64.deb
To test:
cp -r /usr/src/cudnn_samples_v8/ $HOME
cd ~/cudnn_samples_v8/mnistCUDNN/
make clean && make
./mnistCUDNN
If any of the following errors occur:
test.c:1:10: fatal error: FreeImage.h: No such file or directory
    1 | #include "FreeImage.h"
      |          ^~~~~~~~~~~~~
compilation terminated.
Do:
sudo apt-get install -y libfreeimage-dev
error while loading shared libraries: libcudart.so.9.0: cannot open shared object file: No such file or directory
Do:
export LD_LIBRARY_PATH=$LD_LIBRARY_PATH:/usr/local/cuda/lib64
Install other dependencies:
sudo apt-get install libcupti-dev
echo 'export LD_LIBRARY_PATH=/usr/local/cuda/extras/CUPTI/lib64:$LD_LIBRARY_PATH' >> ~/.bashrc
sudo apt-get install openjdk-11-jdk
sudo apt install curl gnupg
curl https://bazel.build/bazel-release.pub.gpg | sudo apt-key add -
echo "deb [arch=amd64] https://storage.googleapis.com/bazel-apt stable jdk1.8" | sudo tee /etc/apt/sources.list.d/bazel.list
sudo apt update && sudo apt install bazel
This problem has so far only occurred with laptops using Ubuntu 20.04 LTS, usually happening when the external monitor is selected as the only display. The following steps were used to resolve this problem:


NOTE: If the NVIDIA (Performance Mode) option is already checked:
- Switch to the other available option, in the reference image use the option NVIDIA on-Demand;
- Exit the app and restart the computer;
- After the computer reboots, repeat the steps by changing to the NVIDIA (Performance Mode) option and restart the computer again.