NucleiLite Mod Menu - KimonoBoy/SHVDNTutorial-NucleiLite GitHub Wiki
We have developed several functional scripts. However, it would be beneficial to create a user-friendly menu that could activate these scripts, eliminating the need for the user to recall each script's hotkey and function. This centralization would enhance the user experience.
In this section we'll cover the concepts of an IDE (Integrated Development Environment) and how we can use the free and open-source menu-library, for ScriptHookVDotNet, named LemonUI to create menus for our mod
Visual Studio Community Edition
Download
You can download the free version of Visual Studio - Visual Studio Community Edition here Visual Studio Community
Note: Microsoft sometimes changes their download-page, if the link above is broken, Google the follwoing 'Visual Studio Community Download' and find the correct download-url.
Installation
-
Run the Visual Studio Installer you've just downloaded.
-
In the Available tab find Visual Studio Community and select Install.
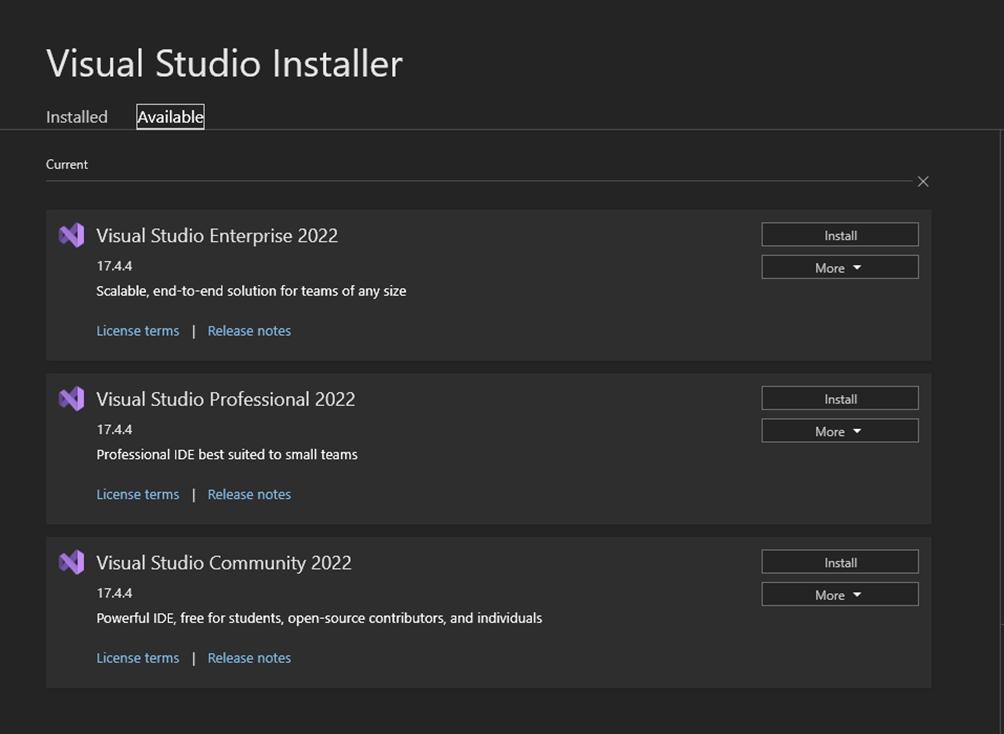
- A new window appears, under the Workloads section find .NET Desktop Development and select it. You can unselect any of the other Workloads if some are selected. Then Install

- IMPORTANT!: While installing Visual Studio, go grab some coffee or some snacks.
Your Visual Studio Community Edition should now be installed correctly.
Creating a new Project
In Visual Studio we create Projects rather than singular .cs files. These Projects contains information about our own .cs classes as well as any Libraries associated with them (e.g. ScriptHookVDotNet, System.Windows.Forms and LemonUI). Follow the procedure below to create a new Project
-
Once installed, open Visual Studio and select Create a new project
-
A huge list of different templates to base your project on is now available. To narrow it down select C# from the Languages dropdown, Windows from the Platforms dropdown and Library from the Project Types dropdown(see image in next step, you can also search for the library)
-
Select the template Class Library (.NET Framework) and hit Next
Note: Ensure that you've selected the correct Class Library the one with the .NET Framework extension!

- Give the Project a name, select a location(select a location that is easy for you to find), select the .NET Framework that was installed previously in the Requirements section (in my case .NET Framework 4.8) and hit Create

- Once created you should be taken to Class1

Adding a Reference (System.Windows.Forms)
- Right-Click References in the Solution Explorer under your Project (NucleiLite)

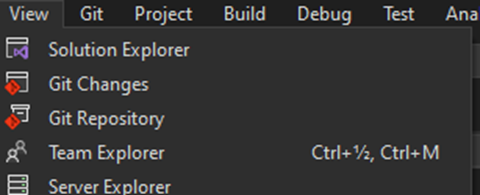
Note: If you accidentally closed your Solution Explorer you can open it again by going to View > Solution Explorer
-
Click Add Reference...
-
Under Assemblies click the Search Bar and search for System.Windows.Forms and check it and hit OK
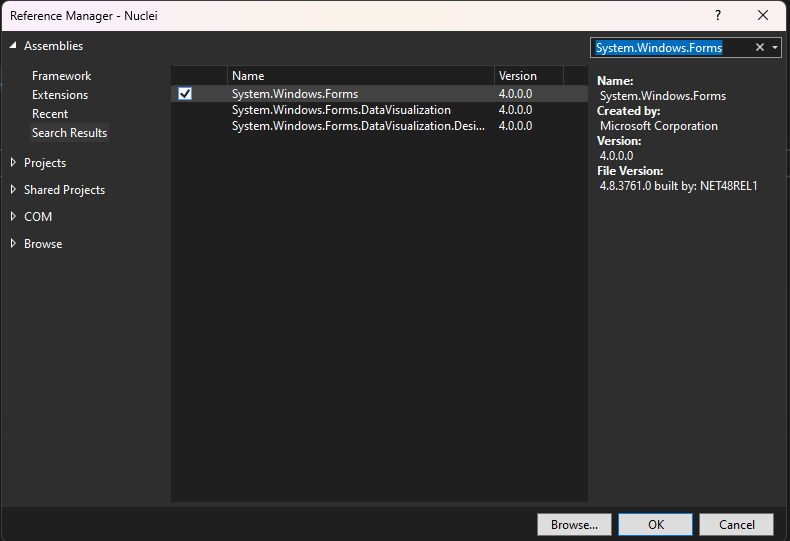
You've now successfully added System.Windows.Forms to your References
NuGet - Package Manager
We can absolutely go ahead and download the different libraries required to work with GTA V directly from GitHub or w/e release page available, but Visual Studio has a built-in feature called NuGet - Package Manager this is an online collection of the latest release libraries, so we'll be using this instead, it's much easier to maintain and update.
Integrating ScriptHookVDotNet
- Select Tools -> NuGet Package Manager -> Manage NuGet Packages for Solution...
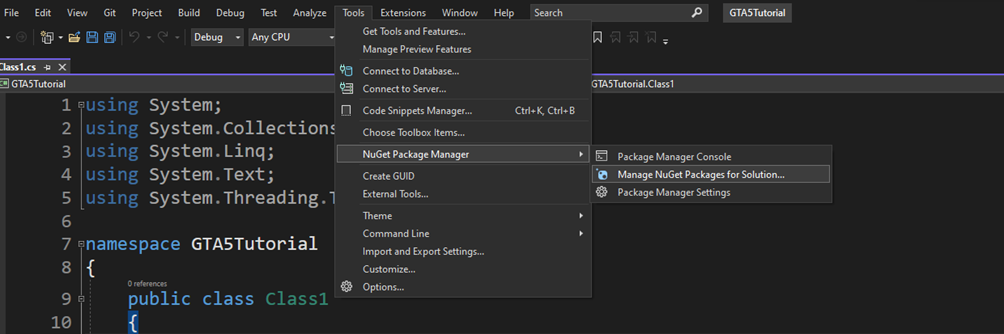
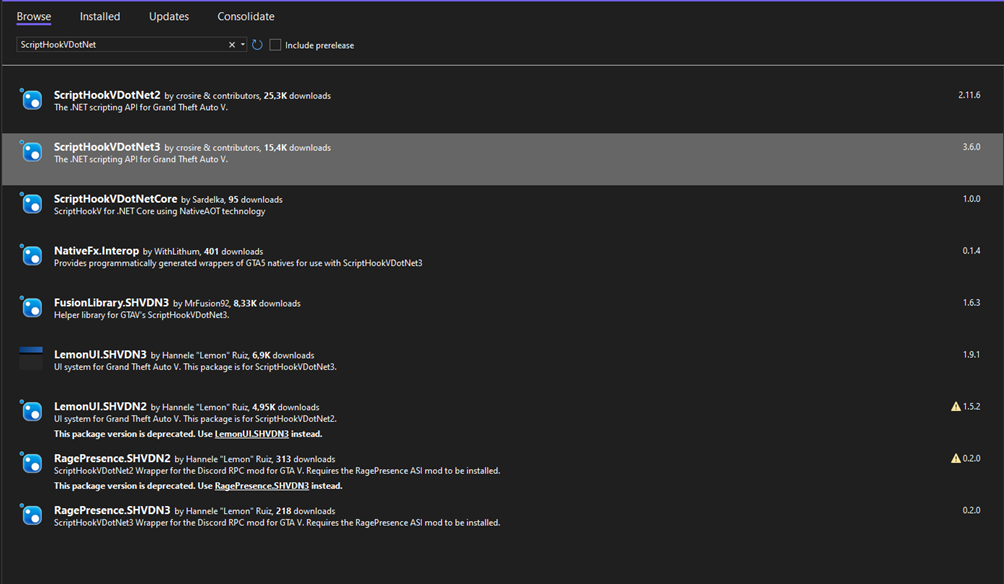
- In the Browse section, Search for ScriptHookVDotNet and select ScriptHookVDotNet3 or whatever version is the latest available to you.
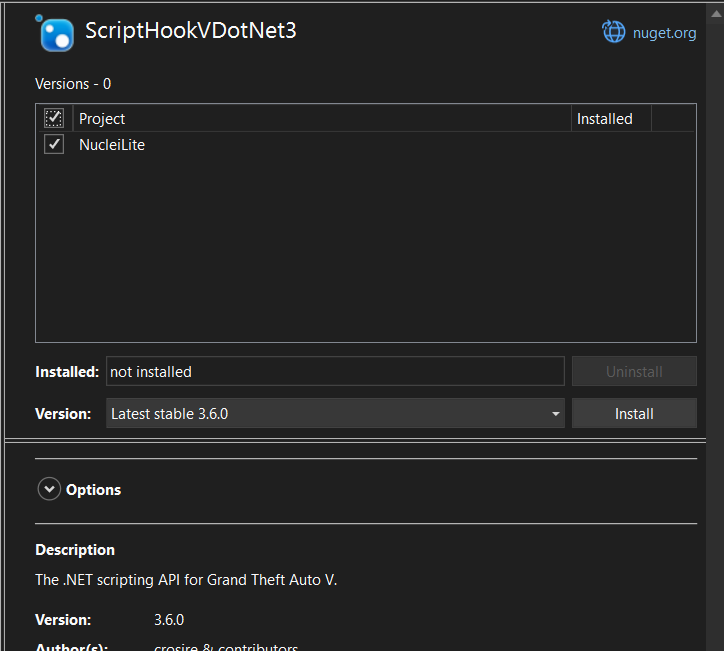
- A new window will appear to the right, select your projects name, in my case I've called my mod NucleiLite, then hit Install
Note: Click OK and Accept to the pop-up windows about making changes to Visual Studio if they appear.
- Close the NuGet - Solution tab
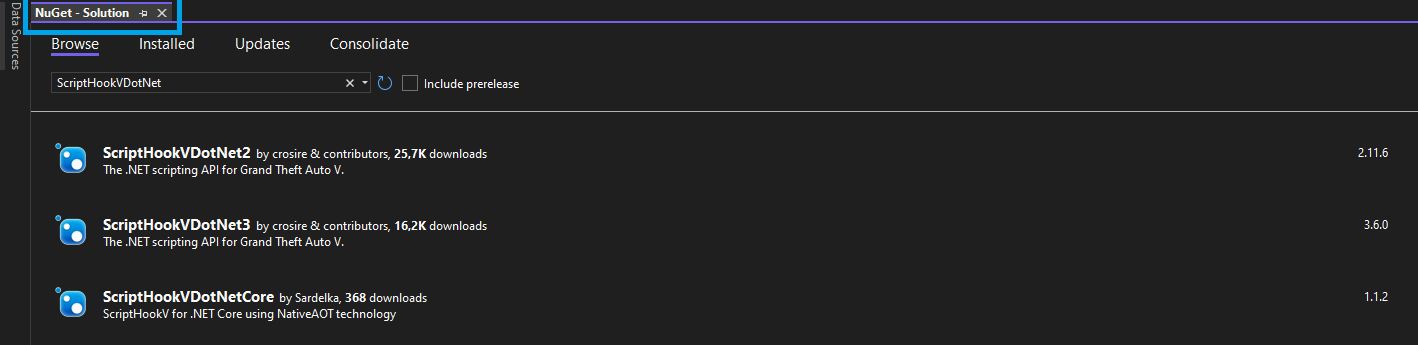
- In your Solution Explorer under your Project (NucleiLite in my case) to the right, click References and make sure that ScriptHookVDotNet3 is now part of your references

Note: If you accidentally closed your Solution Explorer you can open it again by going to View > Solution Explorer
Integrating LemonUI
Just like we did ScriptHookVDotNet, the LemonUI-framework is available through NuGet as well!
- Open the NuGet - Package Manager again - Tools -> NuGet Package Manager -> Manage NuGet Packages for Solution...
- Under the Browse tab Search for LemonUI
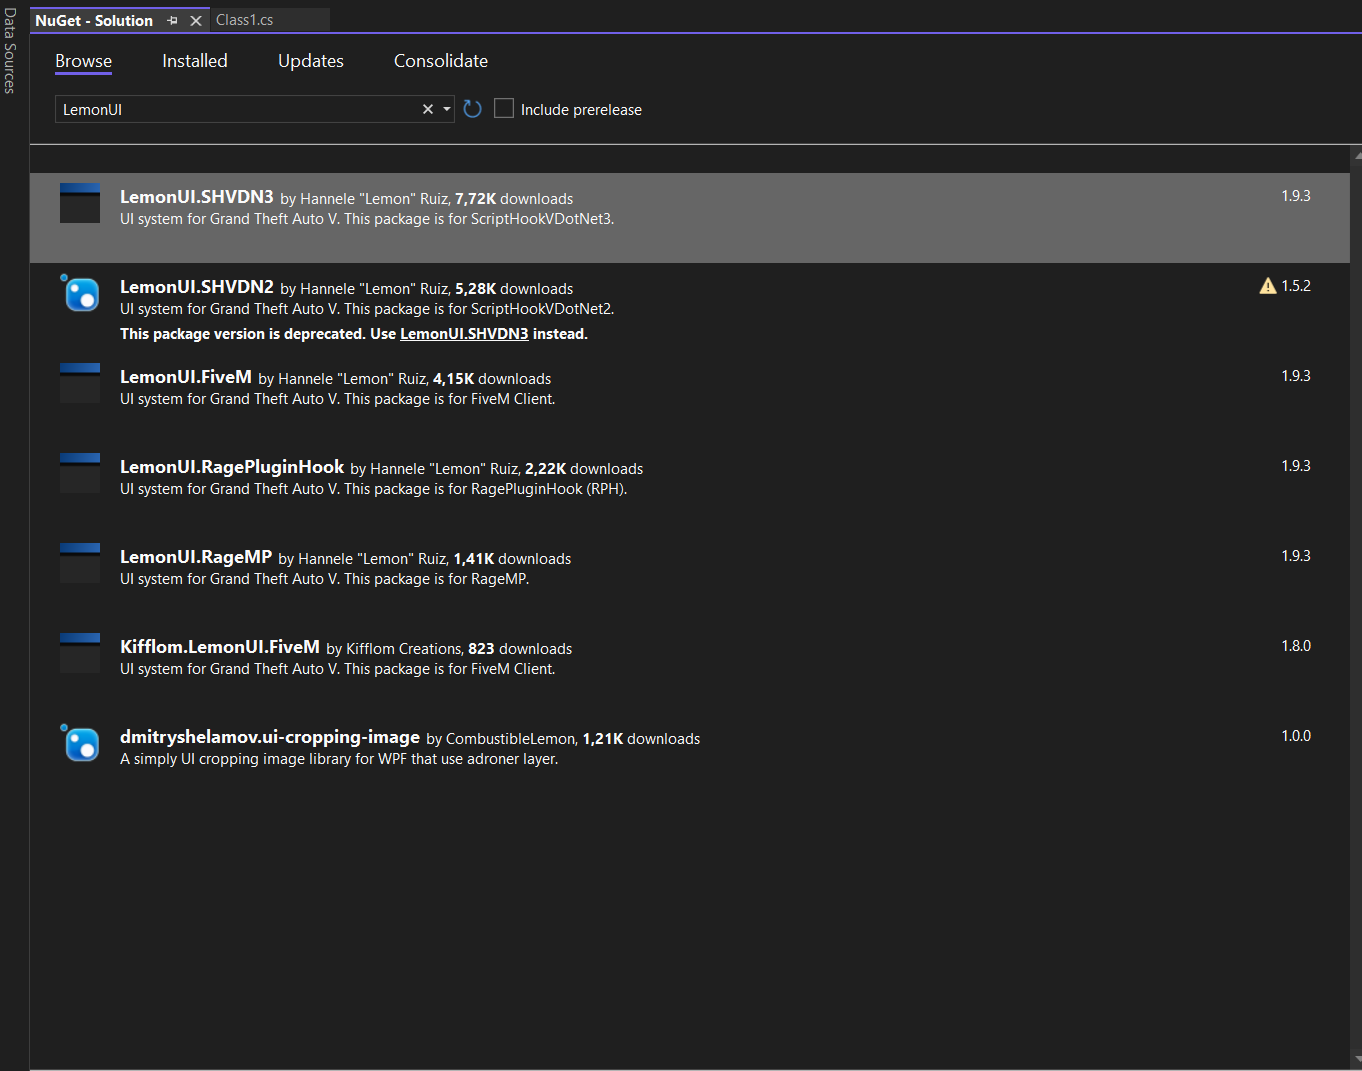
- Select the LemonUI.SHVDN3-package and Select your Project and hit Install to the right
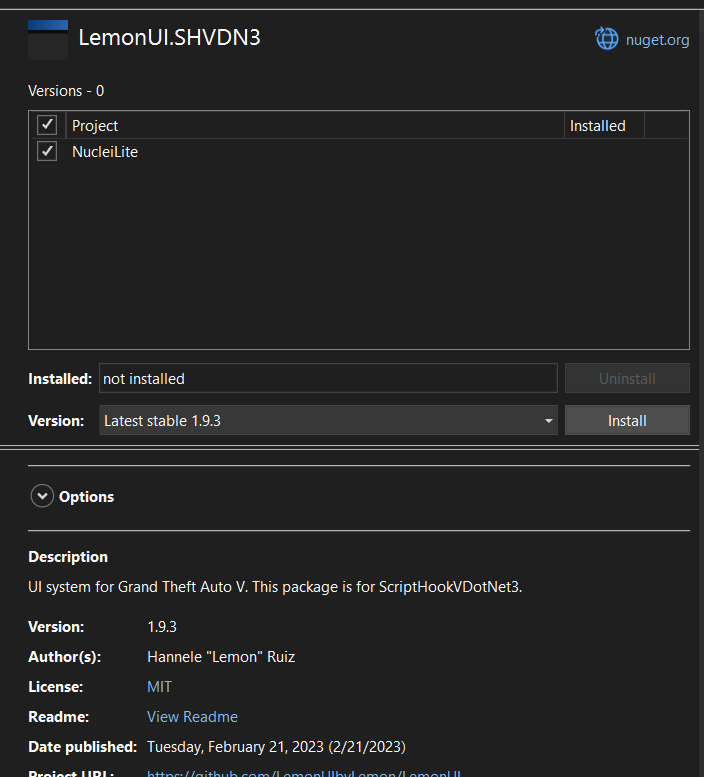
- Ensure that LemonUI.SHVDN3 is added to your References

Deleting a File from your Project
- In your Solution Explorer - Delete the Class1.cs file by Right-Clicking the file -> Delete or Select the file and hit Del-key

Note: If you accidentally closed your Solution Explorer you can open it again by going to View > Solution Explorer
Adding a new File to your Project
- In your Solution Explorer - Right-Click your Project (in my case NucleiLite) and select Add -> New Item...

Note: If you accidentally closed your Solution Explorer you can open it again by going to View > Solution Explorer
- In the Window that appears - Select the Class-item, give it a name (in my case Main.cs) and click Add

Note: You can name it whatever you like, I like to name my entry points of an application Main, hinting that this is the root
- You should now see the following

Our First .dll-compiled Script
Let's create a simple compiled .dll script that displays the following Hello Compiled Script
-
Open your newly created file (in my case Main.cs).
-
Copy and Paste the following
using System.Windows.Forms;
using GTA;
using GTA.UI;

namespace NucleiLite
{
    public class Main : Script
    {
        public Main()
        {
            KeyDown += OnKeyDown;
        }

        private void OnKeyDown(object sender, KeyEventArgs e)
        {
            if (e.KeyCode == Keys.T) Notification.Show("Hello Compiled Script!");
        }
    }
}
Compiling a Script by Building it
Every time we make changes to our code and we want to update the game with the new Script, we'll have to build it.
- Click Build -> Build Solution (or hit CTRL + SHIFT + B)

Locating a Compiled Script
- Right-Click your Project (NucleiLite) -> Open Folder in File Explorer

- Go to the bin -> debug and your path should look something like the following:
C:\Users\username\Desktop\GTA V Mod Tutorials\NucleiLite\bin\Debug
Testing the Compiled Script
-
Copy all the files from the \bin\Debug-folder
-
Navigate to your scripts folder inside your Grand Theft Auto V folder
Note: if scripts does not already exist, create a new folder named scripts
-
Paste the copied files to your scripts folder
-
Reload() the scripts through the Console_
Note: _You can see how to Reload() scripts in this section Reloading Scripts
- Hit T and you should see the following

Visual Studio Tips and Tricks
In this section we'll cover a few things in Visual Studio that can increase our productivity and make our life much easier.
Post-Build Events
Once you've builded your script the first time and copied all files from your Debug folder over to your scripts folder, you can set-up something called Post-Build Events. Post-Build Events are something that happens after a project is successfully compiled - what we'll use this for is to Copy our .dll file to our scripts folder automatically
Note: Instead of building your script and copying the files over, you can also download the LemonUI.SHVDN3.dll directly and place it in your scripts folder manually. You can download it here LemonUI or visit the GitHub page and download it from here GitHub - LemonUI
- Right-Click your Project in Visual Studio and select Properties

-
A new Window appears - Select the tab Build Events (see image in next step)
-
In the Post-Build Events-section Paste in the following
COPY "$(TargetPath)" "C:\Program Files (x86)\Steam\steamapps\common\Grand Theft Auto V\scripts"
Note: Change the path in the second double-quotes to the path of your scripts folder
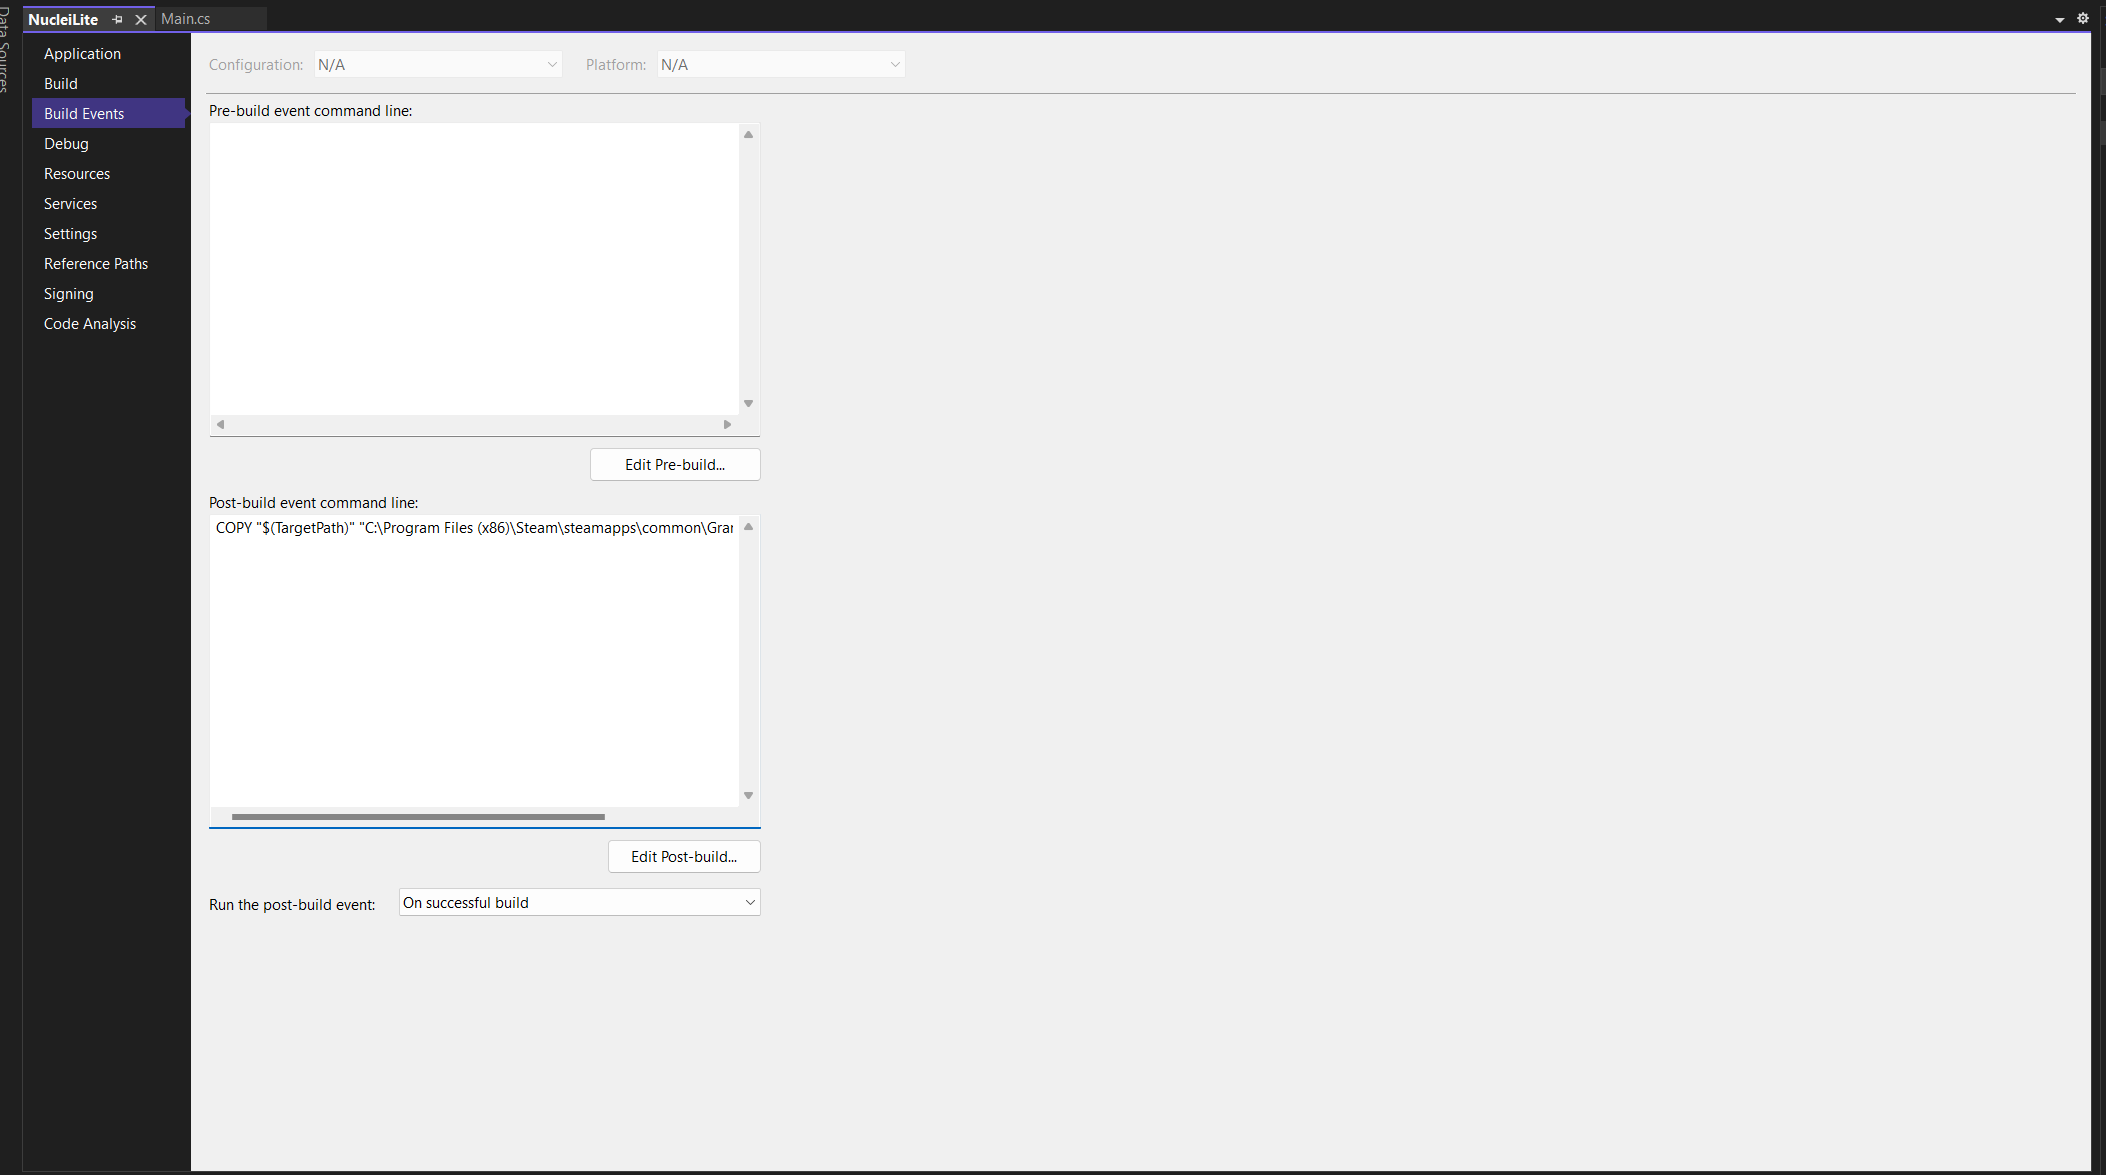
- Save the file (CTRL + S)
Now whenever you successfully Build your Project a copy of the compiled .dll-script is automatically added to your scripts folder.
Features
Here are some of the cool features of Visual Studio - I'll update this section from time to time
Quick Actions and Refactorings Icon (light-bulp)
Errors (red squiggly lines)
Let's first have a look at how we can fix or correct current issues/errors

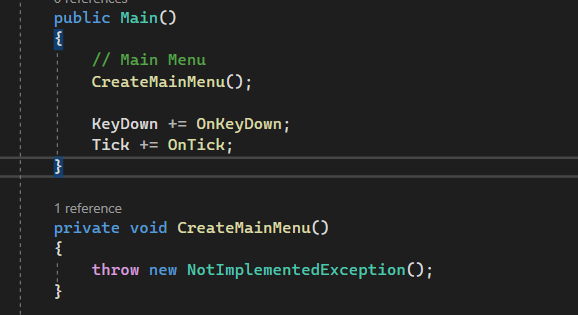
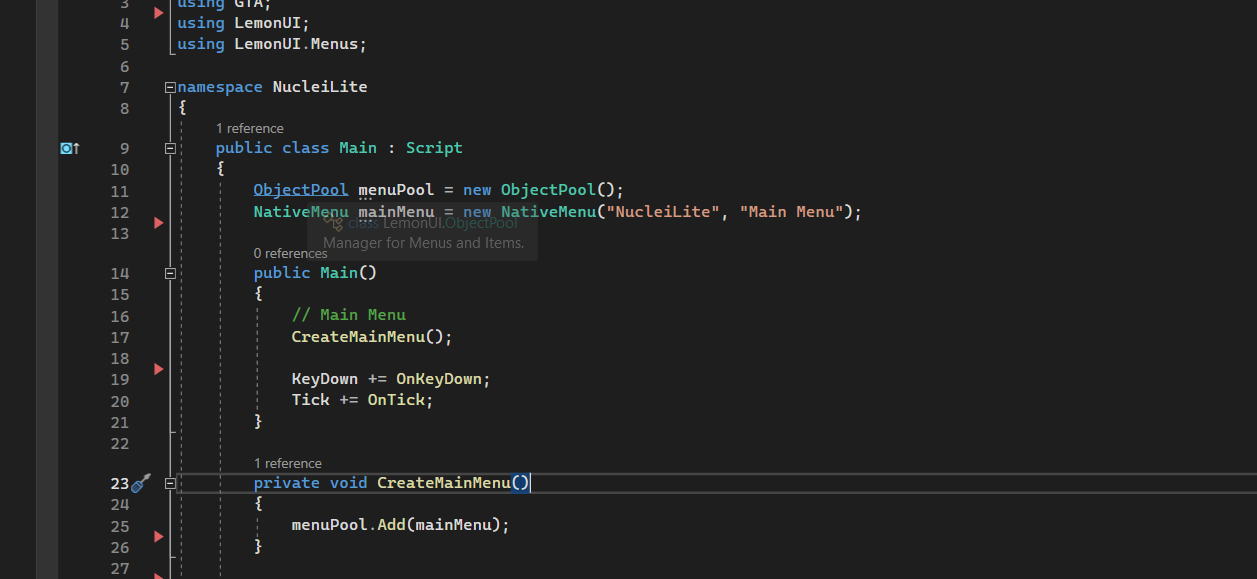
Notice the red squiggly-line underneath the CreateMainMenu() method inside our constructor, to fix this issue
- Hover your mouse over the part of the code where the red squiggly-line is - you'll see the following error
CS0103 The name 'CreateMainMenu' does not exist in the current context
- Wait for an icon (light bulb) to appear
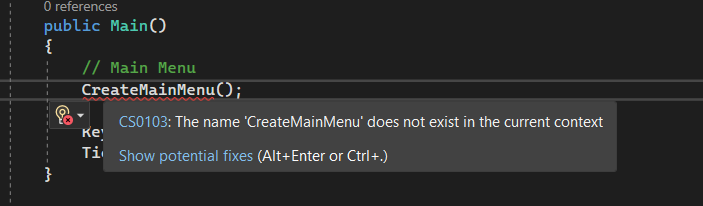
- Click the icon and a new Window appears with ideas for potential fixes
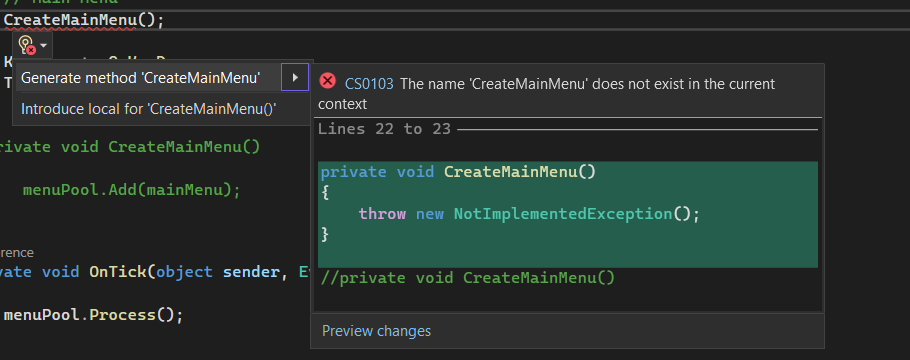
Note: Notice how the suggestion even shows what changes will be made to our code.
- In our case, the first suggestion seems good enough - Select the Generate method 'CreateMainMenu'
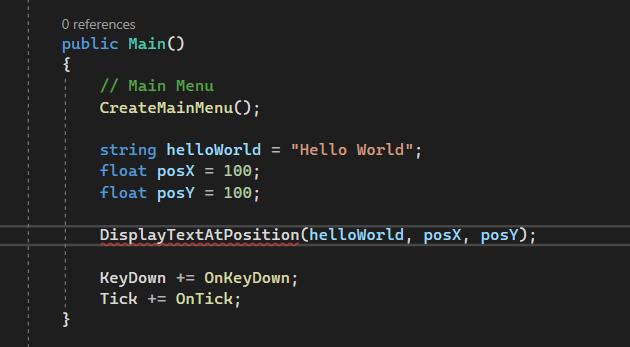
Let's try again, this time with parameters have a look at the below image
- Once again Hover the red squiggly line and click the light-bulp icon
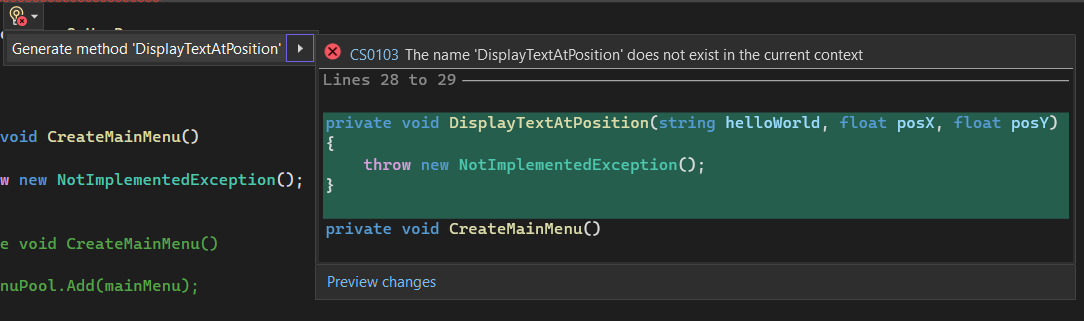
- Select the suggestions

Note: You should change the first parameter helloWorld to something meaningful like message
Let's try something different
Notice the red squiggly line beneath the ObjectPool - this time instead of hovering and selecting the icon we'll use the CTRL + . hotkey.
- Place your carret at the "word" with the red squiggly line underneath

- Hit CTRL + .

- Oh, so we're missing a using-directive - hit Enter
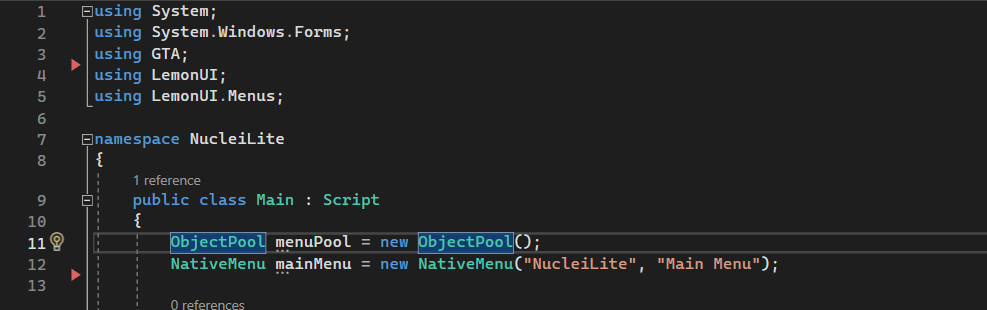
Use this feature to your advantage, once you master it, you'll love it!
Documentation
When working with third-party libraries, sometimes no documentation can be found, but hopefully (and luckily in our case) LemonUI and ScriptHookVDotNet is decently documented in code - we can decompile the different object types (like classes) and view their content
Go to Definition
- Hold down CTRL and move your cursor over an object type and the content should now become like a hyperlink
- Click the hyperlink and you should be taken to a decompiled version where you can read the code
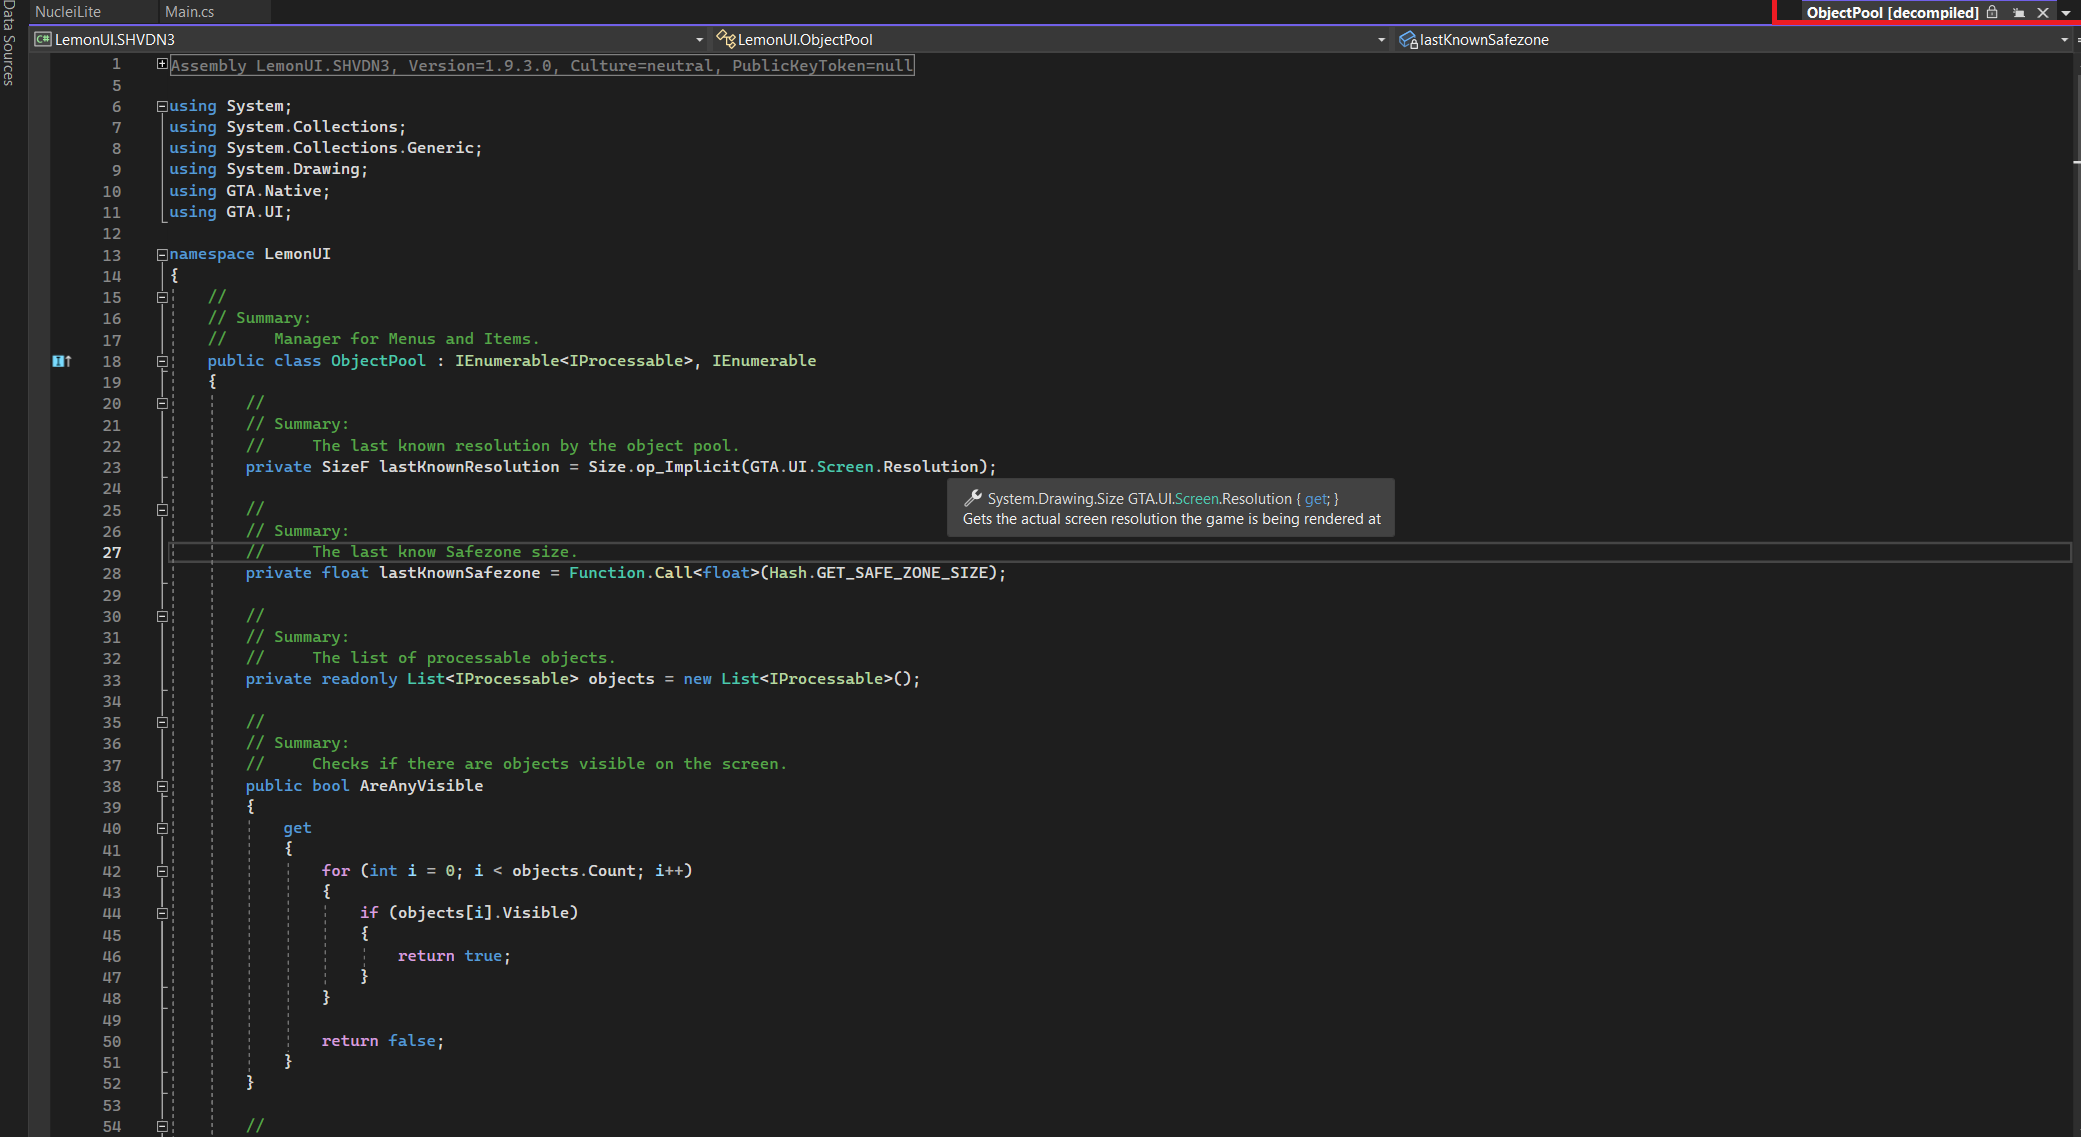
Here you can learn about each object and their methods and properties
Object Browser
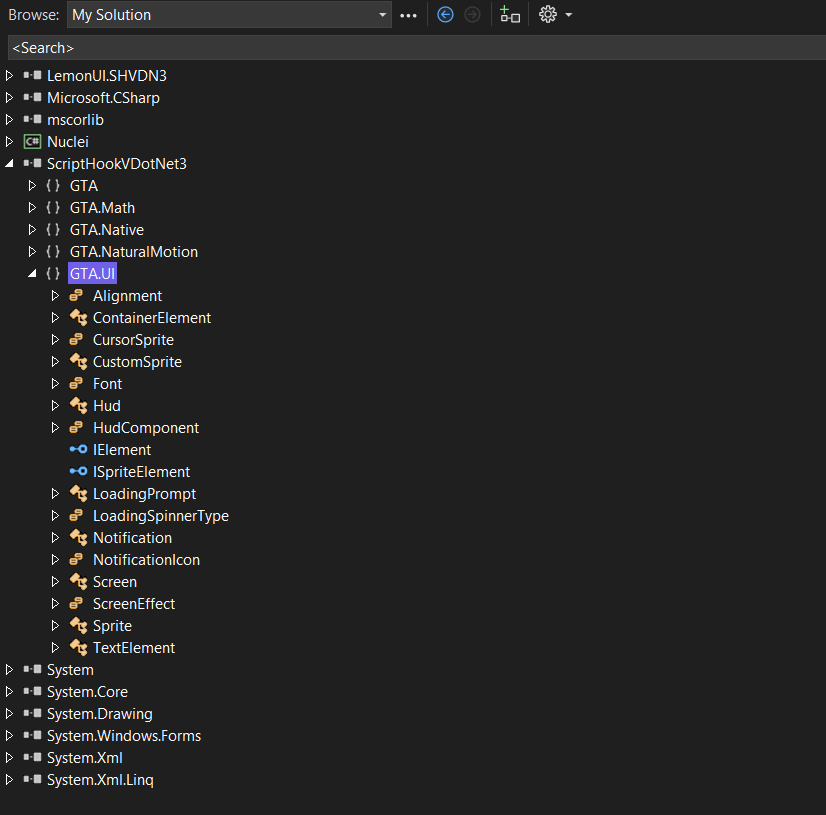
Some find it easier to view the libraries and their behavior in the Object Browser-window, the Object Browser gives you a full insight in what the Library does
- In your Solution Explorer - References -> Double-Click The Library to Inspect
- An Object Browser appears to the left - Select the Library and then you can browse each object

The Object Browser consists of three Windows
Left Window
This is where you select the library you wish to browse, opening the library gives access to the namespaces and the namespaces defines all of the different classes/structs/records/enums/interfaces/etc
Upper Right Window
When you've selected an object in the library window to the left, all of its related methods/properties/events/etc becomes available in the Upper Right Window
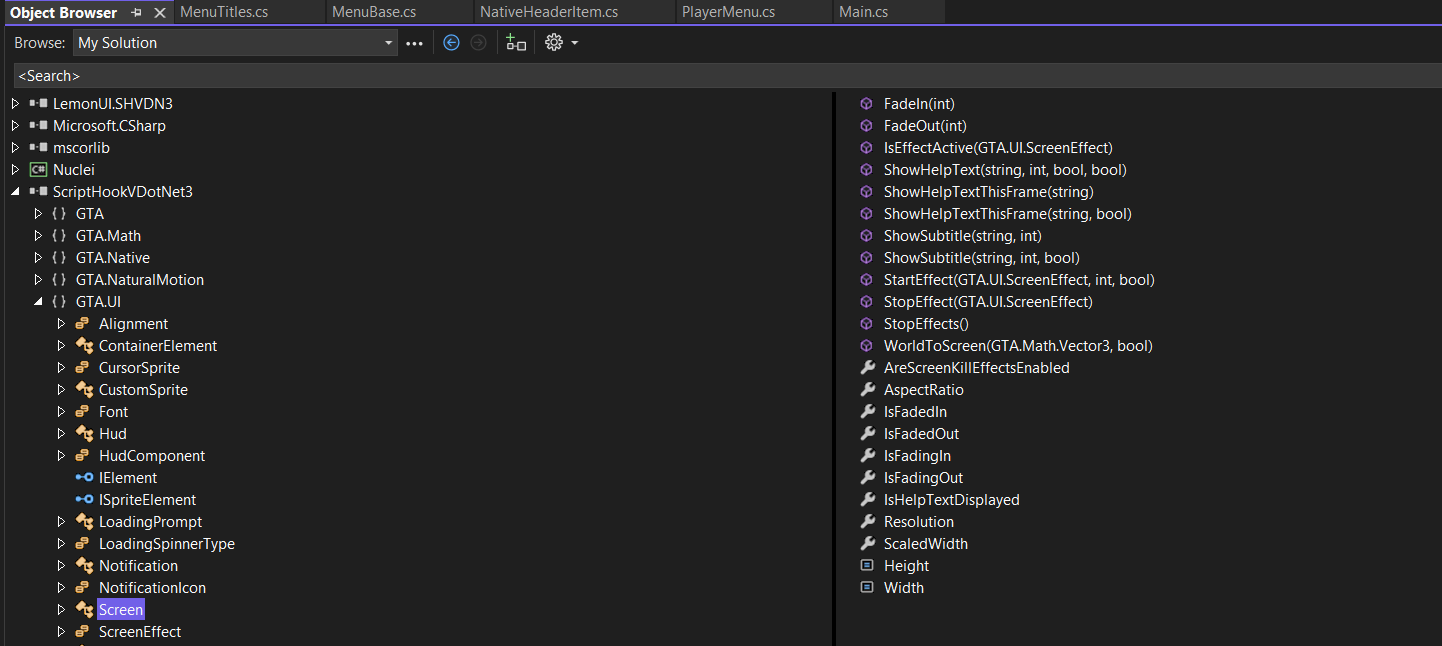
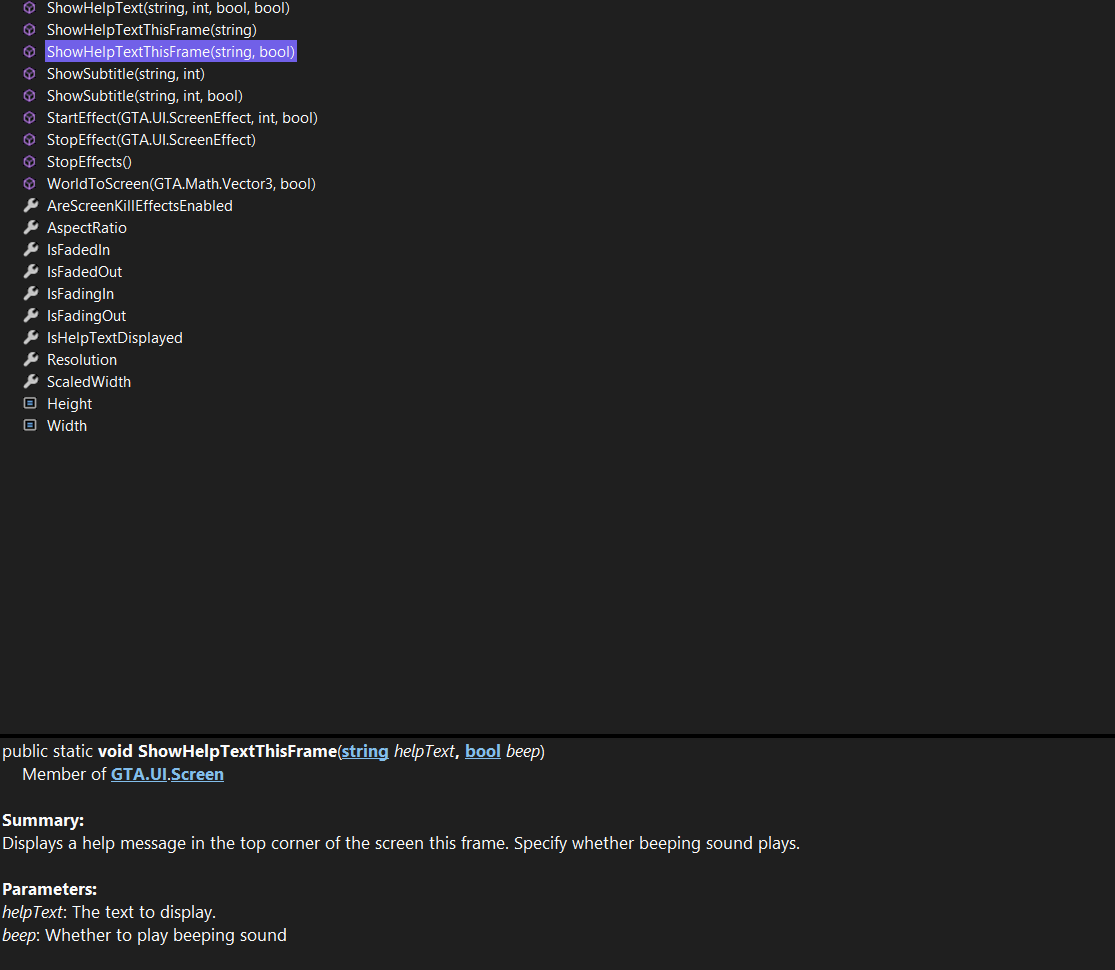
Bottom Right Window
Select any of the members inside the Upper Right Window and it's full documentation for that specific member becomes available in the Bottom Right Window
IntelliCode
IntelliSense suggests members and methods of a particular class or object as you type, along with their parameters and brief descriptions. This can help you write code faster and reduce errors by preventing you from having to remember exact syntax or spelling.
To access IntelliSense in Visual Studio, you can start typing a method name or object and a list of possible members or methods will be displayed in a dropdown list. You can then select the desired member or method from the list, and Visual Studio will automatically complete the code for you, including any required parameters.
IntelliSense is a powerful tool for developers that can save a lot of time and help ensure that code is written correctly.
See the Examples below
Code Completion
In the below image i've added three menus to our menuPool as I enter a new line, Visual Studio knows that I have four menus and since I've added the other three it automatically suggests to add the fourth
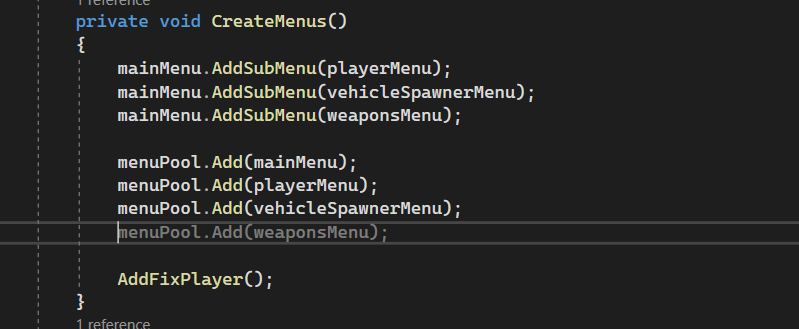
Use the Tab on your KeyBoard to insert the entire line of code.
Code Suggestions
As you begin to type in Visual Studio, the IDE will pop-up a small menu with available methods, classes, w/e you might need see the example below

Here you can see all the valid methods associated with that object - in this case all the valid methods, properties, events, etc associated with the ObjectPool class
You can specify what type you're looking for, e.g. does the lightning-bolt represent events - if you select it, all the valid events of that object is displayed

You can also see information about each subject - what it returns, what parameter it expects, what it does, etc
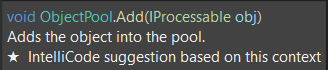
By clicking the up and down arrow you can specify which overloaded method you wish to use


Note: You don't have to specify which constructor you're using, C# will look for the constructor where your input matches its specification. So if you're typing new NativeItem("Hello World", "A Hello World Item"); the compiler automatically knows that you're refering to the constructor that takes two arguments / parameters / inputs
You'll even see what parameter (input) you're currently working on
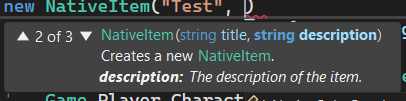
If you're using something that does not have a Documentation-implementation, you can still get a hint from the parameter as to what input is expected

The above takes a string message, a float posX and float posY, probably indicating where on the screen to display this message.
Previous - Give All Weapons Script
Next - Introduction to LemonUI