Create new character - Kagamma/satania-buddy GitHub Wiki
You can create your own character in satania-buddy.
Characters are defined by directories of the same name in data/scripts and data/sprites, which can be switched in Settings. To help you start, a simple template character is available for you to play with. It’s contents looks like this:
scripts
  template
    menu
      A Simple Menu.evil
    system
      loading-start.evil
      loading-stop.evil
      drop-files.evil
    services
      chatgpt.evil
      oobabooga.evil
      koboldcpp.evil
    main.evil
    meta.json
sprites
  template
    sprites.plist
    sprites.png
    avatar.png
-
main.evilis the main script. It will be executed when your character is loaded, and when your character finish executing another script. -
meta.jsonis optional, it is mainly used to set up character’s name, and other configurations needed to access within scripts. A basicmeta.jsonlooks like:
{
  "name": "You character's name. This can be accessed in script via charname constant"
}
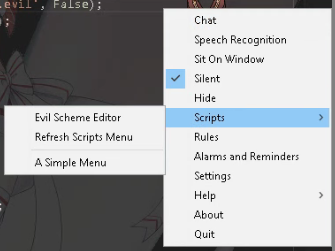
Any .evil scripts in menu directory will appears on Scripts menu. For example this is how A Simple Menu.evil looks like:
Any scripts in system is used by the app. Currently the app expects:
-
loading-start.evilfor loading animation -
loading-stop.evilto tell your character to stop loading animation when the app finish a task. -
drop-files.eviltriggers when users drag files onto the character’s touch panel. Files is stored indrop_filesconstant.
These scripts are optional and no need for the app to work.
Any scripts in services will be shown on chat window’s service dropdown. The purpose of service script is to handle chat messages, often by sending them to another 3rd party backends like ChatGPT or koboldcpp. These scripts are completely optional.
sprites.plist and sprites.png are character’s spritesheet in Cocos2D format.
avatar.png is character’s avatar, used by the WebUI version of chat window.
satania-buddy uses Castle Game Engine (CGE) as rendering engine, thus it can use all CGE’s supported formats. In particular you can:
- Use any supported 3D model formats:
glTF,X3D,VRML, … - Use any supported 2D skeletal formats:
Spine JSON - Use any supported 2D spritesheet formats:
Cocos2D,Starling
There’re however a few limitations that you need to aware when choosing a format:
- CGE doesn’t support GPU skinning, so high-poly 3D models are not recommended at the moment, although it is planned to add support for GPU skinning in near future: https://forum.castle-engine.io/t/joint-bone-controlled-mesh-animation/546/2
- 2D spritesheets, while simple to use, lack the ability to perform multiple animations at once. For example if you want your character keeps talking while blinking their eyes, then you will need to implement a lot of frames for this, instead of 2 separate animations, one for eyes blinking, and one for talking.
- 2D skeletal is the recommended way to create characters for
satania-buddy. This is how I createdsatania, although the downside is thatSpineis not free. You can also tryDragon Bones, which is a free alternative to Spine and can export data in Spine JSON format. Since CGE has it’s own Spine runtime implementation, there are limitations compare to official Spine runtime, see https://castle-engine.io/spine (Update:satania-buddynow come with it’s own official spine runtime 4.2 integration, so if you use Spine 4.2 or above to create models, then CGE’s limitations will not apply.Dragon Bonesstill works, but you need to use CGE’sview3dsceneto convert your model from .json to .x3d/x3dv in order to use withsatania-buddy)
For each spritesheet/model, satania-buddy expects 2 default animations:
-
talk_loopis used when character is talking. -
talk_finishis used when character is done talking. This is usually used to set the lips close in skeletal models.
You can of course change these default talking animations via script, see sprite_animation_talk_set in Scripting Reference
If you use 3D / 2D skeletal model formats, then you can create a touch bone. This bone is used by the app to create a small area which you can use your mouse cursor to right click, or to drag your character around, or to drop files onto character to be handled by drop-files.evil script. If no touch bone is found (2D spritesheets), then the area will be around your character’s pivot.