Database Management in Mendix - Jonaath/EmergingTechnologiesMendix GitHub Wiki
Database Management in Mendix
Overview
Mendix has a clear and robust visual data modeling environment that simplifies the process of building and manage databases. Entities and relationships can be quickly designed and established, and the management of data persistence is effortless. Mendix automatically generates and updates database schemas based on the domain model. This ensures easy integration between the application and the database.
Database Features
- Domain Model Editor – A visual interface for designing data structures.
- Entity Relationships – Supports one-to-one, one-to-many, and many-to-many associations, while allowing multiple associations between entities for more complex structures.
- Built-in Security – Role-based access control (RBAC) at the entity level:

- Database Versioning – Safeguards data during schema updates.
Supported Databases
Multiple databases are supported in Mendix, allowing flexibility based on preferences, requirements, and application's scaling.
- Internal Mendix Database
- Enterprise (External) Databases:
- Oracle
- Microsoft SQL Server
- MySQL/MariaDB
- SAP HANA
- PostgreSQL
To Configure an external database in Mendix, go to App Explorer → App → Settings. Then edit the default configuration and select the desired database.
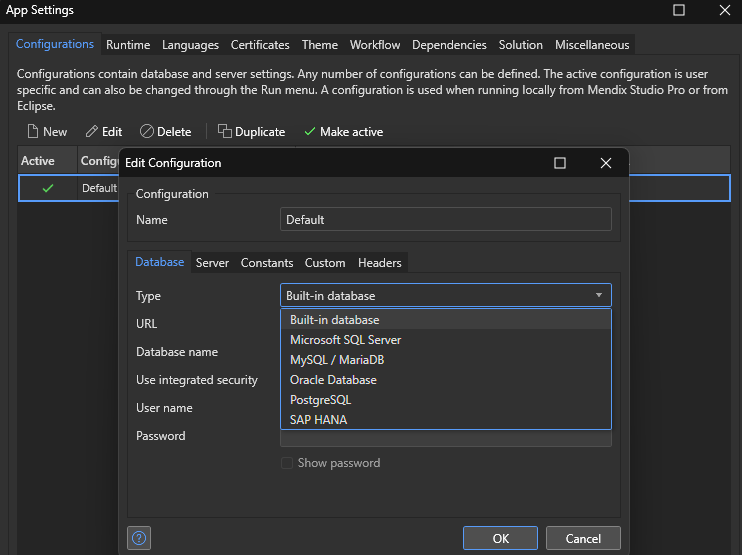
For external databases, Mendix requires connection details, including hostname, port, username, and password.
When the configuration is done, Mendix will handle the communication between the app and the database, including schema creation, migration(s), while preserving existing data. A separate versioning system for the database ensures safe schema updates.
Domain Model Implementation
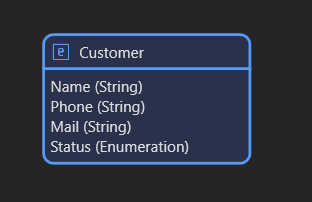
1. Entities and Attributes
Entities in Mendix represent database tables, and each entity contains attributes that define its structure.
SQL tables are automatically generated based on the definitions.
2. Entity Relationships (Associations)
Entities can be connected with associations to define how data interrelates:
- One-to-One (1:1)
- One-to-Many (1:M)
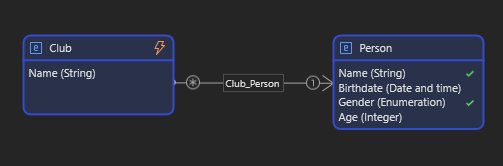
- Many-to-Many (M:M)
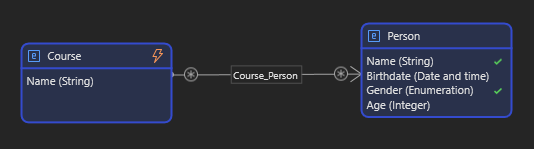
Associations can also be bidirectional or unidirectional depending on the data flow.
3. Persistence and Data Storage
Mendix allows defining persistence (at the entity level):
- Persistable Entities – Stored in the database permanently (displayed in blue).
- Non-Persistable Entities – Used for temporary or session-based data (displayed in orange).
To configure Persistence, open the Domain Model Editor. Then, select an entity → Enable or disable "Persistable".

4. Data Constraints
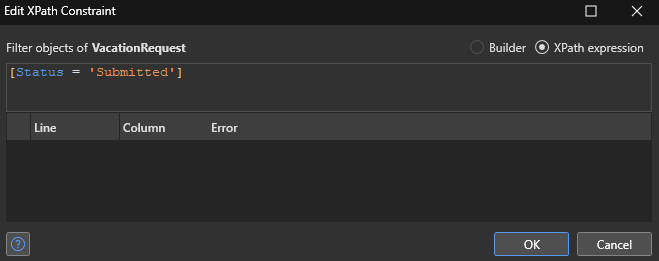
Mendix allows constrain of data with XPath queries, using entities, attributes, associations, and variables. There are multiple ways to add constraints to data. The easiest one is to edit the Data source of a widget directly from the view.
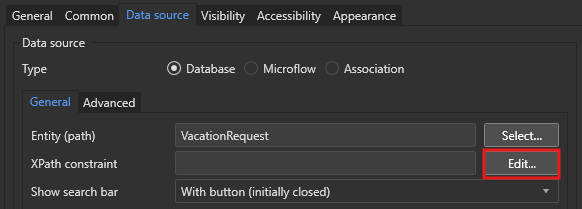
Here, we can either use the builder or write our request directly in XPath.

To simplify queries, Mendix offers a completion system by entering Ctrl + Space.
All Mendix XPath Keywords and System Variables are available here.
Implementation Process in Mendix
Step 1: Define Entities
- Open Domain Model Editor.
- Create entities (e.g. Client, Order, Product).
Step 2: Add Attributes
- Assign data types:
Text,Number,Date,Enumeration, etc. - Apply constraints (e.g. mandatory fields or default values).
Step 3: Establish Relationships
- Use associations to link entities.
- Configure cardinality (1:1, 1:M, or M:M).
Step 4: Configure Data Storage
- Set persistence options.
- Enable inheritance where applicable.
Step 5: Implement Business Logic
- Design Microflows to automate data processing.
- Use Event Handlers for actions on Create, Update, and Delete.
Update entities in the Database
We won't go into detail here, as this is more related to the logic/business layer, but here's a simple example of how to change the value of a variable in the database using a microflow:
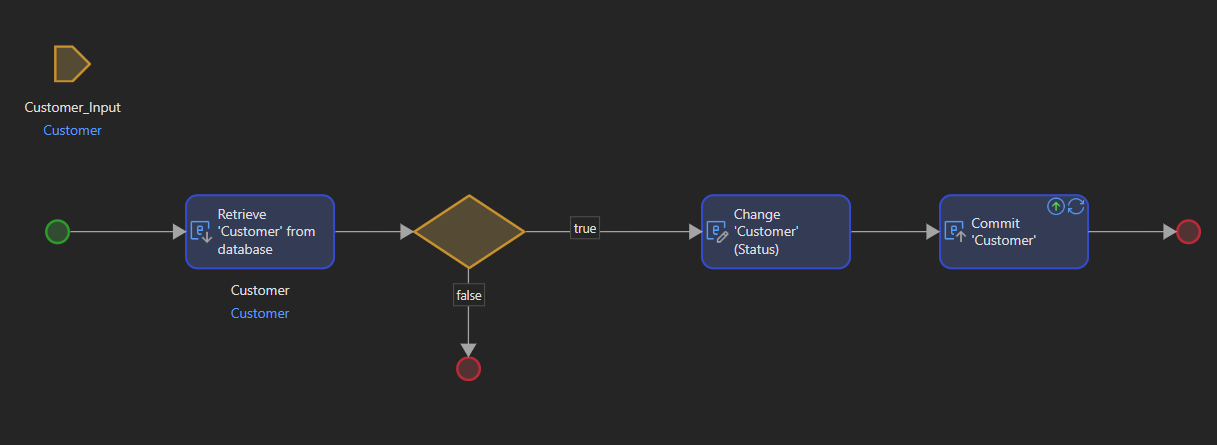
Once the microflow has been created, it can be called up in a number of ways, for example by using a simple button to call up the microflow in a page.
Best Practices when creating domain models in Mendix
- Use Non-Persistable Entities for temporary (or UI-related) data.
- Use role-based security (read and/or write) at the entity level.
- Implement validation rules and event handlers to maintain data integrity.
- Regularly backup the database before major schema changes.
Next page → AI Assistant