Zigbee Debugging SystemView - Jim-tech/IoT-Developer-Boot-Camp GitHub Wiki
Table of Contents
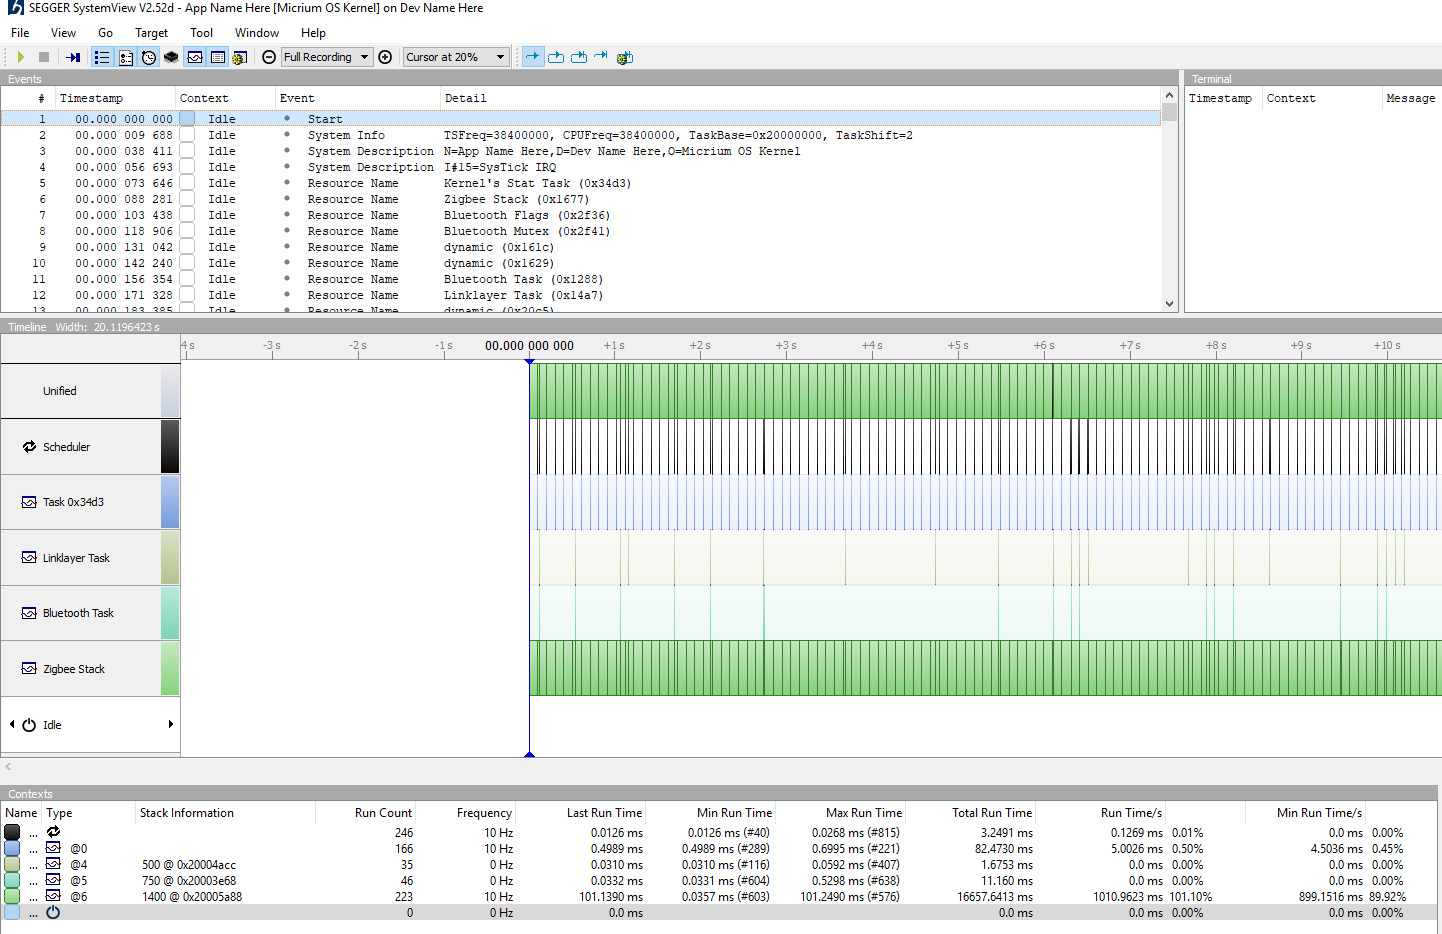
Segger SystemView is a very useful debugging tool, especially in debugging an application with RTOS. We can use it to trace the track of the tasking switching info. Below is a overview.
EmberZnet has provided some DMP (Dynamic Multi-Protocol) sample projects which are based on Micrium OS. When we developing DMP projects, we will need to use SystemView. In this page, we will introduce how to use SystemView in DMP projects.
-
Go to File -> New -> Project, this will bring up the New Project Wizard.
-
Select “Silicon Labs AppBuilder Project”. Click Next.
-
Select “Silicon Labs Zigbee”. Click Next.
-
Select our latest EmberZNet stack for SoC (It's "EmberZNet 6.7.6 GA SoC" when this document is written). Click Next.
-
On the bottom, select “DynamicMultiprotocolLight”. Click Next.
-
Name your project or keep it as is. Click Next.
-
In next window (Project Setup), select board to BRD4162A.
At the time when this document is written, only IAR is supported in Dynamic Multiprotocol sample projects. Please make sure you have installed IAR 8.30.1 or higher version and you need to get a valid license as well.
-
Save and generate your project.
Adding SystemView component to your project can be done by the following steps:
-
Select your project in "Project Explorer", right click and select New -> Folder, click Advanced, choose link to alternate location, then click Browse to select the systemview folder in the SDK (
C:\SiliconLabs\SimplicityStudio\v4\developer\sdks\gecko_sdk_suite\v2.7\util\third_party\segger\systemview), after that, click Finish.
-
There are some conflicted files. We need to resolve these conflicted files. In Project Explorer, find the file debug-basic-library/EFR32/SEGGER_RTT.c. Select this file, right click and select "Properties". In the pop dialog, exclude it from build.

Another conflicted file is systemview/SEGGER/SEGGER_RTT_ASM_ARMv7M.s. Please exlcude it with the approach above.
-
Edit config file of Micrium OS. First find the file in included files, then edit it.

When you see the warning dialog like below, please always choose Make a Copy.

In this step, you need to modify the macro OS_CFG_TRACE_EN from DEF_DISABLED to DEF_ENABLED.
-
Add the path of systemview to the include file path list. Select the project in Project Explorer, right click and select "properties", add the following two directories into the included list.
${StudioSdkPath}/util/third_party/segger/systemview/Sample/MicriumOSKernel
${StudioSdkPath}/util/third_party/segger/systemview/Sample/MicriumOSKernel/Config
-
Build the project and flash it into your device.
-
Press
 in tool bar to start Segger SystemView. Press the icon
  to start.
-
Find the address of the global variable
_SEGGER_RTTin map file, and fill it in the RTT Control Block Field. Open the map file, search the symbol_SEGGER_RTT, you will get the address of theRTT Control Block:_SEGGER_RTT 0x2003'3688 0xa8 Data Gb SEGGER_RTT.o [49]
-
Select OK, then select the J-Link debugger. You will see the task switching trace.

 Home |
 ![]() Zigbee |
Zigbee | ![]() Bluetooth |
Bluetooth | ![]() ZWave |
ZWave | ![]() Proprietary |
Proprietary | ![]() Thread |
Thread | ![]() Matter |
Matter | ![]() Hardware |
Hardware | ![]() Common
Common
All resources of this repository are released under license CC BY-NC-ND 4.0 