Order Entry - JOverseer/joverseer GitHub Wiki
Introduction
JOverseer aims to provide facilities so that players can enter their orders with minimal typing. Typing should be used only when necessary, like when giving the name for a new camp or character.
The tool that facilitates order entry is called the Order Editor. It is located on the bottom right of the screen and shares the same are with the Map Options.
Entering Orders
Entering orders for a certain character starts by locating said character and selecting the respective hex on the map.
Then, you should bring up the orders for the character by clicking the character menu button and selecting "Show Orders".
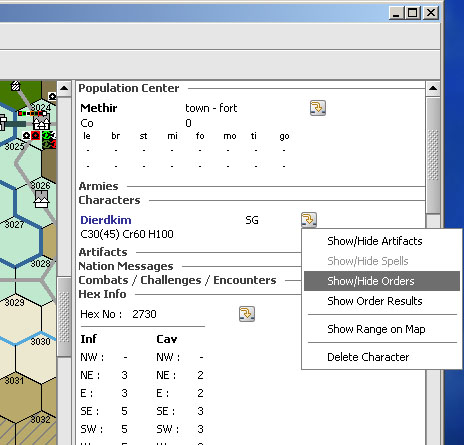
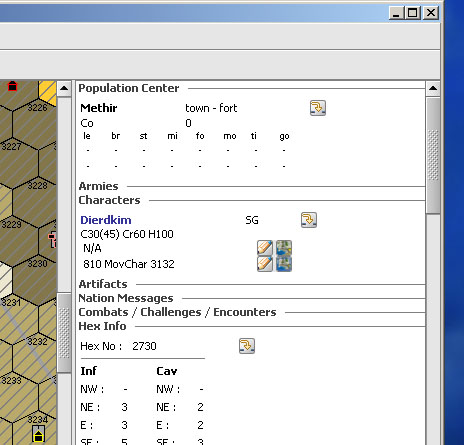
This will show the character's orders below the character's stats. Because no orders have been given for this character, the display shows "N/A". Note that if the character's orders have already been entered, they will be automatically shown when you select the character (i.e. you won't need to use the "Show Orders" option).
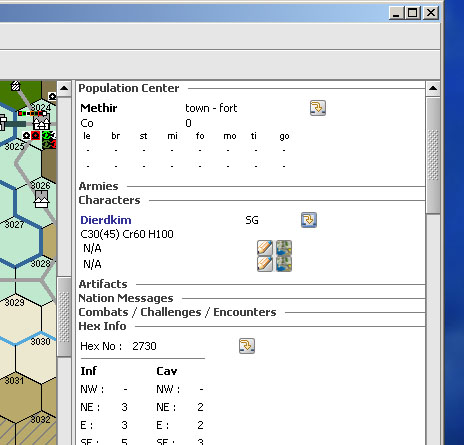
To edit an order, click on the "Pencil" icon next to the order. This activates the Order Editor, which is located on the bottom right panel of the screen.
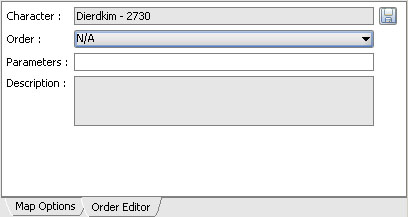
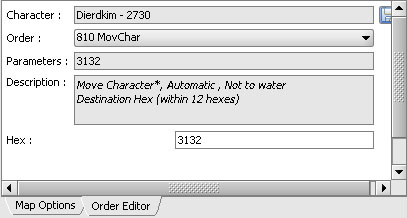
By using the drop down menu you can select the desired order. Note that as the selected order changes, the bottom part of the Order Editor is updated with different controls that correspond to the order's parameters.
For instance, the image below shows the case of order 810. When the order is selected, the "Hex" field is automatically displayed. You can either type in a destination or Drag & Drop the desired hex from the map (put the mouse over the desired hex of the map, hold the left key down, and drag to the "Hex" field).
Note that Drag & Drop also works for:
- Dragging the character name into an order field - the character id is automatically supplied.
- Dragging an artifact (from the character artifacts list) into an order field - the artifact id is automatically supplied.
The Order Editor has two read only fields, in addition to those mentioned above:
- The parameters field, where all the order parameters are shown (separated with spaces) as they are entered in the fields below by the player.
- The description field which shows some information about the order (e.g. requirements, restrictions, etc).
To "Save" the order, click on the Save button on the top right of the Order Editor. This updates the character with the order from the Order Editor, as shown below.
Visualizing Orders on the Map
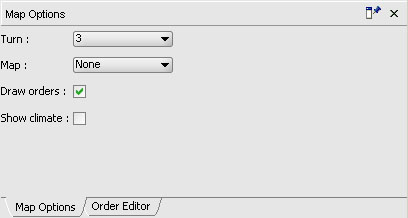
To visualize orders on the map, first you need to enable the "Draw Orders" option on the Map Options panel.
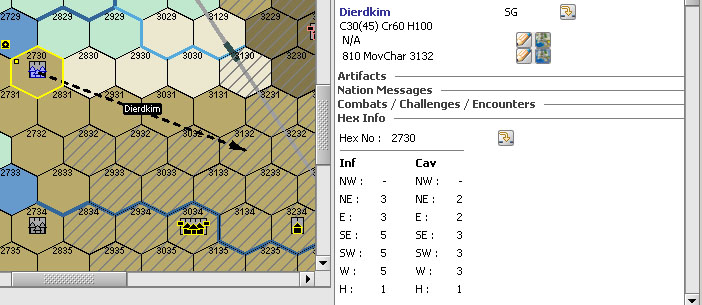
Then you should bring up the desired character and click on the little "Map" button that is located next to the "Pencil" button. This will display the order on the map, as shown in the screen shot below. If the order cannot be drawn, nothing will happen.
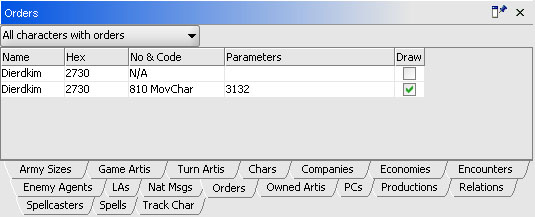
Note that you can also control which orders will be visualized and which won't from the Order view, by using the "Draw" column, as shown below.