Course Scipion in the cloud: create your machine - I2PC/scipion GitHub Wiki
Creating AWS instance for course
- Login to AWS console with your user (i2pc-course-x)
- Go to EC2 services
- Select Ireland region
- Select Instances on the left side menu
- Click on 'Launch instance' button
- Select 'My AMIs' on the left menu
- Select i2pc-cloud-training AMI
- Choose instance type p2.xlarge (GPU).
- Click ‘Next: Configure instance details’ and leave everything by default.
- Click ‘Next: Add Storage’ and leave disk size 50 GB.
- Click ‘Next: Add tags’ and specify the following tags:
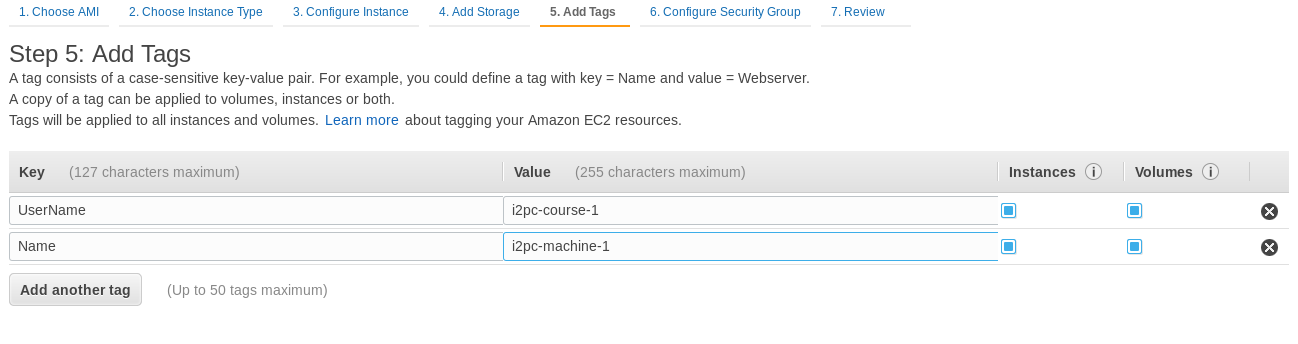
UserName must be your aws user (i2pc-course-x) and Name must be i2pc-machine-x.
- Click ‘Next: Configure Security group’ and select the one named ‘i2pc-training-sg’.

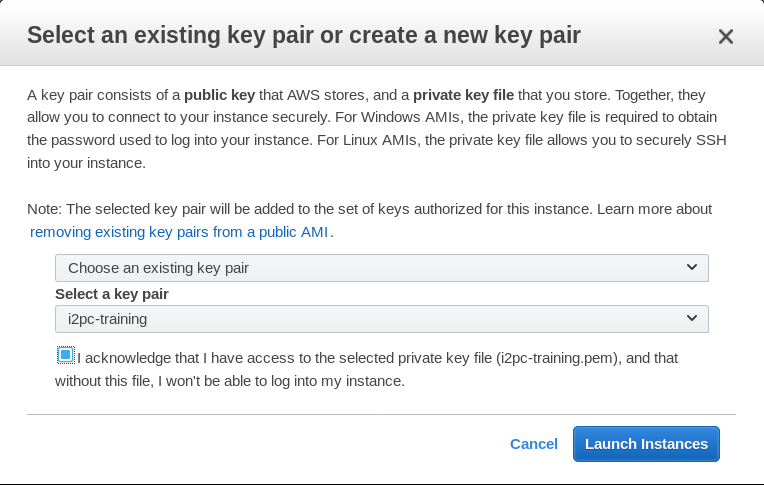
- Click on ‘Review and launch’ and press ‘Launch’. A pop-up window will appear to select or create a security key pair. Choose to select an existing one (i2pc-training).
- Click on ‘Launch Instances’ and click on ‘Go to your instance’ and wait until the instance has been initialized (Status Checks)
Instances are by default created with a dynamic IP address. This means that when the instance is restarted the IP changes. AWS allows to create ‘Elastic IPs’ that are fix IPs that can be assigned to an instance but we will not do this now.
Managing training instances
Each user is allowed only to manage (start, stop and reboot) its training instances (tagged with UserName). The steps are:
- Login to AWS console
- Go to EC2 services
- Select Instances on the left side menu
- We will filter the list to see only our instance and avoid confusion: Click on the small 'search icon' on top of the list and select Tag Key 'UserName'. Then write your user name (i2pc-course-x).
- Select the instance and either click on ‘Actions’ or Right-click on the instance and select Instance State and the action required.

Accessing training instances
Once instances are up and running they can be accessed through the browser at https://PUB_IP/vnc.html (user scipion and password given to you :)
IMPORTANT: Write down the IP address cause you wont be able to access the console during the rest of the day
The first time you access the URL you will be warned that connection is not secure and will have to add a security exception.
This is how Desktop on the new machine will look like:

To resize screen clicks on the Settings icon:

To disconnect from the session click on the little arrow that appears on the left (see menu below) and click on the last option:

IMPORTANT!! Do not disconnect from the top right corner, as in a physical machine. If you do so the machine will need to be reboot
There is a shortcut for Scipion on the desktop.
The following software is installed on the machine:
- Ubuntu 16
- Scipion on /usr/local/scipion (alias scipion): git installation branch release-1.1.facilities-devel with the following EM Packages:
- Ctffind4 4.1.8
- Gctf 1.06
- Gautomatch 0.53
- Eman 2.12
- Frealing 9.07
- Motioncor2 1.0.2
- Motioncorr 2.1
- Relion 2.0
- resmap 1.1.5s2
- Spider 21.13
- chimera 1.10.1
- Scipion devel on /usr/local/scipion_devel (alias scipion_devel): git installation branch model_04_chimerafit
- Nvidia driver version 384
- CUDA 7.5 and 8.0 (default cuda links to 7.5).
- TurboVNC 2.1.1 on
- VirtualGL 2.5.2
- noVNC
The FEICourse finished project can be found under Scipion projects while project raw data is located at /data/relion13_tutorial.