Setting up the GNS3 Environment - Hsanokklis/MasteringEnterpriseNetwork24 GitHub Wiki
Setting up the GNS3 Environment
Learning Objectives
- Create a working GNS3 Learning Environment on a PC or laptop
Prerequisites
- Install Oracle VirtualBox
Deliverables
- None - This is for student needs
Resources
Lab
- Navigate to GNS3 at http://www.gns3.com/
- Click on the Free Download button
- Select, Windows, Mac, or Linux as appropriate, and the Download
- Create your GNS3 Community Account as promoted, login, and then return to the download page.
- Run the installer you downloaded and accept the default options
- Do NOT start GNS automatically, doing so can distract new learners due to errors that will pop up.
-
Navigate to the GNS3 VM download page at https://www.gns3.com/software/download-vm
-
Download the image for VirtualBox
-
Extract (unzip) the .zip file that was downloaded - it will extract to an OVA file
-
Download and launch VirtualBox
-
Select File --> Import Appliance --> Import (Figure 1) and navigate to the .ova file that you just downloaded and unzipped. In this example, our .ova file is named GNS3 VM.ova. (Figure 2)
-
Click Finish to accept the default appliance settings
-
Adjust the network settings of the GNS3 VM by selecting the VM and then selecting settings.
-
In the network settings, under Network Adapter 1, select the name of the host-only adapter drop-down arrow. Yes, even if the right name is already in the box. Just do it, and click OK. If you don’t do this, you will get a network error when you start the virtual machine
I had to do this
- Start the GNS3 VM you just installed to ensure it runs properly. This is a very lightweight version of Linux.
- Launch GNS3
-
Next, choose how to run your GNS3 network simulations by selecting Run Applications in a Virtual machine.
-
Accept the defaults for the Local Server Configuration and click Next
-
You should get a message. Click Next
-
GNS3 default setting is to use VMWare by default so you will get an error. Select OK and choose VirtualBox
-
When you change the radio button, the GNS3 VM you imported and started in VirtualBox earlier should auto-populate. Use the default settings and click Next
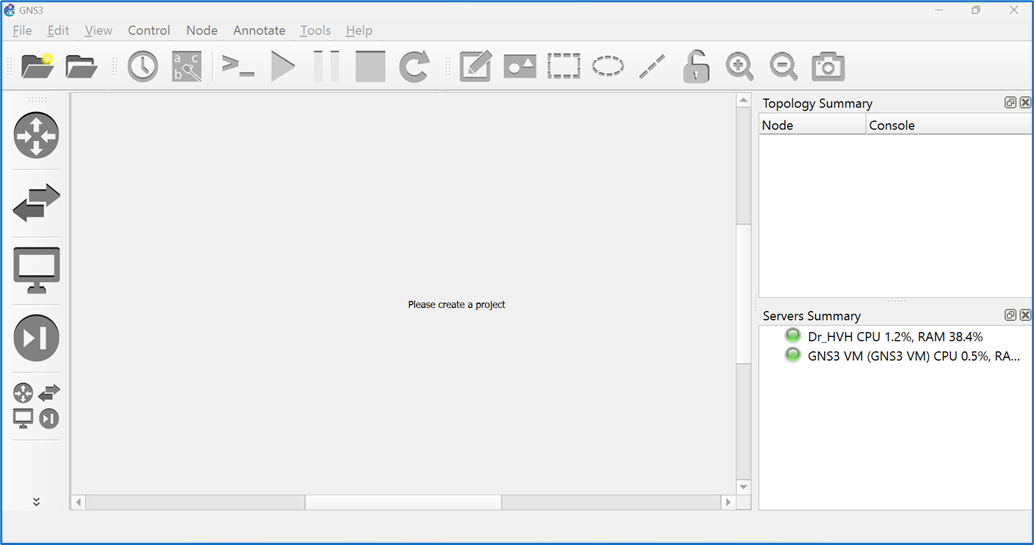
- You should have a screen like the one in Figure 14. The windows are adjustable, but the one to take note of is the “Servers Summary”. You should see your bare metal machine (In Figure 14 it is Dr. HVH) and the GNS3 VM both show green lights and details of how many resources are being used. If the server indicator light is still grey, power off the VM and restart GNS3