Lab 2.1 Intro to Packet Tracer and Deploying Pinging Devices - Hsanokklis/2022-2023-Tech-journal GitHub Wiki
Summary: Our objective in this lab was to begin to understand the functionality and layout of Cisco Packet Tracer. We made an Cisco networking academy account, and practiced deploying network devices.
Part 1: setup
Step 0: Install Packet Tracer on your personal computer It was already on my host workstation
1. Register for a Cisco Network Academy Account
Part 2: Lab
Use Packet Tracer and follow the instructions in the following lab manual
- Open the "Deploying and Cabling Devices Packet Tracer File"

- Learn how to deploy devices and cable them in Packet Tracer

The top row is categories of devices

The bottom category is subcategories
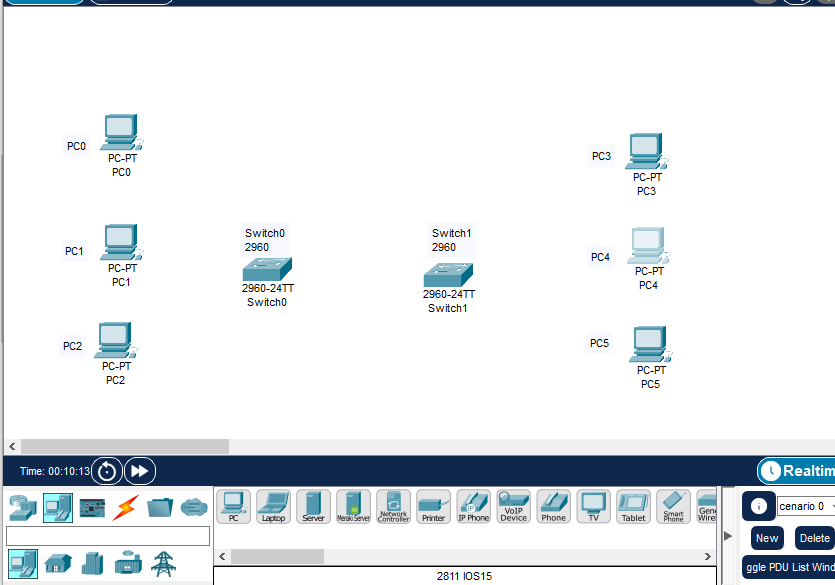
3.Deploy two 2960 switches

- Click on End Devices and deploy six PC's
- Connect the PCs to the Switches. Click on "connections" and use the "copper straight through" wire.

- Click on PC0 and click on FastEthernet0

- Now connect PC0 to Switch 0. When you click on the switch, choose FastEthernet 0/1


The devices are now connected(at first the arrows are blinking and one is green and one is amber but then they both turn green)
- Now we are going to cable all the PCs
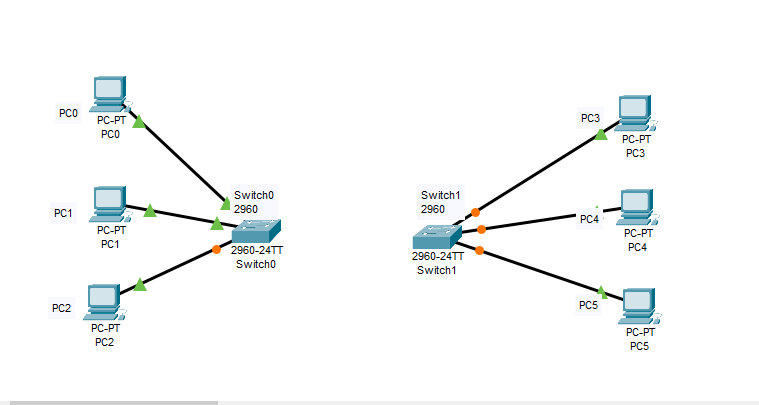

- Now we are going to connect the switches with a "copper cross over cable"
Click on Gigabit 0/1 for both switches


The wire eventually turns green!
- Put your name in!

Part 3: Pinging your packet tracer
- Click on PC0, go to the config tab, go to FastEthernet0 and enter the Ip and Subnetmask

- Do the same thing for PC1(but enter a different IP)

-
Click on PC0 and go to the desktop tab

-
Click on the command prompt option
-
Ping PC1 by typing "ping 192.168.3.100"

- Show the successful ping between PC0 and PC1
